microsoft excel vba programming for the absolute beginner 2002
Bạn đang xem bản rút gọn của tài liệu. Xem và tải ngay bản đầy đủ của tài liệu tại đây (8.85 MB, 425 trang )
TEAMFLY
Team-Fly
®
Microsoft
®
Excel VBA
DUANE BIRNBAUM
Programming
00 XLVBA FM.qxd 2/25/03 7:12 AM Page i
© 2002 by Premier Press, Inc. All rights reserved. No part
of this book may be reproduced or transmitted in any
form or by any means, electronic or mechanical, includ-
ing photocopying, recording, or by any information
storage or retrieval system without written permission
from Premier Press, except for the inclusion of brief
quotations in a review.
The Premier Press logo, top edge printing,
and related trade dress are trademarks of
Premier Press, Inc. and may not be used
without written permission. All other
trademarks are the property of their
respective owners.
Microsoft is a registered trademark of Microsoft
Corporation.
Important:
Premier Press cannot provide software sup-
port. Please contact the appropriate software manufac-
turer’s technical support line or Web site for assistance.
Premier Press and the author have attempted through-
out this book to distinguish proprietary trademarks
from descriptive terms by following the capitalization
style used by the manufacturer.
Information contained in this book has been obtained
by Premier Press from sources believed to be reliable.
However, because of the possibility of human or
mechanical error by our sources, Premier Press, or oth-
ers, the Publisher does not guarantee the accuracy, ade-
quacy, or completeness of any information and is not
responsible for any errors or omissions or the results
obtained from use of such information. Readers should
be particularly aware of the fact that the Internet is an
ever-changing entity. Some facts may have changed
since this book went to press.
ISBN: 1-931841-04-7
Library of Congress Catalog Card Number: 2001099839
Printed in the United States of America
02 03 04 05 RI 10 9 8 7 6 5 4 3 2 1
Publisher:
Stacy L. Hiquet
Marketing Manager:
Heather Buzzingham
Managing Editor:
Sandy Doell
Series Editor:
Andy Harris
Project Editor:
Estelle Manticas
Editorial Assistant:
Margaret Bauer
Technical Reviewer:
Greg Perry
Copy Editor:
Linda Seifert
Interior Layout:
Shawn Morningstar
Cover Design:
Mike Tanamachi
Indexer:
Sherry Massey
Proofreader:
Jenny Davidson
00 XLVBA FM.qxd 2/25/03 7:12 AM Page ii
pecial thanks to my family—Jill, Aaron, and Joshua. You were all won-
derfully patient with me while I worked on this book. Your love and
understanding are greatly appreciated.
Thanks to all the people at Premier Press, especially Stacy, who gave me the
opportunity to write this book, and to everyone else behind the scenes who
worked to make it look good. Special thanks to Estelle for all the help, and for
putting up with my numerous changes during the review process.
I would also like to thank Andy Harris for recommending me to Premier, and for
his guidance in the early development of the book. Thanks to Greg Perry for an
outstanding technical review. I only wish I’d had time to include more of his sug-
gestions; doing so would have made the book even better.
Finally, thanks to all of the contributors of the software and support files on the
CD and to the reader who supports them (and who, of course, also purchases this
book).
A
c
k
n
o
wl
e
d
gm
e
n
t
s
S
00 XLVBA FM.qxd 2/25/03 7:12 AM Page iii
uane Birnbaum
began programming in graduate school, where he
wrote custom software for interfacing the various electronic devices
required for his experiments and analyzing the data obtained from
them. Since completing his Ph.D. in physical chemistry, he has been
working as a post-doctoral and research scientist in academia and industry while
continuing to teach on a part-time basis. For the last five years he has been work-
ing as a research scientist in the biotechnology industry and serving as a part-
time lecturer in the Computer Science department of Indiana University/Purdue
University. He teaches introductory classes in data analysis, database design, and
Visual Basic.
A
b
o
u
t t
he
A
u
t
h
o
r
D
00 XLVBA FM.qxd 2/25/03 7:12 AM Page iv
Introduction. . . . . . . . . . . . . . . . . . . . . . . . . . . . . . . . . . . . . . . x
Visual Basic for
Applications with Excel. . . . . . . 1
Project: Colorful Header . . . . . . . . . . . . . . . . . . . . . . . . . . . . . 2
The VBA Integrated Development Environment (IDE) . . . . . . 3
Getting to the IDE from Excel . . . . . . . . . . . . . . . . . . . . . . 3
Components of the IDE . . . . . . . . . . . . . . . . . . . . . . . . . . . 4
Programming Components within Excel . . . . . . . . . . . . . . . . 8
Macro Selection . . . . . . . . . . . . . . . . . . . . . . . . . . . . . . . . . 8
The Visual Basic Toolbar . . . . . . . . . . . . . . . . . . . . . . . . . . 9
Getting Help with VBA . . . . . . . . . . . . . . . . . . . . . . . . . . . . . 13
Excel Help. . . . . . . . . . . . . . . . . . . . . . . . . . . . . . . . . . . . . 14
VBA Help . . . . . . . . . . . . . . . . . . . . . . . . . . . . . . . . . . . . . 14
Installing VBA Help Files . . . . . . . . . . . . . . . . . . . . . . . . . 15
Constructing the Colorful Header Program . . . . . . . . . . . . . 15
Chapter Summary . . . . . . . . . . . . . . . . . . . . . . . . . . . . . . . . . 19
Beginning Programs with VBA . . 21
Project: Time of Your Life . . . . . . . . . . . . . . . . . . . . . . . . . . . 22
Variables, Data Types, and Constants. . . . . . . . . . . . . . . . . . 22
Declaring Variables . . . . . . . . . . . . . . . . . . . . . . . . . . . . . 23
Data Types . . . . . . . . . . . . . . . . . . . . . . . . . . . . . . . . . . . . 27
Constants . . . . . . . . . . . . . . . . . . . . . . . . . . . . . . . . . . . . . 36
Simple Input and Output with VBA . . . . . . . . . . . . . . . . . . . 37
Collecting User Input with InputBox() . . . . . . . . . . . . . . . 37
Output with MsgBox() . . . . . . . . . . . . . . . . . . . . . . . . . . . 38
Manipulating Strings with VBA Functions . . . . . . . . . . . . . . 39
Fun with Strings. . . . . . . . . . . . . . . . . . . . . . . . . . . . . . . . 40
C
on
t
e
n
t
s
1
CHAPTER
2
CHAPTER
00 XLVBA FM.qxd 2/25/03 7:12 AM Page v
Constructing the Time of Your Life Program . . . . . . . . . . . . 44
Project Statement. . . . . . . . . . . . . . . . . . . . . . . . . . . . . . . 44
Project Tools. . . . . . . . . . . . . . . . . . . . . . . . . . . . . . . . . . . 44
Project Algorithm . . . . . . . . . . . . . . . . . . . . . . . . . . . . . . . 44
Adding the Code . . . . . . . . . . . . . . . . . . . . . . . . . . . . . . . 45
Chapter Summary . . . . . . . . . . . . . . . . . . . . . . . . . . . . . . . . . 49
Procedures and Conditions . . . 51
Project: Poker Dice . . . . . . . . . . . . . . . . . . . . . . . . . . . . . . . . 52
VBA Procedures . . . . . . . . . . . . . . . . . . . . . . . . . . . . . . . . . . 52
Event Procedures . . . . . . . . . . . . . . . . . . . . . . . . . . . . . . . 52
Sub Procedures . . . . . . . . . . . . . . . . . . . . . . . . . . . . . . . . 56
Function Procedures . . . . . . . . . . . . . . . . . . . . . . . . . . . . 61
Logical Operators in VBA. . . . . . . . . . . . . . . . . . . . . . . . . 64
Conditionals and Branching. . . . . . . . . . . . . . . . . . . . . . . 67
Constructing the Poker Dice Program . . . . . . . . . . . . . . . . . 72
Project Statement. . . . . . . . . . . . . . . . . . . . . . . . . . . . . . . 73
Project Tools. . . . . . . . . . . . . . . . . . . . . . . . . . . . . . . . . . . 73
Project Algorithm . . . . . . . . . . . . . . . . . . . . . . . . . . . . . . . 75
Adding the Code . . . . . . . . . . . . . . . . . . . . . . . . . . . . . . . 76
Chapter Summary . . . . . . . . . . . . . . . . . . . . . . . . . . . . . . . . . 84
Loops and Arrays . . . . . . . . . . . 87
Project: The Math Game . . . . . . . . . . . . . . . . . . . . . . . . . . . . 88
Looping with VBA . . . . . . . . . . . . . . . . . . . . . . . . . . . . . . . . . 88
Do Loops . . . . . . . . . . . . . . . . . . . . . . . . . . . . . . . . . . . . . 89
For Loops . . . . . . . . . . . . . . . . . . . . . . . . . . . . . . . . . . . . . 91
Input Validation . . . . . . . . . . . . . . . . . . . . . . . . . . . . . . . . . . . 94
Validation with the InputBox() Function . . . . . . . . . . . . . 95
Validation with a Spreadsheet Cell . . . . . . . . . . . . . . . . . 97
Arrays . . . . . . . . . . . . . . . . . . . . . . . . . . . . . . . . . . . . . . . . . . 99
One-Dimensional Arrays . . . . . . . . . . . . . . . . . . . . . . . . 101
Multi-Dimensional Arrays . . . . . . . . . . . . . . . . . . . . . . . 104
Dynamic Arrays . . . . . . . . . . . . . . . . . . . . . . . . . . . . . . . 106
Programming Formulas into Worksheet Cells . . . . . . . . . . 109
A1 Style References . . . . . . . . . . . . . . . . . . . . . . . . . . . . 109
R1C1 Style References . . . . . . . . . . . . . . . . . . . . . . . . . . 111
vi
Ta
b
l
e
of C
o
n
ten
t
s
3
CHAPTER
4
CHAPTER
00 XLVBA FM.qxd 2/25/03 7:12 AM Page vi
Chapter Project: Math Game. . . . . . . . . . . . . . . . . . . . . . . . 112
Project Statement. . . . . . . . . . . . . . . . . . . . . . . . . . . . . . 112
Project Tools. . . . . . . . . . . . . . . . . . . . . . . . . . . . . . . . . . 113
Project Algorithm . . . . . . . . . . . . . . . . . . . . . . . . . . . . . . 119
Adding the Code . . . . . . . . . . . . . . . . . . . . . . . . . . . . . . 122
Chapter Summary . . . . . . . . . . . . . . . . . . . . . . . . . . . . . . . . 131
Basic Excel Objects . . . . . . . . 133
Project: Battlecell. . . . . . . . . . . . . . . . . . . . . . . . . . . . . . . . . 134
VBA and OOP . . . . . . . . . . . . . . . . . . . . . . . . . . . . . . . . . . . 134
Objects Defined . . . . . . . . . . . . . . . . . . . . . . . . . . . . . . . . . . 135
VBA Collection Objects . . . . . . . . . . . . . . . . . . . . . . . . . . . . 137
The Object Browser. . . . . . . . . . . . . . . . . . . . . . . . . . . . . . . 139
Top-Level Excel Objects . . . . . . . . . . . . . . . . . . . . . . . . . . . 144
The Application Object. . . . . . . . . . . . . . . . . . . . . . . . . . 145
The Workbook and Window Objects . . . . . . . . . . . . . . . 145
The Worksheet Object . . . . . . . . . . . . . . . . . . . . . . . . . . 153
The Range Object. . . . . . . . . . . . . . . . . . . . . . . . . . . . . . 154
Working with Objects. . . . . . . . . . . . . . . . . . . . . . . . . . . 157
Chapter Project: Battlecell . . . . . . . . . . . . . . . . . . . . . . . . . . 161
Project Statement. . . . . . . . . . . . . . . . . . . . . . . . . . . . . . 161
Project Tools. . . . . . . . . . . . . . . . . . . . . . . . . . . . . . . . . . 162
Project Algorithm . . . . . . . . . . . . . . . . . . . . . . . . . . . . . . 162
Adding the Code . . . . . . . . . . . . . . . . . . . . . . . . . . . . . . 164
Chapter Summary . . . . . . . . . . . . . . . . . . . . . . . . . . . . . . . . 184
Enhancing VBA Programs:
Adding Multimedia
and Intelligence . . . . . . . . . . . 187
Project: Enhanced Battlecell . . . . . . . . . . . . . . . . . . . . . . . . 188
Adding Multimedia to a Program . . . . . . . . . . . . . . . . . . . . 188
Animation in VBA. . . . . . . . . . . . . . . . . . . . . . . . . . . . . . 188
Sound in VBA. . . . . . . . . . . . . . . . . . . . . . . . . . . . . . . . . 200
Simulating Intelligence in Programs. . . . . . . . . . . . . . . . . . 203
Chapter Project: Enhanced Battlecell . . . . . . . . . . . . . . . . . 204
Project Statement. . . . . . . . . . . . . . . . . . . . . . . . . . . . . . 204
Project Tools. . . . . . . . . . . . . . . . . . . . . . . . . . . . . . . . . . 205
Project Algorithm . . . . . . . . . . . . . . . . . . . . . . . . . . . . . . 205
vii
Ta
b
l
e
of C
o
n
ten
t
s
5
CHAPTER
6
CHAPTER
00 XLVBA FM.qxd 2/25/03 7:12 AM Page vii
Adding the Code . . . . . . . . . . . . . . . . . . . . . . . . . . . . . . 208
Chapter Summary . . . . . . . . . . . . . . . . . . . . . . . . . . . . . . . . 224
UserForms and
Additional Controls . . . . . . . . 227
Project: Blackjack. . . . . . . . . . . . . . . . . . . . . . . . . . . . . . . . . 228
UserForms . . . . . . . . . . . . . . . . . . . . . . . . . . . . . . . . . . . . . . 228
Adding a UserForm to a Project . . . . . . . . . . . . . . . . . . 229
Components of the UserForm Object . . . . . . . . . . . . . . 229
Adding ActiveX Controls to a UserForm . . . . . . . . . . . . 231
Showing and Hiding UserForms . . . . . . . . . . . . . . . . . . 233
Modal Forms . . . . . . . . . . . . . . . . . . . . . . . . . . . . . . . . . 233
Custom Dialog Boxes with UserForms . . . . . . . . . . . . . 235
Chapter Project: Blackjack . . . . . . . . . . . . . . . . . . . . . . . . . . 246
Project Statement. . . . . . . . . . . . . . . . . . . . . . . . . . . . . . 247
Project Tools. . . . . . . . . . . . . . . . . . . . . . . . . . . . . . . . . . 247
Project Algorithm . . . . . . . . . . . . . . . . . . . . . . . . . . . . . . 247
Adding the Code . . . . . . . . . . . . . . . . . . . . . . . . . . . . . . 250
Chapter Summary . . . . . . . . . . . . . . . . . . . . . . . . . . . . . . . . 267
Data Access, File I/O, Error
Handling, and Debugging. . . . 269
Project: Word Find. . . . . . . . . . . . . . . . . . . . . . . . . . . . . . . . 270
File Input and Output (I/O) . . . . . . . . . . . . . . . . . . . . . . . . . 270
Using VBA File I/O Methods . . . . . . . . . . . . . . . . . . . . . 271
Error Handling . . . . . . . . . . . . . . . . . . . . . . . . . . . . . . . . . . . 283
Using the On Error Statement . . . . . . . . . . . . . . . . . . . . 283
Debugging . . . . . . . . . . . . . . . . . . . . . . . . . . . . . . . . . . . . . . 287
Break Mode . . . . . . . . . . . . . . . . . . . . . . . . . . . . . . . . . . 287
The Immediate Window. . . . . . . . . . . . . . . . . . . . . . . . . 289
The Watch Window . . . . . . . . . . . . . . . . . . . . . . . . . . . . 290
The Locals Window . . . . . . . . . . . . . . . . . . . . . . . . . . . . 291
Chapter Project: Word Find . . . . . . . . . . . . . . . . . . . . . . . . . 292
Project Statement. . . . . . . . . . . . . . . . . . . . . . . . . . . . . . 292
Project Tools. . . . . . . . . . . . . . . . . . . . . . . . . . . . . . . . . . 293
Project Algorithm . . . . . . . . . . . . . . . . . . . . . . . . . . . . . . 293
Adding the Code . . . . . . . . . . . . . . . . . . . . . . . . . . . . . . 296
Chapter Summary . . . . . . . . . . . . . . . . . . . . . . . . . . . . . . . . 310
viii
Ta
b
l
e
of C
o
n
ten
t
s
7
CHAPTER
8
CHAPTER
00 XLVBA FM.qxd 2/25/03 7:12 AM Page viii
Excel Charts . . . . . . . . . . . . . . 313
Project: The Alienated Game . . . . . . . . . . . . . . . . . . . . . . . 314
The Chart Object . . . . . . . . . . . . . . . . . . . . . . . . . . . . . . . . . 314
Accessing Existing Charts . . . . . . . . . . . . . . . . . . . . . . . 314
Manipulating Charts. . . . . . . . . . . . . . . . . . . . . . . . . . . . 318
Creating Charts. . . . . . . . . . . . . . . . . . . . . . . . . . . . . . . . 322
Chart Events . . . . . . . . . . . . . . . . . . . . . . . . . . . . . . . . . . 326
Chapter Project: The Alienated Game. . . . . . . . . . . . . . . . . 332
Project Statement. . . . . . . . . . . . . . . . . . . . . . . . . . . . . . 333
Project Tools. . . . . . . . . . . . . . . . . . . . . . . . . . . . . . . . . . 333
Project Algorithm . . . . . . . . . . . . . . . . . . . . . . . . . . . . . . 333
Adding the Code . . . . . . . . . . . . . . . . . . . . . . . . . . . . . . 335
Chapter Summary . . . . . . . . . . . . . . . . . . . . . . . . . . . . . . . . 355
VBA Shapes . . . . . . . . . . . . . . 357
Project: Excetris. . . . . . . . . . . . . . . . . . . . . . . . . . . . . . . . . . 358
The Shapes Collection and Shape Objects. . . . . . . . . . . . . 358
Manipulating a Shape Object . . . . . . . . . . . . . . . . . . . . 360
The ShapeRange Collection Object . . . . . . . . . . . . . . . . . . 362
Activating Shape Objects . . . . . . . . . . . . . . . . . . . . . . . . . . 365
The OLEObjects Collection . . . . . . . . . . . . . . . . . . . . . . . . . 366
Chapter Project: Excetris . . . . . . . . . . . . . . . . . . . . . . . . . . . 368
Project Statement. . . . . . . . . . . . . . . . . . . . . . . . . . . . . . 369
Project Tools. . . . . . . . . . . . . . . . . . . . . . . . . . . . . . . . . . 369
Project Algorithm . . . . . . . . . . . . . . . . . . . . . . . . . . . . . . 370
Adding the Code . . . . . . . . . . . . . . . . . . . . . . . . . . . . . . 372
Chapter Summary . . . . . . . . . . . . . . . . . . . . . . . . . . . . . . . . 395
A Final Word . . . . . . . . . . . . . . . . . . . . . . . . . . . . . . . . . . . . 396
Index. . . . . . . . . . . . . . . . . . . . 397
ix
Ta
b
l
e
of C
o
n
ten
t
s
9
CHAPTER
10
CHAPTER
00 XLVBA FM.qxd 2/25/03 7:12 AM Page ix
isual Basic for Applications (VBA for short) is a programming environ-
ment designed to work with Microsoft’s Office applications (Excel, Word,
Access, etc.). Components in each application (for example, worksheets or
documents) are exposed as objects and made available to the program-
mer to use and manipulate to a desired end. Anything you can do through normal
use of the Office applications can also be automated through programming.
You can also extend the abilities of the application through the use of additional
reusable objects provided for the programmer. These reusable objects are
referred to as
ActiveX controls
, and I will demonstrate their use throughout this
book. ActiveX controls are pre-built, reusable programming components that you
can add to your own programming projects. Common examples include text
boxes, buttons, labels, and image controls. They are very useful to program devel-
opers because they are reusable and serve to handle common programming
tasks. Because ActiveX controls are reusable they only have to be developed once,
thus saving valuable time. VBA includes several common ActiveX controls for use
in Office projects. You can also import ActiveX controls from third party vendors,
though licensing and copyrights may restrict their use in your VBA project.
Why VBA?
As a beginning language, VBA will suit your needs well. VBA is not as vast as
many popular languages because such extensiveness is simply unnecessary. VBA
was built to work with and extend the capabilities of MS Office applications, so
it doesn’t need the substance of a programming language used to build full-
blown applications from scratch. The relative simplicity of VBA makes it easier
for people to pick up and learn and also makes it less intimidating to the begin-
ner. However, VBA does share many of the programming constructs common to
all languages, so it also serves as a great introduction to programming. For these
reasons, and the fact that MS Excel is the most popular spreadsheet application
available, I am writing this book.
As a scientist I never really gave the business-orientated Excel a chance. At first,
it didn’t even have graphical capabilities, and even after they were added, Excel
still couldn’t match other spreadsheet applications geared toward the scientist.
I
n
t
ro
d
u
c
t
i
o
n
V
00 XLVBA FM.qxd 2/25/03 7:12 AM Page x
TEAMFLY
Team-Fly
®
After ignoring Excel for several years, I started a new job where Excel was the only
spreadsheet application available; it was then that I discovered that it used a
macro language based on the already very popular Visual Basic. I started writing
programs to handle some of the routine data analyses required around the lab,
and the time I have saved using these programs has sold me on Excel as a valu-
able component in any lab or business.
Who Should Read This Book?
The goal of this book is to help you learn VBA programming with Excel. No prior
programming experience is required or expected. Although you do not have to be
an Excel user, you should have a good understanding of the basic tools involved
in using any spreadsheet application. This includes a basic understanding of
ranges and cell references, formulas, built-in functions, and charts. If you’re not
comfortable with spreadsheet applications or it’s been a while since you have
used a spreadsheet, then I recommend you consider purchasing another intro-
ductory book on how to use the Excel application (
Microsoft Excel Fast & Easy
, by
Faith Wempen, is a good choice). In addition to spreadsheets, I also expect you to
have a basic understanding of the Windows operating system.
What’s in This Book?
I developed the programs in this book using Excel 2000 for Windows. It doesn’t
matter if you’re using a slightly older or newer version of Excel (97 or XP); VBA
has changed very little between these three versions. I have added folders to the
accompanying CD-ROM that include versions of the chapter projects that run
without error in these other versions. If you are a Macintosh user, you can still
use the programs in this book. There are small differences in the object model
for Excel Windows and Excel Macintosh but in most cases you will not notice
them. The most notable difference is in how each operating system specifies a
file path (Windows uses a backslash and Macintosh a colon).
The chapter projects in this book feature the development of games using VBA with
Excel. This is somewhat unusual in the sense that prior to writing this book, I had
never seen an Excel application that runs any kind of a game. However, it does serve
to make programming more fun. After all, what’s the first thing anybody does when
they get a new computer? Answer: Find the games that are installed and start play-
ing. With this book, you get to write the program and then play the game. It actu-
ally works very well. The games developed in this book illustrate the use of basic
programming techniques and structures found in all programming languages as
well as all of the common (and some less common) components in Excel.
xi
I
n
t
r
o
d
u
c
t
i
o
n
00 XLVBA FM.qxd 2/25/03 7:12 AM Page xi
xii
I
n
t
ro
d
u
c
t
i
o
n
What’s on the CD-ROM?
The CD that accompanies this book includes two “bonus” chapters, Chapters 11
and 12. These chapters are in PDF (Portable Document Format), and must be viewed
with the Adobe Acrobat Reader software. If you do not currently have the Acrobat
Reader software, you can download it for free from .
Chapter 11
shows you how to import data from external sources (MS Access data-
base, the World Wide Web, and text files) into an Excel worksheet. Chapter 11
also covers some Web-related objects and methods that allow you to view and
save your worksheet as a Web page, and add hyperlinks to a worksheet. The pro-
gramming project uses several of the objects and methods discussed in the chap-
ter to import data from an MS Access database for use in the game of Hangman.
Chapter 12
shows you how to create custom toolbars and menus that appear
when your VBA programs are loaded into Excel. In addition, you will learn how
to store your VBA programs as add-ins that can be loaded by the user when
needed. The programming project uses the Excetris and Hangman programs
from Chapters 10 and 11 and connects them to a custom toolbar with two but-
tons used to start each game. The project is stored as an add-in, so it can be eas-
ily loaded and run in any worksheet.
In addition to the bonus chapters, the CD-ROM also includes the following:
• All source code from the book, including all supporting image and
sound files.
• Links to several helpful VBA and Excel Web sites.
• The GIMP, a powerful graphics creation and editing tool.
• Sawcutter 1.0, a software synthesizer and wave editor that allows wave-
forms to be hand drawn. You can also load external sound files and run
them through several banks of effects that can be adjusted in real-time
• Audacity. Records audio directly and also imports/exports WAV, AIFF and
MP3 files. Supports envelope editing, mixing, simple built-in effects, and
plug-in effects, all with unlimited undo.
Sample VBA programs for Excel. A collection of add-ins and worksheets with
attached VBA programs for your perusal and enjoyment.
00 XLVBA FM.qxd 2/25/03 7:12 AM Page xii
I
n this first chapter I will introduce you to the programmer’s tools available
through Excel. These tools include the VBA IDE (Integrated Development
Environment), controls and functions available through the main Excel
application, and online help from both the Excel and VBA environments. Finally, I will
take you through a very short and simple program that takes textual input from the
user, places it in a spreadsheet cell, and then formats the cell with a large font, bright
colors, and a border.
Specifically this chapter will cover:
• The VBA IDE and its components
• Programming tools within Excel
• Installing and using the online help
• Chapter project: Colorful Header
V
i
s
u
a
l
B
a
s
i
c
f
o
r
A
p
p
l
i
c
a
t
i
o
n
s
w
i
t
h
E
x
c
e
l
1
CHAPTER
01 XLVBA CH01.qxd 2/25/03 7:15 AM Page 1
Project: Colorful Header
The project in this chapter is short and simple but will serve as your first intro-
duction to the VBA programming environment, ActiveX controls, event-driven
programming, and using VBA to interact with your spreadsheet. Figure 1.1 shows
a view of the Colorful Header spreadsheet.
Event-driven programming refers to the creation of a program that is designed
to run when the user generates a stimulus. For example, a keystroke or a mouse
click may trigger specific pieces of a program to execute. The event-driven
programming model has been popular for years and is now commonplace. It is
vastly superior to older programs that did not allow for much user interaction
because the programmers dictated the flow of the program. In event-driven
programming, the user dictates the flow of the program, and it is up to program-
mers to anticipate the user’s needs.
Don’t concern yourself with syntax at this time. In later chapters I will show you
the tools you need to build VBA projects. For right now I just want you to see how
easy it is to make something work, and for you to recognize that many of the key-
words we use in VBA programming projects in this book are already familiar to
you as an Excel user.
Keywords are words used by the programming language for a special purpose,
and are therefore reserved. This means you cannot use a keyword in your pro-
gram for anything other than what was designed into the language.
2
M
i
c
r
o
s
o
f
t
E
x
c
e
l
V
B
A
P
r
o
g
r
am
m
i
n
g
f
o
r t
h
e A
b
s
o
l
ut
e B
e
gi
n
n
e
r
FIGURE 1.1
The Colorful
Header project
01 XLVBA CH01.qxd 2/25/03 7:15 AM Page 2
The VBA Integrated
Development Environment (IDE)
Before learning how to program in VBA you have to learn how to use the software
required for creating your projects. The VBA development software is included
with each component of the Microsoft Office suite of programs, including Excel.
Starting the VBA development software places you in the VBA programming envi-
ronment IDE, which provides you with a number of tools for use in the develop-
ment of your project.
Getting to the IDE from Excel
Before you begin creating projects with VBA you must know your way around the
IDE. You can access the IDE from Excel in a couple of different ways. In Excel,
select Tools, Macro, Visual Basic Editor (as shown in Figure 1.2), or use the key-
stroke Alt+F11.
3
C
h
a
p
t
e
r
1
V
i
s
u
a
l
B
a
s
i
c
f
o
r
A
p
p
l
i
c
a
t
i
o
n
s
w
i
t
h
E
x
c
e
l
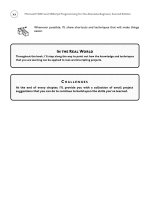
IN THE REAL WORLD
An IDE is software used by programmers for rapid application development
(RAD). IDEs are available for numerous programming languages and are often
quite expensive to purchase (several hundred dollars or more for a single
license). The price is worth it because IDEs provide tools that enable program-
mers to develop applications quickly, saving them considerable time and
money. But the most important component of any development software is the
compiler, which for many languages can be obtained at no cost. The compiler
converts your program into the binary code your computer understands. If you
have the compiler, all you really need to create an application, albeit with con-
siderably more effort, is a text editor. Excel comes with its own IDE and VBA
compiler, thus making it more of a value than you may realize. Yet there are
many companies that purchase large site licenses for Excel only to use the appli-
cation side, never taking advantage of the enhancements VBA can provide.
FIGURE 1.2
Accessing the VBA
IDE from the Tools
menu in Excel
01 XLVBA CH01.qxd 2/25/03 7:15 AM Page 3
Alternatively, select the Visual Basic toolbar from the View/Toolbars menu item
in Excel. When the toolbar is displayed, select the Visual Basic Editor icon in the
middle of the toolbar (see Figure 1.3).
Components of the IDE
After opening the VBA IDE you may find yourself looking at a window similar to
that shown in Figure 1.4. This figure shows the VBA IDE and some of the tools
that can be used to create projects.
Like in most applications, there is a menu bar across the top of the window. You
may only recognize a few items that exist within this menu, but don’t worry. I’ll
show you the function of most of these items as we proceed through the book.
The Standard toolbar is one of four toolbars available from the IDE. Like any tool-
bar, its function is to give the user fast access to common tools available within
the application. Again, I will explain the use of many of these functions, as well
as the use of other toolbars, as we proceed through the book.
Of particular importance is the Project Explorer window, shown in the upper left
corner of the IDE window in Figure 1.4. The Project Explorer lists all projects cur-
rently open, including those opened by Excel upon startup. The Project Explorer
4
M
i
c
r
o
s
o
f
t
E
x
c
e
l
V
B
A
P
r
o
g
r
am
m
i
n
g
f
o
r t
h
e A
b
s
o
l
ut
e B
e
gi
n
n
e
r
FIGURE 1.3
Accessing the VBA
IDE from the Visual
Basic toolbar
The
View/Toolbars
menu item
The list representing
available toolbars
The Visual
Basic toolbar
The Visual Basic
Editor icon
01 XLVBA CH01.qxd 2/25/03 7:15 AM Page 4
also lists the components of any opened projects. For example, Figure 1.4 shows
that there is currently one project, called Book2, open, and that this project con-
tains four Excel objects: Sheet1, Sheet2, Sheet3, and ThisWorkbook. I will discuss
Excel objects in detail in Chapter 5. For right now, recognize that these objects rep-
resent familiar components from Excel (the workbook and worksheets it contains).
Prior to opening the IDE, I created a new workbook from the file menu in Excel.
Excel gave the default name Book2 to the workbook (I had already closed Book1),
and the workbook includes three worksheets (default names Sheet1, Sheet2, and
Sheet3) because that’s what I have set in my options from the Tools menu in
Excel. If I open more workbooks, or add more worksheets to a currently open
workbook in Excel, then their names will appear on the component list in the
Project Explorer window.
Just below the Project Explorer window in Figure 1.4 is the Properties window.
The Properties window displays a list of attributes or properties of the currently
selected object in the Project Explorer window. These properties are used to
manipulate the behavior and appearance of the object to which they belong. The
properties of Sheet1 are displayed in Figure 1.4 because it has been selected in the
Project Explorer. Choosing a different object will result in a different properties
list in the Properties window, as not all objects have the same properties. As a
simple exercise in manipulating the properties of a worksheet, open a new work-
book in Excel, note the name of your workbook and any worksheets it contains
5
C
h
a
p
t
e
r
1
V
i
s
u
a
l
B
a
s
i
c
f
o
r
A
p
p
l
i
c
a
t
i
o
n
s
w
i
t
h
E
x
c
e
l
FIGURE 1.4
The VBA IDE
The Menu bar
The Standard
toolbar
The Project
Explorer window
A Standard Code
window
The Properties
window
01 XLVBA CH01.qxd 2/25/03 7:15 AM Page 5
(do not change any names), then open the VBA IDE. Once in the IDE, display the
Project Explorer and Properties windows. If the Project Explorer and Properties
windows are not already displayed you can access them through the View menu
item (see Figure 1.5). You can also use the keystrokes Ctrl+R and F4 to access the
Project Explorer and Properties windows, respectively.
Once the Project Explorer window is displayed, find the project that represents
the workbook you opened while in Excel (probably Book1 or Book2). If the com-
ponents of the workbook you opened in Excel are not displayed, click on the
+ sign next to the Microsoft Excel Objects folder directly underneath the project
name. Now find the component labeled Sheet1, select it with your mouse, and
then turn your attention to the Properties window. Scroll down the Properties
window until you come to the Name property (the one without the parentheses
around it). Delete the text entered to the right of the
Name property and enter
MySheet. Figure 1.6 illustrates how to find the Name property.
Toggle back to Excel by pressing Alt+F11, or select it from the taskbar in Win-
dows. You will note that the name of
Sheet1 has now been replaced with MySheet
in your Excel workbook, as shown in Figure 1.7.
See how easy it is to alter properties of a worksheet in Excel using VBA? As VBA
developers, however, we will seldom, if ever, alter the properties of a workbook
or worksheet at design time. The bulk of the work affecting workbooks and work-
sheets will occur at run time; however, we will alter properties of ActiveX con-
trols at design time.
Design time refers to project development and the manipulation of object proper-
ties using the VBA IDE prior to running any code. Conversely, run time will refer
to the manipulation of object properties using a program, thus, the properties of
the object do not change until the code is executed.
Finally, I will show you one more component of the VBA IDE. If you look back at
Figure 1.4 you will also see a Standard Code window. Windows such as these are
used as containers for your program(s). This is where you type in the code for
your program, so these windows are essentially text editors very similar to
Notepad. You must be aware that there are pre-defined code windows for specific
Excel objects, namely the workbook (for example, ThisWorkbook) and the work-
sheets (for example, Sheet1). The code window displayed in Figure 1.4 represents
Sheet1 contained within the workbook Book2.
You will also be able to add components to your project and they will have their
own code windows. I will explain how to use code windows more thoroughly as we
proceed through this book. For now, know that you can open a code window by
6
M
i
c
r
o
s
o
f
t
E
x
c
e
l
V
B
A
P
r
o
g
r
am
m
i
n
g
f
o
r t
h
e A
b
s
o
l
ut
e B
e
gi
n
n
e
r
01 XLVBA CH01.qxd 2/25/03 7:15 AM Page 6
7
C
h
a
p
t
e
r
1
V
i
s
u
a
l
B
a
s
i
c
f
o
r
A
p
p
l
i
c
a
t
i
o
n
s
w
i
t
h
E
x
c
e
l
FIGURE 1.5
Accessing the
Project Explorer
and Properties
windows
FIGURE 1.6
Accessing the
Name property of
a worksheet
The View
Code icon
The View
Object icon
The Sheet1
selection
The Name
property
FIGURE 1.7
The altered
workbook in Excel
The worksheet
name
01 XLVBA CH01.qxd 2/25/03 7:15 AM Page 7
double-clicking on any object listed in the Project Explorer. You can also select the
object in the Project Explorer and click on the View Code icon at the top left of the
window (refer to Figure 1.6), select Code from the tools menu, or hit F7 (refer to Fig-
ure 1.5). Note that you can also view the selected object in Excel by selecting the
appropriate item from these same locations (refer to Figures 1.6 and 1.7).
There are, of course, more components to the VBA IDE, but I’ve shown you enough
to get you started for now. As the need arises, I will introduce more tools from the
IDE that will aid in the development of various projects.
Programming Components within Excel
Not everything of interest to the VBA programmer can be found in the VBA IDE.
There are a few programming-related components that you access from the Excel
application. The components I am referring to are the Macro items found under
the Tools menu, and three of the available toolbars—Visual Basic, Control Toolbox,
and Forms—found in the View menu in Excel.
Macro Selection
Now that you’ve had an introduction to the VBA IDE, it’s time to look at develop-
ment tools accessed directly from Excel. To begin, take a closer look at the Macro
selection from the Tools menu, shown back in Figure 1.2. Notice two other items
displayed in Figure 1.2 that I have not yet discussed: Macros and Record New
Macro. Essentially the Record Macro tool will allow you to create a VBA program
by simply selecting various tasks in Excel through the normal interface. The
Record Macro tool is quite helpful, as you’ll see in Chapter 4 when I discuss it in
detail. The Macros menu item will simply display a dialog box with a list of some
or all of the currently loaded VBA programs. Again, I will explain the Macro menu
item in more detail later in the book, but for now remember that it is one way to
access and run desired VBA programs. Figure 1.8 shows the Macro dialog box.
Macros typically refer to programs that are recorded as the user executes a
series of tasks from the normal application interface. They are useful when a
user repeatedly performs the same tasks in Excel. Instead of having to repeat
tasks, the user can simply record his/her actions once, then “play back” the
macro when he/she needs to repeat the same series of tasks. However, it is
possible to access programs that were not recorded through the Macro menu
item, thus I will use the term macro to refer to both recorded programs and
those programs written from scratch.
8
M
i
c
r
o
s
o
f
t
E
x
c
e
l
V
B
A
P
r
o
g
r
am
m
i
n
g
f
o
r t
h
e A
b
s
o
l
ut
e B
e
gi
n
n
e
r
01 XLVBA CH01.qxd 2/25/03 7:15 AM Page 8
TEAMFLY
Team-Fly
®
The Visual Basic Toolbar
The Visual Basic toolbar shown in Figure 1.3 provides another set of tools for the
VBA developer. We have already seen how selecting the Visual Basic Editor icon
from this toolbar gives us access to the VBA IDE. There are several other useful
items on the Visual Basic toolbar—including Run Macro, Record Macro, and
Design Mode—that we will discuss later. Also included on the Visual Basic toolbar
is an icon for the Control toolbox, denoted by the crossed hammer and wrench,
as shown in Figure 1.9. The Control toolbox can also be accessed via the Toolbars
item on the View menu.
The Control toolbox provides you with the ActiveX controls mentioned earlier (see
the Introduction for a discussion of these controls). The Text Box, Command Button,
Label, and Image controls are just some of the controls available and are specifically
labeled in Figure 1.9. You place controls on a worksheet by first clicking on the
desired control and then drawing it onto the worksheet. Start by selecting the Com-
mand Button control and drawing it on a worksheet, as shown in Figure 1.10.
After the Command Button is placed on the worksheet, you will notice that it is
selected and the application is currently in Design Mode (check that the Design
Mode icon in the upper left corner of the Control toolbox appears “pressed in”).
9
C
h
a
p
t
e
r
1
V
i
s
u
a
l
B
a
s
i
c
f
o
r
A
p
p
l
i
c
a
t
i
o
n
s
w
i
t
h
E
x
c
e
l
FIGURE 1.8
The Macro dialog
box displaying
available VBA
programs
Currently selected
macro
List of available
macros
FIGURE 1.9
The Control toolbox
Design
Mode
toggle
Label
control
Properties
Window toggle
Command
Button control
Text box control
Image control
01 XLVBA CH01.qxd 2/25/03 7:15 AM Page 9
You can access the properties of the Command Button control while in design
mode. With the Command Button control selected while in design mode, select
the Properties icon from the Control toolbox. A window much like the Properties
window in the VBA IDE will appear. The Properties window lists all of the attrib-
utes or properties used to describe the Command Button control. Figure 1.11
shows the Properties window.
10
M
i
c
r
o
s
o
f
t
E
x
c
e
l
V
B
A
P
r
o
g
r
am
m
i
n
g
f
o
r t
h
e A
b
s
o
l
ut
e B
e
gi
n
n
e
r
FIGURE 1.10
The Command
Button control
placed on a
worksheet
FIGURE 1.11
The Properties
window of the
Command Button
control
01 XLVBA CH01.qxd 2/25/03 7:15 AM Page 10
In the Properties window of the Command Button control, change the Caption
property to Click Me and then notice how the new caption is displayed on the
control. Changing the
Name property to cmdColorChange allows you to experiment
with some of the other properties, such as
Font, ForeColor, BackColor, Width, and
Height to change the appearance of the control. You can even display a picture
within the Command Button control through the
Picture property, and then
select an image file from your computer.
The Name property is an important property of any ActiveX control. The value
of the Name property should be changed to something meaningful as soon as the
control is added to the worksheet. Typically, an abbreviated word telling us the
type of control (the cmd at the beginning of the name above denotes a Command
Button) and its function in the program, will work well. The Name property of an
ActiveX control should be changed if you will refer to it in your program. A mean-
ingful name will help you remember it, as well as make the code more readable.
Once the appearance of your Command Button control is to your liking, select
the View Code icon from the Control toolbox, or double-click on the Command
Button control to access the code window. You will be taken immediately to the
VBA IDE. Now it’s time to make the Command Button control functional, and you
can only do that by adding code to its code window. Figure 1.12 shows the code
window for the Command Button control.
The title bar tells us the object to which this code window belongs. In this case,
the code window belongs to the worksheet named Sheet1 in the workbook named
Book2. This is because I placed the Command Button control on Sheet1 of Book2
in the Excel application. You may recall that I changed the name of the worksheet
in Excel to MySheet, but the name of the worksheet as it will have to be referenced
in code is still Sheet1. In the upper left corner of the code window is a dropdown
11
C
h
a
p
t
e
r
1
V
i
s
u
a
l
B
a
s
i
c
f
o
r
A
p
p
l
i
c
a
t
i
o
n
s
w
i
t
h
E
x
c
e
l
FIGURE 1.12
The VBA IDE
showing the code
window for the
worksheet named
Sheet1
The title bar
The object list
The procedure list
The editor
01 XLVBA CH01.qxd 2/25/03 7:15 AM Page 11
list box containing the names of all objects contained within the selected work-
sheet. The name of the Command Button control is displayed because the cursor
in the editor is within an event procedure of this Command Button control.
Event procedures are self-contained blocks of code that require some type of
stimulus in order to run. The stimulus often comes directly from the user (for
example, a mouse click), but may also result from another piece of code.
Event procedures are pre-defined for ActiveX controls and other Excel objects,
such as workbooks and worksheets. All event procedures for the selected object
are listed in the upper right corner of the code window in a dropdown list box. I
will discuss event procedures in more depth in Chapter 3. For now, just take a
look at the
Click() event. The Click() event is a very common event procedure
that is built into most ActiveX controls. Any code placed within the predefined
procedure will trigger when the user clicks once on the object—in this case, the
Command Button control named
cmdColorChange. The procedure is defined and
listed in Figure 1.12 with the following two lines of code:
Private Sub cmdColorChange_Click()
End Sub
The name of the procedure will always be the name of the object with an under-
score followed by the name of the event. You cannot change the name of a prede-
fined event procedure. If you do change the name of the event procedure, the
code within the procedure will not run when you want it to. The keyword
Sub is
required and is used as the defining opening of any procedure—event-type or
programmer-defined.
Private is an optional keyword; I’ll discuss it in Chapter 3.
The second line,
End Sub, is always used to close a procedure. Now type the fol-
lowing line of code within the
Click() event procedure of the Command Button
control named
cmdColorChange.
Cells.Interior.ColorIndex = Int(Rnd * 56) + 1
This line will set the fill color of all cells in the worksheet to one of 56 possible
colors. This is the equivalent of a user first selecting all the cells in a worksheet
and then changing the fill color from the formatting toolbar in the Excel appli-
cation. The color of the cells is chosen randomly and will change with each click
of the Command Button control because the above code will run once with each
click event. So the entire procedure now looks like the following:
Private Sub cmdColorChange_Click()
Cells.Interior.ColorIndex = Int(Rnd * 56) + 1
End Sub
12
M
i
c
r
o
s
o
f
t
E
x
c
e
l
V
B
A
P
r
o
g
r
am
m
i
n
g
f
o
r t
h
e A
b
s
o
l
ut
e B
e
gi
n
n
e
r
01 XLVBA CH01.qxd 2/25/03 7:15 AM Page 12