Astm b 33 10 (2014)
Bạn đang xem bản rút gọn của tài liệu. Xem và tải ngay bản đầy đủ của tài liệu tại đây (111.12 KB, 6 trang )
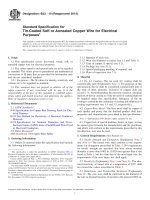
Designation: B33 − 10 (Reapproved 2014)
Standard Specification for
Tin-Coated Soft or Annealed Copper Wire for Electrical
Purposes1
This standard is issued under the fixed designation B33; the number immediately following the designation indicates the year of original
adoption or, in the case of revision, the year of last revision. A number in parentheses indicates the year of last reapproval. A superscript
epsilon (´) indicates an editorial change since the last revision or reapproval.
This standard has been approved for use by agencies of the U.S. Department of Defense.
3.1.1
3.1.2
3.1.3
3.1.4
3.1.5
3.1.6
1. Scope
1.1 This specification covers tin-coated, round, soft, or
annealed copper wire for electrical purposes.
1.2 The values stated in inch-pound units are to be regarded
as standard. The values given in parentheses are mathematical
conversions to SI units that are provided for information only
and are not considered standard.
1.2.1 Exceptions—The SI values for density, resistivity, and
volume are to be regarded as standard.
Quantity of each size,
Wire size-diameter in inches (see 5.3 and Table 1),
Type of copper, if special (see 4.2),
Package size (see 10.1),
Special packaging marking, if required, and
Place of inspection (see 7.1).
4. Material
4.1 Tin for Coating—The tin used for coating shall be
commercially pure (Explanatory Note 1). For purposes of this
specification, the tin shall be considered commercially pure if
the total of other elements, exclusive of copper, does not
exceed 1 %. Notwithstanding the previous sentence, chemical
analysis of the tin coating or of the tin used for coating shall not
be required under this specification. Adequacy of the tin
coating is assured by the continuity of coating and adherence of
coating requirements (see 5.4 and 5.5, respectively).
1.3 This standard does not purport to address all of the
safety concerns, if any, associated with its use. It is the
responsibility of the user of this standard to establish appropriate safety and health practices and determine the applicability of regulatory limitations prior to use.
2. Referenced Documents
2.1 ASTM Standards:2
B49 Specification for Copper Rod Drawing Stock for Electrical Purposes
B193 Test Method for Resistivity of Electrical Conductor
Materials
B258 Specification for Nominal Diameters and CrossSectional Areas of AWG Sizes of Solid Round Wires Used
as Electrical Conductors
2.2 Other Document:3
NBS Handbook 100 Copper Wire Tables
4.2 Copper-Base Metal—The base metal shall be copper of
such quality and purity that the finished product shall have
properties and characteristics prescribed in this specification.
NOTE 1—Specification B49 defines copper suitable for use.
4.3 Copper bars of special qualities, forms, or types, as may
be agreed upon between the manufacturer and the purchaser,
and which will conform to the requirements prescribed in this
specification, may also be used.
5. General Requirements (See Section 8)
3. Ordering Information
5.1 Tensile Strength and Elongation (Explanatory Note 2
and Note 3)—The tinned wire shall conform to the requirements for elongation prescribed in Table 1. No requirements
for tensile strength are specified. For wire whose nominal
diameter is more than 0.001 in. (0.025 mm) greater than a size
listed in Table 1, but less than that of the next larger size, the
requirements of the next larger size shall apply.
3.1 Orders for material under this specification shall include
the following information:
1
This specification is under the jurisdiction of ASTM Committee B01 on
Electrical Conductors and is the direct responsibility of Subcommittee B01.04 on
Conductors of Copper and Copper Alloys.
Current edition approved Sept. 1, 2014. Published September 2014. Originally
approved in 1919. Last previous edition approved in 2010 as B33 – 10. DOI:
10.1520/B0033-10R14.
2
For referenced ASTM standards, visit the ASTM website, www.astm.org, or
contact ASTM Customer Service at For Annual Book of ASTM
Standards volume information, refer to the standard’s Document Summary page on
the ASTM website.
3
Available from National Technical Information Service (NTIS), 5301 Shawnee
Rd., Alexandria, VA 22312, .
5.2 Resistivity (Explanatory Note 1 and Note 4)—The electrical resistivity of tinned wire at a temperature of 20°C shall
not exceed the values prescribed in Table 2.
5.3 Dimensions and Permissible Variations (Explanatory
Note 2)—The wire sizes shall be expressed as the diameter of
the wire in decimal fractions of an inch to the nearest 0.0001 in.
Copyright © ASTM International, 100 Barr Harbor Drive, PO Box C700, West Conshohocken, PA 19428-2959. United States
1
B33 − 10 (2014)
TABLE 1 Tensile Requirements
Diameter
(0.0025 mm). The tin-coated wire shall not vary from the
specified diameter by more than the amounts prescribed in
Table 3.
Area at 20°C
cmil
in.2
mm2
Elongation
in 10 in.
(250 mm),
% min
in.
mm
0.4600
0.4096
0.3648
0.3249
11.684
10.404
9.266
8.252
211600
167800
133100
105600
0.1662
0.1318
0.1045
0.08291
107.0
85.0
67.4
53.5
30
30
30
30
0.2893
0.2576
0.2294
0.2043
7.348
6.543
5.827
5.189
83690
66360
52620
41740
0.06573
0.05212
0.04133
0.03278
42.4
33.6
26.7
21.2
25
25
25
25
0.1819
0.1620
0.1443
0.1285
4.620
4.115
3.665
3.264
33090
26240
20820
16510
0.02599
0.02061
0.01635
0.01297
16.8
13.3
10.6
8.37
25
25
25
25
0.1144
0.1019
0.0907
0.0808
2.906
2.588
2.304
2.052
13090
10380
8230
6530
0.01028
0.008155
0.00646
0.00513
6.63
5.26
4.17
3.31
25
20
20
20
0.0720
0.0641
0.0571
0.0508
1.829
1.628
1.450
1.290
5180
4110
3260
2580
0.00407
0.00323
0.00256
0.00203
2.63
2.08
1.65
1.31
20
20
20
20
0.0453
0.0403
0.0359
0.0320
1.151
1.024
0.912
0.813
2050
1620
1290
1020
0.00161
0.00128
0.00101
0.000804
1.04
0.823
0.653
0.519
20
20
20
20
0.0285
0.0253
0.0226
0.0201
0.724
0.643
0.574
0.511
812
640
511
404
0.000638
0.000503
0.000401
0.000317
0.412
0.324
0.259
0.205
20
20
20
15
0.0179
0.0159
0.0142
0.0126
0.455
0.404
0.361
0.320
320
253
202
159
0.000252
0.000199
0.000158
0.000125
0.162
0.128
0.102
0.080
15
15
15
15
0.0113
0.0100
0.0089
0.0080
0.287
0.254
0.226
0.203
128
100
79.2
64.0
0.000100
0.0000785
0.0000622
0.0000503
0.065
0.051
0.040
0.032
15
10
10
10
0.0071
0.0063
0.0056
0.0050
0.180
0.160
0.142
0.127
50.4
39.7
31.4
25.0
0.0000396
0.0000312
0.0000246
0.0000196
0.026
0.020
0.016
0.013
10
10
10
10
0.0045
0.0040
0.0035
0.0031
0.114
0.102
0.089
0.079
20.3
0.0000159
16.0
0.0000126
12.3 0.00000962
9.61 0.00000755
0.010
0.0081
0.0062
0.0049
10
10
10
10
5.4 Continuity of Coating—The tin coating shall be continuous. The continuity of coating on the wire shall be determined
on representative samples taken before stranding or insulating.
The continuity of tinning shall be determined by the hydrochloric acid-sodium polysulfide test in accordance with 6.3.
5.5 Adherence of Coating—The tin coating shall be firmly
adherent to the surface of the copper. The adherence of coating
on the wire shall be determined on representative samples
taken before stranding or insulating. The adherence of coating
shall be determined by the wrapping and immersion test in
accordance with 6.4 for 0.0320 in. (0.813 mm) and larger sizes.
5.6 Joints—Necessary joints in the completed wire and in
the wire and rods prior to final drawing shall be made in
accordance with the best commercial practice.
5.7 Finish—The coating shall consist of a smooth continuous layer, firmly adherent to the surface of the copper. The wire
shall be free of all imperfections not consistent with the best
commercial practice.
6. Test Methods
6.1 Tensile Strength and Elongation (Explanatory Note 5):
6.1.1 No test for tensile strength shall be required.
6.1.2 The elongation of wire with a nominal diameter
greater than 0.0808 in. (2.052 mm) shall be determined as the
permanent increase in length due to the breaking of the wire in
tension. The elongation shall be measured between gage marks
placed originally 10 in. (254 mm) apart upon the test specimen
and expressed in percent of the original length.
6.1.3 The elongation of wire with a nominal diameter equal
to or less than 0.0808 in. (2.053 mm) may be determined as
described above or by measurements made between the jaws of
the testing machine. When measurements are made between
the jaws, the zero length shall be the distance between the jaws
at the start of the tension test and be as near 10 in. (254 mm)
as practicable. The final length shall be the distance between
the jaws at the time of rupture. The fracture shall be between
gage marks or jaws of the testing machine, depending on
method used, and not closer than 1 in. (25.4 mm) to either gage
mark or jaw.
6.2 Dimensional Measurements—Dimensional measurements shall be made with a micrometer caliper equipped with
a vernier graduated in 0.0001 in. (0.0025 mm). Measurements
shall be made on at least three places on each unit selected for
this test. If accessible, one measurement shall be taken on each
end and one near the middle. The average of the three
measurements shall determine compliance with the requirements.
TABLE 2 Electrical Resistivity Requirements
Nominal Diameter
in.
0.460 to 0.290, incl
Under 0.290 to 0.103, incl
Under 0.103 to 0.0201, incl
Under 0.0201 to 0.0111 incl
Under 0.0111 to 0.0030, incl
Resistivity at 20°C
mm
11.7 to 7.4, incl
Under 7.4 to 2.6, incl
Under 2.6 to 0.51, incl
Under 0.51 to 0.28, incl
Under 0.28 to 0.076, incl
Ω·lb/mile2
Ω·g/m2
896.15
900.77
910.15
929.52
939.51
0.15695
0.15776
0.15940
0.16279
0.16454
TABLE 3 Permissible Variations in Diamter
Nominal Diameter of Wire
in.
Under 0.0100
0.0100 and over
2
mm
Under 0.25
0.25 and over
Permissible Variations in Diameter
in.
mm
plus
minus
plus
minus
0.0003
0.00010 0.0076 0.0025
3%
1%
3%
1%
B33 − 10 (2014)
min in the HCl solution, wash, and dry; (4) immerse the
specimen for 30 s in the sodium polysulfide solution, wash, and
wipe dry.
6.3.3.2 Washing Specimens—After each immersion, immediately wash the specimens thoroughly in clean water and wipe
dry with a clean, soft cloth.
6.3.3.3 Examination of Specimens—After immersion and
washing, examine the specimens to ascertain if copper exposed
through openings in the tin coating has been blackened by
action of the sodium polysulfide. The specimens shall be
considered to have failed if, by such blackening, exposed
copper is revealed. No attention shall be paid to blackening
within 0.5 in. (12.7 mm) of the cut end. A grayish brown
appearance of the coating shall not constitute failure.
6.3 Continuity of Coating:
6.3.1 Specimens:
6.3.1.1 Length of Specimens—Test specimens shall have a
length of about 6 in. (152 mm). They shall be tagged or marked
to correspond with the coil, spool, or reel from which they were
cut.
6.3.1.2 Treatment of Specimens—The specimens shall be
thoroughly cleaned by immersion in a suitable organic solvent
for at least 3 min; then removed and wiped dry with a clean,
soft cloth (Caution—see Explanatory Note 6). The specimens
thus cleaned shall be kept wrapped in a clean, dry cloth until
tested. That part of the specimen to be immersed in the test
solution shall not be handled. Care shall be taken to avoid
abrasion by the cut ends.
6.3.2 Special Solutions Required:
6.3.2.1 Hydrochloric Acid Solution (HCl) (sp gr 1.088)—
Commercial HCl (sp gr 1.12) shall be diluted with distilled
water to a specific gravity of 1.088 measured at 15.6°C (60°F).
A portion of HCl solution having a volume of 180 mL shall be
considered to be exhausted when the number of test specimens
prescribed in Table 4 of a size as indicated in 6.3.3 have been
immersed in it for two cycles.
6.3.2.2 Sodium Polysulfide Solution (sp gr 1.142) (Explanatory Note 7)—A concentrated solution shall be made by
dissolving sodium sulfide cp crystals in distilled water until the
solution is saturated at about 21°C (70°F), and adding sufficient
flowers of sulfur (in excess of 250 g/L of solution) to provide
complete saturation, as shown by the presence in the solution
of an excess of sulfur after the solution has been allowed to
stand for at least 24 h. The test solution shall be made by
diluting a portion of the concentrated solution with distilled
water to a specific gravity of 1.135 to 1.145 at 15.6°C (60°F).
The sodium polysulfide test solution should have sufficient
strength to blacken thoroughly a piece of clean untinned copper
wire in 5 s. The test solution used for testing samples shall be
considered exhausted if it fails to blacken a piece of clean
copper as described above.
6.3.3 Procedure:
6.3.3.1 Immersion of Specimens—Immerse a length of at
least 4-1⁄2 in. (114 mm) from each of the clean specimens, in
accordance with the following cycles, in test solutions maintained at a temperature between 15.6 and 21°C (60 and 70°F):
(1) Immerse the specimen for 1 min in the HCl solution
described in 6.3.2, wash, and wipe dry; (2) immerse the
specimen for 30 s in the sodium polysulfide solution described
in 6.3.2, wash, and wipe dry; (3) immerse the specimen for 1
6.4 Adherence of Coating:
6.4.1 Specimens:
6.4.1.1 Length of Specimens—Test specimens shall be approximately 12 in. (305 mm) in length and shall be tagged or
marked to correspond with the coil, spool, or reel from which
they are cut.
6.4.1.2 Treatment of Specimens—The specimens shall be
thoroughly cleaned, if required, by immersion in a suitable
organic solvent for at least 3 min, then removed and dried
(Caution—see Explanatory Note 6). The specimens thus
cleaned shall be kept wrapped in a clean dry cloth until tested.
That part of the specimens to be immersed in the test solution
shall not be handled. Care shall be taken to avoid abrasion of
the surface to be subjected to test. Wire of sizes 0.005 in. (0.13
mm) and smaller may be cleaned after wrapping around the
mandrel.
6.4.2 Procedure:
6.4.2.1 Wrapping—Slowly wrap the test specimen in a
suitable manner in an open helix around a polished mandrel
having rounded ends and a diameter not to exceed four times
the nominal diameter of the specimen. Take care not to stretch
the specimen during the wrapping operation. The spacing of
the consecutive turns shall be approximately equal to the
diameter of the wire. For sizes 0.021 in. (0.53 mm) and smaller,
not more than six helical turns shall be used for the test, and for
wire larger than 0.021 in., not more than three turns shall be
used.
6.4.2.2 Immersion Test—Remove the helically wrapped portion of the test specimen from the mandrel and immerse
completely in the sodium polysulfide solution (see 6.3.2) for 30
s at the temperature prescribed in 6.3.3. On removal from the
sodium polysulfide solution, immediately rinse the specimen in
clean water and remove the excess by shaking.
6.4.2.3 Examination of Specimens—Examine visually the
outer peripheral surface of the helically wrapped portion of the
specimen. For wires 0.021 in. (0.53 mm) and smaller, a
magnification not greater than three times may be used. Any
cracking or parting of the coating in this area shown by
blackening of the copper shall be cause for rejection. A grayish
brown appearance of the coating after immersion shall not
constitute failure.
TABLE 4 Limiting Number of Test Specimens for Coating Tests
Nominal Diameter, in.
0.460 to 0.141, incl
Under 0.141 to 0.0851, incl
Under 0.0851 to 0.0501, incl
Under 0.0501 to 0.0381, incl
Under 0.0381 to 0.0301, incl
Under 0.0301 to 0.0030, incl
Maximum Number of
Specimens to be Tested
for 2 Cycles in 180 mL of
Acid Solution
2
4
6
10
12
14
6.5 Finish—Surface-finish inspection shall be made with the
unaided eye (normal spectacles excepted).
3
B33 − 10 (2014)
TABLE 5 Sampling for Dimensional Measurements
First Sample
Number of Units in Lot
1 to 14, incl
15 to 50, incl
51 to 100, incl
101 to 200, incl
201 to 400, incl
401 to 800, incl
Over 800
Second Sample
Number of Units in
Sample, n1
Allowable Number
of Defects in First
Sample, c1.
Number of Units in
Sample, n2
n1 plus n2
Allowable Number of
Defects in Both
Samples, c2
all
14
19
24
29
33
34
0
0
0
0
0
0
0
...
...
23
46
76
112
116
...
...
42
70
105
145
150
...
...
1
2
3
4
4
the order) the sample shall consist of a quantity of production
units shown in Table 6.
7. Inspection
7.1 General (Explanatory Note 8 and Note 9)—Unless
otherwise specified in the contract or purchaser order, the
manufacturer shall be responsible for the performance of all
inspection and test requirements specified.
7.1.1 All inspections and tests shall be made at the place of
manufacture unless otherwise especially agreed upon between
the manufacturer and the purchaser at the time of purchase.
7.1.2 The manufacturer shall afford the inspector representing the purchaser all reasonable manufacturer’s facilities to
satisfy him that the material is being furnished in accordance
with this specification.
7.1.3 Unless otherwise agreed upon between the purchaser
and the manufacturer, conformance of the wire to the various
requirements listed in Section 5 shall be determined on samples
taken from each lot of wire presented for acceptance.
7.1.4 The manufacturer shall, if requested prior to
inspection, certify that all wire in the lot was made under such
conditions that the product as a whole conforms to the
requirements of this specification as determined by regularly
made and recorded tests.
8. Conformance Criteria (Explanatory Note 9)
8.1 Any lot of wire, the samples of which comply with the
conformance criteria of this section, shall be considered as
complying to the requirements of Section 5. Individual production units that fail to meet one or more of the requirements
shall be rejected. Failure of a sample group from a lot to meet
one or more of the following criteria shall constitute cause for
rejection of the lot. The conformance criteria for each of the
prescribed properties given in Section 5 are as follows:
8.1.1 Elongation—The lot shall be considered conforming if
the elongation of each of the selected specimens is not less than
the elongation value in Table 1.
8.1.2 Resistivity—The electrical resistivity of each of the
four specimens shall conform to the requirements of 5.2.
Failure to meet these requirements shall constitute failure to
meet the resistivity conformance criterion.
8.1.3 Dimensions—The dimensions of the first sample
(Table 5) shall conform to the requirements of 5.3. If there are
no failures, the lot conforms to this requirement. If there are
failures, but the number of these does not exceed the allowable
defect number c2 (Table 5) for the respective number of units
in the sample, a second sample equal to n2 shall be taken and
the total defects of the n1 plus n2 units shall not exceed the
allowable defect number, c2. Failure to meet this requirement
shall constitute failure to meet the dimensional conformance
criterion.
8.1.4 Continuity of Coating—The continuity of the coating
of each of the eight specimens shall conform to the requirements of 5.4. Failure of more than two specimens shall
constitute failure to meet the continuity criterion. If not more
than two specimens fail to meet the continuity criterion, eight
7.2 Definitions Applicable to Inspection:
7.2.1 lot (Explanatory Note 8)—any amount of wire of one
type and size presented for acceptance at one time, such
amount, however, not to exceed 25 000 lb (11 350 kg).
7.2.2 unit(s)—coil(s), reel(s), or other put-up method which
makes up the lot from a production unit of one size of wire.
7.2.3 sample—a quantity of production units selected at
random from the lot for the purpose of determining conformance of the lot to the requirements of this specification.
7.2.4 specimen—a length of wire removed for test purposes
from any individual production unit of the sample.
7.3 Sample Size (Explanatory Note 9)—The number of
production units in a sample shall be as follows:
7.3.1 For elongation and resistivity determinations, the
sample shall consist of four production units. For continuity
and adherence of coating tests, the sample shall consist of eight
production units. From each unit, one test specimen of sufficient length shall be removed for the performance of the
required tests.
7.3.2 For dimensional measurements, the sample shall consist of a quantity of production units shown in Table 5 under
the heading “First Sample.”
7.3.3 For surface-finish inspection and for packaging inspection (when specified by the purchaser at the time of placing
TABLE 6 Sampling for Surface Finish and Packaging Inspection
Number of Units in Lot
1 to 30, incl
31 to 50, incl
51 to 100, incl
101 to 200, incl
201 to 300, incl
301 to 500, incl
501 to 800, incl
Over 800
4
Number of Units in
Sample, n
Allowable Number
of Defective Units,
c
all
30
37
40
70
100
130
155
0
0
0
0
2
2
3
4
B33 − 10 (2014)
accordance with Table 6. The number of units in the sample
showing nonconformance to the requirement shall not exceed
the allowable defect number, c, in Table 6. Failure to meet this
requirement shall constitute failure to meet the packaging
conformance criterion.
additional specimens from the lot shall be tested, all of which
shall conform to the continuity criterion. However, any individual production unit, the specimen from which failed to meet
the continuity criterion, shall be rejected.
8.1.5 Adherence of Coating—The adherence of the coating
of each of the eight specimens shall conform to the requirements of 5.5. Failure of more than two specimens shall
constitute failure to meet the adherence criterion. If not more
than two specimens fail to meet the adherence criterion, eight
additional specimens from the lot shall be tested, all of which
shall conform to the adherence criterion. However, any individual production unit, the specimen from which failed to meet
the adherence criterion, shall be rejected.
8.1.6 Surface Finish—The surface finish of the samples
taken in accordance with Table 6 shall conform to the requirements of 5.7. The number of units in the sample showing
surface defects not consistent with commercial practice shall
not exceed the allowable defect number c, in Table 6. Failure
to meet this requirement shall constitute failure to meet the
surface-finish conformance criterion.
8.1.7 Packaging—Conformance to the packaging requirements specified by the purchaser shall be determined in
9. Density (Explanatory Note 10)
9.1 For the purpose of calculating linear densities, cross
sections, etc., the density of the copper shall be taken as 8.89
g/cm3 (0.32117 lb/in.3) at 20°C.
10. Packaging and Shipping
10.1 Package sizes shall be agreed upon by the manufacturer and the purchaser in the placing of individual orders.
10.2 The tin-coated wire shall be protected against damage
in ordinary handling and shipping.
11. Keywords
11.1 tin-coated annealed copper wire; tin-coated copper
electrical wire; tin-coated soft copper wire
EXPLANATORY NOTES
NOTE 4—“Resistivity” is used in place of “percentage conductivity.”
The value of 0.15328Ω · g/m2 at 20°C is the international standard for the
resistivity of annealed copper equal to 100 % conductivity. This term
means that a wire 1 m in length and weighing 1 g would have a resistance
of 0.15328 Ω. This is equivalent to a resistivity value of 875.20
Ω·lb/mile2, which signifies the resistance of a wire 1 mile in length
weighing 1 lb. It is also equivalent, for example, to 1.7241 µΩ/cm of
length of a bar 1 cm2 in cross section. A complete discussion of this
subject is contained in NBS Handbook 100 of the National Bureau of
Standards. The presence of tin and of copper-tin alloy in the coating of the
wire increases the resistance of the finished wire as mentioned in Note 1.
Relationships that may be useful in connection with the values of
resistivity prescribed in this specification are as shown in Table 7, each
column containing equivalent expressions at 20°C.
NOTE 5—In general, tested values of tensile strength are increased and
tested values of elongation are reduced with increase of speed of the
moving head of the testing machine in the tension testing of copper wire.
In the case of tests on soft or annealed copper wire, however, the effects
of speed of testing are not pronounced. Tests of soft wire made at speeds
of moving head, which under no-load conditions are not greater than 12
in./min, do not alter the final results of tensile strength and elongation
determinations to any practical extent.
NOTE 6—Caution: Consideration should be given to toxicity and
flammability when selecting solvent cleaners.
NOTE 7—It is important that the polysulfide solution be of proper
composition and strength at the time of test. A solution that is not saturated
with sulfur or that has been made from decomposed sodium sulfide
crystals may give a false indication of failure. Therefore, the requirement
that the solution be tested by observing its blackening effect on a bright
copper wire is significant. Significant also is the requirement that the
NOTE 1—It is necessary that the coating of tin on the wire be
continuous. The test in the sodium polysulfide is for the purpose of
determining whether or not the wire carries a continuous envelope of pure
tin. The thickness of the tin coating is necessarily varied. Under the same
conditions of tinning, the coating on all sizes of wire, excepting on fine
wire, is approximately the same. The coating on fine wire is in general
relatively heavier than that on coarse wire. It is not, therefore, correct to
apply a larger number of cycles in the test on coarse wire than is applied
to fine wire. It is probable that one cycle of the dip test would be sufficient
to discover defects in tinned wire, but in order to make certain that no
partially covered spots may escape attention, provision has been made for
two cycles. It has been found that the tin coating on copper wire consists
of two parts, an envelope of pure tin on the outside, with an intermediate
layer of copper-tin alloy. This tin alloy, as well as the amount of tin
present, has an effect on the resistivity of the wire. Since the relative
amount of tin coating and alloy is greater on the small wire than it is on
the coarser wire, the resistivity of the wire increases as the size decreases.
This also accounts for the decrease in elongation due to tinning soft wire.
NOTE 2—The values of the wire diameters in Table 1 are given to the
nearest 0.0001 in. and correspond to the standard sizes given in Specification B258. The use of gage numbers to specify wire sizes is not
recognized in this specification because of the possibility of confusion. An
excellent discussion of wire gages and related subjects is contained in NBS
Handbook 100 of the National Bureau of Standards.
NOTE 3—Other tests than those provided in this specification have been
considered at various times, such as twist tests, wrap tests, and so forth. It
is the opinion of the committee that twist tests on soft wire serve no useful
purpose and that wrap tests, other than that provided for in 6.4, which is
a test for adhesion, are likewise undesirable and inconclusive as to results
and significance.
TABLE 7 Resistivity Values
Conductivity at 20°C, %
100.00
Ω·lb/mile2
Ω·g/m2
Ω·cmil/ft
Ω·mm2/m
µΩ·in.
µΩ·cm
875.20
0.15328
10.371
0.017241
0.67879
1.7241
97.66
896.15
0.15694
10.619
0.017654
0.69504
1.7654
97.16
900.77
0.15775
10.674
0.017745
0.69863
1.7754
5
96.16
910.15
0.15940
10.785
.017930
0.70590
1.7930
94.16
929.52
0.16279
11.015
0.018312
0.72092
1.8312
93.15
939.51
0.16454
11.133
0.018508
0.78267
1.8508
B33 − 10 (2014)
manufacturer, indicating continued conformance to the criteria, are
necessary to ensure an over-all product meeting the requirements of this
specification. The sample sizes and conformance criteria given for the
various characteristics are applicable only to lots produced under these
conditions.
NOTE 10—The value of density of copper is in accordance with the
International Annealed Copper Standard. The corresponding value at 0°C
is 8.90 g/cm3 (0.32150 lb/in.3). In calculations involving density it must
be borne in mind that the apparent density of coated wire is not a constant
but a variable function of wire diameters. The smaller the diameter, the
greater the percentage of coating present and hence the greater departure
from the density of copper.
solution be saturated with sulfur by allowing the solution to stand at least
24 h after preparation. Attention is called also to the necessity for the use
of sodium sulfide that has not deteriorated through exposure to air; and if
exposure has occurred, the crystals should be tested for purity. The
“Standard Reagents Tests” of the American Chemical Society are useful in
this connection.
NOTE 8—A lot should comprise material taken from a product regularly
meeting the requirements of this specification. Inspection of individual
lots of less than 5000 lb of wire cannot be justified economically. For
small lots of 5000 lb or less, the purchaser may agree to the manufacturer’s regular inspection of the product as a whole, as evidence of
acceptability of such small lots.
NOTE 9—Cumulative results secured on the product of a single
ASTM International takes no position respecting the validity of any patent rights asserted in connection with any item mentioned
in this standard. Users of this standard are expressly advised that determination of the validity of any such patent rights, and the risk
of infringement of such rights, are entirely their own responsibility.
This standard is subject to revision at any time by the responsible technical committee and must be reviewed every five years and
if not revised, either reapproved or withdrawn. Your comments are invited either for revision of this standard or for additional standards
and should be addressed to ASTM International Headquarters. Your comments will receive careful consideration at a meeting of the
responsible technical committee, which you may attend. If you feel that your comments have not received a fair hearing you should
make your views known to the ASTM Committee on Standards, at the address shown below.
This standard is copyrighted by ASTM International, 100 Barr Harbor Drive, PO Box C700, West Conshohocken, PA 19428-2959,
United States. Individual reprints (single or multiple copies) of this standard may be obtained by contacting ASTM at the above
address or at 610-832-9585 (phone), 610-832-9555 (fax), or (e-mail); or through the ASTM website
(www.astm.org). Permission rights to photocopy the standard may also be secured from the Copyright Clearance Center, 222
Rosewood Drive, Danvers, MA 01923, Tel: (978) 646-2600; />
6
