Astm b 277 95 (2012)
Bạn đang xem bản rút gọn của tài liệu. Xem và tải ngay bản đầy đủ của tài liệu tại đây (67.52 KB, 2 trang )
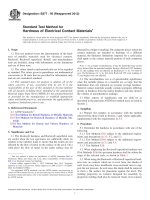
Designation: B277 − 95 (Reapproved 2012)
Standard Test Method for
Hardness of Electrical Contact Materials1
This standard is issued under the fixed designation B277; the number immediately following the designation indicates the year of
original adoption or, in the case of revision, the year of last revision. A number in parentheses indicates the year of last reapproval. A
superscript epsilon (´) indicates an editorial change since the last revision or reapproval.
detected by a bulge or marking. On composite pieces where the
contact materials are attached to backings of a different
material, the thickness limitations imposed for a solid piece
shall apply to the contact material portion of such composite
pieces.
1. Scope
1.1 This test method covers the determination of the hardness of metallic materials used for electrical contacts.
Rockwell, Rockwell superficial, Brinell, and microhardness
tests are included, along with information on the limitations
and use of these tests.
NOTE 1—As a matter of information, it may be stated that tests on fine
silver showed that on annealed samples having a Rockwell 15T hardness
of 27, the readings were not affected on thicknesses 1⁄16 in. (1.6 mm) or
over. On thicknesses of 1⁄32 in. (0.8 mm) Rockwell 15T scale readings of
72 and higher were not affected.
1.2 The values stated in inch-pound units are to be regarded
as standard. The values given in parentheses are mathematical
conversions to SI units that are provided for information only
and are not considered standard.
1.3 This standard does not purport to address all of the
safety concerns, if any, associated with its use. It is the
responsibility of the user of this standard to become familiar
will all hazards including those identified in the appropriate
Material Safety Data Sheet (MSDS) for this product/material
as provided by the manufacturer, to establish appropriate
safety and health practices, and determine the applicability of
regulatory limitations prior to use.
3.2 The microhardness test is of questionable significance
when the metallic phases in a material are so large that the
indentation does not represent an accurate average hardness.
Sintered contact materials usually contain segregates differing
greatly in hardness from the matrix hardness and may destroy
the validity of microhardness readings.
3.3 Other aspects of significance and use shall be as
described in the particular ASTM test method used, as listed in
Section 2.
2. Referenced Documents
4. Sampling
2.1 ASTM Standards:2
E10 Test Method for Brinell Hardness of Metallic Materials
E18 Test Methods for Rockwell Hardness of Metallic Materials
E384 Test Method for Knoop and Vickers Hardness of
Materials
4.1 Prepare test samples in accordance with the method
selected from those listed in Section 2 and, where applicable,
supplemented with the requirements in 5.3.
5. Procedure
5.1 Determine the hardness in accordance with one of the
following:
5.1.1 Test Methods E18 subject to the additional requirements and precautions in 3.1, 5.2, and 5.3.
5.1.2 Test Method E384 subject to the additional requirements and precautions in 3.2 and 5.4.
5.1.3 Test Method E10.
3. Significance and Use
3.1 The Rockwell hardness and Rockwell superficial tests
are useful when the test specimens are sufficiently thick (in
relation to the indentor load) to ensure that the results are not
affected by the flow of metal on the surface of the anvil. On a
solid piece the flow of metal on the under surface may be
5.2 When employing the Rockwell superficial hardness test
(Test Methods E18) the specimen hardness shall be within the
range of the selected scale, as shown in Table 1.
1
This test method is under the jurisdiction of ASTM Committee B02 on
Nonferrous Metals and Alloys and is the direct responsibility of Subcommittee
B02.11 on Electrical Contact Test Methods.
Current edition approved May 1, 2012. Published May 2012. Originally
approved in 1952. Last previous edition approved in 2006 as B277 – 95 (2006).
DOI: 10.1520/B0277-95R12.
2
For referenced ASTM standards, visit the ASTM website, www.astm.org, or
contact ASTM Customer Service at For Annual Book of ASTM
Standards volume information, refer to the standard’s Document Summary page on
the ASTM website.
5.3 When using the Rockwell or Rockwell superficial hardness tests on contacts which are in rivet form, the shanks of
such rivets may have insufficient cross-sectional area to support the test pressure. In such cases the shank shall be removed
to form a flat surface for placement against the anvil. The
welding projection on contacts designed for assembly by
projection welding shall also be removed. Some rivet contacts
Copyright © ASTM International, 100 Barr Harbor Drive, PO Box C700, West Conshohocken, PA 19428-2959. United States
1
B277 − 95 (2012)
TABLE 1 Permissible Hardness Ranges
Scale
Permitted Range
15T
30T
45T
15N
30N
45N
20–90
20–90
10–90
70–100
40–100
20–100
6. Reports
6.1 In addition to the requirements of the applicable hardness method used, the report shall include the following:
6.1.1 When it is necessary to make measurements on thin
sections of material where results will be affected, this fact
shall be stated in reporting the results, stating the thickness of
the material tested.
6.1.2 When tests are made on surfaces having a spherical or
cylindrical curvature, the radius of curvature shall be given in
the report.
7. Precision and Bias
7.1 The precision and bias of this test method are as stated
in the particular ASTM Test Method used (see 2.1 and Note 1).
are too small for the use of Rockwell superficial hardness
testing, in which case the microhardness tests may be used.
5.4 When employing the microhardness test (Test Method
E384) the minimum indentor load shall be 100 gf, except for
specimens that have a thickness or diameter less than 0.005 in.
(0.13 mm) in which case a 25 or 50 gf load shall be used.
5.4.1 When microhardness tests (Test Method E384) are
employed at 100 gf or less load, make a minimum of five
indentations. Obtain the reported microhardness value by
averaging these indentations.
NOTE 2—Interlaboratory Knoop hardness tests at 100 gf on noble alloys
in the range of approximately 170 to 230 HK indicate that measured
diagonal lengths have a standard deviation of approximately 1.4 µm that
corresponds to 5.3 to 7.5 Knoop numbers respectively.
8. Keywords
8.1 contacts; electrical contact materials; hardness; microhardness
ASTM International takes no position respecting the validity of any patent rights asserted in connection with any item mentioned
in this standard. Users of this standard are expressly advised that determination of the validity of any such patent rights, and the risk
of infringement of such rights, are entirely their own responsibility.
This standard is subject to revision at any time by the responsible technical committee and must be reviewed every five years and
if not revised, either reapproved or withdrawn. Your comments are invited either for revision of this standard or for additional standards
and should be addressed to ASTM International Headquarters. Your comments will receive careful consideration at a meeting of the
responsible technical committee, which you may attend. If you feel that your comments have not received a fair hearing you should
make your views known to the ASTM Committee on Standards, at the address shown below.
This standard is copyrighted by ASTM International, 100 Barr Harbor Drive, PO Box C700, West Conshohocken, PA 19428-2959,
United States. Individual reprints (single or multiple copies) of this standard may be obtained by contacting ASTM at the above
address or at 610-832-9585 (phone), 610-832-9555 (fax), or (e-mail); or through the ASTM website
(www.astm.org). Permission rights to photocopy the standard may also be secured from the ASTM website (www.astm.org/
COPYRIGHT/).
2

