Chapter 6 Debugging and error handling
Bạn đang xem bản rút gọn của tài liệu. Xem và tải ngay bản đầy đủ của tài liệu tại đây (364.3 KB, 5 trang )
1
Debugging and Error Handling
Chapter 6
Ebook: Beginning Visual C# 2010, chapter 7
Reference: CSharp How to Program, part D
Contents
Introduction
Debugging
Error Handling
Slide 2
Introduction
Errors in program: a program can have three types of
errors:
Compile-time errors: The compiler will find syntax errors and
other basic problems
Run-time errors: A problem can occur during program
execution, such as trying to divide by zero, which causes a
program to terminate abnormally
Logical errors: A program may run, but produce incorrect
results, perhaps using an incorrect formula
1-3
Debugging
Debugging is the process of finding and correcting logic
errors in applications
Applications are executed in two ways: with debugging
enabled (F5) or without debugging enabled (Ctrl+F5)
Techniques
Debugging in nonbreak mode
Outputting debugging information: Console.WriteLine(),
Debug.WriteLine()
Debugging in break mode
Using Breakpoints
Some windows in Debug\Windows: Autos, Locals, Watch
Slide 4
Error Handling
An exception is an indication of a problem that occurs
during a program's execution
format error,
arithmetic overflow,
out-of range array subscripts,
division by zero,
invalid method parameters
running out of available memory,
…
Your program should be able to handle these exceptional
situations. This is called exception handling
Slide 5
Error Handling (cont.)
int tu = Convert.ToInt32( txtNumerator.Text );
int mau = Convert.ToInt32( txtDenominator.Text );
int result = tu / mau;
lblOutput.Text = result.ToString();
Slide 6
2
Exception Handling: try…catch
try{
// code that may cause exception
}
catch ( ExceptionTypeA e ){
// statement to handle errors occurring
// in the associated try block
}
catch ( ExceptionTypeB e ){
// statement to handle errors occurring
// in the associated try block
}
Slide 7
Exception Handling:
try…catch finally
try{
// code that may cause exception
}
catch ( ExceptionTypeA e ){
// statement to handle errors occurring
// in the associated try block
}
//…
finally{
// statements always excuted
}
Slide 8
Exception Types
Slide 9
Some common exception classes
Exception Class
Cause
DivideByZeroException
An attempt was made to divide by zero.
FormatException
The format of an argument is wrong.
IndexOutOfRangeException
An array index is out of bounds.
InvalidCastExpression
An attempt was made to cast to an invalid class.
OutOfMemoryException
Not enough memory to continue execution.
StackOverflowException
A stack has overflown.
Example: try…catch
private void divideButton_Click( object sender, System.EventArgs e ){
lblOutput.Text = "";
try
{
int x = Convert.ToInt32( txtX.Text );
int y = Convert.ToInt32( txtY.Text );
int result = x / y;
lblOutput.Text = result.ToString();
}
catch ( FormatException ) {
MessageBox.Show( "You must enter two integers“, "Invalid Number Format",
MessageBoxButtons.OK, MessageBoxIcon.Error );
}
catch ( DivideByZeroException er ) {
MessageBox.Show( er.Message, "Attempted to Divide by Zero",
MessageBoxButtons.OK, MessageBoxIcon.Error );
}
}
Slide 10
The throw statement
A throw statement explicitly generates an exception in code
There are two ways you can use the throw statement
Rethrow the exception in a catch block:
catch(Exception e)
{
// Add code to create an entry in event log
throw;
}
Throw explicitly created exceptions
string strMessage = “EndDate should be greater than the StartDate”;
ArgumentOutOfRangeException exp =
new ArgumentOutOfRangeException(strMessage);
throw exp;
Slide 11
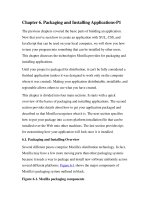
.NET Exception hierarchy
The FCL provides two categories of exceptions
ApplicationException : represents exceptions thrown by the
applications
SystemException : represents exceptions thrown by the CLR
Slide 12
Exception
ApplicationException SystemException
3
Programmer-defined Exception
classes
Creating customized exception types
Should derive from class ApplicationException
Should end with “Exception”
Should define three constructors
A default constructor
A constructor that receives a string argument
A constructor that takes a string argument and an Exception
argument
Slide 13
Programmer-defined Exception
classes: Example
Programmer-defined Exception
classes: Example (cont.)
class NegativeNumberException : ApplicationException
{
public NegativeNumberException() : base( "Phai nhap vao so khong am" )
{
}
public NegativeNumberException( string message ) : base( message )
{
}
public NegativeNumberException( string message, Exception inner )
: base( message, inner )
{
}
}
Programmer-defined Exception
classes: Example (cont.)
private void squareRootButton_Click( object sender, System.EventArgs e ) {
outputLabel.Text = "";
try
{
double input = Double.Parse(inputTextBox.Text);
if ( input < 0 )
throw new NegativeNumberException( "Square root of negative number not permitted" );
double result = Math.Sqrt(input);
outputLabel.Text = result.ToString();
}
// BẮT lỗi định dạng số không hợp lệ
catch ( FormatException error ) {
MessageBox.Show( error.Message, "Invalid Operation", MessageBoxButtons.OK,
MessageBoxIcon.Error );
}
// BẮT lỗi nhập số âm
catch ( NegativeNumberException error ) {
MessageBox.Show( error.Message, "Invalid Operation", MessageBoxButtons.OK,
MessageBoxIcon.Error );
}
}
Validating user input
When getting data from the user, you must ensure that the
entered data is valid
You can use various techniques for validating data:
By using standard controls such as combo boxes, list boxes,
radio buttons, check boxes, numericupdown, trackbar,
By enabling or disabling data fields, depending on the state of
other fields
By capturing the user’s keystrokes and analyze them for
validity
By analyzing the contents of the data field as a whole and
warn the user of any incorrect values when the user attempts
to leave the field or close the window
Slide 17
Keystroke-level validation
Slide 18
When pressing a key on a control, three events occur in
the following order:
KeyDown event
KeyPress event
KeyUp event
4
KeyPressEventArgs class
Properties
KeyChar: returns the character value that corresponds to the
key
Handled: indicates whether the event has been handled
Example: not allow to input alphabets
private void txtX_KeyPress(object sender, KeyPressEventArgs e)
{
if ((e.KeyChar >= 'A' && e.KeyChar <= 'Z') ||
(e.KeyChar >= 'a' && e.KeyChar <= 'z'))
e.Handled = true;
}
Slide 19
KeyEventArgs class
Slide 20
Properties
Alt: returns true if the Alt key is pressed; otherwise, returns false
Control: …
Handled: indicates whether the event has been handled
KeyCode: returns the keyboard code for the event
KeyData: returns the key code for the pressed key, combination of
modifier keys (Ctrl, Shift, and Alt)
KeyValue: returns the integer representation of the KeyData
Modifiers: returns the modifier flags that indicate what
combination of modifier keys (Ctrl, Shift, and Alt) are pressed
Shift: …
KeyEventArgs class (cont.)
Example: catch Enter key
private void TextBox1_KeyDown( object sender, KeyEventArgs e )
{
if (e.KeyCode == Keys.Enter)
MessageBox.Show("You pressed Enter key");
}
Example: catch keys combination
private void TextBox1_KeyDown( object sender, KeyEventArgs e )
{
if (e.Alt && e.KeyCode.ToString() == "F")
{
MessageBox.Show("You pressed Alt+F combination");
}
}
Slide 21
Field-level validation
Slide 22
When the user enters and leaves a field, the events occur in
the following order:
Enter: Occurs when a control is entered
GotFocus: Occurs when a control receives focus
Leave: Occurs when focus leaves a control
Validating: Occurs when a control is validating
Validated: Occurs when a control is finished validating
LostFocus: Occurs when a control looses focus
The Validating event is the ideal place to store the validating
logic for a field
The Validating event
Slide 23
In the Validating event, to retain the focus in the current
control, forcing the user to fix the problem before
proceeding further
To do this, you can use either of the following techniques
Use the Focus() method of the control to transfer the focus
back to the field
Set the Cancel property of CancelEventArgs to true to cancel
the Validating event
When you want a control to respond, regardless of the
validation status of other controls, you should set the
CausesValidation property of that control to false
The Validating event (cont.)
Example:
private void txtX_Validating(object sender, CancelEventArgs e)
{
try {
int x = Convert.ToInt32(txtX.Text);
if (x < 0)
{
MessageBox.Show("Please enter a value > 0");
txtX.SelectAll();
txtX.Focus(); // e.Cancel = true;
}
}
catch (Exception ex) {
MessageBox.Show(ex.Message);
txtX.SelectAll();
txtX.Focus(); // e.Cancel = true;
}
}
Slide 24
5
The ErrorProvider component
Slide 25
You can display an error to alert the user about invalid data
input
Using MessageBox.Show
Using ErrorProvider component
BlinkRate property
BlinkStyle property
ContainerControl property
GetError() method
Icon property
SetError() method
SetIconAlignment() method
SetIconPadding() method
The ErrorProvider component
Example:
private void txtX_Validating(object sender, CancelEventArgs e) {
try {
int x = Convert.ToInt32(txtX.Text);
if (x > 0)
errorProvider1.SetError(txtX, "");
else
{
errorProvider1.SetError(txtX, "Please enter a value > 0");
txtX.Focus(); // e.Cancel = true;
}
}
catch (Exception ex) {
errorProvider1.SetError(txtX, ex.Message);
txtX.Focus(); // e.Cancel = true;
}
}
Slide 26