Toyota land cruiser 1998 2007 body repair manual hướng dẫn sửa chữa thân xe land cruiser đời 1998 2007
Bạn đang xem bản rút gọn của tài liệu. Xem và tải ngay bản đầy đủ của tài liệu tại đây (14.64 MB, 130 trang )
ABS Antilock Brake System
A/C Air Conditioner
assy assembly
ECT Electronic Controlled Transmission
ECU Electronic Control Unit
e.g. Exempli Gratia (for Example)
Ex. Except
4WD Four Wheel Drive Vehicles
in. inch
LH Left-hand
LHD Left-hand Drive
MIG Metal Inert Gas
M/Y Model Year
PPS Progressive Power Steering
RH Right-hand
RHD Right-hand Drive
SRS Supplemental Restraint System
SSM Special Service Materials
w/ with
w/o without
5. ECU (ELECTRONIC CONTROL UNIT)
Many ECUs are mounted in this vehicle.
Take the following precautions during body repair to prevent damage to the ECUs.
S Before starting electric welding operations, disconnect the negative (-) terminal cable from the battery.
When the negative (-) terminal cable is disconnected from the battery, memory of the clock and audio
systems will be cancelled. So before starting work, make a record of the contents memorized by each
memory system. Then when work is finished, reset the clock and audio systems as before.
When the vehicle has tilt and telescopic steering, power seat and outside rear view mirror, which are all
equipped with memory function, it is not possible to make a record of the memory contents. So when the
operation is finished, it will be necessary to explain this fact to the customer, and request the customer to
adjust the features and reset the memory.
S Do not expose the ECUs to ambient temperatures above 80°C (176°F).
NOTICE: If it is possible the ambient temperature may reach 80
°
(176
°
F) or more, remove the ECUs
from the vehicle before starting work.
S Be careful not to drop the ECUs and not to apply physical shocks to them.
ABBREVIATIONS USED IN THIS MANUAL
For convenience, the following abbreviations are used in this
manual.
INTRODUCTION
IN-9
Applicable models:
FOREWORD
This repair manual has been prepared to provide essential infor-
mation on body panel repair methods (including cutting and
welding operations, but excluding painting) for the TOYOTA
LAND CRUISER.
UZJ100, FZJ10_ series
HDJ10_, HZJ105 series
This manual consists of body repair methods, exploded dia-
grams and illustrations of the body components and other infor-
mation relating to body panel replacement such as handling pre-
cautions, etc. However, it should be noted that the front fenders
of the TOYOTA model is bolted on and require no welding.
When repairing, don’t cut and join areas that are not shown in
this manual. Only work on the specified contents to maintain
body strength.
Body construction will sometimes differ depending on specifica-
tions and country of destination. Therefore, please keep in mind
that the information contained herein is based on vehicles for
general destinations.
For the repair procedures and specifications other than collision-
damaged body components of the TOYOTA LAND CRUISER
refer to the repair manuals.
If you require the above manuals, please contact your TOYOTA
Dealer.
All information contained in this manual is the most up-to-date
at the time of publication. However, specifications and proce-
dures are subject to change without prior notice.
TOYOTA MOTOR CORPORATION
GENERAL REPAIR INSTRUCTIONS
Work Precautions
SAFETY
1. Before performing repair work, check
for fuel leaks. If a leak is found, be sure
to close the opening totally.
2. If it is necessary to use a frame in the
area of the fuel tank, first remove the
tank and plug the fuel line.
SAFETY
Never stand in direct line
with the chain when using
a puller on the body or
frame, and be sure to at-
tach a safety cable.
VEHICLE PROTECTION
When welding, protect the
painted surfaces, windows,
seats and carpet with heat-
resistant, fire-proof covers.
Glass Cover
Safety Cable
Seat Cover
WRONG
SAFETY WORK CLOTHES
HAND TOOLS
Keeping your hand tools in
neat order improve your
work efficiency.
In addition to the usual mechanic’s wear, cap and safety shoes,
the appropriate gloves, head protector, glasses, ear plugs, face
protector, dust-prevention mask, etc. should be worn as the
situation demands.
Dust-
Prevention
Mask
Welder’s
Glasses
Ear
Plugs
Face
Protector
Body
Tools
Stand
Head
Protector
Eye
Protector
Welder’s
Gloves
Safety
Shoes
INTRODUCTION
IN-10
Proper and Efficient Work Procedures
REMOVAL
NUMBER OF SPOT WELDS AND PANEL POSITIONS
The number of spot welds and the panel positions to
be removed are shown for your reference.
HINT: See “Symbols” on page IN-4 , 5.
PRE-REMOVAL MEASURING
Before removal or cutting opera-
tions, take measurements in ac-
cordance with the dimension dia-
gram. Always use a puller to
straighten a damaged body or
frame.
REMOVAL OF ADJACENT COMPONENTS
When removing adjacent components, apply
protective tape to the surrounding body and
your tools to prevent damage.
HINT: See “Handling Precautions on
Related Components” on page IN-6 .
PRECAUTIONS FOR DRILLING OR
CUTTING
Check behind any area to be drilled or
cut to insure that there are no hoses,
wires, etc., that may be damaged.
HINT: See “Handling Precautions on
Related Components” on page IN-6 .
CUTTING AREA
Always cut in a straight
line and avoid reinforced area.
Cutting Okay
Corners
Reinforcement
WRONG
INTRODUCTION
IN-11
Thickness of
welded portion
Size of plug hole
1.0 (0.04) under 5 (0.20)
φ over
1.0 (0.04) - 1.5 (0.06)
6.5 (0.26)
φ over
1.5 (0.06) over
8 (0.31)
φ over
Parts Name Parts Number
Spot Sealer
08839 - 00070
REFERENCE:
mm (in.)
PREPARATION FOR INSTALLATION
SPOT WELD POINTS
APPLICATION OF WELD-THROUGH PRIMER
(SPOT SEALER)
Remove the paint from
the portion of the new
parts and body to be
welded, and apply
weld-through primer.
HINT: See ”ANTIRUST
TREATMENT”’ on page
AR-2 .
When welding panels with a
combined thickness of over
3 mm (0.12 in.), use a MIG
(Metal Inert Gas) welder for
plug welding.
HINT: Spot welding will not
provide sufficient durability
for panels over 3 mm (0.12
in.) thick.
Less Than
3 mm
*The above SSM
or equivalent
Air Saw
20 - 30 mm
Puncher
Overlap
ROUGH CUTTING OF
JOINTS
For joint areas, rough
cut the new parts,
leaving 20 - 30 mm
(0.79 - 1.18 in.)
overlap.
MAKING HOLES FOR PLUG WELDING
For areas where a spot welder cannot be
used, use a puncher or drill to make holes
for plug welding.
SAFETY PRECAUTIONS FOR
ELECTRICAL COMPONENTS.
When welding there is a danger
that electrical components will
be damaged by the electrical
current flowing through the body.
Before starting work disconnect
the negative terminal of the bat-
tery and ground the welder near
the welding location of the
body.
INTRODUCTION
IN-12
INSTALLATION
PRE-WELDING MEASUREMENTS
Always take measurements before
installing underbody or engine com-
ponents to insure correct assembly.
After installation, confirm proper
fit.
WELDING PRECAUTIONS
1. The number of welding
spots should be as follows.
Spot weld: 1.3 x No. of
manufacturer’s spots.
Plug weld: More than No. of
manufacturer’s plugs.
POST WELDING REFINISHING
1. Always check the welded
spots to insure they are
secure.
2. When smoothing out the
weld spots with a disc grind-
er, be careful not to grind off
too much as this would
weaken the weld.
WRONG
WRONG
OKAY
2. Plug welding should be done
with a MIG (Metal Inert Gas)
welder. Do not gas weld or
braze panes at areas other
than specified.
Safety Glass
Body
Measurement
Diagrams
SPOT WELDING PRECAUTIONS
1. The shape of the welding tip
point has an effect on the
strength of the weld.
2. Always insure that the seams
and welding tip are free of
paint.
SPOT WELD LOCATIONS
Try to avoid welding over
previous spots.
New Spot
Locations
Old
Spot
Locations
Tip Cutter
INTRODUCTION
IN-13
Parts Name
Parts Number
Pastar UC (Oil Base)
08836-00155
Pastar UW (Water Base)
08836-00115
Pastar Gun (For thick application)
08836-00091
Parts Name
Parts Number
Rustop W (Aerosol)
08860-00200
Rustop W (1ȏ Milky White)
08860-00210
Rustop W (18ȏ Milky White)
08860-00230
Rustop B (1ȏ Black)
08860-00220
Rustop B (18ȏ Black)
08860-00240
Parts Name
Parts Number
Body Sealer, White (Cartridge Type)
08839-00020
Body Sealer, White (Tube Type)
08839-00030
Body Sealer, Black (Cartridge Type)
08839-00040
ANTI-RUST TREATMENT
When replacing body panels, always apply body sealer, anti-rust agent or undercoat according to the re-
quirements of your country.
HINT: For further details, see the description given in Section AR of this manual.
BODY SEALER
Apply body sealer to the
required areas.
ANTI-RUST AGENT (WAX)
Apply anti-rust agent to following
sections.
S Inside of the hems of the doors
and hood.
S Around the hinges of the doors
and hood.
S Inside of the welded parts with
boxed cross-section.
Tube Type
Cartridge Type
*The above SSM or equivalent
*The above SSM or equivalent
UNDERCOAT
Apply undercoat to the underbody and
wheel housings.
*The above SSM or equivalent
Spray Gun
Undercoating
(Water base)
Undercoating
(Oil base)
INTRODUCTION
IN-14
Code
Material
name
Heat*
resistant
temperature
limit
°C (°F)
Resistance to
alcohol or gasoline
Notes
AAS
Acrylonitrile
Acrylic Styrene
80
(176)
Alcohol is harmless if applied only
for short time in small amounts
(e.g., quick wiping to remove
grease.)
Avoid gasoline and
organic or aromatic
solvents.
ABS
Acrylonitrile
Butadiene Styrene
80
(176)
Alcohol is harmless if applied only
for short time in small amounts
(e.g., quick wiping to remove
grease.)
Avoid gasoline and
organic or aromatic
solvents.
AES
Acrylonitrile
Ethylene Styrene
80
(176)
Alcohol is harmless if applied only
for short time in small amounts
(e.g., quick wiping to remove
grease.)
Avoid gasoline and
organic or aromatic
solvents.
ASA
Acrylonitrile
Styrene
Acrylate
80
(176)
Alcohol is harmless if applied only
for short time in small amounts
(e.g., quick wiping to remove
grease.)
Avoid gasoline and
organic or aromatic
solvents.
CAB
Cellulose
Acetate
80
(176)
Alcohol is harmless if applied only
for short time in small amounts
(e.g., quick wiping to remove
grease.)
Avoid gasoline and
organic or aromatic
solvents.
EPDM
Ethylene
Propylene
100
(212)
Alcohol is harmless.
Gasoline is harmless if applied only
for short time in small amounts.
Most solvents are
harmless but avoid
dipping in gasoline,
solvents, etc.
FRP
Fiber
Reinforced
Plastics
180
(356)
Alcohol and gasoline are
harmless.
Avoid alkali.
EVA
Ethylene
Acetate
70
(158)
Alcohol is harmless if applied only
for short time in small amounts
(e.g., quick wiping to remove
grease).
Avoid gasoline and
organic oraromatic
solvents.
PA
Polyamide
(Nylon)
80
(176)
Alcohol and gasoline are
harmless.
Avoid battery acid.
PBT
Polybutylene
Terephthalate
160
(320)
Alcohol and gasoline are
harmless.
Most solvents are
harmless.
PC
Polycarbonate
120
(248)
Avoid gasoline, brake
fluid, wax, wax removers
and organic solvents.
Avoid alkali.
Alcohol is harmless.
HANDLING PRECAUTIONS
1. The repair procedure for plastic body parts must conform with the type of plastic material.
2. Plastic body parts are identified by the codes in the following chart.
3. When repairing metal body parts adjoining plastic body parts (by brazing, frame cutting, welding,
painting etc.), consideration must given to the property of the plastic.
*Temperatures higher than those listed here may result in material deformation during repair.
PLASTIC BODY PARTS
PP-2
Code
Material
name
Heat*
resistant
temperature
limit
°C (°F)
Resistance to
alcohol or gasoline
Notes
PE
Polyethylene
80
(176)
Alcohol and gasoline are harmless.
Most solvents are
harmless.
PET
Polyethylene
Terephthalate
75
(167)
Alcohol and gasoline are
harmless.
Avoid dipping in water.
PMMA
Polymethyl
Methacrylate
80
(176)
Alcohol is harmless if applied only
for short time in small amounts.
Avoid dipping or immersing
in alcohol, gasoline, sol-
vents, etc.
POM
Polyoxymethylene
(Polyacetal)
100
(212)
Alcohol and gasoline are
harmless.
Most solvents are
harmless.
PP
Polypropylene
80
(176)
Alcohol and gasoline are
harmless.
Most solvents are
harmless.
PPO
Modified
Polyphenylene
Oxide
100
(212)
Alcohol is harmless.
Gasoline is harmless if
applied only for quick wiping
to remove grease.
PS Polystyrene
60
(140)
Alcohol and gasoline are harm-
less if applied only for short time
in small amounts.
Avoid dipping or immersing
in alcohol, gasoline, sol-
vents, etc.
PUR Polyurethane
80
(176)
Alcohol is harmless if applied only for
very short time in small amounts
(e.g., quick wiping to remove
grease).
Avoid dipping or immersing
in alcohol, gasoline, sol-
vents, etc.
PVC
Polyvinylchloride
(Vinyl)
80
(176)
Alcohol and gasoline are harmless if ap-
plied only for short time in small amounts
(e.g., quick wiping to remove grease).
Avoid dipping or immersing
in alcohol, gasoline, sol-
vents, etc.
SAN
Styrene
Acrylonitrile
80
(176)
Alcohol is harmless if applied only
for short time in small amounts
(e.g., quick wiping to remove
grease).
Avoid dipping or immers-
ing in alcohol, gasoline,
solvents etc.
TPO
Thermoplastic
Olefine
80
(176)
Alcohol is harmless.
Gasoline is harmless if applied only
for short time in small amounts.
Most solvents are harm-
less but avoid dipping in
gasoline, solvents,
etc.
TPU
Thermoplastic
Polyurethane
80
(176)
Alcohol is harmless if applied only
for short time in small amounts
(e.g., quick wiping to remove
grease).
Avoid dipping or immersing
in alcohol, gasoline, sol-
vents, etc.
TSOP
TOYOTA
Super
Olefine Polymer
80
(176)
Alcohol and gasoline are
harmless.
Most solvents are
harmless.
UP
Unsaturated
Polyester
110
(233)
Alcohol and gasoline are
harmless.
Avoid alkali.
*Temperatures higher than those listed here may result in material deformation during repair.
PLASTIC BODY PARTS
PP-3
HANDLING PRECAUTIONS ON RELATED COMPONENTS
1. FOR VEHICLES EQUIPPED WITH SRS AIRBAG AND SEAT BELT PRETENSIONER
The TOYOTA LAND CRUISER is equipped with an SRS (Supplemental Restraint System), such as the driver
airbag and front passenger airbag and seat belt pretensioners. Failure to carry out service operations in the
correct sequence could cause the supplemental restraint system to unexpectedly deploy during servicing, pos-
sibly leading to a serious accident. Further, if a mistake is made in servicing the supplemental restraint system,
it is possible the SRS may fail to operate when required. Before servicing (including removal or installation of
parts, inspection or replacement), be sure to read the following items carefully, then follow the correct proce-
dure described in this manual.
S Malfunction symptoms of the supplemental restraint system are difficult to confirm, so the diagnostic
trouble codes become the most important source of information when troubleshooting.
When troubleshooting the supplemental restraint system, always inspect the diagnostic trouble codes
before disconnecting the battery.
S Work must be started after 90 seconds from the time the ignition switch is turned to the ”LOCK” position
and the negative (-) terminal cable is disconnected from the battery.
(The supplemental restraint system is equipped with a back-up power source so that if work is started
within 90 seconds of disconnecting the negative (-) terminal cable from the battery, the SRS may
deploy.)
When the negative (-) terminal cable is disconnected from the battery, memory of the clock and audio
systems will be cancelled. So before starting work, make a record of the contents memorized by the
audio memory system.
Then when work is finished, reset the clock and audio systems as before.
To avoid erasing the memory of each memory system, never use a back-up power supply from outside
the vehicle.
S Even in cases of a minor collision where the SRS does not deploy, the passenger’s airbag assembly,
the steering wheel pad and seat belt pretensioners should be inspected.
Never use SRS parts from another vehicle. When replacing parts, replace them with new parts.
S Before repairs, remove the airbag sensor if shocks are likely to be applied to the sensor during repairs.
S Never disassemble and repair the airbag sensor assembly, steering wheel pad in order to reuse it.
S If the airbag sensor assembly, steering wheel pad have been dropped, or if there are cracks, dents or
other defects in the case, bracket or connector, replace them with new ones.
S Do not expose the airbag sensor assembly, steering wheel pad directly to hot air or flames.
S Use a volt/ohmmeter with high impedance (10 kW/V minimum) for troubleshooting of the electrical cir-
cuit.
S Information labels are attached to the periphery of the SRS components. Follow the instructions on the
notices.
S After work on the supplemental restraint system is completed, check the SRS warning light.
S Before repairing the body, remove the SRS parts if, during repair, shocks are likely to be applied to the
sensors due to vibrations of the body or direct tapping with tools or other parts.
S Do not expose the SRS parts directly to hot air or flames.
NOTICE:
1) The maximum ambient temperature tolerance is 120
°
C (248
°
F) for the front airbag sensor, 105
°
C
(221
°
F) for the center airbag sensor assembly and 93
°
C (200
°
F) for the steering wheel pad, and
front passenger airbag assembly. If it is possible that the ambient temperature may reach or ex-
ceed the temperature limit, remove the sensors and the steering wheel pad from the vehicle or
protect them with a hot insulation material before staring work.
2) Prior to welding, remove adjacent SRS parts form the vehicle or protect them with fire-proof cov-
ers.
S If the vehicle is damaged, visually inspect for damage to the steering wheel pad using the inspection
procedures described in section RS of the repair manual for the relevant model year.
INTRODUCTION
IN-6
STEERING WHEEL PAD (with Airbag)
S When removing the steering wheel pad or handling a new steering wheel pad, it should be placed
with the pad top surface facing up.
In this case, the twin-lock type connector lock lever should be in the locked state and care should be
taken to place it so the connector will not be damaged. In addition do not store a steering wheel pad
on top of another one. Storing the pad with its metallic surface up may lead to a serious accident if
the airbag inflates for some reason.
S Never measure the resistance of the airbag squib. (This may cause the airbag to deploy, which is
very dangerous.)
S Grease should not be applied to the steering wheel pad and-the pad should not be cleaned with de-
tergents of any kind.
S Store the steering wheel pad where the ambient temperature remains below 93°C (200°F), without
high humidity and away from electrical noise.
S When using electric welding, first disconnect the airbag connector (yellow color and 2 pins) under the
steering column near the combination switch connector before starting work.
S When disposing of a vehicle or the steering wheel pad alone, the airbag should be deployed using
an SST before disposal.
Carry out the operation in a safe place away from electrical noise.
FRONT PASSENGER AIRBAG ASSEMBLY
S Always store a removed or new front passenger airbag assembly with the airbag deployment direc-
tion facing up. Storing the airbag assembly with the airbag deployment direction facing down could
cause a serious accident if the airbag inflates.
S Never measure the resistance of the airbag squib.
(This may cause the airbag deploy, which is very dangerous.)
S Grease should not be applied to the front passenger airbag assembly and the airbag door should not
be cleaned with detergents of any kind.
S Store the airbag assembly where the ambient temperature remains below 93°C (200°F), without
high humidity and away from electrical noise.
S When using electric welding, first disconnect the airbag connector (yellow color and 2 pins) installed
on the glove compartment finish plate at the left side of the glove compartment before starting work.
S When disposing of a vehicle or the airbag assembly alone, the airbag should be deployed using an
SST before disposal.
Perform the operation in a safe place away from electrical noise.
SEAT BELT PRETENSIONER
S Before doing any operation which will apply a strong shock to the vehicle, or before removing the
seat belt pretensioner, be sure to apply the sensor shock.
S Never disassemble the seat belt pretensioner.
S Do not subject the seat belt pretensioner to shocks or bring magnets close to it.
S Do not expose the seat belt pretensioner to high temperature or fire.
S Do not drop the seat belt pretensioner. Never use a seat belt pretensioner which has been dropped.
S Never install the seat belt pretensioner in another vehicle.
S Store removed seat belt pretensioners on a flat, stable surface.
S After frontal collision, always check whether the seat belt pretensioners have been activated.
S When disposing of a vehicle or the pretensioner by itself, always activate the pretensioner before
disposal.
S The seat belt pretensioner is hot when activated, so let it cool down fully before you dispose of it.
Never apply water to the seat belt pretensioner.
INTRODUCTION
IN-7
Component to be aligned
Section of repair manual for
relevant model
Front Wheels
Suspension and Axle (SA) section
Rear Wheels
Suspension and Axle (SA) section
Plopeller Shaft
Propeller Shaft (PR) section
AIRBAG SENSOR ASSEMBLY
S Never reuse the airbag sensor assembly involved in a collision when the SRS has deployed.
S The connectors to the airbag sensor assembly should be connected or disconnected with the sensor
mounted on the floor. If the connectors are connected or disconnected while the airbag sensor as-
sembly is not mounted to the floor, it could cause undesired ignition of the supplemental restraint sys-
tem.
S Work must be started after 90 seconds from the time the ignition switch is turned to the ”LOCK” posi-
tion and the negative (-) terminal cable is disconnected from the battery, even if only loosening the
set bolts of the airbag sensor assembly.
WIRE HARNESS AND CONNECTOR
S The SRS wire harness is integrated with the cowl wire harness assembly and floor wire harness as-
sembly. The wires for the SRS wire harness are encased in a yellow corrugated tube. All the connec-
tors for the system are also a standard yellow color. If the SRS wire harness becomes disconnected
or the connector becomes broken due to an accident, etc., repair or replace it as shown on page.
2. BRAKE SYSTEM
The brake system is one of the most important safety components. Always follow the directions and
notes given in section BR of the repair manual for the relevant model year when handling brake sys-
tem parts.
NOTICE: When repairing the brake master cylinder or TRAC system, bleed the air out of the TRAC
system.
3. DRIVE TRAIN AND CHASSIS
The drive train and chassis are components that can have great effects on the running performance
and vibration resistance of the vehicle. After installing components in the sections listed in the table
below, perform alignments to ensure correct mounting angles and dimensions. Particularly accurate
repair of the body must also be done to ensure correct alignment.
HINT: Correct procedures and special tools are required for alignment. Always follow the directions
given in the repair manual for the relevant model during alignment and section Dl of this manual.
4. COMPONENTS ADJACENT TO THE BODY PANELS
Various types of component parts are mounted directly on or adjacently to the body panels. Strictly ob-
serve the following precautions to prevent damaging these components and the body panels during
handling.
S Before repairing the body panels, remove their components or apply protective covers over the com-
ponents.
S Before prying components off using a screwdriver or a scraper, etc., attach protective tape to the tool
tip or blade to prevent damaging the components and the body paint.
S Before removing components from the outer surface of the body, attach protective tape to the body
to ensure no damage to painted areas.
HINT: Apply touch-up paint to any damaged paint surfaces.
S Before drilling or cutting sections, make sure that there are no wires, etc. on the reverse side.
INTRODUCTION
IN-8
Lift-Up Type
Swing Type
: High Strength Sheet Steel
HIGH-STRENGTH STEEL (HSS) PARTS
Generally, High-Strength Steel (HSS) is that which has an intensity value of at 35 kgf/mm
2
(343 MPa), and
distinguished from mild steel.
The handling of HSS is the same as for mild steel, but the following should be observed.
1. Panel Hammering: Because HSS is thinner than mild steel, care should be taken to avoid warping dur-
ing hammering operations.
2. Removing Spot Welds: Because HSS is tougher than mild steel, damage will occur more easily to a
regular drill. Therefore, an HSS Spot Cutter is recommended.
Also, use a high-torque drill at low speed, and supply grinding oil to the drill use.
3. Panel welding: Panel welding procedures for HSS are exactly the same as for mild steel. Plug welding
should be done with MIG (Metal Inert Gas) welder. Do not gas weld or braze panels at areas other than
specified.
BODY PANEL CONSTRUCTION
CN-4
mm in.
150
250
5.91
9.84
QUARTER PANEL (CUT)
Replacement Parts
QUARTER PANEL
HOW TO USE THIS MANUAL
Each repair method description provided in Section RE of this manual comprises two pages, divided into 2
blocks (REMOVAL AND INSTALLATION) and includes illustrations to facilitate body repair.
BODY PANEL REPLACEMENT
RE-28
REMOVAL
Cut and Join Location
Cut and Join Location
150 mm
250 mm
[Cut and Join Location]
Cut and Join
Location
(Cut Location for
Supply Parts)
[Cut and Join Locations]
1. Cut and join the parts at the locations as shown
above.
REPLACEMENT PARTS AND METHOD
(CUT)
Replacement method
(ASSY) Assembly replacement. . . . . . .
(CUT) Major cutting (less than 1/2 of parks used). . . . . . . .
(CUT-H) Half cutting (about 1/2 of parks used). . . . . .
(CUT-P) Partial cutting (most of parts used). . . . . .
PARTS LOCATION
REMOVAL DIAGRAM
Describes in detail removal of the damaged parts involving repair by cutting.
REMOVAL GUIDE
Provides additional information to more efficiently help you perform the removal.
INTRODUCTION
IN-2
mm
in,
5
0.20
RE-29
BODY PANEL REPLACEMENT
INSTALLATION
Butt Weld
Butt Weld
Foamed Material
Application Areas
Body Sealer
Butt Weld
Body Sealer
about 5 mm
2. Temporarily install the new parts and check the
fit of the rear door, back door, tail gate and rear
combination light.
3. After installing the new parts, apply foamed ma-
terials.
1. Before temporarily installing the new parts,
apply body sealer to the wheel arch.
HINT:
1) Apply body sealer about 5 mm (0.20 in.) from
the flange, avoiding any oozing.
2) Apply sealer evenly, about 3 - 4 mm (0.12 -
0.16 in.) in diameter.
3) For other sealing points, refer to section AR.
INSTALLATION DIAGRAM
Describes in detail installation of the new parts involving repair by welding and/or cutting, but exclud-
ing painting.
INSTALLATION GUIDE
Provides additional information to more efficiently help you perform the installation.
SYMBOLS
See page IN-4 .
ILLUSTRATION of WELD POINTS
Weld method and panel position symbols.
See page IN-5 .
INTRODUCTION
IN-3
Parts Name
Code
Radiator Grille
ABS
Front Bumper Cover
TSOP
Fog Light
PC/PP
Front Turn Signal Light
PMMA/PC/AAS
Side Turn Signal Light
SAN/AAS
Cowl Top Ventirator Louver
TSOP
Outer Rear View Mirror
ABS
Outside Moulding (Fender, Front & Rear Door, Quarter)
TSOP
Outside Handle (Front & Rear Door)
PC
Rocker Panel Moulding
TSOP
Side Door Step Plate Cover (Front, Rear)
PP
Quarter Ventirator Louver
PPO/PA
Rear Combination Light
PMMA/PP/AAS
Rear Light
PMMA/PP
Back Door Outside Moulding
TSOP
License Plate Light
PC
License Plate Light Cover
AAS
Back Door Outside Handle
POM
Rear Bumper Cover
TSOP
Reflex Refrector
PMMA/ABS
Rear Fog Light
PC/PP
Outer Under Rear View Mirror
PC/PBT
Roof Moulding
PVC
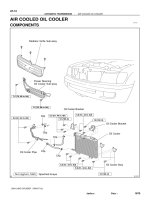
LOCATION OF PLASTIC BODY PARTS
HINT:
•
Resin material differs with model.
/ Made up of 2 or more kinds of materials.
PLASTIC BODY PARTS
PP-4
Cutting tool
Note
Aluminum-Rivet
Steel-Rivet
T-Rivet with
φ6.4 mm
φ6.4 mm
φ6.5 mm
φ4.8 mm
φ5 mm
φ4 mm
φ4 mm
Rivet size
Blade size
Drill blade
S Cutting can be done with drill blade or
rivet cutter for an aluminum-rivet with
φ4.8 mm.
S When a rivet cutter is used for an
aluminum-rivet (except φ4.8 mm), a
steel-rivet, or a Trivet with φ6.4 mm, it
is possible that the drill will spin abnor-
mally damaging the rivet hole and
breaking the rivet cutter.
Waterproof special-Rivet
with
φ4.0 mm
Drill blade with
φ4.0 mm
Aluminum-Rivet
with
φ4.8 mm
Waterproof-Rivet
with
φ4.8 mm or φ6.0 mm
Rivet Cutter (P/N 09060-60350)
S When a ordinary cutter is used for a
waterproof-rivet with φ4.8 mm or φ6.0
mm, the rivet can not be cut as it spins
with the cutter.
Aluminum-Rivet
Steel-Rivet
Waterproof-Rivet
T-Rivet
External Appearance
Inner
Outer
After installation
Before installation
Outer
Inner
After installation
Before installation
Inner
Outer
After installation
Before installation
Waterproof Seal
Outer Inner
After installation
Before installation
Mandrel
Charac-
teristics
S Small nonwaterproof
rivet
S No magnetic
adherence
S Small nonwaterproof
rivet
S Magnetic adherence
S Small waterproof
rivet
S Waterproof seal
S Large waterproof rivet
S Mandrel sticks out
after installation
φX mm
Rivet Size
Flange
Mandrel
RIVET REMOVAL AND INSTALLATION
PARTS NAME AND VARIETY OF RIVET
RIVET REMOVAL
1. SELECTION OF CUTTING TOOL
INTRODUCTION
IN-15
Continue drilling until taking away
Tape
Tape
Drill
5 mm (0.20 in.)
Vacuum Hose
Mandrel
Ponch (
φ5 mm)
2. RIVET REMOVAL
(1) T-Rivet with φ6.4 mm:
Using a ponch with φ5 mm, stamp out the mandrel.
(2) Put tape around the drill blade 5 mm (0.20 in.) from
the tip or insert a vacuum hose.
NOTE: Use of tape or a vacuum hose prevents damage
to the rivet hole.
(3) Attach the drill blade or a rivet cutter to the drill.
(4) Gently and vertically put the drill to the rivet, and cut the
rivets flange.
NOTE:
S While upward drilling, wear a protective glasses.
S If a drill is strongly pushed deeply in to a rivet, the
rivet can’t be cut as it spins together with the drill.
S Prizing the hole with a drill can lead to damage to
the rivet hole or the breaking of the rivet cutter.
S Take care as the cut rivet is hot.
(5) Aluminum-Rivet and Waterproof-Rivet with φ4.8 mm
or φ6.0 mm:
Even if flange is taken off, continue drilling and push
out remaining fragments with the drill.
(6) Steel-Rivet:
If the flange is taken off, stop drilling and pull out the
remaining fragments with a pliers.
(7) T-Rivet with φ6.4 mm:
If the flange is taken off, stop drilling and push out the
remaining fragments with a punch with φ5 mm or pull
out the remaining fragments with pliers.
INTRODUCTION
IN-16
Parts
Name
Parts
Number
Color
Rivet type
Nose piece
No. 1
09050
-02020
Silver
φ4.0 mm Aluminum
φ4.0 mm Steel
φ4.8 mm Waterproof
Nose piece
No. 2
09050
-02030
Copper
φ4.8 mm Aluminum
φ4.8 mm Steel
Nose piece
No. 3
09050
-02040
Black
φ6.4 mm T-Rivet
Nose piece
No. 4
09050
-02050
Black
φ4.0 mm Waterproof
Special
Nose Piece
Air Riveter (P/N 09050 - 20010)
Nose Piece
Hand Riveter
Item
Installation tool
Aluminum-Rivet
Waterproof-Rivet
with
φ4.8 mm
Hand Riveter or Air Riveter
Steel-Rivet
Waterproof-Rivet
with
φ6.0 mm
T-Rivet with
φ6.4 mm
Air Riveter
Nose Piece
RIVET INSTALLATION
1. RIVET INSTALLATION
(1) Apply touch-up paint at the area.
(2) Select an installation tool.
(3) Select the smallest a nosepiece possible for a rivets
mandrel.
NOTE: Wrong selection of a nose piece may cause
the riveter to be damaged or bad tightening.
<Reference> Nose piece of Air Riveter
(4) Insert the nosepiece to the riveter and then the man-
drel of the new rivet into the nose piece
(5) Vertically insert the rivet into a hole and keep place it
strongly.
NOTE:
S If the tip of the rivet is not deformed or the
mandrel is not cut, repeat process (5) again.
INTRODUCTION
IN-17
Mandrel
Riveter
Riveter
Riveter
Mandrel
Riveter
20 mm
(0.79 in.)
20 mm
(0.79 in.)
Riveter
S T-Rivet with of f6.4 mm:
Do not place your hands or the wire harness
within a radius of 20 mm (0.70 in.) from the rivet,
as the rivet is cut and opened in this area.
S Prizing a riveter damages the riveter showing
that it is not tightened correctly and bends the
mandrel.
S Loose tightening may result from either tilting
the riveter while handling or the riveter not con-
necting to the material.
S Loose tightening also occurs when a rivet is ap-
plied between materials without touching.
S T-Rivet with f6.4 mm:
When a mandrel of a rivet is lost, the rivet
should be replaced to prevent loose tighten-
ing.
INTRODUCTION
IN-18
RUST-RESISTANT SHEET STEEL PARTS
Rust-Resistant Sheet Steel have zinc, tin or aluminum etc, plating over the base metal surface in order to
improve the corrosion resistance of the sheet metal. This sheeting is used on areas that require anticorro-
sive abilities but there is no need to distinguish the differences between rust resistant sheet steel and ordi-
nary sheet steel in body repair.
Body panels on TOYOTA models are made of two different melted galvannealed sheet steel. The ordinary
melted galvannealed sheet has a zinc plating over the base metal surface and when heated a zinc-iron
alloy plating. The zinc-iron double layered galvannealed sheet has a iron rich and another zinc-rich layer
above the sheet steel. These 2 layers improve paint adhesion. These two melted galvannealed sheet steels
are used selectively according to need.
Fe-Zn Alloy (Iron Rich) improves
paint quality
Zn-Fe Alloy
(Zinc-Rich)
Zn-Fe Alloy (Zinc Rich) improves
rust-resistant performance
Base Metal
Base
Metal
Galvannealed Sheet Steel
Double Layered Zinc-Iron Galvannealed Sheet Steel
The handling of Rust-Resistant Sheet Steel is the same as for ordinary sheet steel, but the following should
be observed.
1. Panel Welding: The paint as well as the zinc portion must be removed completely from the welding
area to guarantee good welding integrity.
2. Anti-Rust Treatment: Since the zinc plating is lost after welding, anti-rust treatment of the welded area
must be thoroughly performed (refer to section AR).
BODY PANEL CONSTRUCTION
CN-2
Lift-Up Type
Swing Type
Galvannealed Sheet Steel
BODY PANEL CONSTRUCTION
CN-3
SYMBOLS
MEANING
ILLUSTRATION
SAW CUT OR
ROUGH CUT
REMOVE BRAZE
(See page IN-5 )
SPOT WELD OR
MIG PLUG WELD
WELD POINTS
BRAZE
CONTINUOUS MIG
WELD (BUTT WELD
OR TACK WELD)
BODY SEALER
SYMBOLS
The following symbols are used in the welding Diagrams in Section RE of this manual to indicate cutting
areas and the types of weld required.
INTRODUCTION
IN-4
Remove weld point and panel position
Weld points
REMOVAL
Weld method and panel position
Weld points
INSTALLATION
SYMBOL MEANING ILLUSTRATION
SYMBOL
Spot Weld
MEANING
ILLUSTRATION
Remove
Weld
Points
(Outside)
Mig Plug
Weld
(Middle)
(Inside)
Spot MIG
Weld
HINT: Panel position syrnbols are as seen from the
working posture.
Illustration of Weld Point Symbols
EXAMPLE:
INTRODUCTION
IN-5
BACK DOOR OPENING REINFORCEMENT
(ASSY)
Swing Type Back Door Only:
REMOVAL (With the quarter panel removed.)
Back Door Type Spare Wheel Carrier (RH) Only:
BODY PANEL REPLACEMENT
RE-36