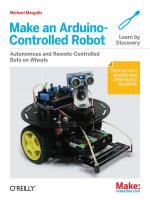
make an arduino-controlled robot
Bạn đang xem bản rút gọn của tài liệu. Xem và tải ngay bản đầy đủ của tài liệu tại đây (15.92 MB, 256 trang )
Michael Margolis
Make an Arduino-
Controlled Robot
ISBN: 978-1-449-34437-5
[LSI]
Make an Arduino-Controlled Robot
by Michael Margolis
Copyright © 2013 Michael Margolis. All rights reserved.
Printed in the United States of America.
Published by O’Reilly Media, Inc., 1005 Gravenstein Highway North, Sebastopol, CA 95472.
O’Reilly books may be purchased for educational, business, or sales promotional use. Online editions are
also available for most titles (
). For more information, contact our corpo-
rate/institutional sales department: 800-998-9938 or
Editor: Brian Jepson Production Editor: Rachel Steely
Interior Designers: Nellie McKesson and Edie
Freedman
October 2012:
First Edition
Revision History for the First Edition:
2012-09-12 First release
2012-10-03 Second release
See for release details.
While every precaution has been taken in the preparation of this book, the publisher and authors assume
no responsibility for errors or omissions, or for damages resulting from the use of the information contained
herein.
Preface . . . . . . . . . . . . . . . . . . . . . . . . . . . . . . . . . . . . . . . . . . . . vii
1.
Introduction to Robot Building . . . . . . . . . . . . . . . . . 1
Why Build a Robot? . . . . . . . . . . . . . . . . . . . . . . . . . . . . . . . . . . . . . . . . . . . . . . 4
How Robots Move . . . . . . . . . . . . . . . . . . . . . . . . . . . . . . . . . . . . . . . . . . . . . . . 5
Tools . . . . . . . . . . . . . . . . . . . . . . . . . . . . . . . . . . . . . . . . . . . . . . . . . . . . . . . . . . . . 6
2. Building the Electronics . . . . . . . . . . . . . . . . . . . . . . . . 9
Hardware Required . . . . . . . . . . . . . . . . . . . . . . . . . . . . . . . . . . . . . . . . . . . . . . 9
Construction Techniques . . . . . . . . . . . . . . . . . . . . . . . . . . . . . . . . . . . . . . . . 10
Soldering . . . . . . . . . . . . . . . . . . . . . . . . . . . . . . . . . . . . . . . . . . . . . . . . . . . . . 10
Building the Motor Controller . . . . . . . . . . . . . . . . . . . . . . . . . . . . . . . . . 10
Soldering the Reflectance Sensors . . . . . . . . . . . . . . . . . . . . . . . . . . . . 17
Making a Line Sensor Mount . . . . . . . . . . . . . . . . . . . . . . . . . . . . . . . . . . 17
Next Steps . . . . . . . . . . . . . . . . . . . . . . . . . . . . . . . . . . . . . . . . . . . . . . . . . . . . 20
3.
Building the Two-Wheeled Mobile Platform . . 21
Hardware Required . . . . . . . . . . . . . . . . . . . . . . . . . . . . . . . . . . . . . . . . . . . . . 22
Mechanical Assembly . . . . . . . . . . . . . . . . . . . . . . . . . . . . . . . . . . . . . . . . . . . 23
Lay Out the Chassis Parts . . . . . . . . . . . . . . . . . . . . . . . . . . . . . . . . . . . . . . 23
Motor Assembly . . . . . . . . . . . . . . . . . . . . . . . . . . . . . . . . . . . . . . . . . . . . . . 24
Assemble the Chassis Components . . . . . . . . . . . . . . . . . . . . . . . . . . . . 26
Attaching the Control Electronics . . . . . . . . . . . . . . . . . . . . . . . . . . . . . 37
Mounting the IR sensors . . . . . . . . . . . . . . . . . . . . . . . . . . . . . . . . . . . . . . . . 38
Mounting the IR Sensors for Edge Detection . . . . . . . . . . . . . . . . . . . 39
Mounting the IR Sensors for Line Following . . . . . . . . . . . . . . . . . . . . 41
iii
Table of Contents
Next Steps . . . . . . . . . . . . . . . . . . . . . . . . . . . . . . . . . . . . . . . . . . . . . . . . . . . . . . 43
4. Building the Four-Wheeled Mobile Platform . . . 45
Hardware Required . . . . . . . . . . . . . . . . . . . . . . . . . . . . . . . . . . . . . . . . . . . . . . 46
Mechanical Assembly . . . . . . . . . . . . . . . . . . . . . . . . . . . . . . . . . . . . . . . . . . . . 47
Lay Out the Chassis Parts . . . . . . . . . . . . . . . . . . . . . . . . . . . . . . . . . . . . . . 47
Motor Assembly . . . . . . . . . . . . . . . . . . . . . . . . . . . . . . . . . . . . . . . . . . . . . . . 49
Assemble the Chassis Components . . . . . . . . . . . . . . . . . . . . . . . . . . . . 51
Solder the Power and Motor Connections . . . . . . . . . . . . . . . . . . . . . . 54
Connecting the Battery Pack and Power Switch . . . . . . . . . . . . . . . . . 55
Building the Optional Trickle Charger . . . . . . . . . . . . . . . . . . . . . . . . . . 56
Assemble the Chassis . . . . . . . . . . . . . . . . . . . . . . . . . . . . . . . . . . . . . . . . . . 57
Mounting Arduino and Connecting Wires to the Shield . . . . . . . . . 58
Mounting the IR sensors . . . . . . . . . . . . . . . . . . . . . . . . . . . . . . . . . . . . . . . . . 65
Mounting the IR Sensors for Edge Detection . . . . . . . . . . . . . . . . . . . . 65
Mounting the IR Sensors for Line Following . . . . . . . . . . . . . . . . . . . . . 67
Next Steps . . . . . . . . . . . . . . . . . . . . . . . . . . . . . . . . . . . . . . . . . . . . . . . . . . . . . . 68
5.
Tutorial: Getting Started with Arduino . . . . . . . . 71
Hardware Required . . . . . . . . . . . . . . . . . . . . . . . . . . . . . . . . . . . . . . . . . . . . . . 72
Arduino Software . . . . . . . . . . . . . . . . . . . . . . . . . . . . . . . . . . . . . . . . . . . . . . . . 72
Arduino Hardware . . . . . . . . . . . . . . . . . . . . . . . . . . . . . . . . . . . . . . . . . . . . . . . 72
Installing the Integrated Development Environment (IDE) . . . . . . . . 74
Installing Arduino on Windows . . . . . . . . . . . . . . . . . . . . . . . . . . . . . . . . 74
Installing Arduino on OS X . . . . . . . . . . . . . . . . . . . . . . . . . . . . . . . . . . . . . 75
Installing Arduino on Linux . . . . . . . . . . . . . . . . . . . . . . . . . . . . . . . . . . . . 76
Driver Installation . . . . . . . . . . . . . . . . . . . . . . . . . . . . . . . . . . . . . . . . . . . . . 76
Connecting the Arduino Board . . . . . . . . . . . . . . . . . . . . . . . . . . . . . . . . . . . 78
Using the IDE . . . . . . . . . . . . . . . . . . . . . . . . . . . . . . . . . . . . . . . . . . . . . . . . . . . . 78
Uploading and Running the Blink Sketch . . . . . . . . . . . . . . . . . . . . . . . . . 81
Using Tabs . . . . . . . . . . . . . . . . . . . . . . . . . . . . . . . . . . . . . . . . . . . . . . . . . . . . . . 82
Installing Third-Party Libraries . . . . . . . . . . . . . . . . . . . . . . . . . . . . . . . . . . . 83
6. Testing the Robot’s Basic Functions . . . . . . . . . . . 85
Hardware Required . . . . . . . . . . . . . . . . . . . . . . . . . . . . . . . . . . . . . . . . . . . . . . 85
Software Prerequisites . . . . . . . . . . . . . . . . . . . . . . . . . . . . . . . . . . . . . . . . . . . 86
Sketches Used in This Chapter . . . . . . . . . . . . . . . . . . . . . . . . . . . . . . . . . . . 87
Load and Run helloRobot.ino . . . . . . . . . . . . . . . . . . . . . . . . . . . . . . . . . . . . 88
About the Sketch . . . . . . . . . . . . . . . . . . . . . . . . . . . . . . . . . . . . . . . . . . . . . . . . 95
Troubleshooting . . . . . . . . . . . . . . . . . . . . . . . . . . . . . . . . . . . . . . . . . . . . . . . . . 98
Making the Sketch Easy to Enhance . . . . . . . . . . . . . . . . . . . . . . . . . . . . . . 99
7.
Controlling Speed and Direction . . . . . . . . . . . . . 103
Hardware Required . . . . . . . . . . . . . . . . . . . . . . . . . . . . . . . . . . . . . . . . . . . . . 103
iv
Make an Arduino-Controlled Robot
Sketches Used in This Chapter . . . . . . . . . . . . . . . . . . . . . . . . . . . . . . . . . . 103
Types of Motors . . . . . . . . . . . . . . . . . . . . . . . . . . . . . . . . . . . . . . . . . . . . . . . . 104
Motor Controllers . . . . . . . . . . . . . . . . . . . . . . . . . . . . . . . . . . . . . . . . . . . . . . 106
Controlling Motor Speed . . . . . . . . . . . . . . . . . . . . . . . . . . . . . . . . . . . . . . . 109
How Motor Speed Is Controlled . . . . . . . . . . . . . . . . . . . . . . . . . . . . . . . 109
Code for Motor Control . . . . . . . . . . . . . . . . . . . . . . . . . . . . . . . . . . . . . . . 110
Calibrating Rotation and Tracking . . . . . . . . . . . . . . . . . . . . . . . . . . . . . 116
Software Architecture for Robot Mobility . . . . . . . . . . . . . . . . . . . . . . . . 119
Functions to Encapsulate Robot Movements . . . . . . . . . . . . . . . . . . . . 123
Core Movement Code . . . . . . . . . . . . . . . . . . . . . . . . . . . . . . . . . . . . . . . . 124
Additional Core Functions . . . . . . . . . . . . . . . . . . . . . . . . . . . . . . . . . . . . 126
Functions to Rotate the Robot . . . . . . . . . . . . . . . . . . . . . . . . . . . . . . . . 127
Higher-Level Movement Functions . . . . . . . . . . . . . . . . . . . . . . . . . . . . 130
8.
Tutorial: Introduction to Sensors . . . . . . . . . . . . . 133
Hardware Discussed . . . . . . . . . . . . . . . . . . . . . . . . . . . . . . . . . . . . . . . . . . . . 133
Software . . . . . . . . . . . . . . . . . . . . . . . . . . . . . . . . . . . . . . . . . . . . . . . . . . . . . . . 134
Infrared Reflectance Sensors . . . . . . . . . . . . . . . . . . . . . . . . . . . . . . . . . . . . 134
Sonar Distance Sensors . . . . . . . . . . . . . . . . . . . . . . . . . . . . . . . . . . . . . . . . . 137
Maxbotix EZ1 Sonar Distance Sensor . . . . . . . . . . . . . . . . . . . . . . . . . . . . 139
Sharp IR Distance Sensor . . . . . . . . . . . . . . . . . . . . . . . . . . . . . . . . . . . . . . . 141
Proximity Sensor . . . . . . . . . . . . . . . . . . . . . . . . . . . . . . . . . . . . . . . . . . . . . . . 142
Sound Sensor . . . . . . . . . . . . . . . . . . . . . . . . . . . . . . . . . . . . . . . . . . . . . . . . . . 143
Arduino Cookbook . . . . . . . . . . . . . . . . . . . . . . . . . . . . . . . . . . . . . . . . . . . . . 146
9.
Modifying the Robot to React to Edges and Lines
. . . . . . . . . . . . . . . . . . . . . . . . . . . . . . . . . . . . . . . . . . . . . . . . . 147
Hardware Required . . . . . . . . . . . . . . . . . . . . . . . . . . . . . . . . . . . . . . . . . . . . . 147
Sketches Used in This Chapter . . . . . . . . . . . . . . . . . . . . . . . . . . . . . . . . . . 148
The Look Code . . . . . . . . . . . . . . . . . . . . . . . . . . . . . . . . . . . . . . . . . . . . . . . . . 149
Edge Detection . . . . . . . . . . . . . . . . . . . . . . . . . . . . . . . . . . . . . . . . . . . . . . . . 150
Line Following . . . . . . . . . . . . . . . . . . . . . . . . . . . . . . . . . . . . . . . . . . . . . . . . . 154
Seeing Sketch Data . . . . . . . . . . . . . . . . . . . . . . . . . . . . . . . . . . . . . . . . . . . . . 160
10.
Autonomous Movement . . . . . . . . . . . . . . . . . . . . . . . 163
Hardware Required . . . . . . . . . . . . . . . . . . . . . . . . . . . . . . . . . . . . . . . . . . . . . 163
Sketches Used in This Chapter . . . . . . . . . . . . . . . . . . . . . . . . . . . . . . . . . . 164
Mounting a Ping Distance Sensor . . . . . . . . . . . . . . . . . . . . . . . . . . . . . . . 165
Making a Mount for the Ping Sensor . . . . . . . . . . . . . . . . . . . . . . . . . . 166
Mounting the Ping Sensor in a Fixed Position . . . . . . . . . . . . . . . . . . 168
Mounting the Ping Sensor on a Servo . . . . . . . . . . . . . . . . . . . . . . . . . 168
Letting the Robot Wander . . . . . . . . . . . . . . . . . . . . . . . . . . . . . . . . . . . . . . 170
v
Table of Contents
Adding Scanning . . . . . . . . . . . . . . . . . . . . . . . . . . . . . . . . . . . . . . . . . . . . . . . 178
11. Remote Control . . . . . . . . . . . . . . . . . . . . . . . . . . . . . . . 185
Hardware Required . . . . . . . . . . . . . . . . . . . . . . . . . . . . . . . . . . . . . . . . . . . . . 185
Sketches Used in This Chapter . . . . . . . . . . . . . . . . . . . . . . . . . . . . . . . . . . 186
Design of the Remote Control Code . . . . . . . . . . . . . . . . . . . . . . . . . . . . . 186
Controlling the Robot with a TV Type IR Remote . . . . . . . . . . . . . . . . . 190
Installing the IR Decoder Chip . . . . . . . . . . . . . . . . . . . . . . . . . . . . . . . . 190
The IR Remote Software . . . . . . . . . . . . . . . . . . . . . . . . . . . . . . . . . . . . . . 192
Appendix A. Enhancing Your Robot . . . . . . . . . . . . . . . . 201
Appendix B. Using Other Hardware with Your Robot 205
Appendix C. Debugging Your Robot . . . . . . . . . . . . . . . . 211
Appendix D. Power Sources . . . . . . . . . . . . . . . . . . . . . . . . 221
Appendix E. Programming Constructs . . . . . . . . . . . . . 231
Appendix F. Arduino Pin and Timer Usage . . . . . . . . . 235
vi
Make an Arduino-Controlled Robot
Building a robot and enabling it to sense its environment is a wonderful way to
take your Arduino knowledge to the next level. In writing this book, I have brought
together my love for invention and my experience with electronics, robotics and
microcontrollers. I hope you have as much pleasure building and enhancing your
robot as I did developing the techniques contained in this book.
Arduino is a family of microcontrollers (tiny computers) and a software creation
environment that makes it easy for you to create programs (called sketches)
that can interact with the physical world. Arduino enables your robot to sense
the environment and respond in a rich variety of ways. This book helps you to
build a robot that is capable of performing a wide variety of tasks. It explains
how to assemble two of the most popular mobile platforms, a robot with two
wheels and a caster (for stability, since it’s hard to balance on two wheels), and
a robot with four wheels and motors. If you want your robot up and running
quickly, choosing one of the kits detailed in this book should speed you
through the build process and get you going with the robot projects. But
whether you prefer to design and build a platform of your own construction
or build from a kit, you will find the projects that comprise the core of this book
a practical and fun introduction to Arduino robots.
Who This Book Is For
This book is for people who want to explore robotics concepts like: movement,
obstacle detection, handling sensors, remote control, and all kinds of real world
physical computing challenges. It is for people who want to understand how
these concepts can be used to build, expand and customize your robot. See
“What Was Left Out” (page xi) for some general references for those with limited
programming or electronics experience.
vii
Preface
How This Book Is Organized
The book contains information that covers a broad range of robotics tasks. The
hardware and software is built up stage by stage, with each chapter using
concepts explained in earlier chapters. A simple “Hello Robot” sketch is intro
duced in Chapter 6, Testing the Robot’s Basic Functions and extended in subse
quent chapters. Each chapter introduces sketches that add new capabilities to
the robot. Experienced users can skip directly to the chapters of interest—full
source code for every sketch in this book is available online. However, users
who want to learn all about the techniques covered will benefit and hopefully
enjoy working with all the sketches presented in the book, as each sketch
enables the robot to perform increasingly complex tasks.
The sketches are built using functional modules. The modules are stored using
Arduino IDE tabs (see Chapter 5). Modules described in early chapters are
reused later and to avoid printing the same code over and over in the book,
only code that is new or changed is printed.
Figure P-1 illustrates how the code
is enhanced from sketch to sketch. The horizontal bars represent the sketches,
the vertical bars represent functional modules that are included in the sketch
es. The initial ‘helloRobot’ sketch is transformed into the ‘myRobot’ sketch by
the moving the code for program definitions into a module named
robotDe
fines.ino and reflectance sensors into a module named IrSensors.ino. These
module are included as tabs in the ‘myRobot’ sketch. Each subsequent sketch
is enhanced by adding code to an existing module or creating a new module
as a tab.
viii
Make an Arduino-Controlled Robot
Figure P-1. Sketch and module family tree
All code for every sketch is available in the download for this book and you can
load the sketch being discussed into your IDE if you want a complete view of
all the code.
Chapter 1, Introduction to Robot Building provides a brief introduction to robot
hardware and software.
Chapter 2, Building the Electronics describes how to prepare the electronics for
use with the robot.
Chapter 3, Building the Two-Wheeled Mobile Platform describes how to assem
ble the 2 Wheel Drive (2WD) mobile platform.
Chapter 4, Building the Four-Wheeled Mobile Platform describes how to assem
ble the 4 Wheel Drive (4WD) mobile platform.
ix
Preface
Chapter 5, Tutorial: Getting Started with Arduino introduces the Arduino envi
ronment and provides help getting the development environment and hard
ware installed and working.
Chapter 6, Testing the Robot’s Basic Functions explains the first robotics sketch.
It is used to test the robot. The code covered in this chapter is the basis of all
other sketches in the book:
•
HelloRobot.ino (Arduino sketch) — Brings the robot to life so you can test
your build.
•
myRobot.ino — Same functionality as above but structured into modules
to make it easy to enhance.
Chapter 7, Controlling Speed and Direction explains how you make the robot
move:
• myRobotMove.ino — Adds higher level movement capability.
• myRobotCalibrateRotation.ino — A sketch for running the robot through
a range of speeds to calibrate the robot.
Chapter 8, Tutorial: Introduction to Sensors introduces the most popular sensors
used with the 2WD and 4WD robots.
Chapter 9, Modifying the Robot to React to Edges and Lines describes techniques
for using reflectance sensors to enable your robot to gain awareness of its
environment. The robot will be able to follow lines or to avoid edges.
•
myRobotEdge.ino — The robot will move about in an area bound by a non-
reflective surface (a large sheet of white paper placed on a non-reflective
surface).
•
myRobotLine.ino — Repositions the sensors used above to allow the robot
to follow black lines painted or taped to a white surface. A variant of this
sketch that sends data over serial for display on an external serial device
is named myRobotLineDisplay and is included in the download code.
Chapter 10, Autonomous Movement describes how to use distance sensors to
enable the robot to see and avoid obstacles encountered as it moves around.
•
myRobotWander.ino — Adds ‘eyes’ to give the robot the ability to look
around and avoid obstacles.
•
myRobotScan.ino — Adds a servo so robot ‘eyes’ can scan independent of
robot movement.
x
Make an Arduino-Controlled Robot
Chapter 11, Remote Control describes techniques for remotely controlling the
robot. Wired and wireless serial commands and using a TV type infrared remote
control are covered.
• myRobotSerialRemote.ino — Controls the robot using serial commands.
•
myRobotRemote.ino — Controls the robot using an IR remote controller.
•
LearningRemote.ino — Captures key codes from your remote control to
enable these to be added to the myRobotRemote sketch.
• myRobotWanderRemote.ino — Combines remote control with autono
mous movement.
Appendix A, Enhancing Your Robot provides tips and techniques for designing
and building complex projects.
Appendix B, Using Other Hardware with Your Robot describes some alternative
solutions for motor control.
Appendix C, Debugging Your Robot has hardware and software debugging tips.
This sections includes Arduino and Processing source code to enable real time
graphical display of robot parameters on a computer screen.
•
myRobotDebug.ino — Arduino example showing how to send data to your
computer.
•
ArduinoDataDisplay.pde (Processing sketch) — graphs data received from
Arduino in real time.
Appendix D, Power Sources introduces some alternatives for powering your
robot.
Appendix E, Programming Constructs provides a brief introduction to some of
the programming constructs used in the sketches for this book that may not
be familiar to some Arduino users.
Appendix F, Arduino Pin and Timer Usage summarizes the pins and Arduino
resources used by the robot.
What Was Left Out
This book explains all the code used for the robot, but it is not an introduction
to programming. If you want to learn more about programming with Arduino,
you may want to refer to the Internet or to one of the following books:
•
Getting Started with Arduino, 2nd Edition by Massimo Banzi (O’Reilly)
• Arduino Cookbook, 2nd Edition by Michael Margolis (O’Reilly)
xi
Preface
A good book for inspiration on more robotics projects is:
• Make: Arduino Bots and Gadgets by Tero Karvinen, Kimmo Karvinen (O’Reil
ly)
Code Style (About the Code)
The code used throughout this book has been tailored to clearly illustrate the
topic covered in each chapter. As a consequence, some common coding short
cuts have been avoided. Experienced C programmers often use rich but terse
expressions that are efficient but can be a little difficult for beginners to read.
For example, code that returns boolean values uses the somewhat verbose
explicit expressions because they are easier for beginner programmers to read,
see the example that follows, which returns true if no reflection was detected
by the robot’s sensor:
return irSensorDetect(sensor) == false;
Here is the terse version that returns the same thing (note the negation oper
ator before the function call):
return !irSensorDetect(sensor);
Feel free to substitute your preferred style. Beginners should be reassured that
there is no benefit in performance or code size in using the terse form.
One or two more advanced programming concepts have been used where
this makes the code easier to enhance. For example, long lists of sequential
constants use the
enum declaration.
The enum keyword creates an enumeration; a list of constant integer values. All
the enums in this book start from 0 and increase sequentially by one.
For example, the list of constants associated with movement directions could
be expressed as:
const int MOV_LEFT = 0
const int MOV_RIGHT = 1;
const int MOV_FORWARD = 2;
const int MOV_BACK = 3;
const int MOV_ROTATE = 4;
const int MOV_STOP = 5;
The following declares the same constants with the identical values:
enum {MOV_LEFT, MOV_RIGHT, MOV_FORWARD,
MOV_BACK, MOV_ROTATE, MOV_STOP};
xii
Make an Arduino-Controlled Robot
In addition to brevity, there are many advantages to the enum version of the
code. If you want to know more about enum, an online search for c++ enum
should tell you all you need to know and more.
Good programming practice involves ensuring that values used are valid
(garbage in equals garbage out) by checking them before using them in cal
culations. However, to keep the code focused on the topic, error-checking code
has been kept to a minimum. If you expand the code, you are encouraged to
add error-checking where needed.
Arduino Hardware and Software
The examples in this book were built using the Arduino Leonardo and Uno
boards (see Chapter 5). The code has been tested with Arduino release 1.0.1
(the first release that fully supports the Leonardo board). Although many of
the sketches will run on earlier Arduino releases, this has not been tested. If
you really want to use a release older than 1.0, you need to change the exten
sion from
.ino to .pde to load the sketch into a pre-1.0 IDE.
There is a website for this book where you can download code for this book;
see
“How to Contact Us” (page xv).
There is also a link to errata on that site. Errata give readers a way to let us know
about typos, errors, and other problems with the book. Errata will be visible
on the page immediately, and we’ll confirm them after checking them out.
O’Reilly can also fix errata in future printings of the book in electronic books,
and on Safari® Books Online, making for a better reader experience pretty
quickly.
If you have problems getting the code to work, check the web link to see if the
code has been updated. The Arduino forum is a good place to post a question
if you need more help:
.
If you like—or don’t like—this book, by all means, please let people know.
Amazon reviews are one popular way to share your happiness or other com
ments. You can also leave reviews at the O’Reilly site for the book.
Conventions Used in This Book
The following font conventions are used in this book:
Italic
Indicates pathnames, filenames, and program names; Internet addresses,
such as domain names and URLs; and new items where they are defined
xiii
Preface
Constant width
Indicates command lines and options that should be typed verbatim;
names and keywords in programs, including method names, variable
names, and class names; and HTML element tags
Constant width bold
Indicates emphasis in program code lines
Constant width italic
Indicates text that should be replaced with user-supplied values
This icon signifies a tip, suggestion, or general note.
Using Code Examples
This book is here to help you make things with Arduino. In general, you may
use the code in this book in your programs and documentation. You do not
need to contact us for permission unless you’re reproducing a significant por
tion of the code. For example, writing a program that uses several chunks of
code from this book does not require permission. Selling or distributing a CD-
ROM of examples from this book
does require permission. Answering a ques
tion by citing this book and quoting example code does not require permis
sion. Incorporating a significant amount of example code from this book into
your product’s documentation
does require permission.
We appreciate, but do not require, attribution. An attribution usually includes
the title, author, publisher, and ISBN. For example: “
Make an Arduino Controlled
Robot by Michael Margolis (O’Reilly). Copyright 2013 Michael Margolis, ISBN
(978-1-4493-4437-5).”
If you feel your use of code examples falls outside fair use or the permission
given here, feel free to contact us at
Safari® Books Online
Safari Books Online is an on-demand digital library that lets you easily search
over 7,500 technology and creative reference books and videos to find the
answers you need quickly.
With a subscription, you can read any page and watch any video from our
library online. Read books on your cell phone and mobile devices. Access new
xiv
Make an Arduino-Controlled Robot
titles before they are available for print, and get exclusive access to manuscripts
in development and post feedback for the authors. Copy and paste code sam
ples, organize your favorites, download chapters, bookmark key sections, cre
ate notes, print out pages, and benefit from tons of other time-saving features.
O’Reilly Media has uploaded this book to the Safari Books Online service. To
have full digital access to this book and others on similar topics from O’Reilly
and other publishers, sign up for free at .
How to Contact Us
We have tested and verified the information in this book to the best of our
ability, but you may find that features have changed (or even that we have
made a few mistakes!). Please let us know about any errors you find, as well as
your suggestions for future editions, by writing to:
O’Reilly Media, Inc.
1005 Gravenstein Highway North
Sebastopol, CA 95472
800-998-9938 (in the United States or Canada)
707-829-0515 (international/local)
707-829-0104 (fax)
We have a web page for this book, where we list errata, example code, and any
additional information. You can access this page at:
/>To comment or ask technical questions about this book, send email to:
For more information about our books, courses, conferences, and news, see
our website at
.
Find us on Facebook: />Follow us on Twitter: />Watch us on YouTube: />Acknowledgments
Rob DeMartin, the business manager at Maker Media, was the driving force
behind the botkits, which inspired the writing of this book. Isaac Alexander
and Eric Weinhoffer at Maker Media ran with the concept to make it a product.
I thank them for testing the content of the book to ensure that the projects
and the hardware worked well together.
xv
Preface
I am grateful to the Arduino community for contributing a wealth of free soft
ware, in particular, the IrRemote library from Ken Sherriff that is used in the
remote control chapter. I would also like to express my appreciation to Limor
Fried (Ladyada) for creating the hardware, software and online build notes for
the motor shield used in this book.
Thanks also to DFRobot, the innovative company that designed the robot
platforms and provided the exploded view drawings used in the build chap
ters.
Mat Fordy at Cool Components (coolcomponents.co.uk) organized the robot
ics workshop that provided a testing ground for the book’s projects. It was
helpful and rewarding to work with the participants, each with a different level
of experience, to build the robots and see their pleasure in bringing their cre
ations to life. Their feedback helped make the book content clear, practical and
fun.
If I have achieved my goal of making the rich variety of technical topics in this
book accessible to readers with limited electronics or programming experi
ence, then much of the credit goes to Brian Jepson. Brian, who was also my
editor for the Arduino Cookbook, was with me every step of the way. I thank
him for his guidance: from his support and passion in beginning the project,
to his editorial expertise and application of his masterful communications skills
right through to using his technical knowledge to test all the projects in the
book.
I would like to thank my entire family for listening to me explain the finer points
of robotics during a week- long vacation in the early stages of preparing this
book. Four generations of my family were patient and constructive at times
when they would have preferred to be boating on the lake or walking in the
woods.
Finally, this book would not be what it is without the contributions made by
my wife, Barbara Faden. Her feedback on early drafts of the manuscript helped
shape the content. I am especially grateful for her support and patience in the
wake of disruption created as I wrangled with these two little robots to meet
the book’s deadline.
xvi
Make an Arduino-Controlled Robot
This book takes you through the steps needed to build a robot capable of
autonomous movement and remote control. Build instructions are provided
for 2WD (two wheel drive) and 4WD (four wheel drive) platforms. The platforms
shown in
Figure 1-1 and Figure 1-2 will make the construction a snap, but you
can build your own robot chassis if you prefer. The connection and use of the
control electronics and sensors are fully explained and the source code is in
cluded in the book and available for download online (see “How to Contact
Us”
(page xv) for more information on downloading the sample code).
Figure 1-1. The assembled two wheeled robot chassis
1
Introduction to Robot
Building
1
Figure 1-2. The assembled four wheeled robot chassis
Here is a preview of the projects you can build:
•
Controlling speed and direction by adding high level movement capabil
ity.
•
Enabling the robot to see the ground—using IR sensors for line and edge
detection (see
Figure 1-3 and Figure 1-4).
•
Enabling the robot to look around—scanning using a servo so the robot
can choose the best direction to move, as shown in
Figure 1-5.
•
Adding remote control using a TV remote control or a wired or wireless
serial connection.
2
Make an Arduino-Controlled Robot
Introduction to Robot Building
Figure 1-3. Robot moves around but remains within the white area
Figure 1-4. Robot follows black line
3
Chapter 1
Introduction to Robot Building
Figure 1-5. Two wheeled and four wheeled robots with distance scanners
Why Build a Robot?
Building a robot is different from any other project you can make with a mi
crocontroller. A robot can move and respond to its environment and exhibit
behaviors that mimic living creatures. Even though these behaviors may be
simple, they convey a sense that your creation has a will and intent of its own.
Building a machine that appears to have some spark of life has fascinated
people throughout the ages. The robots built over 60 years ago by neuro
physiologist W. Grey Walter (see
ex
plored ways that the rich connections between a small number of brain cells
give rise to complex behaviors.
4
Make an Arduino-Controlled Robot
Why Build a Robot?
There are many different kinds of robots, some can crawl, or walk, or slither.
The robots described in this book are the easiest and most popular; they use
two or four wheels driven by motors.
Choosing Your Robot
The projects in this book can use either a two or four
wheeled platform, but if you are still deciding which
is right for you, here are some factors that will help
you choose:
Two Wheeled Robot
Light and very maneuverable, this is a good
choice if you want to experiment with tasks such
as line-following that require dexterous move
ment. However, the caster that balances the ro
bot requires a relatively smooth surface.
Four Wheeled Robot
This robot’s four wheel drive makes this a good
choice if you want it to roam over rougher sur
faces. This platform has a large top plate that can
be used to carry small objects. The robot is heav
ier and draws more current than the 2WD robot,
so battery life is shorter.
How Robots Move
Figure 1-6.
Left and Right wheels turn forward, Robot
moves Forward
The robots covered in this book move forward,
back, left and right much like a conventional
car.
Figure 1-6 shows the wheel motion to
move the robot forward.
Figure 1-7.
Only Left wheels turn, Robot Turns Right
If the wheels on one side are not driven (or are
driven more slowly than the other side) the ro
bot will turn, as in
Figure 1-7.
5
Chapter 1
How Robots Move
Figure 1-8. Left and Right wheels turn backward, Robot
moves Backward
Figure 1-8 shows that reversing the wheel ro
tation drives the robot backward.
Figure 1-9. Left wheels turn forward, Right wheels re-
verse, Robot rotates Clockwise
Unlike a car (but a little like a tank), these robots
can also rotate in place by driving the wheels
on each side in different directions. If the
wheels on each side are spinning in opposite
directions, the robot will rotate.
Figure 1-9
shows clockwise rotation.
Tools
These are the tools you need to assemble the robot chassis.
Phillips Screwdriver
A small Phillips screwdriver from your local hardware store.
Small long-nose or needle-nose pliers
For example, Radio Shack 4.5-inch mini long-nose pliers, part number
64-062 (see Figure 1-10) or Xcelite 4-inch mini long-nose pliers, model L4G.
Small wire cutters
For example, Radio Shack 5” cutters, part number 64-064 (Figure 1-11) or
Jameco 161411
Soldering iron
For example, Radio Shack 640-2070 (Figure 1-12) or Jameco 2094143 are
low cost irons suitable for beginners. But if you are serious about elec
tronics, a good temperature controlled iron is worth the investment, such
as Radio Shack 55027897 or Jameco 146595.
Solder 22 AWG (.6mm) or thinner
For example, Radio Shack 640-0013 or Jameco 73605.
6
Make an Arduino-Controlled Robot
Tools
Figure 1-10. Small Pliers
Figure 1-11. Wire Cutters (Side Cutters)
Figure 1-12. Soldering Iron
7
Chapter 1
Tools