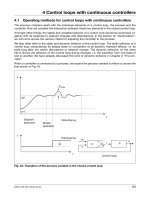
motion 4 quick-reference guide
Bạn đang xem bản rút gọn của tài liệu. Xem và tải ngay bản đầy đủ của tài liệu tại đây (16.41 MB, 165 trang )
Apple Pro Training Series: Motion 4 Quick-Reference Guide
Brendan Boykin and Jem Schofield
Copyright © 2011 Jem Schofield and Brendan Boykin
Published by Peachpit Press. For information on Peachpit Press books, contact:
Peachpit Press
1249 Eighth Street
Berkeley, CA 94710
(510) 524-2178
www.peachpit.com
To r e p o r t e r r o r s , p l e a s e s e n d a n o t e t o e r r a t a @ p e a c h p i t . c o m .
Peachpit Press is a division of Pearson Education.
Apple Series Editor: Lisa McClain
Project Editor: Nancy Peterson
Development Editor: Bob Lindstrom
Production Coordinator: Cory Borman
Te ch nic a l E dito r : Charles Meyer
Copy Editor: Darren Meiss
Proofreaders: Dan Foster, Susan Festa
Compositor: James D. Kramer, Happenstance Type-O-Rama
Indexer: Jack Lewis
Cover Illustrator: Kent Oberheu
Cover Producer: Chris Gillespie
Notice of Rights
All rights reserved. No part of this book may be reproduced or transmitted in any form by any
means, electronic, mechanical, photocopying, recording, or otherwise, without the prior written
permission of the publisher. For information on getting permission for reprints and excerpts,
contact
Pipeline, Ducati, and Evergreen Films footage, courtsey Apple, Inc. All rights reserved.
The projects and footage supplied with this book may only be used for educational purposes in asso-
ciation with the lessons included. Any other use, including but not limited to incorporating footage
into another project, duplicating, or distributing footage, is expressly forbidden and requires explicit
permissions from the copyright holders listed above.
Notice of Liability
The information in this book is distributed on an “As Is” basis, without warranty. While every
precaution has been taken in the preparation of the book, neither the authors nor Peachpit Press
shall have any liability to any person or entity with respect to any loss or damage caused or alleged
to be caused directly or indirectly by the instructions contained in this book or by the computer
software and hardware products described in it.
Tr ad em ar ks
Throughout this book trademarked names are used. Rather than put a trademark symbol in
every occurrence of a trademarked name, we state we are using the names only in an editorial
fashion and to the benefit of the trademark owner with no intention of infringement of the
trademark.
ISBN 13: 978-0-321-63677-5 ISBN 10: 0-321-63677-5
9 8 7 6 5 4 3 2 1 Printed and bound in the United States of America
iii
Chapter 1 Motion Basics . 1
Chapter 2 Te x t . 23
Chapter 3 Shapes, Masks, and Paint . 35
Chapter 4 Particles and Replicators . 49
Chapter 5 Timelines . 67
Chapter 6 Keyframes . 77
Chapter 7 Behaviors . 87
Chapter 8 Filters . 97
Chapter 9 Cameras and Views . 105
Chapter 10 Manipulating Objects in 3D . 113
Chapter 11 Lights, Shadows, and Reflections . 119
Chapter 12 Working w ith Other Applications . 125
Chapter 13 Exporting . 135
Appendix Keyboard Shortcuts . 139
Contents at a Glance
iv
Table of Contents
Chapter 1 Motion Basics . 1
Utility Window . 2
Canvas Window . 6
To o l b a r . 10
Project Pane (F5) . 13
Timing Pane (F6) . 17
Heads-Up Display (F7) . 19
Setting Project Properties and Preferences . 19
Chapter 2 Te x t . 23
Creating Text . 23
Modifying Text in the Inspector Tab . 24
Modifying Text in the HUD . 29
Using the Adjust Glyph Tool . 29
Using Text Generators . 30
Working w ith Text Behav iors . 32
Chapter 3 Shapes, Masks, and Paint . 35
Creating Simple Shapes . 35
Creating Custom Shapes . 36
Modifying a Closed Shape . 38
Creating Masks . 40
Modifying Masks . 41
Adding an Image Mask . 41
Contents v
Using the Paint Stroke Tool . 43
Modifying a Paint Stroke . 44
Modifying the Control Points of
a Shape, Mask, or Paint Stroke .
45
Using Shape Behaviors . 46
Chapter 4 Particles and Replicators . 49
Particle System . 49
Replicators . 57
Chapter 5 Timelines . 67
Working i n the Mini- Ti mel ine . 67
Working i n the Ti melin e . 71
Working w ith Marker s . 76
Chapter 6 Keyframes . 77
Setting Keyframes Manually . 77
Using Record Animation to Create Keyframes . 79
Using the Keyframe Editor . 80
Modifying Keyframes in the Timeline . 85
Converting Behaviors to Keyframes . 86
Chapter 7 Behaviors . 87
Applying Behaviors . 87
Modifying Behaviors. . . . . . . . . . . . . . . . . . . . . . . . . . . .89
Example Behaviors . 90
Applying Parameter Behaviors . 92
Modifying Parameter Behaviors . 93
Example Parameter Behaviors . 93
vi Contents
Chapter 8 Filters . 97
Applying Filters . 98
Modifying Filters . 99
Example Filters . 102
Chapter 9 Cameras and Views . 105
Adding a Camera . 105
Modifying a Camera . 106
Positioning a Camera . 107
Camera Behaviors . 110
Views . 110
Chapter 10 Manipulating Objects in 3D . 113
2D Layering vs. 3D Positioning . 113
Using the 3D Transform Tool in the Canvas . 114
Using the 3D Transform Tool in the HUD. . . . . . . . .116
3D Behaviors . 117
Chapter 11 Lights, Shadows, and Reflections . 119
Adding a Light . 119
Adjusting Lighting Parameters . 120
Disabling Lighting. . . . . . . . . . . . . . . . . . . . . . . . . . . . .121
Activating and Adjusting Shadows . 122
Disabling Shadows . 122
Activating and Adjusting Reflections . 123
Chapter 12 Wor kin g w ith Othe r Ap pli cat ion s . 125
Roundtripping with Final Cut Pro . 125
Using Motion Templates in Final Cut Pro . 130
Working w ith Adobe Photo sho p Do cumen ts . 131
Working w ith Adobe Illus trator Do cumen ts . 132
Contents vii
Chapter 13 Exporting . 135
Using File > Export . 135
Using File > Share . 138
Appendix Keyboard Shortcuts . 139
Interface . 139
View Tools . 142
Create Tools . 143
Mask Tools . 144
Camera and Effects Icons . 145
Canvas . 145
Timing . 146
Project . 147
Index . 149
1
Motion Basics
Motion 4 allows you to create simple text graphics or complex ani-
mations for your visual projects (documentaries, features, news,
digital signage, and so on). With an easy-to-learn interface and rich
tool set, Motion is your in-house special effects solution.
The incredible compositing power of Motion is organized into two
main windows: the Canvas and Utility windows. Each of these win-
dows is composed of multiple panes in which your project creation
and modification is performed. Motion also has a built-in dashboard
window, the Heads-Up Display (HUD), that provides quick access to
often modified parameters.
Utility window Canvas window
1
6 Motion Basics
Object (F4)
The Object tab label changes depending on the currently selected
object type. For example, if you select an image object, the tab will be
labeled Image; if you select a text object, the tab will be labeled Text.
The tab’s properties also reflect your selection.
Locked Inspector icon
If you wish to select another object in a project
but want the Inspector to continue to display
parameters for the prior selection, you can lock
the Inspector by clicking this icon.
Some objects, such as the text object shown
here, have additional subtabs to organize the
available parameters.
Canvas Window
The Canvas window is your main workspace. Here you build your
project and create your composition. This composing process is done
by direct manipulation of the Canvas workspace and in conjunction
with the Inspector tab and the HUD. Two panes in the Canvas win-
dow are not visible when your start a new project: Project and Timing.
Canvas
The Canvas is the most prominent area of the Canvas window and
acts as your composition area. You can transform objects, aim lights,
and draw shapes in addition to performing many other tasks. The
look and performance of the Canvas is dependent on the other areas
of the Canvas window.
Canvas Window 7
Tool ba r
Canvas
Timing
pane
Project pane
With an object selected in the Canvas, you can use a number of tools
to directly manipulate that object. You can also Control-click (or
right-click) an object to access the Object shortcut menu to access
even more options.
Status bar View options
Canvas
Mini-Timeline
Text t oo l (T )Paint Stroke tool (P)
B-Spline tool (B)
Bezier tool (B)
Line tool
Circle tool (C)
Rectangle tool (R)
NOTE
Ǡ
Press B to toggle between the Bezier and B-Spline tools.
Mask Tools
Motion includes a variety of Mask tools, including Bezier and
B-Spline. See Chapter 3 for more information on Mask tools.
B-Spline Mask tool (Option-B)
Rectangle Mask tool (Option-R)
Circle Mask tool (Option-C)
Freehand Mask tool (Option-P)
Bezier Mask tool (Option-B)
NOTE
Ǡ
Press Option-B to toggle between the Bezier Mask and
B-Spline Mask tools.
Camera and Effects Buttons
These buttons allow you to add cameras, behaviors, and filters to
your project. You can also create particle systems or replicators from
a selected object.
Project Pane (F5) 13
Create a replicator from
the selected layer. See
Chapter 4.
Add a new camera to the
project. See Chapter 9.
Add a new behavior to the
selected layer/group. See Chapter 7.
Add a new filter to the
selected layer/group.
See Chapter 8.
Create a particle system from the
selected layer. See Chapter 4.
Interface Buttons
These buttons give you fast access to most of the user interface.
Show/hide the
Timing pane of the
Canvas window (F6).
Show/hide
the Heads-Up
Display (F7).
Show/hide the
Utility window with
the File Browser tab
active (Command-1).
Show/hide the Utility
window with the
Library tab active
(Command-2).
Show/hide the
Utility window with
the Inspector tab
active (Command-3).
Show/hide the
Project pane of the
Canvas window (F5).
Project Pane (F5)
The Project pane is your project organization hub. It contains three
tabs: Layers, Media, and Audio.
Layers Tab (Command-4)
Here you can access all of the objects in your project. Every object is
represented as a layer. Layers can be consolidated into groups. Those
layers and groups can be renamed in the Layers tab.
14 Motion Basics
Click these three icons to disable the
masks, behaviors, or filter effects
(respectively) applied to this object.
Create or delete
a group.
Groups
Organize layers or other groups for organizational
purposes or for effect consolidation. For example, if you
wish to move several objects in unison, drag the objects’
layers into a group, and then apply one behavior to the
group. All of the grouped objects will be affected.
Designate a 2D group. Click to switch
the group to 3D.
Designate a 3D group. Click to switch
the group to 2D.
Click to display additional status
columns: Opacity and Blend.
The layer icon indicates the object type
contained within the layer. The four
icons here indicate (from top to bottom):
a text layer, a text layer with a filter, a
text behavior, and a behavior applied to
the text layer.
Lock and unlock a layer.
Show/hide masks, behaviors, and filters
displayed in the Layers tab.
Enable/disable a layer.
When working with a 2D object, a layer’s vertical position within the
Layers tab determines the associated object’s compositing order in
the Canvas. Higher layers are placed in the foreground; lower layers
are placed in the background. You can drag the layers to reorganize
them or to change their compositing order. An insert bar indicates
where an object will appear in the Layers list and the group in which
the object will reside.
In this example, the text object will be composited behind the shape
but will remain in Group 1.
Mute all tracks.
Adjust the level of
an individual file.
Control the pan
across outputs.
Mute or Solo
(respectively) an
audio file.
Adjust the final
mix level of all
audio files.
Timing Pane (F6)
The Timing pane represents your project within time. It includes
three tabs: the Timeline, Keyframe Editor, and Audio Editor.
Timeline Tab (Command-7)
While in an application such as After Effects you perform most tasks
in the Timeline; in Motion the Timeline is used primarily to make
global changes and perform simple project edits.
NOTE
Ǡ
See Chapter 5 for more information on using the
Timeline.
Each object is
represented as a clip
showing the object’s
timing in relation to
the project and
other objects.
Groups and layers are presented as they
appear in the Project pane’s Layers tab.
Togg le t im e vi ew, z oo m be twee n
projects, and play range durations.
Show/Hide Layers
Show/Hide Audio layers
Show/Hide Keyframes
Show/Hide Masks
Zoom the time view.
Adjust the layers’ row heights.
Show/Hide Filters
Show/Hide Behaviors