the photoshop darkroom 2 creative digital transformations
Bạn đang xem bản rút gọn của tài liệu. Xem và tải ngay bản đầy đủ của tài liệu tại đây (32.03 MB, 209 trang )
Focal Press is an imprint of Elsevier
30 Corporate Drive, Suite 400, Burlington, MA 01803, USA
Linacre House, Jordan Hill, Oxford OX2 8DP, UK
Copyright © 2011, Harold Davis and Phyllis Davis.
Published by Elsevier, Inc. All rights reserved.
No part of this publication may be reproduced, stored
in a retrieval system, or transmitted in any form or by
any means, electronic, mechanical, photocopying,
recording, or otherwise, without the prior written
permission of the publisher.
Permission may be sought directly from Elsevier’s Science
& Technology Rights Department in Oxford, UK: phone
(+44) 1865 843830, fax: (+44) 1865 853333, E-mail:
You may also complete
your request online via the Elsevier homepage at
by selecting Support & Contact,
and then Permissions.
Recognizing the importance of preserving what has
been written, Elsevier prints its books on acid-free
paper whenever possible.
Library of Congress Cataloging-in-Publication Data
Davis, Harold, 1953-
The Photoshop darkroom 2 : creative digital
transformations / Harold Davis, Phyllis Davis.
p. cm.
Includes index.
ISBN-13: 978-0-240-81531-2
ISBN-10: 0-240-81531-9
1. Adobe Photoshop. 2. Photography Digital
techniques. 3. Photography Retouching. 4. Photography,
Artistic. I. Davis, Phyllis, 1963- II. Title.
TR267.5.A3D36 2011
006.6’96 dc22
2010037557
British Library Cataloguing-in-Publication Data
A catalogue record for this book is available from the
British Library.
ISBN 978-0-240-81531-2
For information on all Focal Press publications, visit
our website at www.focalpress.com
11 12 13 14 15 5 4 3 2 1
Printed in China
Harold Davis
Phyllis Davis
Creative Digital Transformations
The Photoshop
®
Darkroom 2
AMSTERDAM • BOSTON • HEIDELBERG • LONDON
NEW YORK • OXFORD • PARIS • SAN DIEGO
SAN FRANCISCO • SINGAPORE • SYDNEY • TOKYO
Focal Press is an imprint of Elsevier
8 A Ballet with Reality
10 Work ow and digital asset
management
12 The RAW advantage
13 Shooting RAW and JPEG
at the same time
14 In which Ed’s feet make
an appearance
16 Multi-RAW processing using
Lightroom
19 Multi-RAW processing:
Lightroom or ACR?
20 Bringing a ower to life
22 Layers and masking
23 Painting on a layer mask
25 Using Screen blending mode
27 Using Multiply to darken
28 Creating a high-key image
30 Cloning and retouching
35 The Patch Tool
37 Checkpoints and work ow
38 Content-aware ll
40 Spiderweb studio
43 Soft Light blending mode
46 Creative coloring and toning
48 Desaturating with black
and white
58 Welcome to the real world
66 Transformations are for
people, too!
68 Multi-RAW processing
a glamour shot
68 Contrasting a gure with
a black background
74 Using hand-HDR to get a
completely black background
76 Photographing kids on
a black background
78 Smoothing skin
80 Head, shoulders, knees,
and toes
84 Glamorous gams
86 Alice works out at the
virtual gym
88 Eyebrows
90 Eye checklist
94 Painting catch lights
98 Making the Unseen Visible
100 Photographing owers
in water
106 Photographing on a lightbox
108 Hand-HDR imaging for
transparency
110 Creating a transparent poppy
medley
112 ACR or Lightroom for RAW
conversion
113 Automated HDR vs. hand-HDR
for transparency
115 Lightboxes aren’t only
for owers
117 Variations and inversions
118 Combining layers for
transparency
125 Using HDR to create complex
imagery
126 Revealing details at night
129 Blending in the moon
130 Faking star trails
132 Stacking star trails—the
real deal
134 Onward & Upward: Beyond
Reality
136 Photo compositing to create
a world in a shadow
138 Photographing to create
the shadow
140 Creating a translucent
marble and its shadow
141 Thinking about content,
color, shape, and scale
142 Inserting a new world
146 Marble of power
147 Shadow play
148 Photographing the
in nitesimal
150 Building the Impossible
152 Harold’s manifesto: Losing
the chains of reality
154 Creating an abstraction
160 Stairs à la Escher
162 Steps toward the impossible
164 Creating the basic building
block
166 The compositor’s cafeteria
168 Creating the “Twisted Stairs”
171 Fixing the mesh point
174 Creating the “Stair Knot”
178 Complexity vs. simplicity
180 Do plants think?
185 A poke in the eye
186 LAB: The neglected color
space
190 LAB channel inversions
and equalizations
195 Using different color spaces
to add color effects
196 Creating a world in a
pine cone
198 Creating a magical portal
200 Onward & Upward: This
challenge is for you!
204 Glossary
206 Index
Contents
6 The Photoshop Darkroom 2
Back in the old days, working in a chemical
darkroom, I could only have dreamed of a post-
processing tool as wonderful as Photoshop. But
for me that’s exactly what Photoshop is—a tool.
It’s a tool that helps me as a professional image
creator. The image is what matters, not the tool.
The Photoshop Darkroom 2: Creative Digital
Transformations looks at the features of
Photoshop as practical aids in making great digital
images. I don’t focus on the latest and greatest
Photoshop menus and palettes. For the most part,
the Photoshop techniques shown in the book can
be done using the core features of Photoshop.
These features have generally been available
going back many versions. Think of it this way: in
a lm darkroom the recipes for developer changed
over time, but the underlying idea of how to
develop lm and paper stayed the same.
The goal of The Photoshop Darkroom series is to
inspire you and provide you with techniques to
try. A digital image starts with a capture or a scan
and proceeds through post-processing towards
its nal state. How well your image comes out
depends upon your mastery of the craft of digital
post-processing and—far more important—your
imagination. I’d like The Photoshop Darkroom
books to be your guide and companion on this
exciting journey.
A digital camera is a special purpose computer
attached to a lens and a scanner. It makes sense
to process imagery in the more powerful context
of a desktop computer (and Photoshop) rather
than in the camera.
It also is just common sense to make the best
photos you can using your camera. Relying on
Photoshop to x sloppy photography is a waste
of time and creative energy. Therefore I’ll give you
pointers about how to photograph with digital
post-processing in mind—which is very different
than being a lazy photographer.
The Photoshop Darkroom 2: Creative Digital
Transformations follows The Photoshop Darkroom:
Creative Digital Post-Processing and can be read
either as a sequel to the rst volume or on its
own. We’ve worked hard to make this volume
self-contained—however, we didn’t want to
be overly repetitive of material that is amply
covered in the rst volume. Where appropriate I’ll
provide page references to the earlier Photoshop
Darkroom book for more in-depth coverage of
certain topics.
The emphasis in this volume is on creative
transformations. This involves a wide range of
image creation challenges from cleaning up an
image that is “almost there”—and requires a little
retouching—to creating entirely new fantastic
digital images that are derived using compositing
and other techniques.
As with the rst Photoshop Darkroom book, I
make no claims that the techniques I present
are the only way, or even the best way, to do
something. Photoshop is an incredibly rich
and complex software environment with many
moving parts and many ways to do anything.
The most I can do is to show you the way I work
in Photoshop on a daily basis as a professional
photographer and image creator. If you can nd
a better or more fun way to accomplish the same
tasks, more power to you—and please drop me a
line to tell me your technique.
Once again, I am blessed with the perfect co-
author, Phyllis Davis. Phyllis makes me complete
in many ways. She is also a great antidote to my
tendency to wave my hands about the details of a
process—because she insists on complete clarity
and wants every step to be explained carefully.
I love spending time behind the camera and I love
spending time working on images in Photoshop.
It’s my hope that this book helps inspire you to
work on your digital imagery in post-processing
with as much joy as I do—enjoy!
>> Introduction
7Introduction
10 ThePhotoshopDarkroom2
*
but were afraid to ask
>> Everything you always wanted to know about Digital Asset Management (DAM)
*
Workow roadmap
Workowreferstotheentireprocess
ofcreatingadigitalphotographfrom
themomenttheshutterispressedto
thenaluseforyourimage.Italsoin-
cludestheveryimportanttopicofhow
youstoreandpreserveyourimages.
Ifyouthinkthatarchivingandbacking
upphotolesisabigpain—well,
maybeyou’reright.Butdon’tdoit
andyou’lllivetoregretit!Adigital
photoisnotatangibleobject.Itonly
existsaslongasthecomputerle
thatholdsitsdataissafeandcanbe
accessed.
Also,youneedtobeabletonda
gosh,darn%&#@imagelewhen
youneedit!
Anyonewhoworksseriouslywith
digitalphotographswilltellyouthat
whenitcomestoworkowandDigital
AssetManagement(DAM),planning
andorganizinginadvancehelps.
ApproachingDAMasaglobaltask
thatneedstoencompassallyour
digitalassetsandactivitieshelpsto
lessentheproblemsandheadaches
youwillencounter.
Getting Photos from Camera to Computer
Hardwareoptions:Cardreader(PD1:14)
Cable(USB)directtocamera
Wireless
Softwareoptions: Finder(Mac)/Explorer(Win)
iPhoto,etc.
Lightroom
Cameravendorsoftware
2
Beware of software such as iPhoto that
only copies images into its database without
placing individual image les on your computer
Archiving Original Files
Fileformats: DNG(PD1:12,PD2:13)
RAW,e.g.NEF(Nikon),CR2andCRW(Canon),etc.
Software: StructuredlesystemusingFinder(Mac)/Explorer(Win)
Lightroomcatalog
Othersoftwaresolutions
Formoreaboutsavingandnaminglesonyourcomputer,takea
lookatPD1:24–25.
3
Be redundant!
You may not want to go into
the Photoshop darkroom
with every capture
Processing RAW Files into Photoshop
Multi-RAWprocessingviaACR(PD1:15–67)
Multi-RAWprocessingviaLightroom(PD2:16–19)
HDRwiththirdpartysoftwaresuchasPhotomatix
Camera-vendorRAWprocessingsoftware
Othersoftwarealternatives
•
•
•
•
•
4
Shooting Photos
Consider: Multi-RAWprocessing
Extendingdynamicrange
HDR/Hand-HDR
Shootingpiecesforcompositing
Formoreaboutshootingfordigital,takea
lookatPD1:104.
1
Don’t try to edit using your camera’s LCD.
Decisions about which images to delete or
work on should be made at the computer
where you can really see them
Think digitally!
11ABalletwithReality
References used in this book
Manyofthetopicsshowninthisworkow
roadmaparecoveredinthisbook,orinthe
rst Photoshop Darkroombook.Whenthereisa
cross-reference,it’slistedwiththeabbreviation
forthebookandthepagenumber.
PD1: 15–17meansThe Photoshop Darkroom:
Creative Digital Post-Processing
(FocalPress:
2010),pages15–17.
PD2: 123–125meansThe Photoshop Darkroom 2:
Creative Digital Transformations
(FocalPress:
2011),pages123–125.
Keeping Track of Files
EXIFdata
Keywording
Structuringstorage(PD1:25)
Cataloginginthelesystem
Lightroomcatalog
Specializedsoftware
Usinginternetresources
suchasFlickrasacatalog
•
•
•
•
•
•
•
7
Go forth and
print and publish !
Beredundant!
Youcan’t
havetoomanycopies
ofyourimportantimage
les.However,whenyou
havemanycopies,youneedtobevery
clearaboutwhichofyourredundant
lesisthemasterlethatyouworkon.
Harold sez
Backing Up
Backupsoftware
Synchronizationsoftwareforredundantbackup
Hardware:RecordablemediasuchasDVDsare
perishableandnotbigenough.
Harddrivesarethebestbet butall
harddriveseventuallyfail.
Youhavetobackupyourbackupdrives!
RAID5(goodbalancebetweenperfor-
mance,safety,andcost,seePD1:27)
8
Be redundant!
Saving Photo Files
Followaconsistentworkowfor
archiving
Saveamasterversionwithlayers
Flattenthenalversion
Sizeappropriatelyforuses
SaveinRGBandCMYKasneeded
SaveJPEGsfortheweb
•
•
•
•
•
•
6
Be
redundant!
Enhancing Converted RAW Images in Photoshop
Multi-RAWprocessing(PD1:15–65,PD2:16–26)
Hand-HDR(PD1:106–119,PD2:108–121)
Retouchingandcloning(PD2:30–37,68–95)
Adjustingexposure(PD1:72–73)
SpecialEffects
Filters
LABcolor(PD1:150–197,PD2:184–195)
Sharpening(PD1:198–201)
•
•
•
•
•
•
•
•
5
The sky’s the limit!
Anything you can
think of you can
probably do in
Photoshop
12 ThePhotoshopDarkroom2
A RAW le has potential
If there’s one single point
that I want people who
take one of my workshops
to understand about digital
photography and the Photo-
shop darkroom, it is the RAW
advantage.
When you capture a digital
photograph as a RAW le,
you are saving all the data
that was available to the
sensor. This is in contrast
to other kinds of digital
captures, such as a JPEG
capture made by lower-
end cameras. With a JPEG
capture, a great deal of data
is simply thrown away.
Your RAW capture is just a
le by itself. It can’t be print-
ed or displayed as part of a
website. You need to process
the image before you can do
almost anything with it.
Think of it this way: a RAW
le is simply potential
information that you can
use to create your image
from. The really, really,
really exciting thing is that
you can process the same
photograph—the same RAW
le—more than once.
Then, when you combine the
different processed versions,
you can use the best bits
from each. This leads to
extraordinary image making
power. Using RAW lets you
take advantage of the power
of digital.
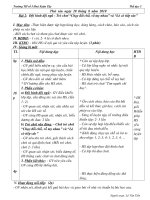
>> The RAW advantage
Here’s the JPEG and here’s the
version I made from a RAW le
JPEG vs RAW
WithinasingleRAWleisahugerangeof
exposurevaluesandcolortemperatures.
It’smucheasiertocorrectproblematic
exposureandcolortemperatureissues
intheRAWconversionprocessthan
downstreamonceyou’vealreadynished
convertingtheimage.
TheonlyadvantagesthattheJPEGlefor-
mathasoverRAWisthatitiscompressed,
andfasttoworkwith.
IftheJPEGisgood,youcanjustsenditoff
toaclientwithoutfurtherwork.
Ontheotherhand,it’slikelm.Whatyou
seeiswhatyouget—andyouonlyhave
oneopportunitytogetitright.Youdon’t
havethechancetoteaseelusivevalues
outofthelethewayyoucanwithRAW.
There’snovirtuetoshootingJPEG—and
havingtogetitrightinthecamera—as
opposedtoRAW.Itallcomesdownto
commonsense:what’sthemostexpedient
waytogettheimageyouwant.
How your camera thinks about RAW
MostcameramanufacturershavetheirownproprietarytypeofRAWle.Inother
words,there’snosuchthingasastandardizedRAWle.Forexample,Nikon’sRAWle
formatproducesimagesintheNEFleformatandCannon’sRAWlesareencodedas
CRWandCR2les.Asjusticationforsavingdatainproprietaryformats,thecamera
manufacturerssaythattheyuniquelyunderstandthecharacteristicsoftheirown
sensorsandthereforeknowhowtoencodetheRAWdatabetter.
13ABalletwithReality
The DNG le format
DNGlesareaneffortatcreatinga
universalRAWformat.Inmyopinion,
there’slessthanmeetstheeyeinthis
effortbecausepartoftheDNGformat
specicallyreserves“hidden”areasfor
eachmanufactures’proprietarysecret
sauce.
None-the-less,therearesomereasons
toconsiderarchivingRAWlesin
theDNGformat(asLightroomwilldo
automaticallyforyou)—andit’sfar
betterthannotarchivingatall.For
moreabouttheimportanceofarchiving
yourimageles,turntopages10–11.
Shooting RAW and JPEG at the
same time
MostcamerasthatshootRAWwilllet
youshootJPEGandRAWsimultane-
ously.Thispossiblygivesyouthe
advantageofbothworlds.IftheJPEG
leisgoodenough,you’realldoneand
cansenditofftoaclient.Buthaving
theRAWlegivesyoutheopportunity
tomakecorrectionsintheconversion
processifyouneedto.
Ialwayswanttokeep
myoriginalles.So
convertingtoDNGisne,
butIstillwanttoarchive
myNEFles.ThismeansthatifIuse
DNG,Ihavetwosetsoforiginallesto
archive(NEFandDNG).Twiceasmuch
storagespaceonmycomputer.Why
bother?Idon’tthinkNikonorCanonare
goingoutofbusinessanytimesoon(an
oftenheardpro-DNGargumentisthatit
islikelytobearoundlongerthanany
cameramanufacturer).
Harold sez
14 ThePhotoshopDarkroom2
What’saphotographertodo?
Iwasstuckatthetopofastairwell
inadecayingtenementinHavana,
Cuba.Now,thistenementwasalso
anartdecobeautyandonceupona
timeshehadbeenne.
Thisstairwellwascallingouttobe
photographed.IknewIwasnotlikely
tobebackinthislocationanytime
soon.SoIpulledoutallthestops:
tripod,sheyelens,andaprogram-
mabletimerforalongexposurein
thedimlight.Ievenfoundanold
toilettanktoclimbonforabetter
pointofview.
Lookingattheresultsinthecom-
puterafewweekslaterandafew
thousandmilesaway,thebestshot
wasawed.Notonlyweremytripod
legsvisible,butworse,Ed’sfeet
wereinthephoto.
That’saperilofshootingwitha
sheyelensinlow-lightconditions.
¡HolaEd!
My tripod leg (yes, I really was ve oors
up on this railing — don’t tell Phyllis!)
©
EdBerlien
Getting ready for the
shot before I found the
toilet tank to stand on
Ed’s feet
A sheye lens helps
emphasize the curvature
of the stairway
>> In which Ed’s feet make an appearance
15ABalletwithReality
Looking at the photos a few weeks later,
this sheye shot was the best composition,
but there were a number of problems, and I
couldn’t go back to reshoot the stairwell
This capture is underexposed,
but that’s something that is
easy to deal with
Next Steps: What to do about the exposure,
Ed’s feet, and my tripod legs
ConfrontedwithachallengelikethisCubanstairwell,
it’simportanttobecarefulabouttheorderinwhich
oneproceeds.(Formoreaboutworkow,seepage10.)
Therstthingtodoistogetthepost-processedexpo-
sureright.Thismeansusingoneofseveraltechniques
togetlights,darks,andcolorrightintheimage.There
areanumberofgoodwaystogoaboutthisstarting
withaRAWimage.Multi-RAWprocessingusingAdobe
CameraRAW(ACR)isperhapsthebest-knownandis
explainedindetailinPD1startingonpage30.
Thisexampleusesanalternativeprocesswithdiffer-
entvirtualcopiesinLightro0mtoadjustexposureand
thenexportsthevirtualcopiesintoPhotoshopasa
layereddocument(pages16–18).
Aftergettingthispartoftheprocessright,thenand
onlythen,canwebegintodealwiththeissueofEd’s
feet(nottomentionmytripodlegs).CloningoutEd’s
feetisshownstartingonpage32.
16 ThePhotoshopDarkroom2
raw rescue, part 1: the lightroom raw conversion
>> Multi-RAW processing using Lightroom
Pre-visualizing and making
a plan
Itisimportantanytimeyouare
processingaRAWletohavea
strategy.Inordertohaveastrategy,
youneedtopre-visualizewhere
youwantthephototoendup.The
purposeofthestrategyistoplan
howyougetfromthedefaultRAW
conversionoftheimagetowhereyou
wantittogo.
Thestrategyforthisimageistostart
withadarkbackgroundandlayersuc-
cessivelylighterversionsontopusing
masksforspecicareas.Thisisone
ofthemostcommonRAWconversion
strategies.
Othertypicalstrategiesaretostart
withaversionthatistoolightand
placedarkerlayersontop,orstart
withanaveragerenditionoftheRAW
captureandlayerlightanddarkareas
ontop.
Whichstrategyyouchoosedepends
upontheimageandhowyoupre-
visualizetheoutcome.Tondout
moreaboutcreatingaRAWconver-
sionstrategyplan,takealookatPD1,
page40.
This is the way the
RAW image opens by
default in Lightroom.
It is easy to see that
it is much too dark
Click here to open the image
in the Develop module
InLightroom,
chooseFile
► Import
PhotosfromDisktoopen
theRAWcaptureinLightroom.
ClickDeveloptoopenthe
imageintheDevelop
module.
1
17ABalletwithReality
SelectPhoto
►
Create
Virtual
Copytocreateacopyoftheimage.
Thiscopyappearsselectednexttothe
originalimageintheFilmstripatthe
bottomoftheLightroomwindow.
3
Virtual copy selected
on the Filmstrip
I also used the Saturation and Vibrancy
sliders to increase the overall color
saturation of the image
Startbylighteningthe
imageusingtheExposureslider.
Movetheslidertotheright.
Youwantto
takecarenotto“overexpose”anyareaofthe
image.Soonlymovethesliderfarenoughto
therightsothelightestareaoftheimageis
properlyrendered.Ifanyareaseemstoolight
orblownout,youhavegonetoofarfor
thisrststep.
2
18 ThePhotoshopDarkroom2
raw rescue, part 1: the lightroom raw conversion
Holddownthe
Shiftkeyandclickboth
versionsoftheimageinthe
Filmstriptoselectthem.
5
FromtheLightroomPhoto
menuchooseEditIn
►
Openas
LayersinPhotoshop
6a
Andthetwoversions
appearastwolayersin
Photoshop.Bydefault,bothlayers
arenamedusingthelename
fromLightroom.
6b
The two versions
appear as layers in the
Photoshop Layers palette
Withthevirtualcopy
selectedintheFilmstrip,use
theExposureslidertomakethe
copyfarlighterthantheoriginalversion.
Don’tworryaboutblow-outswiththis
copybecausewhenthetworenderings
arecombinedas
layersinPhotoshop,
thedarkestversionwillbeblended
intothelighterareas.
4
The virtual
copy is selected
in the Filmstrip
19ABalletwithReality
Renamethelayers
“Lighter”and“Darker.”
7
Multi-RAW processing:
Lightroom or ACR?
ThisprocessusingLightroom
couldhavebeendonewithAdobe
CameraRAW(ACR)andmulti-
RAWprocessing.Formoreabout
thisseePD1,pages30–62.The
choiceisyours,andtheunderlying
processingengineisthesame.
Yougettothesameplace.Either
way—LightroomorACR—you
areopeningmultipleversionsat
differentexposuresofthesame
imageandcombiningthemas
layersinPhotoshop.
SomefolkspreferLightroom,some
folkslikeACR.Ifyouareusing
Lightroomastheengineforyour
digitalworkowtokeeptrackof
yourimages,thenitreallymakes
sensetouseLightroomforthis
kindofconversion.Ifyoudon’t
alreadyuseLightroom,thenACR
maybethebetterchoice.
Next Step
CombinethelayersinPhotoshopbyaddinga
layermasktothe“Lighter”layertomaskoutany
blow-outsandpaintincontrast(pages22–24).
The two layers are stacked one
on top of the other in the Layers
palette. This means that at this
point you can only see the “Lighter”
layer since it is at the top of the
stack. On pages 22
–
25, you’ll use a
layer mask and painting to blend the
two layers, making the best parts of
each layer visible.
Now you’re in Photoshop
Harold sez
I’manindividualist
andIlovePhotoshop!
Ifyouhadapainter
outtherewhodid
onegreatpaintingaweek,you
wouldsaythisisareallyprolic
painter.
Peopleexpectmorevolumefrom
digitalphotographersanddigital
imagemakers.It’snotreasonable!
IshouldbereallyhappyifIcreate
onegreatimageaweek.I’mnot
avolumeoperation.I’mafter
quality,notquantity.Therefore,
usingPhotoshopbyitselfwithout
Lightroommakesmoresensetome
forthebulkofmyworkow(when
aclientneedsmetobatchalarge
numberofsimilarimagesfora
specicproject,IdouseLightroom).
Lightroomisagreatprogramand
Ireallyunderstandwhymany
photographersliketobasetheir
workowaroundit.
Highlightslayer—RAWcaptureat+3.0f-stop
exposureadjustment
Overalllayer—RAWcaptureat+1.5f-stop
exposureadjustment
Darklayer—RAWcaptureasshot(about2f-stops
underexposed)
MaskforOveralllayer
Layerspaletteshowingthe
layersandtheirmasks
MaskforHighlightslayer
Bringing a Flower to Life
IshotthisbeautifulAsiaticRanun-
culuswiththeowerinabudvase
wrappedwithablackvelvetcloth.
Previously,Imentionedtheimpor-
tanceofpre-visualizinghowyouwant
yourimagetocomeoutandhaving
apost-processingstrategy(page16).
Withthisower,IknewthatIwanted
ittoappearlikeajewelonacom-
pletelyblackbackgroundandthatI
wouldneedagoodpost-processing
strategytocreatemydesiredeffect.
SinceIwantedthebackgroundof
theimagetobeadeepblack,my
post-processingstrategywasto
startwithaverydarkversionforthe
backgroundwherethevelvetwas
veryblackandtheowerwasbarely
visible(bottom).Thisversionbecame
the“Dark”layeratthebottomofthe
layerstackintheLayerspalette.
Next,Iprocessedanoverallversion
thatwastheprimarybasisforhow
theowerwasrenderedinthenal
image(middle).Iaddedittothe
Layerpaletteabovethe“Dark”layer
asthe“Overall”layer.Then,Iadded
aHideAlllayermasktothe“Overall”
layerand“painted”intheower,
leavingtheblackvelvetbackground
fromthe“Dark”layerintact.
Someareasinthecenterofthe
owerstillneededmorepunch.
SoIpreparedalightversion(top)
andaddedittothetopofthelayer
stackintheLayerspaletteasthe
“Highlights”layer.Finally,Iaddeda
HideAlllayermasktothislayerand
selectively“painted”inafewbrighter
areas,mainlyontheedgesofthe
petals.
AnysingleversionfromtheRAWle
wouldnothavecapturedmyvision
ofthisgorgeousower.Butcombin-
ingthethreeversionsfromthesame
RAWle,createsthejewel-likeimage
Isawinmymind’seyewhenIcom-
posedthephotoinmyviewnder.
raw rescue, part 2: the photoshop layer experience
Understanding layer masks
Alayermaskisusedtocontrolwhich
partsofalayerarevisibleinthenal
image.Whenyouapplyalayermask
toalayer,blackareasinthemask
hidethelayer,whiteareasrevealthe
layer,andanythinginbetweenblack
andwhite—gray—ispartiallyrevealed.
Youcaneasilyrememberthisusing
therhyme“blackconcealsandwhite
reveals.”
WhenyouaddaHideAlllayermask
toalayer,thelayermaskstartsout
completelylledwithblack,making
thelayercompletelyinvisible.When
youaddaRevealAlllayermask,the
maskislledwithwhite,makingthe
entirelayervisible.
Whichkindoflayermaskyouchoose
toworkwithdependsonthesitua-
tion,howyouliketowork,andyour
overallstrategyfordealingwiththe
image.
Thereisahugerangeoftoolsyou
canuseinPhotoshoptoalteralayer
mask.ThetwoIusemostoftenare
theBrushandGradientTools.
>> Layers and masking in Photoshop
If you are new to layer masks,
there’s a detailed case study in
PD 1 starting on page 34
Now that the “Lighter” layer has
a Hide All layer mask attached to
it, the “Lighter” layer is invisible.
What you see in the Photoshop
window is the “Darker” layer
A black Hide All layer mask
appears on the “Lighter”
layer, completely hiding the
“Lighter” layer
Since the “Lighter” layer is
on top of the layer stack
in the Layers palette, only
that layer is visible in the
Photoshop window
Make
surethe“Lighter”
layerisselectedinthe
Layerspalette.
1
OntheLayermenu,choose
LayerMask
►
Hide
All
2
23ABalletwithReality
For more information about
Brush
Tool
settings and
presets,
see PD 1, pages 48
–
49
Here’s how
>> Painting on a layer mask
Getting rid of blow-outs and
adding contrast
Thepointofusingalayermaskfor
thisimageistoselectivelyremove
areasthataretoobrightandtoadd
contrasttoareasthatneedtoseem
darker.
Thisisaccomplishedbyaddingthe
“Lighter”layeroverthe“Darker”
layer.Thoseareasfromthe“Darker”
layerthatneedtocomethroughare
madevisiblebypaintingwithblack
onthelayermaskattachedtothe
“Lighter”layer.
Thepartsofthe“Lighter”layerthat
needtobeinthenalimageare
madevisiblebypaintingwithwhite
onthelayermask.
Selectthe
Brush
Toolfrom
the
Toolbox.
1
Clickthelayermaskon
the“Lighter”layertomake
sureit’sselected.
2
Makesurethe
foregroundcoloris
settowhite.
3
MostofthetimetheBrush
Tool’s
Opacity,Flow,andHardness
settings
shown
belowarethe
onesIstartwith.
Therearemany
morewaystosetuptheBrush
Tool,butthisis
generallyagoodplacetobegin.
Harold sez
Now to paint on
the layer mask
Ontheleft
sideofthePhotoshop
OptionsBar,clickheretoopen
theBrushPresetPicker.
4
SettheOpacityto30%
andtheFlowto50%.
SettheMasterDiameterto
400pxandtheHardnessto0%.
5
When painting on a layer mask,
I usually work with a very soft
brush (Hardness = 0%)
6
You can nd different brush shapes
and select one by clicking in here. Some
brushes
have harder or softer edges. I
usually use a soft, round brush
24 ThePhotoshopDarkroom2
raw rescue, part 2: the photoshop layer experience
Since the layer mask in the “Lighter”
layer is selected in the Layers palette, the
“paint” you are applying with the Brush
Tool is going on the layer mask not onto
the actual layer. As you paint, you will see
your painting strokes appear on the layer
mask thumbnail in the Layers palette
Here’s what the layer mask
looks like after painting on
it. The black areas hide the
“Lighter” layer and the white
areas reveal the “Lighter” layer
You can see what parts of the
“Lighter” layer are visible if you hide
the “Darker” layer by clicking the
eyeball next to the “Darker” layer in
the Layers palette
PaintwiththeBrush
Toolin
theimagewindowtomakespecic
areaslighterandaddcontrast
totheimage.
7
Next Step
Nowthatyouevenedoutthetoneofthe
imageusinglayersandmasking,it’stimetomake
selectiveareasevenlighterusingtheScreen
blendingmode(pages25–26).
The Brush Tool
at work