Data Analysis and Presentation Skills an intro for the life and med sciences j willis wiley pptx
Bạn đang xem bản rút gọn của tài liệu. Xem và tải ngay bản đầy đủ của tài liệu tại đây (4.69 MB, 196 trang )
Data Analysis and
Presentation Skills
Dat a Analysis and
Presentation Skills
An Introduction for the
Life and Medical Sciences
Jackie Willis
Coventr y Un iversity, UK
Copyright u 2004 JohnWiley & Sons Ltd,The Atrium, Southern Gate , Chichester,
West Sussex PO19 8SQ, England
Telephone (+44) 1243 779777
E-mail (for orders and customer service enquiries):
Visit our Home Page on www.wileyeurope.com or www.wiley.com
All Rights Reserved. No part of this publication may be reproduced, stored in a retrieval
system or transmitted in any form or by any means, electronic, mechanical, photocopying,
recording, scanning or otherwise, except under the terms of the Copyright, Designs and
Patents Act 1988 or under the terms of a licence issued by the Copyright Licensing Agency
Ltd, 90 Tottenham Court Road, London W1T 4LP, UK, without the permission in writing of
the Publisher. Requests to the Publisher should be ad dresse d to the Pe rmissions Departme n t,
JohnWiley & Sons Ltd,The Atrium, Southern Gate, Chichester,West Sussex PO19 8SQ,
England, or emailed to , or faxed to (+44) 1243 770571.
This publication is designed to provide accurate and authoritative information with regard to
the subject matter covered. It is sold on the understanding that the Publisher is not engaged in
rendering professional se rvices. If professional advice or other expert assistance is required,
the services of a comp e ten t professional should be soug ht.
Other Wiley Edi torial O⁄ces
JohnWiley & Sons Inc., 111 River Street, Hoboken, NJ 07030, USA
Jossey-Bass, 989 Market Street, San Francis co, CA 94103-1741, USA
Wiley-VCH Verlag GmbH, Boschstr. 12, D- 69469 Weinheim, Germany
JohnWiley & Sons Australia Ltd, 33 Park Road, Milton, Queensland 4064, Australia
JohnWiley & Sons (Asia) Pte Ltd, 2 Clementi Loop #02-01, Jin Xing Distripark, Singapore
12980 9
JohnWiley & Sons Canada Ltd, 22 Worces ter Road, Etobicoke, Ontario, Canada M9W1L1
Wiley also publishes its books in a variety of electronic formats. Some content that appears in
print may not be available in electronic books.
British Library Cataloguing in Publication Data
A catalogue record for this book is available from the British Library
ISBN 0 470 85273 9 hardback
0 470 85274 7 paperback
Ty p e s e t i n 1 0
1
Ù
2
/13
1
Ù
2
pt Sabon by DobbieTypesetting Ltd,Tavisto ck, Devon
Printed and bound in Great Britain byTJ Internat ional, Padstow, Cornwall
This book is printed on acid- free paper responsibly manufactured from sustainable forestry
in which at least two trees are plante d for each one used for pape r production.
To Malcolm, James, Jennifer and my parents
Contents
Preface xi
1 Work ing in the Windows Environment 1
1.1 Basic computing terms 1
1.2 Working in Windows 2
1. 3 General functions in Microsoft applicat ions 6
2 Researching and Planning S cienti¢c Investigations 11
2.1 Sources of i nformation 11
Going on-line 12
Search engines 15
Search gateways 18
Keeping a record of information from searches 18
Making e¡ective searches 19
Me ta search engines 20
Organization and institutional websites 20
Copyright and validity 20
Searching for scienti¢c publicati ons 21
Electronic mail 23
Dis cussion groups 27
Mailing lists 27
2.2 Experimenta l design 28
Planning an investigation 28
Establishing aims and objectives 29
Populations and sampling 29
Choosing methodology 32
3 Presenting Scienti¢c Data 35
3.1 An introduc tion to Microso ft Excel 35
Se tting up a worksheet 36
Entering data 36
Functions in Excel 38
Adding text to the worksheet 40
Managing lists of data 40
Producing g raphs and charts on the worksheet 44
Customizing worksheets 49
Producing tables in Excel 51
3.2 Presenting graphs and charts 51
Graphs and charts 52
Ed iting plots in Excel 58
Displaying values on charts and graphs 60
Error bars 60
Framing and gridlines 62
Setting the correct proportions for the chart 62
Exploring di¡erent types of bar charts 63
Pie charts 68
Line graphs 70
Combination plots 73
4 Preliminary Data Analysis 77
4.1 Descriptive statisti cs 77
Measures of location 77
Measures of variation 79
Descriptive statistics in E xcel 82
Coe⁄cient of variation 85
4.2 Frequency distributio ns 86
Using the Histogram function 91
4.3 Correlation and linear regression 92
Correlatio n 94
Linear regression 97
5 Statistical Analysis 107
5.1 Selecting a statistical test 107
Types of data 109
Inde pendent and paired samples 110
Characteristics of the sample population 111
5.2 Statistical tests for two samples 111
The Student t-test for indepen dent samples 116
Stude nt t-test for dependent (matched/paired) samples 121
Non-parametric tests for two samples 124
5.3 Analysi s o f variance 135
One-way analysis of variance 137
Least signi¢cant di¡erence (LSD) analysis 140
Two-way analysis of variance wi th replication 142
Two-way analysis of variance wi thout replication 146
5.4 The Chi-squared test 14 8
Compari ng categories in a sing le sample 149
Goodness of ¢t test ^ data from a genetics exp eriment 151
Compari ng two samples 154
viii CONTENTS
6 Presentational Skills 159
6.1 Preparing for seminars 159
Preparing information for the seminar 160
Presenting the seminar 161
6.2 Using Microsoft PowerPoint 162
Starting a new presentation in PowerPoint 162
Opening an existing presentation 163
Starting a new presentation using a template 163
The title slid e 16 3
Building the presentation 165
Notes Page View 166
Slide View 166
Inserting graphs and charts 167
Drawing shape s on slides 167
Drawing lines/arrows 168
Rotating an object 169
Adding animation e¡ects 169
Creating animation e¡ects 169
Transition e¡ects 170
Sorting slides 170
Continuous loops 171
Adding a slide 171
Ending a show 171
Spelling 172
Creating handouts 172
6.3 Poster presentations 172
Appendix 175
Further reading 175
Alt key codes for special symbols in Microsoft applications 176
Statistical tables 177
Critical values for the Student t-test 177
Critical values of R for the Wilcoxon signed rank test 178
Critical values for the Mann^Whitney U test 1 79
Index 181
ixCONTENTS
Preface
Science is a discipline th at involves the planning of experiments, collecti ng
data and evaluating the results. As an undergraduate, skills need to be devel-
oped in researching information, designing experiments then analysi ng and
presenting the data produced . This book provides an introduction to data
analysis and the techniques that may be used in pre senting information for
dissemination to the scienti¢c community. These are demonstrated by using
the standard packages available as part of Microsoft Professional/Microsoft
O⁄ce, Excel and PowerPoint, an Inte rnet browser and e-mail client software.
Using Excel you will learn how to perform calculations on spreadsheets,
present charts and graphs and perform statistical analyses. Applying
PowerPoin t you will be shown how to prepare information in th e form of a
poster or as slides for a seminar.
T he mere mention of statistics is u sually enough to provoke some disquiet
amongst most students, frequently because of its associat ion with mathe-
matics. It is unfortunate that many undergraduates are unable to integrate the
applications of statistics into their studies and feel at a loss to know what test
to use or how to interpret the results of analyses. The approach taken in this
book is to show how statistics may be applied and, by using the easily acces-
sible functions in Excel, perform statistical analyses and explain the results
that have been obtain ed. This is a tactic that has proved successful over the
past several years and, as graduates, students h ave commente d on how useful
they found the approach, subsequently feeling more con¢dent at moving on to
use the more dedicated statistical packages such as MiniTab or SPSS.
Data A nalysis and Presentation Skills by Jackie Willis.
& 2004 John Wiley & Sons, Ltd ISBN 0470852739 (cased) ISBN 0470852747 (paperback)
This bo ok does not intend to enter into any in-depth discussions ab out the
theoretical asp ects of statistics. There are many excellent textbooks already
available that deal with statistic al conce pts and provide full details of how tests
are applied to the medical and life sciences. It is hoped that anyone who works
through this book will then supplement their knowledge by consulting more
demanding texts to build up their understanding of this essential subject.
What is important is that stud ents lose their relu ctance to perform data
analysis by gaining con¢dence in how to use and apply the stand ard package s,
so widely available. This book takes a ve ry ‘hands on’ approach and each
section will take the reader throu gh several processes explai ning e ach step in
detail. Hints and tips are provided on presentation skills, use of statistics and
researching using the Internet. The ¢rst section works through the basics of
working in the Windows environment, the standard platform from which most
software packages are launched. The reader should therefore be able to
progress through the book whether they are already an experi enced user or a
complete novice who has had very little contact with computers before.
Complete support for the material contained in the book is to be found at
the Wiley website: www.wileyeurope.co m/go/WillisData. Here the reader will
be able to look at worked examples of problems, view PowerPoin t presenta-
tions and ¢nd lists of useful links to oth er sites. The website will be regularly
up dated so there should always b e somethi ng new to ¢ n d to reinforce the
mater ial in the book.
Acknowledgements
I would like to thank colleagues at Coven try University for their supp ort,
par ticularly Professor Phil Harris wi thout whose encourag ement this book
would certai nly never have been attempted in the ¢rst place. I am also grateful
for the steadfast support of my family and to my daug hter, Jennifer, for
performi ng the pains taking proofreading of the ¢nal manuscript. Final ly I
would like to thank you, the reader, for purchasing this book. I hope that you
will ¢nd it a useful aid to your studies and that it will play its part in devel-
oping a long and successful career in whatever branch of science you are
studying.
JackieWillis
xii PRE FACE
1
Wor king intheWindows Environment
Microsoft Windows is the standard operating system from
which all Microsoft applications are accessed. If you are
unfamiliar with this package then it is essential that you
work your way through this section before moving on to the
remainder of the book. If you are already familiar with how
Windows operates you may just want to read through this
section to make sure that you can perform all of the
functions described and then move on to Section 2.
1.1 Basic computing terms
Every computer system consi sts of a series of components, these are known as
the hardware. Typical ly a computer system contains a Central Processing Unit
(CPU) which includes the main mi crochip responsible for running the
compute r, housed in a tower system that also accommodates the hard drive.
The hard drive is a storage device that is used to store the programs that will
run the computer. Th ese programs are the instructions that enable the
compute r to p erform speci¢c tasks. Each type of ded icated program is known
as the computer software. The information that is exchanged between the
compute r an d its human user may be viewed on a mo nitor. A keyboard and a
mouse are used for the u ser to input information that the computer th en
processes using the software provided. Informatio n may be stored o n the hard
drive or on a £oppy disk or writable CD using an appropriate drive on the
Data A nalysis and Presentation Skills by Jackie Willis.
& 2004 John Wiley & Sons, Ltd ISBN 0470852739 (cased) ISBN 0470852747 (paperback)
computer. Information may be printed and is known as a hard copy. T his may
vary from written material to photographs and other images.
The majori ty of computer systems use an operating sys tem known as
Windows, provid ed by the Microsoft Corporation. This has become standard
software used as a platform from which other pro grams may be acces sed and
utilized. If you are using a computer on a university network then you are
probably using Windows NT. If you are runn ing your computer wi th the
software accessed from the hard drive then you may be using Windows 2000,
Windows XP or an even earlier version, depending on h ow old your system is.
Whatever the version, the way in which the software fu ncti ons is the same; it is
just the appearance of the information on the s creen or th e way ¢les are
acce ssed which tends to di¡er slightly.
1.2 Working in Windows
Al l of the work you do is contained within a rectangulararea of the screen known
as the window.The background on which the windows are placed is the desktop.
Each application that you work with through Windows (such as the word
processing package Word and the spreadsheet application Excel) are re presented
by small graphical symbols known as icons.Your actions in Windows are carried
out by using either the mouse or the keyboard, dependi ng on the task in hand.
Using the mouse
T he mouse is a mobile device that may be completely wireless or attached to
the bac k of the computer by a lead. The mouse usually has two large buttons
(left and right) and sometimes a middle wheel. Di¡erent functions may be
selected by clicking the left or right buttons, whereas the wheel is used as a
means to scroll up and down the screen quickly.
The most frequently used button on the mouse is the left button. This is
used to move a pointer ac ross the screen to select from menus containi ng
various options, or to display pull down menus containing more options. The
main actions of the mouse are to click and drag and this mainly applies to the
le ft mouse button. The actions of the mouse are summarized in Table 1.1.
The keyboard
T he computer keyboard is the same as you would ¢nd on a typewriter
(QWERTY) for the general layout of the le tters and numbers, but there are
2 1 WORKING IN THE WINDOWS ENV IRONMENT
some other important keys that may have special funct ions in an applicat ion.
The numeric keys are also repeated on the right-hand side of the keyboard and
are set out in blocks of three; these may be used when the NUM LOCK key is
on (press the NUM LOCK key on ce and a light should indicate that is it on.
Press again to switch the NUM LOCK o¡ ). Pres sing down the CAPS LOCK key
will result in all of the letters typed appearing in upper case. Pressing the ke y
again will turn the CAPS LOCK o¡.
T here is also a set of keys at the top of the keyboard labelled F1to F12. Th ese
are known as the function keys as some appli cations will perform speci¢c
operations when one of these are pressed. These keys will not be described for
any of the applicati ons you will be using as all the functions can be carried o ut
using the mouse.
The cursor
When using a program in Windows, the insertion point in a docum ent or
spreadsheet is shown by a £ashi ng black l ine known as the cursor.When using
the mouse a black line (
-
j
-
) or arrow may be moved across the screen to enable
the user to reposition the cursor; by clicking with the left mouse button the
cursor is moved to the point indicated.
T here are some other important keys that you need to become familiar
with. These are listed in Table 1.2.
3WORKING IN WINDOWS
Table 1.1 Actions for the left mous e button
Action Mechanism Uses
Click Push down and release the left-hand
mouse button
1. Selects an option from an on-screen
menu
2. Repositions the insertion point in a
docume n t
3. Selects an option on the screen such
as a program icon
Drag Hold down th e left-hand mouse
button whilst moving (dragging) the
mouse p ointer across the screen
1. Highlights characters/blocks of
text on the screen
2. Moves an object across the screen
Double click Click the left-han d mouse button
twice, rapidly
Selects and runs an application
Opening an application
When you ¢rst start Windows, the screen opens with all of the applications
(programs) appearing as icons.To enter the appl ication you simply double click
the left button on the mouse over the icon.The icon changes colour to indicate
that the application is load ing. Another way to open an application is by
clicking the Start button at the bottom left-hand side of the screen. A menu of
options opens. By goin g to Programs the list of applications appears from
which you can select the one that you want. Using either method, open
Microsoft Word.
Closing an application
To clos e and exit a window, click on the ‘6’ button at the top rig ht of the
application window. (N.B. there are usually two ‘
6’ bu ttons, one for the
4 1 WORKING IN THE WINDOWS ENV IRONMENT
Table 1.2 Important keys and their function
Key symbol Name Funct ion
- Enter
(or Return)
1. Enters a command or information. Returns the
insertion to the left-hand side of th e screen, one line
down in a word processing package or into the next
cell in a spreadsheet
Backspace Moves the cursor back by one character
j
!j
Tab Moves the cursor along to pre-set (or user-de¢ned)
positions (tab stops) on the screen
CAPS
LOCK
Capitals lock One press of the key will cause all letters to be typed in
upper case (switched on). Press again to switch o¡
" Shift 1. Causes letter characters to be typed in upper case
(when the Caps Lock is o¡ )
2. Produces symbols shown over number keys and other
characters
Alt Alternative Key used in conju nctio n with other character keys in an
application to bri ng about a speci¢c function
Ctrl Control As for the Alt key
"
!
#
Arrow keys These move the cursor up, down, left or right in a
document or spreadsheet or move the selection in a pull
down menu
speci¢c ¢le that yo u are working on, the other for the application).Try closin g
Microsoft Word. This operation is also acco mplished by clicking on File and
then choosing Exit from the drop down menu.
Minimiz ing
Sometimes you may want to put aside an appli cation with out having to close it
whilst you use a di¡erent prog ram. Op en Excel by double clicki n g on the icon.
The window may now be minimized without closing the application by
clicking on the ‘
-
’ button at the top right-hand corne r of the application.When
the application is minimize d you should see the d esktop once more. At the
bottom left (on the status bar) you will see a button labelled Excel-Book 1 (or
the name of the ¢le that you were working on). Clicking on the button re-
opens the program.
T he Restore button, in between the minimize and close bu ttons, will control
how much of the screen the window will take (it appears as two overlapping
squares). By clicking on this button you should see the win dow reduce in size
and the desktop appear behind. If you are working on two ¢les in two appli-
cations, making the window smaller in this way enables you to switch between
each application easily whilst being able to see what is happening in each
window at the same time.
Note the change in appearance of the Restore button. As the window
reduces, only one square is seen on the button. Click on the same button to
maximize the window once more (note the change in appearance of the button
to its original form).
Re-sizing
Ap plication wi ndows can also be re-sized. Move your mouse pointer until it is
on on e of the borders of the window. The p oi n ter will change to a double
arrow that indicates the direction you can re-size the window. Drag the borde r
to the size that you require. A vertical and horizontal border can be re-sized at
the same time by ta king the mouse pointer to the corner of the window until a
diagonal double arrow appears. Now drag the borders to the required size.
Moving a window
To move a window to a di¡erent place on the desktop, click on theTitle bar and
drag it to a new position.Try moving the Excel application so that it appe ars in
the centre of the screen.
5WORKING IN WINDOWS
It is worthwhile spendi ng some time to familiarize yourself with the di¡erent
applications available from the desktop. Try the minimize, maximize and
restore features until you feel con¢dent in using them.
1.3 General functions in Microsoft
applications
Wi thin all of the Microsoft applic ations there are a common set of buttons
which may be used as short cuts to perform various operations. Before moving
on it is worthwhile going into Microsoft Word to practise using s ome of the se
easily accessible functions. From the desktop open Microsoft Word by either
using the Star t option or clicking the icon on the de sktop as outlined in section
1.2.
At the top of the screen you will see various op ti ons (File, Edit,View, etc.) as
seen in Figure 1.1. All of these opt ions have drop down menus for a variety of
features that can be used in Word or other Microsoft O⁄ce programs.To make
document processing easier and faster there are also toolbars (which can be
customized to your own preferences): the Standard toolbar and the Formatting
toolbar. A summary of the commands available from these toolbars is given
below.
Figure 1.1 Toolbars in Microsoft applications
Commands from the Standard toolba r
T he Standard toolbar has buttons that are common to all Microsoft O⁄ce
programs. Use the mouse to point at each button on the toolbar and a yellow
‘£ag’ will appear that describes the function of each tool.
Figure 1.2 New, Open and Save buttons
6 1 WORKING IN THE WINDOWS ENV IRONMENT
New ^ create a new docume nt (Word); new workbo ok (Excel); new presen-
tation (PowerP oint).
Open ^ open a ¢le saved on disk. A window wil l appear in which to search for
the document from its location on the drive, e.g. hard disk (C:/) or £oppy
disk (A:/).
Save ^ save the current document you are working on. You will be prompted
to select to which location you want to save the work and provide a suitable
¢lename. The su⁄ x to the ¢lename indicates the package in which the ¢le
has been created. For Word this is ‘.doc’, for Excel ‘.xls’ and ‘.ppt’ for
PowerPoin t.
Figure 1.3 Print, Print Preview, Spelling and Grammar buttons
Pri nt ^ prints your current document providing a printer is attached or you
have access to a printer through a net work.
Print Preview ^ Allows preview of on e pag e or several pages to see how the
text ¢ts into the page format . A more detailed description of th is feature
appears i n Section 3.
Spell i ng and Grammar ^ allows spellchecking of all or a selection of your
doc ument. The software will automatically search the document for
spelli ng mis takes as you are typing (an d will correct so me automatically).
Any that it cannot match with its resident dictionary will be shown in the
spellchecker window. You may then choose to change or ignore the
highlighted word. The resident dictionary will not contain specialized
words such as ‘eukaryotic’, so you will need to check these spellings for
yourself, together with any names that are not recognized. You should also
proofread your document to check for any typing mistakes th at cause a
word to be misused, e.g. form in place of from. It should become routi ne to
spellcheck and proofread every document before printing.
Figure 1.4 Cut, Copy, Paste and Format Painter buttons
Cut ^ items can be highlighted and removed from the document completely
or may simply be taken to a di¡ere nt place in the doc ument and Past e d into
a new position. This is a very useful feature for editing your work and
7GEN ERAL FUNCTIONS IN MICROSOFTAP PLICATIONS
shows the versatility of preparing draf ts using a word processing package as
opposed to pen and paper.The Cut command may also be used to cut drawn
objects, photos or clip art images that are created in a document.
Copy ^ text or objects can be highlighted and copied elsewhere in the
document. Using Copy will not delete the highlighted item as in the Cut
command. Items that are cut or copied are said to be held on a clipboard.
Items are the n pasted back into the document from the clipboard.
Paste ^ Paste is used to insert text or another obje ct at the required place
within the document or may be used to move items from on e document to
another (sometimes from one application to another).
Format Painter ^ this is a feature that allows you to copy the format from one
par t of a doc u me n t to another, or it may be applied from one do cu men t to
another. It is used by ¢rstly selecting the text or item whose format you
would like to be copied elsewhere in the document. Then click th e Format
Painter button and highlight the items whose format is to be changed.
Figure 1.5 UndoandRedobuttons
Undo and Redo ^ Undo will remove the last change that you made to a
document and Redo will change it back again. Applications allow multiple
undo’s and redo’s to many tasks that have been performed, but some
fun ctions cannot be undone. T h is can be a powerful e d iti n g featu re when
you are ¢nalizing a document.
Figure 1.6 Drawing button
Drawing ^ the drawing feature allows you to insert ima ges into your
document or to draw your own pictures and place them in your document.
Figure 1.7 Zoom control
Z oom Control ^ this zooms in an d out of your documen t (and is sometimes a
more helpful feature than Print Preview). Setting the control to 50% will
8 1 WORKING IN THE WINDOWS ENV IRONMENT
show a full A4 sheet on your screen. E diting may be performed whilst
zoome d in or ou t.
Figure 1.8 Help button
Help ^ help is available for all topic s. By clicking o n the Help button and
typing in keyword s associated with a function that you do not understand a
search is done and a list of items containing the keyword is shown. You are
then able to select the topic that is the most appropriate to your query.
The Formatting tool bar
This allows you to format your document as you are looking at it on screen as
opposed to selecting items from the Format menu.These fe atures appear in all
Microsoft O⁄ce applications. Formatting tools may be seen in Figure 1.9 and a
brief description of their functions is given below.
Figure 1.9 Formatting toolbar
Change of fo nt (typesetting); the default is usuallyTimes New Roman
Change of size of the text (point size); the default is usually 10 point
Emboldening text (B)
Changing standard text to italics (I)
Underlining (
U)
Aligning text ^ to the left
^ in the centre (useful for centring ti tles)
^totheright
Text justi¢cation (to even out spaces between words)
Line numbering
Insertion of bullet points
Increasing and decreasing indents to paragraphs
Introduction of text boxes to documents
Inse rtin g additional toolbars
Sometimes it is useful to insert additional toolbars other than the Standard
and Formatting toolbars that are shown by default as an application is opened.
9GEN ERAL FUNCTIONS IN MICROSOFTAP PLICATIONS
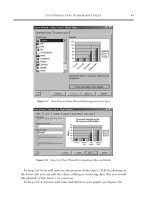
If we are likely to be incorporating pictures into a document then havi ng
acce ss to the Picture toolbar may be useful. To acco mplish this, click on View
and from the list of options obtained by scrolling down to Toolbars, select
Picture. The Picture toolbar should now be displayed above the Standard
toolbar.This allows you to insert pictures from ¢le or the web and then format
them.
T his introductory section has outlined the features of the Windows environ-
ment .We will now move on to e mploy these functions as we learn how to us e
and apply programs in Mi crosof t O⁄ce.
10 1 WORKING IN THE WINDOWS ENVIRONMENT
2
Researching andPlanning Scienti¢c
Investigations
The very nature of science is to pose questions and seek
answers. In order to widen the boundaries of our knowledge
we have to design experiments that will produce the
answers we are looking for. The planning stage is crucial to
the success of the investigation. Without carefully con sid-
ering what information is available to us before we begin,
time and resources can be wasted or the experiments we
design will be flawed. In this section we will look at ways in
which information can be accessed and evaluated using
Internet resources and then consider some of the issues in
experimental design.
2.1 Sources of information
If we are going to plan a scienti ¢c investigation, before considering what
laboratory work or trials to perform, we need to thoroughly research the
background information to our studies. This involves consulting information
from a variety of sources including books, the media and scienti¢c papers to
¢nd out what the curren t thinking is in our ¢eld of interest. One of the most
frequently used resources to access information, other than libraries, is the
Internet. It allows ready access to a vast range of sources including company
Data A nalysis and Presentation Skills by Jackie Willis.
& 2004 John Wiley & Sons, Ltd ISBN 0470852739 (cased) ISBN 0470852747 (paperback)
sites, library catalogues, newspaper, magazine and journal sites, scienti¢c
databases and academic institutions. Lear ning how to use this resource
properly is equally as important as learning any laboratory technique or other
technical skill. This section will demonstrate how to use th e Internet as a
research tool and as a guide to electronic com munication.
The Internet works through a highly complex system of networks to which a
single computer may have access by a set-up as simple as a modem linked to a
phone line. The Internet, or World Wide Web (www), is searched by means of
a browser. This is software that will allow various sites on the network to be
visited by supplying a speci¢c address for a website.This address, known as the
URL (Uniform Resource Locator) is used to access each page of information
on the web. The most commonly used browsers for Internet access are
Netscape Navigator an d Internet Explore r, each functioning in exactly the
same way.
Initially the Inte rnet was d eveloped by academic communities to provide
information to students to support their learning and to promote research.The
Internet has now become far more commercialized as many companies and
businesses have their own websi tes to advertise their products an d service s, as
do non-pro¢t organizat ions, sch ools, colleges and universities and even
individuals, worldwide. Information is available as straightforward text, but
web pages can also provide graphics, sound, video clips and interactive
components. Web pages will also usually contain links (hyperlinks) to other
sites around the world, hence the name World Wide Web. In using the Inte rnet
as a source of information i t must be remembered that it is not catalogued as
we would expect of a standard library and is completely unregulated for
quality.Web resources should there fore be accessed careful ly and assessed for
their validity and usefulness.
Going on-line
T he Internet is connecte d through a computer and a networked system or
phone line by means of an Internet Service Provider (IS P). The IS P usually
requires a sub scription for this service and many o¡er a free or reduced fee for
a limited trial period. You will n eed to us e an ISP if you are linking to the
Internet privately and most service providers supply the browser software for
you to install and then register with them.When choosin g an IS P you should
consider the quality of the service that they o¡er (i.e. reliable and quick access
when logging on, uninterrupted service) and n ot just think about the
subscription cost alone.
12 2 RESEARCHING AND PLA NNING SCIENTIFIC INVESTIGATIONS