Configuring Windows 7 (Training Kit) - Part 6 doc
Bạn đang xem bản rút gọn của tài liệu. Xem và tải ngay bản đầy đủ của tài liệu tại đây (223.88 KB, 10 trang )
Lesson 1: Installing Windows 7 CHAPTER 1 23
n
Windows 7 can be installed from a DVD-ROM, a USB storage device, a network share,
or a WDS server. The DVD-ROM and USB storage devices should be used with a small
number of computers. WDS with a large number of computers, and a network share in
environments that do not support WDS.
n
Windows 7 can be configured to dual-boot with Windows XP, Windows Vista, and
Windows 7. You can only configure Windows 7 to boot from VHD if the computer has
a Windows 7 or Windows Server 2008 R2 boot environment.
Lesson Review
You can use the following questions to test your knowledge of the information in Lesson 1,
“Installing Windows 7.” The questions are also available on the companion DVD if you prefer
to review them in electronic form.
note ANSWERS
Answers to these questions and explanations of why each answer choice is correct or
incorrect are located in the “Answers” section at the end of the book.
1. Which utility can you use to prepare a USB storage device so that you can boot from it
to install Windows 7 on a laptop computer that does not have a DVD-ROM drive?
a. LoadState.exe
B. ScanState.exe
c. Diskpart
D. Bcdedit
2. You want to deploy a new computer for software compatibility testing. This computer
needs to be able to boot into the Windows 7, Windows XP, and Windows Vista
operating systems. In which order should you install the operating systems to meet this
objective without having to edit boot entries using Bcdedit?
a. Windows 7, Windows XP, and then Windows Vista
B. Windows Vista, Windows 7, and then Windows XP
c. Windows XP, Windows 7, and then Windows Vista
D. Windows XP, Windows Vista, and then Windows 7
3. Which of the following versions and editions of Windows 7 can you install to take
advantage of the hardware resources on a computer that has 16 GB of RAM? (Choose
all that apply.)
a. Windows 7 Ultimate x86
B. Windows 7 Professional x64
c. Windows 7 Enterprise x86
D. Windows 7 Home Premium x64
24 CHAPTER 1 Install, Migrate, or Upgrade to Windows 7
4. You want to use WDS to perform a network installation of Windows 7. Which of the
following hardware devices must the computer have, assuming that you are not
booting the computer from a WDS discover image?
a. A DVD-ROM drive
B. A PXE-compliant network adapter
c. A USB 2.0 slot
D. An HDMI port
5. What is the minimum number of volumes that a computer running Windows XP should
have if you want to support dual-booting with Windows 7?
a. 1
B. 2
c. 3
D. 4
Lesson 2: Upgrading to Windows 7 CHAPTER 1 25
Lesson 2: Upgrading to Windows 7
Although most large organizations use system images to allow rapid deployment of an
operating system, settings, and applications to new computers, most smaller organizations
have a more haphazard approach to the management of desktop computers. Applications
are often purchased and installed on an as-needed basis, and in many organizations, no two
computers have exactly the same set of applications installed. This can make rolling out a new
operating system challenging. If you perform clean installations for people, you need to make
sure that you are able to install the unique set of applications that they had on their original
computers. A large benefit of upgrading from one operating system to the next is that all
user data and applications that were present on the previous operating system are present
on the upgraded operating system. In this lesson, you learn about the conditions under which
you an upgrade to Windows 7 while retaining all the applications and data that existed on the
computer prior to the upgrade.
After this lesson, you will be able to:
n
Upgrade to Windows 7 from Windows Vista.
n
Migrate to Windows 7 from Windows XP.
n
Upgrade from one edition of Windows 7 to another edition of Windows 7.
Estimated lesson time: 70 minutes
Upgrading from Windows 7 Editions
Sometimes it is necessary to upgrade from one edition of Windows 7 to another. For
example, suppose that a small business has purchased several laptop computers that came
with Windows 7 Home Basic installed, but they want to use the BitLocker feature and join
the computers to the domain. Rather than just wiping the computers and installing another
edition of Windows 7, it is possible to upgrade those computers to an edition of Windows 7
that supports the features the small business wants.
There are several advantages to performing an edition upgrade of Windows 7 rather than
performing a clean install with another edition. The first advantage is that performing an
intra-edition upgrade is cheaper than purchasing a brand-new operating system license. For
example, upgrading to Windows 7 Ultimate from Windows 7 Home Basic is cheaper than
purchasing a new Windows 7 Ultimate license. The second advantage is that you retain all
applications and data that were already present on the existing computer.
As you learned in Lesson 1, each Windows 7 SKU is a superset of the one before it.
Windows 7 Professional contains all the features present in Windows Home Premium as well
as some additional features; and Windows 7 Ultimate contains all the features in Windows 7
Professional, as well as its own additional features.
26 CHAPTER 1 Install, Migrate, or Upgrade to Windows 7
Windows 7 allows you to upgrade from one edition to another so long as that edition
has more features. For example, you can upgrade from Home Premium to Professional,
Enterprise, or Ultimate editions, but you cannot upgrade from Ultimate to Home Premium or
Professional editions.
Although it is possible to upgrade between editions of Windows 7, it is not possible to
upgrade between versions of Windows 7. You cannot upgrade an x86 version to an x64 version,
and you cannot upgrade an x64 version to an x86 version. For example, a developer in your
organization has a computer with 4 GB of RAM and the x86 version of Windows 7 Enterprise
installed. This particular developer does a lot of work testing application compatibility using
virtual machines and needs more RAM. The x86 version of Windows 7 Enterprise supports
a maximum of 4 GB of RAM. The x64 version of Windows 7 Enterprise supports up to 128 GB
of RAM. However, it is not possible to upgrade the x86 version of Windows 7 Enterprise to the
x64 version of Windows 7. It will be necessary to perform a wipe-and-load migration instead,
backing up the developer’s data and performing a clean installation of the x64 operating
system before importing it onto the upgraded computer. Alternatively, you could configure
the computer to dual-boot between an x86 and an x64 edition of Windows 7, something
made even simpler with the boot from VHD functionality that is included with the Enterprise
and Ultimate editions. It is still necessary to migrate data between the two operating systems
however. Migration is covered in more detail in Lesson 3, “Managing User Profiles.”
You can use either of the following two methods to perform an upgrade from one edition
of Windows 7 to another:
n
Upgrade using the installation media Upgrading using the media is similar to
upgrading from Windows Vista. You obtain the product key for the edition you want
to upgrade to and then start an upgrade using the Windows 7 installation media. This
method is most appropriate for organizations where a large number of intra-edition
upgrades is required.
n
Windows Anytime Upgrade With Windows Anytime Upgrade, shown in Figure 1-14,
you can purchase an upgrade to an application over the Internet and have the features
unlocked automatically. This upgrade method is more suitable for home users and
users in small businesses where a small number of intra-edition upgrades is required.
Upgrading from Windows Vista
You can upgrade computers running Windows Vista to Windows 7. When you upgrade
from Windows Vista to Windows 7, all documents, settings, applications, and user accounts
that existed on the computer running Windows Vista are available when the upgrade is
finished. The advantage to an upgrade is that it allows you to keep the current application
configuration. When you perform a migration, you need to reinstall the user’s applications
on the new computer. As mentioned previously, this can be problematic in organizations that
are not careful about keeping track of which specific set of applications are installed on each
user’s computer.
Lesson 2: Upgrading to Windows 7 CHAPTER 1 27
FIGURE 1-14 Windows Anytime Upgrade
Prior to attempting to perform the upgrade from Windows Vista to Windows 7, you should
run the Windows 7 Upgrade Advisor. The Windows 7 Upgrade Advisor is an application that
you can download from Microsoft’s Web site that will inform you if Windows 7 supports a
computer running the current hardware and software configuration of Windows Vista. Prior
to running the Windows 7 Upgrade Advisor, you should ensure that all hardware that you
want to use with Windows 7, such as printers, scanners, and cameras, are connected to the
computer. The Upgrade Advisor generates a report that informs you of which applications
and devices are known to have problems with Windows 7. A similar compatability report is
generated during the upgrade process, but the version created by the Windows 7 Upgrade
Advisor is more likely to be up to date.
More Info WINDOWS 7 UPGRADE ADVISOR
You can obtain the Windows 7 Upgrade Advisor from the following Web site:
/>note USE A SEARCH ENGINE
Another way to determine whether a particular hardware device or application is
compatible with Windows 7 is to use a search engine. It is likely that someone before you
has attempted to use the set of hardware devices and applications that you are interested
in with Windows 7. If they have had a problem with it, it is likely that they have posted
information about it in a support forum, a blog, or somewhere else on the World Wide Web.
28 CHAPTER 1 Install, Migrate, or Upgrade to Windows 7
Windows Vista and Windows 7 have the same basic hardware requirements. This means
that you should not have to upgrade the RAM or processor for your computer running
Windows Vista to support Windows 7, though you need at least 10 extra gigabytes on the
Windows Vista volume to perform the upgrade.
You should keep the following in mind prior to and during the upgrade from Windows
Vista to Windows 7:
n
Perform a full backup of the computer running Windows Vista prior to performing the
installation. That way, if things go wrong, you can do a full restore back to Windows Vista.
n
You must ensure that Windows Vista has Service Pack 1 or later installed before you
can upgrade it to Windows 7.
n
Ensure that you have the Windows 7 product key prior to the upgrade.
n
You cannot upgrade between processor architectures. An x86 version of Windows
Vista cannot be upgraded to an x64 version of Windows 7, and vice versa.
n
You can upgrade only to an equivalent or higher edition of Windows 7. You can
upgrade Windows Vista Home Premium to Windows 7 Home Premium, Professional,
Enterprise, or Ultimate, but not to Windows 7 Starter. Windows 7 Professional is
equivalent to Windows Vista Business.
n
Ensure that there is at least 10 GB of free disk space on the Windows Vista volume
prior to attempting the upgrade.
You will perform an upgrade from Windows Vista to Windows 7 in the practice exercise at
the end of this lesson.
Rolling Back a Failed Upgrade
A Windows 7 upgrade automatically rolls back to Windows Vista if there is a failure during
the installation process. You can also roll back to Windows Vista manually up until the point
where a successful logon occurs. This means that if there is a problem with a hardware driver
that prevents you from successfully logging on, you can go back to your existing Windows
Vista installation. After you have performed a successful logon to Windows 7, however, it
is not possible to return to Windows Vista without performing a clean installation of the
operating system or a restore from backup.
Quick Check
n
Under which conditions is it not possible to upgrade from Windows Vista to
Windows 7?
Quick Check Answer
n
You cannot upgrade from an x86 version of Windows Vista to an x64 version
of Windows 7, nor from an x64 version of Windows Vista to an x86 version of
Windows 7. It is also not possible to upgrade from certain editions of Windows
Vista to certain editions of Windows 7.
Lesson 2: Upgrading to Windows 7 CHAPTER 1 29
Migrating from Windows XP
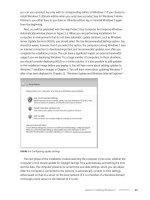
It is not possible to upgrade directly from Windows XP to Windows 7. If you attempt an
upgrade, you receive the message shown in Figure 1-15. Organizations that want to move
users from computers running Windows XP to Windows 7 need to consider migration.
FIGURE 1-15 No upgrade from Windows XP to Windows 7
There are two basic migration scenarios for migrating user profile data: the side-by-side
migration and the wipe-and-load migration. The version that you choose depends largely
on the computer hardware of the source computer. If the source computer has sufficient
hardware to support Windows 7, and you choose not to configure the computer to dual-boot,
you perform a wipe-and-load migration. If the source computer’s hardware is not sufficient to
support Windows 7, you need to perform a side-by-side migration. You also need to perform
a side-by-side migration if you are configuring the computers to dual-boot because that is the
only way to get application data from the Windows XP partition to the Windows 7 partition.
Side-by-Side Migrations
You use side-by-side migrations when you need to move user data from one computer to
another. Depending on the migration method you use, you may need to ensure that both
computers are turned on during the migration. This is necessary when you use methods that
directly transfer data from one computer to another, such as through a special cable or over
the network. The advantage of a side-by-side migration is that all data remains on the source
computer even after it is migrated to the destination computer. If something goes wrong with
the migration, the user can still go back to the old computer.
30 CHAPTER 1 Install, Migrate, or Upgrade to Windows 7
Wipe-and-Load Migrations
Wipe-and-load migrations involve exporting user data from a machine to an external location,
such as a USB storage device or network share, removing the existing operating system,
performing a clean installation of Windows 7, and then importing the user data from the
external location. Once you successfully complete the migration, you can delete the user data
from the external location.
You use wipe-and-load migrations when you need to install Windows 7, but you cannot
perform a direct upgrade because the computer has Windows XP installed or a version of
Windows Vista or Windows 7 that uses a different architecture. For example, you wanted to
change the operating system on a computer from Windows 7 Enterprise (x86) to Windows 7
Enterprise (x64). The disadvantage of a wipe-and-load migration is that the user cannot go
back to their original configuration easily if something goes wrong during the migration. You
will learn more about migrating data in Lesson 3.
Practice Upgrading to Windows 7
In this optional practice, you upgrade an existing computer running Windows Vista to
Windows 7. You should ensure that the computer has at least 10 GB of free space for the
upgrade to be successful. This upgrade can be performed on a computer running Windows
Vista through virtualization software.
exercise 1 Upgrading Windows Vista to Windows 7
Before starting this exercise, ensure that the version of Windows 7 that you will be upgrading
to shares the same architecture as the version of Windows Vista that you are upgrading.
For example, if you have an x86 version of Windows Vista, make sure that you have the
installation media for the x86 version of Windows 7. Perform the following steps:
1. Log on to the computer running Windows Vista with a user account that is a member
of the local Administrators group.
2. Access the Windows 7 installation source and double-click Setup.exe. When prompted
by User Account Control, click Allow. This loads the Install Windows page. Click
Install Now.
3. On the Get Important Updates For Installation page, click Do Not Get The Latest
Updates For Installation.
4. On the licensing page, review the Windows 7 operating system license and then select
the I Accept The License Terms check box. Click Next.
5. On the Which Type Of Installation Do You Want? page, click Upgrade. The installation
routine performs a compatibility check and then begins upgrading Windows.
Depending on the speed of the computer you are upgrading, this step may take time.
The computer reboots several times during this process.
Lesson 2: Upgrading to Windows 7 CHAPTER 1 31
note
It is possible to roll back the upgrade when the computer restarts by selecting the Roll
Back Upgrade option from the boot menu. Do not do this unless you want to restart the
upgrade.
6. On the Type Your Product Key For Activation page, enter the Windows 7 product key
as shown in Figure 1-16, clear the Automatically Activate Windows When I’m Online
check box, and click Next.
FIGURE 1-16 Enter the product key.
7. On the Help Protect Your Computer And Improve Windows Automatically page, click
Use Recommended Settings.
8. On the Review Your Time And Date Settings page, ensure that the time zone setting
matches your locale and that the clock setting is accurate and then click Next.
9. On the Select Your Computer’s Current Location page, click Home Network.
10. Log on to the upgraded computer running Windows 7 using the credentials that you
used to log on to the computer running Windows Vista at the start of this exercise.
11. Turn off the upgraded computer running Windows 7.
32 CHAPTER 1 Install, Migrate, or Upgrade to Windows 7
Lesson Summary
n
You can upgrade Windows Vista to Windows 7 only when the version of Windows 7
you are upgrading to shares the same architecture (x86 or x64) and is an equivalent or
higher edition.
n
You should run the Windows 7 Upgrade Advisor prior to attempting an upgrade to
ensure that hardware and software installed on the computer running Windows Vista
is compatible with Windows 7.
n
You can upgrade from an edition of Windows 7 with fewer features to an edition with
more features, but not from an edition that has more features to one that has fewer
features.
n
It is not possible to upgrade from Windows XP to Windows 7 at all.
n
Side-by-side migrations involve moving data from one computer to another or from
one partition to another in dual-boot scenarios.
n
Wipe-and-load migrations involve moving user data off a computer, removing the
existing operating system installation, replacing it with a new Windows 7 installation,
and then importing the original user data.
Lesson Review
You can use the following questions to test your knowledge of the information in Lesson 2,
“Upgrading to Windows 7.” The questions are also available on the companion DVD if you
prefer to review them in electronic form.
note ANSWERS
Answers to these questions and explanations of why each answer choice is correct or
incorrect are located in the “Answers” section at the end of the book.
1. To which of the following versions and editions of Windows 7 can you directly upgrade
a computer running Windows Vista Enterprise (x86)?
a. Windows 7 Home Professional (x86).
B. Windows 7 Ultimate (x86)
c. Windows 7 Ultimate (x64)
D. Windows 7 Enterprise (x64)
2. In which of the following scenarios must you perform a migration rather than an
upgrade? (Choose all that apply.)
a. Windows XP Professional (x64) to Windows 7 Professional (x64)
B. Windows Vista Business (x86) to Windows 7 Professional (x64)
c. Windows Vista Enterprise (x64) to Windows 7 Enterprise (x64)
D. Windows Vista Home Premium (x64) to Windows 7 Home Premium (x86)


