Configuring Windows 7 (Training Kit) - Part 80 docx
Bạn đang xem bản rút gọn của tài liệu. Xem và tải ngay bản đầy đủ của tài liệu tại đây (304.73 KB, 10 trang )
Lesson 3: Recovering Files and Folders CHAPTER 14 763
To restore a file or folder from backup, click Restore My Files in the Backup And Restore
console. By default, files and folders are restored from the latest backup. If you want to use
an earlier backup, click Choose A Different Date, select the date and time from the list you are
presented with, and click OK.
On the first page of the Restore Files Wizard, you have the option of clicking Search and
specifying all or part of a file or folder name, clicking Browse For Files and selecting a file, or
clicking Browse For Folders and selecting a folder. You select a file or folder and click Add
File or Add Folder as appropriate. Figure 14-19 shows a Word file called Backup and Restore
selected for restoration.
FIGURE 14-19 Selecting a file to restore
When you have selected the files or folders that you want to restore, click Next on
the Restore Files Wizard. You then have the option of restoring to the original location
or specifying a different location to perform a dummy restore. You can either type in the
dummy restore location or browse to it. Your dummy restore location can be on an internal
or external hard disk, a USB flash memory device, an optical drive, a VHD, or (in Windows 7
Ultimate, Enterprise, and Professional editions only) a network share.
When you have specified where you want to restore your files or folders (or accepted the
default), click Restore. If a file or folder with the same name already exists at that location,
you are given the options of Copy And Replace; Don’t Copy; and Copy, But Keep Both Files
(as with any normal file-copying operation). If you want, you can select the Do This For All
Conflicts check box. You then select the action that you want Windows 7 to take. If you want,
you can review the stored files. Finally, click Finish.
7 6 4 CHAPTER 14 Recovery and Backup
Shadow Copies
Shadow copies are automatically saved as part of a restore point. If system protection is
enabled, Windows 7 automatically creates shadow copies of files that have been modified
since the last restore point was created. By default, new restore points are created every seven
days or whenever a significant system change (such as a driver or application installation)
occurs.
You can access previous versions of a file or folder by right-clicking the file or folder in
Windows Explorer and clicking Restore Previous Versions. As shown in Figure 14-20, you then
see a list of available previous versions of the file or folder. The list includes both backed-up
files and shadow copies if both types are available.
FIGURE 14-20 Selecting Restore Previous Versions
If you want to restore a previous version of a file or folder, right-click the file or folder
and click Restore Previous Versions. Select the item that you want to restore and then click
Restore, as shown in Figure 14-21. You need to take care to select the previous version
that you want to restore because that file or folder will replace the current version on the
computer and the replacement cannot be undone. If the Restore option is unavailable, you
cannot restore a previous version of the file or folder (possibly because the file structure
has been changed). You might, however, be able to open the previous version or save it to
a different location.
Lesson 3: Recovering Files and Folders CHAPTER 14 765
FIGURE 14-21 Selecting a previous version to restore
You can use the Previous Versions tab of the Backup And Restore Properties dialog box
to recover previous versions of files directly from restore points on your hard disk or from
a backup. If you need to restore a backup copy, you carry out the same procedure. In this
case, when you click Restore, Windows 7 opens the Restore Files Wizard.
If you cannot find shadow copies of some files, system protection might not be turned on
for that hard disk or the file might be an offline file. Offline files are copies of files that are
stored on shared network folders. Shadow copies are not available for offline files. Shadow
copies are unavailable for files and folders that are required for Windows 7 to work. For
example, there is no shadow copy of the system folder (the folder that the operating system is
installed in) or its contents.
Recovering Renamed and Deleted Files
You can restore a renamed file or folder from a shadow copy, but you need to know the
location that the file or folder was saved to. You do this in the practice in this lesson.
You cannot directly recover a deleted file that has been removed from the Recycle Bin.
However, you can recover a previous version of the folder that the file was in. Take care,
because recovering the folder overwrites other files in the folder with their previous versions.
The procedure to recover an accidentally deleted file that has been removed from the Recycle
Bin is as follows:
1. Identify the folder that contained the deleted file.
2. Create a new folder and copy the contents of the folder you identified into the new
folder.
7 6 6 CHAPTER 14 Recovery and Backup
3. Replace the folder you identified with its most recent previous version.
4. Copy the contents of the new folder back into the previous version folder. Permit any
old versions of files to be overwritten by the newer versions in the new folder. The file
that was deleted will be in the previous version folder but will not be affected by the
copy operation because that file will not be in the new folder.
5. Finally, you can delete the new folder.
Recovering Several Previous Versions of the Same File
If you recover a previous version of a file or folder (either created when a restore point was
created or from backup) to its original location, it overwrites the existing file or folder. If you
then restore another previous version of the same file or folder to its original location, it in
turn overwrites the version you created earlier.
Sometimes you want to recover and retain several versions of the same file for historical
reasons or in the course of an audit or an investigation. In this case, you would use the Copy
function on the Previous Version tab of the Backup And Restore Properties dialog box shown
previously in Figure 14-21.
For example, suppose that you want to restore several previous versions of a file going
back the last four weeks. Your first step should be to create a new folder to hold these files.
You right-click the current file, click Restore Previous Versions, select the previous version that
you want to recover, and click Copy to copy it to the new folder (not to the folder that holds
the current version). You then rename the file you have recovered, typically by appending
a month and day (such as Backup_and_restore_7_12.docx). You do this for all the files in which
you are interested, renaming each in turn. The renaming is necessary because all the previous
versions of the same file have the same name by default, and you do not want any file to be
overwritten.
The Volume Shadow Copy Service
VSS manages and implements shadow copies, which are used for backup and to create
previous versions when a restore point is generated, and manages volume snapshots.
When you initiate a file and folder backup from the Backup And Restore console, the VSS
creates a snapshot of the volume that contains the files and folders to be backed up, and the
snapshots are backed up rather than the files themselves. This speeds up the backup process
and enables you to back up files on disk even when the file is open and you are working on
it. Note that the backup process does not back up the changes you have made to an open
file since the last time you saved it. The shadow copy creates volumes that match the original
volumes at the shadow copy point of time.
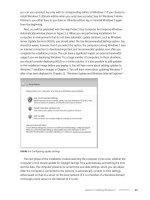
VSS is installed on computers running Windows 7. As shown in Figure 14-22, its startup
type is Manual. The service starts as needed. If the service does not start when required,
shadow copies are unavailable for backup and Windows Backup does not succeed. Nor can
you create restore points and previous versions. In this case, check the service and ensure that
it has not been disabled.
Lesson 3: Recovering Files and Folders CHAPTER 14 767
FIGURE 14-22 The Volume Shadow Copy Service
Restoring User Profiles
When you perform a file and folder backup, by default you back up all the files (the Documents
library, Pictures library, Favorites folder, and so on) associated with each of the users on the
computer. Information specific to a particular user is known as the user profile. In a small
network, user profiles are stored locally. In a domain-based enterprise network, you can store
user profiles on a server and download them to a client computer whenever a user logs on.
The second type of profile, known as a roaming profile, enables a user to log on at any client
computer in a domain; see that it is configured with his or her personal settings; and access his
or her libraries, Internet favorites, contacts, and so on. As shown in Figure 14-23, user profiles
can take up a lot of storage space.
If you need to reverse recent changes to a user profile, you can restore the latest backup of
the user’s profile by running the Restore Files Wizard from the Backup And Restore console.
Typically, if you are restoring a user profile, you restore folders. Restoring individual files is a
lengthy process.
If you click Restore My Files in the Backup And Restore console and then click Browse For
Folders in the Restore Files Wizard, you find a folder specific to each user on the computer in
the left pane of the Browse The Backup For Folders Or Drives dialog box. If you select one of
these folders, you obtain a list of folders similar to that shown in Figure 14-24. These folders
contain all the files and settings specific to the specified user.
7 6 8 CHAPTER 14 Recovery and Backup
FIGURE 14-23 A user profile taking up 2.7 GB storage space
FIGURE 14-24 A user profile backup
You can select each of the folders that you want to restore in turn and click Add Folder.
You need to return to the Browse The Backup For Folders Or Drives page for each folder you
want to restore. When you have finished specifying folders, your Restore Files Wizard page
should look similar to Figure 14-25.
Lesson 3: Recovering Files and Folders CHAPTER 14 769
FIGURE 14-25 Specifying the user profile folders to restore
note SPECIFYING FILES
If you want to specify a file in addition to (or instead of) the folders you are restoring, click
Browse For Files rather than Browse For Folders. You can specify both files and folders in
a restore.
You then click Next and proceed as you would with a normal file and folder restore. If you
are restoring corrupted user profile information, you would typically restore to the original
location.
Configuring System Protection and Disk Usage
You accessed the System Protection tab of the System Properties dialog box in a practice
exercise in Lesson 2, when you were creating a restore point. In the exercise, you clicked
Configure and enabled system protection for a disk drive. A drive needs to have system
protection enabled if it is to be included in a restore point, which means that system
protection is also required for previous copies to be generated on that drive. You will not find
previous copies of files and folders on drives that do not have system protection enabled.
7 7 0 CHAPTER 14 Recovery and Backup
It is appropriate at this point to examine the System Protection dialog box more closely.
This dialog box for the C: drive is shown in Figure 14-26. This figure is similar to (but not the
same as) Figure 14-16 in Lesson 2.
FIGURE 14-26 System protection settings
The Restore Settings section of the System Protection dialog box presents you with the
following options:
n
Restore System Settings And Previous Versions Of Files You typically use this setting
on disk drives that hold a system volume, for which this is the default setting. It enables
the creation of restore points that hold system information to be used during
a system restore. If user files are held on the same drive, previous versions of the files
are generated when a restore point is created. Typically, Disk Space Usage is set to
a relatively low value (for example, 10 percent) because the disk drive is mainly used to
hold system files that are seldom updated.
n
Only Restore Previous Versions Of Files You typically use this setting on disk drives
that you use for file storage and that do not contain system files, such as a second
internal hard disk. If you create a restore point that includes a drive with this level of
system protection, previous versions of the files are generated. Typically, you would
allocate a high percentage of Disk Space Usage (for example, 40 percent) for system
protection so a large number of previous versions can be held.
n
Turn Off System Protection You typically use this setting on disk drives that are
backup destinations. You do not need to create previous versions of backup files
because backup file sets already perform this function. Typically, you would configure
this setting on an external USB disk used as a backup medium.
Lesson 3: Recovering Files and Folders CHAPTER 14 771
eXaM tIP
Remember you can configure system protection only on hard disks (or mounted VHDs)
that are formatted using the NTFS file system. You cannot configure system protection
or create previous versions on USB flash drives, optical drives, or hard disks (internal
or external) that are formatted using the FAT file system.
Configuring Disk Space Usage is a matter of individual judgment, although the general
guidelines are that it should be set to a low volume for system disks and a high value for data
disks. When the disk space allocated to system protection is used up, the oldest previous
versions are overwritten. If you are in an environment where users want to access versions
of files that are several months old, you might need to allocate a lot of disk space for that
purpose. If users seldom need to access previous versions that are more than a week old, you
can allocate a lower percentage.
Similarly, you need to think carefully about which of the Restore Settings options you
choose. Although you typically select Restore System Settings And Previous Versions Of Files
for a drive that holds system files, you might have a computer with a single hard disk and
your priority might be to store as many previous versions of files and folders as possible. In
this case, you could decide to select Only Restore Previous Versions Of Files and accept the
fact that a system restore might not solve the problem of a misconfigured system setting or
roll back a problem driver.
note SYSTEM PROTECTION SETTINGS ARE NOT RETROSPECTIVE
If previous versions of files and folders have been deleted because of the Disk Space Usage
limitation, they will not be restored by increasing the Disk Space Usage percentage setting.
If you want to access the previous version of a file you created four weeks ago but you
find previous versions going back only two weeks, you cannot retrieve the older previous
versions by changing the Disk Space Usage setting. You need to restore the file from the
backup set created four weeks ago (or as soon after that time as possible). Backed-up files
can also be considered to be previous versions.
Practice Recovering a File You Have Renamed
In this practice, you recover the previous version of a file you have renamed.
exercise Recovering a Renamed File
In this exercise, you select a file that has a number of previous versions and rename it. You
then discover that you need to recover an older version of the file. You recover the previous
version with its original file name. You do not need to elevate privileges to complete this
exercise. However, the procedure, as written, asks you to log in by using an administrator-level
account. Unless you have sophisticated users, recovering a renamed file would typically be an
administrative function.
7 7 2 CHAPTER 14 Recovery and Backup
The procedure asks you to find a file (such as a Word document or an Excel spreadsheet)
that has a number of previous versions. Hopefully, several such files exist on your computer.
If not, you need to create a file, perform a file and folder backup, edit the file, and create
a restore point. The procedures for performing backups and manually creating a restore point
are described earlier in this chapter. The figures in the exercise show a file called Lesson 2.docx
being used for this purpose. You can choose a suitable file on your Canberra computer. To
recover a previous copy of a renamed file, perform the following steps:
1. If necessary, log on to the Canberra computer using the Kim_Akers account
2. Open Windows Explorer by double-clicking Computer on the Start menu.
3. Navigate to a folder in which you store personal files.
4. Open the folder and right-click a file that you amend regularly. Select Restore Previous
Versions.
5. Check that previous copies of the file exist, as shown in Figure 14-27.
FIGURE 14-27 Previous versions of a selected file
6. Close the file Properties dialog box.
7. Right-click the file and rename it.
8. Right-click the renamed file. As shown in Figure 14-28, the Restore Previous Versions
option is no longer available.
9. To restore a previous version of the file, right-click the folder in which it is saved in
the left-hand Windows Explorer pane, as shown in Figure 14-29, and choose Restore
Previous Versions.

