Configuring Windows 7 (Training Kit) - Part 13 pptx
Bạn đang xem bản rút gọn của tài liệu. Xem và tải ngay bản đầy đủ của tài liệu tại đây (413.61 KB, 10 trang )
Lesson 2: Managing Virtual Hard Disk Files CHAPTER 2 93
Booting from VHD
The ability to boot from VHD (available in Windows 7 Ultimate and Enterprise editions only) is
one of the more significant new features introduced by Windows 7. You can boot the machine
as if it were running from the primary hard disk, and your operating system recognizes all
the hardware available in your system. This lets you run multiple operating systems on the
same computer without the performance issues sometimes encountered in virtual PCs.
You can create multiple VHDs with multiple operating systems installed on them.
Previously in this lesson, you saw how to create a new VHD and attach it using Disk
Management or the Diskpart utility. If you choose to install the Windows 7 operating system
from the installation DVD-ROM, you require the Install.wim file from that optical device. You
also need the ImageX utility (Imagex.exe). If you have installed the Windows AIK, as instructed
in Lesson 1, you will find this file at C:\Program Files\Windows AIK\Tools\\x86.
You can also copy a WIM system image that you created for your computer (as described
in Lesson 1) to a VHD on that computer. You do this in the practice later in this lesson.
Adding a Boot Entry for a VHD File
When you have created a VHD and installed a system image on it, you can use the BCDEdit
tool Bcdedit.exe to add a boot entry for the VHD file in your computer running Windows 7.
A step-by-step procedure to do this is given in the practice later in this lesson. The high-level
procedure is as follows:
Open the elevated command prompt with Administrator privileges and enter a command
similar to the following:
bcdedit /copy {current} /d "Your New VHD Description"
This returns the GUID of the loader object. You use this value to replace the variable
<guid> in the following commands:
bcdedit /set <guid> device vhd=[driveletter:]\<directory>\<vhd filename>
bcdedit /set <guid> osdevice vhd=[driveletter:]\<directory>\<vhd filename>
BCDEdit locates the VHD file and Bootmgr locates the partition containing the VHD File to
boot from. Finally, you enter the command:
bcdedit /set <guid> detecthal on
Detecthal is used to force Windows 7 to automatically detect the Hardware Abstraction
Layer (HAL). The following command tests if your boot entry is successfully created:
bcdedit /v
If you want to delete an existing VHD entry from the Boot menu, you use the following
command:
bcdedit /delete <guid> /cleanup
94 CHAPTER 2 Configuring System Images
This deletes the specified operating system entry from the store and removes the entry
from the display order.
When you restart your computer after successfully completing this procedure, you should
see an additional entry in the Boot menu along with the default Windows 7 operating system.
More Info BCDEdit
For more information about BCDEdit, go to />aspx, expand BCD Boot Options Reference, and click the links in the navigation pane.
eXaM tIP
You can use Bcdedit.exe to enable a VHD file as a boot option, but you cannot use the tool
to create VHD files.
Using the Windows Image to Virtual Hard Disk Tool
You can use the WIM2VHD command-line tool to create VHD images from any Windows 7
installation source or from an image in a custom WIM file. WIM2VHD creates VHDs that boot
directly to the Out-of-Box Experience (OOBE). You can also automate the OOBE configuration
by supplying your own Unattend.xml file.
You need a client computer running Windows 7 that has the Windows AIK installed, and
an operating system image in a WIM file. You also need to have created a native VHD on that
computer.
The WIM2VHD tool runs from the Cscript command. The syntax is as follows:
cscript wim2vhd.wsf. /wim:<wimPath> /sku:<sku> [/vhd:<vhdPath>] [/size:<vhdSizeInMb>]
[/disktype:<dynamic|fixed>] [/unattend:<unattendxmlPath>] [/qfe:<qfe1,.,qfen>]
[/hyperv:<true|false>] [/ref:<ref1,.,refn] [/dbg:<args>] [/passthru:<physicaldrive>])
WIM2VHD Parameters
Table 2-8 describes the parameters of the WIM2VHD tool.
TABLE 2-8 WIM2VHD Parameters
PARAMETER DESCRIPTION
/wim:<wimPath> This is the path of the WIM file you use when creating
the VHD.
/sku:<skuName>|<skuIndex> The Stock-Keeping Unit (SKU) identifies the
operating system to use when creating the VHD
(for example, “HomePremium”). You can also specify
a number that you obtain by using ImageX to analyze
the relevant WIM file.
Lesson 2: Managing Virtual Hard Disk Files CHAPTER 2 95
PARAMETER DESCRIPTION
/vhd:<vhdPath> (optional) This defines the path and the name of the VHD to be
created. If a file with this name already exists, it will be
overwritten. If no VHD is specified, a VHD will be created
in the current folder.
/size:<vhdSizeInMb>
(optional)
For Fixed disks, this is the size in megabytes of the
VHD that will be created. For Dynamic disks, this is the
maximum size in megabytes to which the VHD can grow
if additional space is required. If you do not specify this
parameter, a default value of 40 GB is used.
/disktype:<dynamic|fixed>
(optional)
This specifies what kind of VHD should be created,
dynamic or fixed. A Fixed disk allocates all of the
necessary disk space for the VHD upon creation.
A Dynamic disk only allocates the space required by
files in the VHD at any given time and will grow as more
space is required. The default value is Dynamic.
/unattend:<unattendxmlpath>
(optional)
This specifies the path to an Unattend.xml file that is
used to automate the OOBE portion of Windows setup
the first time the VHD is booted.
/qfe:<qfe1,.,qfen> (optional) This is a comma-separated list of Quick Fix Engineering
(QFE) or hotfix patches to apply to the VHD after the
WIM is implemented.
/ref:<ref1,.,refn> (optional) This is a comma-separated list of WIM “pieces” (split files)
to apply to the VHD. A WIM “piece” is the result of a split
WIM, and typically has a .swm file extension. The first
piece of the split WIM should be specified with the /wim
switch. Subsequent pieces should be specified (in order)
with /ref.
/dbg:<protocol>,<port/
channel/target>[,<baudrate>].
(optional)
This configures debugging in the OS on the VHD.
You can use your own custom WIM files in this process. However, be careful. Although
Microsoft supports the underlying process, as documented in the Windows AIK, WIM2VHD is
not supported at this time.
You can copy files manually into the VHD, but there is no mechanism to do this with WIM2VHD.
WIM2VHD Examples
To create a Windows 7 Ultimate VHD with an automated setup answer file Unattend.xml,
open an elevated command prompt and enter:
cscript wim2vhd.wsf /win:x:\mysources\install.wim /sku: ultimate
/unattend:C:\answer_files\unattend.xml
96 CHAPTER 2 Configuring System Images
You need to adjust the location of the WIM file and the answer file to your own
specifications.
To apply the first image in a custom WIM in the folder C:\Mystuff to a VHD named
Mycustom.vhd when you have analyzed the WIM file with ImageX and know the SKU is
designated as 1 within the WIM, open an elevated command prompt and enter:
cscript wim2vhd.wsf /wim:C:\mystuff\custom.wim /sku:1 /VHD:C:\mycustom.vhd
More Info VIM2VHD
For more information about VIM2VHD, see
Using the Offline Virtual Machine Servicing
Tool to Update a VHD
The Offline Virtual Machine Servicing Tool 2.0.1 is a solution accelerator (as is MDT 2010).
In addition to the appropriate installation files, a solution accelerator provides automated tools
and additional guidance files. You can install the tool on a server running Windows Server 2008
or Windows Server 2003 SP2, where it works with Microsoft System Center Virtual Machine
Manager (SCVMM) 2007 or SCVMM 2008 to maintain offline virtual machines and VHDs.
If your server is on the same network as a client running Windows 7 Enterprise or Ultimate
edition, on which you have configured a bootable VHD, you can use the tool to update the
VHD content when the VHD is typically offline. If your computer running Windows 7 is not
normally booted from the VHD, the offline VHD does not receive operating system updates.
The tool provides a way to keep the VHD up to date so that booting from the VHD does not
introduce vulnerabilities into your computer.
The Offline Virtual Machine Servicing Tool can be configured to boot the client computer
from the VHD just long enough for the VHD to receive updates from either SCCM 2007 or
Windows Server Update Services (WSUS). As soon as the VHD’s operating system is up to
date, the tool reboots the client computer from its default boot disk.
The Offline Virtual Machine Servicing Tool solution accelerator includes the following
features:
n
Brief Overview
n
OfflineVMServicing_x64.msi installation file
n
OfflineVMServicing_x86.msi installation file
n
Offline Virtual Machine Servicing Tool Getting Started Guide
n
Offline_VM_Servicing_Tool_2.0_Release_Notes
n
Offline_Virtual_Machine_Servicing_Tool_Help
The tool uses a servicing job that you schedule using Windows Task Scheduler on the
server to manage the update operation. The servicing job boots the client computer from the
Lesson 2: Managing Virtual Hard Disk Files CHAPTER 2 97
VHD, triggers the appropriate software update cycle using SCCM or WSUS, and then reboots
the client computer from its default boot disk.
Installing the Offline Virtual Machine Servicing Tool
You cannot install the Offline Virtual Machine Servicing Tool until you have first installed
SCVMM (although you can download and study the associated documentation). A beta
version of SCVMM 2008 is currently available at />scvmm/downloadbeta.mspx. You can download SCVMM documentation from the same
source. Note that the Offline Virtual Machine Servicing Tool and SCVMM are server tools. You
cannot install them on a computer running Windows 7.
You can download the Offline Virtual Machine Servicing Tool installation files and
associated documentation directly from
details.aspx?FamilyID=8408ecf5-7afe-47ec-a697-eb433027df73&DisplayLang=en. However,
it is probably easier to access and
click the link at the end of the Web page. All the files are downloaded as a single compressed
file that you expand into a folder that you have created on the server for this purpose. It is
a good idea to read the release notes and the Getting Started Guide and become familiar
with them before running the appropriate installation file.
The SCVMM Administrative Console
SCVMM provides a management solution for the virtualized data center that helps enable
centralized management of IT infrastructure, increased server utilization, and dynamic
resource optimization across multiple virtualization platforms. It works with the Offline Virtual
Machine Servicing Tool to ensure virtual machines and VHDs are kept up to date. SCVMM
delivers the following features:
n
It manages virtual machines running on Windows Server 2008 Hyper-V and Microsoft
Hyper-V Server.
n
It provides virtualization support for virtual machines running on Virtual Server and
VMware ESX Server.
n
It offers end-to-end support for consolidating physical servers onto a virtual
infrastructure.
n
It provides performance and resource optimization (PRO) for dynamic management of
virtual infrastructure.
n
It implements placement of virtual workloads on the best-suited physical host servers.
n
It provides a complete library to manage all the building blocks of the virtual data
center centrally.
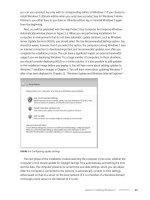
The SCVMM Administrator Console, shown in Figure 2-14, is built upon a Windows
PowerShell command-line interface. Any action in the Administrator Console can be
performed through the Windows PowerShell command line, and each wizard in the
98 CHAPTER 2 Configuring System Images
user interface shows the associated command-line actions. The Administrator Console
integrates with System Center Operations Manager 2007 to provide insight into the physical
environment as well as the virtual environment.
FIGURE 2-14 The SCVMM Administrator Console
Deploying to an Online VHD Using
Windows Deployment Services
WDS enables you to deploy Windows 7 Enterprise or Ultimate remotely to bootable VHDs on
client computers. Lesson 1 of this chapter briefly discussed WDS images. You can download
the WDS documentation (including a Getting Started Guide, Deployment Guide, and
WDSUTIL command-line syntax) at />lang=en&FamilyID=3cb929bc-af77-48d2-9b51-48268cd235fe. You can download a step-by-
step guide at />4F62-8586-B0A2096460EB&displaylang=en.
To use WDS to distribute Windows 7 images, you should install it on a server running
Windows Server 2008 or Windows Server 2008 R2. WDS is a server role and you can install
it by using the Initial Configuration Wizard, Server Manager, or the ServerManagerCmd
command-line utility.
More Info WDS INSTALLATION REQUIREMENTS
For more information about the requirements for installing and using WDS,
see /> Lesson 2: Managing Virtual Hard Disk Files CHAPTER 2 99
WDS reduces the complexity of deployments and the costs associated with manual
installation. It enables you to perform network-based installation of Windows operating
systems, including Windows 7, to destination computers, online virtual machines, and online
VHDs. WDS uses standard Windows Server 2008 setup technologies, including Windows PE,
WIM files, and image-based setup.
WDS provides the Windows Deployment Services MMC snap-in GUI tool and the WDSUTIL
command-line tool. The console enables you to perform almost all deployment tasks,
although you cannot use it to pre-stage client computers. You can, however, use it to set the
Auto-Add policy and approve or reject pending computers.
You can use the WDSUTIL command-line tool to perform all deployment tasks. WDSUTIL
also enables you to script common tasks and run the required commands from simple batch
files, because no WDSUTIL command requires an interactive user session.
More Info CONFIGURING YOUR DEPLOYMENT
For more information about configuring a deployment using WDS,
see />More Info WDS DEPLOYMENT SCENARIOS
For a description of scenarios in which you would use WDS, see />en-us/library/cc770667.aspx.
Quick Check
1. What management tools are provided by WDS?
2. Which of these tools can you use to pre-stage a client computer?
Quick Check Answers
1. The Windows Deployment Services MMC snap-in GUI tool and the WDSUTIL
command-line tool
2. The WDSUTIL command-line tool
Using WDS Images
WDS uses a split WIM image method in which file resources are shared across each image
group and the metadata of each image resides in a separate image file. The WDS image store
creates a split media set consisting of two files:
n
A minimal WIM file that contains only the definition of the image
n
A Res.rwm file that contains all the file resources for all images in the image group.
The data within Res.rwm is single-instanced and compressed.
1 0 0 CHAPTER 2 Configuring System Images
At this juncture, it is probably helpful to briefly restate the difference between an install
image and a boot image. Install images are the operating system images that you deploy
to the client computer on internal disks, bootable external disks, and bootable VHDs.
Boot images are the images that you boot a client computer into to perform an operating
system installation. Boot images contain Windows PE and the WDS client Setup.exe with its
supporting files for WDS. You can use the standard boot images that are included on the
Windows 7 or Windows Server 2008 R2 media without modification.
More Info WDS DOCUMENTATION
You can download WDS documentation (including a step-by-step guide) at
/>af77-48d2-9b51-48268cd235fe. You might need to supply your Microsoft Passport. This is
a Windows Server 2008 link because WDS is a server role and cannot be installed on a client
computer.
When you install the WDS server role on your deployment server, you also install
the WDSUTIL command-line tool. You can create boot images from the WIM file on an
appropriate operating system installation disk by using the Windows Deployment Services
MMC snap-in or WDSUTIL.
Creating a Capture Image
To use the Windows Deployment Services MMC snap-in to create a capture image, perform
the following procedure on your WDS server:
1. In the Windows Deployment Services MMC snap-in, expand the Boot Images node.
2. Right-click the image to use it as a capture image (typically the \Sources\Boot.wim file
from the installation media).
3. Click Create Capture Boot Image.
4. Type a name, description, and location where you want to save a local copy of the file.
You specify a location so that if there is a network issue when you deploy the capture
image, you have a local copy.
5. Follow the instructions in the wizard. When it completes, click Finish.
6. Right-click the boot image folder.
7. Click Add Boot Image.
8. Select the new capture image and then click Next.
9. Follow the instructions in the Image Capture Wizard.
To use WDSUTIL to create a capture image, perform the following procedure:
1. Open an elevated command prompt.
2. Enter WDSUTIL /New-CaptureImage /Image:<source boot image name>
/Architecture:{x86|ia64|x64} /DestinationImage /FilePath:<file path>, where
<file path> is the path and name for the capture image.
Lesson 2: Managing Virtual Hard Disk Files CHAPTER 2 101
Adding a Boot Image
To use the Windows Deployment Services MMC snap-in to add a boot image to the WDS
image store, perform the following procedure on your WDS server:
1. Right-click the Boot Images node and then click Add Boot Image.
2. Enter the path to the boot image or browse to the image file, and then click Next.
Typically, you use the standard boot image that is included on the Windows Server
operating system installation media without modification.
3. Enter an image name and description, and then click Next.
4. Review your choices, and then click Next.
To use WDSUTIL to add a boot image, perform the following procedure:
1. Open an elevated command prompt.
2. Enter WDSUTIL /Verbose /Progress /Add-Image /ImageFile:<path>
/ImageType:Boot, where <path> is a full path to the image file.
Creating a Discover Image
To use the Windows Deployment Services MMC snap-in to create a discover image, perform
the following procedure on your WDS server:
1. In the Windows Deployment Services MMC snap-in, expand the Boot Images node.
2. Right-click the image you want to use as a discover image. Typically, this is the Boot.
wim file from the \Sources directory of the operating system installation DVD.
3. Click Create Discover Boot Image.
4. Follow the instructions in the Image Capture Wizard. When it completes, click Finish.
To use WDSUTIL to create a discover image, perform the following procedure:
1. Open an elevated command prompt.
2. Enter WDSUTIL /New-DiscoverImage /Image:<name>
/Architecture:{x86|x64|ia64} /DestinationImage /FilePath:<path and name
to new file>. To specify which server the discover image connects to, append
/WDSServer:<server name or IP>.
Adding an Install Image
To use the Windows Deployment Services MMC snap-in to add an install image to the WDS
image store, perform the following procedure on your WDS server:
1. Right-click the image group in the MMC console and click Add Install Image.
2. Select an image group.
3. Select the file to add.
4. Proceed through the rest of the wizard.
1 0 2 CHAPTER 2 Configuring System Images
To use WDSUTIL to add an install image, perform the following procedure:
1. Open an elevated command prompt.
2. If you need to create an image group, enter WDSUTIL /Add-ImageGroup
/ImageGroup:<image group name>.
3. Enter WDSUTIL /Verbose /Progress /Add-Image /ImageFile:<path to .wim file>
/ImageType:Install.
If more than one image group exists on the server, append /ImageGroup:<image
group name> to specify to which group the image should be added. If you want to skip the
integrity check before adding the image, append /SkipVerify to the command in step 3.
Exporting an Image
When you export a boot image, WDS copies the file to the specified destination. When you
export an install image, WDS combines the metadata in the Install.wim file with the resources
in the Res.rwm file into a single WIM file at the specified destination.
To use the Windows Deployment Services MMC snap-in to export a boot or install image
from your server to a hard disk or bootable VHD on a client computer, perform the following
procedure on your WDS server:
1. Right-click a boot or install image and click Export Image.
2. In the dialog box, choose a file name and network path to which to export the image.
To use WDSUTIL to export a boot or install image from your server to a hard disk or
bootable VHD on a client computer, perform the following procedure:
1. Open an elevated command prompt.
2. To export a boot image, enter WDSUTIL /Verbose /Progress /Export-Image
/Image:<name> /ImageType:Boot /Architecture:{x86|x64|ia64}
/DestinationImage /Filepath:<path and file name>.
3. To export an install image, enter WDSUTIL /Verbose /Progress /Export-Image
/Image:<name> /ImageType:Install /ImageGroup:<image group name>
/DestinationImage /Filepath:<path and file name>.
You can append /Name:<name> or /Description:<description> to the command if
you want to set these metadata fields on the image. To determine behavior when the image
specified in /DestinationImage already exists, append /Overwrite:{Yes|No|Append}.
Yes overwrites the image, No causes an error, and Append (available for install images only)
appends the new image to the existing WIM file.
Updating an Image
To use the Windows Deployment Services MMC snap-in to replace an image on the server
with an updated version, perform the following procedure on your WDS server:
1. Right-click a boot or install image, and then click Replace Image.
2. Browse to the updated image.
3. Complete the wizard.


