adobe flash cs5 on demand part 11 ppsx
Bạn đang xem bản rút gọn của tài liệu. Xem và tải ngay bản đầy đủ của tài liệu tại đây (592.4 KB, 6 trang )
ptg
60 Chapter 2
Setting General
Preferences
Set General Preferences
Click the Flash (Mac) or Edit (Win)
menu, and then click Preferences.
Click the General category.
Select from the following options:
◆ On Launch. Select an option to
specify which document opens
when you start the program.
◆ Welcome Screen.
◆ New Document.
◆ Last Documents Open.
◆ No Document.
◆ Undo Levels. Select Document
or Object-level Undo, and then
enter a value from 2 to 300 to
set the number of undo/redo
levels. The default level is 100.
◆ Open Test Movie In Tabs.
Select this check box to have
Flash open a test movie in
document tab.
◆ Auto-Collapse Icon Panels.
Select this check box to
automatically collapse the
panel set to Icons only.
◆ Shift Select. Select or deselect
this check box to control the
selection of multiple elements.
3
2
1
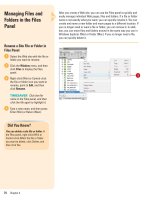
Flash allows you to set general preferences to customize the way you
work in the program. You can specify what you want to display or open
when you launch Flash. Some of the preferences allow you to specify
the number of undo levels, enable multiple selection, show tooltips,
open documents and test movies in tabs, enable span-based selection
in the Timeline, make the first frame of each scene in a document a
named anchor, and select a specific selection highlight color for differ-
ent element types, such as drawings, groups, and symbols. You can
also set Project preferences for closing and saving project files. In
Flash, the Preferences dialog box is reorganized with new categories
and options for ease of use, such as having have Flash open a new
document tab instead of opening in its own window.
2
3
From the Library of Wow! eBook
ptg
Chapter 2 Working Within the Flash Environment 61
◆ Show Tooltips. Select to display
tooltips when the pointer points
to a button or control.
◆ Contact-Sensitive Selection
and Lasso Tools. For the object
drawing model, select to select
objects when any part of the
marquee touches it. Clear it to
select objects that are
completely enclosed by the
marquee. Points within the
selection will be selected.
◆ Show Axes For 3D Movie Clips.
Select to show axes for 3d
movie clips.
◆ Span Based Selection. Select
to use span-based selection
instead of frame-based
selection.
◆ Named Anchor On Scene.
Select to make the first frame of
each scene in a document a
named anchor.
◆ Highlight Color. Select the Use
Layer Color option to use the
current layer’s outline color, or
select the option, and then
select a color for Drawing
objects, Drawing primitives,
groups, symbols, and other
elements.
◆ Printing (Win). Select the
Disable PostScript check box if
you have problems printing to a
postscript printer.
Click OK.
4
3
4
Setting Drawing Model Options
You can draw shapes in Flash using two main drawing models:
Merge Drawing and Object Drawing. Merge Drawing model automat-
ically merges shapes that you draw when you overlap them. If you
select a shape that has been merged with another, and move it, the
shape below it is moved too. For example, if you draw a square and
overlay a circle on top of it, and then select the circle and move it,
the portion of the square that overlaid the circle is removed. Object
Drawing model allows you to draw shapes as separate objects that
do not automatically merge together when overlaid. This lets you
overlap shapes without altering their appearance should you choose
to move them apart, or rearrange their appearance. Flash creates
each shape as a separate object that you can individually manipulate.
When you select a shape created using the Object Drawing model,
Flash surrounds the shape with a rectangular bounding box. You can
use the Pointer tool to move the object by clicking the bounding box
and dragging the shape anywhere you’d like to position it on the
Stage. You can now extend the Object Drawing mode by creating
primitive rectangles and ovals in Primitive mode, which allows you to
edit properties in the Property Inspector and specify the corner
radius of rectangles and inner radius of ovals. This makes it easy to
create pie wedges, round off corners, and other shapes.
For Your Information
From the Library of Wow! eBook
ptg
62 Chapter 2
Setting Text
Preferences
Set Text Preferences
Click the Flash (Mac) or Edit (Win)
menu, and then click Preferences.
Click the Text category.
Select from the following options:
◆ Show Asian Text Options. Select
to show Asian text options in the
Property Inspector (New!).
◆ Show Right-To-Left Text Options.
Select to show Direction options
in the Property Inspector (New!).
◆ Font Mapping Default. Click the
list arrow, and then select a font
to use when substituting missing
fonts. Click the Style list arrow,
and then select a font style.
◆ Show For Missing Fonts. Select
to show the Font Mapping dialog
box.
◆ Vertical Text options.
◆ Default Text Orientation.
Select to make default
orientation vertical, which
is useful for Asian fonts.
◆ Right To Left Text Flow.
Select to reverse the default
text direction.
◆ No Kerning. Select to turn
off kerning for vertical text.
◆ Input Method. Select the Text
Input Window check box (Mac)
or language option to select a
language type.
◆ Font Menus. Select check boxes
and option to show fonts in
menus.
Click OK.
4
3
2
1
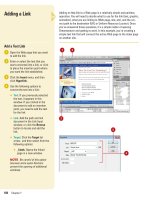
When you edit or work with text in a Flash document, you can specify
text related preferences. You can select a font to use when substituting
missing fonts, or select text orientation options, which is useful when
using English (horizontal) or Asian (vertical) language fonts. In addition,
you can select a language as an input method.
2
3
4
From the Library of Wow! eBook
ptg
Chapter 2 Working Within the Flash Environment 63
Setting Clipboard
Preferences
Set Clipboard Preferences
Click the Flash (Mac) or Edit (Win)
menu, and then click Preferences.
Click the Clipboard category.
Select from the following options:
◆ Bitmaps (Win). Select options
for Color Depth and Resolution
to specify these parameters for
bitmaps copied to the
Clipboard. Select Smooth to
apply anti-aliasing. Enter a
value in the Size Limit box to
specify the amount of RAM that
is used when placing a bitmap
on the Clipboard.
◆ PICT Settings (Mac). Select
Objects to preserve data
copied to the Clipboard as a
vector graphic, or select one of
the bitmap formats to convert
the image. Enter a value for
Resolution. Select the Include
Postscript check box to include
Postscript data. For gradients,
select an option to specify
quality in the PICT.
◆ Gradient quality. Select an
option to specify the quality of
gradient fills placed in the
Windows Metafile.
Click OK.
4
3
2
1
When you copy or cut graphics to the Clipboard, you can set prefer-
ences to determine how you want to paste the graphic into a Flash
document. The preference options give you control over the size and
quality of the graphics you insert in a document. If you are using
Windows, the Clipboard preferences include options for bitmaps and
gradients in the Windows Metafile format. If you are using a
Macintosh, the Clipboard preferences include options for the PICT
format.
Macintosh options
3
Windows
options
2
3
4
From the Library of Wow! eBook
ptg
64 Chapter 2
Setting Warning
Preferences
Set Warning Preferences
Click the Flash (Mac) or Edit (Win)
menu, and then click Preferences.
Click the Warnings category.
Select from the following options:
◆ Warn On Save For Adobe Flash
CS4 Compatibility. When you
save documents with content
features specific to Flash CS5.
◆ Warn On URL Changes In
Launch And Edit. If the URL for
a document has changed.
◆ Warn On Inserting Frames
When Importing Content. When
Flash inserts frames while you
import audio or video files.
◆ Warn On Encoding Conflicts
When Exporting ActionScript
Files. When you create a
document with different
language characters for export.
◆ Warn On Conversion Of Effect
Graphic Objects. When you
attempt to edit a symbol with
effects applied to it.
◆ Warn on sites with overlapped
root folder. When you create a
site in which the local root
folder overlaps another site.
◆ Warn On Behavior Symbol
Conversion. When you convert
a symbol with a behavior
attached to a symbol of a
different type.
◆ Warn On Symbol Conversion.
When you convert a symbol to
a symbol of a different type.
3
2
1
Flash provides warning messages when you perform actions that might
create problems for your document or lose important data. The warn-
ings help you avoid compatibility problems with Flash CS4 and charac-
ter corruption from encoding, which lets you know about missing fonts,
URL changes, and symbol conversion. Additional warnings let you know
when importing audio and video content inserts frames and when
motion frames or target objects contain ActionScript.
2
3
From the Library of Wow! eBook
ptg
Chapter 2 Working Within the Flash Environment 65
◆ Warn On Automatically
Converting From Drawing Object
To Group. When you convert an
object drawn in Object Drawing
mode to a group.
◆ Warn On Automatically
Converting Objects To Drawing
Objects.
◆ Show Incompatibility Warnings
On Feature Controls. When
controls are not supported by
the Flash Player version
specified in Publish Settings.
◆ Warn On Automatically
Generating ActionScript Classes
For Timelines. When you don’t
create a class, Flash does.
◆ Warn On Compiled Clips
Defining ActionScript Classes
For Symbols. When you try to
create ActionScript classes for
symbols.
◆ Warn On Converting Multiple
Selection To Symbol For Tween.
When you don’t have a symbol
to create a tween.
◆ Warn On Replacing Current
Tween Target. When you try to
replace the current tween target
◆ Warn On Motion Frame Contains
ActionScript.
◆ Warn On Motion Target Object
Contains ActionScript.
◆ Warn On IK Bones Not Showing.
◆ Warn On Text Needs Embedded
Font. When a font is not avail-
able on your computer (New!).
◆ Warn On Clearing SWF History
When Saving Template (New!).
◆ Warn On RSL Preloading Causes
All Content To Download Before
The First Frame Will Play
(New!).
◆ Warn On Remove Default Value
From RSL List (New!).
Click OK.
4
3
4
From the Library of Wow! eBook