Oracle Database 2 Day DBA 11g Release- P9 pps
Bạn đang xem bản rút gọn của tài liệu. Xem và tải ngay bản đầy đủ của tài liệu tại đây (240.91 KB, 20 trang )
Managing Program Code Stored in the Database
Managing Schema Objects 8-27
■ About Program Code Stored in the Database
■ Validating (Compiling) Invalid Schema Objects
About Program Code Stored in the Database
Oracle Database offers the ability to store program code in the database. Developers
write program code in PL/SQL or Java, and store the code in schema objects. You, as
the DBA, can use Oracle Enterprise Manager Database Control (Database Control) to
manage program code objects such as:
■ PL/SQL packages, procedures, functions, and triggers
■ Java source code (Java sources) and compiled Java classes
The actions that you can perform include creating, compiling, creating synonyms for,
granting privileges on, and showing dependencies for these code objects. You access
administration pages for these objects by clicking links in the Programs section of the
Schema subpage.
Note that creating and managing program code objects is primarily the responsibility
of application developers. However, as a DBA you might have to assist in managing
these objects. Your most frequent task with respect to program code objects might be
to revalidate (compile) them, because they can become invalidated if the schema
objects on which they depend change or are deleted.
Validating (Compiling) Invalid Schema Objects
As a database administrator (DBA), you may be asked to revalidate schema objects
that have become invalid. Schema objects (such as triggers, procedures, or views) are
invalidated when changes are made to objects on which they depend. For example, if a
PL/SQL procedure contains a query on a table and the table structure is modified, the
PL/SQL procedure becomes invalid. You revalidate schema objects by compiling
them.
Note: Other types of schema objects besides program code objects
can become invalid. For example, if you delete a table, any views that
reference that table become invalid.
See Also:
■ Oracle Database 2 Day Developer's Guide for more information
about PL/SQL procedures, functions, packages, and triggers
■ Oracle Database 2 Day + Java Developer's Guide for more
information about Java sources and Java classes
■ Oracle Database PL/SQL Language Reference to learn about PL/SQL
code
■ Oracle Database Administrator's Guide for more information about
object invalidation
Managing Program Code Stored in the Database
8-28 Oracle Database 2 Day DBA
Database Control notifies you when schema objects become invalid by displaying an
alert in the Alerts section of the Database Home page.
There are two ways to display schema objects that require validation: by following an
alert on the Database Home page, or by viewing the appropriate object page (Views
page, Procedures page, and so on) and searching for the objects.
To validate schema objects starting from an alert:
1. Go to the Database Home page, logging in as user SYSTEM.
See "Accessing the Database Home Page" on page 3-4.
2. In the Alerts section, search for alerts with the following message:
n object(s) are invalid in the schema_name schema.
An example of such a message is the following:
4 object(s) are invalid in the HR schema.
There is a separate message for each schema that contains invalid objects.
3. In the Message column, click an invalid object message.
The Owner's Invalid Object Count page appears.
4. Under Related Links, click Invalid Objects Details.
The Invalid Object Details page appears, showing a list of invalid objects.
Note: It is not always possible to revalidate a schema object that
stores program code by compiling it. You may have to take remedial
actions first. For example, if a view becomes invalid because a table
that it references is deleted, compiling the view produces an error
message that indicates that the table does not exist. You cannot
validate the view until you re-create the table or retrieve it from the
recycle bin.
Working with Other Schema Objects
Managing Schema Objects 8-29
5.
Select one or more objects, and then click Recompile.
A confirmation message appears, and the newly validated objects are removed
from the list.
To validate a schema object starting from an object page:
1. Go to the Database Home page, logging in as user SYSTEM.
See "Accessing the Database Home Page" on page 3-4.
2. At the top of the page, click Schema to view the Schema subpage.
3. In the Database Objects section, click the link for the object type that you want to
validate.
For example, if you want to validate a view, click Views.
4. On the object page (for example, the Views page), enter a schema name and,
optionally, an object name or partial object name, and then click Go.
The schema objects are displayed.
5. Select the schema object that you want to validate.
6. In the Actions list, select Compile, and then click Go.
A confirmation message appears.
Working with Other Schema Objects
You can manage other schema objects with Oracle Enterprise Manager Database
Control (Database Control), including the following:
■ Sequences
A sequence is a database object that generates unique integers. Each time that you
query the sequence, it increments its current value by a designated amount and
returns the resulting integer. Sequences can be simultaneously queried by multiple
users, and each user receives a unique value. For this reason, using a sequence to
provide the value for a primary key in a table is an easy way to guarantee that the
key value is unique, regardless of the number of users inserting data into the table.
■ Synonyms
A synonym is an alias for any schema object, such as a table or view. Synonyms
provide an easy way to hide the underlying database structure from an
application or a user. Synonyms can be private or public. A public synonym does
not need to be qualified with a schema name, whereas a private synonym does, if
the user referencing the private synonym is not the synonym owner. For example,
consider the following query, issued by a user who has been granted the SELECT
object privilege on the hr.employees table:
SELECT employee_id, salary
FROM hr.employees
ORDER BY salary
Now suppose you create a public synonym named personnel as an alias for the
hr.employees table, and you grant the SELECT privilege on the hr.employees
table to PUBLIC (all database users). With the public synonym in place, any user
can issue the following simpler query:
SELECT employee_id, salary
FROM personnel
Schemas: Oracle By Example Series
8-30 Oracle Database 2 Day DBA
ORDER BY salary
The user who created this query did not need to know the name of the schema
that contains the personnel data.
An additional benefit of synonyms is that you can use the same synonym in a
development database as in the production database, even if the schema names
are different. This technique enables application code to run unmodified in both
environments. For example, the preceding query would run without errors in a
development database that had the employees table in the dev1 schema, if the
personnel synonym is defined in the development database to point to the dev1
schema.
Because a synonym is simply an alias, it requires no storage other than its
definition in the data dictionary. To reference a synonym in a query, you must
have privileges on the object to which it points. Synonyms themselves cannot be
secured. If you grant object privileges on a synonym to a user, you are granting
privileges on the object to which the synonym points.
■ Database links
A database link is a schema object that points to another Oracle database. You use
a database link to query or update objects in a remote database. Database links are
used in distributed database environments, which are described in Oracle Database
Administrator's Guide.
Schemas: Oracle By Example Series
Oracle By Example (OBE) has a series on the Oracle Database 2 Day DBA guide. This
OBE steps you through the tasks in this chapter and includes annotated screenshots.
To view the Schemas OBE, in your browser, enter the following URL:
/>Note: If a user owns a table named personnel, that table is used in
the query. If no such table exists, the database then resolves the public
synonym and uses the hr.employees table.
See Also:
■ Oracle Database 2 Day Developer's Guide for more information
about sequences
■ Oracle Database SQL Language Reference
Performing Backup and Recovery 9-1
9
Performing Backup and Recovery
This chapter introduces you to Oracle Database backup and recovery with Oracle
Enterprise Manager Database Control. After reading this chapter, you should be
familiar with the basic concepts of Oracle Database backup and recovery operations,
know how to implement a disk-based backup strategy, and perform simple repairs to
database files.
This chapter contains the following sections:
■ Overview of Database Backup and Recovery
■ Database Backup and Recovery Concepts
■ Configuring Your Database for Basic Backup and Recovery
■ Backing Up Your Database
■ Displaying Backup Reports
■ Managing Backups
■ Performing Oracle Advised Recovery
■ Performing User-Directed Recovery
■ Backup and Recovery: Oracle By Example Series
Overview of Database Backup and Recovery
The focus in Oracle Database backup and recovery is on the physical backup of
database files, which permits you to reconstruct your database. The files protected by
the backup and recovery facilities built into Oracle Enterprise Manager Database
Control (Database Control) include datafiles, control files, server parameter files, and
archived redo logs. With these files you can reconstruct your database. The backup
mechanisms work at the physical level to protect against file damage, such as the
accidental deletion of a datafile or the failure of a disk drive.
Oracle Recovery Manager (RMAN), a command-line and Enterprise Manager-based
tool, is the method preferred by Oracle for efficiently backing up and recovering your
Oracle database. RMAN is designed to work intimately with the server, providing
block-level corruption detection during backup and restore. RMAN optimizes
See Also:
■ Oracle Database Backup and Recovery User's Guide to learn how to
use the command-line interface for Recovery Manager
■ Oracle Database Backup and Recovery Reference for the syntax and
semantics of Recovery Manager commands
Database Backup and Recovery Concepts
9-2 Oracle Database 2 Day DBA
performance and space consumption during backup with file multiplexing and
backup set compression, and integrates with leading tape and storage media products.
Logical backups, such as exporting database objects such as tables or tablespaces, are a
useful supplement to physical backups, but cannot protect your whole database. An
effective backup strategy must be based on physical backups.
The Oracle Database flashback features provide a range of physical and logical data
recovery tools as efficient, easy-to-use alternatives to physical and logical backups. The
flashback features enable you to reverse the effects of unwanted database changes
without restoring datafiles from backup or performing media recovery.
This section introduces the following flashback features:
■ Oracle Flashback Table, which enables you to revert a table to its contents at a time
in the recent past
■ Oracle Flashback Drop, which enables you to retrieve deleted (dropped) database
tables
■ Oracle Flashback Database, which enables you to revert the entire database to a
past point in time
The first two features operate at the logical level, whereas the last feature operates at
the physical level. None of the preceding features requires advance preparation such
as creating logical exports to allow for retrieval of your lost data. You can use all of the
features while your database is available. Oracle Database Backup and Recovery User's
Guide discusses the flashback features of Oracle Database at greater length.
The Oracle Enterprise Manager physical backup and recovery features are built on the
Recovery Manager (RMAN) command-line client. Database Control makes available
many of the RMAN features, and provides wizards and automatic strategies to
simplify and further automate RMAN-based backup and recovery.
Database Backup and Recovery Concepts
To back up your database means to make copies of your datafiles, control file, and
archived redo logs (if your database runs in ARCHIVELOG mode). Restoring a
database means copying the physical files that make up the database from a backup
medium, typically disk or tape, to their original or to new locations. Database
recovery is the process of updating database files restored from a backup with the
changes made to the database after the backup, typically using redo log files.
Consistent and Inconsistent Backups
A backup is either consistent or inconsistent. To make a consistent backup, your
database must have been shut down cleanly and remain closed for the duration of the
backup. All committed changes in the redo log are written to the datafiles, so the
datafiles are in a transaction-consistent state. When you restore your datafiles from a
consistent backup, you can open the database immediately.
If the database is in ARCHIVELOG mode, then you can make inconsistent backups that
are recoverable using archived redo log files. Open database backups are inconsistent
because the online redo logs contain changes not yet applied to the datafiles. The redo
logs must be archived and then backed up with the datafiles to ensure recoverability.
Note: Oracle Flashback Database does not recover missing datafiles.
Database Backup and Recovery Concepts
Performing Backup and Recovery 9-3
Despite the name, an inconsistent backup is as robust a form of backup as a consistent
backup. The advantage of making inconsistent backups is that you can back up your
database while the database is open for updates.
Media Recovery
If you restore the archived redo logs and datafiles, then you must perform media
recovery before you can open the database. Any database transactions in the archived
redo logs not already reflected in the datafiles are applied to the datafiles, bringing
them to a transaction-consistent state before the database is opened.
Media recovery requires a control file, datafiles (typically restored from backup), and
online and archived redo logs containing changes since the time the datafiles were
backed up. Media recovery is most often used to recover from media failure, such as
the loss of a file or disk, or a user error, such as the deletion of the contents of a table.
Media recovery can be a complete recovery or a point-in-time recovery. In a complete
recovery, you restore backup datafiles and apply all changes from the archived and
online redo logs to the datafiles. The database is returned to its state at the time of
failure and can be opened with no loss of data.
In a point-in-time recovery, you return a database to its contents at a user-selected
time in the past. You restore a backup of datafiles created before the target time and a
complete set of archived redo log files from backup creation through the target time.
Recovery applies changes between the backup time and the target time to the datafiles.
All changes after the target time are discarded.
Oracle Enterprise Manager Database Control (Database Control) provides an interface
to both a complete and a point-in-time recovery in the form of a Recovery wizard.
However, this guide focuses on complete recovery.
Flash Recovery Area
To simplify the management of backup and recovery files, you can create a flash
recovery area for your database. The flash recovery area is an Oracle-managed
directory, file system, or Automatic Storage Management disk group that provides a
centralized disk location for backup and recovery files. Oracle creates archived logs
and flashback logs in the flash recovery area. RMAN can store its backup sets and
image copies in the flash recovery area, and it uses it when restoring files during
media recovery. The flash recovery area also acts as a disk cache for tape.
Oracle Database automatically manages this storage, deleting files that are no longer
needed. Periodically copying backups to tape frees space in the flash recovery area for
other files. Oracle recommends that you enable a recovery area to simplify backup
management. Except as noted, this documentation assumes the use of a flash recovery
area.
See Also:
■ "About Archived Redo Log Files" on page 6-4
■ Oracle Database Backup and Recovery User's Guide to learn how to
use the BACKUP command in the RMAN client
See Also:
■ "Performing User-Directed Recovery" on page 9-25
■ Oracle Database Backup and Recovery User's Guide for more detailed
information about complete and point-in-time recovery
Configuring Your Database for Basic Backup and Recovery
9-4 Oracle Database 2 Day DBA
RMAN Repository
RMAN maintains a record of database files and backups for each database on which it
performs operations. This metadata is called the RMAN repository.
If you back up a file without using RMAN, such as by copying the file at the host
operating system level, then you can add metadata about the copy to the RMAN
repository. If you later use a command such as RESTORE DATABASE, then RMAN
uses the records in the repository to select backups needed for the recovery.
The primary location for the RMAN repository for a database is its control file. The
importance of this metadata for RMAN is one more reason why protecting your
control file is a vital part of your backup strategy. In some installations, a second copy
of the RMAN repository is stored in a schema called the recovery catalog. The
recovery catalog is located in a separate database and can store metadata for multiple
databases. Use of a recovery catalog is optional and is beyond the scope of this guide.
Configuring Your Database for Basic Backup and Recovery
This section explains how to set up your database to take advantage of Oracle
suggested backup strategies. If you already configured the database for automated
backups with the Oracle Database Configuration Assistant (DBCA), then skip this
section.
To take maximum advantage of Oracle Database features that automatically manage
backup and recovery files and operations, configure your database as follows:
■ Use a flash recovery area, which automates storage management for most
backup-related files, and specify it as an archived redo log destination.
■ Run the database in ARCHIVELOG mode so you can perform online backups and
have data recovery options such as complete and point-in-time media recovery.
You must also set a number of policies governing which files are backed up, what
format is used to store backups on disk, and when files become eligible for deletion.
See "Using DBCA to Create and Configure a Database" on page 2-8 to learn how to
create a database preconfigured for automated daily backups.
Specifying Credentials for Backup and Recovery Using Database Control
You must have the proper credentials to perform some of the configuration tasks for
backup and recovery, and to schedule backup jobs and perform recovery. The
following credentials may be required:
See Also:
■ "Planning Space Usage and Location for the Flash Recovery Area"
on page 9-5
■ Oracle Database Backup and Recovery User's Guide for more detailed
information about configuring a flash recovery area
See Also:
■ "Displaying Backup Reports" on page 9-17
■ "Managing Backups" on page 9-18
■ Oracle Database Backup and Recovery User's Guide for more detailed
information about RMAN reporting capabilities and querying the
recovery catalog
Configuring Your Database for Basic Backup and Recovery
Performing Backup and Recovery 9-5
■ The Oracle Database user you specify when you log in to Oracle Enterprise
Manager Database Control (Database Control)
■ The host operating system user whose credentials you provide when performing
backup and recovery tasks
To enter credentials for backup and recovery tasks:
1. Log in to Database Control as a database user with SYSDBA privileges, or provide
host operating system credentials for a user in the dba group on UNIX or Linux,
or the ora_dba group on Microsoft Windows.
The host operating system user must also have execute permission for the RMAN
command-line client.
For tasks requiring host operating system credentials, a Host Credentials form
appears at the bottom of the page used to perform the task. Enterprise Manager
uses the credentials when it starts RMAN jobs that you requested or scheduled.
2. Optionally, in the Host Credentials form, select Save as Preferred Credential.
If you select this option before performing your action, then the provided
credentials are stored persistently for the currently logged-in Oracle Database
user. The preferred credentials are reused by default whenever you log in as that
user and perform operations requiring host credentials.
Planning Space Usage and Location for the Flash Recovery Area
You should place the flash recovery area on a separate disk from the working set of
database files. Otherwise, the disk becomes a single point of failure for your database.
The amount of disk space to allocate for the flash recovery area depends on the size
and activity levels of your database, which determine the size of your datafiles and
redo logs files in addition to your recovery objectives. Your objectives dictate what
kinds of backups you use, when you make them, and how long to keep them.
About the Backup Retention Policy and the Flash Recovery Area
Space management in the flash recovery area is governed by a backup retention
policy. A retention policy determines when files are obsolete, meaning that they are no
longer needed to meet your data recovery objectives.
Retention policies can be based on redundancy of backups or on a recovery window
(period of time). When using a policy based on redundancy, the flash recovery area
considers a backup of a file obsolete only when the RMAN repository has records of a
specified number of more recent backups of that file. When using a recovery policy
based on a period of time (or window), you specify a time interval in days. Files are
obsolete only when they are no longer needed for complete recovery or point-in-time
recovery to a system change number (SCN) within the window. Therefore, a recovery
retention policy based on a window is recommended.
Even after files in the flash recovery area are obsolete, they are typically not deleted
until space is needed for new files. As long as space permits, files recently moved to
tape remain on disk to avoid restoring them from tape for a recovery. The automatic
deletion of obsolete files and files moved to tape from the flash recovery area makes it
a convenient archiving destination. Other destinations require manual deletion of logs.
Note: In situations in which the database is shut down, you may
still be prompted for host credentials even if you have saved the
preferred credentials.
Configuring Your Database for Basic Backup and Recovery
9-6 Oracle Database 2 Day DBA
About the Flash Recovery Area Size
Oracle Database Backup and Recovery User's Guide explains how to size the flash
recovery area. As a general rule, the larger the flash recovery area, the more useful it
is. Ideally, the flash recovery area should be large enough for copies of the datafiles,
control files, online redo logs, and archived logs needed to recover the database, and
also the copies of these backup files that are kept based on the retention policy.
If your backup strategy includes incremental backups, which are described in
"Incremental Backups of Datafiles" on page 9-10, then add enough space to the flash
recovery area for these files. If you can move some backups to tape, then you can
reduce the size of the flash recovery area. Note that retrieving files from tape causes
longer database restore operations and recovery times.
Configuring Recovery Settings
In the Recovery Settings page, you can configure settings for instance recovery, media
recovery, and flash recovery. In this section, you configure the flash recovery area and
enable archiving for the database.
You can configure a flash recovery area when first creating the database. If you did not
perform this task at database creation time, however, then you can create a flash
recovery area for your database now.
To configure a flash recovery area and put the database in ARCHIVELOG mode:
1. On the host operating system, create a directory to hold the flash recovery area.
Make sure that the operating system permissions for this directory allow the
database to create files.
2. On the Database Home page, click Availability to display the Availability
subpage.
3. In the Backup/Recovery section, click Recovery Settings.
The Recovery Settings page appears.
4. Complete the following steps:
a. In the Media Recovery section, select ARCHIVELOG Mode.
b. If USE_DB_RECOVERY_FILE_DEST is not already set as an archiving
destination, then set it.
This initialization parameter indicates that the flash recovery area should be
an archiving destination.
For ease of database management, the best practice is to use the flash recovery
area as your only archiving destination.
c. In the Flash Recovery section, enter the path to the flash recovery area created
in Step 1 in Flash Recovery Area Location, and select a value for Flash
Recovery Area Size.
d. Select Enable Flashback Database.
This option specifies that the database should generate flashback logs in the
flash recovery area, enabling you to use Flashback Database. During usual
operation, the database occasionally logs images of data blocks to the
flashback logs. The database automatically creates, deletes, and resizes
flashback logs.
e. Ensure that the Apply changes to SPFile only box is not selected.
Configuring Your Database for Basic Backup and Recovery
Performing Backup and Recovery 9-7
f.
Click Apply to save your changes.
A message prompts you to restart the database.
5. Click Yes.
The Restart Database: Specify Host and Target Database Credentials page appears.
6. Enter your host and database credentials, and then click OK.
The Restart Database: Confirmation page appears.
7. Click Yes to begin the restart operations.
You can click Refresh periodically to monitor the progress of the operation.
8. Make a consistent (that is, offline) backup of your entire database immediately after
switching your database to ARCHIVELOG mode.
Monitoring Flash Recovery Area Usage
It is important to monitor space usage in the flash recovery area to ensure that it is
large enough to contain backups and other recovery-related files.
To monitor available space in the flash recovery area:
■ In the High Availability section of the Database Home page, click the link next to
Usable Flash Recovery Area (%).
The Recovery Settings page appears.
The Reclaimable Flash Recovery Area (GB) and Free Flash Recovery Area (GB)
settings indicate how much space is available.
Configuring Backup Settings
You can configure a number of backup-related settings and policies. For example, you
can determine how backups are stored, which data is backed up, and how long
backups are retained. You can also configure settings to optimize backup performance.
This section explains the concepts behind the available settings and also explains how
to change them using the Backup Settings page in Database Control. The settings on
the Device subpage affect how RMAN writes backups to disk and to tape.
About RMAN Backups
Database backups created by RMAN are stored as image copies or backup sets.
Caution: You cannot use backups from before the switch to
ARCHIVELOG mode to restore and recover the database to a point in
time after the switch. Thus, if you do not immediately make a backup
after switching, you are running your database without a backup. See
"Performing and Scheduling Backups Using Database Control" on
page 9-11 to learn how to make database backups.
See Also:
■ "Rewinding a Database Using Oracle Flashback Database" on
page 9-30
■ Oracle Database Backup and Recovery User's Guide for more details
about configuring a flash recovery area
Configuring Your Database for Basic Backup and Recovery
9-8 Oracle Database 2 Day DBA
Image copies are exact byte-for-byte copies of files. You can create an image copy by
copying a file at the operating system level. Unlike copying files at the operating
system level, however, image copies created through RMAN or Database Control are
recorded in the RMAN repository so that RMAN can use these copies during database
restore operations and recovery. RMAN can restore files only if they are recorded in
the RMAN repository. RMAN can create image copies only on disk.
Backup sets are logical entities produced by the RMAN BACKUP command. This
command can produce one or more backup sets on disk or media management
devices. RMAN can write backup sets only to a media manager.
Each backup set contains several physical files called backup pieces. A backup piece
stores the backup of one or more database files in a compact RMAN-specific format.
One advantage of backup sets is that RMAN uses unused block compression to save
space in backing up datafiles. Only those blocks in the datafiles that have been used to
store data are included in the backup set.
RMAN depends on server sessions, processes that run on the database server, to create
backups and restore them. Each server session, in turn, corresponds to an RMAN
channel, representing one stream of data to or from a backup device. Channels are
either of type disk or type SBT (tape).
RMAN supports parallelism, which is the use of multiple channels and server sessions
to carry out the work of one backup or recovery task. Proper use of parallelism can
greatly increase performance on backup and recovery tasks.
Configuring Backup Device Settings
For disk-based backups, you can configure the default format for backups, the location
on disk where backups are stored, and whether or not backup tasks run in parallel.
For tape backups, you can configure settings such as the number of tape drives and
whether or not backups are compressed. On most platforms, you must integrate a
media manager with the Oracle database to use sequential media for storage.
You can use Oracle Secure Backup, which supports both database and file system
backups to tape, as your media manager. Oracle Secure Backup provides the same
services for RMAN as other third-party SBT interfaces, but is better integrated with
Database Control. This section assumes that you will make only disk backups.
To configure backup settings for disk:
1. On the Database Home page, click Availability to display the Availability
subpage.
2. In the Backup/Recovery section, click Backup Settings.
The Backup Settings page appears.
3. Click Device.
The Device subpage of Backup Settings appears.
4. Complete the following steps:
a. In Parallelism, enter 1.
See Also:
■ Oracle Database Backup and Recovery User's Guide for an overview
of RMAN architecture
■ Oracle Database Backup and Recovery User's Guide for more
conceptual details about RMAN backups
Configuring Your Database for Basic Backup and Recovery
Performing Backup and Recovery 9-9
Later, when you have had time to review the information in Oracle Database
Backup and Recovery User's Guide about parallelism and performance in
RMAN, you may want to change this value.
b. Leave the Disk Backup Location field blank so that RMAN directs backups to
the flash recovery area.
c. In the Disk Backup Type section, select Backup Set.
One advantage of backup sets is that RMAN uses unused block compression
to save space when backing up datafiles. Only those blocks in the datafiles
that have been used to store data are included in the backup set.
5. In Host Credentials, enter values in the Username and Password fields.
Host credentials are described in "Specifying Credentials for Backup and Recovery
Using Database Control" on page 9-4.
6. Click Test Disk Backup to ensure the credentials and backup location are correct.
A message appears that states whether or not the test was successful.
In this example you do not change the settings on the Backup Set subpages.
Configuring Backup Policy Settings
You can set the backup policies that govern control file and server parameter file
backups, tablespaces to exclude from an entire database backup, and the backup
retention policy.
To configure the backup policy settings:
1. On the Database Home page, click Availability to display the Availability
subpage.
2. In the Backup/Recovery section, click Backup Settings.
The Backup Settings page appears.
3. Click Policy.
The Backup Policy subpage appears.
4. Perform the following actions:
■ Select the Automatically backup the control file and server parameter file
(SPFILE) with every backup and database structural change option. Leave
the Autobackup Disk Location field blank so that RMAN stores the automatic
backups in the flash recovery area.
The server parameter file and control file are critical to the database and
RMAN, and are also relatively small compared to typical datafiles. Backing
them up frequently results in relatively little storage overhead.
■ Select the Optimize the whole database backup by skipping unchanged files
such as read-only and offline datafiles that have been backed up option.
This option saves space in the flash recovery area.
See Also:
■ Oracle Secure Backup Administrator's Guide to learn how to set up
and use Oracle Secure Backup with Database Control
■ Oracle Database Backup and Recovery User's Guide to learn how to
use the RMAN client to configure the default device for backups
Backing Up Your Database
9-10 Oracle Database 2 Day DBA
■ Select the Enable block change tracking for faster incremental backups
option. Either leave the Block Change Tracking File field blank (if you
configured a database area in "Step 7 - Database File Locations" on page 2-11)
or enter a file name.
This option takes advantage of the block change tracking feature, which
greatly improves incremental backup performance at a small cost of overhead.
5. In the Tablespaces Excluded From Whole Database Backup section, leave the
settings as they are.
This feature enables you to specify a list of tablespaces to exclude from a backup.
For example, you do not need to include read-only tablespaces in every backup.
6. In the Retention Policy section, select Retain backups that are necessary for a
recovery to any time within the specified number of days (point-in-time
recovery). In Days, enter 31.
This setting enables a recovery policy with retention based on a period of time.
7. In the Archivelog Deletion Policy section, select None.
This option specifies that logs are eligible for automatic deletion only when they
have been backed up to tape or are obsolete based on the retention policy.
8. Click OK to save your changes.
Backing Up Your Database
This section describes how to back up your database with Oracle Enterprise Manager
Database Control (Database Control). The Oracle suggested strategy for disk-only
backups provides efficient daily backup of the database. This strategy enables you to
quickly return your database to its state at any point during the previous 24 hours. For
more flexible backup options, see Oracle Database Backup and Recovery User's Guide.
RMAN Backup Concepts
This section provides the concepts you need to understand the Oracle suggested
backup strategy and other backup types provided through Database Control.
Full Backups of Datafiles
A full backup of a datafile includes all used blocks of the datafile. As explained in
"About RMAN Backups" on page 9-7, an RMAN backup can be either an image copy
or backup set. An image copy is a bit-for-bit copy of the datafile, and thus includes
unused blocks.
Incremental Backups of Datafiles
RMAN incremental backups copy only those blocks in a datafile that change between
backups. A level 0 incremental backup, which copies all blocks in the datafile, is used
as a starting point for an incremental backup strategy.
Incremental backups at level 1 copy only images of blocks that have changed since a
previous incremental backup. Level 1 backups can be cumulative, in which case all
See Also:
■ "Managing Backups" on page 9-18
■ Oracle Database Backup and Recovery User's Guide to learn how to
configure a backup retention policy
Backing Up Your Database
Performing Backup and Recovery 9-11
blocks changed since the most recent level 0 backup are included, or differential, in
which case only those blocks changed since the most recent level 0 or level 1
incremental backup are included. A typical incremental strategy makes level 1
backups at regular intervals such as once each day.
Recovering changed blocks from incremental backups can speed media recovery.
Because an incremental level 1 backup copies the final contents of all datafile blocks
changed during the period covered by the incremental backup strategy, the recovery
process can omit reapplying individual updates from the redo logs of that period, and
update each block with its final contents. The redo logs are used only for changes from
the period not covered by level 1 backups.
Incrementally Updated Backups: Rolling Forward Image Copies of Datafiles
RMAN enables you to apply level 1 incremental backups to an older image copy of
your datafiles. You can roll forward the old copy to the point in time of the most
recent level 1 incremental backup. All blocks changed since the image copy was
created are overwritten with their new contents as of the time of the last level 1
incremental backup. The effect is to roll the file forward in time, so that its contents are
equivalent, for the purposes of database recovery, to an image copy of the datafile
made at the time of the last incremental level 1 backup.
Incorporating incrementally updated backups into your backup strategy shortens
expected recovery times. The reason is that media recovery to the present time or to a
point in time in the recent past can begin at the time of the last level 1 backup applied,
rather than at the time of the last full database backup.
Backup Tags
All RMAN backups, including incremental backups, are labeled with a tag. A tag is a
text string that identifies that backup, either uniquely or as part of a group of backups.
For instance, if you performed a weekly, full database backup on Saturday nights, you
could use the tag FULL_SAT to identify all such backups.
You can use tags to refer to specific backups in RMAN commands. For example, you
could issue a command to move the latest FULL_SAT backup to tape. If you do not
specify a tag, then RMAN creates a unique tag automatically.
Because you can use tags to refer to different groups of backups, you can create
different routines in your backup strategy that do not interfere with each other. When
you schedule a backup job and give the job a name, the job name is used as a tag.
Performing and Scheduling Backups Using Database Control
Database Control enables you to perform RMAN backups and schedule backup jobs
required by your backup strategy.
Performing a Whole Database Backup
Whole backups of a database include the complete contents of all datafiles of the
database, as well as the control file, archived redo logs, and server parameter file. With
these files, you can perform a complete recovery.
While whole database backups can be an important element in your overall backup
strategy, they are also a required step in some situations, such as when you enable or
disable ARCHIVELOG mode (see "Configuring Recovery Settings" on page 9-6). This
section explains how to make whole database backups to disk.
Backing Up Your Database
9-12 Oracle Database 2 Day DBA
To perform a whole database backup when the database is open:
1. On the Database Home page, click Availability to display the Availability
subpage.
2. In the Backup/Recovery section of the Availability page, click Schedule Backup.
The Schedule Backup page appears.
3. In the Customized Backup section, select Whole Database, and then click
Schedule Customized Backup.
The Schedule Customized Backup: Options page appears.
4. In the Backup Type section, select Full Backup.
5. In the Backup Mode section, select either Online Backup or Offline Backup.
Typically, you will want to perform online backups to maximize database
availability.
6. In the Advanced section, make the following selections, and then click Next:
■ If you are performing an online backup, select Also back up all archived logs
on disk.
You do not need to back up archived logs when performing an offline backup
because the database is in a consistent state at the time of backup and does not
require media recovery if you restore the database from this backup.
However, you can choose to include archived logs in the backup.
■ If a flash recovery area is your only archiving destination, do not select "Delete
all archived logs from disk after they are successfully backed up".
In this case, redo logs that have been backed up are deleted automatically as
space is needed. If you are using some other archiving destination, it may be
useful to select this option as part of managing your backup storage.
■ Do not select "Use proxy copy supported by media management software to
perform a backup" for now.
Note: As explained in "Configuring Your Database for Basic
Backup and Recovery" on page 9-4, you can make online backups
only if your database is running in ARCHIVELOG mode.
Backing Up Your Database
Performing Backup and Recovery 9-13
■ If the flash recovery area stores backups, do not select the Delete obsolete
backups option.
In this case, obsolete backups are deleted automatically as space is needed. If
you use another destination for your backup files, you can select this option.
■ Do not enter a value for Maximum Files per Backup Set.
■ Do not select the Encryption option.
For improved security, you can encrypt RMAN backup sets with a
user-selected algorithm. Encrypted backups cannot be read by unauthorized
users.
The Schedule Customized Backup: Settings page appears.
7. Select Disk and then click Next.
Oracle recommends backing up to disk when possible to minimize recovery time
by minimizing restore operations from tape. Later, you can move disk backups to
tape.
The Schedule Customized Backup: Schedule page appears.
8. Complete the following steps:
a. In the Job section, leave the default values for Job Name and Job Description.
In the Job Name field, you can enter a user-specified tag for this backup. The
job name is used as a prefix for the backup tag for backups created by this job.
In the Job Description field, you can enter any descriptive text that is useful
for your own reference.
b. In the Schedule section, click One Time (Immediately), and then click Next.
The Schedule Customized Backup: Review page appears.
9. Click Submit Job.
The Status page appears. This page should contain a message that indicates the job
was successfully submitted.
10. Click View Job to monitor the progress of the backup.
The Execution: Database page appears. This page contains a Summary section
describing the job. The table at the bottom of the page displays the progress of the
various steps of the backup job. You can reload this page in your browser to
monitor the ongoing progress of the job.
In the Name column of the table, you can see the current phase of the RMAN job.
Clicking the name of the phase of the backup job displays a page containing the
RMAN output for that part of the job. From this page, click the Back button in
your browser to return to the Execution: Database page.
To perform a whole database backup when the database is closed:
■ Follow the same steps as for an open database backup, except select Offline
Backup in Step 4 and then continue with the steps that follow.
Note: For recurring jobs, it is useful to set a Job Name so that the
resulting backups are easy to identify as part of an ongoing series. Use
a descriptive tag, such as WEEKLY_FULL_BACKUP.
Backing Up Your Database
9-14 Oracle Database 2 Day DBA
Using the Oracle Suggested Backup Strategy
Database Control makes it easy to set up an Oracle suggested backup strategy for
backups to disk that protects your data and provides efficient recoverability to any
point in the user-specified recovery window (time period). The Oracle suggested
strategy leverages the incremental backup and incrementally-updated backup features
to provide faster backups than whole database backups, and faster recoverability than
is possible through applying database changes from the archive log to your datafiles.
About the Oracle Suggested Backup Strategy The Oracle suggested strategy is based on
creating an image copy of your database. The database rolls forward this copy by
using incrementally updated backups. Oracle Enterprise Manager schedules RMAN
backup jobs during the overnight hours.
For each datafile, the strategy calls for backups as follows:
■ At the beginning of day 1 of the strategy (the time the first scheduled job actually
runs), RMAN creates an incremental level 0 datafile copy. It contains the datafile
contents at the beginning of day 1.
If a recovery is required, the redo logs from day 1 can be used to recover to any
point during day 1.
■ At the beginning of day 2, RMAN creates an incremental level 1 backup that
contains the blocks changed during day 1.
If a recovery is required, RMAN can apply this incremental level 1 to roll forward
the level 0 backup to the beginning of day 2. RMAN can use redo logs to recover
to any point during day 2.
■ At the beginning of each day n for day 3 and onward, RMAN applies the level 1
backup from the beginning of day n-1 to the level 0 backup. This action brings the
datafile copy to its state at the beginning of day n-1. Then, RMAN creates a new
level 1 backup that contains the blocks changed during day n-1.
If a recovery is required, RMAN can apply this incremental level 1 backup to the
datafile rolled forward on day n-1 to the beginning of day n. RMAN can use redo
logs to recover the database to any point during day n.
The datafile copies used in the Oracle suggested backup strategy are tagged as
ORA$OEM_LEVEL_0. The level 1 incremental backups for use in this strategy are
created for use with datafile copies with this label. You can safely implement other
backup strategies without interfering with the Oracle suggested backup strategy.
Oracle suggested backup strategies also use tape backups in addition to disk backups,
but these are beyond the scope of this section.
Backing Up Your Database Using the Oracle Suggested Disk Backup Strategy The following
procedure schedules daily database backups. The strategy uses incremental backups
and incrementally applied backups to enable quick recovery to any time in the
preceding 24 hours.
To backup your database using the Oracle-suggested disk backup strategy:
1. On the Database Home page, click Availability to display the Availability
subpage.
2. In the Backup/Recovery section of the Availability page, click Schedule Backup.
The Schedule Backup page appears.
3. In the Oracle-Suggested Backup section, click Schedule Oracle-Suggested
Backup.
Backing Up Your Database
Performing Backup and Recovery 9-15
The Schedule Oracle-Suggested Backup: Destination page appears. On this page,
you select the destination media for the backup, which can be disk, tape, or both.
4. Select Disk and then click Next.
The Schedule Oracle-Suggested Backup: Setup page appears.
This page describes the backups that are performed each day as part of the
disk-based strategy.
5. Review the information and then click Next.
The Schedule Oracle-Suggested Backup: Schedule page appears.
6. Choose a Start Date, Time Zone, and Daily Backup Time for the daily backups,
and then click Next.
The Schedule Oracle-Suggested Backup: Review page appears.
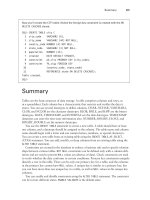
Database Control displays the backup script that RMAN will run (although you
cannot edit the script directly). The script should look similar to the following:
Daily Script:
run {
allocate channel oem_disk_backup device type disk;
recover copy of database with tag 'ORA$OEM_LEVEL_0';
backup incremental level 1 cumulative copies=1 for recover of copy with tag
'ORA$OEM_LEVEL_0' database;
}
7. Click Submit Job.
Scheduling Miscellaneous Backup Tasks
After taking some time to understand the full range of available backup options
described in Oracle Database Backup and Recovery Basics, you may decide to schedule
backup tasks beyond those used to implement the Oracle suggested backup strategy.
To schedule miscellaneous backup tasks:
1. On the Database Home page, click Availability to display the Availability
subpage.
2. In the Backup/Recovery section of the Availability page, click Schedule Backup.
The Schedule Backup page appears.
3. In the Customized Backup section, select the object that you want to back up. For
example, select Table spa ce s or Archivelogs.
4. Click Schedule Customized Backup to start the Schedule Customized Backup
wizard.
5. On the following pages of the wizard, specify details such as objects to back up,
and required options and settings. Click Next to proceed to the next page.
The choices presented on these pages are determined by the type of objects being
backed up. For more information about using the wizard, click Help on any page.
6. Click Submit Job.
Backing Up Your Database
9-16 Oracle Database 2 Day DBA
Validating Backups and Testing Your Backup Strategy
As part of your backup strategy, you should periodically check whether or not your
backups are intact and can be used to meet your recoverability objectives. You can
validate your backups in the following ways:
■ Select specific backup sets or image copies in Database Control and validate them.
This technique indicates if a backup exists and can be restored. For this form of
validation, use the Manage Current Backups pages as described in "Validating
Selected Backups" on page 9-16.
■ Specify database files and let RMAN select backups to use when restoring those
files, as it would for an actual restore operation. This technique ensures that your
available backups are sufficient to restore the database. For this form of validation,
use the Perform Recovery pages as described in "Validating Backups for Restore
Operations" on page 9-17.
You can set up both forms of validation as scheduled tasks in Database Control. You
should incorporate both forms of validation into your backup strategy to ensure that
your recoverability goals are met by your available backups.
Validating Selected Backups
Validating specific backups checks whether or not these backups exist and can be
restored. It does not test whether or not the set of available backups meet your
recoverability goals. For example, image copies of datafiles for several tablespaces
from your database may exist, each of which can be validated. If there are some
tablespaces for which no valid backups exist, however, then you cannot restore and
recover the database.
To validate selected backups:
1. On the Database Home page, click Availability to display the Availability
subpage.
2. In the Availability page, click Manage Current Backups.
The Manage Current Backups page appears.
3. Use the search features on this page to identify the backups whose contents you
want to validate.
4. Select the check boxes next to each backup of interest in the list of current backups,
and click Vali da te .
The Validate: Specify Job Parameters page appears.
5. Specify a job name and description, and time settings for starting and repeating
the operation, and then click Submit Job.
A message confirms the submission of the job.
6. Click View Job to display details about the validation.
Note: Validating backups stored on tape can be time-consuming
because the entire backup is read from tape.
See Also:
■ Oracle Database Backup and Recovery User's Guide to learn how to
use the VALIDATE command