Java Programming for absolute beginner- P12 pdf
Bạn đang xem bản rút gọn của tài liệu. Xem và tải ngay bản đầy đủ của tài liệu tại đây (373.75 KB, 20 trang )
Using Frames
The Frame class is a GUI component that defines a top-level window. A Frame
includes a border and a title bar. The Frame class extends the Window class, which
is a top-level window without a border or title bar. The
Window class subclasses the
Container class, which is a component that can contain other components.
Because
Frame inherits from these other classes, it is itself a container able to
hold other components. Table 6.2 summarizes some of the
Frame class’s methods.
Remember also that
Frame inherits from the Component class, so the methods
shown in Table 6.1 are also present in the
Frame class.
The UselessFrame Application
The UselessFrame class extends the Frame class and doesn’t do much except set
its size and display it. To write this application, first you must import the
Frame
class:
import java.awt.Frame;
Then you declare the UselessFrame class and indicate that it is a subclass of the
Frame class:
public class UselessFrame extends Frame {
178
J
a
v
a
P
r
o
g
r
am
m
i
n
g
f
o
r t
h
e A
b
s
o
l
ut
e B
e
gi
n
n
e
r
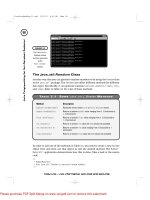
Method Description
Frame() Constructs a new Frame that is initially not visible.
Frame(String) Constructs a new invisible Frame with the given String title.
Image getIconImage() Returns this Frame’s icon Image object.
MenuBar getMenuBar() Returns this Frame’s MenuBar.
String getTitle() Returns this Frame’s String title.
boolean isResizeable() Returns a boolean that indicates whether this Frame can be
resized by the users.
setIconImage(Image) Sets the Frame’s icon image to the given Image object.
setMenuBar(MenuBar) Sets this Frame’s menu bar to the given MenuBar object.
setResizeable(boolean) Determines whether this Frame can be resized.
setTitle(String) Sets this Frame’s title to the given String.
setVisible(boolean) Makes this Frame visible if the given parameter is true. If it is
false, it makes the Frame invisible.
TABLE 6.2 SUMMARY OF
F
RAME
M ETHODS
JavaProgAbsBeg-06.qxd 2/25/03 8:52 AM Page 178
TEAM LinG - Live, Informative, Non-cost and Genuine!
Please purchase PDF Split-Merge on www.verypdf.com to remove this watermark.
Frames are initially not visible and are automatically sized to their minimum
size, which is quite small. So small, in fact, that you might not even notice them
once they are displayed in the upper-left corner of your screen. The constructor
takes care of creating a new
UselessFrame with the title, Useless Frame, by call-
ing its superclass’s
Frame(String) constructor. Then it sets the size to 300 pixels
wide by
200 pixels high, by calling the setSize(300, 200) method defined in the
Component class. Finally, the constructor shows the UselessFrame by calling
setVisible(true). The main() method simply instantiates a new UselessFrame
because the constructor takes care of the rest. The source code for Useless-
Frame.java
is listed here:
/*
* UselessFrame
* A Frame that does absolutely nothing aside from merely existing
*/
import java.awt.Frame;
public class UselessFrame extends Frame {
public UselessFrame() {
super(“Useless Frame”);
setSize(300, 200);
setVisible(true);
}
public static void main (String args[]) {
UselessFrame uf = new UselessFrame();
}
}
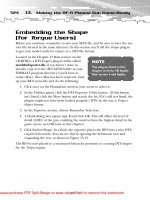
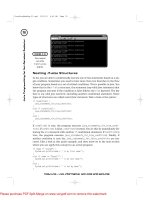
When you run this at the command prompt by typing java UselessFrame, a win-
dow will pop up with the title
Useless Frame. You can see the window in Figure
6.3. I ran this from a Microsoft Windows 98 environment at a screen resolution
of 800×600. Your window might look different if you ran it from a different oper-
ating system and/or screen resolution. The
UselessFrame initially appears in the
top-left corner of the computer screen, but I moved it by clicking the title bar and
dragging it to a new location before I created the screen shot. When you run this
you can go ahead and play around with it. Move it, minimize it, maximize it,
deactivate it by clicking another window or on the desktop, reactivate it by click-
ing it, and so on. The one thing you can’t do is close the window by clicking the
x. That’s because you haven’t handled the window-closing event yet. You do this
in the next section.
When you create a window that won’t close, or any Java program that hangs
without any activity, try pressing Ctrl+C at the command prompt to stop the pro-
gram from running if you are using a Windows environment. Another thing you
TRICK
179
C
h
a
p
t
e
r 6 C
r
e
a
t
i
n
g
a
G
U
I
U
s
i
n
g
t
h
e
A
b
s
t
r
a
c
t
W
i
n
d
o
w
i
n
g
T
o
o
l
k
i
t
JavaProgAbsBeg-06.qxd 2/25/03 8:52 AM Page 179
TEAM LinG - Live, Informative, Non-cost and Genuine!
Please purchase PDF Split-Merge on www.verypdf.com to remove this watermark.
can try is pressing Ctrl+Alt+Delete to end the task from the task manager. Be
careful when using Ctrl+Alt+Del because after you press this combo once,
pressing it again will cause your computer to reboot and you will lose any
unsaved files.
180
J
a
v
a
P
r
o
g
r
am
m
i
n
g
f
o
r t
h
e A
b
s
o
l
ut
e B
e
gi
n
n
e
r
FIGURE 6.3
This is an example
of a frame that
does nothing other
than display itself.
Learning about Containers
The Container class defines a Component that can contain other Components. The
Container maintains a list of the Components it contains. You can add Components
to it by calling its
add(Component) method. Containers arrange their Components
by using a layout manager. Layout managers are fully covered in Chapter 7, but
in this chapter you do use the
FlowLayout class, the simplest of the layout man-
agers in this chapter to display multiple
Components within a Frame.
Using the WindowListener Interface
The WindowListener interface handles WindowEvents. The UselessFrame window
doesn’t close when you click the close button because it does not implement the
WindowListener interface. When you implement this abstract interface in your
classes, you are required to define all the following methods:
public void windowClosing(WindowEvent)
public void windowActivated(WindowEvent)
public void windowClosed(WindowEvent)
public void windowIconified(WindowEvent)
JavaProgAbsBeg-06.qxd 2/25/03 8:52 AM Page 180
TEAM LinG - Live, Informative, Non-cost and Genuine!
Please purchase PDF Split-Merge on www.verypdf.com to remove this watermark.
public void windowDeiconified(WindowEvent)
public void windowDeactivated(WindowEvent)
public void windowOpened(WindowEvent)
These methods are defined in Chapter 7. In this chapter, you are only interested
in the
windowClosing(WindowEvent) method. This is what is called when the user
clicks your window’s close button to close it. They are all listed here because you
have to define them in the
ComponentTestFrame class because you want to be able
to use the interface to actually close the window without having to manually
intervene and halt your program.
The
ComponentTestFrame class extends Frame and implements the WindowLis-
tener
interface. How do you get it to do that? You just tell it the way it is:
public class ComponentTestFrame extends Frame implements WindowListener {
You use the extends word normally, followed by the superclass, Frame, and then
you follow that with another keyword
implements and the interface, WindowLis-
tener
. As soon as you do this, you know that you have to define the methods
shown previously. Take a look at the source code for
ComponentTestFrame.java
and then make sure you take the time to write it out and compile it. You need to
use it throughout the rest of this chapter.
/*
* ComponentTestFrame
* A Simple Frame to use for testing components
*/
import java.awt.*;
import java.awt.event.*;
public class ComponentTestFrame extends Frame
implements WindowListener {
public ComponentTestFrame(String title) {
super(title);
setBackground(SystemColor.control);
setSize(400, 300);
setLocation(200, 150);
setLayout(new FlowLayout());
addWindowListener(this);
}
// the only WindowListener method I care about
public void windowClosing(WindowEvent e) {
dispose();
System.exit(0);
}
// the rest of them that must be declared
public void windowActivated(WindowEvent e) { }
public void windowClosed(WindowEvent e) { }
181
C
h
a
p
t
e
r 6 C
r
e
a
t
i
n
g
a
G
U
I
U
s
i
n
g
t
h
e
A
b
s
t
r
a
c
t
W
i
n
d
o
w
i
n
g
T
o
o
l
k
i
t
JavaProgAbsBeg-06.qxd 2/25/03 8:52 AM Page 181
TEAM LinG - Live, Informative, Non-cost and Genuine!
Please purchase PDF Split-Merge on www.verypdf.com to remove this watermark.
public void windowIconified(WindowEvent e) { }
public void windowDeiconified(WindowEvent e) { }
public void windowDeactivated(WindowEvent e) { }
public void windowOpened(WindowEvent e) { }
}
The only method you care about here is the windowClosing(WindowEvent)
method, so that’s the only one you need to add statements to. You add two state-
ments to the body of this method that take care of closing the window and exit-
ing the program.
dispose() releases the native resources owned by the Frame
and those of its components as well (closes and disposes of the window’s
resources). The
System.exit(0) statement terminates the program itself. The
rest of the
WindowListener methods are there only because you have to define
them. In this case, you don’t add any statements in the methods, so they don’t
actually do anything.
The WindowListener interface is defined within the java.awt.event package,
so you need to import that package. It also defines the
WindowEvent class. When
you import a package using the asterisk character
*, it indicates that only those
classes that are referenced within the program should be imported. Actually,
nothing is imported into the object code; remember that the
import statement
just indicates where to find the classes you’re using.
This ComponentTestFrame component performs some other operations of interest
as well. It sets its background color to
SystemColor.control, which is the back-
ground color currently set for your operating system’s control objects, such as
windows, dialog boxes, buttons, and so on. This color is not the default color for
Frames; however, so you need to set it explicitly if you want it to have that partic-
ular background color. It also sets its location to the (x, y) pixel coordinates (
200,
150) and sets its layout to FlowLayout. Basically, this layout manager lays its Com-
ponent
s out in a center-aligned row (by default) until there is no more room, and
then wraps around to the next row and continues to do this until there are no
more
Components to align.
Using Components
In this section, you test the AWT Components by adding them to a ComponentTest-
Frame
instance of the class you defined in the previous section. Because the lay-
out is already set to
FlowLayout, you create the Components and then add them to
the
ComponentTestFrame, using the add(Component) method. You learn about the
different specifics of these
Components by creating multiple instances of the same
Component using different states. You then call different methods and compare
their appearances and behaviors.
TRICK
182
J
a
v
a
P
r
o
g
r
am
m
i
n
g
f
o
r t
h
e A
b
s
o
l
ut
e B
e
gi
n
n
e
r
JavaProgAbsBeg-06.qxd 2/25/03 8:52 AM Page 182
TEAM LinG - Live, Informative, Non-cost and Genuine!
Please purchase PDF Split-Merge on www.verypdf.com to remove this watermark.
The Label Component
A Label contains read-only text that you display within a container. Like all other
Components, you can change its background and foreground colors. You can also
set the alignment of text within the
Label’s area. Table 6.3 shows some of the
more common fields and methods of the
Label class.
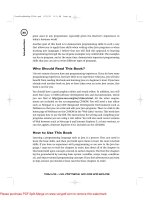
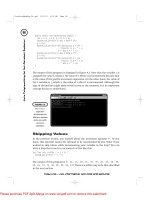
In the
LabelTest program, you use the ComponentTestFrame to display four dif-
ferent
Labels. You create the l1 object by using the Label(String) constructor,
which builds a
Label with the given String that is left aligned by default. The l2
label demonstrates that the font can be changed using the setFont(Font)
method. You use the Label() constructor with no arguments to construct the l3
Label
, and then set the text using the setText(String) method and also call
setEnabled(false) to disable the Label. As you can see in Figure 6.4, the graph-
ics for a disabled
Label are grayed out. The l4 Label’s foreground color is set to
green and the background color is set to black. Its text is right-aligned because
the constructor was called using
Label.RIGHT.
Next, you create the
ComponentTestFrame. Because that class itself does most of its
own work, you only need to create a
ComponentTestFrame object, frame, by pass-
ing a
String title to its constructor. After you do that, you can add the Label com-
ponents you created earlier by calling
frame.add(Component) and passing the
label as its Component parameter. Next, you call frame.setVisible(true) to show
183
C
h
a
p
t
e
r 6 C
r
e
a
t
i
n
g
a
G
U
I
U
s
i
n
g
t
h
e
A
b
s
t
r
a
c
t
W
i
n
d
o
w
i
n
g
T
o
o
l
k
i
t
Field or Method Description
static int CENTER Indicates the Label should be center-aligned.
static int LEFT Indicates the Label should be left-aligned.
static int RIGHT Indicates the Label should be right-aligned.
Label() Constructs a blank Label.
Label(String) Constructs a Label with the given String text.
Label(String, int) Constructs a Label with the given String text and int
alignment.
int getAlignment() Returns an int representation of this Label’s alignment.
String getText() Returns the String object that holds this Label’s text.
setAlignment(int) Sets the alignment of this object to the given int.
setText(String) Sets the text of this Label to the given String.
TABLE 6.3 FIELDS AND
M ETHODS OF THE
L
ABEL
C
OMPONENT
JavaProgAbsBeg-06.qxd 2/25/03 8:52 AM Page 183
TEAM LinG - Live, Informative, Non-cost and Genuine!
Please purchase PDF Split-Merge on www.verypdf.com to remove this watermark.
the window and that’s all you need to do. The window-closing event is already
handled in the
ComponentTestFrame class itself, so you don’t have to worry about
that here. Notice that if you resize the window, the
Labels can be realigned. If you
maximize the window, they will all form one row, but if you make the window
narrow, the
labels will all line up in one column. That fact further emphasizes
how the
FlowLayout layout manager works. Here is a listing of the source code:
/*
* LabelTest
* Tests the Label Component
*/
import java.awt.*;
public class LabelTest {
public LabelTest() {
//Make the Labels
Label l1 = new Label(“Label”);
Label l2 = new Label(“I am a Label”);
l2.setFont(new Font(“Timesroman”, Font.BOLD, 18));
Label l3 = new Label();
l3.setText(“I am disabled”);
l3.setEnabled(false);
Label l4 = new Label(“Colored, Right aligned”, Label.RIGHT);
l4.setForeground(Color.green);
l4.setBackground(Color.black);
//Make the Frame and add the labels to it
ComponentTestFrame frame = new ComponentTestFrame(“Label Test”);
frame.add(l1);
frame.add(l2);
frame.add(l3);
frame.add(l4);
frame.setVisible(true);
}
public static void main(String args[]) {
LabelTest lt = new LabelTest();
}
}
184
J
a
v
a
P
r
o
g
r
am
m
i
n
g
f
o
r t
h
e A
b
s
o
l
ut
e B
e
gi
n
n
e
r
FIGURE 6.4
Four Labels are
displayed in the
Component-
TestFrame
.
JavaProgAbsBeg-06.qxd 2/25/03 8:52 AM Page 184
TEAM LinG - Live, Informative, Non-cost and Genuine!
Please purchase PDF Split-Merge on www.verypdf.com to remove this watermark.
The Font and Color classes of the java.awt package are used here to change the
font and color associated with the
Labels. They are used throughout this chap-
ter to emphasize the flexibility you have in changing the appearance of
Compo-
nent
s. The Font class defines a font face associated with a Component that is
present on the system. In this chapter, you use the
Font(String, int, int) con-
structor to build a
Font. The first argument is the name of the Font, and the sec-
ond argument is the style of the
Font, which can be Font.PLAIN, Font.BOLD,
Font.ITALIC, or Font.BOLD + Font.ITALIC. The third argument is the point size
for the
Font. In this chapter you also use Color constants to specify colors for your
Components. Some of these constants are Color.black, Color.blue, Color.cyan,
Color.red, and Color.yellow. The Font class and the Color class are revisited in
Chapter 7 when you learn about graphics programming.
The Button Component
The Button class defines a labeled button. Buttons typically trigger some action
when the user clicks them. There are two constructors. One accepts no arguments
and just creates an empty
Button. You can set its label later on using the setLa-
bel(String)
method. The other constructor accepts a String argument specified
to be its
label. Table 6.4 shows some of the other common Button methods.
In the
ButtonTest program, you create four Button objects to get a feel for how to
create and use the
Button component. You construct b1 with the Button(String)
constructor to set its label to “Button”. You call the Button() constructor to
instantiate the
b2 Button object, creating an empty Button. Then you call two of
its methods to set the label and change the font:
b2.setLabel(“Press me!”);
b2.setFont(new Font(“Timesroman”, Font.BOLD, 18));
185
C
h
a
p
t
e
r 6 C
r
e
a
t
i
n
g
a
G
U
I
U
s
i
n
g
t
h
e
A
b
s
t
r
a
c
t
W
i
n
d
o
w
i
n
g
T
o
o
l
k
i
t
Method Description
Button() Constructs a Button with no text label.
Button(String) Constructs a Button with the given String
text label.
addActionListener(ActionListener) Adds an ActionListener to this Button.
String getLabel() Returns the String label of this Button.
setLabel() Sets this Button’s label to the given String.
removeActionListener(ActionListener) Removes the specified ActionListener from
this
Button.
TABLE 6.4
B
UTTON
M ETHODS
JavaProgAbsBeg-06.qxd 2/25/03 8:52 AM Page 185
TEAM LinG - Live, Informative, Non-cost and Genuine!
Please purchase PDF Split-Merge on www.verypdf.com to remove this watermark.
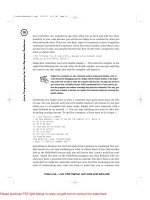
When looking at Figure 6.5 from left to right, you can see that the font of the sec-
ond
Button is bigger, bold, and Times Roman. (The first Button is a standard one
added for comparison.) You can also see that the third
Button, b3 (called “Can’t
press me”), is not enabled. The label is grayed out and when you actually run this,
you can see that you cannot click it. Disabling a
Component has a visual and func-
tional effect. Its appearance is altered and the users cannot interact with it. The
fourth
Button, b4 (called “Colors”), has a different appearance than the other but-
tons because you set its background color and foreground colors differently by
calling its
setBackground(Color) and setForeground(Color) methods. Here is a
listing of
ButtonTest.java.
/*
* ButtonTest
* Demonstrates the Button Component
*/
import java.awt.*;
public class ButtonTest {
public ButtonTest() {
//Make the Buttons
Button b1 = new Button(“Button”);
Button b2 = new Button();
b2.setLabel(“Press me!”);
b2.setFont(new Font(“Timesroman”, Font.BOLD, 18));
Button b3 = new Button(“Can’t press me”);
b3.setEnabled(false);
Button b4 = new Button(“Colors”);
b4.setForeground(Color.green);
b4.setBackground(Color.black);
//Make the Frame and add the buttons to it
ComponentTestFrame frame = new ComponentTestFrame(“Button Test”);
frame.add(b1);
frame.add(b2);
frame.add(b3);
frame.add(b4);
186
J
a
v
a
P
r
o
g
r
am
m
i
n
g
f
o
r t
h
e A
b
s
o
l
ut
e B
e
gi
n
n
e
r
FIGURE 6.5
This is a test of the
Button
component.
JavaProgAbsBeg-06.qxd 2/25/03 8:52 AM Page 186
TEAM LinG - Live, Informative, Non-cost and Genuine!
Please purchase PDF Split-Merge on www.verypdf.com to remove this watermark.
frame.setVisible(true);
}
public static void main(String args[]) {
ButtonTest bt = new ButtonTest();
}
}
When you run the ButtonTest application, try traversing the buttons using Tab
and Shift+Tab. You can see the appearance of the
Button currently in focus is dif-
ferent and stands out as the one that has user input focus. A
Component is said to
have focus when it is immediately ready to accept user input. For instance, while
traversing through the
Buttons, press the spacebar. The Button that currently has
focus will be clicked. Also take note that the disabled
Button never receives user
input focus.
The TextField Component
There are two text components in the AWT. They subclass the TextComponent
superclass. Table 6.5 shows some of the TextComponent methods inherited by
187
C
h
a
p
t
e
r 6 C
r
e
a
t
i
n
g
a
G
U
I
U
s
i
n
g
t
h
e
A
b
s
t
r
a
c
t
W
i
n
d
o
w
i
n
g
T
o
o
l
k
i
t
Method Description
int getCaretPosition() Returns the caret position of this TextComponent.
String getSelectedText() Returns the selected (highlighted) text in this TextComponent.
int getSelectionStart() Returns the position in this TextComponent where the
selected text begins.
int getSelectionEnd() Returns the position in this TextComponent where the
selected text ends.
String getText() Returns the String that represents the full text of this
TextComponent.
select(int, int) Causes the text between the first and the second argument
positions to become selected.
setCaretPosition(int) Sets the position of the caret (the blinking cursor where text
is inserted).
setEditable(boolean) Sets whether the users can edit the text within this
TextComponent.
setSelectionStart(int) Sets the beginning index of the selected text.
setSelectionEnd(int) Sets the ending index of the selected text.
setText(String) Sets this TextComponent’s text to the given String.
TABLE 6.5
T
EXT
C
OMPONENT
M ETHODS
JavaProgAbsBeg-06.qxd 2/25/03 8:52 AM Page 187
TEAM LinG - Live, Informative, Non-cost and Genuine!
Please purchase PDF Split-Merge on www.verypdf.com to remove this watermark.
both TextField and TextArea. The TextField class defines a text component that
gives the users the capability to enter and edit a single line of text, whereas the
TextArea class allows users to enter and edit multiple lines of text.
The
TextField component has four constructors. These four constructors offer
different options for instantiating a
TextField object centering around two of
its properties—its initial text and the number of columns wide it is. The number
of columns is a somewhat vague concept. One column is an approximation of
the average character width and is system dependent. The
TextField will actu-
ally be able to fit varying numbers of characters (with proportional fonts) in its
visible area. Table 6.6 shows this class’s constructors as well as some of its other
methods.
The
TextFieldTest application uses a bunch of TextFields to demonstrate the
versatility of the class. The source code for this application is listed here.
188
J
a
v
a
P
r
o
g
r
am
m
i
n
g
f
o
r t
h
e A
b
s
o
l
ut
e B
e
gi
n
n
e
r
Method Description
TextField() Constructs a new TextField with no text and with
the default number of columns.
TextField(int) Constructs a new TextField with no text and the
given number of columns.
TextField(String) Constructs a new TextField with the specified
String text.
TextField(String, int) Constructs a new TextField with the specified
String text and the given number of columns.
addActionListener(ActionListener) Adds an ActionListener that will be listed for this
TextField’s ActionEvents.
boolean echoCharIsSet() Returns a boolean value that indicates whether
this
TextField has an echo character set.
removeActionListener() Removes the specified ActionListener from this
TextField.
setColumns() Sets this TextField’s number of columns.
setEchoChar(char) Sets the echo character for this TextField. An
echo character is a character that is displayed in
place of the actual characters that are typed. For
example, a password field might use an asterisk as
the echo character, so when a user types a
password, the field will only display
********.
setText(String) Sets this TextField’s text.
TABLE 6.6
T
EXT
F
IELD
M ETHODS
JavaProgAbsBeg-06.qxd 2/25/03 8:52 AM Page 188
TEAM LinG - Live, Informative, Non-cost and Genuine!
Please purchase PDF Split-Merge on www.verypdf.com to remove this watermark.
/*
* TextFieldTest
* Demonstrates the TextField Component
*/
import java.awt.*;
public class TextFieldTest {
public TextFieldTest() {
//Make the TextFields
TextField tf1 = new TextField();
TextField tf2 = new TextField(25);
tf2.setText(“Type stuff here”);
tf2.setFont(new Font(“Timesroman”, Font.BOLD, 18));
TextField tf3 = new TextField(“I am disabled”, 15);
tf3.setEnabled(false);
TextField tf4 = new TextField(“Colors”);
tf4.setForeground(Color.green);
tf4.setBackground(Color.black);
TextField tf5 = new TextField(“Not editable”);
tf5.setEditable(false);
TextField tf6 = new TextField(“I am selected text!!!”);
tf6.select(5, 13);
TextField tf7 = new TextField(“Caret Here >< ”);
TextField tf8 = new TextField(“username”, 8);
TextField tf9 = new TextField(“password”,8);
tf9.setEchoChar(‘*’);
//Make the Frame and add the TextFields to it
ComponentTestFrame frame = new ComponentTestFrame(“TextField Test”);
frame.add(tf1);
frame.add(tf2);
frame.add(tf3);
frame.add(tf4);
frame.add(tf5);
frame.add(tf6);
frame.add(tf7);
frame.add(tf8);
frame.add(tf9);
frame.setVisible(true);
tf7.setCaretPosition(14);
}
public static void main(String args[]) {
TextFieldTest tft = new TextFieldTest();
}
}
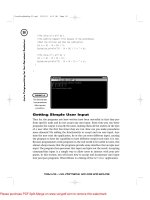
Wondering what you do with the TextField objects in this application? Well, the
t1 object is as simple as a TextField can get. The TextField() constructor is
called and you don’t call any other of its methods to alter its state. Figure 6.6
189
C
h
a
p
t
e
r 6 C
r
e
a
t
i
n
g
a
G
U
I
U
s
i
n
g
t
h
e
A
b
s
t
r
a
c
t
W
i
n
d
o
w
i
n
g
T
o
o
l
k
i
t
JavaProgAbsBeg-06.qxd 2/25/03 8:52 AM Page 189
TEAM LinG - Live, Informative, Non-cost and Genuine!
Please purchase PDF Split-Merge on www.verypdf.com to remove this watermark.
shows that when a TextField is constructed this way, it appears as a tiny little
TextField with no initial text. You can enter some text in it. You construct the
tf2 object with 25 columns, and set its text after it is constructed by calling
tf2.setText(“Type stuff here”). You also change its font. You play around with
tf4’s colors, by setting its background to black and its foreground to green. You
don’t allow the user to edit the text in the
tf5 TextField by calling tf5.setEd-
itable(false)
. When a TextField is not editable, it is still traversable and you
can copy its text to the Clipboard, but you cannot edit the text itself. You might
want to create a
TextField that is not editable if you want to use it to display
information that might change, but the user should not be the one who’s chang-
ing it. For example, if you wrote a clock program that displays the current time,
which is updated every second, you could display it in a non-editable field. This
program demonstrates how you can cause a
TextField’s text to be selected.
TextField tf6 = new TextField(“I am selected text!!!”);
tf6.select(5, 13);
This causes the word selected in tf6’s text, “I am selected text!!!” to become
selected because the letter
s is at index 5, the first argument in the select(int,
int)
method and the second argument, 13, indicates the index after the d char-
acter. The length of any
String that is selected by this method is equal to the sec-
ond argument minus the first argument. After that, you create three more
TextFields: tf7, tf8, and tf9. The interesting thing about tf7 is that you set the
caret position. The caret is just the cursor that indicates the insertion location
for when you are entering text. You set the caret position to 14, which puts it
right between the arrows.
For TextField tf9 of the TextFieldTest application, you call the
setEchoChar(char) method. What this does is display the given character in
place of all the characters in the
TextField. You can use this to hide the actual
value of the
TextArea, which is useful when a user is entering a password and
doesn’t want anyone to see it on the screen.
TRICK
190
J
a
v
a
P
r
o
g
r
am
m
i
n
g
f
o
r t
h
e A
b
s
o
l
ut
e B
e
gi
n
n
e
r
FIGURE 6.6
This shows
different
implementations of
the
TextField
component.
JavaProgAbsBeg-06.qxd 2/25/03 8:52 AM Page 190
TEAM LinG - Live, Informative, Non-cost and Genuine!
Please purchase PDF Split-Merge on www.verypdf.com to remove this watermark.
The TextArea Component
The TextArea component is similar to the TextField component except that it
allows editing of multiple lines of text. A
TextField has a certain number of rows
and columns that determines its size. It also can have scroll bars associated with
it. Table 6.7 lists the fields and some methods of the
TextArea class.
191
C
h
a
p
t
e
r 6 C
r
e
a
t
i
n
g
a
G
U
I
U
s
i
n
g
t
h
e
A
b
s
t
r
a
c
t
W
i
n
d
o
w
i
n
g
T
o
o
l
k
i
t
Field or Method Description
SCROLLBARS_NONE Indicates that this TextArea should not use any
scroll bars.
SCROLLBARS_VERTICAL_ONLY Indicates that this TextArea should use only a
vertical scroll bar.
SCROLLBARS_HORIZONTAL_ONLY Indicates that this TextArea should use only a
horizontal scroll bar.
SCROLLBARS_BOTH Indicates that this TextArea should use both a
horizontal and a vertical scroll bar.
TextArea() Constructs a new, empty TextArea.
TextArea(String) Constructs a new TextArea with the given String
text.
TextArea(int, int) Constructs a new TextArea with the given rows and
columns.
TextArea(String, int, int) Constructs a new TextArea with the given String
text and the specified number of rows and columns.
TextArea(String, int, int, int) Constructs a new TextArea with the given String
text, the specified number of rows and columns as
the second and third arguments and the
int
representation, such as SCROLLBARS_BOTH, of how
the scroll bars are displayed.
append(String) Appends the given String to the end of this
TextArea’s text.
int getColumns() Returns the number of columns.
int getRows() Returns the number of rows.
insert(String, int) Inserts the given String at the specified text index.
replaceRange(String, int, int) Replaces the currently existing text starting with the
second argument beginning index and ending with
the third argument ending index with the specified
String argument.
setColumns(int) Sets the number of columns.
setRows(int) Sets the number of rows.
TABLE 6.7
T
EXT
A
REA
F IELDS AND M ETHODS
JavaProgAbsBeg-06.qxd 2/25/03 8:52 AM Page 191
TEAM LinG - Live, Informative, Non-cost and Genuine!
Please purchase PDF Split-Merge on www.verypdf.com to remove this watermark.
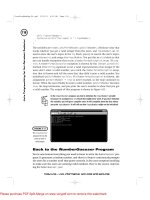
The TextAreaTest application is pretty straightforward. You create four TextArea
objects and display them in the ComponentTestFrame. The first one on the left,
ta1, is constructed with no text, 10 rows, and 20 columns. You can see in Figure
6.7 that the default for the scroll bars is
TextArea.SCROLLBARS_BOTH, because both
the horizontal and vertical scroll bars appear in this
TextArea. The middle
TextArea, ta2, changes its background and foreground colors and specifies its
scroll bars as
TextArea.SCROLLBARS_NONE. You can see that no scroll bars appear.
The behavior of this
TextArea is different as a result. In ta1, while you’re typing,
if your line becomes longer than the displayable width, the horizontal scroll bar
will start to react to indicate this. You are allowed to continue typing on one sin-
gle line. However, in
ta2, if you attempt to type past the visible number of
columns, the text will automatically be wrapped and no scrolling takes place.
One more thing to note is that when the text for
ta2 is initialized, a newline char-
acter
\n is used. As you might expect, the TextArea correctly interprets it and the
initial text becomes two lines long. As for the other two,
ta3 (on the right) is not
editable, but it can gain focus and you can select its text, and
ta4 (on the bottom)
is not enabled. It can’t have focus, and the text is a bit grayed out to indicate this.
/*
* TextAreaTest
* Demonstrates the TextArea Component
*/
import java.awt.*;
public class TextAreaTest {
public TextAreaTest() {
//Make the TextAreas
TextArea ta1 = new TextArea(““, 10, 20);
TextArea ta2 = new TextArea(“TextArea\nText”, 10, 10,
TextArea.SCROLLBARS_NONE);
ta2.setFont(new Font(“Verdana”, Font.ITALIC, 12));
ta2.setForeground(Color.yellow);
ta2.setBackground(Color.black);
TextArea ta3 = new TextArea(“This TextArea is not editable”,
10, 15, TextArea.SCROLLBARS_HORIZONTAL_ONLY);
ta3.setEditable(false);
TextArea ta4 = new TextArea(“This TextArea is not enabled”,
4, 25, TextArea.SCROLLBARS_VERTICAL_ONLY);
ta4.setEnabled(false);
//Make the Frame and add the TextAreas to it
ComponentTestFrame frame = new ComponentTestFrame(“TextArea Test”);
frame.add(ta1);
frame.add(ta2);
frame.add(ta3);
frame.add(ta4);
frame.setVisible(true);
}
192
J
a
v
a
P
r
o
g
r
am
m
i
n
g
f
o
r t
h
e A
b
s
o
l
ut
e B
e
gi
n
n
e
r
JavaProgAbsBeg-06.qxd 2/25/03 8:52 AM Page 192
TEAM LinG - Live, Informative, Non-cost and Genuine!
Please purchase PDF Split-Merge on www.verypdf.com to remove this watermark.
193
C
h
a
p
t
e
r 6 C
r
e
a
t
i
n
g
a
G
U
I
U
s
i
n
g
t
h
e
A
b
s
t
r
a
c
t
W
i
n
d
o
w
i
n
g
T
o
o
l
k
i
t
public static void main(String args[]) {
TextAreaTest tat = new TextAreaTest();
}
}
FIGURE 6.7
Here are four
TextArea
components.
The Choice Component
The Choice component allows the users to choose one item from a list of items.
It is implemented as a drop-down menu. Initially, it is visibly about the size of a
TextField, but when a user is selecting an item, a drop-down (also called pop-up)
menu opens and the user selects the item from the list of items that appear
within it. Once the user has selected an item, the
Choice “shrinks” again; actu-
ally, the menu disappears, and the selected item will be the one visible item in
the
Choice. A Choice is used first by calling its only constructor, which accepts no
arguments. Then you add items to it:
Choice myChoice = new Choice();
myChoice.add(“Work”);
myChoice.add(“Play”);
myChoice.add(“Sleep”);
This snippet of code constructs a Choice, called myChoice, and then adds three
items to it,
Work, Play, and Sleep. From a user standpoint, this is a choice
between
Work, Play, and Sleep. Note that you cannot pick more than one of these
at a time—they are mutually exclusive. No contest, right—“
Sleep”. Table 6.8 lists
some of
Choice’s more common methods.
The
ChoiceTest application creates four Choice objects, c1, c2, c3, and c4. There
is nothing out of the ordinary here except
c3 shows that you can change its col-
ors and
c4 is not enabled. Figure 6.8 shows the output. Here is a listing of the
ChoiceTest application source code, ChoiceTest.java.
/*
* ChoiceTest
* Demonstrates the Choice Component
*/
JavaProgAbsBeg-06.qxd 2/25/03 8:52 AM Page 193
TEAM LinG - Live, Informative, Non-cost and Genuine!
Please purchase PDF Split-Merge on www.verypdf.com to remove this watermark.
import java.awt.*;
public class ChoiceTest {
public ChoiceTest() {
//Make the Choices
Choice c1 = new Choice();
c1.add(“Soup”);
c1.add(“Salad”);
Choice c2 = new Choice();
c2.add(“Java”);
c2.add(“C++”);
c2.add(“HTML”);
c2.add(“JavaScript”);
c2.add(“COBOL”);
c2.add(“FORTRAN”);
Choice c3 = new Choice();
c3.add(“One”);
c3.add(“Two”);
c3.add(“Three”);
c3.setForeground(Color.red);
c3.setBackground(Color.black);
194
J
a
v
a
P
r
o
g
r
am
m
i
n
g
f
o
r t
h
e A
b
s
o
l
ut
e B
e
gi
n
n
e
r
Method Description
Choice() Constructs a new Choice object.
add(String) Adds a new item to this Choice.
addItem(String) Adds a new item to this Choice.
addItemListener(ItemListener) Adds an ItemListener to this Choice.
String getItem(int) Returns the item at the specified index.
int getItemCount() Returns the number of items in this Choice.
int getSelectedIndex() Returns the index of the currently selected item.
insert(String, int) Inserts a String at the specified index.
remove(int) Removes the item at the specified index.
remove(String) Removes the first occurrence of the specified item.
removeAll() Removes all the items from this Choice.
removeItemListener(ItemListener) Removes the ItemListener from this Choice.
select(int) Causes the item at the specified index to be
selected.
select(String) Causes the first occurrence of the specified item to
be selected.
TABLE 6.8
C
HOICE
M ETHODS
JavaProgAbsBeg-06.qxd 2/25/03 8:52 AM Page 194
TEAM LinG - Live, Informative, Non-cost and Genuine!
Please purchase PDF Split-Merge on www.verypdf.com to remove this watermark.
c3.setFont(new Font(“Courier”, Font.PLAIN, 16));
Choice c4 = new Choice();
c4.add(“Not Enabled”);
c4.add(“Nope”);
c4.setEnabled(false);
//Make the Frame and add the Choices to it
ComponentTestFrame frame = new ComponentTestFrame(“Choice Test”);
frame.add(c1);
frame.add(c2);
frame.add(c3);
frame.add(c4);
frame.setVisible(true);
}
public static void main(String args[]) {
ChoiceTest ct = new ChoiceTest();
}
}
195
C
h
a
p
t
e
r 6 C
r
e
a
t
i
n
g
a
G
U
I
U
s
i
n
g
t
h
e
A
b
s
t
r
a
c
t
W
i
n
d
o
w
i
n
g
T
o
o
l
k
i
t
The List Component
The List component is similar to the Choice component, except it shows multi-
ple rows at a time and allows the users to scroll through the items. You typically
use
Lists over Choices when there are a significantly large number of items to
choose from. Another difference is that you can set up a
List component so that
the users can select multiple items simultaneously. Similar to the
Choice com-
ponent, the
List component is used by first constructing one, and then adding
items to it:
List myList = new List(3, true);
myList.add(“Milk”);
myList.add(“Eggs”);
myList.add(“Bread”);
The myList component has three rows (specified in the call to the constructor)
and three items to choose from. One is listed per row, so all three are visible. The
second argument,
true, indicates that multiple items can be selected simultane-
FIGURE 6.8
You use the Choice
component to pick
one item out of
many.
JavaProgAbsBeg-06.qxd 2/25/03 8:52 AM Page 195
TEAM LinG - Live, Informative, Non-cost and Genuine!
Please purchase PDF Split-Merge on www.verypdf.com to remove this watermark.
ously. The user can select from “Milk”, “Eggs”, and “Bread”. All of them can be
selected, or none of them. Also one or two can be selected as well. Table 6.9 shows
some of the more important methods that belong to the
List class.
Four
List objects are created in the ListTest application. l1 (upper-left) is con-
structed using the no-parameter constructor and two items are added to it. All
the items fit within its visible area, so the scroll bar is not displayed. Also the
default multiple mode is
false, so only one item can be selected at a time. The
l2 (upper-right) object sets its multiple mode to true, so you can select more than
one item at a time. The
l3 (lower-left) object demonstrates that you can change
its colors and fonts and also that when there are too many items for the
List to
display all at once, the scroll bar is used to scroll through them. The
l4 (lower-
right) object is not enabled, so you cannot select or deselect any of the items.
Using the
select(int) method, it selects the second item (because the index
starts at zero),
Nope. When you run this procedure, you will be unable to deselect
it or select the other item. Here is the source code for
ListTest.java. The execu-
tion of this program appears in Figure 6.9.
/*
* ListTest
* Demonstrates the List Component
*/
import java.awt.*;
public class ListTest {
public ListTest() {
//Make the Lists
List l1 = new List();
l1.add(“Soup”);
l1.add(“Salad”);
List l2 = new List(6, true);
l2.add(“Java”);
l2.add(“C++”);
l2.add(“HTML”);
l2.add(“JavaScript”);
l2.add(“COBOL”);
l2.add(“FORTRAN”);
List l3 = new List(5, false);
l3.add(“One”);
l3.add(“Two”);
l3.add(“Three”);
l3.add(“Four”);
l3.add(“Five”);
l3.add(“Six”);
l3.add(“Seven”);
l3.add(“Eight”);
l3.add(“Nine”);
l3.add(“Ten”);
196
J
a
v
a
P
r
o
g
r
am
m
i
n
g
f
o
r t
h
e A
b
s
o
l
ut
e B
e
gi
n
n
e
r
JavaProgAbsBeg-06.qxd 2/25/03 8:52 AM Page 196
TEAM LinG - Live, Informative, Non-cost and Genuine!
Please purchase PDF Split-Merge on www.verypdf.com to remove this watermark.
197
C
h
a
p
t
e
r 6 C
r
e
a
t
i
n
g
a
G
U
I
U
s
i
n
g
t
h
e
A
b
s
t
r
a
c
t
W
i
n
d
o
w
i
n
g
T
o
o
l
k
i
t
Method Description
List() Constructs a new List object.
List(int) Constructs a new List object with the specified
number of visible rows.
List(int, boolean) Constructs a new List object with the specified
number of visible rows and a
boolean that
indicates whether this
List allows multiple
selections.
add(String) Adds the specified item to this List.
add(String, int) Adds the specified item to this List at the given
index.
addActionListener(ActionListener) Adds the given ActionListener to this List.
addItemListener(ItemListener) Adds the given ItemListener to this List.
deselect(int) Deselects the item at the given index.
String getItem(int) Returns the String item at the given index.
String[] getItems() Returns all the items as an array of Strings.
int getItemCount() Returns the number of items in this List.
int getRows() Returns the number of visible rows.
int getSelectedIndex() Returns the index of the currently selected item.
If either none or more than one item is selected,
this method returns
–1.
int[] getSelectedIndexes() Returns an array of integers that represent all
this
List’s selected item indices.
String getSelectedItem() Returns the String item that is currently
selected or
null.
String[] getSelectedItems() Returns all this List’s selected items as an
array of
Strings.
boolean isMultipleMode() Returns whether this List can have multiple
selections.
remove(int) Removes the item at the given index.
remove(String) Removes the first occurrence of the given item.
removeAll() Removes all the items from this List.
removeActionListener(ActionListener) Removes the specified ActionListener from
this
List.
removeItemListener(ItemListener) Removes the specified ItemListener from this
List.
select(int) Selects the specified item within this List.
setMultipleMode(boolean) Sets whether this List can have multiple
selections.
TABLE 6.9
L
IST
M ETHODS
JavaProgAbsBeg-06.qxd 2/25/03 8:52 AM Page 197
TEAM LinG - Live, Informative, Non-cost and Genuine!
Please purchase PDF Split-Merge on www.verypdf.com to remove this watermark.