DHTML Utopia Modern Web Design Using JavaScript & DOM- P13 ppt
Bạn đang xem bản rút gọn của tài liệu. Xem và tải ngay bản đầy đủ của tài liệu tại đây (353.34 KB, 20 trang )
204 Piggybacks
Even simpler than the image swap technique is to use the HTTP 204 “No Con-
tent” response. Using this technique, instead of changing the src of an image to
a new document, we simply navigate to a special link. That link runs a server
script that returns a 204 response code (and no content at all), along with useful
cookie data. Browsers know to leave the current page in place when a 204 response
is received. This approach is otherwise very similar to the image swap technique.
Example: Name Resolution
Many email clients have an address book with a “nickname” feature; enter the
nickname into the To or Cc boxes, and the email client replaces it with the email
address attached to that nickname. Webmail systems don’t often provide this
functionality, but it’s a clear example of the sort of problem that the RSLite library
is designed to answer.
To create this functionality, we pass a small amount of data (a nickname) to the
server via the RSLite library; the server then does all the work, resolving the
nickname to an email address. RSLite then passes the results of that work (the
email address) back to the client for display.
Here’s a sample Web mail page. It looks just like an ordinary Web application:
File: nameresolution.html
<!DOCTYPE HTML PUBLIC "-//W3C//DTD HTML 4.01//EN"
" /><html>
<head>
<title>Name Resolution</title>
<link type="text/css" rel="stylesheet"
href="nameresolution.css">
<script src="rslite.js" type="text/javascript"></script>
<script src="nameresolution.js" type="text/javascript">
</script>
</head>
<body>
<h1>Name resolution</h1>
<form>
<p>
<label for="to">To:</label>
<input type="text" name="to" id="to">
</p>
220
Chapter 8: Remote Scripting
Licensed to
<p>
<label for="cc">Cc:</label>
<input type="text" name="cc" id="cc">
</p>
<p>
<label for="Subject">Subject:</label>
<input type="text" name="subject" id="subject">
</p>
<p>
<textarea id="message" name="message"></textarea>
</p>
<p>
<input type="submit" value="Send">
</p>
</form>
</body>
</html>
The styles in nameresolution.css are decorative only: they have no impact on
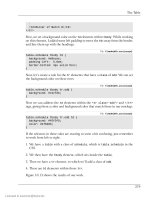
the DHTML effect. Figure 8.5 shows this page in action:
Figure 8.5. A Webmail interface.
Any code that we add should watch the To and Cc fields for changes. Whenever
they change, our code will pass the contents back to the server using RSLite.
RSLite will hand us back a resolved email address to go with the passed nickname
(assuming an email address if found); otherwise, it will not hand back anything.
Here’s the very simplified server script:
221
Example: Name Resolution
Licensed to
File: resolver.php
<?php
$names = array(
'sil' => '',
'simon' => '',
'simonm' => '',
'nigel' => '',
'kev' => ''
);
$p = @$_GET['p'];
if (isset($names[$p]))
setcookie('RSLite', $names[$p]);
?>
Obviously, in a real application, the $names array would not be hardcoded; instead,
the code might look up the passed nickname ($_GET['p']) in a database.
Here’s our scripting plan. The HTML includes the rslite.js library to make
RSLite calls possible. Our script should then attach a change listener to the To
and Cc fields so that it is notified of changes. Our script must also tell RSLite
about callbacks.
RSLite is an asynchronous library, so when the code calls the server, that call
does not return with the server’s response data. Instead, the call returns immedi-
ately with no data. RSLite then repeatedly checks for a cookie set by the server
(using setInterval) and, when one is set, a nominated callback function is called
with the new cookie value from the server.
Here’s an example of the required processing for just one field change:
1. Initialization code in the page tells RSLite which callback to call if any values
arrive from the server.
2. The change event listener calls RSLite when a change occurs.
3. RSLite uses a JavaScript Image object to make a request to the server, sets
up an interval timer to watch for responses, and finishes.
4. The server returns a cookie with its response to the request.
222
Chapter 8: Remote Scripting
Licensed to
5. The interval timer notices the cookie and calls the callback function specified
in Step 1.
As usual, let’s start with the signature of the library object for which we’re aiming:
File: nameresolution.js (excerpt)
var nR = {
init: function() { },
addEvent: function(elm, evType, fn, useCapture) { },
resolve: function(e) { },
resolve_callback: function(response) { },
resolve_failure: function() { }
}
nR.addEvent(window, 'load', nR.init, false);
init and addEvent have the same roles as always. resolve is the listener that
will kick off the name resolution. The other two methods are callbacks that are
passed to RSLite.
Here’s the init method that sets everything up:
File: nameresolution.js (excerpt)
init: function() {
if (!document.getElementById) return;
if (!RSLiteObject) return;
window.RSLite = new RSLiteObject();
// Set the "to" and "cc" fields to have name resolution
var to_field = document.getElementById('to');
if (to_field) nR.addEvent(to_field, 'change', nR.resolve,
false);
var cc_field = document.getElementById('cc');
if (cc_field) nR.addEvent(cc_field, 'change', nR.resolve,
false);
// Set up the callbacks
window.RSLite.callback = nR.resolve_callback;
window.RSLite.failure = nR.resolve_failure;
}
The resolve method is registered as a listener on every field that supports name
lookup, and RSLite is told about the two callback methods. Have a read of the
RSLite code if you want to see how it stores those methods for later processing.
223
Example: Name Resolution
Licensed to
The resolve method is the event listener for the change event on the To and Cc
fields. Here it is:
File: nameresolution.js (excerpt)
resolve: function(e) {
var target = window.event ? window.event.srcElement: e ?
e.target : null;
if (!target || !target.value) return;
nR.currentTarget = target;
if (target.value.indexOf('@') != -1) return; // email address
// Try and resolve the entered value to a proper value by
// calling the server for name resolution
window.RSLite.call('resolver.php', target.value);
}
This method retrieves the target element as usual, then saves that target element
in an object property for later use. This is required so that the callback method
can find out which field changed. The method then checks that the value does
not contain an @ symbol; if it does, the code returns on the assumption that if
the value in the field is already an email address, it does not need resolving. Fi-
nally, it uses RSLite to pass the value
10
back to the server. nR.RSLite.call takes
two parameters: the name of the server page that’s to be called (resolver.php),
and the value to pass to that page (which, in this case, is the content of the field
for resolution). This method then immediately exits; it does not wait for the value
returned from the server. Instead, when the server returns a value, that value is
passed to the callback method, resolve_callback. Here it is:
File: nameresolution.js (excerpt)
resolve_callback: function(response) {
nR.currentTarget.value = response;
},
This method receives the server response, and sets the value of the field to that
response. This is why resolve, above, saved the field into a variable. The field
automatically changes from an entered nickname (“sil”) to a resolved email address
(“”) when the user clicks or tabs out of it.
RSLite also allows for a failure callback function, which is called if the server re-
turns nothing. In the server code above, the server will return nothing if the
10
The function assumes, for simplicity, that the user has only entered one nickname into the field.
Extending the function to allow for multiple (comma-separated) addresses or nicknames is an exercise
that I’ve left to you.
224
Chapter 8: Remote Scripting
Licensed to
passed nickname is not in the $names array; the code can use this to flag to the
user that the entered nickname is unknown:
File: nameresolution.js (excerpt)
resolve_failure: function() {
var errorSpan = document.createElement('span');
errorSpan.className = 'error';
errorSpan.appendChild(document.createTextNode(
'Address ' + nR.currentTarget.value + ' invalid'));
nR.currentTarget.errorSpan = errorSpan;
nR.currentTarget.parentNode.appendChild(errorSpan);
},
An invalid address is flagged with the addition of a new span to the document
containing the text, “Address foo invalid”. A tiny extra customization to resolve
is also required:
File: nameresolution.js (excerpt)
resolve: function(e) {
var target = window.event ? window.event.srcElement: e ?
e.target : null;
if (!target || !target.value) return;
nR.currentTarget = target;
if (nR.currentTarget.errorSpan) {
nR.currentTarget.errorSpan.parentNode.removeChild(
nR.currentTarget.errorSpan);
nR.currentTarget.errorSpan = null;
}
if (target.value.indexOf('@') != -1) return; // email address
// Try and resolve the entered value to a proper value by
// calling the server for name resolution
window.RSLite.call('resolver.php', target.value);
},
The additional lines above remove any existing error message span before
checking for a new address.
XMLHTTP
The methods presented so far have the disadvantage that they’re oriented towards
transferring small amounts of data from server to client: short strings, numbers,
and the like. Transferring a larger quantity of data would be problematic using
these methods; the hidden image technique, for example, is limited to data
225
XMLHTTP
Licensed to
quantities of four kilobytes: the maximum size of a cookie.
11
For notifications,
for small amounts of data, for a flag saying merely “yes” or “no”, these methods
are sufficient. When the client wants to retrieve a larger amount of data from
the server, a different technique is called for. The best alternative is XMLHTTP.
Origins of XMLHTTP
XMLHTTP was originally implemented by Microsoft in Internet Explorer. It al-
lows JavaScript to request an arbitrary URL,
12
receive the returned content, and
do anything with it that you wish. The data returned from that URL can obviously
be anything: it can be as long as you like, and anything you like. Although the
method is called XMLHTTP, you are not limited to sending or returning XML.
It is, therefore, a technique that’s useful where other methods fall short.
Other methods fall short from time to time because they’re essentially hacks—they
use side-effects of other techniques to perform data transfer. XMLHTTP was
specifically designed to do this transfer, so, if you want to pass a lot of data from
the server back to the client, XMLHTTP is the way to go.
Even though the technique is called XMLHTTP, the class invented by Microsoft
is called XMLHttpRequest. Since HTTP is also an acronym it should really be
called XMLHTTPRequest. It’s not though, so we’re stuck with using XMLHttpRequest
in our code. We’ll continue to use XMLHTTP as the name of the technique,
though.
The XMLHTTP technique relies entirely on HTTP requests and responses, as
does the rest of the Web. There’s no new form of communication between the
Web browser and the Web server, there’s just a new way to make requests from
scripts—that’s all.
Browser Variations
XMLHTTP has some compatibility issues; it’s implemented a little differently
in Gecko-based browsers (Mozilla, Firefox, Camino, and so on) than it is in IE.
13
Apple’s Safari implements the Mozilla method, while other browsers may not
support it at all. Opera is introducing support in its latest releases; Opera 7.6 will
also implement the Mozilla approach.
11
It would, of course, be possible to re-engineer the server code and the library to use multiple
cookies to transfer data to get around this limit, but it would be a lot of work for not much benefit.
12
The JavaScript security rules apply here; briefly, you can only request URLs from the server from
which this HTML page was served. You can’t just grab any URL from anywhere on the Web.
13
IE 5.5 and above: IE5.0 does not support the technique.
226
Chapter 8: Remote Scripting
Licensed to
By far the easiest way to work around these issues is to use one of the existing
libraries that “wrap” the XMLHTTP objects provided by each browser. Including
the library and using its objects, instead of the browser objects, to make requests
neatly hides the varying browser implementations.
XMLHTTP, AJAX, and the Future
Since XMLHTTP has become widely supported across the browser market, more
and more applications use it. Jesse James Garrett at Adaptive Path has coined
the term “AJAX”
14
for applications using XMLHTTP, as a shorthand for “Asyn-
chronous JavaScript And XML”. Use of AJAX by famous Websites like Google
(on the Google Suggest page) has helped to accelerate its popularity.
XMLHTTP has great potential because it breaks down the page-based model
that most Web-based applications use. Before the Web came along, most applic-
ations used static data entry screens that weren’t page-oriented. XMLHTTP allows
that earlier kind of design to be re-expressed on the Web. If it worked once,
probably it will work again.
XMLHTTP also has its issues. It reduces the accessibility of Web pages somewhat.
That, however, was also said about DHTML when it first came on the scene. In
this book, we’ve explained ways to ensure the accessibility of a site while exploiting
the possibilities of DHTML. The same sorts of techniques are likely to evolve
for XMLHTTP as well.
Sarissa: a Cross-Browser Library
One of the better XMLHTTP libraries is Sarissa
15
, which wraps up both the
XMLHttpRequest class for making HTTP requests, and the DOM Document class
for interpreting the response as an XML DOM tree.
Making a request for a URL with Sarissa is simple. First, include the Sarissa library
in your code:
<script type="text/javascript" src="sarissa.js"></script>
Next, create a cross-browser XMLHTTP object:
var xmlhttp = new XMLHttpRequest();
14
/>15
/>227
XMLHTTP
Licensed to
Third, specify the page to request:
xmlhttp.open('GET', 'url-of-page', true);
This call does not actually send the HTTP request; it merely specifies what it
will be when it’s sent. The request can, in theory, use any HTTP request type.
The type is specified in the first parameter to the open call.
16
The request should
be made asynchronously, so that the browser doesn’t lock up while it’s being
made. An asynchronous request is performed by making the third parameter in
the open call above true. The callback function, which is called when the request
returns with data, is defined as follows:
xmlhttp.onreadystatechange = function() {
if (xmlhttp.readyState == 4) {
// place your callback code here
}
}
That’s an anonymous (nameless) callback function. It uses the number 4 because
the returning response goes through a number of different states; state 4 means
“the response is complete.” Finally, to send the request, we use the following:
xmlhttp.send(null);
send returns immediately. When the request returns (later on, in its own time),
your callback code is called, and the data from the requested URL is available in
xmlhttp.responseText. Easy!
Example: Checking Usernames
Lots of Websites have signup forms that require a name, address, email address,
username, and so forth. In signing up for a popular site, it’s not uncommon to
find that the username you wanted, or even your second and third choices, have
already been taken. Of course, to find that out, you have to complete the whole
form and then wait while it’s submitted to the server. Then, finally, you’re
presented with the dreaded, “That username is already in use” message. In this
example, we’ll try to improve that user experience.
A nice enhancement to these forms might use remote scripting to check if the
username you entered is already in use while you’re filling in the rest of the form.
That solution saves time and effort. We could achieve it using the above methods;
16
In practice, browser support for request verbs other than GET and POST is lacking. Other verbs,
such as PUT and DELETE, can be used with REST-style APIs, but they’re not very common as yet.
228
Chapter 8: Remote Scripting
Licensed to
RSLite, for example, would be an ideal approach. Simply pass the entered user-
name back to the server asynchronously, and have the server pass back true or
false, meaning already-in-use or available-for-use, respectively.
An extra enhancement could see the server, which knows the names already in
use, suggest some alternatives that are not currently taken. Passing back this
larger quantity of data, as already discussed, is an ideal use case for XMLHTTP.
Imagining the Solution
To make this work, there would first have to be a server-side page. When passed
a name and a possible username, that page would return a simple list of suggested
alternatives. Implementation of this server-side page is left as an exercise for the
reader;
17
for now, assume that it is called with username and name parameters
in the query string, and that it returns a list of possible alternative unused user-
names as XML, like so:
<usernames>
<username>StuartLangridge</username>
<username>SLangridge</username>
<username>sil194</username>
</usernames>
For the sake of completeness, here’s a naïve implementation of such a script in
PHP:
File: check-username.php
<?php
// A quick and dirty XMLHTTP response script
header('Content-type: text/xml');
$username = $_GET['username'];
$name = $_GET['name'];
$names = explode(' ', $name);
$initial = substr(trim($name), 0, 1);
$surname = $names[count($names) - 1];
$firstname = $names[0];
?>
<usernames>
17
Obviously it also needs to return an indication that the suggested username is available if, in fact,
it is. This is also left as an exercise for the reader.
229
Example: Checking Usernames
Licensed to
<username><?php echo htmlspecialchars($firstname) .
htmlspecialchars($surname); ?></username>
<username><?php echo htmlspecialchars($initial) .
htmlspecialchars($surname); ?></username>
<username><?php echo htmlspecialchars($username);
?>194</username>
</usernames>
The signup form itself requires very simple HTML:
File: check-username.html
<!DOCTYPE HTML PUBLIC "-//W3C//DTD HTML 4.01//EN"
" /><html>
<head>
<title>Check a username for uniqueness</title>
<link type="text/css" rel="stylesheet"
href="check-username.css">
<script type="text/javascript" src="sarissa.js"></script>
<script type="text/javascript" src="check-username.js">
</script>
</head>
<body>
<form action="">
<div>
<label for="name">Your name</label>
<input type="text" class="text" id="name" name="name">
</div>
<div id="usernamecontainer">
<label for="username">Your chosen username</label>
<input type="text" class="text" id="username"
name="username">
</div>
<div>
<label for="address">Address</label>
<textarea id="address" name="address"></textarea>
</div>
<div><input type="submit" class="submit"></div>
</form>
</body>
</html>
The username field (indicated in bold above) is the key here; when the field’s
value changes, the server should be called to confirm or deny the availability of
the supplied username.
230
Chapter 8: Remote Scripting
Licensed to
Here’s the style sheet that controls the layout of the form:
File: check-username.css
form {
margin-left: 200px;
}
form div {
margin: 0 0 0.25em 0;
}
label {
float: left;
margin-left: -200px;
}
label.para {
float: none;
display: block;
}
label.radio {
float: none;
margin-left: 0;
}
ul.radio {
margin: 0;
padding: 0;
list-style-type: none;
}
input.text {
width: 15em;
}
textarea {
width: 20em;
height: 10em;
}
input.submit {
margin-left: -200px;
}
231
Example: Checking Usernames
Licensed to
This style sheet contains a few rules for elements that the document does not
yet contain, but they will come into play by the time we finish building this ex-
ample. Since this isn’t a book about style sheets, I’ll leave you to examine the
rules in detail if you wish.
Figure 8.6 shows the form before the server has been called.
Figure 8.6. Entering a username.
Building the JavaScript Scripts
We’ll use the standard approach to attach an event listener to the change event
on the username field, and to store some variables for later use. Here’s our library
object signature:
File: check-username.js (excerpt)
var cU = {
init: function() { },
addEvent: function(elm, evType, fn, useCapture) { },
checkUsername: function() { },
receiveUsernames: function(dom) { }
}
cU.addEvent(window, 'load', cU.init, false);
checkUsername will ask the server to perform the check. receiveUsernames is
the callback method that handles the server response. Here’s the init method
that sets this up:
232
Chapter 8: Remote Scripting
Licensed to
File: check-username.js (excerpt)
init: function() {
if (!document.getElementById) return;
if (!Sarissa) return;
cU.name = document.getElementById('name');
cU.username = document.getElementById('username');
cU.usernamecontainer = document.getElementById(
'usernamecontainer');
if (!cU.name || !cU.username) return;
if (!cU.usernamecontainer.innerHTML) return;
cU.addEvent(cU.username, 'change', cU.checkUsername, false);
}
All this does is store references to the form fields, and to the div element where
results will be displayed; it also installs a change event listener on the username
field.
Note that init checks for the presence of the Sarissa object before proceed-
ing—it’s very easy to forget to load the library!
The checkUsername method, the event listener, constructs the appropriate URL
for the server-side page (check-username.php?username=A&name=B) and initiates
the XMLHTTP request.
File: check-username.js (excerpt)
checkUsername: function() {
var xmlhttp = new XMLHttpRequest();
var qs = '?username=' + cU.username.value +
'&name=' + cU.name.value;
xmlhttp.open('GET', 'check-username.php' + qs, true);
xmlhttp.onreadystatechange = function() {
if (xmlhttp.readyState == 4) {
cU.receiveUsernames(xmlhttp.responseXML);
}
};
xmlhttp.send(null);
},
The callback function shown in bold simply calls receiveUsernames with the
returned XML document structure, responseXML.
The receiveUsernames method can, when called, obtain the suggested usernames
from the returned XML, and then present them to the user in some way. Let’s
break receiveUsernames down.
233
Example: Checking Usernames
Licensed to
The list of usernames can be obtained from the XML DOM in the same way as
it would be obtained from the HTML DOM when parsing a Web page:
File: check-username.js (excerpt)
receiveUsernames: function(dom) {
var alternatives = dom.getElementsByTagName('username');
The alternatives variable now holds a set of elements. A suitable way to present
the list of alternative usernames to the user might involve adding a set of labeled
radio buttons to the page. The page must also leave the text box in place (so the
user is not forced to choose one of the presented alternatives), along with a
message to explain that the selected username is unavailable.
This is quite a lot of HTML to add to the page. In theory, the script should use
DOM methods like document.createElement, and document.appendChild to
create each element, build the elements together into a DOM tree, and then insert
that DOM tree into the page. This would be exceedingly tedious.
Instead, let’s make use of the proprietary (but widely supported) property,
innerHTML. While using this property is frowned upon by standards-bearers, it
is a much simpler way of creating a block of HTML on-the-fly than is building
it with DOM methods.
18
Since we’re already using XMLHTTP—a nonstandard
browser feature—we might as well use innerHTML as well.
The HTML block that is to be inserted looks like this:
File: check-username.js (excerpt)
var usernameHTML = '<label for="username" class="para">' +
'The username \'USERNAME\' is already in use. ' +
'Please choose one of the alternatives below, or ' +
'enter another username.</label>' +
'<ul class="radio">ALTERNATIVESLIST<li>' +
'<label class="radio"><input type="radio" ' +
'name="unchoice" checked="checked" value="username"> ' +
'Another choice:</label> ' +
'<input type="text" class="text" id="username" ' +
'name="username"></li></ul>';
usernameHTML = usernameHTML.replace('USERNAME',
cU.username.value);
18
The new E4X standard provides an easy, standards-based solution. It’s only available in Mozilla
1.8 and Firefox 1.1 and above, though.
234
Chapter 8: Remote Scripting
Licensed to
As you can see, the HTML code placed in usernameHTML initially contains two
placeholders: USERNAME and ALTERNATIVESLIST. The username is added with the
string’s replace method.
The ALTERNATIVESLIST placeholder is a little more complicated. We must con-
struct the list of alternative usernames by iterating through the elements in
alternatives and building it up:
File: check-username.js (excerpt)
var alternativeslist = '';
for (var i = 0; i < alternatives.length; i++) {
var thisAL = '<li><label class="radio"><input ' +
'type="radio" name="unchoice" checked="checked" ' +
'value="USERNAME"> USERNAME</label></li>';
thisAL = thisAL.replace(/USERNAME/g,
alternatives[i].firstChild.nodeValue);
alternativeslist += thisAL;
}
usernameHTML = usernameHTML.replace('ALTERNATIVESLIST',
alternativeslist);
Each time through the loop, we create the HTML code for a radio button for one
username in the alternatives array. We collect all that content together in
alternativeslist and stick that set of list items into the HTML content string
we prepared earlier.
Finally, we add the HTML to the page. Note that this replaces the current content
of the usernamecontainer div, removing the previously-contained elements
from the document entirely.
File: check-username.js (excerpt)
cU.usernamecontainer.innerHTML = usernameHTML;
Since the previous username text box was removed from the document and re-
placed with a new one by the innerHTML assignment, there will no longer be a
change event listener attached to it. We’ll have to put one back in. Instead of
reassigning it directly, we delay that assignment for a short time with setTimeout;
the browser occasionally takes a little time to make DOM nodes available after
adding them to the document with innerHTML, so we give it time to catch up.
File: check-username.js (excerpt)
// reattach the event, giving browsers time to do the
// innerHTML work
setTimeout(function() {
235
Example: Checking Usernames
Licensed to
cU.username = document.getElementById('username');
cU.addEvent(cU.username, 'change', cU.checkUsername, false);
}, 200);
}
Altogether, the receiveUsernames method looks like this:
File: check-username.js (excerpt)
receiveUsernames: function(dom) {
var alternatives = dom.getElementsByTagName('username');
var usernameHTML = '<label for="username" class="para">' +
'The username \'USERNAME\' is already in use. ' +
'Please choose one of the alternatives below, or ' +
'enter another username.</label>' +
'<ul class="radio">ALTERNATIVESLIST<li>' +
'<label class="radio"><input type="radio" ' +
'name="unchoice" checked="checked" value="username"> ' +
'Another choice:</label> ' +
'<input type="text" class="text" id="username" ' +
'name="username"></li></ul>';
usernameHTML = usernameHTML.replace('USERNAME',
cU.username.value);
var alternativeslist = '';
for (var i = 0; i < alternatives.length; i++) {
var thisAL = '<li><label class="radio"><input ' +
'type="radio" name="unchoice" checked="checked" ' +
'value="USERNAME"> USERNAME</label></li>';
thisAL = thisAL.replace(/USERNAME/g,
alternatives[i].firstChild.nodeValue);
alternativeslist += thisAL;
}
usernameHTML = usernameHTML.replace('ALTERNATIVESLIST',
alternativeslist);
cU.usernamecontainer.innerHTML = usernameHTML;
// reattach the event, giving browsers time to do the
// innerHTML work
setTimeout(function() {
cU.username = document.getElementById('username');
cU.addEvent(cU.username, 'change', cU.checkUsername, false);
}, 200);
}
Figure 8.7 shows the result of this manipulation for the example alternatives
presented earlier.
236
Chapter 8: Remote Scripting
Licensed to
Figure 8.7. The username alternatives looked up with XMLHTTP.
Other Client-Server Options
Finally, we should point out that there exists another class of solutions for
drawing data from the server. These all rely on more traditional client-server ar-
chitecture, and have more to do with programming than with Web development.
We’ll just point them out here, and do no more than that.
The first option in this class of solutions is Web services. XML-based messaging
systems like XML-RPC and SOAP provide options for communicating with
servers without replacing the current page.
The second option is in-page components. If Web content is digitally signed,
then alternatives like Microsoft ActiveX controls and Mozilla XPCOM compon-
ents can be used. Even without digital signatures, a Java applet that takes up no
screen space at all can be used to “phone home” to its server in the background.
These are all specialized solutions and are not intended for typical Web pages.
Nevertheless, they are part of the picture of DHTML.
237
Other Client-Server Options
Licensed to
Drawing Code from Servers
The methods described so far are all focused on passing pure data from the
server, then doing something with that data on the client-side. It’s possible to
make your application run faster by passing back from the server something a
bit more structured than pure data. The server might pass back some formatted
HTML; the client can then just drop this HTML directly into the page without
having to do any work—an approach which makes for speed. Similarly, the
server could pass back JavaScript code; the client can then execute that code
directly by passing it to the JavaScript eval function. While these methods are
a bit less “pure” than passing simple data back-and-forth, they can really accelerate
the client work in your application.
Example: Learning about Beer
A simple demonstration is in order. Imagine an online guide to beer, which dis-
plays a number of beers and provides information about each. Figure 8.8 illu-
strates:
Figure 8.8. The beer guide.
If developed in a traditional style, the HTML for the body of the page might
look like this:
File: first-beer.html (excerpt)
<div id="characters">
<h2>Beer characters</h2>
<ul>
<li>
<a id="hoppy"
238
Chapter 8: Remote Scripting
Licensed to
href="character.php?character=hoppy">hoppy</a>
</li>
<li>
<a id="malty"
href="character.php?character=malty">malty</a>
</li>
</ul>
</div>
<div id="beers">
<h2>The beers</h2>
<ul>
<li>
<a id="adnamsbitter"
href="beer.php?beer=adnamsbitter">Adnams Bitter</a>
</li>
<li>
<a id="draughtbass"
href="beer.php?beer=draughtbass">Draught Bass</a>
</li>
</ul>
</div>
Each description of a character forms a link to a new page, which describes beers
that exhibit that character (character.php). Each beer is also a link to a page
(beer.php) that describes that beer.
19
There’s lots of CSS styling at work, but
the only tricky bit is this:
File: first-beer.css (excerpt)
#characters {
width: 25%;
float: left;
margin-right: 5px;
overflow: hidden;
}
#beers {
width: 40%;
float: left;
margin-right: 5px;
overflow: hidden;
}
19
These pages aren’t described; I’m sure you can imagine roughly what they’d be like.
239
Example: Learning about Beer
Licensed to