HTML Utopia: Designing Without Tables Using CSS- P11
Bạn đang xem bản rút gọn của tài liệu. Xem và tải ngay bản đầy đủ của tài liệu tại đây (1009.51 KB, 30 trang )
The Table
⋮
<td>Winner of Match 9</td>
</tr>
First, we set a background color on the td elements within tbody. While working
on this element, I added some left padding to move the tds away from the border,
and line them up with the headings:
File: fixedwidth.css (excerpt)
table.schedule tbody td {
background: #e9ecee;
padding-left: 0.6em;
border-bottom: 4px solid #ccc;
}
Now, let’s create a rule for the tr elements that have a class of odd. We can set
the background color on these rows:
File: fixedwidth.css (excerpt)
table.schedule tbody tr.odd {
background: #c4cfdb;
}
Now we can address the td elements within the <tr class="odd"> and </tr>
tags, giving them a color and background color that match those in our mockup:
File: fixedwidth.css (excerpt)
table.schedule tbody tr.odd td {
background: #f0f0f0;
color: #4f6480;
}
If the selectors in these rules are starting to seem a bit confusing, just remember
to work from left to right:
1. We have a table with a class of schedule, which is table.schedule in the
CSS.
2. We then have the tbody element, which sits inside the table.
3. Then we have a tr element, to which we’ll add a class of odd.
4. There are td elements within those trs.
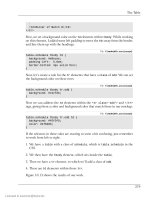
Figure 10.13 shows the results of our work.
279
Licensed to
Chapter 10: Fixed-width Layouts
Figure 10.13. After styling the odd rows
Finally, let’s style the links that appear in this table. There are two sets of links:
those in the row headings down the side of the table, and those associated with
the dates in the table cells.
First, we style the links within the th element:
File: fixedwidth.css (excerpt)
table.schedule tbody tr th a:link {
font-weight: bold;
color: #5e7796;
text-decoration: underline;
}
table.schedule tbody tr th a:visited {
font-weight: bold;
color: #5e7796;
}
table.schedule tbody tr th a:hover {
font-weight: bold;
color: #5e7796;
text-decoration: none;
}
We then complete our table by styling the links within the td element:
280
Licensed to
Multiple-column Fixed-width Layouts
File: fixedwidth.css (excerpt)
table.schedule tbody td a:link {
color: #808000;
text-decoration: underline;
}
table.schedule tbody td a:visited {
color: #808000;
}
table.schedule tbody td a:hover {
color: #808000;
text-decoration: none;
}
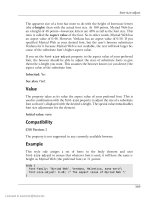
Your table, and as a result, your layout, is now complete. It should look great—like
Figure 10.14.
Figure 10.14. The completed table
Multiple-column Fixed-width Layouts
The layout we’ve focused on in this chapter really contains just a single column
of content. It’s possible to create multiple-column fixed-width layouts in much
the same way as you created your multiple-column liquid layouts: by either pos
itioning or floating the columns.
281
Licensed to
Chapter 10: Fixed-width Layouts
Positioned Columns
To use absolute positioning to add a second column to this layout, we need first
to add the column—or sidebar—text to the page in its own div. Let’s add an ID
of extras just after the closing </div> tag of this div. On a real site, this sidebar
might contain advertising, or additional information about the matches or venue,
but for our purposes, dummy text will be fine.
In the natural flow of the document, this text displays below the white box, as
Figure 10.15 illustrates.
Figure 10.15. The sidebar div before any CSS is added
As with the liquid layouts we created previously, we need to wrap this sidebar
content inside two divs—one will provide our positioning context, while the
other will help us make room for the sidebar. Add the two divs as shown in the
code excerpt below: the content wrapper div wraps the content div, while the
div with the ID main wraps the divs with IDs content-wrapper and extras.
File: fixedwidth.html (excerpt)
</div> <!-- header -->
<div id="main">
<div id="content-wrapper">
<div id="content">
⋮
</div> <!-- content -->
</div> <!-- content-wrapper -->
282
Licensed to
Positioned Columns
<div id="extras">
⋮
</div> <!-- extras -->
</div> <!-- main -->
</div> <!-- wrapper -->
We can now add style rules for these divs. The content wrapper applies a 200
pixel left margin to the sidebar, while the main div provides its positioning con
text.
File: fixedwidth.css (excerpt)
#content-wrapper {
margin: 0 0 0 200px;
}
#main {
position: relative;
}
Refresh your page in the browser, and you should see that a space has been created
for the sidebar. Our next step is to position the column within this space. Simply
use the following CSS to position this sidebar from the top and left, or top and
right, of the browser’s viewport:
File: fixedwidth.css (excerpt)
#extras {
position: absolute;
top: 0;
left: 0;
width: 180px;
background-color: white;
border: 1px solid #f0f0f0;
}
This CSS positions the column and gives it the same white background color and
border that the content div displays. Figure 10.16 shows the finished product.
283
Licensed to
Chapter 10: Fixed-width Layouts
Figure 10.16. The completed layout with a positioned sidebar
Floated Columns
There are a number of reasons why you might want to use floated columns, rather
than positioned columns, in this layout. For example, if you want to add a footer
that will always remain beneath both the columns, floating the columns will enable
you to do that. You might want to wrap your content around the column, rather
than have the content take up only the column’s width. Again, floating the
columns makes this possible.
If you wish to float the sidebar, you’ll need to move it to occur just before the
<div id="content-wrapper"> tag.
File: fixedwidth.html (excerpt)
<div id="main">
<div id="extras">
⋮
</div> <!-- extras -->
<div id="content-wrapper">
284
Licensed to
Floated Columns
Now, to float this column, all we need to do is replace the positioning declarations
in our #extras rule with a float: left declaration. Figure 10.17 shows the
impact of this markup.
File: fixedwidth.css (excerpt)
#extras {
float: left;
width: 180px;
background-color: white;
border: 1px solid #f0f0f0;
}
Figure 10.17. The floated column displaying as expected in Firefox
That’s all you need to do to float your sidebar column alongside your main content
column in Firefox. However, as Figure 10.18 illustrates, Internet Explorer 6 proves
a little more troublesome.
285
Licensed to
Chapter 10: Fixed-width Layouts
Figure 10.18. Internet Explorer 6 failing to display our world cup
image, and pushing the events schedule below the sidebar
As you can see in Figure 10.18, the world cup logo is no longer being displayed,
and our events schedule table has been pushed down below the bottom of the
sidebar. Occasionally, as you test your pages in Internet Explorer 6, you’ll en
counter bugs in its application of your CSS rules. Most of these problems have
been fixed in IE 7, but unfortunately, it will likely be some time before most users
upgrade to IE 7 and IE 6 can be ignored.
One of the most common causes of these bugs has to do with Internet Explorer’s
concept of “having layout,” which is discussed in the article “On Having Layout”.2
A simple work-around for such bugs is to apply one of a number of declarations
2
/>
286
Licensed to
Floated Columns
to one of the problematic element’s ancestors. In our case, adding display: in3
line-block to the #content rule fixes our problem, as Figure 10.19 shows.
File: fixedwidth.css (excerpt)
#content {
background-color: white;
border: 1px solid #f0f0f0;
padding: 0;
display: inline-block;
}
A list of the properties that can be used, and a discussion of their side-effects, is
available in the “On Having Layout” article mentioned above.
Figure 10.19. The floated column displaying as desired in Internet
Explorer 6
3
Theoretically, this declaration changes the content div’s behavior when it’s adjacent to other ele
ments, but in this specific case, as it’s wrapped in the content wrapper div, it has no effect.
287
Licensed to
Chapter 10: Fixed-width Layouts
These examples have shown just how flexible a CSS layout can be. Instead of
needing to rebuild your nested table layout to add new columns, you can make
big changes to your layouts with just a few additional CSS properties.
“Zoom” Layouts
Before we wrap up this chapter, let’s spend a few moments discussing a technique
that can make your site much more usable to users with various accessibility
needs. That technique involves the provision of one or more alternate style sheets
that give a different look and feel to the site in order to address particular diffi
culties that some users experience as they work with the Web.
When we discuss accessibility, we often consider users who employ some kind
of text-only device—a screen reader that reads the content of the site aloud,
perhaps. By using semantic markup, and separating a document’s content and
structure from its presentation with CSS, we can do a lot to help these users to
understand and use our sites easily. However, these are not the only site users
who we can help by considering accessibility issues.
There are many more users who have “low vision”—they are not completely
blind, nor do they use screen readers, but they do need some help to be able to
see web site text. Many of these users have screen magnifiers that help to enlarge
on-screen elements to a size at which they can be read. As you might expect,
these users have very different requirements than those who use screen readers.
For instance, users with low vision can usually see the layout of your site, and
with the help of their magnifier, they may find diagrams, images, and other
visual elements useful. These users don’t want a text-only page—that would deny
them visual elements like images, which they can understand once they’re mag
nified. However, the problem with many layouts is that, once they are magnified,
columns of text disappear off the edge of users’ screens, never to be found again!
Since we know how to build site layouts using CSS, we can help these users by
creating an additional style sheet that’s tailored to their specific needs. These
kinds of style sheets have been called “zoom layouts,” as they’re specially designed
for people who magnify or zoom into web sites. The technique is detailed com
prehensively by web accessibility guru Joe Clark on his web site,4 but let’s take
a brief look at what we would need to do to create a zoom layout for our fixedwidth design.
4
/>
288
Licensed to
“Zoom” Layouts
Figure 10.20. The layout we're creating
Zoom layouts need to achieve the following:
❑ Switch the text to a large font.
❑ Change the colors used in the design to light text on a dark background, as
low-vision users find this easier to read.
289
Licensed to
Chapter 10: Fixed-width Layouts
❑ Rearrange the content so that it all falls into one column. This way, there’s
no danger of users missing out on content that has disappeared off the edge
of the screen.
Let’s take the layout with the floated left-hand column, and create an alternate
“zoom layout” style sheet for it. The finished layout will look like Figure 10.20.
It’s not quite as pretty as our original layout, but it is a lot easier for the target
users to read.
Creating the Style Sheet
While you’re working on your alternate style sheet, it’s not a bad idea to link it
as the main style sheet attached to your document, so you can see your changes
easily. Take your existing style sheet and save it as zoom.css, then attach it to
your document. Now, disable your existing style sheet by wrapping it in a com
ment, as shown below.
File: fixedwidth.html (excerpt)
<head>
<title>Footbag Freaks</title>
content="text/html; charset=iso-8859-1" />
<link rel="stylesheet" type="text/css" href="zoom.css" />
</head>
We don’t want to use fixed widths in our zoom layout. As the text in a fixedwidth layout gets larger, one of two things will happen: either the text will become
too large for the fixed-width columns (imagine a very long word becoming longer
than the fixed-width column), or, if the column grows wider as the text gets larger,
the column will become wider than the screen itself, necessitating a horizontal
scroll bar.
First, edit the CSS rule for the body element to remove the min-width declaration
as well as the background image and color. In addition, make the base font size
large:
File: zoom.css (excerpt)
body {
margin: 0;
padding: 0;
background-color: #333;
290
Licensed to
Creating the Style Sheet
color: white;
font: large Arial, Helvetica, Verdana, sans-serif;
}
Then, delete everything but the padding property from the #wrapper rule.
Let’s make the header—which contains no text other than the tagline and the
image—into a white top banner for the page. To do this, add a CSS rule #header:
File: zoom.css (excerpt)
#header {
background-color: white;
}
To make the content div the full width of the page, and to remove the pale
background color, delete the #content rule. We can also get rid of the #main and
#content-wrapper rules, as we used them only for positioning purposes.
Then, to move the sidebar above the page’s main content, remove the existing
declarations in the #extras rule, and style this div so it appears with a white
border:
File: zoom.css (excerpt)
#extras {
border: 2px solid white;
padding: 0.2em;
}
The rest of the changes that we need to make will affect the colors that are used
in the document, and remove some of the background image, margin, and padding
settings. My zoom.css file now contains the following rules:
File: zoom.css
body {
margin: 0;
padding: 0;
background-color: #333;
color: white;
font:large Arial, Helvetica, Verdana, sans-serif;
}
#wrapper {
padding: 10px;
}
#header {
background-color: white;
291
Licensed to
Chapter 10: Fixed-width Layouts
}
#tagline {
font-weight: bold;
color: #050845;
font-style: italic;
margin: 0 0 0.5em 0;
padding: 0 0 0 20px;
}
#extras {
border: 2px solid white;
padding: 0.2em;
}
#content .inner {
margin: 30px;
}
#worldcuplogo {
float: right;
margin: 0 0 20px 40px;
width: 111px;
}
#content h1 {
font-size: 120%;
color: #ccc;
}
#content h2 {
font-size: 260%;
font-weight: normal;
}
#content p {
line-height: 1.6em;
font-family: Georgia, Times, "Times New Roman", serif;
}
#dateline {
font-size: 160%;
font-weight: normal;
font-family: Georgia, Times, "Times New Roman", serif;
}
.intro {
font-weight: bold;
}
table.schedule {
clear: right;
width: 100%;
line-height: 1.4em;
border-collapse: collapse;
292
Licensed to
Creating the Style Sheet
border: 4px solid #ccc;
color: white;
background: #333;
}
table.schedule caption {
margin: 0;
padding: 0;
color: white;
line-height: 2em;
text-align: left;
font-weight: bold;
}
table.schedule thead tr {
color: white;
background: #333;
}
table.schedule thead tr th {
padding: 0.4em 0.6em 0.4em 0.6em;
border: 4px solid #ccc;
}
table.schedule tbody tr {
border: 4px solid #ccc;
}
table.schedule tbody th {
padding: 0.6em;
border: 4px solid #ccc;
}
table.schedule tbody td {
background: #333;
padding-left: 0.6em;
border-bottom: 4px solid #ccc;
}
table.schedule tbody tr.odd {
background: #999;
}
table.schedule tbody tr.odd td {
background: #666666;
color: white;
}
table.schedule a:link {
font-weight: bold;
color: #fc0;
text-decoration: underline;
}
table.schedule a:visited {
font-weight: bold;
293
Licensed to
Chapter 10: Fixed-width Layouts
color: #fc0;
}
table.schedule a:hover {
font-weight: bold;
color: #fc0;
text-decoration: none;
}
When the layout, styled with zoom.css, is displayed by the browser, it looks like
Figure 10.21.
294
Licensed to
Attaching Alternate Style Sheets
Figure 10.21. The finished “zoom” layout
Attaching Alternate Style Sheets
Many modern browsers, such as Firefox and Opera, already give users the ability
to select from multiple style sheets that are attached to a document, provided
the style sheets are linked correctly. To offer your users a choice of style sheets,
first uncomment your main style sheet to include it in the document once more,
and give the link element a title attribute with a value of default layout.
295
Licensed to
Chapter 10: Fixed-width Layouts
Then, move to the link element that refers to zoom.css. Change the rel attribute
to alternate stylesheet, and add zoom layout as its title:
<head>
<title>Footbag Freaks</title>
content="text/html; charset=iso-8859-1" />
title="default layout" />
title="zoom layout" />
</head>
In Firefox, which supports alternate style sheets, you’ll now be able to switch
between style sheets: simply select View > Page Style, then choose the style sheet
you want. The options you’re provided will reflect the names that you entered
as the title attributes of the linked style sheets, as Figure 10.22 shows.
Figure 10.22. Switching style sheets in Firefox
What about people whose browsers don’t offer this switching functionality? Well,
you can also implement your own “style switcher” to enable those users to switch
styles easily. While a discussion of how to build a switcher is beyond the scope
of this book, there are a number of ways to create this functionality using
296
Licensed to
Summary
JavaScript or a server-side language such as PHP or ASP. A popular JavaScript
method of switching style sheets is explained on A List Apart in the article “Al
ternative Style: Working With Alternate Style Sheets”5 by Paul Sowden.
Summary
In this chapter we’ve learned how to build fixed-width and centered layouts, but
I’ve also shown you how you can start to combine the techniques we’ve discussed
in this book to create many different kinds of layouts. CSS is a powerful tool
that can create for designers opportunities that would not have been easy to
achieve using a table-based layout. Consider, for example, the ease with which
we can create a zoom layout that’s tailored for users with low vision capabilities,
while still being able to provide a standard layout that meets our branding and
visual design aims.
By using the different layout concepts that we’ve discussed in these last three
chapters, along with the many different styling techniques we’ve explored in this
book, you’ll find that you can create a variety of layouts on which you might
wish to base your site designs. We have discussed here the basic building blocks
of CSS layout, and as you explore further and look at some of the examples
available on the Web, you’ll find that a good understanding of the basics will
stand you in good stead as you start to create more complex layouts using CSS.
5
/>
297
Licensed to
298
Licensed to
Appendix A: CSS Miscellany
This appendix pulls together information about CSS that I thought was particu
larly interesting and potentially useful, but which didn’t fit the main flow of the
text. The operative word in the title of this appendix is “miscellaneous.” There’s
no particular order to the information here. The following list identifies the topics
covered in this appendix, shown in the order in which they’re presented:
❑ at-rules
❑ aural style sheets
❑ CSS and JavaScript
At-rules
The CSS 2 recommendation from the W3C defines a new type of CSS rule. It’s
called an “at-rule” because all the rules of this type start with an “at” symbol (@).
This type of rule is meant to be extensible. In other words, future editions of the
W3C recommendation, browser developers, and others may define new sets of
rules that begin with @.
For now, there are four groups of @ rules:
❑ @import
❑ @media
❑ @page
❑ @font-face
The @media rule allows you to define different output options for various media
in a single style sheet. Browser support is somewhat inconsistent, though it seems
to be getting better with each release. Right now, support for this rule is at least
usable in most modern browsers (the most notable exception being IE 5.2 on
Macintosh).
Initially, W3C defines that the following media types are valid for use with the
@media rule. However, you should note that the list is not guaranteed to be
Licensed to
Appendix A: CSS Miscellany
complete. As new technologies and display platforms emerge, more keywords will
undoubtedly be added.
❑ all
❑ aural (deprecated in CSS 2.1)
❑ braille
❑ embossed
❑ handheld
❑ projection
❑ screen
❑ TTY
❑ TV
The purpose of all of these is largely self-explanatory, with the exception of em
bossed, which is intended to define output for a Braille printer. The following
HTML produces two decidedly different appearances, depending on whether
you’re viewing the page on your monitor or printing it out. It demonstrates the
syntax and use of the @media rule.
" />
<html xmlns=" />
<head>
<title>Demonstrating @media Rules</title>
<style type="text/css">
@media print {
body {
font-size: 12pt;
font-family: courier;
}
}
@media screen {
300
Licensed to
At-rules
body {
font-size: 36px;
font-family: arial;
}
}
@media screen, print {
body {
line-height: 1.2;
}
}
-->
</style>
</head>
<body>
Let's see if this actually works and, if so, in which browsers.
I've defined an @media rule for print that makes it print
12-point Courier, but another @media rule that displays in
36-pixel Arial on the screen. Both devices produce output with a
line-height 120% of the default value.
</body>
</html>
Notice that it’s okay to define a single @media rule for application to multiple
media. In that case, the names of the media must be separated by commas. There
are two other ways to specify the medium to be used with a given style sheet or
rule. You can use the @import rule and supply the media type as a parameter, as
in this example:
@import url(bossvoice.css) aural;
This rule tells the browser to import the CSS style sheet called bossvoice.css,
and to apply it to aural output devices.
The second way to define a style’s medium is to use the media attribute of the
style tag, shown here:
<style type="text/css" media="projection">
body {
color: blue;
background-color: white;
}
</style>
301
Licensed to
Appendix A: CSS Miscellany
If you define a style sheet for a medium that understands the notion of a “page,”
you can use the @page at-rule to declare sizes, borders, page breaks, and the
presence or absence of crop marks on the output page.1
For example, to define an eight and a half-inch by 11-inch page with a half-inch
border all the way around, you would write an @page rule like this:
@page {
size: 8.5in 11in;
margin: 0.5in;
}
The size property can be given one of three constant values, in addition to the
specific size values shown earlier:
❑ auto, which tells the browser to use the default page size for the browser ap
plication
❑ landscape, where the larger dimension is the width
❑ portrait, where the larger dimension is the height
The margin property is a shorthand for the following, more specific properties,
which may be specified individually:
❑ margin-top
❑ margin-right
❑ margin-bottom
❑ margin-left
You can also define special, overriding dimensions and margins for the first page
of a document, as well as separate dimensions for left- and right-hand pages using
the :first, :left, and :right pseudo-classes.
Here’s a set of @page rules that defines the layout for a document to be printed
on both sides, with a special setting for the front page:
1
The @page rule has some complexity associated with it, but I’m not going to attempt to cover that
here. If you’re curious, I suggest you go to the W3C page where the @page rule is defined.
[ />
302
Licensed to
Aural Style Sheets
@page {
margin: 2cm; /* All margins set to 2cm */
}
@page:first {
margin-top: 10cm; /* Top margin on first page 10cm */
}
/* 1cm larger margins near binding */
@page:left {
margin-left: 3cm;
margin-right: 4cm;
}
@page:right {
margin-left: 4cm;
margin-right: 3cm;
}
Under the CSS 2 Recommendation, you can control page breaks in paged output
as well. Page control is a very complex topic and one that is probably beyond not
only the scope of this discussion, but also the interest level of the vast majority
of web designers. So I’m not going to go into it here, except to say that if you
ever get into a position where you want or need to prepare a web page for printed
(or other paged) output, you can confidently state that you can control the page
break. The relevant properties are described in detail in Appendix B.
Aural Style Sheets
Many web designers agree that sound is a vastly under-utilized aspect of commu
nication on the Internet. Flash movies, streamed video, and podcasts are all ex
amples of ways in which sound is becoming a key part of the Web’s content.
However, opinions differ on how aural cues should be used to improve navigation
and user interfaces, particularly with regards to visually impaired users. In the
future, I anticipate that we’ll see far greater use of spoken language, background
music, and mixtures of voice and music to enliven the user experience and improve
the accessibility of web content, independent of screenreader software.
The CSS 2 Recommendation from the W3C defines a whole range of sound
(aural) presentation qualities that can be defined in CSS. Collectively, these make
up the components of an aural style sheet.
303
Licensed to