Professional ASP.NET 1.0 Special Edition- P34 pdf
Bạn đang xem bản rút gọn của tài liệu. Xem và tải ngay bản đầy đủ của tài liệu tại đây (1.21 MB, 40 trang )
if ( eventArgument == "inc" )
Number = Number + 1;
if ( eventArgument == "dec" )
Number = Number - 1;
}
protected override void Render(HtmlTextWriter writer)
{
writer.Write("The Number is " + Number.ToString() + " (" );
writer.Write("<a href=\"javascript:" +
Page.GetPostBackEventReference(this,"inc") +
"\"'>Increase Number</a>");
writer.Write(" or " );
writer.Write("<a href=\"javascript:" +
Page.GetPostBackEventReference(this,"dec") +
"\">Decrease Number)</a>");
}
}
}
The following HTML is rendered by this control:
<html>
<body>
<form name="ctrl0" method="post" action="myfirstcontrol.aspx" id="ctrl0">
<input type="hidden" name="__VIEWSTATE"
value="dDwtMTM0MTQ1NDExNjt0PDtsPGk8MT47PjtsPHQ8O2w8aTwxPjs+O2w8dDxwPGw8TnVtYmVyOz
47bDxpPDQ4Pjs+Pjs7Pjs+Pjs+Pjs+" />
The Number is 48 (<a href="javascript:
__
doPostBack('ctrl1','inc')"'>Increase Number</a> or
<a href="javascript:__doPostBack('ctrl1','dec')">Decrease Number)</a>
<input type="hidden" name="__EVENTTARGET" value="" />
<input type="hidden" name="__EVENTARGUMENT" value="" />
<script language="javascript">
<!
function __doPostBack(eventTarget, eventArgument) {
var theform = document.ctrl0;
theform.__EVENTTARGET.value = eventTarget;
theform.__EVENTARGUMENT.value = eventArgument;
theform.submit();
}
// >
</script>
</form>
</body>
</html>
Notice how the following script block containing the __doPostBack function is automatically rendered into the output
stream when an ASP.NET server control calls the
Page.GetPostBackEventReference reference:
<script language="javascript">
<!
function __doPostBack(eventTarget, eventArgument) {
var theform = document.ctrl0;
theform.__EVENTTARGET.value = eventTarget;
theform.__EVENTARGUMENT.value = eventArgument;
theform.submit();
}
// >
</script>
This function is called by the script code returned from Page.GetPostBackEventReference:
<a href="javascript:__doPostBack('ctrl1','inc')">
Now we have covered handling postback and events, let's look at how a control can persist state during postback using
viewstate.
Using ViewState
After an ASP.NET page is rendered the page object, which created the page and all of its server controls, is destroyed.
When a postback occurs, a new page object and new server-control objects are created.
When writing a server control you often need to store and manage state. Since a control is created and destroyed with
each page request, any state held in object member variables will be lost. If a control needs to maintain state, it has to
do so using another technique. As we have seen with our textbox control, one way of managing state is to use postback.
When a postback occurs, any postback data associated with a control is made available to it via the
IPostBackData
interface. A control can therefore re-populate its class variables, making the control appear to be stateful.
Using postback data to manage the state of a control is a good technique when it can be used, but there are some
drawbacks. The most obvious one is that only certain HTML elements like
input can use postback. If you had a label
control that needed to remember its value, you couldn't use postback. Also, postback is only really designed to contain a
single item of data. For example, our textbox control needs to remember its last value so it can raise a
TextChanged
event when the value changes. To maintain this additional state, one option would be to use hidden fields. When a control
renders its output, it could also output hidden fields with other values that need to be remembered. When a postback
occurs, these values would be retrieved into the
LoadPostData method. This approach would work for a single control,
but could be problematic when there are potentially many instances of the same control on a page. For example, what
would you call the hidden fields? How could you ensure the names do not clash with names a page developer may have
used?
To resolve the problems of managing state ASP.NET has a feature called viewstate. In a nutshell, viewstate is a hidden
input field that can contain state for any number of server controls. This hidden field is automatically managed for you,
and as a control author you never need to access it directly.
Introducing the StateBag
All server controls have a property called
ViewState. This is defined in the Control class as the type StateBag, and
allows server controls to store and retrieve values that are automatically round-tripped and recreated during a postback.
During the save state stage of a page, the ASP.NET framework enumerates all server controls within a page and persists
their combined state into a hidden field called
__VIEWSTATE. If you view any rendered ASP.NET containing a form
element you will see this field:
<input type="hidden" name="__VIEWSTATE" value="dDwtMTcxOTc0MTI5NDs7Pg==" />
When a postback occurs, ASP.NET decodes the __VIEWSTATE hidden field and automatically repopulates the viewstate
for each server control as they are created. This reloading of state occurs during the load state stage of a page for controls
that are declared on an ASP.NET page. If a control is dynamically created, either on a page or within another composite
control, the state will be loaded at the point of creation. ASP.NET keeps track of what viewstate hasn't been processed,
and when a new control is added to the
Controls property of a Control (remember a page is a control), it checks to
see if it has any viewstate for the control. If it has, it is loaded into the control at that point.
To see viewstate in action, we will change our textbox control to store its current value in viewstate, rather than the
_
value field. By doing this, when LoadPostData is called to enable our textbox control to retrieve its new value, we can
compare it to the old value held in viewstate. If the values are different we will return
true, causing a TextChanged
event to be raised in
RaisePostDataChangedEvent. If the values are the same, we will return false so
RaisePostDataChangedEvent is not called, and no event is raised.
The
StateBag class implements the IDictionary interface, and for the most part is used just like the Hashtable class
with a string key. All items stored are of the type
System.Object, so any type can be held in the viewstate, and casting
is required to retrieving an item.
In our earlier textbox control we used a string member variable
_value to hold the current value of our textbox. We'll
delete that variable and rewrite the property to use viewstate:
public string Text
{
get
{
if ( ViewState["value"] == null )
return String.Empty;
return (string) ViewState["value"];
}
set
{
ViewState["value"] = value;
}
}
Since we have deleted the _value member variable and replaced it with this property, we need to change all references
to it, with the
Text property. We could directly reference the ViewState where we previously used _value, but it's good
practice to use properties to encapsulate our usage of viewstate, making our code cleaner and more maintainable. (For
example, if we changed the viewstate key name used for the text value, we'd only have to do it in one place.)
With this new property in place, we can revise the
LoadPostData to perform the check against the existing value as
discussed:
bool IPostBackDataHandler.LoadPostData(string postDataKey, NameValueCollection
postCollection)
{
bool raiseEvent = false;
if ( Text != postCollection[postDataKey] )
raiseEvent = true;
Text = postCollection[postDataKey];
return raiseEvent;
}
Before testing this code to prove that our TextChanged event is now only raised when the text changes, we need to
make a small change to our ASP.NET page. As you'll recall from earlier, we have an event handler that sets the contents
of a label to reflect our textbox value when our event is raised:
<script runat="server" language="C#">
private void OnNameChanged( object sender, EventArgs e )
{
status.Text = "Value changed to " + name.Text;
}
</script>
The label control uses viewstate to remember its value. When a postback occurs, even if this event is not raised, the label
will still display the text from the previous postback, making it look like an event was raised. So to know if an event really
was raised, we need to reset the value of the label during each postback. We could do this within the page
init or load
events, but since the label uses viewstate to retain its value, we can simply disable viewstate for the control using the
EnableViewState attribute as follows:
<ASP:Label runat="server" EnableViewState="false" id="status" />
During the save state stage of a page, the ASP.NET page framework will not persist viewstate for the controls with an
EnableViewState property of false. This change to the page will therefore make our label forget its value during each
postback.
Setting
EnableViewState to false does not prevent a control from remembering state using postback. As such,
should you need to reset the value of a textbox, you'd have to clear the
Text property in a page's init/load event.
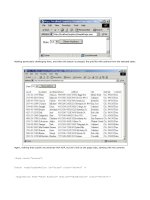
With all these changes made, if we enter a value of "
Wrox Press" and press the postback button, we will see that during
the first postback our event is fired, and our label control displays the value:
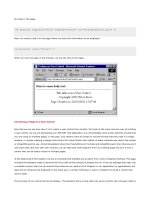
If we click the postback button again, the textbox control will use its viewstate to determine that the postback value has
not changed, and it will not fire its
TextChanged event. Since the label control does not remember its state, as we
disabled viewstate for it, the value-changed message will not appear during the second postback since the label will
default back to its original blank value:
Our textbox control is now pretty functional for a simple control: it can remember its value during postback, can raise
events when its text changes, and can have style properties applied in the same way as other web controls using the
various style attributes:
<Wrox:MyTextBox id="name" runat="server"
BackColor="Green"
ForeColor="Yellow"
BorderColor="Red"
OnTextChanged="OnNameChanged" />
More on Events
Any server control that derives from the
Control base classes automatically inherits several built-in events that page
developers can also handle:
Init - called when a control has to be constructed and its properties have been set.
Load - called when a control's viewstate is available.
DataBinding - called when a control bound to a data source should enumerate its data source and build its
control tree.
PreRender - called just before the UI of a control is rendered.
Unload - called when a control has been rendered.
Disposed - called when a control is destroyed by its container.
These events behave just like any other event. For example, we could catch the
PreRender event of our TextBox and
restrict its length to seven characters by adding an
OnPreRender attribute to our control declaration:
<P>Enter a value: <Wrox:MyTextBox id="name" runat="server"
BackColor="Green"
ForeColor="Yellow"
BorderColor="Red"
OnTextChanged="OnNameChanged"
OnPreRender="OnPreRender" />
and an event handler that restricts the size of the TextBox value if it exceeds 7 characters:
private void OnPreRender( object sender, EventArgs e )
{
if ( name.Text.Length > 7 )
name.Text = name.Text.Substring(0,7);
}
As a control author you can also catch these standard events within your controls. You can do this by either wiring up the
necessary event wire-up code, or, as we've seen already, overriding one of these methods:
OnInit(EventArgs e)
OnLoad(EventArgs e)
OnDataBinding(EventArgs e)
OnPreRender(EventArgs e)
OnUnload(EventArgs e)
Disposed()
The default implementation of each of these methods raises the associated events listed earlier. For example,
OnInit
fires the
Init event, and OnPreRender fires the PreRender event. When overriding one of these methods, you should
call the base-class implementation of the method so that events are still raised, assuming that is the behavior you want:
protected override void OnInit(EventArgs e)
{ base.OnInit(e);
if ( _text == null )
_text = "Here is some default text";
}
Event Optimization in C# Using the EventHandlerList
When an event is declared within a class definition, additional memory must be allocated for an object instance at
run-time for the field containing the event. As the number of events a class supports increases, the amount of memory
consumed by each and every object instance increases. Assuming that a control supports 10 events (the 6 built-in ones
and 4 custom events), and assuming an event declaration requires roughly 16 bytes of memory, each object instance will
require 160 bytes of memory. If nobody is interested in any of these events, this is a lot of overhead for a single control.
To only consume memory for events that are in use, ASP.NET controls can use the
EventHandlerList class.
The
EventHandlerList is an optimized list class designed to hold delegates. The list can hold any number of delegates,
and each delegate is associated with a key. The
Control class has an Events property that returns a reference to an
instance of the
EventHandlerList. This instantiates the class on demand, so if no event handlers are in use, there is
almost no overhead:
protected EventHandlerList Events
{
get
{
if (_events == null)
_events = new EventHandlerList();
}
return _events;
}
The EventHandlerList class has two main methods:
void AddHandler( object key, Delegate handler );
void RemoveHandler( object key, Delegate handler );
AddHandler is used to associate a delegate (event handler) with a given key. If the method is called with a key for which
a delegate already exists, the two delegates will be combined and both will be called when an event is raised.
RemoveHandler simply performs the reverse of AddHandler.
Using the
Events property, a server control should implement support for an event using a property declared as the type
event:
private static readonly object _textChanged = new object();
public event EventHandler TextChanged
{
add { Events.AddHandler(EventPreRender, value); }
remove { Events.RemoveHandler(EventPreRender, value); }
}
Since this property is declared as an event, we have to use the add and remove property accessor declarations, rather
than
get and set. When add or remove are called, the value is equal to the delegate being added or removed, so we use
this when calling
AddHandler or RemoveHandler.
As Visual Basic .NET does not support the
add/remove accessor, we can't use optimized event handlers in Visual
Basic .NET.
To create a unique key for our events, which we know will not clash with any events defined in our base classes, we define
a static, read-only member variable called _
textChanged, and instantiate it with an object reference. We could use
other techniques for creating the key, but this approach adds no overhead for each instance of our server control, and is
also the technique used by the built-in ASP.NET server controls. By making the key value static, there is no per-object
overhead.
Checking and raising an event using the
Events property is done by determining if a delegate exists for the key
associated with an event. If it does, we raise it to notify one or more subscribed listeners:
void IPostBackDataHandler.RaisePostDataChangedEvent()
{
EventHandler handler = (EventHandler) Events[_textChanged];
if (handler != null)
handler(this, EventArgs.Empty);
}
Using the EventHandler technique, a control can implement many events without causing excessive overhead for
controls that do not have any event listeners associated with them. Since the
Control class already implements most of
the work for you it makes sense to always implement your events in this way.
Tracking ViewState
When adding and removing items from viewstate, they are only persisted by a control if its viewstate is being tracked. This
tracking only occurs after the initialization phase of a page is completed. This means any changes a server control makes
to itself, or to another control before this phase, and the
OnInit event has been raised, will not be saved.
Types and ViewState
We mentioned earlier that the
StateBag class used to implement viewstate allows any type to be saved and retrieved
from it. While this is true, this does not mean that you can use any type with it. Only types that can be safely persisted
can be used. As such, types that maintain resources such as database connections or file handles should not be used.
ViewState is optimized and designed to work with the following types:
Int32, Boolean, String, and other primitive types.
Arrays of Int32, Boolean, String, and other primitive types.
ArrayList, Hashtable.
Types that have a type converter. A type converter is a class derived from
System.ComponentModel.TypeConverter that can convert one type into another. For example, the type
converter for the
Color class can convert the string "red" into the enumeration value for red. ASP.NET requires
a type converter that can convert a type to and from a string.
Types that are serializable (marked with the serializable attribute, or support the serialization interfaces).
Pair, Triplet (defined in System.Web.UI, and respectively hold 2 or 3 of the other types listed).
ViewState is converted from these types into a string by the Limited Object Serialization (LOS) formatter class
(
System.Web.UI.LosFormatter).
The LOS formatter used by ASP.NET encodes a hash code into viewstate when a page is generated. This hash code is use d
during postback to determine if the static control declarations in an ASP.NET page have changed (for example, the
number and ordering of server controls declared within an ASP.NET page). If a change is detected, all viewstate is
discarded, since viewstate cannot reliably be processed if the structure of a page has changed. This limitation stems from
the fact that ASP.NET automatically assigns unique identifiers to controls, and uses these identifiers to associate viewstate
with individual given controls. If a page structure changes, so do the unique identifiers assigned to controls, so the
viewstate/control relationship is meaningless. In case you're wondering, yes, this is one technical reason why ASP.NET
only allows a page to postback to itself.
More on Object Properties and Template UI
Earlier, we discussed how the default control builder of a server control would automatically map sub-elements defined
within a server-control declaration to public properties of that control. For example, given the following server-control
declaration:
<Wrox:ICollectionLister id="SessionList" runat="server">
<HeadingStyle ForeColor="Blue">
<Font Size="18"/>
</HeadingStyle>
<ItemStyle ForeColor="Green" Font-Size="12"/>
</Wrox:ICollectionLister>
The control builder of the ICollectionLister control shown here would try to initialize the object properties
HeadingStyle and ItemStyle, determining the type of the object properties by examining the meta data of the
ICollectionLister class using reflection. As the HeadingStyle element in this example has a Font sub-element,
the control builder would determine that the
HeadingStyle object property has an object property of Font.
The
ICollectionLister server control is a simple composite control we've created that can enumerate the contents of
any collection class implementing the
ICollection. For each item in the collection it creates a Label control, and sets
the text of the label using the
ToString method of the current item in the collection. This causes a linebreak because for
each item in the collection, the label starts with "
<BR>". The control also has a fixed heading of "ICollection Lister
Control" which is also created using a label control.
The
ICollectionLister control has three properties:
DataSource - a public property of the type ICollection. When CreateChildControls is called this
property is enumerated to generate the main output of the control.
HeadingStyle - a public property of the type Style. This allows users of the control to specify the style
attributes used for the hard-coded heading text. The
Style.ApplyStyle method is used to copy this style
object into the
Label control created for the header.
ItemStyle - a public property of the type Style. This allows users of the control to specify the style attributes
used for each of the collections that is rendered. The
Style.ApplyStyle method is used to copy this style
object into the
Label control created for each item.
The code for this server control is shown here:
using System;
using System.Web;
using System.Web.UI;
using System.Collections;
using System.Web.UI.WebControls;
namespace WroxControls
{
public class ICollectionLister : WebControl, INamingContainer
{
ICollection _datasource;
public ICollection DataSource
{
get { return _datasource; }
set { _datasource = value; }
}
Style _headingStyle = new Style();
public Style HeadingStyle
{
get{ return _headingStyle; }
}
Style _itemStyle = new Style();
public Style ItemStyle
{
get{ return _itemStyle; }
}
protected override void CreateChildControls()
{
IEnumerator e;
Label l;
// Create the heading, using the specified user style
l = new Label();
l.ApplyStyle( _headingStyle );
l.Text = "ICollection Lister Control";
Controls.Add( l );
// Create a label for each key/value pair in the collection
if ( _datasource == null )
throw new Exception("Control requires a datasource");
e = _datasource.GetEnumerator();
while( e.MoveNext() )
{
l = new Label();
l.ApplyStyle( _itemStyle );
l.Text = "<BR>" + e.Current.ToString();
Controls.Add( l );
}
}
}
};
There is nothing new in this code that we haven't already discussed. If you've skipped the chapter on collection classes,
refer back to Chapter 15 for an explanation of using
IEnumerator and ICollection.
The following ASP.NET page uses the
ICollectionLister control to list the contents of a string array. This array is
created in the
Page_Load event and associated with a server control which has been given a name/Id of SessionList
in this page:
<%@ Register TagPrefix="Wrox" Namespace="WroxControls"
Assembly="DictionaryLister" %>
<script runat="server" language="C#">
void Page_Load( object sender, EventArgs e )
{
string[] names = new string[3];
names[0] = "Richard";
names[1] = "Alex";
names[2] = "Rob";
SessionList.DataSource = names;
}
</script>
<Wrox:ICollectionLister id="SessionList" runat="server">
<HeadingStyle ForeColor="Blue">
<Font Size="18"/>
</HeadingStyle>
<ItemStyle ForeColor="Green" Font-Size="12"/>
</Wrox:ICollectionLister>
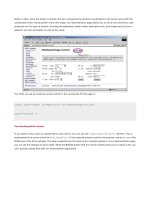
The output from this page (if viewed in color) is a blue header with green text for each item in the collection:
For controls that have fixed style and layout requirements, initializing them using object properties like we have in the
ICollectionLister control is a good approach. You will have seen the same approach used throughout the standard
ASP.NET server controls, such as the data grid and data list. However, for a control to provide ultimate flexibility, it's
better to enable the user of the control to define what the UI of a control looks like by using templates. Again, you'll have
seen this in earlier chapters, with controls like the data grid.
Using Templates
As we saw in Chapter 7, templates allow the users of a control to define how chunks of its UI - such as the header or footer
- should be rendered.
Templates are classes that implement the
ITemplate interface. As a control developer, to support one or more
templates you declare public properties of the type
ITemplate. When the default control builder sees a property of this
type, it knows to dynamically build a class that supports the ITemplate interface, which can be used to render the
section of UI the template defines.
Supporting template properties in a server control is relatively straightforward, although when using them within a
data-bound control things can initially seem a little complex, since the way child controls are created has to be handled
slightly differently.
Let's introduce templates by rewriting our
ICollectionLister control to support a heading and item template. We
need to make the following changes to our code:
Change the HeadingStyle and ItemStyle properties to the ITemplate type.
Make the HeadingStyle and ItemStyle properties writeable. This has to be done since the objects
implementing the
ITemplate interface are dynamically created by the ASP.NET page and then associated with
our server control.
Use the TemplateContainer attribute to give the control builder a hint about the type of object within which
our templates will be instantiated. This reduces the need for casting in databinding syntax.
Our changed code is shown here:
ITemplate _headingStyle;
[TemplateContainer(typeof(ICollectionLister))]
public ITemplate HeadingStyle
{
get{ return _headingStyle; }
set{ _headingStyle = value; }
}
ITemplate _itemStyle;
[TemplateContainer(typeof(ICollectionLister))]
public ITemplate ItemStyle
{
get{ return _itemStyle; }
set{ _itemStyle = value; }
}
At run-time, if a user specifies a template the properties will contain a non-Null value. If they are Null, no template has
been specified.
The
ITemplate interface has one method called InstantiateIn. This method accepts one parameter of the type
Control. When called, this method populates the Controls collections of the control passed in with one or more server
controls that represent the UI defined within a template by a user. Any existing controls in the collection are not removed,
so you can instantiate a template against another server control one or more times.
A server control could use the
Page class's LoadTemplate method (string filename) to dynamically load templates, but
this is not recommended. It is very slow and is known to be unreliable. If you need dynamic templates you should write
your own class that implements the
ITemplate interface.
Using the
InstantiateIn method we can change our CreateChildControls to use our new template properties to
build the server controls for the header and each item.
Since we're not supporting the data-binding syntax yet, the UI created for each item in the collection will not contain any
useful values.
In the following code, we only call the
InstantiateIn method if a template is not Null. If a template is Null we throw
an exception to let the user know the control needs a data source:
protected override void CreateChildControls()
{
IEnumerator e;
if ( _headingStyle != null )
_headingStyle.InstantiateIn( this );
if ( _datasource == null )
throw new Exception("Control requires a data source");
e = _datasource.GetEnumerator();
while( e.MoveNext() )
{
if( _itemStyle != null)
_itemStyle.InstantiateIn( this);
}
}
With our new template properties and revised CreateChildControls, we can now declare a page that uses templates
to style our controls UI. Here is a basic example that uses a
<H3> element for the heading, and some bold text for each
item (remember we're not showing the item value yet):
<Wrox:ICollectionLister id="SessionList" runat="server">
<HeadingStyle>
<h3>ICollection Lister</H3>
</HeadingStyle>
<ItemStyle>
<BR><Strong>An item in the collection</Strong></BR>
</ItemStyle>
</Wrox:ICollectionLister>
With these changes, our UI will now render like this:
Although not visually stunning, these changes allow the UI of our control to be completely controlled and changed by the
user in their declaration of our server control. As you'll have seen in previous chapters, this is a very powerful technique.
Without any additional changes, our controls template support can use databinding syntax, but it is limited to the data it
can access. Without any additional changes we can access public properties, or methods, on the page within which the
control is declared, or any public property or method of any other server control we can access.
For example, if we had a public property declared in our ASP.NET page called
Name, we could bind our item template to
this using the databinding syntax, which was introduced in Chapter 7:
<ItemStyle>
<BR><Strong>An item in the collection: <%#Name%></Strong></BR>
</ItemStyle>
When this expression is evaluated, ASP.NET will try and locate the Name property on the naming container first (the
control in which the template was instantiated, in our case); if it's not found there, it will check the ASP page. Assuming
we defined this property to return the string '
Templates Rock', we'd see this output from our control:
To bind to a text field called mylabel declared within the same page we would use this syntax:
<ItemStyle>
<BR><Strong>An item in the collection: <%#mylabel.Text%></Strong></BR>
</ItemStyle>
If w e only want t o bind to th e namin g conta iner in which the template is instantiated, we can use the Container. syntax:
<ItemStyle>
<BR><Strong>An item in the collection: <%#Container.DataItem%></Strong></BR>
</ItemStyle>
Using this last syntax we could be forgiven for thinking we could enable our item template to access the current collection
item being enumerated. To achieve this, it looks as if we'd simply add a public
object property to our server control
called
DataItem:
object _dataitem;
public object DataItem
{
get{ return _dataitem; }
}
Then we set that property to the current item being enumerated in the loop that instantiates the item template, like this:
e = _datasource.GetEnumerator();
while( e.MoveNext() )
{
if ( _itemStyle != null )
{
// Set the current item
_dataitem = e.Current;
_itemStyle.InstantiateIn( this );
}
}
But if we were to make these changes, and compiled them, we'd encounter an interesting problem: