XML Step by Step- P13 pps
Bạn đang xem bản rút gọn của tài liệu. Xem và tải ngay bản đầy đủ của tài liệu tại đây (360.25 KB, 15 trang )
Chapter 8 Displaying XML Documents Using Basic Cascading Style Sheets 211
8
Basic Cascading Style Sheets
note
If the browser can’t find the style sheet file specified in the xml-stylesheet
processing instruction, it will display the document text using its own property
settings (for example, its current font and font-size settings). And, as you
learned in Chapter 2, if the XML document isn’t linked to a style sheet (that
is, the document doesn’t contain an xml-stylesheet processing instruction),
Internet Explorer will display the XML source for the document rather than
its content.
You can include more than one style sheet in an XML document by inserting an
xml-stylesheet processing instruction for each one, as in this example of the be-
ginning of an XML document:
<?xml version=”1.0"?>
<?xml-stylesheet type=”text/css” href=”Book01.css”?>
<?xml-stylesheet type=”text/css” href=”Book02.css”?>
<INVENTORY>
<!— contents of document element —>
</INVENTORY>
The option of linking several style sheets allows you to store groups of related
rules in separate files, and then combine them as needed for particular types of
XML documents.
When you link more than one style sheet, Internet Explorer merges the rules
from the different sheets. If separate style sheets contain conflicting rules, the
rules in a style sheet linked later in the document take precedence over those in a
style sheet linked previously in the document. (In the preceding example, rules in
Book02.css would have priority over conflicting rules in Book01.css.) You’ll
learn more about precedence among conflicting rules in the next section.
Cascading in Cascading Style Sheets
The “cascading” in Cascading Style Sheets means that you can assign values to
properties at several different levels (just as a cascading stream spills through
different levels). The following list describes the main levels at which you can
assign a value to a property. The levels are listed in their order of precedence—
from highest to lowest. When the browser goes to display an element, if a
given property such as font-size is assigned conflicting values for that element
at different levels, the browser will use the setting given at the highest
precedence level.
212 XML Step by Step
1 If you assign a value to a property in the STYLE attribute of a specific ele-
ment in the XML document, the browser will use that value for displaying
the element. For example, it would display the following element in bold:
<TITLE STYLE=”font-weight:bold”>Leaves of Grass</TITLE>
2 If you don’t set a property through a STYLE attribute, the browser will use a
property value declared in a CSS rule with a contextual selector (that is, a
selector that specifies an element together with one or more of its ancestor
elements, as discussed earlier in “Using Contextual Selectors”). Assume, for
example, that the following is the document element of an XML document:
<MAPS>
<CITY>
<NAME>Santa Fe</NAME>
<STATE>New Mexico</STATE>
</CITY>
<STATE>California</STATE>
</MAPS>
Assume also that the attached style sheet contains the following rules:
CITY STATE
{font-style:normal}
STATE
{font-style:italic}
The browser would use the CITY STATE rule to format the “New Mexico”
STATE element, because it has a contextual selector and therefore takes pre-
cedence over the STATE rule, which has only a generic selector. “New
Mexico” would thus appear in a normal font.
3 If you don’t declare the value of a particular property in a rule with a
matching contextual selector, the browser will use the value declared in a
rule with a generic selector (that is, a selector that includes only the element
type name). For instance, in the example style sheet given in item 2, the
browser wouldn’t find a matching contextual rule for the “California”
STATE element, so it would use the generic STATE rule, and would therefore
display “California” in italics.
4 If you don’t declare the value of a particular property in a generic rule for
the element type, the browser will use the property’s setting declared for
the closest ancestor element (parent, parent of parent, and so on). For in-
stance, in the style sheet in Listing 8-1, the rule for the TITLE element
doesn’t assign a value to the font-size property:
Chapter 8 Displaying XML Documents Using Basic Cascading Style Sheets 213
8
Basic Cascading Style Sheets
TITLE
{font-style:italic}
Therefore, the browser will use the font-size setting from this element’s par-
ent element, BOOK (BOOK is the parent of TITLE in the XML document
that uses the style sheet):
BOOK
{display:block;
margin-top:12pt;
font-size:10pt}
It will therefore display the TITLE element’s text using 10-point characters.
Note, however, that this process will occur only for an inherited property.
For a noninherited property, the browser will use the property’s default
value (see “Inheritance of Property Settings” earlier in this chapter).
5 If the style sheet doesn’t include a property setting for any ancestor ele-
ment, the browser will use its own setting. This setting might be a default
value built into the browser or one set by the browser’s user. For instance,
because the example style sheet in Listing 8-1 doesn’t set the font-family
property for any element, the browser will use its own font-family value to
display all elements. (In Internet Explorer, this is Times New Roman unless
the browser user chooses a different font family through the Internet Op-
tions command on the Tools menu.)
Again, this process applies only to inherited properties. For noninherited
properties, the browser uses the property’s default value.
As you can see from this list, the general principle is this: If you assign a prop-
erty conflicting values at different levels, the browser gives preference to the
more specific rule. For example, a property setting for the element itself is more
specific than a setting for the element’s parent and therefore takes precedence.
You can use this principle to figure out more complex cases. (For example, if a
child element’s parent has both a contextual rule and a generic rule, which rule
will the browser use for the child element? You’re right: The browser will use
the contextual rule!)
214 XML Step by Step
note
The order of precedence in the preceding list isn’t cast in stone. It’s possible for
the browser’s property settings to take precedence over the property settings
in the style sheet that you attach to your XML document. This enables users
with special needs to have control over formatting (for instance, a user with
impaired vision could use an extra-large font). In Internet Explorer, for example,
a user can give the browser’s property settings precedence over your style sheet
settings by choosing the Internet Options command from the Tools menu, click-
ing the Accessibility button in the General tab of the Internet Options dialog
box, and choosing appropriate options.
What happens if a particular property is given conflicting settings at the same
level? In this case, the browser uses the last setting that it processes. For in-
stance, if two generic rules for the same element have conflicting settings for the
font-style property, as in the following example, the browser would use the sec-
ond one because it processes it last:
TITLE, AUTHOR, BINDING, PRICE
{display:block;
font-size:12pt;
font-weight:bold;
font-style:italic}
AUTHOR
{font-style:normal}
Thus, in this example, it would format the AUTHOR elements using a normal
rather than an italic font.
The following points describe the order in which the browser processes style
sheet rules:
■ If you link several style sheets to the document using xml-stylesheet
processing instructions, the browser processes the style sheets in the
order that you list the processing instructions.
■ If you import one or more other style sheets into a style sheet using
the @import directive (as explained in the earlier section “Importing
Other Style Sheets”), the browser processes the imported style sheets
before the importing style sheet, and it processes them in the order
in which you imported them.
Chapter 8 Displaying XML Documents Using Basic Cascading Style Sheets 215
8
Basic Cascading Style Sheets
■ In a particular style sheet, the rules are processed in the order in
which they are listed.
note
The rule whereby the browser uses the last style property setting that it pro-
cesses is the opposite of the rule an XML processor uses when it encounters
multiple attribute or entity declarations. Recall from previous chapters that the
XML processor uses the first attribute or entity declaration and ignores any
subsequent ones.
Setting the
display
Property
The display property controls the basic way the browser displays an element’s
text. You can assign it one of the following four CSS keywords:
■ block. The browser always inserts a line break before and after the
element’s text (which includes the text belonging to any child ele-
ments). As a result, the element’s text is displayed in a separate
“block” with the preceding document text above it and the follow-
ing document text below it. A block element is thus similar to a
paragraph in a word-processing program.
■ inline (the default). The browser does not insert a line break be-
tween the text of two elements that have the inline setting of the dis-
play property (unless the first element’s text has reached the right
edge of the window and the browser must wrap the text down to the
next line). It inserts line breaks within an inline element’s text only
as necessary to make the text fit within the window. An inline ele-
ment is thus similar to a sequence of characters within a paragraph
in a word-processing program.
notenote
notenote
note
The browser doesn’t insert an extra line break between two adjoining block
elements. It inserts a single line break between a block element and an adjoining
inline element, as well as between two adjoining block elements.
216 XML Step by Step
tiptip
tiptip
tip
(Internet Explorer 5.5–6.0 only.) Normally, the browser inserts a line break within
the text of a block or inline element when a line of text reaches the right edge
of the window. This text wrapping allows the reader to view the entire text
without scrolling back and forth. However, you can suppress the insertion of
these automatic line breaks by assigning the CSS keyword nowrap to an
element’s white-space property, as in the following example:
VERSE {white-space:nowrap} /* text in VERSE elements won’t
be wrapped */
The default value of this property is normal, which allows automatic line breaks.
■ list-item (Internet Explorer 6.0 only). The browser treats the ele-
ment as a block element and formats its content as a bulleted or
numbered list item. For details, see the next section.
■ none. The browser does not display the content of the element or
any of its child elements (even if a child element has a different dis-
play setting). See the sidebar “Hiding the Content of an Element”
later in this section.
note
The CSS specification indicates that the display property isn’t inherited by child
elements. This is clearly true if you assign the block or list-item setting to an
element’s display property. However, child elements effectively inherit the none
setting, because when you assign this setting to the parent’s display property,
you hide all child elements as well. Also, the child elements of an inline element
will likewise be inline if they don’t have a display value, because inline is the
default setting.
For more information on assigning CSS keywords to properties, see the sidebar
“Specifying CSS Keyword Values” at the end of this section.
Assume, for instance, that you use the following style sheet to display the ex-
ample XML document in Listing 8-2 (recall that to change the style sheet used
to display an XML document, you need to edit the xml-stylesheet processing in-
struction within the document):
Chapter 8 Displaying XML Documents Using Basic Cascading Style Sheets 217
8
Basic Cascading Style Sheets
Hiding the Content of an Element
The CSS standard provides two ways to hide the content of an element: You
can assign the element’s display property the value none, or you can assign
its visibility property the CSS keyword hidden. If you assign none to an
element’s display property, the element—plus any child elements—is hid-
den and doesn’t take up space on the page. In contrast, if you assign hid-
den to an element’s visibility property, the browser leaves a blank area in
the page where the element would have been displayed. The size of the blank
area is equal to the size of the hidden element, based on its content and its
other property settings. Also, the hidden setting doesn’t necessarily hide
child elements.
The visibility property can be assigned one of the following three CSS key-
word values:
■
inheritinherit
inheritinherit
inherit (the default). The element inherits the visibility of its parent.
■
visiblevisible
visiblevisible
visible. The element is made visible (even if its parent is hidden).
■
hiddenhidden
hiddenhidden
hidden. The element is hidden.
For example, if the following rules were applied to the XML document in
Listing 8-2, all the child elements of a BOOK element would be hidden
except TITLE, resulting in a simple list of titles. (However, the other child
elements would take up space on the page, possibly causing extra blank lines
to appear between titles.)
BOOK {visibility:hidden}
TITLE {visibility:visible}
BOOK
{display:block;
margin-top:12pt;
font-size:10pt}
TITLE
{font-style:italic}
AUTHOR
{font-weight:bold}
PAGES
{display:none}
Chapter 8 Displaying XML Documents Using Basic Cascading Style Sheets 219
8
Basic Cascading Style Sheets
note
The CSS specification includes quite a few properties that are largely redun-
dant—that is, it often provides two or more properties that allow you to set the
same formatting feature in slightly different ways. For example, you can apply
a text border to any combination of edges either by using the single border-
style property or by using the separate border-left, border-right, border-top,
and border-bottom properties. To provide room for covering more topics, I often
omit redundant properties from the discussions in this chapter and in Chapter
9. In each case, I’ve attempted to select the most basic, convenient set of prop-
erties that you can use to apply any of the available formats, and to omit the
properties that merely provide alternative ways to apply these same features.
For instance, in the section on applying borders, I present the basic border-style,
border-width, and border-color properties, but omit the other 17 border prop-
erties that offer some possible convenience but don’t actually provide additional
formatting features (for example, border-left, border-left-style, border-left-
width, and border-left-color).
Specifying CSS Keyword Values
With many of the CSS properties, you can—or must—assign a value by
using a predefined CSS keyword. The specific keywords that you can use
depend upon the particular property. For example, you can assign the dis-
play property one of four keywords: block, inline, list-item, or none. You
can assign the color property one of 16 keywords that describe the basic
colors, such as red, green, yellow, or fuchsia, as in this example:
PARA {color:fuchsia}
And you can assign the border-style property one of nine possible keywords:
solid, dotted, dashed, double, groove, ridge, inset, outset, or none as
shown here:
SECTION {border-style:solid}
Creating Bulleted and Numbered Lists
(Internet Explorer 6.0 only)
If an XML document is going to be displayed using Internet Explorer 6.0, you
can create a bulleted or numbered list by setting the display property of one or
220 XML Step by Step
more element types to the value list-item. This setting causes the browser to treat
the element as a block element and to display a list marker to the left of the
element’s content. A list marker can be either a bullet or an automatically
incremented number or letter. You control the formatting of the list marker by
using the properties described in the following table. These properties are inher-
ited by child elements.
List formatting property Property effect and values
list-style-type Controls the type of list marker that’s displayed if
the list-style-image property (described next) is set
to none or is omitted. The following are the poss-
ible keyword values and the resulting marker types:
■ disc (default): a solid circle
■ circle: an open circle
■ square: a solid square
■ decimal: 1, 2, 3, …
■ lower-roman: i, ii, iii, …
■ upper-roman: I, II, III, …
■ lower-alpha: a, b, c, …
■ upper-alpha: A, B, C, …
■ none: no list marker
list-style-image Allows you to use a custom image as a list
marker. The possible values are as follows:
■ none (default): A custom image isn’t used. The
list marker that’s displayed is determined by
the setting of the list-style-type property.
■ The URL of the graphics file containing the list
marker image, as in this example:
list-style-image:url(MyBullet.bmp)
See the sidebar “Specifying URL Values” on
page 209.
list-style-position Controls the position of the list marker. The
following are the possible values:
■ outside (default): The marker is outdented—
that is, it’s placed to the left of the block of
text. You must assign the element a positive
left margin to show the marker. (A left margin
of at least 30 points is recommended; see “Set-
ting the Margin Properties” on page 259.)
■ inside: The marker is not outdented—that is,
it’s displayed in the first character position
within the block of text.
As an example, you could format the list of books in the XML document of
Listing 8-2 as an automatically numbered list by replacing the BOOK rule given
in the attached style sheet (Listing 8-1) with the following rule:
222 XML Step by Step
■ font-weight
■ font-variant
All of these properties are inherited by child elements.
Setting the
font-family
Property
The font-family property specifies the name of the font used to display the
element’s text, as shown in this example:
BOOK {font-family:Arial}
You can enter any font name that you want. (They aren’t predefined CSS keywords.)
If the browser can’t find the requested font, it will substitute an available font.
tip
If a font name contains spaces, surround the whole thing with single or double
quotes, as in this example: BOOK {font-family:”Times New Roman”}.
You can increase your chances of getting the type of font you want by listing
several alternative choices, separated with commas, in the order of your prefer-
ence. Here’s an example:
BOOK {font-family:Arial, Helvetica}
If a font named Arial isn’t available, the browser will use Helvetica. If Helvetica
isn’t available, it will substitute some other available font.
You can further increase your chances of getting a desirable font by including a
CSS keyword—normally at the end of the list—that indicates the general type of
font you want, as in this example:
BOOK {font-family:Arial, Helvetica, sans-serif}
Here, if the browser can’t find Arial or Helvetica, it will substitute some other
sans serif font (that is, a font without serifs, also known as a gothic font).
The following table lists the CSS keywords you can use to indicate the general
type of font that you want. The CSS specification calls these generic family
names. For each generic family name, the table also gives the name of a specific
font that belongs to that family, as well as a sample of the text that Internet Ex-
plorer displays when you request that family. (The particular fonts that Internet
Explorer displays depend upon the set of fonts currently installed in Microsoft
Windows, so the fonts you see might be different.)
Chapter 8 Displaying XML Documents Using Basic Cascading Style Sheets 223
8
Basic Cascading Style Sheets
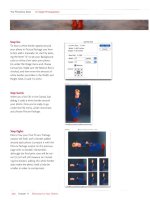
For example, if you attached the following style sheet to the example XML
document given in Listing 8-2, Internet Explorer would display the document as
shown in the following figure:
BOOK
{display:block;
margin-top:12pt;
font-family:Arial, sans-serif;
font-size:12pt}
TITLE
{font-style:italic}
AUTHOR
{font-family:”Times New Roman”, serif}
font-family
Example of a Text sample
generic family specific font
name keyword
serif Times New Roman
sans-serif Arial
cursive ZapfChancery
fantasy Western
monospace Courier New
224 XML Step by Step
The Arial font assigned to the BOOK element’s font-family property is inherited
by all child elements except AUTHOR, which has its own overriding font-family
value ("Times New Roman", serif).
Setting the
font-size
Property
The font-size property sets the height of the font used to display the element’s
text. You can assign this property four different types of values:
■ A value relative to the size of the browser’s font. You can specify a
font size that is relative to the size of the browser’s current font by
assigning the font-size property one of the keyword values in the fol-
lowing table. With Internet Explorer, the value small causes the
browser to use its currently selected font size; the other values are
scaled down or up from there.
font-size keyword: xx-small
Example CSS rule: TITLE {font-size:xx-small}
Description: The smallest font size that can be set by keyword
Text sample:
font-size keyword: x-small
Example CSS rule:
TITLE {font-size:x-small}
Description: Approximately 1.5 times the size of xx-small
Text sample:
font-size keyword: small
Example CSS rule:
TITLE {font-size:small}
Description: Approximately 1.5 times the size of x-small. This
value causes Internet Explorer to use its current
font size.
Text sample:
font-size keyword: medium
Example CSS rule:
TITLE {font-size:medium}
Description: Approximately 1.5 times the size of small
Text sample:
font-size keyword: large
Example CSS rule:
TITLE {font-size:large}
Description: Approximately 1.5 times the size of medium
Text sample:
Chapter 8 Displaying XML Documents Using Basic Cascading Style Sheets 225
8
Basic Cascading Style Sheets
font-size keyword: x-large
Example CSS rule:
TITLE {font-size:x-large}
Description: Approximately 1.5 times the size of large
Text sample:
font-size keyword: xx-large
Example CSS rule:
TITLE {font-size:xx-large}
Description: Approximately 1.5 times the size of x-large
Text sample:
note
The CSS Level 1 specification recommends the 1.5 scaling factor, and the CSS
Level 2 specification recommends 1.2. However, in Internet Explorer, the ac-
tual ratio between the different sizes varies quite a bit. For example, medium
is actually only about 1.15 times as large as small.
■ A value relative to the size of the parent’s font. You can specify a
font size that is relative to the size of the parent element’s current
font by assigning one of the following keyword values to the font-
size property:
font-size keyword: smaller
Example CSS rule:
TITLE {font-size:smaller}
Description: A font approximately 33% smaller than the parent
element’s font (or, for the root element, 33% smaller
than the browser’s font)
Text sample:
font-size keyword: larger
Example CSS rule:
TITLE {font-size:larger}
Description: A font approximately 50% larger than the parent
element’s font (or, for the root element, 50% larger
than the browser’s font)
Text sample:
Chapter 8 Displaying XML Documents Using Basic Cascading Style Sheets 227
8
Basic Cascading Style Sheets
Specifying Percentage Values
You can assign certain properties a percentage value. Percentage values are
useful when you’re more concerned with the relative sizes of different com-
ponents than with their actual sizes.
A percentage value specifies the size of some property as a percentage of
some other value. What that other value is depends on the particular prop-
erty you’re setting. Usually, it’s the font size of the element itself. For ex-
ample, the following setting makes the line height two times the height of
the element’s current font, resulting in double-spaced lines:
SECTION {line-height:200%}
For the font-size property, however, a percentage value refers to the current
font size of the element’s parent. For example, the following rule sets the
element’s font height to three-quarters of the height of its parent element’s
current font:
PARAGRAPH {font-size:75%}
Note that if a child element inherits a percentage property value, it inher-
its the calculated result of the percentage, not the percentage itself. (Oth-
erwise, if a series of descendent elements inherited a percentage value, the
size would keep getting smaller or larger with each successive generation.)
Specifying Size Values
Many CSS properties can, or must, be assigned a size value (termed a length
value in the CSS specifications). Size values are used to specify font sizes,
positions of background images, text spacings, indentations, line heights,
margin widths, border widths, widths and heights of elements, and other
properties. You can assign either an absolute size value or a relative size
value to any property that takes a size value.
An absolute size value is one that specifies an exact size using standard units
of measurement, such as inches, points, or millimeters. The following table
lists the different units you can specify. For each type of unit, it gives the
abbreviation you must use to indicate the unit in a rule, and it shows the
equivalent numbers of the other units.
continued
Chapter 8 Displaying XML Documents Using Basic Cascading Style Sheets 229
8
Basic Cascading Style Sheets
PARAGRAPH {font-size:.75em}
(This final rule is equivalent to the PARAGRAPH {font-size:75%} example
rule you saw in the previous sidebar.)
Note that if a child element inherits a relative value, it inherits the calcu-
lated result of the value, not the relative value itself.
Setting the
font-style
Property
The font-style property controls whether an element’s text is displayed in italic
or in normal upright (roman) characters. You can assign this property one of the
following three CSS keyword values:
font-style keyword: italic
Example CSS rule:
TITLE {font-style:italic}
Effect: Assigns an italic font if available. If one is not
available, it assigns an oblique font.
Text sample:
font-style keyword: oblique
Example CSS rule:
TITLE {font-style:oblique}
Effect: Assigns an oblique font if available. (A font generated
by slanting the letters of a normal font.)
Text sample:
font-style keyword: normal
Example CSS rule:
TITLE {font-style:normal}
Effect: Assigns a roman font
Text sample:
Setting the
font-weight
Property
The font-weight property determines how bold (that is, how dark and thick) an
element’s characters appear. You can assign this property one of the following
13 CSS keyword values:
font-weight keyword: normal
Example CSS rule:
TITLE {font-weight:normal}
Effect: Displays the text in the normal level of boldness
Text sample:
continued