The Adobe Photoshop CS5 Book for Digital Photographers part 32 potx
Bạn đang xem bản rút gọn của tài liệu. Xem và tải ngay bản đầy đủ của tài liệu tại đây (1.41 MB, 10 trang )
ptg
The Adobe Photoshop CS5 Book for Digital Photographers
291Chapter 10Special Effects for Photographers
Continued
The super-high-contrast, desaturated look is incredibly popular right now, and
while there are a number of plug-ins that can give you this look, along with a
Camera Raw technique I’ll show you next, I also wanted to include this version,
which I learned from German retoucher Calvin Hollywood, who shared this tech-
nique during a stint as my special guest blogger at my daily blog (www.scottkelby
.com). The great thing about his version is: (1) you can write an action for it and
apply it with one click, and (2) you don’t need to buy a third-party plug-in to get
this look. My thanks to Calvin for sharing this technique with me, and now you.
Step One:
Open the image you want to apply a
high-contrast look to. Let’s start, right off
the bat, by creating an action to record
our steps, so when you’re done, you can
reapply this same look to other photos
with just one click. Go to the Actions
panel, and click on the Create New Action
icon at the bottom of the panel. When
the New Action dialog appears, name this
“High-Contrast Look” and click the Record
button. Now it’s recording every move
you make…every step you take, it’ll be
watching you (sorry, I just couldn’t resist).
Step Two:
Make a copy of your Background layer by
pressing Command-J (PC: Ctrl-J). Now,
change the blend mode of this duplicate
layer to Vivid Light (I know it doesn’t
look pretty now, but it’ll get better in a
few more moves).
High-Contrast Look
SCOTT KELBY
Download from www.wowebook.com
ptg
292
Chapter 10 Special Effects for Photographers
The Adobe Photoshop CS5 Book for Digital Photographers
Step Three:
Now press Command-I (PC: Ctrl-I) to
Invert the layer (it should look pretty gray
at this point). Next, go under the Filter
menu, under Blur, and choose Surface
Blur. When the dialog appears, enter 40
for the Radius and 40 for the Threshold,
and click OK (it takes a while for this par-
ticular filter to do its thing, so be patient.
If you’re running this on a 16-bit version
of your photo, this wouldn’t be a bad
time to grab a cup of coffee. Maybe a
sandwich, too).
Step Four:
We need to change the layer’s blend
mode again, but we can’t change this one
from Vivid Light or it will mess up the
effect, so instead we’re going to create a
new layer, on top of the stack, that looks
like a flattened version of the image. That
way, we can change its blend mode to get
a different look. This is called “creating a
merged layer,” and you get this layer by
pressing Command-Option-Shift-E
(PC: Ctrl-Alt-Shift-E).
Download from www.wowebook.com
ptg
293Chapter 10Special Effects for Photographers
Continued
The Adobe Photoshop CS5 Book for Digital Photographers
Step Five:
Now that you have this new merged layer,
you need to delete the middle layer (the
one you ran the Surface Blur upon), so
drag it onto the Trash icon at the bot-
tom of the Layers panel. Next, change
the blend mode of your merged layer
(Layer 2) to Overlay, and now you can
start to see the effect taking shape
(although we still have a little to do to
bring it home).
Step Six:
Go under the Image menu, under
Adjustments, and choose Shadows/
Highlights. When the dialog appears,
drag the Shadows Amount down to 0.
Then, you’re going to add what amounts
to Camera Raw’s Clarity by increasing
the amount of Midtone Contrast on
this Overlay layer. (If you don’t see the
Adjustments section, turn on the Show
More Options checkbox at the bottom
left.) Go down near the bottom of the
dialog and drag the Midtone Contrast
slider to the right, and watch how your
image starts to get that crispy look (crispy,
in a good way). Of course, the farther to
the right you drag, the crispier it gets, so
don’t go too far, because you’re still going
to sharpen this image. Now click OK, then
go to the Layers panel’s flyout menu and
choose Flatten Image. Next, you’re going
to add a popular finishing touch to this
type of look—an edge vignette.
Download from www.wowebook.com
ptg
294
Chapter 10 Special Effects for Photographers
The Adobe Photoshop CS5 Book for Digital Photographers
Step Seven:
Go under the Filter menu and choose Lens
Correction. When the dialog opens, click
on the Custom tab, and then in the Vi gnette
section, drag the Amount slider to the left
to –100 (this slider determines how dark
the edges will be), then drag the Midpoint
slider to around 12 (this determines how
far in toward the center of the image the
edge darkening extends, and we want it
pretty large in this case), and click OK. The
final step, which is optional, is to add mega-
sharpening using the High Pass sharpening
technique found in Chapter 11, then
flatten the image again, and you’re done.
Go to the Actions panel and click the square
Stop button at the bottom of the panel to
stop recording. Open a different image and
test your action on it by clicking on the action,
then clicking the Play button at the bottom
of the panel. A before/after is shown below.
Before
After
Download from www.wowebook.com
ptg
The Adobe Photoshop CS5 Book for Digital Photographers
295Chapter 10Special Effects for Photographers
Continued
Step One:
Open a photo in Camera Raw. This is one
of those effects that needs the right kind
of image for it to look right. Photos with
lots of detail, texture, along with anything
metallic, and lots of contrast seem to
work best (it also works great for sports
portraits, cars, even some landscapes. In
other words: I wouldn’t apply this effect
to a shot of a cute little fuzzy bunny).
Here’s the original RAW image open in
Camera Raw. (Note: This effect actually
seems to come out better when you run
it on RAW images, rather than JPEG or
TIFF, but it does work on all three.)
Step Two:
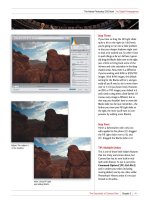
Set these four sliders all at 100: Recovery,
Fill Light, Contrast, and Clarity (as shown
here). This is going to make your image
look kind of washed out (like you see
here). The brightness for this photo looks
okay, because it was kind of dark when
we started, but if your image was already
kind of bright in the first place, it’s going
to look really bright now. If that’s the
case, you can go ahead and lower the
Exposure amount (just drag the Exposure
slider to the left until the brightness looks
normal. The image will still look washed
out, but it shouldn’t be crazy bright).
If you want that extreme contrast, grungy look, you can create it right within
Camera Raw itself by just dragging a few sliders in the Basic panel and then adding
a vignette. If you’re going to leave Camera Raw and go to Photoshop at some point
anyway, you should try poppin’ some High Pass sharpening on this puppy. Shots like
this, with lots of texture and metal, just love a little High Pass tossed on them, so give
it a try. But let’s not get ahead of ourselves—here’s the grungy look made easy:
Getting the Grungy,
High-Contrast
Look Right Within
Camera Raw
SCOTT KELBY
Download from www.wowebook.com
ptg
296
Chapter 10 Special Effects for Photographers
The Adobe Photoshop CS5 Book for Digital Photographers
Step Three:
Now, you’re going to bring back all the
saturation and warmth to the color in
the image by dragging the Blacks slider
way up to the right. Keep dragging until
the photo looks balanced (like it does
here, where I dragged it over to +51). If
the colors look too colorful and vibrant
(and they probably will), just lower the
Vibrance amount until it looks just a
little desaturated (that’s part of “the
look”). Here, I lowered the Vibrance to
–30. It did seem just a little dark at this
point, so I also dragged the Exposure
slider to +0.35.
Step Four:
The finishing move for this effect is to
add a dark edge vignette. So, click on the
Lens Corrections icon (sixth from the
left at the top of the Panel area), then
click on the Manual tab, and in the Lens
Vignetting section, drag the Amount
slider to the left to darken the edges a
bit (here, I dragged over to –48), and
the Midpoint slider to the left to move
the darkening farther into the center
(I dragged it to around 43) to finish off
the image (as seen here). Compare this to
the original, and you can see the appeal
of this effect, which almost looks a little
like an HDR photo. Well, that’s it—the
whole grungy enchilada right within
Camera Raw. (But, I gotta ask ya—is this
baby screamin’ for some High Pass sharp-
ening, or what? See the next chapter for
more on that.)
Download from www.wowebook.com
ptg
The Adobe Photoshop CS5 Book for Digital Photographers
297Chapter 10Special Effects for Photographers
Continued
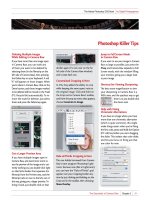
Traditional skylight filters have been popular with photographers for years, because
they help cut haze, and cut down on the blue color casts you sometimes get when
part of your image is in the distance (like a mountain range in a landscape shot). The
overall effect is a warming effect, and even though traditional screw-on filters actu-
ally have a magenta color cast to them, here in Photoshop we use a warming filter
to get a similar effect and warm up an otherwise cold image.
Step One:
Open the color photo you want to apply
a Skylight Filter effect to in Photoshop
CS5. Go to the Adjustments panel and
click on the Photo Filter icon (it’s the
icon with a camera and a circle to the
left of it—it’s second from the right in
the middle row).
Step Two:
Choose Warming Filter (81) from the
pop-up menu, then increase the Density
amount to 70% (as shown here).
Skylight Filter Effect
SCOTT KELBY
Download from www.wowebook.com
ptg
298
Chapter 10 Special Effects for Photographers
The Adobe Photoshop CS5 Book for Digital Photographers
Before After
Step Three:
Now go to the Layers panel and change
the blend mode of this layer to Soft
Light at the top left of the panel to
complete the effect. Note: Changing
the blend mode to Soft Light adds a
bit of contrast, as well, so if it looks too
contrasty after making this change, just
lower the Opacity setting for this layer
(at the top right of the Layers panel)
until it looks about right (start at 50%
and see what that looks like. In the
photo shown here, the added contrast
looks good, so I left it at 100%, but
dependi ng on the photo, you might
have to tweak that Opacity setting
a little bit). Below is a side-by-side
before/after.
Download from www.wowebook.com
ptg
The Adobe Photoshop CS5 Book for Digital Photographers
299Chapter 10Special Effects for Photographers
Continued
Step One:
Start with the photo you want to apply
the technique to (we’re going to use a
bridal photo here. You can download
the same photo from the book’s com-
panion website. In fact, you can down-
load most of the key images used in the
book, so you can follow right along. The
Web address is in that introduction in
the front of the book that you skipped).
Step Two:
First, you’re going to add a very warm,
yellowish tint to the image (while still
leaving it in color) by going under the
Image menu, under Adjustments, and
choosing Color Balance. When the dialog
appears, drag the top slider over toward
Red, until it reads +26. Drag the center
slider toward Magenta to –9, and drag
the bottom slider over toward Yellow,
to –59 (as shown here). Make sure the
Preserve Luminosity checkbox is turned
on, and that Midtones are selected for
your Tone Balance (it’s the center radio
button). Now click OK.
This is another one of those effects that has grown in popularity over the past
year or so, and it takes just a few steps to totally nail the look. By the way, you
could add an optional Polaroid-look border when you’re done. First, select the
entire photo, and cut it onto its own layer. Then, add two inches of white canvas
area around the photo. Add a Drop Shadow layer style, then add a Stroke layer
style. Set your stroke color to white, the location to Inside, set the Size to 120,
and click OK—you’re done.
The Faded
Antique Look
SCOTT KELBY
Download from www.wowebook.com
ptg
300
Chapter 10 Special Effects for Photographers
The Adobe Photoshop CS5 Book for Digital Photographers
Step Three:
Now, you’ll need to desaturate the col-
ors a bit (remember, those old, faded
photos didn’t have the bright, punchy
colors we have today), so go under the
Image menu, under Adjustments, and
choose Hue/Saturation. When the dia-
log appears, drag the Saturation slider
to –70 (as shown here) to remove some,
but not all, of the color from the image.
Now click OK.
Step Four:
Press Command-J (PC: Ctrl-J) to dupli-
cate the Background layer, then change
the blend mode of this duplicate layer
to Screen (as shown here), which makes
the whole photo very bright and a little
blown out (it’s all part of the effect).
Now press Command-E (PC: Ctrl-E) to
flatten the two layers into one.
Download from www.wowebook.com


