Phát triển ứng dụng cho iPhone và iPad - part 5 pps
Bạn đang xem bản rút gọn của tài liệu. Xem và tải ngay bản đầy đủ của tài liệu tại đây (3.59 MB, 10 trang )
Implementing Your Data Model Class
In order for your class to serve data to the TableView , you ’ ll need a method to return the requested
data. So, let ’ s create an interface method called
getNameAtIndex that will return the name from the
model that corresponds with the index that is passed in.
Bring up your
DataModel.h header fi le by selecting it in the left - hand browser pane in Xcode. Below
the right brace that closes the interface defi nition, add the following line of code to declare the
getNameAtIndex interface method:
-(NSString*) getNameAtIndex:(int) index;
You ’ ll also need an interface method that tells users of the class how many rows you ’ ll be
returning. So add another method to the interface called
getRowCount . Below the declaration for
getNameAtIndex , add the declaration for getRowCount :
-(int) getRowCount;
Your header fi le should look like this:
#import < Foundation/Foundation.h >
@interface DataModel : NSObject {
}
-(NSString*) getNameAtIndex:(int) index;
-(int) getRowCount;
@end
DataModel.h
Now, let ’ s switch over to the data model implementation fi le DataModel.m and implement the new
methods. You can quickly switch between a header and implementation fi le in Xcode by using the
shortcut key combination CTRL - OPT - UP ARROW.
You will be well served to learn the keyboard shortcuts in Xcode. The small amount
of time that you invest in learning them will more than pay off in time saved.
Below the #import statement in your implementation fi le, add a local variable to hold the data
list. Typically, the data in your application will come from a database or some other datasource.
To keep this example simple, you ’ ll use an
NSArray as the datasource. Add the following line to the
DataModel.m fi le below the #import statement:
NSArray* myData;
Building a Simple Data - Driven Application
❘
9
CH001.indd 9CH001.indd 9 9/18/10 11:06:38 AM9/18/10 11:06:38 AM
10
❘
CHAPTER 1 INTRODUCING DATA - DRIVEN APPLICATIONS
Now, inside the @implementation block, you add the implementation of the getNameAtIndex method.
Add the following code stub between the
@implementation and @end tags in DataModel.m :
-(NSString*) getNameAtIndex:(int) index
{
}
Before you get to the lookup implementation, you need to initialize the data store, the myData
array. For this example, you ’ ll do that in the initializer of the class. Above the function stub
getNameAtIndex , add the following code to initialize the class:
-(id)init
{
if (self = [super init])
{
// Initialization code
myData = [[NSArray alloc] initWithObjects:@”Albert”, @”Bill”, @”Chuck”,
@”Dave”, @”Ethan”, @”Franny”, @”George”, @”Holly”, @”Inez”,
nil];
}
return self;
}
The fi rst line calls the superclass ’ s init function. You should always call init on the superclass in
any subclass that you implement. You need to do this to ensure that attributes of the superclass are
constructed before you begin doing anything in your subclass.
The next line allocates memory for the array and populates it with a list of names.
The fi nal line returns an instance of the class.
Now that you have the data initialized, you can implement the function to get your data. This is
quite simple in this example. You just return the string at the specifi ed location in the array like so:
-(NSString*) getNameAtIndex:(int) index
{
return (NSString*)[myData objectAtIndex:index];
}
This line of code simply looks up the object at the specifi ed index in the array and casts it to an
NSString* . You know that this is safe because you ’ ve populated the data by hand and are sure that
the object at the given index is an
NSString .
To keep this example simple, I have omitted bounds checking that would be
performed in a production application.
To implement getRowCount , you simply return the count of the local array like this:
-(int) getRowCount
{
CH001.indd 10CH001.indd 10 9/18/10 11:06:54 AM9/18/10 11:06:54 AM
return [myData count];
}
At this point, if you build your project by clicking the build icon in the toolbar or pressing Command+B,
your code should compile and link cleanly with no errors or warnings. If you have an error or warning,
go back and take a look at the code provided and make sure that you have typed everything correctly.
I am a big proponent of compiling early and often. Typically, after every method that I write or any
particularly tricky bit of code, I will attempt to build. This is a good habit to get into, as it is much
easier to narrow down compile errors if the amount of new code that you ’ ve added since your last
successful compile is small. This practice also limits the amount of errors or warnings that you receive.
If you wait until you ’ ve written 2,000 lines before attempting to compile, you are likely to fi nd the
number of errors (or at least warnings) that you receive overwhelming. It is also sometimes diffi cult to
track down the source of these errors because compiler and linker errors tend to be a little cryptic.
Your completed data model class should look like this:
#import “DataModel.h”
NSArray* myData;
@implementation DataModel
-(id)init
{
if (self = [super init])
{
// Initialization code
myData = [[NSArray alloc] initWithObjects:@”Albert”, @”Bill”, @”Chuck”,
@”Dave”, @”Ethan”, @”Franny”, @”George”, @”Holly”, @”Inez”,
nil];
}
return self;
}
-(NSString*) getNameAtIndex:(int) index
{
return (NSString*)[myData objectAtIndex:index];
}
-(int) getRowCount
{
return [myData count];
}
-(void) dealloc
{
[myData release]; // release the previously allocated NSArray
[super dealloc];
}
@end
DataModel.m
Building a Simple Data - Driven Application
❘
11
CH001.indd 11CH001.indd 11 9/18/10 11:07:00 AM9/18/10 11:07:00 AM
12
❘
CHAPTER 1 INTRODUCING DATA - DRIVEN APPLICATIONS
Displaying the Data
Now that you have the view and model in place, you have to hook them up using the controller.
In order for a
TableView to display data, it needs to know what the data is and how to display
it. To do this, a
UITableView object must have a delegate and a datasource. The datasource
coordinates the data from your model with the
TableView . The delegate controls the appearance
and behavior of the
TableView . To guarantee that you have properly implemented the delegate, it
must implement the
UITableViewDelegate protocol. Likewise, the datasource must implement the
UITableViewDataSource protocol.
Protocols
If you are familiar with Java or C++, protocols should also be familiar. Java interfaces and C++ pure
virtual classes are the same as protocols. A protocol is just a formal contract between a caller and
an implementer. The protocol defi nition states what methods a class that implements the protocol
must implement. The protocol can also include optional methods.
Saying that a
TableView ’ s delegate must implement the UITableViewDelegate protocol means
you agree to a contract. That contract states that you will implement the required methods specifi ed
in the
UITableViewDelegate protocol. Similarly, a class that will be set as the datasource for a
TableView must implement the required methods specifi ed in the UITableViewDataSource protocol.
This may sound confusing but it will become clearer as you continue to work through the example.
To keep this example as simple as possible and to avoid introducing more classes, you ’ ll make
the
SampleTableProjectViewController the delegate and datasource for the TableView . To
do this, you will have to implement the
UITableViewDelegate and UITableViewDataSource
protocols in the
SampleTableProjectViewController . You need to declare that the
SampleTableProjectViewController class implements these protocols in the header fi le. Change the
@interface line in the SampleTableProjectViewController.h header fi le to add the protocols that
you plan on implementing in angle brackets after the interface name and inheritance hierarchy like so:
@interface SampleTableProjectViewController : UIViewController
< UITableViewDataSource, UITableViewDelegate >
If you try to build your project now, you will get some warnings. Open the Build Results window
by selecting Build Results from the Build menu (or by using the shortcut Command+Shift+B). You
should see a dialog box that looks something like Figure 1 - 5.
You should see several warnings associated with the compilation of
SampleTableProjectViewController.m; specifi cally, the warnings, “ incomplete implementation
of class ‘ SampleTableProjectViewController’ ” and “ class ‘ SampleTableProjectViewController ’ does
not fully implement the ‘ UITableViewDataSource ’ protocol. ”
These warnings are clear. You have not implemented the protocols that you claimed you would
implement. In fact, the warnings are even more specifi c in that they specify the required methods that
you failed to implement: “ method defi nition for ‘ - tableView:cellForRowAtIndexPath: ’ not found ” and
“ method defi nition for ‘ - tableView:numberOfRowsInSection: ’ not found. ” If you have any doubt about
which methods are required to implement a protocol, a quick build will tell you with explicit warnings.
CH001.indd 12CH001.indd 12 9/18/10 11:07:00 AM9/18/10 11:07:00 AM
Implementing the UITableViewDataSource Protocol
Let ’ s get rid of those warnings and move one step closer to a working application by implementing
the
UITableViewDataSource protocol.
Because you will be using the
DataModel class in the SampleTableProjectViewController class,
you have to import the
DataModel.h header fi le. In the SampleTableProjectViewController.h
header fi le, add the following
#import statement just below the #import < UIKit/UIKit.h > statement:
#import “DataModel.h”
Now that you ’ ve imported the DataModel class, you ’ ll have to create an instance variable of
the
DataModel type. In the SampleTableProjectViewController.m implementation, add the
following declaration below the
@implementation keyword:
DataModel* model;
To actually create the instance of the model class, add the following code to the beginning of the
loadView method:
model = [[DataModel alloc] init];
FIGURE 1 - 5: Build Results dialog
Building a Simple Data - Driven Application
❘
13
CH001.indd 13CH001.indd 13 9/18/10 11:07:01 AM9/18/10 11:07:01 AM
14
❘
CHAPTER 1 INTRODUCING DATA - DRIVEN APPLICATIONS
Now that you have an initialized model ready to go, you can implement the required
UITableViewDataSource protocol methods. You can see from the compiler warnings that the
methods that you need to implement are
cellForRowAtIndexPath and numberOfRowsInSection .
The
numberOfRowsInSection method tells the TableView how many rows to display in the current
section. You can divide a
TableView into multiple sections. In the Contacts application, a letter of
the alphabet precedes each section. In this example, you have only one section, but in Chapter 3,
you see how to implement multiple sections.
To implement
numberOfRowsInSection , get the number of rows that the datasource contains by
calling the model ’ s
getRowCount method:
- (NSInteger)tableView:(UITableView *)tableView
numberOfRowsInSection:(NSInteger)section{
return [model getRowCount];
}
If you build your project now, you will see that the warning about not implementing
numberOfRowsInSection is gone.
The
cellForRowAtIndexPath method returns the actual UITableViewCell object that will display
your data in the
TableView . The TableView calls this method any time it needs to display a cell.
The
NSIndexPath parameter identifi es the desired cell. So, what you need to do is write a method
that returns the correct
UITableViewCell based on the row that the TableView asks for. You
do that like so:
- (UITableViewCell *)tableView:(UITableView *)tableView
cellForRowAtIndexPath:(NSIndexPath *)indexPath
{
static NSString *CellIdentifier = @”Cell”;
UITableViewCell *cell = [tableView
dequeueReusableCellWithIdentifier:CellIdentifier];
if (cell == nil) {
cell = [[[UITableViewCell alloc]
initWithFrame:CGRectZero
reuseIdentifier:CellIdentifier] autorelease];
}
NSUInteger row = [indexPath row];
cell.textLabel.text = [model getNameAtIndex:row];
return cell;
}
The fi rst few lines of code return a valid UITableViewCell object. I won ’ t go into the details
of exactly what is happening here because I cover it in detail in Chapter 3, which is dedicated
to the
UITableView . For now, suffi ce it to say that for performance purposes you want to reuse
TableViewCells whenever possible and this code does just that.
CH001.indd 14CH001.indd 14 9/18/10 11:07:02 AM9/18/10 11:07:02 AM
The last few lines of code fi nd the row that the caller is interested in, look up the data for that row
from the model, set the text of the cell to the name in the model, and return the
UITableViewCell .
That ’ s all there is to it. You should now be able to successfully build the project with no errors or
warnings.
Delegates
In designing the iPhone SDK and the Cocoa libraries in general, Apple engineers frequently
implemented common design patterns. You ’ ve already seen how to use the Model - View - Controller
(MVC) pattern in an application design. Another pattern that you will see all across the Cocoa and
Cocoa touch frameworks is delegation .
In the delegate pattern, an object appears to do some bit of work; however, it can delegate that
work to another class. For example, if your boss asks you to do some work and you hand it off to
someone else to do, your boss doesn ’ t care that you or someone else did the work, as long as the
work is completed.
While working with the iPhone SDK, you will encounter many instances of delegation,
and the
TableView is one such instance. A delegate for the TableView implements the
UITableViewDelegate protocol. This protocol provides methods that manage selection of rows,
control adding and deleting cells, and control confi guration of section headings along with various
other operations that control the display of your data.
Finishing Up
The only thing left to do with the sample is to set the UITableView ’ s delegate and DataSource
properties. Because you have implemented the delegate and datasource protocols, in the
SampleTableProjectViewController , you set both of these properties to self .
In the
loadView method of the SampleTableProjectViewController.m fi le, add the following
code to confi gure the datasource and the delegate for the
TableView :
[myTable setDelegate:self];
[myTable setDataSource:self];
The fi nal code for the SampleTableProjectViewController.m should look something like Listing 1 - 1.
LISTING 1 - 1: SampleTableProjectViewController.m
#import “SampleTableProjectViewController.h”
@implementation SampleTableProjectViewController
DataModel* model;
// Implement loadView to create a view hierarchy programmatically, without
Building a Simple Data - Driven Application
❘
15
continues
CH001.indd 15CH001.indd 15 9/18/10 11:07:03 AM9/18/10 11:07:03 AM
16
❘
CHAPTER 1 INTRODUCING DATA - DRIVEN APPLICATIONS
LISTING 1-1
(continued)
// using a nib.
- (void)loadView {
model = [[DataModel alloc] init];
CGRect cgRct = CGRectMake(0, 20, 320, 460);
UITableView * myTable = [[UITableView alloc] initWithFrame:cgRct];
[myTable setDelegate:self];
[myTable setDataSource:self];
self.view = myTable;
}
- (void)didReceiveMemoryWarning {
// Releases the view if it doesn’t have a superview.
[super didReceiveMemoryWarning];
}
- (void)viewDidUnload {
// Release any retained subviews of the main view.
// e.g. self.myOutlet = nil;
}
- (void)dealloc {
[super dealloc];
}
// UITableViewDataSource protocol methods
- (NSInteger)tableView:(UITableView *)tableView
numberOfRowsInSection:(NSInteger)section
{
return [model getRowCount];
}
- (UITableViewCell *)tableView:(UITableView *)tableView
cellForRowAtIndexPath:(NSIndexPath *)indexPath
{
static NSString *CellIdentifier = @”Cell”;
UITableViewCell *cell = [tableView
dequeueReusableCellWithIdentifier:CellIdentifier];
if (cell == nil) {
cell = [[[UITableViewCell alloc]
initWithFrame:CGRectZero
reuseIdentifier:CellIdentifier] autorelease];
}
// Set up the cell
NSUInteger row = [indexPath row];
cell.textLabel.text = [model getNameAtIndex:row];
return cell;
}
@end
CH001.indd 16CH001.indd 16 9/18/10 11:07:04 AM9/18/10 11:07:04 AM
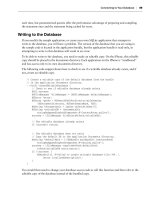
You should now be able to build and run your application
in the simulator. You should see the table populated with the
names that are contained in your
DataModel class, as in
Figure 1 - 6.
Congratulations! You ’ ve successfully built your fi rst data - driven
application! Feel free to go back and modify the
DataModel to use a
different datasource, like a text fi le.
FURTHER EXPLORATION
In this chapter, you learned how to build an iPhone application that
uses the
UITableView control to display data. You also learned a little
bit about design patterns, specifi cally the Model - View - Controller
pattern that is prevalent in iPhone application development. In the next
chapter, you learn how to use the SQLite database as your datasource.
Then, in Chapter 3, you master the
UITableView control. By the
end of Chapter 3, you should be able to build a data - centric iPhone
application on your own.
Design Patterns
If you are interested in writing maintainable, high - quality software, I highly recommend Design
Patterns: Elements of Reusable Object - Oriented Software by Erich Gamma, Richard Helm, Ralph
Johnson, and John Vlissides (Addison - Wesley, 1994). This is the bible of OO design patterns. The
book illustrates each pattern with a UML model, very readable explanations of the patterns and
their implementation, and code samples in both C++ and SmallTalk. If you don ’ t already have this
masterpiece of computer science, get it now — you won ’ t regret it.
I would also recommend Object - Oriented Design and Patterns by Cay S. Horstmann
(Wiley, 2005). Although the code in the book is in Java, you will fi nd that the explanations of
the patterns introduced in the design patterns book are outstanding and will help you to further
understand the patterns and their importance in implementing high - quality software.
Even if you are not interested in either of these titles, do yourself a favor and search Google for
“ design patterns. ” There is a reason why there is a lot of literature on design patterns. It doesn ’ t make
any sense to try to re - invent the wheel. Others have already discovered the solutions to many of the
problems that you will fi nd in your software designs. These solutions have become design patterns.
The point of these design patterns is to present well - tested designs to developers in a form that
everyone can understand. The patterns are time proven and offer a common vocabulary that is useful
when communicating your design to other developers.
FIGURE 1 - 6: Running
TableView with data
Further Exploration
❘
17
CH001.indd 17CH001.indd 17 9/18/10 11:07:04 AM9/18/10 11:07:04 AM
18
❘
CHAPTER 1 INTRODUCING DATA - DRIVEN APPLICATIONS
Reading a Text File
If you are interested in making your simple table viewing application more interesting, it is easy to
read data from a text fi le. The following code snippet shows you how:
NSError *error;
NSString *textFileContents = [NSString
stringWithContentsOfFile:[[NSBundle mainBundle]
pathForResource:@”myTextFile”
ofType:@”txt”]
encoding:NSUTF8StringEncoding
error: & error];
// If there are no results, something went wrong
if (fileContents == nil) {
// an error occurred
NSLog(@”Error reading text file. %@”, [error localizedFailureReason]);
}
NSArray *lines = [textFileContents componentsSeparatedByString:@”\n”];
NSLog(@”Number of lines in the file:%d”, [lines count] );
This code will read the contents of the fi le myTextFile.txt , which should be included in your code
bundle. Simply create a text fi le with this name and add it to your Xcode project.
The fi rst line declares an error object that will be returned to you should anything go wrong while
trying to read your text fi le. The next line loads the entire contents of your fi le into a string.
The next line is an error handler. If you get
nil back from the call to stringWithContentesOfFile ,
that means that something went wrong. The error will be output to the console using the
NSLog function.
The next line breaks up the large string into an array separated by
\n , which is the return character.
You create an element in the
lines array for each line in your fi le.
The fi nal line outputs the number of lines read in from the fi le.
MOVING FORWARD
In this chapter, you have learned how to build a simple data - driven application using an NSArray as
your datasource. You also explored the project options available when creating a project in Xcode.
Then, you learned about the Model - View - Controller architecture and how the
TableView fi ts in
with that design. Finally, you looked at the important concepts of Protocols and Delegates.
In the next chapter, you will learn how to get data from a more robust datasource, the SQLite
database. This is the embedded database that is included as part of the iPhone SDK. Learning to
use this database will enable you to build rich, data - driven applications for the iPhone.
CH001.indd 18CH001.indd 18 9/18/10 11:07:05 AM9/18/10 11:07:05 AM