Phát triển ứng dụng cho iPhone và iPad - part 7 ppsx
Bạn đang xem bản rút gọn của tài liệu. Xem và tải ngay bản đầy đủ của tài liệu tại đây (2.49 MB, 10 trang )
1 Widget A 1 Details of Widget A 1.29 5 1 Canvas_1
2 Widget B 1 Details of Widget B 4.29 15 2 Canvas_2
3 Widget X 1 Details of Widget X 0.29 25 3 Canvas_3
4 Widget Y 1 Details of Widget Y 1.79 5 3 Canvas_4
5 Widget Z 1 Details of Widget Z 6.26 15 4 Canvas_5
6 Widget R 1 Details of Widget R 2.29 45 1 Canvas_6
7 Widget S 1 Details of Widget S 3.29 55 1 Canvas_7
8 Widget T 1 Details of Widget T 4.29 15 2 Canvas_8
9 Widget L 1 Details of Widget L 5.29 50 3 Canvas_9
10 Widget N 1 Details of Widget N 6.29 50 3 Canvas_10
11 Widget E 1 Details of Widget E 17.29 25 4 Canvas_11
12 Part Alpha 2 Details of Part Alpha 1.49 25 1 Canvas_12
13 Part Beta 2 Details of Part Beta 1.89 35 1 Canvas_13
14 Part Gamma 2 Details of Part Gamma 3.46 45 2 Canvas_14
15 Device N 3 Details of Device N 9.29 15 3 Canvas_15
16 Device O 3 Details of Device O 21.29 15 3 Canvas_16
17 Device P 3 Details of Device P 51.29 15 4 Canvas_17
18 Tool A 4 Details of Tool A 14.99 5 1 Canvas_18
19 Tool B 4 Details of Tool B 44.79 5 1 Canvas_19
20 Tool C 4 Details of Tool C 6.59 5 1 Canvas_20
21 Tool D 4 Details of Tool D 8.29 5 1 Canvas_21
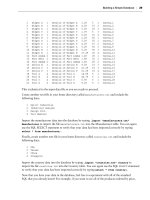
This is identical to the input data fi le so you are ready to proceed.
Create another text fi le in your home directory called
manufacturers.txt and include the
following data:
1 Spirit Industries
2 Industrial Designs
3 Design Intl.
4 Tool Masters
Import the manufacturer data into the database by typing .import “ manufacturers.txt ”
Manufacturer
to import the fi le manufacturers.txt into the Manufacturer table. You can again
use the SQL SELECT statement to verify that your data has been imported correctly by typing
select * from manufacturer; .
Finally, create another text fi le in your home directory called
countries.txt and include the
following data:
1 USA
2 Taiwan
3 China
4 Singapore
Import the country data into the database by typing .import “ countries.txt ” Country to
import the fi le
countries.txt into the Country table. You can again use the SQL SELECT statement
to verify that your data has been imported correctly by typing
select * from country; .
Now that you have your data in the database, feel free to experiment with all of the standard
SQL that you already know! For example, if you want to see all of the products ordered by price,
Building a Simple Database
❘
29
CH002.indd 29CH002.indd 29 9/20/10 2:31:29 PM9/20/10 2:31:29 PM
30
❘
CHAPTER 2 THE IPHONE AND IPAD DATABASE: SQLITE
you can type select name,price from product order by price; . The result of that query
is as follows:
Widget X 0.29
Widget A 1.29
Part Alpha 1.49
Widget Y 1.79
Part Beta 1.89
Widget R 2.29
Widget S 3.29
Part Gamma 3.46
Widget B 4.29
Widget T 4.29
Widget L 5.29
Widget Z 6.26
Widget N 6.29
Tool C 6.59
Tool D 8.29
Device N 9.29
Tool A 14.99
Widget E 17.29
Device O 21.29
Tool B 44.79
Device P 51.29
You can join your tables using standard SQL syntax. For example, you can show each product
and the name of the country of origin using this SQL statement
SELECT name,country FROM
Product,country where product.countryoforiginid=country.countryid
. The results are as
follows:
Widget A USA
Widget B Taiwan
Widget X China
Widget Y China
Widget Z Singapore
Widget R USA
Widget S USA
Widget T Taiwan
Widget L China
Widget N China
Widget E Singapore
Part Alpha USA
Part Beta USA
Part Gamma Taiwan
Device N China
Device O China
Device P Singapore
Tool A USA
Tool B USA
Tool C USA
Tool D USA
CH002.indd 30CH002.indd 30 9/20/10 2:31:29 PM9/20/10 2:31:29 PM
You can also fi lter your data using a WHERE clause. To fi nd all products manufactured in China, you
can use the following query:
SELECT name, country FROM Product, country where
product.countryoforiginid=country.countryid and country.country=”China”.
The result of this query is a list of all of the products made in China:
Widget X China
Widget Y China
Widget L China
Widget N China
Device N China
Device O China
Tools to Visualize the SQLite Database
As powerful as the command - line interface to SQLite is, sometimes it is easier to use a GUI interface
to examine the database. Many applications provide this functionality. You can fi nd a list of them
on the SQLite web site at
.
Feel free to try out any or all of the applications listed on the SQLite site. These applications range
in price from free to hundreds of dollars and offer a variety of capabilities including import/export
from various tools and commercial databases, graphical ER modeling, SQL editors with syntax
highlighting, and many other advanced features. If you are going to use SQLite for enterprise
applications, it may very well be worth it to purchase one of these applications.
For developing simple iPhone applications that do not require intense database development, I prefer
to use the SQLite Manager plug - in for the Firefox web browser. This free plug - in, available at the
Google code web site (
) provides you with the
following features:
Dialog interface for creation and deletion of tables, indexes, views, and triggers
Ability to modify tables by adding and dropping columns
Ability to create or open any existing SQLite databases
Ability to execute arbitrary SQL or simply view all of the data in your tables
Visual interface for database settings, eliminating the need to write pragma statements to
view and change the SQLite library settings
Ability to export tables/views, such as CSV, SQL, or XML fi les
Ability to import tables from CSV, SQL, or XML fi les
➤
➤
➤
➤
➤
➤
➤
Building a Simple Database
❘
31
CH002.indd 31CH002.indd 31 9/20/10 2:31:30 PM9/20/10 2:31:30 PM
32
❘
CHAPTER 2 THE IPHONE AND IPAD DATABASE: SQLITE
A tree view that shows all tables, indexes, views, and triggers
Interface to browse data from any table/view
Ability to edit and delete records while browsing data
The plug - in is very easy to install and use. You can use the plug - in to create new tables by simply
clicking the Create Table icon. You are then presented with a dialog that contains all of the data
that you need to create a new table, as shown in Figure 2 - 7. I have populated the dialog with the
fi elds from the ERD diagram.
➤
➤
➤
FIGURE 2 - 7: Creating a table with SQLite Manager
Click the disclosure triangle next to Tables in the left - hand pane of the interface to see a list of all of
the tables in the database. Selecting a table, like Product in Figure 2 - 8, will reveal the details of the
table. You can see the SQL that was originally used to create the table, the number of fi elds in
the table, the number of records, and detailed information on all of the columns in the table. You
can also add, alter, and drop columns from this view.
You can select the Browse & Search tab at the top of the right pane to view and edit the data in the
selected table, as shown in Figure 2 - 8.
CH002.indd 32CH002.indd 32 9/20/10 2:31:30 PM9/20/10 2:31:30 PM
Selecting the Execute SQL tab enables you to execute arbitrary SQL statements against the
database. Finally, the DB Settings tab enables you to view and edit various database settings that are
normally only available via pragma statements at the command prompt.
CONNECTING TO YOUR DATABASE
Now that you have a catalog database, let ’ s get to writing the iPhone application that will be used to
view the catalog. In order to do this, you ’ ll need to create an application with a TableView to display
the catalog. Clicking a cell in the TableView should navigate to a detail page that shows detailed
information about the selected catalog entry. To build this interface, you will need to be able to
connect to your database and run SQL statements against it. You ’ ll also use a Navigation Controller
to implement a master - child interface.
As I previously mentioned, it is often a good idea to mock up your application interface before
you get started. It helps to get buy-in from your customer that the interface that you ’ ve designed
meets their needs. It is far easier to move interface items around or redesign the look and feel of a
FIGURE 2 - 8: Browsing table data with SQLite Manager
Connecting to Your Database
❘
33
CH002.indd 33CH002.indd 33 9/20/10 2:31:31 PM9/20/10 2:31:31 PM
34
❘
CHAPTER 2 THE IPHONE AND IPAD DATABASE: SQLITE
mockup than it is to rework your
actual application code. You want to fi nd
any problems with the design as early as
possible to avoid costly and time - consuming
changes to the software. A picture can go
a long way in explaining to your customer
what the application will look like.
Figure 2 - 9 shows a mocked up interface
in OmniGraffl e.
The interface might not look pretty, but it
will get the job done. You will spruce it up a
bit in the next chapter. But, for now, it will
do the job of demonstrating how to get data
out of your SQLite database.
Starting the Project
For this project, you are going to implement
a master - detail interface. As seen in the
mockup, the main screen will show the entire
product catalog and tapping on an item should
display a screen with the details for that item.
The UINavigationController is perfect for
building this kind of interface. To get started,
open up Xcode and create a new project using
the Navigation - based application template.
This template creates a project that contains two
Interface Builder
xib fi les. The MainWindow
.xib
contains a NavigationController that
manages the navigation of the application. The
NavigationController , in turn, contains the RootViewController . You can see this by inspecting
the
MainWindow.xib fi le using Interface Builder (see Figure 2 - 10).
The UINavigationController
The Navigation Controller is used to display and manage a hierarchy of View Controllers. Any
time that you need to display hierarchical data, consider using the UINavigationController. The
Navigation Controller manages the state of the display using a “ navigation stack. ” View controllers
that you want to display are pushed on to the navigation stack when you are ready to display them.
Pressing the Back button causes the current View Controller to be popped off the navigation stack.
At the bottom of the stack is the Root View Controller.
You will implement navigation in the catalog application using the
UINavigationController . The
diagram in Figure 2 - 11 shows the application mockup along with the navigation stack.
FIGURE 2 - 9: Application interface mockup
FIGURE 2 - 10: MainWindow.xib
CH002.indd 34CH002.indd 34 9/20/10 2:31:31 PM9/20/10 2:31:31 PM
The left side shows the product catalog displayed in the UITableView , which is included in the
RootViewController . Selecting a row in the TableView causes a new View Controller that you will
create called the
ProductDetailViewController to be pushed onto the navigation stack. You see
this in the image on the right. The status of the navigation stack appears at the bottom of the fi gure.
Tapping the catalog button in the navigation bar at the top of the screen will cause the
ProductDetailViewController to be popped from the navigation stack, thus displaying
the
RootViewController again. The most important thing to remember is that the
UINavigationController will always display the View Controller that is at the top
of the navigation stack.
You can see what makes the Navigation Controller ideal for displaying hierarchical data. As a user
navigates down a hierarchy, the application pushes View Controllers onto the stack. When the
user presses the Back button, the View Controllers are popped back off of the stack, navigating
back up the hierarchy.
The UITableViewController
If you take a look at the code header for the RootViewController , you will notice that the
RootViewController is not a subclass of UIViewController as in the last chapter. Instead, it is a
subclass of
UITableViewController .
Connecting to Your Database
❘
35
FIGURE 2 - 11: Application screens and navigation stack state
RootViewController RootViewController
ProductDetailViewController
CH002.indd 35CH002.indd 35 9/20/10 2:31:32 PM9/20/10 2:31:32 PM
36
❘
CHAPTER 2 THE IPHONE AND IPAD DATABASE: SQLITE
When implementing a View Controller that will control a TableView , you can subclass the
UITableViewController class instead of UIViewController . UITableViewController is a great
shortcut to use. When using a
UITableViewController , you are freed from having to declare that
you will be implementing the
UITableViewDataSource and UITableViewDelegate protocols.
The
UITableViewController also already has a TableView associated with it. You can get
a reference to the
TableView by using the tableView property. Because you are subclassing
UITableViewController , you don ’ t need to worry about creating the TableView as you did
in the previous chapter. You simply need to implement the model and the controller. You are,
however, still responsible for implementing the methods
numberOfSectionsInTableView ,
numberOfRowsInSection , and cellForRowAtIndexPath as in the previous chapter.
The
#pragma mark Table view methods section highlights which TableView methods must be
implemented. You ’ ll notice that they are all grouped together at the bottom of the implementation
fi le for the
RootViewController ( RootViewController.m ).
Because the
UITableView is being loaded from the NIB fi le for the RootViewController
(
RootViewController.xib ), the dataSource and delegate properties are read from the NIB.
These properties both default to self, which is fi ne because the
RootViewController will be the
delegate and
dataSource for your UITableView .
The Model Class
By simply creating a project based on the Navigation template, you get a
lot of functionality for free. In fact, if you build and run the application,
you should get something that looks like Figure 2 - 12.
You have added no code at all, yet you already have a navigation bar (the
blue - gray area at the top) and a table view (the lines). Now, you need to
fi ll the table view with data.
In keeping with the preferred application architecture on the iPhone,
you ’ ll design this application by following the Model - View - Controller
design pattern. You already have your view and controller; you just need
a model. You need to design a model class that represents your data. The
model class should also have a method that returns the number of rows
in the database and provides access to the data for a specifi c row.
For this application, your model will be based on the
Product class. The
Product class will mirror the fi elds in the Products table in the database.
Your model will be a collection of
Product objects.
To implement this model, create a new Objective - C class called
Product .
In the header, you will add a property for each database fi eld. The
following is the code for the header:
#import < Foundation/Foundation.h >
@interface Product : NSObject {
int ID;
NSString* name;
FIGURE 2 - 12: Running the
Navigation template
CH002.indd 36CH002.indd 36 9/20/10 2:31:33 PM9/20/10 2:31:33 PM
NSString* manufacturer;
NSString* details;
float price;
int quantity;
NSString* countryOfOrigin;
NSString* image;
}
@property (nonatomic) int ID;
@property (retain, nonatomic) NSString *name;
@property (retain, nonatomic) NSString *manufacturer;
@property (retain, nonatomic) NSString *details;
@property (nonatomic) float price;
@property (nonatomic) int quantity;
@property (retain, nonatomic) NSString *countryOfOrigin;
@property (retain, nonatomic) NSString *image;
@end
Product.h
You can see that you simply declare a member variable for each database fi eld and then create a
property to access each fi eld.
The implementation for this class is even easier:
#import “Product.h”
@implementation Product
@synthesize ID;
@synthesize name;
@synthesize manufacturer;
@synthesize details;
@synthesize price;
@synthesize quantity;
@synthesize countryOfOrigin;
@synthesize image;
@end
Product.m
Here, you just synthesize all of the properties declared in the header. At this point, it is a good idea
to build and verify that there are no errors in your application.
The DBAccess Class
Now that you have your model object completed, you need to write the code to get the data out of
the database and into your model class. It is a good idea to abstract out the database access. This
gives you fl exibility in the event that you want to move to a different database engine later. To do
this, you ’ ll create a database access class that talks to the database. This class will have methods
Connecting to Your Database
❘
37
CH002.indd 37CH002.indd 37 9/20/10 2:31:34 PM9/20/10 2:31:34 PM
38
❘
CHAPTER 2 THE IPHONE AND IPAD DATABASE: SQLITE
to initialize the database, close the database, and most
important, build and return an array of
Product objects.
Before you get started on coding the database access
class, you need to add the SQLite database to the
Xcode project. Add the SQLite database to the project ’ s
Resources folder by right - clicking on the Resources
folder and selecting Add ➪ Existing Files. Navigate to
your home directory or wherever you stored the catalog
database and select it. Make sure that “ Copy items into
destination group ’ s folder if needed ” is selected, as in
Figure 2 - 13.
To create the database access class, create a new
Objective - C class called
DBAccess . In the header,
DBAccess.h , you will need to add an import statement
for
sqlite3.h as you intend to use functions from the
sqlite3 library in the data access class.
You ’ ll also need to add three method signatures for the methods that you plan on implementing:
getAllProducts , closeDatabase , and initializeDatabase . closeDatabase and
initializeDatabase are self - explanatory. The getAllProducts method will return an array of
all of the
Product objects in the catalog. Because you will be referencing the Product object in this
class, you need to add an
import statement for Product.h .
The
DBAccess.h header fi le should look like this:
#import < Foundation/Foundation.h >
// This includes the header for the SQLite library.
#import < sqlite3.h >
#import “Product.h”
@interface DBAccess : NSObject {
}
- (NSMutableArray*) getAllProducts;
- (void) closeDatabase;
- (void)initializeDatabase;
@end
DBAccess.h
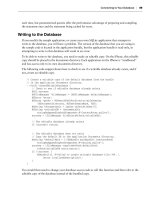
In the implementation of the DBAccess class, add a class - level variable to hold a reference to the
database:
// Reference to the SQLite database.
sqlite3* database;
FIGURE 2 - 13: Adding an existing fi le
CH002.indd 38CH002.indd 38 9/20/10 2:31:35 PM9/20/10 2:31:35 PM