Windows Admin Scripting Little Black Book- P1 doc
Bạn đang xem bản rút gọn của tài liệu. Xem và tải ngay bản đầy đủ của tài liệu tại đây (360.92 KB, 10 trang )
Windows Admin Scripting Little Black Book
Jesse M. Torres
© 2001 The Coriolis Group. All rights reserved.
This book may not be duplicated in any way without the express written consent of the publisher, except in the form
of brief excerpts or quotations for the purposes of review. The information contained herein is for the personal use of
the reader and may not be incorporated in any commercial programs, other books, databases, or any kind of
software without written consent of the publisher. Making copies of this book or any portion for any purpose other
than your own is a violation of United States copyright laws.
Limits of Liability and Disclaimer of Warranty
The author and publisher of this book have used their best efforts in preparing the book and the programs contained
in it. These efforts include the development, research, and testing of the theories and programs to determine their
effectiveness. The author and publisher make no warranty of any kind, expressed or implied, with regard to these
programs or the documentation contained in this book.
The author and publisher shall not be liable in the event of incidental or consequential damages in connection with,
or arising out of, the furnishing, performance, or use of the programs, associated instructions, and/or claims of
productivity gains.
Trademarks
Trademarked names appear throughout this book. Rather than list the names and entities that own the trademarks or
insert a trademark symbol with each mention of the trademarked name, the publisher states that it is using the
names for editorial purposes only and to the benefit of the trademark owner, with no intention of infringing upon that
trademark.
The Coriolis Group, LLC
14455 North Hayden Road
Suite 220
Scottsdale, Arizona 85260
(480) 483-0192
FAX (480) 483-0193
www.coriolis.com
Library of Congress Cataloging-in-Publication Data
Torres, Jesse M.
Windows admin scripting little black book / by Jesse M. Torres.
p. cm.
ISBN 1-57610-881-3
1. Microsoft Windows (Computer file) 2. Operating systems
(Computers) 3. Programming languages (Electronic computers) I. Title.
QA76.76.O63 T6775 2000
005.4'469 dc21 00-050858
CIP
Printed in the United States of America
10 9 8 7 6 5 4 3 2
President and CEO: Keith Weiskamp
Publisher: Steve Sayre
Acquisitions Editor: Charlotte Carpentier
Development Editor: Michelle Stroup
Product Marketing Manager: Tracy Rooney
Project Editor: Sybil Ihrig, Helios Productions
Technical Reviewer: Francis Botto
Production Coordinator: Kim Eoff
Cover Designer: Jody Winkler
Layout Designer: April Nielsen
A Note from Coriolis
The Coriolis Group, LLC • 14455 North Hayden Road, Suite 220 • Scottsdale, Arizona 85260
Coriolis Technology Press was founded to create a very elite group of books: the ones you keep closest to your
machine. In the real world, you have to choose the books you rely on every day very carefully, and we understand
that.
To win a place for our books on that coveted shelf beside your PC, we guarantee several important qualities in every
book we publish. These qualities are:
Technical accuracy—It’s no good if it doesn’t work. Every Coriolis Technology Press book is reviewed by
technical experts in the topic field, and is sent through several editing and proofreading passes in order to create
the piece of work you now hold in your hands.
Innovative editorial design—We’ve put years of research and refinement into the ways we present information
in our books. Our books’ editorial approach is uniquely designed to reflect the way people learn new
technologies and search for solutions to technology problems.
Practical focus—We put only pertinent information into our books and avoid any fluff. Every fact included
between these two covers must serve the mission of the book as a whole.
Accessibility—The information in a book is worthless unless you can find it quickly when you need it. We put a
lot of effort into our indexes, and heavily cross-reference our chapters, to make it easy for you to move right to
the information you need.
Here at The Coriolis Group we have been publishing and packaging books, technical journals, and training materials
since 1989. We have put a lot of thought into our books; please write to us at
and let us know
what you think. We hope that you’re happy with the book in your hands, and that in the future, when you reach for
software development and networking information, you’ll turn to one of our books first.
Keith Weiskamp, President and CEO
Jeff Duntemann, VP and Editorial Director
Look for these related books from The Coriolis Group:
Windows 2000 System Administrator’s Black Book
By Stu Sjouwerman, Barry Shilmover, and James Michael Stewart
Windows 2000 TCP/IP Black Book
By Ian McLean
Windows 2000 Systems Programming Black Book
By Al Williams
Windows 2000 Registry Little Black Book
By Nathan Wallace
Windows 2000 Security Little Black Book
By Ian McLean
Windows 2000 Reducing TCO Little Black Book
By Robert E. Simanski
Windows 2000 Mac Support Little Black Book
By Gene Steinberg and Pieter Paulson
Windows 2000 Professional Advanced Configuration and Implementation
By Morten Strunge Nielsen
Windows 2000 Professional Upgrade Little Black Book
By Nathan Wallace
Also recently published by Coriolis Technology Press:
Exchange 2000 Server Black Book
By Marcus Goncalves
XHTML Black Book
By Steven Holzner
To my future wife, Carina: Your love and smile mean more to me than you could ever know.
About the Author
Jesse M. Torres’ experience in the computer industry includes the private, corporate, and government sectors. He
served six years in the Air National Guard working in computer maintenance and has since worked for large
corporations such as PricewaterhouseCoopers and United Technologies. His education includes a specialist’s
certification in electronic switching systems from the U.S. Air Force, a B.A. in Versatile Technology from the
University of Connecticut, a specialist’s certification in Lotus application development, and an MCSE certification.
Jesse has extensively scripted software and OS installations and updates, inventory procedures, desktop
management, maintenance, security, and more. His scripting and automation experience includes shell scripting,
KiXtart, Windows Script Host (WSH), Windows Management Instrumentation (WMI), Active Directory Service
Interfaces (ADSI), VBScript, JavaScript, Active Server Pages (ASP), Veritas WinINSTALL, PowerQuest DeltaDeploy,
Microsoft Systems Management Server (SMS), AutoIt, and Microsoft ScriptIt. He has also written an article on WSH
for Windows 2000 Magazine’s Win32 Scripting Journal.
Currently, Jesse is working for Strategic Business Systems, LLC, a privately owned consulting firm located in
Seymour, CT, and in his spare time (whenever that is), he likes to play the guitar or piano, or record his own techno
music (check out his Web site
www.jesseweb.com
for audio clips). By the time this book hits the presses, he will be
married to a beautiful and wonderful woman named Carina and will be relaxing somewhere in the sunny Caribbean.
Kind of a nice change after writing non-stop for the past few months.
Acknowledgements
First, I would like to thank Charlotte Carpentier, acquisitions editor at The Coriolis Group. She took my small idea,
helped reshape it, and fought to make it reality. Thank you, Charlotte, for your promptness and for allowing me to
work with one of the leaders of the technical publishing industry.
I would also like to thank Michelle Stroup, developmental editor at The Coriolis Group. Although we worked together
only a short time, thank you for your encouragement and for guiding me through the initial stages. Thanks to
everyone at The Coriolis Group who worked hard on this book.
Special thanks to project editor Sybil Ihrig of Helios Productions, copyeditor Margaret Berson, and technical reviewer
Francis Botto. Together you put up with my unique sense of humor and stubbornness while realizing that techies still
have a life (sometimes). Thanks for adding your expertise and personal touch.
Thanks to all the software companies and developers (Rudd van Velsen, Microsoft, Sapien Technologies, Executive
Software, Dave Thomas, Hidden Software, and BellCraft Technologies) for sharing information and making quality
products.
Thanks to John Breyan, Ray Wise, Daniel Teplitsky, Enzo Maini, and everyone at Strategic Business Systems for
your understanding and encouragement during these past few months. Special thanks to Gideon Rasmussen for his
security and scripting help, regardless of his misguided devotion to Unix. Also, I would like to thank John McGowan
(McGowan Consulting Group) for his support, understanding, guidance, and unfailing good humor.
Thanks to my family, whose pride in my accomplishments clearly shines through. I love you all. Special thanks to my
mom and dad for supporting me and seeing the bigger picture, even when I would take apart the VCR or spend
hours playing video games.
Finally, special thanks to my future wife, Carina, for giving up some of our time together so I could share this book
with the world. I love you and will always be here for you, as you’ve been for me. Thank you for understanding.
Introduction
Welcome to Windows Admin Scripting Little Black Book. This book is specifically designed to teach you how to
quickly turn routine, repetitive, time-consuming, or complex administrative tasks into simple scripts. If you’re like me,
you probably don’t have the time to spend thumbing through books filled with general examples that you’ll never use.
Because of its compact size, this book is free of generic filler material (a common trait of the larger scripting books)
and comes packed with information and examples that you can actually use. Whether you’re a basic Windows user
or a network administrator in charge of a corporate infrastructure, this book will teach you how to use scripting to
become more productive and recoup some free time from your busy schedule.
This book is a concise reference detailing various scripting methods and techniques to automate all types of
administrative tasks. At its core, this book explains and illustrates the three major scripting methods: shell scripting,
KiXtart, and Windows Script Host. It will also teach you the inner workings of Active Directory Service Interfaces and
Windows Management Instrumentation, and how to use the provided examples to manage an enterprise. Finally, this
book will show you how to use alternative methods, such as ScriptIt or AutoIt, when conventional scripting just won’t
cut it. Beyond the extensive scripting examples and information, this book also provides in-depth coverage of
scripting for both Windows NT and Windows 2000.
Is This Book for You?
If you’ve read this far, chances are this is the book for you. Out of all the sites where I’ve worked, only a small
percentage of employees have even thought about using scripting. Perhaps it’s because there is a common
misconception that you have to be a programmer or computer genius to write scripts. This couldn’t be any further
from the truth. Scripts are the simplest form of programming, and anyone who uses a computer can easily create
them.
The examples and information in this book are specifically focused around the daily tasks of the IT professional. For
the novice administrator or scripter, this book will guide you through the world of scripting and administration, while
helping you quickly build your skill set. For the experienced administrator or scripter, this book provides a wealth of
information and advanced techniques to help you manage and standardize your environment.
Chapter 1: Scripting Workstation Setups
In Brief
This chapter begins our journey into Windows Admin Scripting. In this chapter you’ll learn the quickest methods to
automate hard disk setups and images. You’ll begin learning the secrets of Microsoft FDISK and how to create
partitions from the command line. You’ll also learn about the scripting limitations of Microsoft FDISK and how to use
Free FDISK to script creating and deleting partitions. You’ll then learn about different imaging solutions and how to
script those packages to create and restore image files.
In order to implement all the examples in this chapter, you’ll need to obtain the following files:
Free FDISK (www.23cc.com/free-fdisk/
)
PowerQuest Drive Image Pro (www.powerquest.com
)
Norton Ghost (www.symantec.com
)
Note
All the DOS-related information in this chapter refers to MS-DOS 7.0.
Warning
This chapter contains examples on how to partition, format, and image drives. These processes
will destroy any data on a disk.
Setting Up a New Hard Drive
For the typical PC, the core component to store user data and system files is the hard drive. A hard drive is like a
wallet or purse—a place you can store your most valuable assets you need to access quickly. When you receive a
new hard drive from the manufacturer, it is most likely low-level formatted with no data on it. After you install and
configure the hard drive properly, you must partition and format it before you can put any real data on it.
Partitioning
The first step to setting up a new drive is to partition it. Partitioning is the act of dividing up a hard disk into logical
sections, which allows one physical drive to appear as multiple drives. When you partition a new drive, a master boot
record (MBR) is created on the first physical sector on the hard drive. As a computer initially powers up, it calls the
routines stored in the BIOS (Basic Input/Output System). These routines access the system’s basic hardware
devices (e.g., floppy disk, hard disk, keyboard, video). After these routines are executed, the BIOS reads and
executes instructions from the MBR. The MBR contains the partition table, which contains four entries, allowing for
various partition types.
Partition Types
When scripting the creation of a partition, you must know the type of partition and its dependencies beforehand.
There are three different types of partitions: primary, extended, and logical. Each physical disk can have a maximum
of four primary partitions, and only one can be marked active in order to boot. When a primary partition is marked
active, it is automatically assigned the drive letter C.
Each primary partition can have only one extended partition. Within an extended partition, you can create up to 24
logical partitions (or 23 logical partitions if you have an active partition on the same drive). Each logical partition is
assigned a drive letter (with A and B reserved for floppy drives).
Note
Only one primary and one extended partition are allowed per physical disk.
Partition Hierarchy
Partition types follow a hierarchy: primary, extended, and logical. They can only be created in this order, and can only
be deleted in the opposite order. To begin scripting partitions, you must first familiarize yourself with Microsoft FDISK.
Microsoft FDISK
Microsoft FDISK (Fixed DISK) is a program that an experienced administrator can be all too familiar with. If only I had
a nickel for each time I’ve used Microsoft FDISK, I’d be as rich as these IT salary surveys say I should be. Microsoft
FDISK is the most commonly used partitioning utility for hard disks, but despite its popularity, most of its functionality
remains highly undocumented. Microsoft FDISK is included in all versions of DOS and Windows. It allows you to
create, delete, or view entries in the partition table. If you’ve ever used Microsoft FDISK to set up a new hard drive
manually, you know how time-consuming it can be navigating through menus and waiting for drive integrity checks.
Microsoft FDISK provides limited support for scripting from the command line.
Note
If you want to change entries in the partition table, you must first delete and then recreate them.
Scripting Limitations
Scripting Microsoft FDISK is like going to the casino—sometimes you win, sometimes you lose, but most of the time
you lose. Microsoft FDISK does support many command-line options, but doesn’t work well with command
redirection input (for example, FDISK < COMMANDS.TXT). And although the menu-based portion allows for deleting
partitions, there’s no way to delete partitions from the command line. Just as you do when you’re at the casino, you
have to know when it’s time to collect your chips and move on to the next table. For us, that move is to Free FDISK.
Free FDISK
If Microsoft FDISK were a used car, you could slap a new engine in it and make it run just the way you like. Well,
Free FDISK does just that. Free FDISK offers enhanced functionality over Microsoft’s FDISK and is the official FDISK
of FreeDOS (
www.freedos.org
). Free FDISK provides the same standard Microsoft FDISK interface and command-
line options, while adding even more options for batch scripting. After you partition the hard drive, formatting is the
last step needed before the drive is ready for data.
Formatting
Formatting is the process of preparing a disk for reading and writing. FORMAT.COM is the executable used to format
both floppy and hard disks. When you format a disk, a file allocation table (FAT) and a new root directory are created,
allowing you to store and retrieve files. This, in essence, places a file system on a disk for you to use.
The FAT organizes a hard disk into clusters, grouped into 512K sectors. Clusters are the smallest units for storing
data and vary in size depending on the file system. Starting with the Windows 95 OSR2 release, Windows 9x/2000
supports the following two file system types: FAT16 and FAT32. FAT16 is a 16-bit file system that typically stores
files in 32K clusters, depending on the partition size. FAT32 is a 32-bit file system that stores files more efficiently in
4K clusters. You should choose a file system that will be compatible with the various operating systems running,
provide the greatest security, and be the most efficient.
Note
Windows NT does not natively support FAT32. Additionally, Windows NT/2000 support the NTFS
(New Technology File System). See
Chapter 6
for more information about NTFS.
After the drive is formatted with a file system, the operating system can be loaded and made ready for deployment.
Imaging
Imaging is the process of taking an exact copy of a reference computer’s hard drive or partition and storing it to an
image file (usually compressed). That image can be stored on any storage medium (hard disk, CDR, ZIP) and
restored to multiple computers, creating a standardized software and operating system environment. The basic
principle of imaging is very similar to a simple disk copy.
Tools
For an administrator, deploying new PCs can become a large part of your job. With old PCs being retired and new
PCs rolling in, finding a way to streamline the imaging process can help cut hours from your work day. And when
you’re dealing with more than a few PCs, automating the imaging process is not only helpful, but also essential.
Imaging tools such as PowerQuest’s Drive Image Pro or Norton Ghost make it easy for an administrator to re-image
multiple hard drives in a matter of minutes.
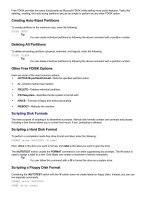
PowerQuest’s Drive Image Pro
Drive Image Pro (see Figure 1.1) is an imaging and software distribution solution package from PowerQuest
Corporation (www.powerquest.com
). In addition to running in standard interactive mode, this product can also be
run in batch mode, allowing a script file to send commands to the main program executable (PQDI.EXE).
Figure 1.1: Drive Image Pro window showing automatic script syntax checking.
Drive Image Pro uses a proprietary scripting language and includes many commands and switches to image your
hard disk. The most commonly used commands are:
SELECT DRIVE number—Selects a drive according to the number specified
SELECT PARTITION x—Selects a partition where x is:
A partition number
A drive letter
A disk label
ALL—Selects all partitions
DELETE—Deletes the partitions specified in the last SELECT command
DELETE x—Deletes partitions within the currently selected drive where x is:
ALL—To delete all partitions
EXTENDED—To delete the extended partition (if there are no logical drives)
STORE—Stores selected partitions to an image file with no compression
STORE WITH COMPRESSION x—Stores selected partitions to an image file with compression where x is:
OFF—Stores images with no compression
LOW—Stores images with low compression (about 40%)
HIGH—Stores images with high compression (about 50%)
RESIZE IMAGE x—Resizes the partitions being restored where x is:
NO—Turns resizing off
A size in megabytes (for example, 1000)
PROPORTIONAL—Resizes partitions proportionally
MAX—Resizes partitions to the maximum size possible
MOST SPACE—Resizes partitions leaving most free space
RESTORE—Restores selected partitions
REBOOT—Immediately reboots the computer
Tip
To see a brief description of all the available switches, type “PQDI /?” at the command prompt.
Symantec’s Norton Ghost
Norton Ghost from Symantec (www.symantec.com) is the imaging package most commonly used by IT (Information
Technology) professionals. In addition to imaging, Norton Ghost includes cloning functionality, which allows disk-to-
disk/partition-to-partition copying. Unlike Drive Image Pro, which mainly uses script files for automation, Norton Ghost
uses only command-line switches.
The -CLONE switch is the main switch used to create and restore Norton Ghost image files. The basic syntax of the -
CLONE switch is:
GHOST -CLONE,MODE=m,SRC=s,DST=d
Here, m is any mode parameter, s is any source parameter, and d is any destination parameter. The MODE
parameters are:
COPY—Copies one disk to another
LOAD—Restores an image to disk
DUMP—Creates an image from disk
PCOPY—Copies one partition to another
PLOAD—Restores an image to partition
PDUMP—Creates an image from partition
The rest of the parameters are dependent on the selected MODE parameter.
The SRC parameters are:
Drive—Specifies a drive number (COPY/DUMP)
File—Specifies a source image file (LOAD)
Drive:partition—Specifies a drive and partition number (PCOPY/PDUMP)
@MTx—Specifies a tape drive where x is the device number (LOAD)
The DST parameters are:
Drive—Specifies a drive number (COPY/LOAD)
File—Specifies a source image file (DUMP/PDUMP)
Drive:partition—Specifies a drive and partition number (PCOPY/PLOAD)
@MTx—Specifies a tape drive where x is the device number (DUMP)
Note
Inserting spaces between the CLONE parameters will cause script errors.
Imaging
Imaging is the process of taking an exact copy of a reference computer’s hard drive or partition and storing it to an
image file (usually compressed). That image can be stored on any storage medium (hard disk, CDR, ZIP) and
restored to multiple computers, creating a standardized software and operating system environment. The basic
principle of imaging is very similar to a simple disk copy.
Tools
For an administrator, deploying new PCs can become a large part of your job. With old PCs being retired and new
PCs rolling in, finding a way to streamline the imaging process can help cut hours from your work day. And when
you’re dealing with more than a few PCs, automating the imaging process is not only helpful, but also essential.
Imaging tools such as PowerQuest’s Drive Image Pro or Norton Ghost make it easy for an administrator to re-image
multiple hard drives in a matter of minutes.
PowerQuest’s Drive Image Pro
Drive Image Pro (see Figure 1.1) is an imaging and software distribution solution package from PowerQuest
Corporation (www.powerquest.com). In addition to running in standard interactive mode, this product can also be
run in batch mode, allowing a script file to send commands to the main program executable (PQDI.EXE).
Figure 1.1: Drive Image Pro window showing automatic script syntax checking.
Drive Image Pro uses a proprietary scripting language and includes many commands and switches to image your
hard disk. The most commonly used commands are:
SELECT DRIVE number—Selects a drive according to the number specified
SELECT PARTITION x—Selects a partition where x is:
A partition number
A drive letter
A disk label
ALL—Selects all partitions
DELETE—Deletes the partitions specified in the last SELECT command
DELETE x—Deletes partitions within the currently selected drive where x is:
ALL—To delete all partitions
EXTENDED—To delete the extended partition (if there are no logical drives)
STORE—Stores selected partitions to an image file with no compression
STORE WITH COMPRESSION x—Stores selected partitions to an image file with compression where x is:
OFF—Stores images with no compression
LOW—Stores images with low compression (about 40%)
HIGH—Stores images with high compression (about 50%)
RESIZE IMAGE x—Resizes the partitions being restored where x is:
NO—Turns resizing off
A size in megabytes (for example, 1000)
PROPORTIONAL—Resizes partitions proportionally
MAX—Resizes partitions to the maximum size possible
MOST SPACE—Resizes partitions leaving most free space
RESTORE—Restores selected partitions
REBOOT—Immediately reboots the computer
Tip
To see a brief description of all the available switches, type “PQDI /?” at the command prompt.
Symantec’s Norton Ghost
Norton Ghost from Symantec (www.symantec.com) is the imaging package most commonly used by IT (Information
Technology) professionals. In addition to imaging, Norton Ghost includes cloning functionality, which allows disk-to-
disk/partition-to-partition copying. Unlike Drive Image Pro, which mainly uses script files for automation, Norton Ghost
uses only command-line switches.
The -CLONE switch is the main switch used to create and restore Norton Ghost image files. The basic syntax of the -
CLONE switch is:
GHOST -CLONE,MODE=m,SRC=s,DST=d
Here, m is any mode parameter, s is any source parameter, and d is any destination parameter. The MODE
parameters are:
COPY—Copies one disk to another
LOAD—Restores an image to disk
DUMP—Creates an image from disk
PCOPY—Copies one partition to another
PLOAD—Restores an image to partition
PDUMP—Creates an image from partition
The rest of the parameters are dependent on the selected MODE parameter.
The SRC parameters are:
Drive—Specifies a drive number (COPY/DUMP)
File—Specifies a source image file (LOAD)
Drive:partition—Specifies a drive and partition number (PCOPY/PDUMP)
@MTx—Specifies a tape drive where x is the device number (LOAD)
The DST parameters are:
Drive—Specifies a drive number (COPY/LOAD)
File—Specifies a source image file (DUMP/PDUMP)
Drive:partition—Specifies a drive and partition number (PCOPY/PLOAD)
@MTx—Specifies a tape drive where x is the device number (DUMP)
Note
Inserting spaces between the CLONE parameters will cause script errors.
Working with Free FDISK