Android SDK (phần 6) pptx
Bạn đang xem bản rút gọn của tài liệu. Xem và tải ngay bản đầy đủ của tài liệu tại đây (2.1 MB, 50 trang )
Working with SQLite Databases
❘
217
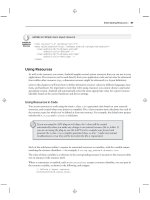
LISTING 7-5: Extracting values from a Cursor
int GOLD_HOARDED_COLUMN = 2;
Cursor myGold = myDatabase.query("GoldHoards", null, null, null, null, null, null);
float totalHoard = 0f;
// Make sure there is at least one row.
if (myGold.moveToFirst()) {
// Iterate over each cursor.
do {
float hoard = myGold.getFloat(GOLD_HOARDED_COLUMN);
totalHoard += hoard;
} while(myGold.moveToNext());
}
float averageHoard = totalHoard / myGold.getCount();
Because SQLite database columns are loosely typed, you can cast individual values into valid types as
required. For example, values stored as floats can be read back as strings.
Adding, Updating, and Removing Rows
The
SQLiteDatabase
class exposes
insert
,
delete
,and
update
methods that encapsulate the SQL state-
ments required to perform these actions. Additionally, the
execSQL
method lets you execute any valid
SQL on your database tables should you want to execute these (or any other) operations manually.
Any time you modify the underlying database values, you should call
refreshQuery
on each Cursor
that has a view on the affected table.
Inserting New Rows
To create a new row, construct a
ContentValues
object and use its
put
methods to provide a value for
each column. Insert the new row by passing the Content Values object into the
insert
method called
on the target database — along with the table name — as shown in Listing 7-6.
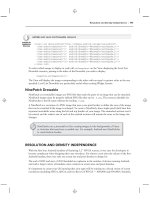
LISTING 7-6: Inserting new rows into a database
// Create a new row of values to insert.
ContentValues newValues = new ContentValues();
// Assign values for each row.
newValues.put(COLUMN_NAME, newValue);
[ Repeat for each column ]
// Insert the row into your table
myDatabase.insert(DATABASE_TABLE, null, newValues);
218
❘
CHAPTER 7 DATABASES AND CONTENT PROVIDERS
Updating a Row
Updating rows is also done with Content Values.
Create a new
ContentValues
object, using the
put
methods to assign new values to each column you
want to update. Call
update
on the database, passing in the table name, the updated Content Values
object, and a where clause that specifies the row(s) to update as shown in Listing 7-7.
LISTING 7-7: Updating a database row
// Define the updated row content.
ContentValues updatedValues = new ContentValues();
// Assign values for each row.
newValues.put(COLUMN_NAME, newValue);
[ Repeat for each column ]
String where = KEY_ID + "=" + rowId;
// Update the row with the specified index with the new values.
myDatabase.update(DATABASE_TABLE, newValues, where, null);
Deleting Rows
To delete a row simply call
delete
on a database, specifying the table name and a where clause that
returns the rows you want to delete as shown in Listing 7-8.
LISTING 7-8: Deleting a database row
myDatabase.delete(DATABASE_TABLE, KEY_ID + "=" + rowId, null);
Saving Your To-Do List
In Chapter 6 you enhanced the To-Do List example to persist the Activity’s UI state across sessions.
That was only half the job; in the following example you’ll create a database to save the to-do items.
1. Start by creating a new
ToDoDBAdapter
class. It will be used to manage your database inter-
actions. Create private variables to store the
SQLiteDatabase
object and the Context of the
calling application. Add a constructor that takes an application Context, and create static
class variables for the name and version of the database, as well as a name for the to-do item
table.
package com.paad.todolist;
import android.content.ContentValues;
import android.content.Context;
import android.database.Cursor;
import android.database.SQLException;
import android.database.sqlite.SQLiteException;
Working with SQLite Databases
❘
219
import android.database.sqlite.SQLiteDatabase;
import android.database.sqlite.SQLiteOpenHelper;
import android.util.Log;
public class ToDoDBAdapter {
private static final String DATABASE_NAME = "todoList.db";
private static final String DATABASE_TABLE = "todoItems";
private static final int DATABASE_VERSION = 1;
private SQLiteDatabase db;
private final Context context;
public ToDoDBAdapter(Context _context) {
this.context = _context;
}
}
2. Create public convenience variables that define the column names: this will make it easier to
find the correct columns when extracting values from query result Cursors.
public static final String KEY_ID = "_id";
public static final String KEY_TASK = "task";
public static final String KEY_CREATION_DATE = "creation_date";
3. Create a new
taskDBOpenHelper
class within the
ToDoDBAdapter
that extends SQLiteOpen-
Helper. It will be used to simplify version management of your database. Within it, overwrite
the
onCreate
and
onUpgrade
methods to handle the database creation and upgrade logic.
private static class toDoDBOpenHelper extends SQLiteOpenHelper {
public toDoDBOpenHelper(Context context, String name,
CursorFactory factory, int version) {
super(context, name, factory, version);
}
// SQL Statement to create a new database.
private static final String DATABASE_CREATE = "create table " +
DATABASE_TABLE + " (" + KEY_ID + " integer primary key autoincrement, " +
KEY_TASK + " text not null, " + KEY_CREATION_DATE + " long);";
@Override
public void onCreate(SQLiteDatabase _db) {
_db.execSQL(DATABASE_CREATE);
}
@Override
public void onUpgrade(SQLiteDatabase _db, int _oldVersion, int _newVersion) {
Log.w("TaskDBAdapter", "Upgrading from version " +
_oldVersion + " to " +
_newVersion + ", which will destroy all old data");
// Drop the old table.
_db.execSQL("DROP TABLE IF EXISTS " + DATABASE_TABLE);
// Create a new one.
onCreate(_db);
}
}
220
❘
CHAPTER 7 DATABASES AND CONTENT PROVIDERS
4. Within the
ToDoDBAdapter
class, add a private variable to store an instance of the
toDoDBOpenHelper
class you just created, and assign it within the constructor.
private toDoDBOpenHelper dbHelper;
public ToDoDBAdapter(Context _context) {
this.context = _context;
dbHelper = new toDoDBOpenHelper(context, DATABASE_NAME,
null, DATABASE_VERSION);
}
5. Still in the adapter class, create
open
and
close
methods that encapsulate the open and close
logic for your database. Start with a close method that simply calls close on the database
object.
public void close() {
db.close();
}
6. The
open
method should use the
toDoDBOpenHelper
class. Call
getWritableDatabase
to let
the helper handle database creation and version checking. Wrap the call to try to provide a
readable database if a writable instance can’t be opened.
public void open() throws SQLiteException {
try {
db = dbHelper.getWritableDatabase();
} catch (SQLiteException ex) {
db = dbHelper.getReadableDatabase();
}
}
7. Add strongly typed methods for adding, removing, and updating items.
// Insert a new task
public long insertTask(ToDoItem _task) {
// Create a new row of values to insert.
ContentValues newTaskValues = new ContentValues();
// Assign values for each row.
newTaskValues.put(KEY_TASK, _task.getTask());
newTaskValues.put(KEY_CREATION_DATE, _task.getCreated().getTime());
// Insert the row.
return db.insert(DATABASE_TABLE, null, newTaskValues);
}
// Remove a task based on its index
public boolean removeTask(long _rowIndex) {
return db.delete(DATABASE_TABLE, KEY_ID + "=" + _rowIndex, null) > 0;
}
// Update a task
public boolean updateTask(long _rowIndex, String _task) {
ContentValues newValue = new ContentValues();
newValue.put(KEY_TASK, _task);
return db.update(DATABASE_TABLE, newValue, KEY_ID + "=" + _rowIndex, null) > 0;
}
Working with SQLite Databases
❘
221
8. Now add helper methods to handle queries. Write three methods — one to return all the
items, another to return a particular row as a Cursor, and finally one that returns a strongly
typed
ToDoItem
.
public Cursor getAllToDoItemsCursor() {
return db.query(DATABASE_TABLE,
new String[] { KEY_ID, KEY_TASK, KEY_CREATION_DATE},
null, null, null, null, null);
}
public Cursor setCursorToToDoItem(long _rowIndex) throws SQLException {
Cursor result = db.query(true, DATABASE_TABLE,
new String[] {KEY_ID, KEY_TASK},
KEY_ID + "=" + _rowIndex, null, null, null,
null, null);
if ((result.getCount() == 0) || !result.moveToFirst()) {
throw new SQLException("No to do items found for row: " + _rowIndex);
}
return result;
}
public ToDoItem getToDoItem(long _rowIndex) throws SQLException {
Cursor cursor = db.query(true, DATABASE_TABLE,
new String[] {KEY_ID, KEY_TASK},
KEY_ID + "=" + _rowIndex, null, null, null,
null, null);
if ((cursor.getCount() == 0) || !cursor.moveToFirst()) {
throw new SQLException("No to do item found for row: " + _rowIndex);
}
String task = cursor.getString(TASK_COLUMN);
long created = cursor.getLong(CREATION_DATE_COLUMN);
ToDoItem result = new ToDoItem(task, new Date(created));
return result;
}
9. That completes the database helper class. Return the
ToDoList
Activity and update it to
persist the to-do list array. Start by updating the Activity’s
onCreate
method to create an
instance of the
toDoDBAdapter
and open a connection to the database. Also include a call to
the
populateTodoList
method stub.
ToDoDBAdapter toDoDBAdapter;
public void onCreate(Bundle icicle) {
[ existing onCreate logic ]
toDoDBAdapter = new ToDoDBAdapter(this);
// Open or create the database
toDoDBAdapter.open();
populateTodoList();
}
private void populateTodoList() { }
222
❘
CHAPTER 7 DATABASES AND CONTENT PROVIDERS
10. Create a new instance variable to store a Cursor over all the to-do items in the database.
Update the
populateTodoList
method to use the
toDoDBAdapter
instance to query the
database, and call
startManagingCursor
to let the Activity manage the Cursor. It should
also make a call to
updateArray
, a method that will be used to repopulate the to-do list array
using the Cursor.
Cursor toDoListCursor;
private void populateTodoList() {
// Get all the todo list items from the database.
toDoListCursor = toDoDBAdapter. getAllToDoItemsCursor();
startManagingCursor(toDoListCursor);
// Update the array.
updateArray();
}
private void updateArray() { }
11. Now implement the
updateArray
method to update the current to-do list array. Call
requery
on the result Cursor to ensure it’s fully up to date, then clear the array and iterate over the
result set. When the update is complete call
notifyDataSetChanged
on the Array Adapter.
private void updateArray() {
toDoListCursor.requery();
todoItems.clear();
if (toDoListCursor.moveToFirst())
do {
String task = toDoListCursor.getString(ToDoDBAdapter.TASK_COLUMN);
long created = toDoListCursor.getLong(ToDoDBAdapter.CREATION_DATE_COLUMN);
ToDoItem newItem = new ToDoItem(task, new Date(created));
todoItems.add(0, newItem);
} while(toDoListCursor.moveToNext());
aa.notifyDataSetChanged();
}
12. To join the pieces together, modify the
OnKeyListener
assigned to the text entry box
in the
onCreate
method, and update the
removeItem
method. Both should now use the
toDoDBAdapter
to add and remove items from the database rather than modifying the to-do
list array directly.
12.1. Start with the
OnKeyListener
, insert the new item into the database, and refresh
the array.
public void onCreate(Bundle icicle) {
super.onCreate(icicle);
setContentView(R.layout.main);
myListView = (ListView)findViewById(R.id.myListView);
myEditText = (EditText)findViewById(R.id.myEditText);
Working with SQLite Databases
❘
223
todoItems = new ArrayList<ToDoItem>();
int resID = R.layout.todolist_item;
aa = new ToDoItemAdapter(this, resID, todoItems);
myListView.setAdapter(aa);
myEditText.setOnKeyListener(new OnKeyListener() {
public boolean onKey(View v, int keyCode, KeyEvent event) {
if (event.getAction() == KeyEvent.ACTION_DOWN)
if (keyCode == KeyEvent.KEYCODE_DPAD_CENTER) {
ToDoItem newItem = new ToDoItem(myEditText.getText().toString());
toDoDBAdapter.insertTask(newItem);
updateArray();
myEditText.setText("");
aa.notifyDataSetChanged();
cancelAdd();
return true;
}
return false;
}
});
registerForContextMenu(myListView);
restoreUIState();
toDoDBAdapter = new ToDoDBAdapter(this);
// Open or create the database
toDoDBAdapter.open();
populateTodoList();
}
12.2. Then modify the
removeItem
method to remove the item from the database and
refresh the array list.
private void removeItem(int _index) {
// Items are added to the listview in reverse order, so invert the index.
toDoDBAdapter.removeTask(todoItems.size()-_index);
updateArray();
}
13. As a final step, override the
onDestroy
method of your activity to close your database
connection.
@Override
public void onDestroy() {
super.onDestroy();
// Close the database
toDoDBAdapter.close();
}
All code snippets in this example are part of the Chapter 7 Todo List project, available for download at Wrox.com.
224
❘
CHAPTER 7 DATABASES AND CONTENT PROVIDERS
Your to-do items will now be saved between sessions. As a further enhancement you could change the
Array Adapter to a Simple Cursor Adapter and have the List View update dynamically with changes to
the database.
Because you’re using a private database your tasks are not available to other applications. To provide
access to your tasks in other applications, expose them using a Content Provider. You’ll do exactly
that next.
CREATING A NEW CONTENT PROVIDER
To create a new Content Provider, extend the abstract
ContentProvider
class. Override the
onCreate
method to create (and initialize) the underlying data source you’re planning to publish with this
provider. Sample skeleton code for a new Content Provider is shown in Listing 7-9.
LISTING 7-9: Creating a new Content Provider
import android.content.*;
import android.database.Cursor;
import android.net.Uri;
import android.database.SQLException;
public class MyProvider extends ContentProvider {
@Override
public boolean onCreate() {
// TODO Construct the underlying database.
return true;
}
}
You should expose a public static
CONTENT_URI
property that returns the full URI of this provider. A
Content Provider URI must be unique to the provider, so it’s good practice to base the URI path on
your package name. The general form for defining a Content Provider’s URI is:
content://com.<CompanyName>.provider.<ApplicationName>/<DataPath>
For example:
content://com.paad.provider.myapp/elements
Content URIs can represent either of two forms. The previous URI represents a request for all values of
that type (in this case all elements).
A trailing
/<rownumber>
, as shown in the following code, represents a request for a single record
(in this case the fifth element).
content://com.paad.provider.myapp/elements/5
It’s good practice to support access to your provider for both of these forms.
The simplest way to do this is to use a
UriMatcher
. Create and configure a Uri Matcher to parse
URIs and determine their forms. This is particularly useful when you’re processing Content Resolver
requests. Listing 7-10 shows the skeleton code for this pattern.
Creating a New Content Provider
❘
225
LISTING 7-10: Using the UriMatcher to handle single or multiple query requests
public class MyProvider extends ContentProvider {
private static final String myURI = "content://com.paad.provider.myapp/items";
public static final Uri CONTENT_URI = Uri.parse(myURI);
@Override
public boolean onCreate() {
// TODO: Construct the underlying database.
return true;
}
// Create the constants used to differentiate between the different URI
// requests.
private static final int ALLROWS = 1;
private static final int SINGLE_ROW = 2;
private static final UriMatcher uriMatcher;
// Populate the UriMatcher object, where a URI ending in ‘items’ will
// correspond to a request for all items, and ‘items/[rowID]’
// represents a single row.
static {
uriMatcher = new UriMatcher(UriMatcher.NO_MATCH);
uriMatcher.addURI("com.paad.provider.myApp", "items", ALLROWS);
uriMatcher.addURI("com.paad.provider.myApp", "items/#", SINGLE_ROW);
}
}
You can use the same technique to expose alternative URIs for different subsets of data, or different
tables within your database, using the same Content Provider.
It’s also good practice to expose the name of each of the columns available in your provider, to simplify
extracting data from a query-result Cursor.
Exposing Access to the Data Source
Expose queries and transactions on your Content Provider by implementing the
delete
,
insert
,
update
,and
query
methods.
These methods are the interface used by the Content Resolver to access the underlying data. They allow
applications to share data across application boundaries without having to publish different interfaces
for each data source.
The most common scenario is to use a Content Provider to expose a private SQLite database, but
within these methods you can access any source of data (including files or application instance
variables).
Listing 7-11 shows the skeleton code for implementing queries and transactions within a Content
Provider. Notice that the
UriMatcher
object is used to refine the transaction and query requests.
226
❘
CHAPTER 7 DATABASES AND CONTENT PROVIDERS
LISTING 7-11: Implementing queries and transactions within a Content Provider
@Override
public Cursor query(Uri uri,
String[] projection,
String selection,
String[] selectionArgs,
String sort) {
// If this is a row query, limit the result set to the passed in row.
switch (uriMatcher.match(uri)) {
case SINGLE_ROW :
// TODO: Modify selection based on row id, where:
// rowNumber = uri.getPathSegments().get(1));
}
return null;
}
@Override
public Uri insert(Uri _uri, ContentValues _initialValues) {
long rowID = [ Add a new item ]
// Return a URI to the newly added item.
if (rowID > 0) {
return ContentUris.withAppendedId(CONTENT_URI, rowID);
}
throw new SQLException("Failed to add new item into " + _uri);
}
@Override
public int delete(Uri uri, String where, String[] whereArgs) {
switch (uriMatcher.match(uri)) {
case ALLROWS:
case SINGLE_ROW:
default: throw new IllegalArgumentException("Unsupported URI:" + uri);
}
}
@Override
public int update(Uri uri, ContentValues values, String where, String[]
whereArgs) {
switch (uriMatcher.match(uri)) {
case ALLROWS:
case SINGLE_ROW:
default: throw new IllegalArgumentException("Unsupported URI:" + uri);
}
}
The final step in creating a Content Provider is defining the MIME type that identifies the data the
provider returns.
Using Content Providers
❘
227
Override the
getType
method to return a String that uniquely describes your data type. The type
returned should include two forms, one for a single entry and another for all the entries, following
these forms:
➤ Single item
vnd.<companyname>.cursor.item/<contenttype>
➤ All items
vnd.<companyName>.cursor.dir/<contenttype>
Listing 7-12 shows how to override the
getType
method to return the correct MIME type based on the
URI passed in.
LISTING 7-12: Returning a Content Provider MIME type
@Override
public String getType(Uri _uri) {
switch (uriMatcher.match(_uri)) {
case ALLROWS: return "vnd.paad.cursor.dir/myprovidercontent";
case SINGLE_ROW: return "vnd.paad.cursor.item/myprovidercontent";
default: throw new IllegalArgumentException("Unsupported URI: " + _uri);
}
}
Registering Your Provider
Once you have completed your Content Provider, it must be added to the application manifest.
Use the
authorities
tag to specify its base URI, as shown in the following XML snippet.
<provider android:name="MyProvider"
android:authorities="com.paad.provider.myapp"/>
USING CONTENT PROVIDERS
The following sections introduce the
ContentResolver
class, and how to use it to query and transact
with a Content Provider.
Introducing Content Resolvers
Each application Context includes a
ContentResolver instance
, accessible using the
getContentResolver
method.
ContentResolver cr = getContentResolver();
The Content Resolver includes a number of methods to modify and query Content Providers. Each
method accepts a URI that specifies the Content Provider to interact with.
A Content Provider’s URI is its authority as defined by its manifest node. An authority URI is an arbi-
trary string, so most Content Providers include a public
CONTENT_URI
property to publish that authority.
228
❘
CHAPTER 7 DATABASES AND CONTENT PROVIDERS
Content Providers usually expose two forms of URI, one for requests against all data, and another that
specifies only a single row. The form for the latter appends
/<rowID>
to the general
CONTENT_URI
.
Querying for Content
Content Provider queries take a form very similar to that of database queries. Query results are returned
as Cursors over a result set, like databases, in the same way as described previously in this chapter.
You can extract values from the result Cursor using the same techniques described within the database
section on ‘‘Extracting Results from a Cursor.’’
Using the
query
method on the
ContentResolver
object, pass in:
➤ The URI of the Content Provider data you want to query.
➤ A projection that lists the columns you want to include in the result set.
➤ A where clause that defines the rows to be returned. You can include
?
wildcards that will be
replaced by the values passed into the selection argument parameter.
➤ An array of selection argument strings that will replace the
?
sinthewhere clause.
➤ A string that describes the order of the returned rows.
Listing 7-13 shows how to use a Content Resolver to apply a query to a Content Provider:
LISTING 7-13: Querying a Content Provider with a Content Resolver
ContentResolver cr = getContentResolver();
// Return all rows
Cursor allRows = cr.query(MyProvider.CONTENT_URI, null, null, null, null);
// Return all columns for rows where column 3 equals a set value
// and the rows are ordered by column 5.
String where = KEY_COL3 + "=" + requiredValue;
String order = KEY_COL5;
Cursor someRows = cr.query(MyProvider.CONTENT_URI,
null, where, null, order);
You’ll see more examples of querying for content later in this chapter when the native Android Content
Providers are introduced.
Adding, Updating, and Deleting Content
To perform transactions on Content Providers, use the
delete
,
update
,and
insert
methods on the
ContentResolver
object.
Inserts
The Content Resolver offers two methods for inserting new records into your Content Provider —
insert
and
bulkInsert
. Both methods accept the URI of the item-type you’re adding; where the former
takes a single new
ContentValues
object, the latter takes an array.
Using Content Providers
❘
229
The simple
insert
method will return a URI to the newly added record, while
bulkInsert
returns the
number of successfully added rows.
Listing 7-14 shows how to use the
insert
and
bulkInsert
methods.
LISTING 7-14: Inserting new rows into a Content Provider
// Get the Content Resolver
ContentResolver cr = getContentResolver();
// Create a new row of values to insert.
ContentValues newValues = new ContentValues();
// Assign values for each row.
newValues.put(COLUMN_NAME, newValue);
[ Repeat for each column ]
Uri myRowUri = cr.insert(MyProvider.CONTENT_URI, newValues);
// Create a new row of values to insert.
ContentValues[] valueArray = new ContentValues[5];
// TODO: Create an array of new rows
int count = cr.bulkInsert(MyProvider.CONTENT_URI, valueArray);
Deletes
To delete a single record, call delete on the Content Resolver, passing in the URI of the row you want
to remove. Alternatively, you can specify a where clause to remove multiple rows. Both techniques are
shown in Listing 7-15.
LISTING 7-15: Deleting records from a Content Provider
ContentResolver cr = getContentResolver();
// Remove a specific row.
cr.delete(myRowUri, null, null);
// Remove the first five rows.
String where = "_id < 5";
cr.delete(MyProvider.CONTENT_URI, where, null);
Updates
Content Provider row updates are made with the Content Resolver
update
method. The
update
method
takes the URI of the target Content Provider, a
ContentValues
object that maps column names to
updated values, and a where clause that indicates which rows to update.
When the update is executed, every row matched by the where clause is updated using the specified
Content Values, and the number of successful updates is returned as shown in Listing 7-16.
230
❘
CHAPTER 7 DATABASES AND CONTENT PROVIDERS
LISTING 7-16: Updating records in a Content Provider
// Create a new row of values to insert.
ContentValues newValues = new ContentValues();
// Create a replacement map, specifying which columns you want to
// update, and what values to assign to each of them.
newValues.put(COLUMN_NAME, newValue);
// Apply to the first 5 rows.
String where = "_id < 5";
getContentResolver().update(MyProvider.CONTENT_URI, newValues, where, null);
Accessing Files in Content Providers
Content Providers represent files as fully qualified URIs rather than as raw file blobs. To insert a
file into a Content Provider, or access a saved file, use the Content Resolvers
openOutputStream
or
openInputStream
methods respectively. The process for storing a file is shown in Listing 7-17.
LISTING 7-17: Adding files to Content Providers
// Insert a new row into your provider, returning its unique URI.
Uri uri = getContentResolver().insert(MyProvider.CONTENT_URI, newValues);
try {
// Open an output stream using the new row’s URI.
OutputStream outStream = getContentResolver().openOutputStream(uri);
// Compress your bitmap and save it into your provider.
sourceBitmap.compress(Bitmap.CompressFormat.JPEG, 50, outStream);
}
catch (FileNotFoundException e) { }
CREATING AND USING AN EARTHQUAKE CONTENT PROVIDER
Having created an application that features a list of earthquakes, you have an excellent opportunity to
share this information with other applications.
By exposing this data through a Content Provider you make it possible for yourself, and others, to
create new applications based on earthquake data without having to duplicate network traffic and the
associated XML parsing.
Creating the Content Provider
1. First open the Earthquake project and create a new
EarthquakeProvider
class that extends
ContentProvider
. Include stubs to override the
onCreate
,
getType
,
query
,
insert
,
delete
,
and
update
methods.
Creating and Using an Earthquake Content Provider
❘
231
package com.paad.earthquake;
import android.content.*;
import android.database.Cursor;
import android.database.SQLException;
import android.database.sqlite.SQLiteOpenHelper;
import android.database.sqlite.SQLiteDatabase;
import android.database.sqlite.SQLiteQueryBuilder;
import android.net.Uri;
import android.text.TextUtils;
import android.util.Log;
public class EarthquakeProvider extends ContentProvider {
@Override
public boolean onCreate() {
}
@Override
public String getType(Uri url) {
}
@Override
public Cursor query(Uri url, String[] projection, String selection,
String[] selectionArgs, String sort) {
}
@Override
public Uri insert(Uri _url, ContentValues _initialValues) {
}
@Override
public int delete(Uri url, String where, String[] whereArgs) {
}
@Override
public int update(Uri url, ContentValues values,
String where, String[]wArgs) {
}
}
2. Publish the URI for this provider. This URI will be used to access this Content Provider from
within other application components via the
ContentResolver
.
public static final Uri CONTENT_URI =
Uri.parse("content://com.paad.provider.earthquake/earthquakes");
3. Create the database that will be used to store the earthquakes. Within the
EarthquakeProvider
create a new
SQLiteDatabase
instance and expose public variables that describe the column
names and indexes. Include an extension of
SQLiteOpenHelper
to manage database creation
and version control.
// The underlying database
private SQLiteDatabase earthquakeDB;
232
❘
CHAPTER 7 DATABASES AND CONTENT PROVIDERS
private static final String TAG = "EarthquakeProvider";
private static final String DATABASE_NAME = "earthquakes.db";
private static final int DATABASE_VERSION = 1;
private static final String EARTHQUAKE_TABLE = "earthquakes";
// Column Names
public static final String KEY_ID = "_id";
public static final String KEY_DATE = "date";
public static final String KEY_DETAILS = "details";
public static final String KEY_LOCATION_LAT = "latitude";
public static final String KEY_LOCATION_LNG = "longitude";
public static final String KEY_MAGNITUDE = "magnitude";
public static final String KEY_LINK = "link";
// Column indexes
public static final int DATE_COLUMN = 1;
public static final int DETAILS_COLUMN = 2;
public static final int LONGITUDE_COLUMN = 3;
public static final int LATITUDE_COLUMN = 4;
public static final int MAGNITUDE_COLUMN = 5;
public static final int LINK_COLUMN = 6;
// Helper class for opening, creating, and managing database version control
private static class earthquakeDatabaseHelper extends SQLiteOpenHelper {
private static final String DATABASE_CREATE =
"create table " + EARTHQUAKE_TABLE + " ("
+ KEY_ID + " integer primary key autoincrement, "
+ KEY_DATE + " INTEGER, "
+ KEY_DETAILS + " TEXT, "
+ KEY_LOCATION_LAT + " FLOAT, "
+ KEY_LOCATION_LNG + " FLOAT, "
+ KEY_MAGNITUDE + " FLOAT), "
+ KEY_LINK + " TEXT);";
public earthquakeDatabaseHelper(Context context, String name,
CursorFactory factory, int version) {
super(context, name, factory, version);
}
@Override
public void onCreate(SQLiteDatabase db) {
db.execSQL(DATABASE_CREATE);
}
@Override
public void onUpgrade(SQLiteDatabase db, int oldVersion, int newVersion) {
Log.w(TAG, "Upgrading database from version " + oldVersion + " to "
+ newVersion + ", which will destroy all old data");
db.execSQL("DROP TABLE IF EXISTS " + EARTHQUAKE_TABLE);
onCreate(db);
}
}
4. Create a
UriMatcher
to handle requests using different URIs. Include support for queries
and transactions over the entire dataset (
QUAKES
) and a single record matching a quake index
value (
QUAKE_ID
).
Creating and Using an Earthquake Content Provider
❘
233
// Create the constants used to differentiate between the different URI
// requests.
private static final int QUAKES = 1;
private static final int QUAKE_ID = 2;
private static final UriMatcher uriMatcher;
// Allocate the UriMatcher object, where a URI ending in ‘earthquakes’ will
// correspond to a request for all earthquakes, and ‘earthquakes’ with a
trailing ‘/[rowID]’ will represent a single earthquake row.
static {
uriMatcher = new UriMatcher(UriMatcher.NO_MATCH);
uriMatcher.addURI("com.paad.provider.Earthquake", "earthquakes", QUAKES);
uriMatcher.addURI("com.paad.provider.Earthquake", "earthquakes/#", QUAKE_ID);
}
5. Override the
getType
method to return a string for each of the URI structures supported.
@Override
public String getType(Uri uri) {
switch (uriMatcher.match(uri)) {
case QUAKES: return "vnd.android.cursor.dir/vnd.paad.earthquake";
case QUAKE_ID: return "vnd.android.cursor.item/vnd.paad.earthquake";
default: throw new IllegalArgumentException("Unsupported URI: " + uri);
}
}
6. Override the provider’s
onCreate
handler to create a new instance of the database helper
class, and open a connection to the database.
@Override
public boolean onCreate() {
Context context = getContext();
earthquakeDatabaseHelper dbHelper = new earthquakeDatabaseHelper(context,
DATABASE_NAME, null, DATABASE_VERSION);
earthquakeDB = dbHelper.getWritableDatabase();
return (earthquakeDB == null) ? false : true;
}
7. Implement the query and transaction stubs. Start with the
query
method, which should
decode the request being made based on the URI (either all content or a single row), and
apply the selection, projection, and sort-order criteria parameters to the database before
returning a result Cursor.
@Override
public Cursor query(Uri uri,
String[] projection,
String selection,
String[] selectionArgs,
String sort) {
SQLiteQueryBuilder qb = new SQLiteQueryBuilder();
qb.setTables(EARTHQUAKE_TABLE);
234
❘
CHAPTER 7 DATABASES AND CONTENT PROVIDERS
// If this is a row query, limit the result set to the passed in row.
switch (uriMatcher.match(uri)) {
case QUAKE_ID: qb.appendWhere(KEY_ID + "=" + uri.getPathSegments().get(1));
break;
default : break;
}
// If no sort order is specified sort by date / time
String orderBy;
if (TextUtils.isEmpty(sort)) {
orderBy = KEY_DATE;
} else {
orderBy = sort;
}
// Apply the query to the underlying database.
Cursor c = qb.query(earthquakeDB,
projection,
selection, selectionArgs,
null, null,
orderBy);
// Register the contexts ContentResolver to be notified if
// the cursor result set changes.
c.setNotificationUri(getContext().getContentResolver(), uri);
// Return a cursor to the query result.
return c;
}
8. Now implement methods for inserting, deleting, and updating content. In this case the
process is an exercise in mapping Content Provider transaction requests to their database
equivalents.
@Override
public Uri insert(Uri _uri, ContentValues _initialValues) {
// Insert the new row, will return the row number if
// successful.
long rowID = earthquakeDB.insert(EARTHQUAKE_TABLE, "quake", _initialValues);
// Return a URI to the newly inserted row on success.
if (rowID > 0) {
Uri uri = ContentUris.withAppendedId(CONTENT_URI, rowID);
getContext().getContentResolver().notifyChange(uri, null);
return uri;
}
throw new SQLException("Failed to insert row into " + _uri);
}
@Override
public int delete(Uri uri, String where, String[] whereArgs) {
int count;
Creating and Using an Earthquake Content Provider
❘
235
switch (uriMatcher.match(uri)) {
case QUAKES:
count = earthquakeDB.delete(EARTHQUAKE_TABLE, where, whereArgs);
break;
case QUAKE_ID:
String segment = uri.getPathSegments().get(1);
count = earthquakeDB.delete(EARTHQUAKE_TABLE, KEY_ID + "="
+ segment
+ (!TextUtils.isEmpty(where) ? " AND ("
+ where + ‘)’ : ""), whereArgs);
break;
default: throw new IllegalArgumentException("Unsupported URI: " + uri);
}
getContext().getContentResolver().notifyChange(uri, null);
return count;
}
@Override
public int update(Uri uri, ContentValues values, String where, String[]
whereArgs) {
int count;
switch (uriMatcher.match(uri)) {
case QUAKES: count = earthquakeDB.update(EARTHQUAKE_TABLE, values,
where, whereArgs);
break;
case QUAKE_ID: String segment = uri.getPathSegments().get(1);
count = earthquakeDB.update(EARTHQUAKE_TABLE, values, KEY_ID
+ "=" + segment
+ (!TextUtils.isEmpty(where) ? " AND ("
+ where + ‘)’ : ""), whereArgs);
break;
default: throw new IllegalArgumentException("Unknown URI " + uri);
}
getContext().getContentResolver().notifyChange(uri, null);
return count;
}
9. With the Content Provider complete, register it in the manifest by creating a new
<provider>
node within the application tag.
<provider android:name=".EarthquakeProvider"
android:authorities="com.paad.provider.earthquake" />
All code snippets in this example are part of the Chapter 7 Todo List 2 project, available for download at Wrox.com.
236
❘
CHAPTER 7 DATABASES AND CONTENT PROVIDERS
Using the Provider
You can now update the Earthquake Activity to use the Earthquake Provider to store quakes and use
them to populate the List View.
1. Within the
Earthquake
Activity, update the
addNewQuake
method. It should use the applica-
tion’s Content Resolver to insert each new Earthquake into the provider. Move the existing
array control logic into a separate
addQuakeToArray
method.
private void addNewQuake(Quake _quake) {
ContentResolver cr = getContentResolver();
// Construct a where clause to make sure we don’t already have this
// earthquake in the provider.
String w = EarthquakeProvider.KEY_DATE + " = " + _quake.getDate().getTime();
// If the earthquake is new, insert it into the provider.
if (cr.query(EarthquakeProvider.CONTENT_URI, null, w, null, null).getCount()==0){
ContentValues values = new ContentValues();
values.put(EarthquakeProvider.KEY_DATE, _quake.getDate().getTime());
values.put(EarthquakeProvider.KEY_DETAILS, _quake.getDetails());
double lat = _quake.getLocation().getLatitude();
double lng = _quake.getLocation().getLongitude();
values.put(EarthquakeProvider.KEY_LOCATION_LAT, lat);
values.put(EarthquakeProvider.KEY_LOCATION_LNG, lng);
values.put(EarthquakeProvider.KEY_LINK, _quake.getLink());
values.put(EarthquakeProvider.KEY_MAGNITUDE, _quake.getMagnitude());
cr.insert(EarthquakeProvider.CONTENT_URI, values);
earthquakes.add(_quake);
addQuakeToArray(_quake);
}
}
private void addQuakeToArray(Quake _quake) {
if (_quake.getMagnitude() > minimumMagnitude) {
// Add the new quake to our list of earthquakes.
earthquakes.add(_quake);
// Notify the array adapter of a change.
aa.notifyDataSetChanged();
}
}
2. Create a new
loadQuakesFromProvider
method that loads all the earthquakes from the
Earthquake Provider, and inserts them into the Array List using the
addQuakeToArray
methodcreatedinStep1.
private void loadQuakesFromProvider() {
// Clear the existing earthquake array
earthquakes.clear();
ContentResolver cr = getContentResolver();
Creating and Using an Earthquake Content Provider
❘
237
// Return all the saved earthquakes
Cursor c = cr.query(EarthquakeProvider.CONTENT_URI, null, null, null, null);
if (c.moveToFirst())
{
do {
// Extract the quake details.
Long datems = c.getLong(EarthquakeProvider.DATE_COLUMN);
String details = c.getString(EarthquakeProvider.DETAILS_COLUMN);
Float lat = c.getFloat(EarthquakeProvider.LATITUDE_COLUMN);
Float lng = c.getFloat(EarthquakeProvider.LONGITUDE_COLUMN);
Double mag = c.getDouble(EarthquakeProvider.MAGNITUDE_COLUMN);
String link = c.getString(EarthquakeProvider.LINK_COLUMN);
Location location = new Location("dummy");
location.setLongitude(lng);
location.setLatitude(lat);
Date date = new Date(datems);
Quake q = new Quake(date, details, location, mag, link);
addQuakeToArray(q);
} while(c.moveToNext());
}
}
3. Call
loadQuakesFromProvider
from
onCreate
to initialize the earthquake List View
at start-up.
@Override
public void onCreate(Bundle icicle) {
super.onCreate(icicle);
setContentView(R.layout.main);
earthquakeListView = (ListView)this.findViewById(R.id.earthquakeListView);
earthquakeListView.setOnItemClickListener(new OnItemClickListener() {
@Override
public void onItemClick(AdapterView _av, View _v, int _index, long arg3) {
selectedQuake = earthquakes.get(_index);
showDialog(QUAKE_DIALOG);
}
});
int layoutID = android.R.layout.simple_list_item_1;
aa = new ArrayAdapter<Quake>(this, layoutID , earthquakes);
earthquakeListView.setAdapter(aa);
loadQuakesFromProvider();
updateFromPreferences();
refreshEarthquakes();
}
238
❘
CHAPTER 7 DATABASES AND CONTENT PROVIDERS
4. Finally, make a change to the
refreshEarthquakes
method so that it loads the saved
earthquakes from the provider after clearing the array, but before adding any new quakes
received.
private void refreshEarthquakes() {
[ exiting refreshEarthquakes method ]
// Clear the old earthquakes
earthquakes.clear();
loadQuakesFromProvider();
[ exiting refreshEarthquakes method ]
}
All code snippets in this example are part of the Chapter 7 Todo List 3 project, available for download at Wrox.com.
NATIVE ANDROID CONTENT PROVIDERS
Android exposes several native databases using Content Providers.
You can access these Content Providers directly using the techniques described earlier in this chapter.
Alternatively, the
android.provider
package includes classes that can simplify access to many of the
most useful providers, including:
➤
Browser
Use the browser Content Provider to read or modify bookmarks, browser history,
or web searches.
➤
CallLog
View or update the call history, including both incoming and outgoing calls,
together with missed calls and call details like caller ID and call durations.
➤
ContactsContract
Use the Contacts Contract provider to retrieve, modify, or store your
contacts’ details. This Content Provider replaces the Contact Content Provider.
➤
MediaStore
The Media Store provides centralized, managed access to the multimedia on
your device, including audio, video, and images. You can store your own multimedia within
the media store and make it globally available, as shown in Chapter 11.
➤
Settings
You can access the device’s preferences using the Settings provider.
You can view most system settings and modify some of them. More usefully, the
android.provider.Settings
class includes a collection of Intent actions that can be used to
open the appropriate settings screen to let users modify their own settings.
➤
UserDictionary
Access (or add to) the user defined words added to the dictionary for use in
IME predictive text input.
You should use these native Content Providers wherever possible to ensure your application integrates
seamlessly with other native and third-party applications.
While a detailed description of how to use each of these helpers is beyond the scope of this chapter, the
following sections describe how to use the Media Store and Contacts Contract Content Provider.
Native Android Content Providers
❘
239
Using the Media Store Provider
The Android Media Store is a managed repository of audio, video, and image files.
Whenever you add a new multimedia file to the file system, it should also be added to the Media Store.
This will expose it to other applications, including the default media player. Chapter 11 shows you
how to use the Content Scanner to add new media to the Media Store.
To access media from the Media Store, query the image, video, or audio Content Providers using
the techniques described earlier within this chapter. The
MediaStore
class includes
Audio
,
Video
,and
Images
subclasses, which in turn contain subclasses that are used to provide the column names and
content URIs for each media provider.
The Media Store segregates media kept on the internal and external volumes of the host device. Each
of the Media Store subclasses provides a URI for either the internally or externally stored media using
the forms:
➤
MediaStore.<mediatype>.Media.EXTERNAL_CONTENT_URI
➤
MediaStore.<mediatype>.Media.INTERNAL_CONTENT_URI
Listing 7-18 shows a simple code snippet used to find the song title and album name for each piece of
audiostoredontheexternalvolume.
LISTING 7-18: Accessing the Media Store Content Provider
// Get a cursor over every piece of audio on the external volume.
Cursor cursor =
getContentResolver().query(MediaStore.Audio.Media.EXTERNAL_CONTENT_URI,
null, null, null, null);
// Let the activity manage the cursor lifecycle.
startManagingCursor(cursor);
// Use the convenience properties to get the index of the columns
int albumIdx = cursor.getColumnIndexOrThrow(MediaStore.Audio.Media.ALBUM);
int titleIdx = cursor. getColumnIndexOrThrow(MediaStore.Audio.Media.TITLE);
String[] result = new String[cursor.getCount()];
if (cursor.moveToFirst())
do {
// Extract the song title.
String title = cursor.getString(titleIdx);
// Extract the album name.
String album = cursor.getString(albumIdx);
result[cursor.getPosition()] = title + " (" + album + ")";
} while(cursor.moveToNext());
In Chapter 11 you’ll learn how to play audio and video resources stored in the Media Store by specify-
ing the URI of a particular multi media item.
240
❘
CHAPTER 7 DATABASES AND CONTENT PROVIDERS
Using the Contacts Provider
Access to the contact manager is particularly useful on a communications device. Android does the
right thing by exposing all the information available from the contacts database to any application
granted the
READ_CONTACTS
permission.
Android 2.0 (API level 5) introduced the
ContactsContract
class, which superceded the
Contacts
class
that had previously been used to store and manage the contacts stored on the device.
The new contact Content Provider extends the scope of contacts management in Android by providing
an extensible database of contact-related information. This allows users to specify multiple sources for
their contact information. More importantly for us, it allows developers to arbitrarily extend the data
stored against each contact, or even become an alternative provider for contacts and contact details.
Introducing the Contacts Contract Content Provider
The Contacts Contract Content Provider is an extensible database of contact-related information.
Rather than using a single well-defined table of contact detail columns, the Contacts Contract provider
uses a three-tier data model to store data, associate it with a contact, and aggregate it to a single person
using the following
ContactsContract
subclasses:
➤
Data
In the underlying table, each row defines a set of personal data (e.g., phone numbers,
e-mail addresses, etc.), separated by MIME type. While there is a predefined set of common
column names for each personal data-type (available, along with the appropriate MIME
types from subclasses within
ContactsContract.CommonDataKinds)
,thistablecanbeused
to store any value.
Importantly, the kind of data stored in a particular row is determined by the MIME type
specified for that row. A series of generic columns is used to store up to 15 different pieces
of data varying by data type.
When adding new data to the Data table, you specify a Raw Contact to which a set of data
will be associated.
➤
RawContacts
From Android 2.0 onwards, users can specify multiple contact accounts (e.g.,
Gmail, Facebook, etc.). Each row in the Raw Contacts table defines an account to which a set
of
Data
values is associated.
➤
Contacts
The Contacts table aggregates rows from Raw Contacts that all describe the same
person.
Typically you will use the Data table to add, delete, or modify data stored against an existing contact
account, the Raw Contacts table to create and manage accounts, and both the Contact and Data tables
to query the database and extract contact details.
Reading Contact Details
You can use the Content Resolver to query any of the three Contact Contracts tables described above
using the
CONTENT_URI
static constant available from each class. Each class includes a number of static
properties that describe the column names included in the underlying tables.
Native Android Content Providers
❘
241
In order to access any contact details you need to include the
READ_CONTACTS
uses-permission in your
application manifest:
<uses-permission android:name="android.permission.READ_CONTACTS"/>
Listing 7-19 queries the Contacts table for a Cursor to every person in the address book, creating an
array of strings that holds each contact’s name and unique ID.
LISTING 7-19: Accessing the contact Content Provider
// Get a cursor over every aggregated contact.
Cursor cursor =
getContentResolver().query(ContactsContract.Contacts.CONTENT_URI,
null, null, null, null);
// Let the activity manage the cursor lifecycle.
startManagingCursor(cursor);
// Use the convenience properties to get the index of the columns
int nameIdx =
cursor.getColumnIndexOrThrow(ContactsContract.Contacts.DISPLAY_NAME);
int idIdx = cursor. getColumnIndexOrThrow(ContactsContract.Contacts._ID);
String[] result = new String[cursor.getCount()];
if (cursor.moveToFirst())
do {
// Extract the name.
String name = cursor.getString(nameIdx);
// Extract the phone number.
String id = cursor.getString(idIdx);
result[cursor.getPosition()] = name + " (" + id + ")";
} while(cursor.moveToNext());
stopManagingCursor(cursor);
The
ContactsContract.Data
Content Provider is used to store all the contact details — such as
addresses, phone numbers, and e-mail addresses — making it the best approach when searching for
one of these details.
The Data table is also used for finding details for a given contact. In most cases, you will likely be
querying for contact details based on a full or partial contact name.
To simplify this lookup, Android provides the
ContactsContract.Contacts.CONTENT_FILTER_URI
query URI. Append the full or partial name to lookup as an additional path segment to the URI. To
extract the associated contact details, find the
_ID
value from the returned Cursor and use it to create a
query on the Data table.
The content of each column with a row in the Data table depends on the MIME type specified for
that row. As a result, any query on the Data table must filter the rows by MIME-type in order to
meaningfully extract data.
