Microsoft Visual C# 2010 Step by Step (P2) potx
Bạn đang xem bản rút gọn của tài liệu. Xem và tải ngay bản đầy đủ của tài liệu tại đây (639.08 KB, 50 trang )
20 Part I Introducing Microsoft Visual C# and Microsoft Visual Studio 2010
Note The XAML description of the form in the lower pane now includes the label control,
together with properties such as its location on the form, governed by the Margin prop-
erty. The Margin property consists of four numbers indicating the distance of each edge
of the label from the edges of the form. If you move the control around the form, the
value of the Margin property changes. If the form is resized, the controls anchored to the
form’s edges that move are resized to preserve their margin values. You can prevent this
by setting the Margin values to zero. You learn more about the Margin and also the Height
and Width properties of WPF controls in Chapter 22, “Introducing Windows Presentation
Foundation.”
4. On the View menu, click Properties Window.
If it was not already displayed, the Properties window appears on the lower right side
of the screen, under Solution Explorer. You can specify the properties of controls by us-
ing the XAML pane under the Design View window. However, the Properties window
provides a more convenient way for you to modify the properties for items on a form,
as well as other items in a project. It is context sensitive in that it displays the proper-
ties for the currently selected item. If you click the title bar of the form displayed in the
Design View window, you can see that the Properties window displays the properties for
the form itself. If you click the label control, the window displays the properties for the
label instead. If you click anywhere else on the form, the Properties window displays the
properties for a mysterious item called a grid. A grid acts as a container for items on a
WPF form, and you can use the grid, among other things, to indicate how items on the
form should be aligned and grouped together.
5. Click the label control on the form. In the Properties window, locate the FontSize
property. Change the FontSize property to 20, and then in the Design View window
click the title bar of the form.
The size of the text in the label changes.
6. In the XAML pane below the Design View window, examine the text that defines the
label control. If you scroll to the end of the line, you should see the text FontSize=“20”.
Any changes that you make by using the Properties window are automatically reflected
in the XAML definitions and vice versa.
Overtype the value of the FontSize property in the XAML pane, and change it back to
12. The size of the text in the label in the Design View window changes back.
7. In the XAML pane, examine the other properties of the label control.
The properties that are listed in the XAML pane are only the ones that do not have
default values. If you modify any property values by using the Properties Window, they
appear as part of the label definition in the XAML pane.
8. Change the value of the Content property from Label to Please enter your name.
Notice that the text displayed in the label on the form changes, although the label is
too small to display it correctly.
Chapter 1 Welcome to C# 21
9. In the Design View window, click the label control. Place the mouse over the right edge
of the label control. It should change into a double-headed arrow to indicate that you
can use the mouse to resize the control. Click the mouse and drag the right edge of the
label control further to the right, until you can see the complete text for the label.
10. Click the form in the Design View window, and then display the Toolbox again.
11. In the Toolbox, click and drag the TextBox control onto the form. Move the text box
control so that it is directly underneath the label control.
Tip When you drag a control on a form, alignment indicators appear automatically when
the control becomes aligned vertically or horizontally with other controls. This gives you a
quick visual cue for making sure that controls are lined up neatly.
12. While the text box control is selected, in the Properties window, change the value of the
Name property displayed at the top of the window to userName.
Note You will learn more about naming conventions for controls and variables in
Chapter 2, “Working with Variables, Operators, and Expressions.”
13. Display the Toolbox again, and then click and drag a Button control onto the form.
Place the button control to the right of the text box control on the form so that the
bottom of the button is aligned horizontally with the bottom of the text box.
14. Using the Properties window, change the Name property of the button control to ok.
And change the Content property from Button to OK. Verify that the caption of the
button control on the form changes.
15. Click the title bar of the MainWindow.xaml form in the Design View window. In the
Properties window, change the Title property to Hello.
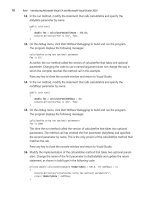
16. In the Design View window, notice that a resize handle (a small square) appears on the
lower right corner of the form when it is selected. Move the mouse pointer over the
resize handle. When the pointer changes to a diagonal double-headed arrow, click and
drag the pointer to resize the form. Stop dragging and release the mouse button when
the spacing around the controls is roughly equal.
Important Click the title bar of the form and not the outline of the grid inside the form
before resizing it. If you select the grid, you will modify the layout of the controls on the
form but not the size of the form itself.
The form should now look similar to the following figure.
22 Part I Introducing Microsoft Visual C# and Microsoft Visual Studio 2010
17. On the Build menu, click Build Solution, and verify that the project builds successfully.
18. On the Debug menu, click Start Without Debugging.
The application should run and display your form. You can type your name in the text
box and click OK, but nothing happens yet. You need to add some code to process the
Click event for the OK button, which is what you will do next.
19. Click the Close button (the X in the upper-right corner of the form) to close the form
and return to Visual Studio.
You have managed to create a graphical application without writing a single line of C# code.
It does not do much yet (you will have to write some code soon), but Visual Studio actually
generates a lot of code for you that handles routine tasks that all graphical applications must
perform, such as starting up and displaying a form. Before adding your own code to the
application, it helps to have an understanding of what Visual Studio has generated for you.
In Solution Explorer, expand the MainWindow.xaml node. The file MainWindow.xaml.cs
appears. Double-click the file MainWindow.xaml.cs. The code for the form is displayed in the
Code and Text Editor window. It looks like this:
using System;
using System.Collections.Generic;
using System.Linq;
using System.Text;
using System.Windows;
using System.Windows.Controls;
using System.Windows.Data;
Chapter 1 Welcome to C# 23
using System.Windows.Documents;
using System.Windows.Input;
using System.Windows.Media;
using System.Windows.Media.Imaging;
using System.Windows.Navigation;
using System.Windows.Shapes;
namespace WPFHello
{
/// <summary>
/// Interaction logic for MainWindow.xaml
/// </summary>
public partial class MainWindow : Window
{
public MainWindow()
{
InitializeComponent();
}
}
}
In addition to a good number of using statements bringing into scope some namespaces
that most WPF applications use, the file contains the definition of a class called MainWindow
but not much else. There is a little bit of code for the MainWindow class known as a con-
structor that calls a method called InitializeComponent, but that is all. (A constructor is a
special method with the same name as the class. It is executed when an instance of the class
is created and can contain code to initialize the instance. You will learn about constructors
in Chapter 7.) In fact, the application contains a lot more code, but most of it is generated
automatically based on the XAML description of the form, and it is hidden from you. This
hidden code performs operations such as creating and displaying the form, and creating and
positioning the various controls on the form.
The purpose of the code that you can see in this class is so that you can add your own
methods to handle the logic for your application, such as determining what happens when
the user clicks the OK button.
Tip You can also display the C# code file for a WPF form by right-clicking anywhere in the
Design View window and then clicking View Code.
At this point, you might be wondering where the Main method is and how the form gets
displayed when the application runs; remember that Main defines the point at which the
program starts. In Solution Explorer, you should notice another source file called App.xaml.
If you double-click this file, the XAML description of this item appears. One property in the
24 Part I Introducing Microsoft Visual C# and Microsoft Visual Studio 2010
XAML code is called StartupUri, and it refers to the MainWindow.xaml file as shown in bold in
the following code example:
<Application x:Class="WPFHello.App"
xmlns="
xmlns:x="fx/2006/xaml"
StartupUri="MainWindow.xaml">
<Application.Resources>
</Application.Resources>
</Application>
If you click the Design tab at the bottom of the XAML pane, the Design View window for App.
xaml appears and displays the text “Intentionally left blank. The document root element is
not supported by the visual designer”. This occurs because you cannot use the Design View
window to modify the App.xaml file. Click the XAML tab to return to the XAML pane.
If you expand the App.xaml node in Solution Explorer, you will see that there is also an
Application.xaml.cs file. If you double-click this file, you will find it contains the following
code:
using System;
using System.Collections.Generic;
using System.Configuration;
using System.Data;
using System.Linq;
using System.Windows;
namespace WPFHello
{
/// <summary>
/// Interaction logic for App.xaml
/// </summary>
public partial class App : Application
{
}
}
Once again, there are a number of using statements but not a lot else, not even a Main
method. In fact, Main is there, but it is also hidden. The code for Main is generated based on
the settings in the App.xaml file; in particular, Main will create and display the form specified
by the StartupUri property. If you want to display a different form, you edit the App.xaml file.
The time has come to write some code for yourself!
Write the code for the OK button
1. Click the MainWindow.xaml tab above the Code and Text Editor window to display
MainWindow in the Design View window.
Chapter 1 Welcome to C# 25
2. Double-click the OK button on the form.
The MainWindow.xaml.cs file appears in the Code and Text Editor window, but a new
method has been added called ok_Click. Visual Studio automatically generates code to
call this method whenever the user clicks the OK button. This is an example of an event.
You will learn much more about how events work as you progress through this book.
3. Add the following code shown in bold to the ok_Click method:
void ok_Click(object sender, RoutedEventArgs e)
{
MessageBox.Show("Hello " + userName.Text);
}
This is the code that will run when the user clicks the OK button. Do not worry too
much about the syntax of this code just yet (just make sure you copy it exactly as
shown) because you will learn all about methods in Chapter 3. The interesting part is
the MessageBox.Show statement. This statement displays a message box containing
the text “Hello” with whatever name the user typed into the username text box on the
appended form.
4. Click the MainWindow.xaml tab above the Code and Text Editor window to display
MainWindow in the Design View window again.
5. In the lower pane displaying the XAML description of the form, examine the Button
element, but be careful not to change anything. Notice that it contains an element
called Click that refers to the ok_Click method:
<Button Height="23" … Click="ok_Click" />
6. On the Debug menu, click Start Without Debugging.
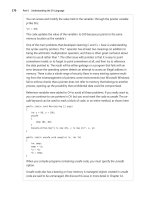
7. When the form appears, type your name in the text box and then click OK. A message
box appears, welcoming you by name:
8. Click OK in the message box.
The message box closes.
9. Close the form.
26 Part I Introducing Microsoft Visual C# and Microsoft Visual Studio 2010
In this chapter, you have seen how to use Visual Studio 2010 to create, build, and run applica-
tions. You have created a console application that displays its output in a console window,
and you have created a WPF application with a simple graphical user interface.
n
If you want to continue to the next chapter
Keep Visual Studio 2010 running, and turn to Chapter 2.
n
If you want to exit Visual Studio 2010 now
On the File menu, click Exit. If you see a Save dialog box, click Yes and save the project.
Chapter 1 Quick Reference
To Do this
Create a new console application
using Visual Studio 2010 Standard
or Professional
On the File menu, point to New, and then click Project to open
the New Project dialog box. In the left pane, under Installed
Templates, click Visual C#. In the middle pane, click Console
Application. Specify a directory for the project files in the
Location box. Type a name for the project. Click OK.
Create a new console application
using Visual C# 2010 Express
On the File menu, click New Project to open the New Project
dialog box. For the template, select Console Application.
Choose a name for the project. Click OK.
Create a new graphical application
using Visual Studio 2010 Standard
or Professional
On the File menu, point to New, and then click Project to open
the New Project dialog box. In the left pane, under Installed
Templates, click Visual C#. In the middle pane, click WPF
Application. Specify a directory for the project files in the
Location box. Type a name for the project. Click OK.
Create a new graphical application
using Visual C# 2010 Express
On the File menu, click New Project to open the New Project
dialog box. For the template, select WPF Application. Choose a
name for the project. Click OK.
Build the application On the Build menu, click Build Solution.
Run the application On the Debug menu, click Start Without Debugging.
27
Chapter 2
Working with Variables, Operators,
and Expressions
After completing this chapter, you will be able to:
n
Understand statements, identifiers, and keywords.
n
Use variables to store information.
n
Work with primitive data types.
n
Use arithmetic operators such as the plus sign (+) and the minus sign (–).
n
Increment and decrement variables.
In Chapter 1, “Welcome to C#,” you learned how to use the Microsoft Visual Studio 2010
programming environment to build and run a Console program and a Windows Presentation
Foundation (WPF) application. This chapter introduces you to the elements of Microsoft
Visual C# syntax and semantics, including statements, keywords, and identifiers. You’ll study
the primitive types that are built into the C# language and the characteristics of the values
that each type holds. You’ll also see how to declare and use local variables (variables that ex-
ist only in a method or other small section of code), learn about the arithmetic operators that
C# provides, find out how to use operators to manipulate values, and learn how to control
expressions containing two or more operators.
Understanding Statements
A statement is a command that performs an action. You combine statements to create
methods. You’ll learn more about methods in Chapter 3, “Writing Methods and Applying
Scope,” but for now, think of a method as a named sequence of statements. Main, which was
introduced in the previous chapter, is an example of a method. Statements in C# follow a
well-defined set of rules describing their format and construction. These rules are collectively
known as syntax. (In contrast, the specification of what statements do is collectively known as
semantics.) One of the simplest and most important C# syntax rules states that you must ter-
minate all statements with a semicolon. For example, without its terminating semicolon, the
following statement won’t compile:
Console.WriteLine("Hello World");
28 Part I Introducing Microsoft Visual C# and Microsoft Visual Studio 2010
Tip C# is a “free format” language, which means that white space, such as a space character or a
newline, is not significant except as a separator. In other words, you are free to lay out your state-
ments in any style you choose. However, you should adopt a simple, consistent layout style and
keep to it to make your programs easier to read and understand.
The trick to programming well in any language is learning the syntax and semantics of the
language and then using the language in a natural and idiomatic way. This approach makes
your programs more easily maintainable. In the chapters throughout this book, you’ll see
examples of the most important C# statements.
Using Identifiers
Identifiers are the names you use to identify the elements in your programs, such as
namespaces, classes, methods, and variables. (You will learn about variables shortly.) In C#,
you must adhere to the following syntax rules when choosing identifiers:
n
You can use only letters (uppercase and lowercase), digits, and underscore characters.
n
An identifier must start with a letter or an underscore.
For example, result, _score, footballTeam, and plan9 are all valid identifiers, whereas result%,
footballTeam$, and 9plan are not.
Important C# is a case-sensitive language: footballTeam and FootballTeam are not the same
identifier.
Identifying Keywords
The C# language reserves 77 identifiers for its own use, and you cannot reuse these identi-
fiers for your own purposes. These identifiers are called keywords, and each has a particular
meaning. Examples of keywords are class, namespace, and using. You’ll learn the meaning of
most of the C# keywords as you proceed through this book. The keywords are listed in the
following table.
abstract do in protected true
as double int public try
base else interface readonly typeof
bool enum internal ref uint
break event is return ulong
Chapter 2 Working with Variables, Operators, and Expressions 29
byte explicit lock sbyte unchecked
case extern long sealed unsafe
catch false namespace short ushort
char finally new sizeof using
checked fixed null stackalloc virtual
class float object static void
const for operator string volatile
continue foreach out struct while
decimal goto override switch
default if params this
delegate implicit private throw
Tip In the Visual Studio 2010 Code and Text Editor window, keywords are colored blue when you
type them.
C# also uses the following identifiers. These identifiers are not reserved by C#, which means
that you can use these names as identifiers for your own methods, variables, and classes, but
you should really avoid doing so if at all possible.
dynamic join set
from let value
get orderby var
group partial where
into select yield
Using Variables
A variable is a storage location that holds a value. You can think of a variable as a box in the
computer’s memory holding temporary information. You must give each variable in a pro-
gram an unambiguous name that uniquely identifies it in the context in which it is used. You
use a variable’s name to refer to the value it holds. For example, if you want to store the value
of the cost of an item in a store, you might create a variable simply called cost and store the
item’s cost in this variable. Later on, if you refer to the cost variable, the value retrieved will be
the item’s cost that you stored there earlier.
30 Part I Introducing Microsoft Visual C# and Microsoft Visual Studio 2010
Naming Variables
You should adopt a naming convention for variables that helps you avoid confusion
concerning the variables you have defined. The following list contains some general
recommendations:
n
Don’t start an identifier with an underscore.
n
Don’t create identifiers that differ only by case. For example, do not create one variable
named myVariable and another named MyVariable for use at the same time because it
is too easy to get them confused.
Note Using identifiers that differ only by case can limit the ability to reuse classes in ap-
plications developed using other languages that are not case sensitive, such as Microsoft
Visual Basic.
n
Start the name with a lowercase letter.
n
In a multiword identifier, start the second and each subsequent word with an upper-
case letter. (This is called camelCase notation.)
n
Don’t use Hungarian notation. (Microsoft Visual C++ developers reading this book are
probably familiar with Hungarian notation. If you don’t know what Hungarian notation
is, don’t worry about it!)
Important You should treat the first two of these recommendations as compulsory
because they relate to Common Language Specification (CLS) compliance. If you want to
write programs that can interoperate with other languages, such as Microsoft Visual Basic,
you must comply with these recommendations.
For example, score, footballTeam, _score, and FootballTeam are all valid variable names, but
only the first two are recommended.
Declaring Variables
Variables hold values. C# has many different types of values that it can store and process—
integers, floating-point numbers, and strings of characters, to name three. When you declare
a variable, you must specify the type of data it will hold.
You declare the type and name of a variable in a declaration statement. For example, the
following statement declares that the variable named age holds int (integer) values. As
always, the statement must be terminated with a semicolon.
int age;
Chapter 2 Working with Variables, Operators, and Expressions 31
The variable type int is the name of one of the primitive C# types, integer, which is a whole
number. (You’ll learn about several primitive data types later in this chapter.)
Note Microsoft Visual Basic programmers should note that C# does not allow implicit variable
declarations. You must explicitly declare all variables before you use them.
After you’ve declared your variable, you can assign it a value. The following statement assigns
age the value 42. Again, you’ll see that the semicolon is required.
age = 42;
The equal sign (=) is the assignment operator, which assigns the value on its right to the vari-
able on its left. After this assignment, the age variable can be used in your code to refer to
the value it holds. The next statement writes the value of the age variable, 42, to the console:
Console.WriteLine(age);
Tip If you leave the mouse pointer over a variable in the Visual Studio 2010 Code and Text Editor
window, a ScreenTip appears, telling you the type of the variable.
Working with Primitive Data Types
C# has a number of built-in types called primitive data types. The following table lists the
most commonly used primitive data types in C# and the range of values that you can store in
each.
Data type Description Size (bits) Range Sample usage
int Whole numbers 32 –2
31
through
2
31
– 1
int count;
count = 42;
long Whole numbers (bigger
range)
64 –2
63
through
2
63
– 1
long wait;
wait = 42L;
float Floating-point numbers 32 ±1.5 × 10
45
through
±3.4 × 10
38
float away;
away = 0.42F;
double Double-precision (more
accurate) floating-point
numbers
64
±5.0 × 10
−324
through
±1.7 × 10
308
double trouble;
trouble = 0.42;
decimal Monetary values 128 28 significant figures
decimal coin;
coin = 0.42M;
32 Part I Introducing Microsoft Visual C# and Microsoft Visual Studio 2010
Data type Description Size (bits) Range Sample usage
string Sequence of characters 16 bits per
character
Not applicable
string vest;
vest = "fortytwo";
char Single character 16 0 through 2
16
– 1
char grill;
grill = 'x';
bool Boolean 8 True or false
bool teeth;
teeth = false;
Unassigned Local Variables
When you declare a variable, it contains a random value until you assign a value to it. This
behavior was a rich source of bugs in C and C++ programs that created a variable and ac-
cidentally used it as a source of information before giving it a value. C# does not allow you to
use an unassigned variable. You must assign a value to a variable before you can use it; oth-
erwise, your program might not compile. This requirement is called the Definite Assignment
Rule. For example, the following statements generate a compile-time error because age is
unassigned:
int age;
Console.WriteLine(age); // compile-time error
Displaying Primitive Data Type Values
In the following exercise, you use a C# program named PrimitiveDataTypes to demonstrate
how several primitive data types work.
Display primitive data type values
1. Start Visual Studio 2010 if it is not already running.
2. If you are using Visual Studio 2010 Standard or Visual Studio 2010 Professional, on the
File menu, point to Open, and then click Project/Solution.
If you are using Visual C# 2010 Express, on the File menu, click Open Project.
The Open Project dialog box appears.
3. Move to the \Microsoft Press\Visual CSharp Step By Step\Chapter 2\PrimitiveDataTypes
folder in your Documents folder. Select the PrimitiveDataTypes solution file, and then
click Open.
The solution loads, and Solution Explorer displays the PrimitiveDataTypes project.
Chapter 2 Working with Variables, Operators, and Expressions 33
Note Solution file names have the .sln suffix, such as PrimitiveDataTypes.sln. A solution
can contain one or more projects. Project files have the .csproj suffix. If you open a project
rather than a solution, Visual Studio 2010 automatically creates a new solution file for it.
If you build the solution, Visual Studio 2010 automatically saves any new or updated files,
so you will be prompted to provide a name and location for the new solution file.
4. On the Debug menu, click Start Without Debugging.
You might see some warnings in Visual Studio. You can safely ignore them. (You will
correct them in the next exercise.) The following application window appears:
5. In the Choose a data type list, click the string type.
The value “forty two” appears in the Sample value box.
6. Click the int type in the list.
The value “to do” appears in the Sample value box, indicating that the statements to
display an int value still need to be written.
7. Click each data type in the list. Confirm that the code for the double and bool types is
not yet implemented.
8. Click Quit to close the window and stop the program.
Control returns to the Visual Studio 2010 programming environment.
Use primitive data types in code
1. In Solution Explorer, double-click MainWindow.xaml.
The WPF form for the application appears in the Design View window.
2. Right-click anywhere in the Design View window displaying the MainWindow.xaml
form, and then click View Code.
The Code and Text Editor window opens, displaying the MainWindow.xaml.cs file.
34 Part I Introducing Microsoft Visual C# and Microsoft Visual Studio 2010
Note Remember that you can also use Solution Explorer to access the code; click
the plus sign, +, to the left of the MainWindow.xaml file, and then double-click
MainWindow.xaml.cs.
3. In the Code and Text Editor window, find the showFloatValue method.
Tip To locate an item in your project, on the Edit menu, point to Find and Replace, and
then click Quick Find. A dialog box opens, asking what you want to search for. Type the
name of the item you’re looking for, and then click Find Next. By default, the search is not
case sensitive. If you want to perform a case-sensitive search, click the plus button, +, next
to the Find Options label to display additional options, and select the Match Case check
box. If you have time, you can experiment with the other options as well.
You can also press Ctrl+F (press the Control key, and then press F) to display the Quick Find
dialog box rather than using the Edit menu. Similarly, you can press Ctrl+H to display the
Quick Replace dialog box.
As an alternative to using the Quick Find functionality, you also locate the methods in
a class by using the class members drop-down list box above the Code and Text Editor
window, on the right. The class members drop-down list box displays all the methods
in the class, together with the variables and other items that the class contains. (You
will learn more about these items in later chapters.) In the drop-down list box, click
showFloatValue(), and the cursor will move directly to the showFloatValue method in
the class.
The showFloatValue method runs when you click the float type in the list box. This
method contains the following three statements:
float variable;
variable=0.42F;
value.Text = "0.42F";
The first statement declares a variable named variable of type float.
The second statement assigns variable the value 0.42F. (The F is a type suffix specifying
that 0.42 should be treated as a float value. If you forget the F, the value 0.42 is treated
as a double and your program will not compile, because you cannot assign a value of
one type to a variable of a different type without writing additional code—C# is very
strict in this respect.)
The third statement displays the value of this variable in the value text box on the
form. This statement requires a little bit of your attention. The way in which you display
an item in a text box is to set its Text property. Notice that you access the property
of an object by using the same “dot” notation that you saw for running a method.
(Remember Console.WriteLine from Chapter 1?) The data that you put in the Text prop-
erty must be a string (a sequence of characters enclosed in double quotation marks)
and not a number. If you try to assign a number to the Text property, your program
Chapter 2 Working with Variables, Operators, and Expressions 35
will not compile. In this program, the statement simply displays the text “0.42F” in the
text box. In a real-world application, you add statements that convert the value of the
variable variable into a string and then put this into the Text property, but you need
to know a little bit more about C# and the Microsoft .NET Framework before you can
do that. (Chapter 11, “Understanding Parameter Arrays,” and Chapter 21, “Operator
Overloading,” cover data type conversions.)
4. In the Code and Text Editor window, locate the showIntValue method. It looks like this:
private void showIntValue()
{
value.Text = "to do";
}
The showIntValue method is called when you click the int type in the list box.
5. Type the following two statements at the start of the showIntValue method, on a new
line after the opening brace, as shown in bold type in the following code:
private void showIntValue()
{
int variable;
variable = 42;
value.Text = "to do";
}
6. In the original statement in this method, change the string “to do” to “42”.
The method should now look exactly like this:
private void showIntValue()
{
int variable;
variable = 42;
value.Text = "42";
}
Note If you have previous programming experience, you might be tempted to change
the third statement to
value.Text = variable;
This looks like it should display the value of variable in the value text box on the form.
However, C# performs strict type checking; text boxes can display only string values, and
variable is an int, so this statement will not compile. You will see some simple techniques
for converting between numeric and string values later in this chapter.
7. On the Debug menu, click Start Without Debugging.
The form appears again.
8. Select the int type in the Choose a data type list. Confirm that the value 42 is displayed
in the Sample value text box.
36 Part I Introducing Microsoft Visual C# and Microsoft Visual Studio 2010
9. Click Quit to close the window and return to Visual Studio.
10. In the Code and Text Editor window, find the showDoubleValue method.
11. Edit the showDoubleValue method exactly as shown in bold type in the following code:
private void showDoubleValue()
{
double variable;
variable = 0.42;
value.Text = "0.42";
}
12. In the Code and Text Editor window, locate the showBoolValue method.
13. Edit the showBoolValue method exactly as follows:
private void showBoolValue()
{
bool variable;
variable = false;
value.Text = "false";
}
14. On the Debug menu, click Start Without Debugging.
15. In the Choose a data type list, select the int, double, and bool types. In each case, verify
that the correct value is displayed in the Sample value text box.
16. Click Quit to stop the program.
Using Arithmetic Operators
C# supports the regular arithmetic operations you learned in your childhood: the plus sign
(+) for addition, the minus sign (–) for subtraction, the asterisk (*) for multiplication, and the
forward slash (/) for division. The symbols +, –, *, and / are called operators because they
“operate” on values to create new values. In the following example, the variable moneyPaid-
ToConsultant ends up holding the product of 750 (the daily rate) and 20 (the number of days
the consultant was employed):
long moneyPaidToConsultant;
moneyPaidToConsultant = 750 * 20;
Note The values that an operator operates on are called operands. In the expression 750 * 20,
the * is the operator, and 750 and 20 are the operands.
Chapter 2 Working with Variables, Operators, and Expressions 37
Operators and Types
Not all operators are applicable to all data types. The operators that you can use on a value
depend on the value’s type. For example, you can use all the arithmetic operators on values
of type char, int, long, float, double, or decimal. However, with the exception of the plus oper-
ator, +, you can’t use the arithmetic operators on values of type string or bool. So the follow-
ing statement is not allowed, because the string type does not support the minus operator
(thus, subtracting one string from another would be meaningless):
// compile-time error
Console.WriteLine("Gillingham" – "Forest Green Rovers");
You can use the + operator to concatenate string values. You need to be careful because this
can have results you might not expect. For example, the following statement writes "431" (not
"44") to the console:
Console.WriteLine("43" + "1");
Tip The .NET Framework provides a method called Int32.Parse that you can use to convert
a string value to an integer if you need to perform arithmetic computations on values held
as strings.
You should also be aware that the type of the result of an arithmetic operation depends on
the type of the operands used. For example, the value of the expression 5.0/2.0 is 2.5; the
type of both operands is double, so the type of the result is also double. (In C#, literal num-
bers with decimal points are always double, not float, to maintain as much accuracy as pos-
sible.) However, the value of the expression 5/2 is 2. In this case, the type of both operands
is int, so the type of the result is also int. C# always rounds values down in circumstances like
this. The situation gets a little more complicated if you mix the types of the operands. For
example, the expression 5/2.0 consists of an int and a double. The C# compiler detects the
mismatch and generates code that converts the int into a double before performing the op-
eration. The result of the operation is therefore a double (2.5). However, although this works,
it is considered poor practice to mix types in this way.
C# also supports one less-familiar arithmetic operator: the remainder, or modulus, operator,
which is represented by the percent sign (%). The result of x % y is the remainder after divid-
ing x by y. For example, 9 % 2 is 1 because 9 divided by 2 is 4, remainder 1.
38 Part I Introducing Microsoft Visual C# and Microsoft Visual Studio 2010
Numeric Types and Infinite Values
There are one or two other features of numbers in C# that you should be aware of.
For example, the result of dividing any number by zero is infinity, which is outside the
range of the int, long, and decimal types; consequently, evaluating an expression such
as 5/0 results in an error. However, the double and float types actually have a special
value that can represent infinity, and the value of the expression 5.0/0.0 is Infinity. The
one exception to this rule is the value of the expression 0.0/0.0. Usually, if you divide
zero by anything, the result is zero, but if you divide anything by zero the result is
infinity. The expression 0.0/0.0 results in a paradox—the value must be zero and infin-
ity at the same time. C# has another special value for this situation called NaN, which
stands for “not a number.” So if you evaluate 0.0/0.0, the result is NaN. NaN and Infinity
propagate through expressions. If you evaluate 10 + NaN, the result is NaN, and if you
evaluate 10 + Infinity, the result is Infinity. The one exception to this rule is the case
when you multiply Infinity by 0; The value of the expression Infinity * 0 is 0, although
the value of NaN * 0 is NaN.
Note If you are familiar with C or C++, you know that you can’t use the remainder operator on
float or double values in these languages. However, C# relaxes this rule. The remainder operator
is valid with all numeric types, and the result is not necessarily an integer. For example, the result
of the expression 7.0 % 2.4 is 2.2.
Examining Arithmetic Operators
The following exercise demonstrates how to use the arithmetic operators on int values.
Work with arithmetic operators
1. Open the MathsOperators project, located in the \Microsoft Press\Visual CSharp Step
By Step\Chapter 2\MathsOperators folder in your Documents folder.
2. On the Debug menu, click Start Without Debugging.
A WPF form appears on the screen.
3. Type 54 in the left operand text box.
4. Type 13 in the right operand text box.
You can now apply any of the operators to the values in the text boxes.
5. Click the – Subtraction button, and then click Calculate.
Chapter 2 Working with Variables, Operators, and Expressions 39
The text in the Expression text box changes to 54 – 13, and the value 41 appears in the
Result box, as shown in the following image:
6. Click the / Division button, and then click Calculate.
The text in the Expression text box changes to 54/13, and the value 4 appears in the
Result text box. In real life, 54/13 is 4.153846 recurring, but this is not real life; this is
C# performing integer division—when you divide one integer by another integer, the
answer you get back is an integer, as explained earlier.
7. Click the % Remainder button, and then click Calculate.
The text in the Expression text box changes to 54 % 13, and the value 2 appears
in the Result text box. This is because the remainder after dividing 54 by 13 is 2.
(54 – ((54/13) * 13)) is 2 if you do the arithmetic, rounding down to an integer at
each stage—my old math master at school would be horrified to be told that
(54/13) * 13 does not equal 54!
8. Test the other combinations of numbers and operators. When you have finished, click
Quit to return to the Visual Studio 2010 programming environment.
In the next exercise, you will take a look at the MathsOperators program code.
Examine the MathsOperators program code
1. Display the MainWindow.xaml form in the Design View window. (Double-click the file
MainWindow.xaml in Solution Explorer.)
2. On the View menu, point to Other Windows, and then click Document Outline.
The Document Outline window appears, showing the names and types of the con-
trols on the form. The Document Outline window provides a simple way to locate
and select controls on a complex WPF form. The controls are arranged in a hierarchy,
starting with the Window that constitutes the WPF form. As mentioned in the previous
40 Part I Introducing Microsoft Visual C# and Microsoft Visual Studio 2010
chapter, a WPF form actually contains a Grid control, and the other controls are placed
in this Grid. If you expand the Grid node in the Document Outline window, the other
controls appear. As you click each of the controls on the form, the name of the control
is highlighted in the Document Outline window. Similarly, if you select a control in the
Document Outline window, the corresponding control is selected in the Design View
window. If you hover the mouse over a control in the Document Outline window, an
image of the control (and any child controls that the control contains) appears.
3. On the form, click the two TextBox controls in which the user types numbers. In the
Document Outline window, verify that they are named lhsOperand and rhsOperand.
(You can see the name of a control in the parentheses to the right of the control.)
When the form runs, the Text property of each of these controls holds the values that
the user enters.
4. Toward the bottom of the form, verify that the TextBox control used to display the
expression being evaluated is named expression and that the TextBox control used to
display the result of the calculation is named result.
5. Close the Document Outline window.
6. Display the code for the MainWindow.xaml.cs file in the Code and Text Editor window.
7. In the Code and Text Editor window, locate the subtractValues method. It looks like this:
private void subtractValues()
{
int lhs = int.Parse(lhsOperand.Text);
int rhs = int.Parse(rhsOperand.Text);
int outcome;
outcome = lhs – rhs;
expression.Text = lhsOperand.Text + " – " + rhsOperand.Text;
result.Text = outcome.ToString();
}
The first statement in this method declares an int variable called lhs and initializes it
with the integer corresponding to the value typed by the user in the lhsOperand text
box. Remember that the Text property of a text box control contains a string, so you
must convert this string to an integer before you can assign it to an int variable. The int
data type provides the int.Parse method, which does precisely this.
The second statement declares an int variable called rhs and initializes it to the value in
the rhsOperand text box after converting it to an int.
The third statement declares an int variable called outcome.
The fourth statement subtracts the value of the rhs variable from the value of the lhs
variable and assigns the result to outcome.
The fifth statement concatenates three strings indicating the calculation being
performed (using the plus operator, +) and assigns the result to the expression.Text
property. This causes the string to appear in the expression text box on the form.
Chapter 2 Working with Variables, Operators, and Expressions 41
The final statement displays the result of the calculation by assigning it to the Text
property of the result text box. Remember that the Text property is a string and that
the result of the calculation is an int, so you must convert the string to an int before as-
signing it to the Text property. This is what the ToString method of the int type does.
The ToString Method
Every class in the .NET Framework has a ToString method. The purpose of ToString is to
convert an object to its string representation. In the preceding example, the ToString
method of the integer object, outcome, is used to convert the integer value of outcome
to the equivalent string value. This conversion is necessary because the value is dis-
played in the Text property of the result text box—the Text property can contain only
strings. When you create your own classes, you can define your own implementation
of the ToString method to specify how your class should be represented as a string.
You learn more about creating your own classes in Chapter 7, “Creating and Managing
Classes and Objects.”
Controlling Precedence
Precedence governs the order in which an expression’s operators are evaluated. Consider the
following expression, which uses the + and * operators:
2 + 3 * 4
This expression is potentially ambiguous; do you perform the addition first or the multiplica-
tion? The order of the operations matters because it changes the result:
n
If you perform the addition first, followed by the multiplication, the result of the
addition (2 + 3) forms the left operand of the * operator, and the result of the whole
expression is 5 * 4, which is 20.
n
If you perform the multiplication first, followed by the addition, the result of the multi-
plication (3 * 4) forms the right operand of the + operator, and the result of the whole
expression is 2 + 12, which is 14.
In C#, the multiplicative operators (*, /, and %) have precedence over the additive operators
(+ and –), so in expressions such as 2 + 3 * 4, the multiplication is performed first, followed by
the addition. The answer to 2 + 3 * 4 is therefore 14.
You can use parentheses to override precedence and force operands to bind to operators in
a different way. For example, in the following expression, the parentheses force the 2 and the
3 to bind to the + operator (making 5), and the result of this addition forms the left operand
of the * operator to produce the value 20:
(2 + 3) * 4
42 Part I Introducing Microsoft Visual C# and Microsoft Visual Studio 2010
Note The term parentheses or round brackets refers to ( ). The term braces or curly brackets
refers to { }. The term square brackets refers to [ ].
Using Associativity to Evaluate Expressions
Operator precedence is only half the story. What happens when an expression contains dif-
ferent operators that have the same precedence? This is where associativity becomes im-
portant. Associativity is the direction (left or right) in which the operands of an operator are
evaluated. Consider the following expression that uses the / and * operators:
4 / 2 * 6
This expression is still potentially ambiguous. Do you perform the division first or the multi-
plication? The precedence of both operators is the same (they are both multiplicative), but
the order in which the expression is evaluated is important because you get one of two pos-
sible results:
n
If you perform the division first, the result of the division (4/2) forms the left operand of
the * operator, and the result of the whole expression is (4/2) * 6, or 12.
n
If you perform the multiplication first, the result of the multiplication (2 * 6) forms the
right operand of the / operator, and the result of the whole expression is 4/(2 * 6), or
4/12.
In this case, the associativity of the operators determines how the expression is evaluated.
The * and / operators are both left-associative, which means that the operands are evalu-
ated from left to right. In this case, 4/2 will be evaluated before multiplying by 6, giving the
result 12.
Note As each new operator is described in subsequent chapters, its associativity is also covered.
Associativity and the Assignment Operator
In C#, the equal sign = is an operator. All operators return a value based on their operands.
The assignment operator = is no different. It takes two operands; the operand on its right
side is evaluated and then stored in the operand on its left side. The value of the assignment
operator is the value that was assigned to the left operand. For example, in the following
assignment statement, the value returned by the assignment operator is 10, which is also the
value assigned to the variable myInt:
int myInt;
myInt = 10; // value of assignment expression is 10
Chapter 2 Working with Variables, Operators, and Expressions 43
At this point, you are probably thinking that this is all very nice and esoteric, but so what?
Well, because the assignment operator returns a value, you can use this same value with
another occurrence of the assignment statement, like this:
int myInt;
int myInt2;
myInt2 = myInt = 10;
The value assigned to the variable myInt2 is the value that was assigned to myInt. The assign-
ment statement assigns the same value to both variables. This technique is very useful if you
want to initialize several variables to the same value. It makes it very clear to anyone reading
your code that all the variables must have the same value:
myInt5 = myInt4 = myInt3 = myInt2 = myInt = 10;
From this discussion, you can probably deduce that the assignment operator associates
from right to left. The rightmost assignment occurs first, and the value assigned propagates
through the variables from right to left. If any of the variables previously had a value, it is
overwritten by the value being assigned.
You should treat this construct with a little caution, however. One frequent mistake that
new C# programmers make is to try and combine this use of the assignment operator with
variable declarations, like this:
int myInt, myInt2, myInt3 = 10;
This is legal C# code (because it compiles). What it does is declare the variables myInt,
myInt2, and myInt3, and initialize myInt3 with the value 10. However, it does not initialize
myInt or myInt2. If you try and use myInt or myInt2 in an expressions such as this
myInt3 = myInt / myInt2;
the compiler generates the following errors:
Use of unassigned local variable 'myInt'
Use of unassigned local variable 'myInt2'
Incrementing and Decrementing Variables
If you want to add 1 to a variable, you can use the + operator:
count = count + 1;
However, adding 1 to a variable is so common that C# provides its own operator just for this
purpose: the ++ operator. To increment the variable count by 1, you can write the following
statement:
count++;
44 Part I Introducing Microsoft Visual C# and Microsoft Visual Studio 2010
Similarly, C# provides the –– operator that you can use to subtract 1 from a variable, like this:
count ;
The ++ and –– operators are unary operators, meaning that they take only a single operand.
They share the same precedence and left associativity as the ! unary operator, which is dis-
cussed in Chapter 4, “Using Decision Statements.”
Prefix and Postfix
The increment, ++, and decrement, ––, operators are unusual in that you can place them
either before or after the variable. Placing the operator symbol before the variable is called
the prefix form of the operator, and using the operator symbol after the variable is called the
postfix form. Here are examples:
count++; // postfix increment
++count; // prefix increment
count ; // postfix decrement
count; // prefix decrement
Whether you use the prefix or postfix form of the ++ or –– operator makes no difference
to the variable being incremented or decremented. For example, if you write count++, the
value of count increases by 1, and if you write ++count, the value of count also increases by 1.
Knowing this, you’re probably wondering why there are two ways to write the same thing. To
understand the answer, you must remember that ++ and –– are operators and that all opera-
tors are used to evaluate an expression that has a value. The value returned by count++ is the
value of count before the increment takes place, whereas the value returned by ++count is
the value of count after the increment takes place. Here is an example:
int x;
x = 42;
Console.WriteLine(x++); // x is now 43, 42 written out
x = 42;
Console.WriteLine(++x); // x is now 43, 43 written out
The way to remember which operand does what is to look at the order of the elements
(the operand and the operator) in a prefix or postfix expression. In the expression x++, the
variable x occurs first, so its value is used as the value of the expression before x is increment-
ed. In the expression ++x, the operator occurs first, so its operation is performed before the
value of x is evaluated as the result.
These operators are most commonly used in while and do statements, which are presented
in Chapter 5, “Using Compound Assignment and Iteration Statements.” If you are using the
increment and decrement operators in isolation, stick to the postfix form and be consistent.