Microsoft Visual C# 2010 Step by Step (P14) pptx
Bạn đang xem bản rút gọn của tài liệu. Xem và tải ngay bản đầy đủ của tài liệu tại đây (508.84 KB, 50 trang )
620 Part VI Building Professional Solutions with Visual Studio 2010
The outer for loop that iterates through values of the integer variable x is a prime
candidate for parallelization. You might also consider the inner loop based on the
variable i, but this loop takes more effort to parallelize because of the type of i. (The
methods in the Parallel class expect the control variable to be an integer.) Additionally,
if you have nested loops such as occur in this code, it is good practice to parallelize the
outer loops first and then test to see whether the performance of the application is suf-
ficient. If it is not, work your way through nested loops and parallelize them working
from outer to inner loops, testing the performance after modifying each one. You will
find that in many cases parallelizing outer loops has the most effect on performance,
while the effects of modifying inner loops becomes more marginal.
5. Move the code in the body of the for loop, and create a new private void method
called calculateData with this code. The calculateData method should take an integer
parameter called x and a byte array called data. Also, move the statements that declare
the local variables a, b, and c from the generateGraphData method to the start of the
calculateData method. The following code shows the generateGraphData method with
this code removed and the calculateData method (do not try and compile this code
yet):
private void generateGraphData(byte[] data)
{
for (int x = 0; x < a; x++)
{
}
}
private void calculateData(int x, byte[] data)
{
int a = pixelWidth / 2;
int b = a * a;
int c = pixelHeight / 2;
int s = x * x;
double p = Math.Sqrt(b - s);
for (double i = -p; i < p; i += 3)
{
double r = Math.Sqrt(s + i * i) / a;
double q = (r - 1) * Math.Sin(24 * r);
double y = i / 3 + (q * c);
plotXY(data, (int)(-x + (pixelWidth / 2)), (int)(y + (pixelHeight / 2)));
plotXY(data, (int)(x + (pixelWidth / 2)), (int)(y + (pixelHeight / 2)));
}
}
6. In the generateGraphData method, change the for loop to a statement that calls the
static Parallel.For method, as shown in bold here:
private void generateGraphData(byte[] data)
{
Parallel.For (0, pixelWidth / 2, (int x) => { calculateData(x, data); });
}
Chapter 27 Introducing the Task Parallel Library 621
This code is the parallel equivalent of the original for loop. It iterates through the val-
ues from 0 to pixelWidth / 2 – 1 inclusive. Each invocation runs by using a task. (Each
task might run more than one iteration.) The Parallel.For method finishes only when all
the tasks it has created complete their work. Remember that the Parallel.For method
expects the final parameter to be a method that takes a single integer parameter. It
calls this method passing the current loop index as the parameter. In this example, the
calculateData method does not match the required signature because it takes two pa-
rameters: an integer and a byte array. For this reason, the code uses a lambda expres-
sion to define an anonymous method that has the appropriate signature and that acts
as an adapter that calls the calculateData method with the correct parameters.
7. On the Debug menu, click Start Without Debugging to build and run the application.
8. Display the Windows Task Manager, and click the Performance tab if it is not currently
displayed.
9. Return to the Graph Demo window, and click Plot Graph. In the Windows Task Manager,
note the maximum value for the CPU usage while the graph is being generated. When
the graph appears in the Graph Demo window, record the time taken to generate the
graph. Repeat this action several times to get an average value.
10. Close the Graph Demo window, and minimize the Windows Task Manager.
You should notice that the application runs at a comparable speed to the previous
version that used Task objects (and possibly slightly faster, depending on the number of
CPUs you have available), and that the CPU usage peaks at 100 percent.
When Not to Use the Parallel Class
You should be aware that despite appearances and the best efforts of the Visual Studio
development team at Microsoft, the Parallel class is not magic; you cannot use it without
due consideration and just expect your applications to suddenly run significantly faster and
produce the same results. The purpose of the Parallel class is to parallelize compute-bound,
independent areas of your code.
The key phrases in the previous paragraph are compute-bound and independent. If your code
is not compute-bound, parallelizing it might not improve performance. The next exercise
shows you that you should be careful in how you determine when to use the Parallel.Invoke
construct to perform method calls in parallel.
Determine when to use Parallel.Invoke
1. Return to Visual Studio 2010, and display the GraphWindow.xaml.cs file in the Code and
Text Editor window if it is not already open.
2. Examine the calculateData method.
622 Part VI Building Professional Solutions with Visual Studio 2010
The inner for loop contains the following statements:
plotXY(data, (int)(-x + (pixelWidth / 2)), (int)(y + (pixelWidth / 2)));
plotXY(data, (int)(x + (pixelWidth / 2)), (int)(y + (pixelWidth / 2)));
These two statements set the bytes in the data array that correspond to the points
specified by the two parameters passed in. Remember that the points for the graph are
reflected around the X axis, so the plotXY method is called for the positive value of the
X coordinate and also for the negative value. These two statements look like good can-
didates for parallelization because it does not matter which one runs first, and they set
different bytes in the data array.
3. Modify these two statements, and wrap them in a Parallel.Invoke method call, as shown
next. Notice that both calls are now wrapped in lambda expressions, and that the semi-
colon at the end of the first call to plotXY is replaced with a comma and the semi-colon
at the end of the second call to plotXY has been removed because these statements are
now a list of parameters:
Parallel.Invoke(
() => plotXY(data, (int)(-x + (pixelWidth / 2)), (int)(y + (pixelWidth / 2))),
() => plotXY(data, (int)(x + (pixelWidth / 2)), (int)(y + (pixelWidth / 2)))
);
4. On the Debug menu, click Start Without Debugging to build and run the application.
5. In the Graph Demo window, click Plot Graph. Record the time taken to generate the
graph. Repeat this action several times to get an average value.
You should find, possibly unexpectedly, that the application takes significantly longer to
run. It might be up to 20 times slower than it was previously.
6. Close the Graph Demo window.
The questions you are probably asking at this point are, “What went wrong? Why did the
application slow down so much?” The answer lies in the plotXY method. If you take another
look at this method, you will see that it is very simple:
private void plotXY(byte[] data, int x, int y)
{
data[x + y * pixelWidth] = 0xFF;
}
There is very little in this method that takes any time to run, and it is definitely not a com-
pute-bound piece of code. In fact, it is so simple that the overhead of creating a task, run-
ning this task on a separate thread, and waiting for the task to complete is much greater than
the cost of running this method directly. The additional overhead might account for only a
few milliseconds each time the method is called, but you should bear in mind the number
of times that this method runs; the method call is located in a nested loop and is executed
thousands of times, so all of these small overhead costs add up. The general rule is to use
Chapter 27 Introducing the Task Parallel Library 623
Parallel.Invoke only when it is worthwhile. Reserve Parallel.Invoke for operations that are
computationally intensive.
As mentioned earlier in this chapter, the other key consideration for using the Parallel class
is that operations should be independent. For example, if you attempt to use Parallel.For to
parallelize a loop in which iterations are not independent, the results will be unpredictable.
To see what I mean, look at the following program:
using System;
using System.Threading;
using System.Threading.Tasks;
namespace ParallelLoop
{
class Program
{
private static int accumulator = 0;
static void Main(string[] args)
{
for (int i = 0; i < 100; i++)
{
AddToAccumulator(i);
}
Console.WriteLine("Accumulator is {0}", accumulator);
}
private static void AddToAccumulator(int data)
{
if ((accumulator % 2) == 0)
{
accumulator += data;
}
else
{
accumulator -= data;
}
}
}
}
This program iterates through the values from 0 to 99 and calls the AddToAccumulator
method with each value in turn. The AddToAccumulator method examines the current
value of the accumulator variable, and if it is even it adds the value of the parameter to the
accumulator variable; otherwise, it subtracts the value of the parameter. At the end of the
program, the result is displayed. You can find this application in the ParallelLoop solution,
located in the \Microsoft Press\Visual CSharp Step By Step\Chapter 27\ParallelLoop folder in
your Documents folder. If you run this program, the value output should be –100.
624 Part VI Building Professional Solutions with Visual Studio 2010
To increase the degree of parallelism in this simple application, you might be tempted to
replace the for loop in the Main method with Parallel.For, like this:
static void Main(string[] args)
{
Parallel.For (0, 100, AddToAccumulator);
Console.WriteLine("Accumulator is {0}", accumulator);
}
However, there is no guarantee that the tasks created to run the various invocations of
the AddToAccumulator method will execute in any specific sequence. (The code is also not
thread-safe because multiple threads running the tasks might attempt to modify the ac-
cumulator variable concurrently.) The value calculated by the AddToAccumulator method
depends on the sequence being maintained, so the result of this modification is that the
application might now generate different values each time it runs. In this simple case, you
might not actually see any difference in the value calculated because the AddToAccumulator
method runs very quickly and the .NET Framework might elect to run each invocation se-
quentially by using the same thread. However, if you make the following change shown in
bold to the AddToAccumulator method, you will get different results:
private static void AddToAccumulator(int data)
{
if ((accumulator % 2) == 0)
{
accumulator += data;
Thread.Sleep(10); // wait for 10 milliseconds
}
else
{
accumulator -= data;
}
}
The Thread.Sleep method simply causes the current thread to wait for the specified period
of time. This modification simulates the thread, performing additional processing and affects
the way in which the .NET Framework schedules the tasks, which now run on different
threads resulting in a different sequence.
The general rule is to use Parallel.For and Parallel.ForEach only if you can guarantee that each
iteration of the loop is independent, and test your code thoroughly. A similar consideration
applies to Parallel.Invoke; use this construct to make method calls only if they are indepen-
dent and the application does not depend on them being run in a particular sequence.
Returning a Value from a Task
So far, all the examples you have seen use a Task object to run code that performs a piece
of work but does not return a value. However, you might also want to run a method that
Chapter 27 Introducing the Task Parallel Library 625
calculates a result. The TPL includes a generic variant of the Task class, Task<TResult>, that
you can use for this purpose.
You create and run a Task<TResult> object in a similar way as a Task object. The main dif-
ference is that the method run by the Task<TResult> object returns a value, and you specify
the type of this return value as the type parameter, T, of the Task object. For example, the
method calculateValue shown in the following code example returns an integer value. To
invoke this method by using a task, you create a Task<int> object and then call the Start
method. You obtain the value returned by the method by querying the Result property of
the Task<int> object. If the task has not finished running the method and the result is not
yet available, the Result property blocks the caller. What this means is that you don’t have to
perform any synchronization yourself, and you know that when the Result property returns a
value the task has completed its work.
Task<int> calculateValueTask = new Task<int>(() => calculateValue( ));
calculateValueTask.Start(); // Invoke the calculateValue method
int calculatedData = calculateValueTask.Result; // Block until calculateValueTask completes
private int calculateValue( )
{
int someValue;
// Perform calculation and populate someValue
return someValue;
}
Of course, you can also use the StartNew method of a TaskFactory object to create a
Task<TResult> object and start it running. The next code example shows how to use
the default TaskFactory for a Task<int> object to create and run a task that invokes the
calculateValue method:
Task<int> calculateValueTask = Task<int>.Factory.StartNew(() => calculateValue( ));
To simplify your code a little (and to support tasks that return anonymous types), the
TaskFactory class provides generic overloads of the StartNew method and can infer the type
returned by the method run by a task. Additionally, the Task<TResult> class inherits from the
Task class. This means that you can rewrite the previous example like this:
Task calculateValueTask = Task.Factory.StartNew(() => calculateValue( ));
The next exercise gives a more detailed example. In this exercise, you will restructure
the GraphDemo application to use a Task<TResult> object. Although this exercise seems
a little academic, you might find the technique that it demonstrates useful in many real-
world situations.
626 Part VI Building Professional Solutions with Visual Studio 2010
Modify the GraphDemo application to use a Task<TResult> object
1. Using Visual Studio 2010, open the GraphDemo solution, located in the \Microsoft
Press\Visual CSharp Step By Step\Chapter 27\GraphDemo Using Tasks that Return
Results folder in your Documents folder.
This is a copy of the GraphDemo application that creates a set of four tasks that you
saw in an earlier exercise.
2. In Solution Explorer, in the GraphDemo project, expand the GraphWindow.xaml node,
and then double-click GraphWindow.xaml.cs to display the code for the form in the
Code and Text Editor window.
3. Locate the plotButton_Click method. This is the method that runs when the user clicks
the Plot Graph button on the form. Currently, it creates a set of Task objects to perform
the various calculations required and generate the data for the graph, and it waits for
these Task objects to complete before displaying the results in the Image control on the
form.
4. Underneath the plotButton_Click method, add a new method called getDataForGraph.
This method should take an integer parameter called dataSize and return a byte array,
as shown in the following code:
private byte[] getDataForGraph(int dataSize)
{
}
You will add code to this method to generate the data for the graph in a byte array and
return this array to the caller. The dataSize parameter specifies the size of the array.
5. Move the statement that creates the data array from the plotButton_Click method to
the getDataForGraph method as shown here in bold:
private byte[] getDataForGraph(int dataSize)
{
byte[] data = new byte[dataSize];
}
6. Move the code that creates, runs, and waits for the Task objects that populate the data
array from the plotButton_Click method to the getDataForGraph method, and add a
return statement to the end of the method that passes the data array back to the caller.
The completed code for the getDataForGraph method should look like this:
private byte[] getDataForGraph(int dataSize)
{
byte[] data = new byte[dataSize];
Task first = Task.Factory.StartNew(() => generateGraphData(data, 0, pixelWidth /
8));
Task second = Task.Factory.StartNew(() => generateGraphData(data, pixelWidth / 8,
pixelWidth / 4));
Task third = Task.Factory.StartNew(() => generateGraphData(data, pixelWidth / 4,
Chapter 27 Introducing the Task Parallel Library 627
pixelWidth * 3 / 8));
Task fourth = Task.Factory.StartNew(() => generateGraphData(data, pixelWidth * 3 /
8, pixelWidth / 2));
Task.WaitAll(first, second, third, fourth);
return data;
}
Tip You can replace the code that creates the tasks and waits for them to complete with
the following Parallel.Invoke construct:
Parallel.Invoke(
() => Task.Factory.StartNew(() => generateGraphData(data, 0, pixelWidth / 8))
() => Task.Factory.StartNew(() => generateGraphData(data, pixelWidth / 8,
pixelWidth / 4)),
() => Task.Factory.StartNew(() => generateGraphData(data, pixelWidth / 4,
pixelWidth * 3 / 8)),
() => Task.Factory.StartNew(() => generateGraphData(data, pixelWidth * 3 / 8,
pixelWidth / 2))
);
7. In the plotButton_Click method, after the statement that creates the Stopwatch
variable used to time the tasks, add the statement shown next in bold that cre-
ates a Task<byte[]> object called getDataTask and uses this object to run the
getDataForGraph method. This method returns a byte array, so the type of the task is
Task<byte []>. The StartNew method call references a lambda expression that invokes
the getDataForGraph method and passes the dataSize variable as the parameter to this
method.
private void plotButton_Click(object sender, RoutedEventArgs e)
{
Stopwatch watch = Stopwatch.StartNew();
Task<byte[]> getDataTask = Task<byte[]>.Factory.StartNew(() =>
getDataForGraph(dataSize));
}
8. After creating and starting the Task<byte []> object, add the following statements
shown in bold that examine the Result property to retrieve the data array returned by
the getDataForGraph method into a local byte array variable called data. Remember
that the Result property blocks the caller until the task has completed, so you do not
need to explicitly wait for the task to finish.
private void plotButton_Click(object sender, RoutedEventArgs e)
{
Task<byte[]> getDataTask = Task<byte[]>.Factory.StartNew(() =>
getDataForGraph(dataSize));
byte[] data = getDataTask.Result;
}
628 Part VI Building Professional Solutions with Visual Studio 2010
Note It might seem a little strange to create a task and then immediately wait for it to
complete before doing anything else because it only adds overhead to the application.
However, in the next section, you will see why this approach has been adopted.
9. Verify that the completed code for the plotButton_Click method looks like this:
private void plotButton_Click(object sender, RoutedEventArgs e)
{
if (graphBitmap == null)
{
graphBitmap = new WriteableBitmap(pixelWidth, pixelHeight, dpiX, dpiY,
PixelFormats.Gray8, null);
}
int bytesPerPixel = (graphBitmap.Format.BitsPerPixel + 7) / 8;
int stride = bytesPerPixel * pixelWidth;
int dataSize = stride * pixelHeight;
Stopwatch watch = Stopwatch.StartNew();
Task<byte[]> getDataTask = Task<byte[]>.Factory.StartNew(() =>
getDataForGraph(dataSize));
byte[] data = getDataTask.Result;
duration.Content = string.Format("Duration (ms): {0}", watch.ElapsedMilliseconds);
graphBitmap.WritePixels(new Int32Rect(0, 0, pixelWidth, pixelHeight), data,
stride, 0);
graphImage.Source = graphBitmap;
}
10. On the Debug menu, click Start Without Debugging to build and run the application.
11. In the Graph Demo window, click Plot Graph. Verify that the graph is generated as
before and that the time taken is similar to that seen previously. (The time reported
might be marginally slower because the data array is now created by the task, whereas
previously it was created before the task started running.)
12. Close the Graph Demo window.
Using Tasks and User Interface Threads Together
The section “Why Perform Multitasking by Using Parallel Processing?” at the start of this
chapter highlighted the two principal reasons for using multitasking in an application—to
improve throughput and increase responsiveness. The TPL can certainly assist in improving
throughput, but you need to be aware that using the TPL alone is not the complete solu-
tion to improving responsiveness, especially in an application that provides a graphical user
interface. In the GraphDemo application used as the basis for the exercises in this chapter,
although the time taken to generate the data for the graph is reduced by the effective use
of tasks, the application itself exhibits the classic symptoms of many GUIs that perform pro-
cessor-intensive computations—it is not responsive to user input while these computations
Chapter 27 Introducing the Task Parallel Library 629
are being performed. For example, if you run the GraphDemo application from the previous
exercise, click Plot Graph, and then try and move the Graph Demo window by clicking and
dragging the title bar, you will find that it does not move until after the various tasks used to
generate the graph have completed and the graph is displayed.
In a professional application, you should ensure that users can still use your application even
if parts of it are busy performing other tasks. This is where you need to use threads as well as
tasks.
In Chapter 23, you saw how the items that constitute the graphical user interface in a WPF
application all run on the same user interface (UI) thread. This is to ensure consistency and
safety, and it prevents two or more threads from potentially corrupting the internal data
structures used by WPF to render the user interface. Remember also that you can use the
WPF Dispatcher object to queue requests for the UI thread, and these requests can update
the user interface. The next exercise revisits the Dispatcher object and shows how you can
use it to implement a responsive solution in conjunction with tasks that ensure the best
available throughput.
Improve responsiveness in the GraphDemo application
1. Return to Visual Studio 2010, and display the GraphWindow.xaml.cs file in the Code and
Text Editor window if it is not already open.
2. Add a new method called doPlotButtonWork below the plotButton_Click method. This
method should take no parameters and not return a result. In the next few steps, you
will move the code that creates and runs the tasks that generate the data for the graph
to this method, and you will run this method on a separate thread, leaving the UI
thread free to manage user input.
private void doPlotButtonWork()
{
}
3. Move all the code except for the if statement that creates the graphBitmap object
from the plotButton_Click method to the doPlotButtonWork method. Note that some
of these statements attempt to access user interface items; you will modify these
statements to use the Dispatcher object later in this exercise. The plotButton_Click and
doPlotButtonWork methods should look like this:
private void plotButton_Click(object sender, RoutedEventArgs e)
{
if (graphBitmap == null)
{
graphBitmap = new WriteableBitmap(pixelWidth, pixelHeight, dpiX, dpiY,
PixelFormats.Gray8, null);
}
}
630 Part VI Building Professional Solutions with Visual Studio 2010
private void doPlotButtonWork()
{
int bytesPerPixel = (graphBitmap.Format.BitsPerPixel + 7) / 8;
int stride = bytesPerPixel * pixelWidth;
int dataSize = stride * pixelHeight;
Stopwatch watch = Stopwatch.StartNew();
Task<byte[]> getDataTask = Task<byte[]>.Factory.StartNew(() =>
getDataForGraph(dataSize));
byte[] data = getDataTask.Result;
duration.Content = string.Format("Duration (ms): {0}", watch.ElapsedMilliseconds);
graphBitmap.WritePixels(new Int32Rect(0, 0, pixelWidth, pixelHeight), data,
stride, 0);
graphImage.Source = graphBitmap;
}
4. In the plotButton_Click method, after the if block, create an Action delegate called
doPlotButtonWorkAction that references the doPlotButtonWork method, as shown here
in bold:
private void plotButton_Click(object sender, RoutedEventArgs e)
{
Action doPlotButtonWorkAction = new Action(doPlotButtonWork);
}
5. Call the BeginInvoke method on the doPlotButtonWorkAction delegate. The BeginInvoke
method of the Action type executes the method associated with the delegate (in this
case, the doPlotButtonWork method) on a new thread.
Note The Action type also provides the Invoke method, which runs the delegated meth-
od on the current thread. This behavior is not what we want in this case because it blocks
the user interface and prevents it from being able to respond while the method is running.
The BeginInvoke method takes parameters you can use to arrange notification when
the method finishes, as well as any data to pass to the delegated method. In this ex-
ample, you do not need to be notified when the method completes and the method
does not take any parameters, so specify a null value for these parameters as shown in
bold here:
private void plotButton_Click(object sender, RoutedEventArgs e)
{
Action doPlotButtonWorkAction = new Action(doPlotButtonWork);
doPlotButtonWorkAction.BeginInvoke(null, null);
}
Chapter 27 Introducing the Task Parallel Library 631
The code will compile at this point, but if you try and run it, it will not work correctly
when you click Plot Graph. This is because several statements in the doPlotButtonWork
method attempt to access user interface items, and this method is not running on
the UI thread. You met this issue in Chapter 23, and you also saw the solution at that
time—use the Dispatcher object for the UI thread to access UI elements. The following
steps amend these statements to use the Dispatcher object to access the user interface
items from the correct thread.
6. Add the following using statement to the list at the top of the file:
using System.Windows.Threading;
The DispatcherPriority enumeration is held in this namespace. You will use this enumer-
ation when you schedule code to run on the UI thread by using the Dispatcher object.
7. At the start of the doPlotButtonWork method, examine the statement that initializes the
bytesPerPixel variable:
private void doPlotButtonWork()
{
int bytesPerPixel = (graphBitmap.Format.BitsPerPixel + 7) / 8;
}
This statement references the graphBitmap object, which belongs to the UI thread. You
can access this object only from code running on the UI thread. Change this statement
to initialize the bytesPerPixel variable to zero, and add a statement to call the Invoke
method of the Dispatcher object, as shown in bold here:
private void doPlotButtonWork()
{
int bytesPerPixel = 0;
plotButton.Dispatcher.Invoke(new Action(() =>
{ bytesPerPixel = (graphBitmap.Format.BitsPerPixel + 7) / 8; }),
DispatcherPriority.ApplicationIdle);
}
Recall from Chapter 23 that you can access the Dispatcher object through the
Dispatcher property of any UI element. This code uses the plotButton button. The
Invoke method expects a delegate and an optional dispatcher priority. In this case,
the delegate references a lambda expression. The code in this expression runs on the
UI thread. The DispatcherPriority parameter indicates that this statement should run
only when the application is idle and there is nothing else more important going on in
the user interface (such as the user clicking a button, typing some text, or moving the
window).
632 Part VI Building Professional Solutions with Visual Studio 2010
8. Examine the final three statements in the doPlotButtonWork method. They look like
this:
private void doPlotButtonWork()
{
duration.Content = string.Format("Duration (ms): {0}", watch.ElapsedMilliseconds);
graphBitmap.WritePixels(new Int32Rect(0, 0, pixelWidth, pixelHeight), data,
stride, 0);
graphImage.Source = graphBitmap;
}
These statements reference the duration, graphBitmap, and graphImage objects, which
are all part of the user interface. Consequently, you must change these statements to
run on the UI thread.
9. Modify these statements, and run them by using the Dispatcher.Invoke method, as
shown in bold here:
private void doPlotButtonWork()
{
plotButton.Dispatcher.Invoke(new Action(() =>
{
duration.Content = string.Format("Duration (ms): {0}", watch.
ElapsedMilliseconds);
graphBitmap.WritePixels(new Int32Rect(0, 0, pixelWidth, pixelHeight), data,
stride, 0);
graphImage.Source = graphBitmap;
}), DispatcherPriority.ApplicationIdle);
}
This code converts the statements into a lambda expression wrapped in an Action
delegate, and then invokes this delegate by using the Dispatcher object.
10. On the Debug menu, click Start Without Debugging to build and run the application.
11. In the Graph Demo window, click Plot Graph and before the graph appears quickly
drag the window to another location on the screen. You should find that the window
responds immediately and does not wait for the graph to appear first.
12. Close the Graph Demo window.
Canceling Tasks and Handling Exceptions
Another common requirement of applications that perform long-running operations is the
ability to stop those operations if necessary. However, you should not simply abort a task be-
cause this could leave the data in your application in an indeterminate state. Instead, the TPL
implements a cooperative cancellation strategy. Cooperative cancellation enables a task to
Chapter 27 Introducing the Task Parallel Library 633
select a convenient point at which to stop processing and also enables it to undo any work it
has performed prior to cancellation if necessary.
The Mechanics of Cooperative Cancellation
Cooperative cancellation is based on the notion of a cancellation token. A cancellation token
is a structure that represents a request to cancel one or more tasks. The method that a task
runs should include a System.Threading.CancellationToken parameter. An application that
wants to cancel the task sets the Boolean IsCancellationRequested property of this parameter
to true. The method running in the task can query this property at various points during its
processing. If this property is set to true at any point, it knows that the application has re-
quested that the task be canceled. Also, the method knows what work it has done so far, so
it can undo any changes if necessary and then finish. Alternatively, the method can simply
ignore the request and continue running if it does not want to cancel the task.
Tip You should examine the cancellation token in a task frequently, but not so frequently that
you adversely impact the performance of the task. If possible, you should aim to check for
cancellation at least every 10 milliseconds, but no more frequently than every millisecond.
An application obtains a CancellationToken by creating a System.Threading.
CancellationTokenSource object and querying the Token property of this object. The appli-
cation can then pass this CancellationToken object as a parameter to any methods started
by tasks that the application creates and runs. If the application needs to cancel the tasks,
it calls the Cancel method of the CancellationTokenSource object. This method sets the
IsCancellationRequested property of the CancellationToken passed to all the tasks.
The following code example shows how to create a cancellation token and use it to cancel a
task. The initiateTasks method instantiates the cancellationTokenSource variable and obtains
a reference to the CancellationToken object available through this variable. The code then
creates and runs a task that executes the doWork method. Later on, the code calls the Cancel
method of the cancellation token source, which sets the cancellation token. The doWork
method queries the IsCancellationRequested property of the cancellation token. If the
property is set the method terminates; otherwise, it continues running.
public class MyApplication
{
// Method that creates and manages a task
private void initiateTasks()
{
// Create the cancellation token source and obtain a cancellation token
CancellationTokenSource cancellationTokenSource = new CancellationTokenSource();
CancellationToken cancellationToken = cancellationToken.Token;
634 Part VI Building Professional Solutions with Visual Studio 2010
// Create a task and start it running the doWork method
Task myTask = Task.Factory.StartNew(() => doWork(cancellationToken));
if ( )
{
// Cancel the task
cancellationTokenSource.Cancel();
}
}
// Method run by the task
private void doWork(CancellationToken token)
{
// If the application has set the cancellation token, finish processing
if (token.IsCancellationRequested)
{
// Tidy up and finish
return;
}
// If the task has not been canceled, continue running as normal
}
}
As well as providing a high degree of control over the cancellation processing, this approach
is scalable across any number of tasks. You can start multiple tasks and pass the same
CancellationToken object to each of them. If you call Cancel on the CancellationTokenSource
object, each task will see that the IsCancellationRequested property has been set and can
react accordingly.
You can also register a callback method with the cancellation token by using the
Register method. When an application invokes the Cancel method of the corresponding
CancellationTokenSource object, this callback runs. However, you cannot guarantee when this
method executes; it might be before or after the tasks have performed their own cancellation
processing, or even during that process.
cancellationToken,Register(doAdditionalWork);
private void doAdditionalWork()
{
// Perform additional cancellation processing
}
In the next exercise, you will add cancellation functionality to the GraphDemo application.
Chapter 27 Introducing the Task Parallel Library 635
Add cancellation functionality to the GraphDemo application
1. Using Visual Studio 2010, open the GraphDemo solution, located in the \Microsoft
Press\Visual CSharp Step By Step\Chapter 27\GraphDemo Canceling Tasks folder in
your Documents folder.
This is a completed copy of the GraphDemo application from the previous exercise that
uses tasks and threads to improve responsiveness.
2. In Solution Explorer, in the GraphDemo project, double-click GraphWindow.xaml to
display the form in the Design View window.
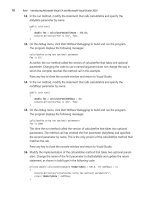
3. From the Toolbox, add a Button control to the form under the duration label. Align the
button horizontally with the plotButton button. In the Properties window, change the
Name property of the new button to cancelButton, and change the Content property to
Cancel.
The amended form should look like the following image.
4. Double-click the Cancel button to create a Click event handling method called
cancelButton_Click.
5. In the GraphWindow.xaml.cs file, locate the getDataForGraph method. This method
creates the tasks used by the application and waits for them to complete. Move the
declaration of the Task variables to the class level for the GraphWindow class as shown
in bold in the following code, and then modify the getDataForGraph method to
instantiate these variables:
public partial class GraphWindow : Window
{
private Task first, second, third, fourth;
private byte[] getDataForGraph(int dataSize)
636 Part VI Building Professional Solutions with Visual Studio 2010
{
byte[] data = new byte[dataSize];
first = Task.Factory.StartNew(() => generateGraphData(data, 0, pixelWidth /
8));
second = Task.Factory.StartNew(() => generateGraphData(data, pixelWidth / 8,
pixelWidth / 4));
third = Task.Factory.StartNew(() => generateGraphData(data, pixelWidth / 4,
pixelWidth * 3 / 8));
fourth = Task.Factory.StartNew(() => generateGraphData(data, pixelWidth * 3 /
8, pixelWidth / 2));
Task.WaitAll(first, second, third, fourth);
return data;
}
}
6. Add the following using statement to the list at the top of the file:
using System.Threading;
The types used by cooperative cancellation live in this namespace.
7. Add a CancellationTokenSource member called tokenSource to the GraphWindow class,
and initialize it to null, as shown here in bold:
public class GraphWindow : Window
{
private Task first, second, third, fourth;
private CancellationTokenSource tokenSource = null;
}
8. Find the generateGraphData method, and add a CancellationToken parameter called
token to the method definition:
private void generateGraphData(byte[] data, int partitionStart, int partitionEnd,
CancellationToken token)
{
}
9. In the generateGraphData method, at the start of the inner for loop, add the code
shown next in bold to check whether cancellation has been requested. If so, return
from the method; otherwise, continue calculating values and plotting the graph.
private void generateGraphData(byte[] data, int partitionStart, int partitionEnd,
CancellationToken token)
{
int a = pixelWidth / 2;
int b = a * a;
int c = pixelHeight / 2;
for (int x = partitionStart; x < partitionEnd; x ++)
{
int s = x * x;
Chapter 27 Introducing the Task Parallel Library 637
double p = Math.Sqrt(b - s);
for (double i = -p; i < p; i += 3)
{
if (token.IsCancellationRequested)
{
return;
}
double r = Math.Sqrt(s + i * i) / a;
double q = (r - 1) * Math.Sin(24 * r);
double y = i / 3 + (q * c);
plotXY(data, (int)(-x + (pixelWidth / 2)), (int)(y + (pixelHeight / 2)));
plotXY(data, (int)(x + (pixelWidth / 2)), (int)(y + (pixelHeight / 2)));
}
}
}
10. In the getDataForGraph method, add the following statements shown in bold that in-
stantiate the tokenSource variable and retrieve the CancellationToken object into a vari-
able called token:
private byte[] getDataForGraph(int dataSize)
{
byte[] data = new byte[dataSize];
tokenSource = new CancellationTokenSource();
CancellationToken token = tokenSource.Token;
}
11. Modify the statements that create and run the four tasks, and pass the token variable as
the final parameter to the generateGraphData method:
first = Task.Factory.StartNew(() => generateGraphData(data, 0, pixelWidth / 8,
token));
second = Task.Factory.StartNew(() => generateGraphData(data, pixelWidth / 8,
pixelWidth / 4, token));
third = Task.Factory.StartNew(() => generateGraphData(data, pixelWidth / 4, pixelWidth
* 3 / 8, token));
fourth = Task.Factory.StartNew(() => generateGraphData(data, pixelWidth * 3 / 8,
pixelWidth / 2, token));
12. In the cancelButton_Click method, add the code shown here in bold:
private void cancelButton_Click(object sender, RoutedEventArgs e)
{
if (tokenSource != null)
{
tokenSource.Cancel();
}
}
This code checks that the tokenSource variable has been instantiated; if it has been, the
code invokes the Cancel method on this variable.
13. On the Debug menu, click Start Without Debugging to build and run the application.
638 Part VI Building Professional Solutions with Visual Studio 2010
14. In the GraphDemo window, click Plot Graph, and verify that the graph appears as it did
before.
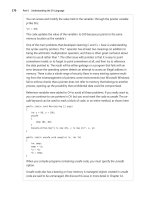
15. Click Plot Graph again, and then quickly click Cancel.
If you are quick and click Cancel before the data for the graph is generated, this ac-
tion causes the methods being run by the tasks to return. The data is not complete, so
the graph appears with holes, as shown in the following figure. (The size of the holes
depends on how quickly you clicked Cancel.)
16. Close the GraphDemo window, and return to Visual Studio.
You can determine whether a task completed or was canceled by examining the Status prop-
erty of the Task object. The Status property contains a value from the System.Threading.Tasks.
TaskStatus enumeration. The following list describes some of the status values that you might
commonly encounter (there are others):
n
Created This is the initial state of a task. It has been created but has not yet been
scheduled to run.
n
WaitingToRun The task has been scheduled but has not yet started to run.
n
Running The task is currently being executed by a thread.
n
RanToCompletion The task completed successfully without any unhandled exceptions.
n
Canceled The task was canceled before it could start running, or it acknowledged
cancellation and completed without throwing an exception.
n
Faulted The task terminated because of an exception.
Chapter 27 Introducing the Task Parallel Library 639
In the next exercise, you will attempt to report the status of each task so that you can see
when they have completed or have been canceled.
Canceling a Parallel For or ForEach Loop
The Parallel.For and Parallel.ForEach methods don’t provide you with direct access to
the Task objects that have been created. Indeed, you don’t even know how many tasks
are running—the .NET Framework uses its own heuristics to work out the optimal num-
ber to use based on the resources available and the current workload of the computer.
If you want to stop the Parallel.For or Parallel.ForEach method early, you must use a
ParallelLoopState object. The method you specify as the body of the loop must include
an additional ParallelLoopState parameter. The TPL creates a ParallelLoopState object
and passes it as this parameter into the method. The TPL uses this object to hold infor-
mation about each method invocation. The method can call the Stop method of this
object to indicate that the TPL should not attempt to perform any iterations beyond
those that have already started and finished. The following example shows the Parallel.
For method calling the doLoopWork method for each iteration. The doLoopWork meth-
od examines the iteration variable; if it is greater than 600, the method calls the Stop
method of the ParallelLoopState parameter. This causes the Parallel.For method to stop
running further iterations of the loop. (Iterations currently running might continue to
completion.)
Note Remember that the iterations in a Parallel.For loop are not run in a specific
sequence. Consequently, canceling the loop when the iteration variable has the value
600 does not guarantee that the previous 599 iterations have already run. Equally, some
iterations with values greater than 600 might already have completed.
Parallel.For(0, 1000, doLoopWork);
private void doLoopWork(int i, ParallelLoopState p)
{
if (i > 600)
{
p.Stop();
}
}
640 Part VI Building Professional Solutions with Visual Studio 2010
Display the status of each task
1. In Visual Studio, in the Code and Text Editor window, find the getDataForGraph method.
2. Add the following code shown in bold to this method. These statements generate a
string that contains the status of each task after they have finished running, and they
display a message box containing this string.
private byte[] getDataForGraph(int dataSize)
{
Task.WaitAll(first, second, third, fourth);
String message = String.Format("Status of tasks is {0}, {1}, {2}, {3}",
first.Status, second.Status, third.Status, fourth.Status);
MessageBox.Show(message);
return data;
}
3. On the Debug menu, click Start Without Debugging.
4. In the GraphDemo window, click Plot Graph but do not click Cancel. Verify that
the following message box appears, which reports that the status of the tasks is
RanToCompletion (four times), and then click OK. Note that the graph appears only
after you have clicked OK.
5. In the GraphDemo window, click Plot Graph again and then quickly click Cancel.
Surprisingly, the message box that appears still reports the status of each task as
RanToCompletion, even though the graph appears with holes. This is because although
you sent a cancellation request to each task by using the cancellation token, the
methods they were running simply returned. The .NET Framework runtime does not
know whether the tasks were actually canceled or whether they were allowed to run to
completion and simply ignored the cancellation requests.
6. Close the GraphDemo window, and return to Visual Studio.
So how do you indicate that a task has been canceled rather than allowed to run to
completion? The answer lies in the CancellationToken object passed as a parameter to the
method that the task is running. The CancellationToken class provides a method called
ThrowIfCancellationRequested. This method tests the IsCancellationRequested property of a
Chapter 27 Introducing the Task Parallel Library 641
cancellation token; if it is true, the method throws an OperationCanceledException exception
and aborts the method that the task is running.
The application that started the thread should be prepared to catch and handle this
exception, but this leads to another question. If a task terminates by throwing an ex-
ception, it actually reverts to the Faulted state. This is true, even if the exception is an
OperationCanceledException exception. A task enters the Canceled state only if it is canceled
without throwing an exception. So how does a task throw an OperationCanceledException
without it being treated as an exception?
The answer lies in the task itself. For a task to recognize that an OperationCanceledException
is the result of canceling the task in a controlled manner and not just an exception caused
by other circumstances, it has to know that the operation has actually been canceled. It can
do this only if it can examine the cancellation token. You passed this token as a parameter
to the method run by the task, but the task does not actually look at any of these param-
eters. (It considers them to be the business of the method and is not concerned with them.)
Instead, you specify the cancellation token when you create the task, either as a parameter
to the Task constructor or as a parameter to the StartNew method of the TaskFactory object
you are using to create and run tasks. The following code shows an example based on the
GraphDemo application. Notice how the token parameter is passed to the generateGraph-
Data method (as before), but also as a separate parameter to the StartNew method:
Task first = null;
tokenSource = new CancellationTokenSource();
CancellationToken token = tokenSource.Token;
first = Task.Factory.StartNew(() => generateGraphData(data, 0, pixelWidth / 8, token),
token);
Now when the method being run by the task throws an OperationCanceledException excep-
tion, the infrastructure behind the task examines the CancellationToken. If it indicates that the
task has been canceled, the infrastructure handles the OperationCanceledException excep-
tion, acknowledges the cancelation, and sets the status of the task to Canceled. The infra-
structure then throws a TaskCanceledException, which your application should be prepared to
catch. This is what you will do in the next exercise, but before you do that you need to learn a
little more about how tasks raise exceptions and how you should handle them.
Handling Task Exceptions by Using the AggregateException
Class
You have seen throughout this book that exception handling is an important element in any
commercial application. The exception handling constructs you have met so far are straight-
forward to use, and if you use them carefully it is a simple matter to trap an exception and
determine which piece of code raised it. However, when you start dividing work into multiple
642 Part VI Building Professional Solutions with Visual Studio 2010
concurrent tasks, tracking and handling exceptions becomes a more complex problem. The
issue is that different tasks might each generate their own exceptions, and you need a way
to catch and handle multiple exceptions that might be thrown concurrently. This is where the
AggregateException class comes in.
An AggregateException acts as a wrapper for a collection of exceptions. Each of the
exceptions in the collection might be thrown by different tasks. In your application, you can
catch the AggregateException exception and then iterate through this collection and perform
any necessary processing. To help you, the AggregateException class provides the Handle
method. The Handle method takes a Func<Exception, bool> delegate that references a meth-
od. The referenced method takes an Exception object as its parameter and returns a Boolean
value. When you call Handle, the referenced method runs for each exception in the collection
in the AggregateException object. The referenced method can examine the exception and
take the appropriate action. If the referenced method handles the exception, it should return
true. If not, it should return false. When the Handle method completes, any unhandled excep-
tions are bundled together into a new AggregateException and this exception is thrown; a
subsequent outer exception handler can then catch this exception and process it.
In the next exercise, you will see how to catch an AggregateException and use it to handle the
TaskCanceledException exception thrown when a task is canceled.
Acknowledge cancellation, and handle the AggregateException exception
1. In Visual Studio, display the GraphWindow.xaml file in the Design View window.
2. From the Toolbox, add a Label control to the form underneath the cancelButton button.
Align the left edge of the Label control with the left edge of the cancelButton button.
3. Using the Properties window, change the Name property of the Label control to status,
and remove the value in the Content property.
4. Return to the Code and Text Editor window displaying the GraphWindow.xaml.cs file,
and add the following method below the getDataForGraph method:
private bool handleException(Exception e)
{
if (e is TaskCanceledException)
{
plotButton.Dispatcher.Invoke(new Action(() =>
{
status.Content = "Tasks Canceled";
}), DispatcherPriority.ApplicationIdle);
return true;
}
else
{
return false;
}
}
Chapter 27 Introducing the Task Parallel Library 643
This method examines the Exception object passed in as a parameter; if it is a
TaskCanceledException object, the method displays the text “Tasks Canceled” in the
status label on the form and returns true to indicate that it has handled the exception;
otherwise, it returns false.
5. In the getDataForGraph method, modify the statements that create and run the tasks
and specify the CancellationToken object as the second parameter to the StartNew
method, as shown in bold in the following code:
private byte[] getDataForGraph(int dataSize)
{
byte[] data = new byte[dataSize];
tokenSource = new CancellationTokenSource();
CancellationToken token = tokenSource.Token;
first = Task.Factory.StartNew(() => generateGraphData(data, 0, pixelWidth / 8,
token), token);
second = Task.Factory.StartNew(() => generateGraphData(data, pixelWidth / 8,
pixelWidth / 4, token), token);
third = Task.Factory.StartNew(() => generateGraphData(data, pixelWidth / 4,
pixelWidth * 3 / 8, token), token);
fourth = Task.Factory.StartNew(() => generateGraphData(data, pixelWidth * 3 / 8,
pixelWidth / 2, token), token);
Task.WaitAll(first, second, third, fourth);
}
6. Add a try block around the statements that create and run the tasks, and wait for
them to complete. If the wait is successful, display the text “Tasks Completed” in the
status label on the form by using the Dispatcher.Invoke method. Add a catch block that
handles the AggregateException exception. In this exception handler, call the Handle
method of the AggregateException object and pass a reference to the handleException
method. The code shown next in bold highlights the changes you should make:
private byte[] getDataForGraph(int dataSize)
{
byte[] data = new byte[dataSize];
tokenSource = new CancellationTokenSource();
CancellationToken token = tokenSource.Token;
try
{
first = Task.Factory.StartNew(() => generateGraphData(data, 0, pixelWidth / 8,
token), token);
second = Task.Factory.StartNew(() => generateGraphData(data, pixelWidth / 8,
pixelWidth / 4, token), token);
third = Task.Factory.StartNew(() => generateGraphData(data, pixelWidth / 4,
pixelWidth * 3 / 8, token), token);
fourth = Task.Factory.StartNew(() => generateGraphData(data, pixelWidth * 3 /
8, pixelWidth / 2, token), token);
Task.WaitAll(first, second, third, fourth);
644 Part VI Building Professional Solutions with Visual Studio 2010
plotButton.Dispatcher.Invoke(new Action(() =>
{
status.Content = "Tasks Completed";
}), DispatcherPriority.ApplicationIdle);
}
catch (AggregateException ae)
{
ae.Handle(handleException);
}
String message = String.Format("Status of tasks is {0}, {1}, {2}, {3}",
first.Status, second.Status, third.Status, fourth.Status);
MessageBox.Show(message);
return data;
}
7. In the generateDataForGraph method, replace the if statement that examines the
IsCancellationProperty of the CancellationToken object with code that calls the
ThrowIfCancellationRequested method, as shown here in bold:
private void generateDataForGraph(byte[] data, int partitionStart, int partitionEnd,
CancellationToken token)
{
for (int x = partitionStart; x < partitionEnd; x++);
{
for (double i = -p; I < p; i += 3)
{
token.ThrowIfCancellationRequested();
}
}
}
8. On the Debug menu, click Start Without Debugging.
9. In the Graph Demo window, click Plot Graph and verify that the status of every task is
reported as RanToCompletion, the graph is generated, and the status label displays the
message “Tasks Completed”.
10. Click Plot Graph again, and then quickly click Cancel. If you are quick, the status of one
or more tasks should be reported as Canceled, the status label should display the text
“Tasks Canceled”, and the graph should be displayed with holes. If you are not quick
enough, repeat this step to try again!
11. Close the Graph Demo window, and return to Visual Studio.