Easy PHP Websites with the Zend Framework (phần 5) doc
Bạn đang xem bản rút gọn của tài liệu. Xem và tải ngay bản đầy đủ của tài liệu tại đây (1.96 MB, 50 trang )
181CHAPTER 7 • PROCESSING FORMS AND SENDING EMAIL
keep in mind you need to create the directory images/captcha (the images directory residing in your
application's public directory), or alternatively use Zend_Captcha_Image's setImgDir() method to
explicitly specify an alternative directory.
Validating the CAPTCHA
Earlier I mentioned Zend_Captcha will handle the CAPTCHA validation for you. To validate a capt-
cha, just tell Zend_Captcha_Image the name of the form variable which will be passed back to the
controller when instantiating the class. Then when the form variable is passed back, use the
isVal-
id()
method like you would any other validation class:
01 $captcha = new Zend_Captcha_Image(array('name' => 'gamer', 'wordLen' => 5));
02 $captcha->setFont("/usr/share/fonts/truetype/ttf-bitstream-vera/VeraBd.ttf");
03 $captcha->generate();
04 $this->view->captcha = $captcha->render($this->view);
05
06 if ($captcha->isValid($this->_request->getPost('gamer'))) {
07 echo "VALID!";
08 }
Conclusion
The impressive form creation, validation and ltering features offered by the Zend Framework leave
you with no excuse for not properly vetting input arriving from external sources. Be sure to take ad-
vantage of these time-saving (and perhaps job-saving) features no matter the type of website. Like-
wise, the Zend_Mail component makes sending e-mail from your website a total breeze, replacing the
tricky and error-prone strategies of the past.
The next chapter tackles another important topic: user management. In this chapter you'll learn how
implement user registration and login mechanisms, along with requisite features such as password
recovery.
Download at Boykma.Com
Download at Boykma.Com
CHAPTER 8
Managing Your User Community
One of the most compelling aspects of the Web is it’s a two-way street. A website can disseminate in-
formation almost as easily as it can ask for it, greatly expanding the attractiveness of your website in
the process by allowing users to manage proles, control site preferences such as layout and content
availability, and interact with other users. By providing similarly rich levels of interactivity to your
users, you'll build brand loyalty, encourage users to tell their friends about the site, and be able to bet-
ter respond to user needs by monitoring their behavior.
Of course, your website will require a means for tying these sorts of interactions back to a specic
user. The standard process for doing so is by prompting a registered user to login to the site using a
username and password. Once logged in, any actions the user undertakes are then associated with the
account tied to the provided username and password.
As the developer, you'll need to create mechanisms for not only allowing the user to register, but also
login, logout, and carry out various account-related tasks such password recovery and perhaps prole
management. In this chapter you'll learn all about these tasks, building several of them with the help
of the Zend_Auth framework component. You'll also learn how to create a facility for allowing users
to build an onsite network by identifying certain other users as friends.
Chapter Steps
The goals of this chapter are accomplished in ve steps:
• Step #1. Creating the Users Table and Model: Before anything can be done with user man-
agement, we'll need to create a database table and model used to manage this data. We'll kick
off this chapter by creating this table and model.
• Step #2. Registering Users: Once the model has been created we'll want to begin populating
it by providing users with an account registration form. This form will prompt users to create
an account password while providing any other registration-related information you'd like to
collect, such as the user's name and location. In this step we'll build upon what you learned in
the last chapter by creating the registration form which collects this information. You'll also
learn how to conrm registration by forcing the user to click on a link found in an e-mail sent
to his account following submission of the registration form.
• Step #3. Managing User Logins: The Zend Framework's Zend_Auth component makes it
easy to manage user logins, providing mechanisms for logging the user into the site, main-
taining the user's session as he interacts with the site, and logging the user out of the site. In
this step you'll learn how these features are implemented. You'll also learn how to create a
password recovery feature so the user can autonomously reset his password in the event it is
forgotten.
• Step #4: Displaying User Proles: Chances are you'll want to display user prole informa-
tion on the website, in addition to other site content he's compiled over time. In this section
Download at Boykma.Com
184 CHAPTER 8 • MANAGING YOUR USER COMMUNITY
you'll learn how to do this. For the purposes of demonstration this example will only include
the user's name and last login date, but it will nonetheless serve as a basis for adding addi-
tional content. In fact, in the nal step (discussed next) you'll learn how to integrate the user's
friends list into this prole page.
• Step #5. Making Friends: In the nal step of this chapter we'll create a mechanism for giv-
ing users the ability to identify other users as friends, thereby opening up the possibility for
you to build features which allow friends to track the interactions of each other on the site,
such as new additions to their game collection, or status updates regarding what game they're
currently playing.
Step #1. Creating the Users Table and Model
Before creating any of the scripts used to power the aforementioned features, it makes sense to rst
spend some time designing the table and model used to store and manage the user data. Let's start by
creating the
users table, subsequently building the Users model based on the corresponding schema.
The Users Table
The users table will store each user's key account information, namely the username and password,
prole-related information such as his name and gender, and data which will help us gather simple
usage metrics, such as when the account was created, when it was last updated, and when the user last
logged into the system. The
users table follows:
CREATE TABLE users (
id INTEGER UNSIGNED NOT NULL AUTO_INCREMENT PRIMARY KEY,
email VARCHAR(255) NOT NULL,
password CHAR(32) NOT NULL,
registration_key CHAR(32) NOT NULL,
conrmed TINYINT UNSIGNED NOT NULL DEFAULT 0,
handle VARCHAR(32) NOT NULL,
rst_name VARCHAR(255) NOT NULL,
last_name VARCHAR(255) NOT NULL,
gender ENUM('m','f') NOT NULL,
created_at DATETIME NOT NULL,
updated_at DATETIME NOT NULL,
last_login DATETIME NOT NULL
);
Given each relevant line of this listing can be easily identied by the column name rather than a line
number, I'll break from the usual protocol and instead use these names to break down the listing:
• The
id serves as the table's primary key which you learned all about in Chapter 4.
• The
email will serve double-duty not only as the vehicle for contacting each user, but also
as the account's username which the user will have to supply when logging into the system.
Some sites ask the user to contrive a nickname (for instance, I typically use wjgilmore), how-
Download at Boykma.Com
185CHAPTER 8 • MANAGING YOUR USER COMMUNITY
ever doing so requires the user to recall another piece of information when logging in. On the
contrary, an e-mail address is almost certainly instantly recallable by the user, and therefore
serves as an ideal username.
• The
password is stored as a 32-character encrypted string, created using a one-way calcula-
tion based on the user's provided password. Storing the password in this fashion makes it
impossible for an attacker to determine the original password text even if he somehow gets
his hands on the table data. Each time the user logs in, we will encrypt the provided password
and compare it to the stored encrypted string. You'll learn how this encryption process occurs
in the section "Registering a New User Account".
• The
registration_key column stores a random 32-character string used as an important
part of the registration conrmation process. You'll learn more about the role of this column
in the section "Conrming Registration".
• The
conrmed column is set once the user has conrmed his e-mail address. You'll learn more
about the role of this column in the section "Conrming Registration".
• The
handle column is used to refer to the gamer on the site and among friends. Think of the
handle as a fun nickname, much like a gamer handle used when playing the Xbox 360.
• The
rst_name and last_name columns are used as alternative ways to refer to the user
when we need to do for more formal reasons, such as when sending administrative emails.
• The
gender column identies the user's gender, and is primarily used for referring to the
proper possessive grammar when talking about for instance the user's game collection (e.g.
Jason has 14 games in his collection), but is also useful for determining website user trends.
• The
created_at, updated_at, and last_login columns are used to determine when the
user's account was created, last updated, and last logged into, respectively.
With the
users table created, it's time to create the data model we'll use to interact with it.
The Users Model
As is typical, the model used to represent the users table is actually broken into two parts: the User
model, which is used for performing actions against the users table writ large, and the UserRow
model, which is used for accessing and manipulating the users table at the row level. In this section
we'll build both models, and subsequently use them in later sections.
Creating the User Model
The Users model, displayed in Listing 8-1, includes basic functionality for accessing the users table.
Obviously as your website grows in size and complexity, so will the
Users model, however what is
presented here serves as a solid starting point. Take some time to review Listing 8-1 and thoroughly
review the explanation that follows it.
Download at Boykma.Com
186 CHAPTER 8 • MANAGING YOUR USER COMMUNITY
Listing 8-1. The User Model
01 class User extends Zend_Db_Table
02 {
03
04 /**
05 * The actual name of the table
06 *
07 * @var string
08 */
09 protected $_name = 'users';
10
11 /**
12 * The table's primary key
13 *
14 * @var string
15 */
16 protected $_primary = 'id';
17
18 /**
19 * The User class' row model
20 *
21 */
22 protected $_rowClass = 'UserRow';
23
24 /**
25 * Retrieve a user using his email address
26 *
27 * @param string $email
28 * @return UserRow
29 */
30 function getUserByEmail($email)
31 {
32 $query = $this->select();
33 $query->where('email = ?', $email);
34 $result = $this->fetchRow($query);
35 return $result;
36 }
37
38 /**
39 * Retrieve user according to his gamer handle
40 *
41 * @param string $handle
42 * @return UserRow
43 */
44 function getUserByHandle($handle)
45 {
46 $query = $this->select();
47 $query->where('handle = ?', $handle);
48 $result = $this->fetchRow($query);
Download at Boykma.Com
187CHAPTER 8 • MANAGING YOUR USER COMMUNITY
49 return $result;
50 }
51
52 /**
53 * Calculate the total number of registered users
54 *
55 * @return integer
56 */
57 function getUserCount()
58 {
59 $query = $this->select('id');
60 $result = $this->fetchAll($query);
61 return count($result);
62 }
63
64 }
The code review follows:
• Line 01 denes the model name, and extends the model from the
Zend_Db_Table class. As
mentioned in Chapter 6, I prefer to use single tense for model names (because we're referring
to one table), and plural tense for table names (because the table manages multiple entities
presumably of the same name, for instance the users table manages multiple users).
• In order to override the Zend Framework's default convention of presuming the model name
matches the table name it represents, line 09 overrides the default and species the table name
is
users rather than user.
• Line 16 identies the table's primary key.
• Line 22 identies the model used to represent the rows of the table represented by the User
model. We'll talk about this model next.
• Lines 30-36 dene the
getUserByEmail() method, which can be used to retrieve a user
when all you have available is the user's e-mail address.
• Lines 44-50 dene the
getUserByHandle() method, which can be used to retrieve a user
when all you have available is the user's e-mail address.
• Lines 57-62 dene a useful method we'll use to determine the total number of users in the
system. For instance, GameNomad uses this method to display the total number of registered
users at the top right of each page.
Creating the UserRow Model
Once a user or group of users have been identied using the User model, you can begin perform-
ing row-specic operations using the UserRow model. Listing 8-2 presents a simple example of this
model, complete with a simple method. Later in this chapter we'll add other methods to the model as
Download at Boykma.Com
188 CHAPTER 8 • MANAGING YOUR USER COMMUNITY
other features are introduced.
Listing 8-2. The UserRow model
01 class UserRow extends Zend_Db_Table_Row
02 {
03
04 /**
05 * Determines whether the user is male
06 *
07 * @return boolean
08 */
09 function isMale()
10 {
11 if ($this->gender == "m")
12 {
13 return TRUE;
14 } else {
15 return FALSE;
16 }
17 }
18
19 }
Let's breakdown some code:
• Line 01 denes the model name (
UserRow). Note this inherits from Zend_Db_Table_Row.
The Zend Framework will be able to determine the relation to the User model based on the
$_rowClass assignment made in the User model.
• Lines 09-17 dene the
isMale() function. Note how we can refer to the user's attributes us-
ing $this, although keep in mind only those attributes which were made available by way of
the query are available to the
UserRow model.
Step #2. Registering Users
To create accounts, we need to provide users with an autonomous means for registering. This is typi-
cally done in two steps, the rst providing the user with a form for creating the account, and the sec-
ond requiring the user to conrm registration by clicking on an emailed link. In this section I'll show
you how to carry out both steps.
Creating a New User Account
The registration process requires the user to complete a short form which will then be validated. If all
provided data is proved valid, it will be inserted into the database and the second step (validation) will
ensue.
Download at Boykma.Com
189CHAPTER 8 • MANAGING YOUR USER COMMUNITY
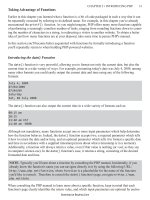
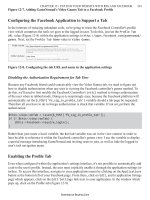
Let's begin with a screenshot (Figure 8-1) of a typical registration form, which should serve to give
you a visual idea of the data we're collecting:
Figure 8-1. A user registration form
By this point in the book the form syntax should be pretty easy to gure out, so I'll move on to where
the action's at (no pun intended), namely the
Gamers controller's register action. This action is
rather long, so rather than simply pasting in a listing which spans several pages I'll instead focus on
two select sections and leave it to you to review the entire action located in the code download. Let's
begin the review with Listing 8-2, which contains the code used to validate the form elds.
Listing 8-2. The register action's validation tasks
01 // If the form has been submitted, process it
02 if ($this->getRequest()->isPost()) {
03
04 // Valid email address?
05 if (! Zend_Validate::is($this->_request->getPost('email'),
'EmailAddress')) {
06 $this->view->errors[] = "Invalid e-mail address.";
07 } // end valid email
08
09 // E-mail cannot already exist in database
10 $user = new User();
11 $foundUser = $user->getUserByEmail($this->_request->getPost('email'));
12 if ($foundUser->id != "") {
13 $this->view->errors[] = "E-mail address already in database.";
14 }
15
16 // Handle must be between 2 and 20 characters
17 $validHandle = new Zend_Validate_StringLength(2,20);
Download at Boykma.Com
190 CHAPTER 8 • MANAGING YOUR USER COMMUNITY
18 if (! $validHandle->isValid($this->_request->getPost('handle'))) {
19 $this->view->errors[] = "Handle must be between 2 and 14 characters.";
20 } // end valid handle
21
22 // Handle must consist solely of alphanumeric characters
23 $validHandle = new Zend_Validate_Alnum();
24 if (! $validHandle->isValid($this->_request->getPost('handle'))) {
25 $this->view->errors[] = "Handle must consist of letters and numbers.";
26 } // end valid handle
27
28 // Handle cannot already exist in database
29 $foundUser = $user->getUserByHandle($this->_request->getPost('handle'));
30 if ($foundUser->id != "") {
31 $this->view->errors[] = "Handle already exists in database.";
32 }
33
34 // Password must be at least 6 characters
35 $validPswd = new Zend_Validate_StringLength(6,20);
36 if (! $validPswd->isValid($this->_request->getPost('password'))) {
37 $this->view->errors[] = "Password must be at least 6 characters.";
38 } // end valid password
39
40 // First name must not be empty
41 $validFirstName = new Zend_Validate_NotEmpty();
42 if (! $validFirstName->isValid($this->_request->getPost('rst_name'))) {
43 $this->view->errors[] = "Please provide your rst name.";
44 } // end valid rst name
45
46 // Last name must not be empty
47 $validLastName = new Zend_Validate_NotEmpty();
48 if (! $validLastName->isValid($this->_request->getPost('last_name'))) {
49 $this->view->errors[] = "Please provide your last name.";
50 } // end valid last name
51
52 // Valid gender?
53 if (! Zend_Validate::is($this->_request->getPost('gender'), 'NotEmpty')) {
54 $this->view->errors[] = "Please identify your gender.";
55 } // end valid gender
56
57 // If errors exist, prepare the form data for inclusion in the form so
58 // the user doesn't have to repopulate the data
59 if (count($this->view->errors) > 0) {
60
61 $this->view->email = $this->_request->getPost('email');
62 $this->view->handle = $this->_request->getPost('handle');
63 $this->view->rst_name = $this->_request->getPost('rst_name');
64 $this->view->last_name = $this->_request->getPost('last_name');
65 $this->view->gender = $this->_request->getPost('gender');
66
Download at Boykma.Com
191CHAPTER 8 • MANAGING YOUR USER COMMUNITY
67 // No errors, add the user to the database and send the conrmation e-mail
68 } else {
Let's review the code:
• We'll process the form once we've determined it's been posted by examining the return value
of the
$this->getRequest()->isPost() method, as shown in line 02.
• Lines 04-55 perform the series of validations, checking various facets of each form eld val-
ue. Should any of the validations fail, an appropriate message will be appended to the
$this-
>view->errors array. These aren't all standard validation procedures as dened by the Zend
Framework; we also rely upon two methods found in the User model (getUserByHandle()
and getUserByEmail()) to ensure the provided handle and e-mail address don't already exist.
• Once the validations are complete, the size of the
$this->view->errors array will be deter-
mined (line 59). If it's greater than zero, meaning errors have occurred, several view variables
will be created and assigned the values of the user's provided form eld entries, so we can
repopulate the form and save the user some time and frustration. Otherwise, if no errors have
occurred, (line 68) we'll begin the process of adding the user's registration data to the users
table and preparing and sending the conrmation e-mail.
Next, let's take a look at the second step in the register action, in which the user's registration data is
inserted into the table (Listing 8-3). In the next section, "Conrming Registration", we'll review the
nal step of the action, in which the user's conrmation e-mail is prepared and sent.
Listing 8-3. Inserting the registration data and sending the conrmation email
01 } else {
02
03 // Generate the random key used for registration conrmation
04 $registrationKey = $this->generate_random_string();
05
06 // Prepare the data array for database insertion
07 $data = array (
08 'email' => $this->_request->getPost('email'),
09 'password' => md5($this->_request->getPost('password')),
10 'registration_key' => $registrationKey,
11 'handle' => $this->_request->getPost('handle'),
12 'rst_name' => $this->_request->getPost('rst_name'),
13 'last_name' => $this->_request->getPost('last_name'),
14 'gender' => $this->_request->getPost('gender'),
15 'created_at' => date('Y-m-d H:i:s'),
16 'updated_at' => date('Y-m-d H:i:s'),
17 'last_login' => date('Y-m-d H:i:s')
18 );
19
20 // Insert the registration data into the database
21 $user = new User();
22 $user->insert($data);
Download at Boykma.Com
192 CHAPTER 8 • MANAGING YOUR USER COMMUNITY
Let's review the code:
• Line 01 continues where we left off in Listing 8-2 (reproducing line 68), inserting the user's
registration data into the users table and sending the conrmation e-mail. Line 04 creates the
random string (how this is done is covered in the next section) used to identify the user during
the conrmation process.
• Lines 07-18 create an array containing the user data which will subsequently be inserted into
users table. Note how the password is encrypted using PHP's
md5() function, which converts
the provided password into a 32-character string which cannot be reverted back to the origi-
nal value. When logging the user into the system we'll also encrypt the provided password
and compare it to the value stored in the password column. We'll also auto-assign the current
timestamp to the created_at, updated_at, and last_login columns.
• Lines 21-22 complete the insertion process by inserting the array into the
users table.
Once the user's registration data has been saved to the database, it's time to prepare and send the con-
rmation e-mail. This nal step of the process is covered in the next section.
Conrming Registration
To combat spammers and individuals who attempt to potentially manipulate the website by register-
ing multiple accounts, it's a good idea to require the user to conrm registration by verifying his pro-
vided e-mail is valid. You can do this by sending a conrmation e-mail to the user's account following
submission of the form. You already learned how accomplish the majority of this task in Chapter 7,
however there are a few other steps to the task making coverage of this topic a worthwhile endeavor.
The conrmation process is typically carried out by asking the user to click on a link found in the
conrmation e-mail. This link will include a unique key which was generated at the moment of reg-
istration and associated with that user by storing it in the
registration_key column of the users
table. To generate the random key, add the following private method to your
Gamers controller:
01 /**
02 * Generate a unique random string
03 *
04 * @param int $length Length of string to be generated
05 * @return string $str Random string
06 */
07 private function generate_random_string($length=32)
08 {
09 // Allowable random string characters
10 $seeds = 'abcdefghijklmnopqrstuvwxyz0123456789';
11
12 // Generate the random string
13 $str = '';
14 $count = strlen($seeds);
15 for ($i = 0; $length > $i; $i++)
16 {
Download at Boykma.Com
193CHAPTER 8 • MANAGING YOUR USER COMMUNITY
17 $str .= $seeds[mt_rand(0, $count - 1)];
18 }
19
20 return $str;
21 }
The code breakdown follows:
• Line 07 denes the private method, setting a default length of the randomly generated string
to 32 characters.
• Line 10 denes the set of allowable characters which can appear in the string
• Lines 15-18 build the random string, using the
mt_rand() function to randomly choose an
integer between 0 and 35, which is then used to retrieve a character located in that offset posi-
tion of the $seeds string.
As you saw earlier in this section, we'll call this method when inserting the newly registered user's
record into the database, adding the random string to the
registration_key column. Following that,
we'll e-mail the user:
01 try {
02 // Create a new mail object
03 $mail = new Zend_Mail();
04
05 $mail->setFrom($this->cong->email->from_admin);
06 $mail->addTo($this->_request->getPost('email'),
07 "{$this->_request->getPost('rst_name')}
08 {$this->_request->getPost('last_name')}");
09 $mail->setSubject('GameNomad: Please conrm your registration');
10
11 include "_email-conrm-registration.phtml";
12
13 $mail->setBodyText($email);
14 $mail->send();
15
16 $this->view->success = 1;
17 } catch (Exception $e) {
18 $this->view->errors[] = "We were unable to send your conrmation
e-mail. Please contact {$this->cong->email->support}.";
19 }
Per usual, let's review the code:
• Lines 03 through 09 congure the e-mail, setting the sender and recipient addresses along
with an e-mail subject.
• Line 11 pulls the registration e-mail text into the script. I'll show you what this le looks like
in a moment.
Download at Boykma.Com
194 CHAPTER 8 • MANAGING YOUR USER COMMUNITY
• Line13 adds the e-mail text to the prepared e-mail. Notice it's using an $email variable which
isn't otherwise found in the script. This is because that variable is found in the included le, _
email-conrm-registration.phtml
. As mentioned, in a moment you'll understand exactly
what's being done to make this possible.
• Line 14 sends the e-mail and sets the success ag accordingly. If an error occurs, the errors
array is set.
I mentioned the e-mail body a few times during the code breakdown.
01 <?php
02
03 $email = <<< email
04 Dear {$this->_request->getPost('rst_name')},
05
06 Welcome to the GameNomad community! To conrm your e-mail address, click
07 on the following URL:
08
09 {$this->cong->website->url}/gamers/verify/key/{$registrationKey}
10
11 Questions? Comments? Contact us at {$this->cong->email->support}!
12
13 Thank you,
14 The GameNomad Team
15 email;
16
17 ?>
The code summary follows:
• Because this code is included into the register action, any variables found in the string as-
signed to
$email will be interpolated in the scope of the action. Therefore the variables found
on lines 04, 09, and 11 will all be converted to their appropriate values before being assigned
along with the rest of the string to the
$email variable.
Once the user receives the e-mail, he can click on the conrmation link, which would look very simi-
lar to this:
/>
As you can surmise by this URL, we'll need to add another action to the
Gamers controller named
verify. This action will accept as input a parameter named key which contains the registration key:
01 /**
02 * Completes the registration process by validating a user's email address
03 *
04 */
05 public function verifyAction() {
06
07 $this->view->pageTitle = "Complete the Registration Process";
Download at Boykma.Com
195CHAPTER 8 • MANAGING YOUR USER COMMUNITY
08
09 // Retrieve the key from the URL
10 $registrationKey = $this->_request->getParam('key');
11
12 // Identify the user associated with this key
13 $user = new User();
14 $query = $user->select()->where('registration_key = ?', $registrationKey);
15 $result = $user->fetchRow($query);
16
17 // If the user has been located, set the conrmed column.
18 if(count($result) == 1) {
19 $result->conrmed = 1;
20 $result->save();
21 $this->view->success = 1;
22 $this->view->rstName = $result->rst_name;
23 } else {
24 $this->view->errors = "We were unable to locate your registration key.";
25 }
26
27 }
Let's review the code:
• Line 10 retrieves the registration key from the URL. This key is subsequently used on line 14
to retrieve the user record from the
users table.
• If the record is located (line 18), we'll set the record's conrmed attribute (line 19) and save
the record back to the database (line 20).
• We'll subsequently set the usual success ag (line 21), and retrieve the user's rst name (line
22) so it can be used within the view message.
The corresponding view (
verify.phtml) looks like this:
<h1>Complete the Registration Process</h1>
<?php if (count($this->errors) > 0) { ?>
<div id="errors">
Errors were encountered while creating your account:<br />
<?= $this->Errors($this->errors); ?>
</div>
<?php } ?>
<?php if ($this->success == 1) { ?>
<p>
Congratulations <?= $this->rstName; ?>, your e-mail address has
been veried! <a href="/gamers/login">Login to your account</a>
and begin building your game collection.
Download at Boykma.Com
196 CHAPTER 8 • MANAGING YOUR USER COMMUNITY
</p>
<?php } ?>
Step #3. Managing User Logins
Once the user has conrmed registration, he's free to begin logging into the site and take advantage of
any special features afforded to registered users. In this section you'll learn how to create the interface
and action used to log the user into and out of your website, as well as create a password recovery
tool in the event the user forgets it.
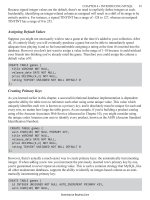
Logging the User into the Website
To login to the website, the user must provide an e-mail address and password, as shown in Figure
8-2. This form points to the Gamers controller's login interface, which will be dissected in this section.
Figure 8-2. The login interface
The
login action is responsible for comparing the provided e-mail address and password with those
found in the users table. While this is easily done using a simple table query, other more complex
issues remain. Notably, if a match is found, we need to establish a session which will keep the user
logged into the site as he navigates from one page to the next.
Also, while a database is a common solution for managing user accounts, it's just one of many popu-
lar authentication backends; you might have heard of, or even relied upon, solutions such as LDAP,
Open ID, or even a simple text le for user account management. To accommodate both the gory de-
tails surrounding session management and the number of account backend solutions, the Zend devel-
opers created the Zend_Auth authentication component. We'll use this component to build the features
introduced in this section.
Listing 8-4 presents the login action. Take some time to review the code, and carefully read the ensu-
ing breakdown.
Download at Boykma.Com
197CHAPTER 8 • MANAGING YOUR USER COMMUNITY
Listing 8-4. The login action
01 public function loginAction()
02 {
03 if ($this->getRequest()->isPost()) {
04
05 // Retrieve the provided email address and password
06 $email = $this->_request->getPost('email');
07 $password = $this->_request->getPost('password');
08
09 // Make sure the email and password were provided
10 if (empty($email) || empty($password)) {
11 $this->view->errors[] = "Provide e-mail address and password.";
12 } else {
13
14 // Identify the authentication adapter
15 $authAdapter = new Zend_Auth_Adapter_DbTable($this->db);
16
17 // Identify the table where the user data is stored
18 $authAdapter->setTableName('users');
19
20 // Identify the column used to store the "username"
21 $authAdapter->setIdentityColumn('email');
22
23 // Identify the column used to store the password
24 $authAdapter->setCredentialColumn('password');
25
26 // How is the password stored?
27 $authAdapter->setCredentialTreatment('MD5(?)');
28
29 // Pass the provided information to the adapter
30 $authAdapter->setIdentity($email);
31 $authAdapter->setCredential($password);
32
33 $auth = Zend_Auth::getInstance();
34 $result = $auth->authenticate($authAdapter);
35
36 // Did the participant successfully login?
37 if ($result->isValid()) {
38
39 // Retrieve the user so can update the login timestamp
40 $user = new User();
41 $updateLogin = $user->getUserByEmail($email);
42
43 if ($updateLogin->conrmed == 1) {
44
45 // Update the login timestamp and save the row
46 $updateLogin->last_login = date('Y-m-d H:i:s');
47 $updateLogin->save();
48
Download at Boykma.Com
198 CHAPTER 8 • MANAGING YOUR USER COMMUNITY
49 // Redirect the user to the index page
50 $this->_redirect('/');
51
52 } else {
53
54 $this->view->errors[] = "The e-mail address associated
with this account has not been conrmed.";
56
57 }
58
59 } else {
60 $this->view->valid = 0;
61 $this->view->errors[] = "Login failed.";
62 }
63
64 }
65
66 }
67 }
Let's review the code:
• Lines 06-07 store the provided e-mail address and password in more accessible variables.
• Line 10 performs a quick check to determine whether the user mistakenly omitted either the
e-mail address or password. If not the action moves on to the authentication verication step.
• Line 15 identies the type of authentication adapter we'll be using, in this case a database.
Notice the database handle is being passed to the adapter (
$this->db). This handle is located
in the controller's init() method, as you learned is a commonplace strategy in Chapter 5.
• Line 18 identies the name of the table used to store the user account information.
• Lines 21 and 24 identify the column names used to store the identity, or username (in our case
the e-mail address), and the password.
• Line 27 denes the encryption scheme used to encode the password. This works like a pre-
pared statement; you could substitute
MD5() for any supported PHP function, although MD5()
is recommended.
• Line 33 invokes the Zend_Auth class in a special way. Instead of using the
new operator, we
use getInstance() to make sure there's only ever one instance of the class available to the
script; if there isn't, getInstance() will create one, otherwise it will use the one already
instantiated. This is known as the Singleton strategy (or pattern).
• Line 34 uses the newly created object to authenticate the user, passing in the adapter informa-
tion. If the e-mail address and password match a pair found in the
users table (line 37), lines
38 through 58 carry out various custom tasks such as updating the user's last_login column
and redirecting the user to the index page.
Download at Boykma.Com
199CHAPTER 8 • MANAGING YOUR USER COMMUNITY
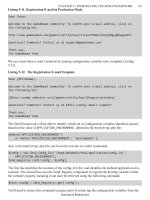
In this last bullet point I mentioned we're redirecting the user to the index page. While I prefer to do
this for reasons of expediency, chances are you'll want to offer some indication to the user that he has
indeed successfully logged in. For instance, Figure 8-3 presents two screenshots indicating how the
GameNomad website depicts a user's login status.
Figure 8-3. Determining the user's login status
You can easily determine the user's login status using the Zend_Auth class'
hasIdentity() and
getIdentity() methods, as is demonstrated below. I place this snippet in the init() method of
controllers where I'd like to ascertain this status, setting a
$user variable intended for access within
the view scope:
if (Zend_Auth::getInstance()->hasIdentity()) {
$user = new User();
$this->view->user = $user->getUserByEmail(
Zend_Auth::getInstance()->getIdentity());
} else {
$this->view->user = "";
}
Within the view scope, you can then simply refer to the
$user variable, determining whether it's been
set:
<?php if (! $this->user) { ?>
<a href="/gamers/register">Register</a> | <a href="/gamers/login">Login</a>
<?php } else { ?>
Hello, <?php echo $this->user->handle; ?> | <a href="/gamers/logout">Logout</a>
<?php } ?>
This example's reference to a logout feature brings us to the next section which shows you how to do
exactly that: log a user out of the website.
Logging the User Out of the Website
Most users will prefer to maintain their session for reasons of convenience, allowing them to auto-
matically login upon each return to the site. However, because many users login from insecure loca-
tions such as a library or internet cafe, you'll need to provide an explicit means for logging out of the
system. To do so, create a logout action within the Gamers controller, shown in Listing 8-5.
Download at Boykma.Com
200 CHAPTER 8 • MANAGING YOUR USER COMMUNITY
Listing 8-5. The logout action
01 /**
02 * Logs the user out of the application
03 *
04 */
05 public function logoutAction()
06 {
07 Zend_Auth::getInstance()->clearIdentity();
08 $this->_redirect('/');
09 }
This action will log the user out of the application by rst deleting the session (line 07) and then
redirecting the user to the website's index page. Any subsequent attempts to access pages requiring
authentication will be denied until the user logs in anew.
Note you won't need a corresponding view for the
logout action, because the user is immediately
redirected to the home page.
Resetting the User's Password
Over time users have devised innumerable strategies in an attempt to recall the often dozens of user
passwords they're required to create and manage in order to perform their daily online activities.
Inevitably though, a user will eventually forget a password, barring his irresponsible use of the same
password with every account. To minimize the user's frustration when the inevitable does occur, your
site should have a password recovery feature which allows the user to easily reset and recover the
new password. Neglecting to include this feature will ultimately result in users contacting you with
requests to reset the password for them, creating a new and therefore redundant account, or worst of
all, quitting coming to your site altogether out of frustration. Fortunately, creating this feature is easy!
VIDEO. Recovering Passwords with Zend_Auth
The Zend_Auth component makes managing user registrations and logs very easy, but the process
of recovering passwords is often a bit more confusing. This video discusses the factors involved
in recovering user passwords, and showing you how to implement this feature using Zend_Auth.
Watch the video at />Because for security purposes the user's chosen password has been encrypted using a one-way
algorithm, there is no way to simply retrieve and send it to the user. Therefore we'll need to create a
solution for allowing the user to explicitly reset the password. In order to do so securely, the user will
need to verify his identity either by responding to a personal question which presumably only he'd
know the answer to, clicking on a password reset link sent to his e-mail address, or perhaps some
combination of the two approaches, as is often seen when dealing with particularly sensitive data.
Personally I think simply requiring the user to click on e-mailed link which initiates the password
recovery process is more than sufce for most situations, so for the purposes of this exercise we'll
implement the feature in this fashion.
Download at Boykma.Com
201CHAPTER 8 • MANAGING YOUR USER COMMUNITY
Initiating the Password Recovery Process
Should the user forget his password, he'll need a means for initiating the recovery process. The easiest
way to do so is to simply ask the user to provide his username (in our case, his e-mail address). After
verifying this username exists in the user table, you can generate a random key (using the same gen-
erate_random_string()
method used to create the registration conrmation key) and send that key
to the user in the same fashion we used to conrm a user's registration. For instance, the initial step in
GameNomad's password recovery process is shown in Figure 8-4.
Figure 8-4. Initiating the password recovery process
Once the user's e-mail address has been located in the
users table, a random string is generated, at-
tached to the user's record (I typically just reuse the registration_key eld since it serves no other
purpose following registration conrmation), and an e-mail is sent to the user in the very same fash-
ion in which was used for registration conrmation. The password recovery URL looks like this:
/>
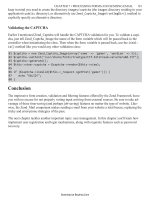
Once clicked, the user will be taken to the reset action, which will begin by prompting the user to
choose and conrm a new password, as shown in Figure 8-5.
Figure 8-5. Prompting the user to reset his password
The
reset action handles the display of the password reset form as well as carries out the process of
updating the user's account to reect the new password. It's presented next (Listing 8-6), followed by
a breakdown of the relevant code.
Listing 8-6. Resetting the user's password
01 /**
02 * Completes password recovery process
03 */
04
Download at Boykma.Com
202 CHAPTER 8 • MANAGING YOUR USER COMMUNITY
05 public function resetAction()
06 {
07
08 $this->view->pageTitle = "Reset your password";
09
10 // If the form has been posted, reset the password
11 if ($this->getRequest()->isPost()) {
12
13 // Password must be at least 6 characters
14 $valid_pswd = new Zend_Validate_StringLength(6,20);
15 if (! $valid_pswd->isValid($this->_request->getPost('password'))) {
16 $this->view->errors[] = "Password must be at least 6 characters.";
17 } // end valid password
18
19 if ($this->_request->getPost('password') !=
20 $this->_request->getPost('password2')) {
21 $this->view->errors[] = "Your passwords do not match.";
22 }
23
24 // No errors, so update the password
25 if (count($this->view->errors) == 0) {
26
27 $user = new User();
28 $query = $user->select()->where('registration_key = ?',
29 $this->_request->getPost('key'));
30 $result = $user->fetchRow($query);
31
32 if (count($result) == 1) {
33 $result->password = md5($this->_request->getPost('password'));
34 $result->save();
35 $this->view->updated = 1;
36 }
37
38 } else {
39 $this->view->success = 1;
40 $this->view->key = $this->_request->getPost('key');
41 }
42
43 // User has clicked the emailed password recovery link. Find the user
44 // using the recovery key, and prepare the password reset form
45 } else {
46
47 $recoveryKey = $this->_request->getParam('key');
48
49 $user = new User();
50 $query = $user->select()->where('registration_key = ?', $recoveryKey);
51
52 $result = $user->fetchRow($query);
53
Download at Boykma.Com
203CHAPTER 8 • MANAGING YOUR USER COMMUNITY
54 if(count($result)) {
55 $result->save();
56 $this->view->success = 1;
57 $this->view->key = $recoveryKey;
58 } else {
59 $this->view->errors[] = "Unable to locate password recovery key.";
60 }
61
62 }
63 }
Let's review some code:
• If the form has been posted, lines 13-22 will perform two validations, ensuring the provided
password is of a length between six and twenty characters, and also making sure the password
and conrmation password match.
• If validation is successful, lines 27-30 retrieve the user's row by looking up the registration
key. If it's located, lines 32-36 perform the password update, making sure the provided pass-
word is rst hashed using the
md5() function before saving the password to the database.
• Lines 45-63 execute if the user is retrieving the form for the rst time (presumably by way
of clicking on the link found in the password recovery e-mail). Lines 50-52 use the provided
recovery key to determine whether the key exists in the database. If so, the form is presented.
Otherwise, an error message is displayed.
Step #4. Displaying User Proles
Most, if not all social network driven sites provide users with the ability to view at least some part
of the other registered users' proles. Of course, you might limit the display of certain parts of the
proles to just the user's friends (discussed in the next step), but attributes such as each user's rst and
last name, gender, and time of last login seem to be fair game.
You'll also want to provide users with an easy way to point others to their prole. One easy way is by
using an easily recallable URL which includes the user's gaming handle, such as:
/>
By taking advantage of the Gamers controller's index action you could even cut the URL down to
just:
/>
Using this sort of approach, retrieving a user's prole is trivial; just retrieve the handle from the URL
and use the User model's getUserByHandle() method to retrieve the user. The Gamers controller's
prole action demonstrates how this is done:
Download at Boykma.Com
204 CHAPTER 8 • MANAGING YOUR USER COMMUNITY
public function proleAction()
{
$handle = $this->_request->getParam('handle');
$this->view->pageTitle = "Gamer Prole: {$handle}";
$user = new User();
$this->view->gamer = $user->getUserByHandle($handle);
if ($this->view->gamer->id == "") {
$this->view->errors[] = "This user does not exist.";
}
}
The corresponding prole view either outputs an error if the provided user handle does not exist, or
outputs some basic prole information, including the user's gaming handle, date of account creation,
and the last time the user logged into the site:
<?php if (count($this->errors) > 0) { ?>
<div id="errors">
Errors were encountered while searching for this user:<br />
<?php echo $this->Errors($this->errors); ?>
</div><br />
<?php } else { ?>
<p>
The user <b><?= $this->escape($this->gamer->handle); ?></b> has been a member
since <b><?= date('F d, Y', strtotime($this->gamer->created_at)); ?></b>,
and last logged in on
<b><?= date('F d, Y @ h:i:s', strtotime($this->gamer->last_login)); ?></b>.
</p>
<?php } ?>
Step #5. Making Friends
In this fth and nal step of the chapter, we'll discuss one of the fundamental aspects of any website
sporting a social slant: connecting users. By granting users the ability to connect with their friends,
we can start offering an abundant array of new and interesting social features, such as knowing when
your friends are also online and viewing restricted content only available to a user's network. Integrat-
ing the basic framework for implementing these sorts of features is easier than you might think!
To begin, we need a way to map these connections. But for starters, how are the connections initiated
in the rst place? It wouldn't be acceptable to allow users to automatically add friends to their list; in-
stead, one user would have to invite another to join his network. This is done in a manner very similar
to that already used in this chapter to conrm user registration and change a password: by generating
Download at Boykma.Com
205CHAPTER 8 • MANAGING YOUR USER COMMUNITY
a unique key which is attached to an invitation. The user invites a user by initiating a sequence of
events which creates an invitation, generates a unique ID, and mails the invitation to the prospective
friend-in-question. While you're by now familiar enough with this process that I won't go into it anew
here, it is worth showing the invitations database table (Listing 8-7) and corresponding Invita-
tion
model (Listing 8-8) here. Furthermore, in the interests of space I'll only include the method
bodies found in the
Invitation class; based on the method names alone you'll be able to easily
identify their purpose. Of course, if you'd like to review the actual code you'll nd it in its entirety in
the code download.
Listing 8-7. The invitations database table
CREATE TABLE invitations (
id INTEGER UNSIGNED NOT NULL AUTO_INCREMENT PRIMARY KEY,
created_on TIMESTAMP NOT NULL,
invitation_key CHAR(32) NOT NULL,
inviter_id INTEGER UNSIGNED NOT NULL,
invitee_id INTEGER UNSIGNED NOT NULL
);
The code review follows:
• The
created_on column identies the time in which the invitation was created. You might
track this information in order to periodically delete invitations which have been outstanding
for a long period of time.
• The
invitation_key is the 32 character random string generated in the same fashion as the
other random keys in this chapter. It's used to uniquely and securely identify the invitation.
• The
inviter_id is the primary key assigned to the user who is inviting the user to join his
network.
• The
invitee_id is the primary key assigned to the user who is being invited to join the
inviter's network.
Next let's take a look at the
Invitation model.
Listing 8-8. The Invitation model
01 class Invitation extends Zend_Db_Table_Abstract
02 {
03
04 protected $_name = 'invitations';
05 protected $_primary = 'id';
06
07 protected $_referenceMap = array (
08 'Inviter' => array (
09 'columns' => array('inviter_id'),
10 'refTableClass' => 'User'
11 ),
12 'Invitee' => array (
Download at Boykma.Com