Học php, mysql và javascript - p 20 ppt
Bạn đang xem bản rút gọn của tài liệu. Xem và tải ngay bản đầy đủ của tài liệu tại đây (1.68 MB, 10 trang )
one with a possible range from a negative value, through zero, to a positive one, and
an unsigned one has a value ranging from zero to a positive one. They can both hold
the same number of values—just picture a signed number as being shifted halfway to
the left so that half its values are negative and half are positive. Note that floating-point
values (of any precision) may only be signed.
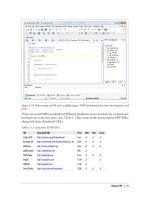
Table 8-10. MySQL’s numeric data types
Data type Bytes used Minimum value (Signed/Unsigned) Maximum value (Signed/Unsigned)
TINYINT 1 −128
0
127
255
SMALLINT 2 −32768
0
32767
65535
MEDIUMINT 3 −8388608
0
8388607
16777215
INT or INTEGER 4 −2147483648
0
2147483647
4294967295
BIGINT 8 −9223372036854775808
0
9223372036854775807
18446744073709551615
FLOAT 4 −3.402823466E+38
(no unsigned)
3.402823466E+38
(no unsigned)
DOUBLE or REAL 8 −1.7976931348623157E+308
(no unsigned)
1.7976931348623157E+308
(no unsigned)
To specify whether a data type is signed or unsigned, use the UNSIGNED qualifier. The
following example creates a table called tablename with a field in it called fieldname of
the data type UNSIGNED INTEGER:
CREATE TABLE tablename (fieldname INT UNSIGNED);
When creating a numeric field, you can also pass an optional number as a parameter,
like this:
CREATE TABLE tablename (fieldname INT(4));
But you must remember that, unlike BINARY and CHAR data types, this parameter does
not indicate the number of bytes of storage to use. It may seem counterintuitive, but
what the number actually represents is the display width of the data in the field when
it is retrieved. It is commonly used with the ZEROFILL qualifier like this:
CREATE TABLE tablename (fieldname INT(4) ZEROFILL);
What this does is cause any numbers with a width of less than four characters to be
padded with one or more zeros, sufficient to make the display width of the field four
Accessing MySQL via the Command Line | 171
characters long. When a field is already of the specified width or greater no padding
takes place.
DATE and TIME
The main remaining data types supported by MySQL relate to the date and time and
can be seen in Table 8-11.
Table 8-11. MySQL’s DATE and TIME data types
Data type Time/date format
DATETIME '0000-00-00 00:00:00'
DATE '0000-00-00'
TIMESTAMP '0000-00-00 00:00:00'
TIME '00:00:00'
YEAR 0000 (Only years 0000 and 1901–2155)
The DATETIME and TIMESTAMP data types display the same way. The main difference is
that TIMESTAMP has a very narrow range (from the years 1970 through 2037), whereas
DATETIME will hold just about any date you’re likely to specify, unless you’re interested
in ancient history or science fiction.
TIMESTAMP is useful, however, because you can let MySQL set the value for you. If you
don’t specify the value when adding a row, the current time is automatically inserted.
You can also have MySQL update a TIMESTAMP column each time you change a row.
The AUTO_INCREMENT data type
Sometimes you need to ensure that every row in your database is guaranteed to be
unique. You could do this in your program by carefully checking the data you enter
and making sure that there is at least one value that differs in any two rows, but this
approach is error-prone and works only in certain circumstances. In the classics table,
for instance, an author may appear multiple times. Likewise, the year of publication
will also be frequently duplicated, and so on. It would be hard to guarantee that you
have no duplicate rows.
The general solution is to use an extra row just for this purpose. In a while, we’ll look
at using a publication’s ISBN (International Standard Book Number), but first I’d like
to introduce the AUTO_INCREMENT data type.
As its name implies, a column given this data type will set the value of its contents to
that of the column entry in the previously inserted row, plus 1. Example 8-5 shows how
to add a new column called id to the table classics with auto-incrementing:
Example 8-5. Adding the auto-incrementing column id
ALTER TABLE classics ADD id INT UNSIGNED NOT NULL AUTO_INCREMENT KEY;
172 | Chapter 8: Introduction to MySQL
This is your introduction to the ALTER command, which is very similar to CREATE.
ALTER operates on an existing table, and can add, change, or delete columns. Our ex-
ample adds a column named id with the following characteristics:
INT UNSIGNED
Makes the column take an integer large enough for you to store more than 4 billion
records in the table.
NOT NULL
Ensures that every column has a value. Many programmers use NULL in a field to
indicate that the field doesn’t have any value. But that would allow duplicates,
which would violate the whole reason for this column’s existence. So we disallow
NULL values.
AUTO_INCREMENT
Causes MySQL to set a unique value for this column in every row, as described
earlier. We don’t really have control over the value that this column will take in
each row, but we don’t care: all we care about is that we are guaranteed a unique
value.
KEY
An auto-increment column is useful as a key, because you will tend to search
for rows based on this column. This will be explained in the section “In-
dexes” on page 177.
Each entry in the column id will now have a unique number, with the first starting at
1 and the others counting upward from there. And whenever a new row is inserted, its
id column will automatically be given the next number in sequence.
Rather than applying the column retroactively, you could have included it by issuing
the CREATE command in slightly different format. In that case, the command in Exam-
ple 8-3 would be replaced with Example 8-6. Check the final line in particular.
Example 8-6. Adding the auto-incrementing id column at table creation
CREATE TABLE classics (
author VARCHAR(128),
title VARCHAR(128),
type VARCHAR(16),
year CHAR(4),
id INT UNSIGNED NOT NULL AUTO_INCREMENT KEY) ENGINE MyISAM;
If you wish to check whether the column has been added, use the following command
to view the table’s columns and data types:
DESCRIBE classics;
Now that we’ve finished with it, the id column is no longer needed, so if you created it
using Example 8-5, you should now remove the column using the command in Exam-
ple 8-7.
Accessing MySQL via the Command Line | 173
Example 8-7. Removing id column
ALTER TABLE classics DROP id;
Adding data to a table
To add data
to a table, use the INSERT command. Let’s see this in action by populating
the table classics with the data from Table 8-1, using one form of the INSERT command
repeatedly (Example 8-8).
Example 8-8. Populating the classics table
INSERT INTO classics(author, title, type, year)
VALUES('Mark Twain','The Adventures of Tom Sawyer','Fiction','1876');
INSERT INTO classics(author, title, type, year)
VALUES('Jane Austen','Pride and Prejudice','Fiction','1811');
INSERT INTO classics(author, title, type, year)
VALUES('Charles Darwin','The Origin of Species','Non-Fiction','1856');
INSERT INTO classics(author, title, type, year)
VALUES('Charles Dickens','The Old Curiosity Shop','Fiction','1841');
INSERT INTO classics(author, title, type, year)
VALUES('William Shakespeare','Romeo and Juliet','Play','1594');
After every second line, you should see a “Query OK” message. Once all lines have
been entered, type the following command, which will display the table’s contents. The
result should look like Figure 8-4:
SELECT * FROM classics;
Don’t worry about the SELECT command for now—we’ll come to it in the upcoming
section “Querying a MySQL Database” on page 183. Suffice it to say that as typed, it
will display all the data you just entered.
Figure 8-4. Populating the classics table and viewing its contents
174 | Chapter 8: Introduction to MySQL
Let’s go back and look at how we used the INSERT command. The first part, INSERT INTO
classics, tells MySQL where to insert the following data. Then, within parentheses,
the four column names are listed—author, title, type, and year—all separated by com-
mas. This tells MySQL that these are the fields into which the data is to be inserted.
The second line of each INSERT command contains the keyword VALUES followed by
four strings within parentheses, and separated by commas. This supplies MySQL with
the four values to be inserted into the four columns previously specified. (As always,
my choice of where to break the lines was arbitrary.)
Each item of data will be inserted into the corresponding column, in a one-to-one
correspondence. If you accidentally listed the columns in a different order from the
data, the data would go into the wrong columns. And the number of columns must
match the number of data items.
Renaming a table
Renaming a table, like any other change to the structure or meta-information about a
table, is achieved via the ALTER command. So, for example, to change the name of table
classics to pre1900, use the following command:
ALTER TABLE classics RENAME pre1900;
If you tried that command, you should rename the table back again by entering the
following, so that later examples in this chapter will work as printed:
ALTER TABLE pre1900 RENAME classics;
Changing the data type of a column
Changing a column’s data type also makes use of the ALTER command, this time in
conjunction with the MODIFY keyword. So to change the data type of column year from
CHAR(4) to SMALLINT (which requires only two bytes of storage and so will save disk
space), enter the following:
ALTER TABLE classics MODIFY year SMALLINT;
When you do this, if the conversion of data type makes sense to MySQL, it will auto-
matically change the data while keeping the meaning. In this case, it will change each
string to a comparable integer, and so on, as the string is recognizable as referring to
an integer.
Adding a new column
Let’s suppose that you have created a table and populated it with plenty of data, only
to discover you need an additional column. Not to worry. Here’s how to add the new
column pages, which will be used to store the number of pages in a publication:
ALTER TABLE classics ADD pages SMALLINT UNSIGNED;
Accessing MySQL via the Command Line | 175
This adds the new column with the name pages using the UNSIGNED SMALLINT
data type,
sufficient to hold a value of up to 65,535—hopefully that’s more than enough for any
book ever published!
And, if you ask MySQL to describe the updated table using the DESCRIBE command, as
follows, you will see the change has been made (see Figure 8-5):
DESCRIBE classics;
Renaming a column
Looking again at Figure 8-5, you may decide that having a column named type can be
confusing, because that is the name used by MySQL to identify data types. Again, no
problem—let’s change its name to category, like this:
ALTER TABLE classics CHANGE type category VARCHAR(16);
Note the addition of VARCHAR(16) on the end of this command. That’s because the
CHANGE keyword requires the data type to be specified, even if you don’t intend to change
it, and VARCHAR(16) was the data type specified when that column was initially created
as type.
Removing a column
Actually, upon reflection, maybe the page count column pages isn’t actually all that
useful for this particular database, so here’s how to remove that column using the
DROP keyword:
ALTER TABLE classics DROP pages;
Figure 8-5. Adding the new pages column and viewing the table
176 | Chapter 8: Introduction to MySQL
Remember that DROP is irreversible
and you should always use it with
caution, because you could delete entire tables (and even databases)
with it if you are not careful!
Deleting a table
Deleting a table is very easy indeed. But, because I don’t want you to have to reenter
all the data for the classics table, let’s quickly create a new table, verify its existence,
and then delete it by typing in the commands in Example 8-9. The result of these four
commands should look like Figure 8-6.
Example 8-9. Creating, viewing, and deleting a table
CREATE TABLE disposable(trash INT);
DESCRIBE disposable;
DROP TABLE disposable;
SHOW tables;
Indexes
As things stand, the table classics works and can be searched without problem by
MySQL—until it grows to more than a couple hundred rows, that is. At that point,
database accesses will get slower and slower with every new row added, because
MySQL has to search through every row whenever a query is issued. This is like search-
ing through every book in a library whenever you need to look something up.
Of course, you don’t have to search libraries that way, because they have either a card
index system or, most likely, a database of their own. And the same goes for MySQL,
Figure 8-6. Creating, viewing, and deleting a table
Indexes | 177
because at the expense of a slight overhead in memory and disk space, you can create
a “card index” for a table that MySQL will use to conduct lightning-fast searches.
Creating an Index
The way to achieve fast searches is to add an index, either when creating a table or at
any time afterward. But the decision is not so simple. For example, there are different
index types, such as INDEX, PRIMARY KEY, and FULLTEXT. Also you must decide which
columns require an index, a judgment that requires you to predict whether you will be
searching any of the data in that column. Indexes can also get complicated, because
you can combine multiple columns in one index. And even when you’ve decided that,
you still have the option of reducing index size by limiting the amount of each column
to be indexed.
If we imagine the searches that may be made on the classics table, it becomes apparent
that all of the columns may need to be searched. However, if the pages column created
in the earlier section (“Adding a new column” on page 175) had not been deleted, it
would probably not have needed an index, as most people would be unlikely to search
for books by the number of pages they have. Anyway, go ahead and add an index to
each of the columns, using the commands in Example 8-10.
Example 8-10. Adding indexes to the classics table
ALTER TABLE classics ADD INDEX(author(20));
ALTER TABLE classics ADD INDEX(title(20));
ALTER TABLE classics ADD INDEX(category(4));
ALTER TABLE classics ADD INDEX(year);
DESCRIBE classics;
The first two commands create indexes on both the author and title columns, limiting
each index to only the first 20 characters. For instance, when MySQL indexes the fol-
lowing title:
The Adventures of Tom Sawyer
It will actually store in the index only the first 20 characters:
The Adventures of To
This is done to minimize the size of the index, and to optimize database access speed.
I chose 20 because it’s likely to be sufficient to ensure uniqueness for most strings in
these columns. If MySQL finds two indexes with the same contents, it will have to
waste time going to the table itself and checking the column that was indexed to find
out which rows really matched.
With the category column, currently only the first character is required to identify a
string as unique (F for Fiction, N for Non-Fiction, and P for Play), but I chose an index
of four characters to allow for future category types that may be unique only after four
characters. You can also reindex this column later, when you have a more complete set
178 | Chapter 8: Introduction to MySQL
of categories. And finally, I set no limit to the year column’s index,
because it’s an
integer, not a string.
The results of issuing these commands (and a DESCRIBE command to confirm that they
worked) can be seen in Figure 8-7, which shows the key MUL for each column. This
key means that multiple occurrences of a value may occur within that column, which
is exactly what we want, as authors may appear many times, the same book title could
be used by multiple authors, and so on.
Using CREATE INDEX
An alternative to using ALTER TABLE to add an index is to use the CREATE INDEX command.
They are equivalent, except that CREATE INDEX cannot be used to create a PRIMARY KEY
(see the section “Primary keys” on page 180). The format of this command can be seen
in the second line of Example 8-11.
Example 8-11. These two commands are equivalent
ALTER TABLE classics ADD INDEX(author(20));
CREATE INDEX author ON classics (author(20));
Adding indexes when creating tables
You don’t have to wait until after creating a table to add indexes. In fact, doing so can
be time-consuming, as adding an index to a large table can take a very long time.
Therefore, let’s look at a command that creates the table classics with indexes already
in place.
Figure 8-7. Adding indexes to the classics table
Indexes | 179
Example 8-12 is a reworking of Example 8-3 in which the indexes are created at the
same time as the table. Note that to incorporate the modifications made in this chapter,
this version uses the new column name category instead of type and sets the data type
of year to SMALLINT instead of CHAR(4). If you want to try it out without first deleting
your current classics table, change the word classics in line one to something else like
classics1, then drop classics1 after you have finished with it.
Example 8-12. Creating the table classics with indexes
CREATE TABLE classics (
author VARCHAR(128),
title VARCHAR(128),
category VARCHAR(16),
year SMALLINT,
INDEX(author(20)),
INDEX(title(20)),
INDEX(category(4)),
INDEX(year)) ENGINE MyISAM;
Primary keys
So far you’ve created the table classics and ensured that MySQL can search it quickly
by adding indexes, but there’s still something missing. All the publications in the table
can be searched, but there is no single unique key for each publication to enable instant
accessing of a row. The importance of having a key with a unique value for each row
will come up when we start to combine data from different tables.
The earlier section “The AUTO_INCREMENT data type” on page 172 briefly intro-
duced the idea of a primary key when creating the auto incrementing column id, which
could have been used as a primary key for this table. However, I wanted to reserve that
task for a more appropriate column: the internationally recognized ISBN number.
So let’s go ahead and create a new column for this key. Now, bearing in mind that ISBN
numbers are 13 characters long, you might think that the following command would
do the job:
ALTER TABLE classics ADD isbn CHAR(13) PRIMARY KEY;
But it doesn’t. If you try it, you’ll get the error “Duplicate entry” for key 1. The reason
is that the table is already populated with some data and this command is trying to add
a column with the value NULL to each row, which is not allowed, as all columns using
a primary key index must be unique. However, if there were no data already in the
table, this command would work just fine, as would adding the primary key index upon
table creation.
In our current situation, we have to be a bit sneaky and create the new column without
an index, populate it with data, and then add the index retrospectively using the com-
mands in Example 8-13. Luckily, each of the years is unique in the current set of data,
so we can use the year column to identify each row for updating. Note that this example
180 | Chapter 8: Introduction to MySQL