JavaScript Bible, Gold Edition part 15 docx
Bạn đang xem bản rút gọn của tài liệu. Xem và tải ngay bản đầy đủ của tài liệu tại đây (132.56 KB, 10 trang )
CD-70
Part II ✦ JavaScript Tutorial
The window reference is optional when the script is accessing the document
object that contains the script. If you want a preview of the document object prop-
erties of the browser you’re using, enter
document into the bottom text box of The
Evaluator Jr. and press Enter/Return. The object’s properties and current values
appear in the Results box.
document.forms[] property
One of the object types contained by a document is the FORM element object.
Because conceivably there can be more than one form in a document, forms are
stored as arrays in the
document.forms[] property. As you recall from the discus-
sion of arrays in Chapter 7, an index number inside the square brackets points to
one of the elements in the array. To find out how many
FORM objects are in the
current document, use
document.forms.length
To access the first form in a document, for example, the reference is
document.forms[0]
In general, however, I recommend that you access a form by way of a name you
assign to the form in its
NAME attribute, as in
document.formName
Either methodology reaches the same object. When a script needs to reference
elements inside a form, the complete address to that object must include
document
and form references.
document.title property
Not every property of a document object is set in a <BODY> tag attribute. If you
assign a title to the page in the
<TITLE> tag set within the Head portion, that title
text is reflected by the
document.title property. A document’s title is mostly a
cosmetic setting that gives a plain-language name of the page appearing in the
browser’s title bar, as well as the user’s history listing and bookmark of your page.
document.write() method
The document.write() method operates in both immediate scripts to create
content in a page as it loads and in deferred scripts that create new content in the
same or different window. The method requires one string parameter, which is the
HTML content to write to the window or frame. Such string parameters can be
variables or any other expressions that evaluate to a string. Very often, the written
content includes HTML tags.
Bear in mind that after a page loads, the browser’s output stream is automatically
closed. After that, any
document.write() method issued to the current page
opens a new stream that immediately erases the current page (along with any vari-
ables or other values in the original document). Therefore, if you wish to replace
the current page with script-generated HTML, you need to accumulate that HTML
in a variable and perform the writing with just one
document.write() method.
You don’t have to explicitly clear a document and open a new data stream; one
document.write() call does it all.
One last piece of housekeeping advice about the
document.write() method
involves its companion method,
document.close(). Your script must close the
CD-71
Chapter 8 ✦ Window and Document Objects
output stream when it finishes writing its content to the window (either the same
window or another). After the last
document.write() method in a deferred script,
be sure to include a
document.close() method. Failure to do this may cause
images and forms not to appear. Also, any
document.write() method invoked
later will only append to the page, rather than clear the existing content to write
anew. To demonstrate the
document.write() method, I show two versions of the
same application. One writes to the same document that contains the script; the
other writes to a separate window. Type in each document in a new text editor
document, save it with an
.html file name extension, and open it in your browser.
Listing 8-2 creates a button that assembles new HTML content for a document,
including HTML tags for a new document title and color attribute for the
<BODY>
tag. An operator in the listing that may be unfamiliar to you is +=. It appends a
string on its right side to whatever string is stored in the variable on its left side.
This operator is a convenient way to accumulate a long string across several
separate statements. With the content gathered in the
newContent variable, one
document.write() statement blasts the entire new content to the same document,
obliterating all vestiges of the content of Listing 8-2. The
document.close() state-
ment, however, is required to close the output stream properly. When you load this
document and click the button, notice that the document title in the browser’s title
bar changes accordingly. As you click back to the original and try the button again,
notice that the dynamically written second page loads much faster than even a
reload of the original document.
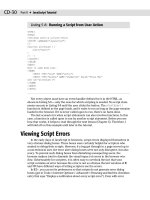
Listing 8-2: Using document.write() on the Current Window
<HTML>
<HEAD>
<TITLE>Writing to Same Doc</TITLE>
<SCRIPT LANGUAGE=”JavaScript”>
function reWrite() {
// assemble content for new window
var newContent = “<HTML><HEAD><TITLE>A New Doc</TITLE></HEAD>”
newContent += “<BODY BGCOLOR=’aqua’><H1>This document is brand new.</H1>”
newContent += “Click the Back button to see original document.”
newContent += “</BODY></HTML>”
// write HTML to new window document
document.write(newContent)
document.close() // close layout stream
}
</SCRIPT>
</HEAD>
<BODY>
<FORM>
<INPUT TYPE=”button” VALUE=”Replace Content” onClick=”reWrite()”>
</FORM>
</BODY>
</HTML>
In Listing 8-3, the situation is a bit more complex because the script generates a
subwindow to which is written an entirely script-generated document. To keep the
reference to the new window alive across both functions, the
newWindow variable is
declared as a global variable. As soon as the page loads, the
onLoad event handler
CD-72
Part II ✦ JavaScript Tutorial
invokes the makeNewWindow() function. This function generates a blank subwin-
dow. I added a property to the third parameter of the
window.open() method that
instructs the status bar of the subwindow to appear.
A button in the page invokes the
subWrite() method. The first task it performs
is to check the
closed property of the subwindow. This property (which exists
only in newer browser versions) returns
true if the referenced window is closed. If
that’s the case (if the user manually closed the window), the function invokes the
makeNewWindow() function again to reopen that window.
With the window open, new content is assembled as a string variable. As with
Listing 8-2, the content is written in one blast (although that isn’t necessary for a
separate window), followed by a
close() method. But notice an important differ-
ence: both the
write() and close() methods explicitly specify the subwindow.
Listing 8-3: Using document.write() on Another Window
<HTML>
<HEAD>
<TITLE>Writing to Subwindow</TITLE>
<SCRIPT LANGUAGE=”JavaScript”>
var newWindow
function makeNewWindow() {
newWindow = window.open(“”,””,”status,height=200,width=300”)
}
function subWrite() {
// make new window if someone has closed it
if (newWindow.closed) {
makeNewWindow()
}
// bring subwindow to front
newWindow.focus()
// assemble content for new window
var newContent = “<HTML><HEAD><TITLE>A New Doc</TITLE></HEAD>”
newContent += “<BODY BGCOLOR=’coral’><H1>This document is brand new.</H1>”
newContent += “</BODY></HTML>”
// write HTML to new window document
newWindow.document.write(newContent)
newWindow.document.close() // close layout stream
}
</SCRIPT>
</HEAD>
<BODY onLoad=”makeNewWindow()”>
<FORM>
<INPUT TYPE=”button” VALUE=”Write to Subwindow” onClick=”subWrite()”>
</FORM>
</BODY>
</HTML>
CD-73
Chapter 8 ✦ Window and Document Objects
The Link Object
Belonging to the document object in the hierarchy is the link object. A link object
is the object model equivalent of an
<A> tag when the tag includes an HREF attribute.
A document can have any number of links, so references to links (if necessary) are
usually made via the array index method:
document.links[n].propertyName
More commonly, though, links are not scripted. However, there is an important
JavaScript component to these objects. When you want to click a link to execute a
script rather than navigate directly to another URL, you can redirect the
HREF
attribute to call a script function. The technique involves a pseudo-URL called the
javascript: URL. If you place the name of a function after the javascript: URL,
then a scriptable browser runs that function. So as not to mess with the minds of
users, the function should probably perform some navigation in the end. However,
the script can do other things as well, such as simultaneously changing the content
of two frames within a frameset.
The syntax for this construction in a link is as follows:
<A HREF=”javascript:void functionName([parameter1] [parameterN])”> </A>
The void keyword prevents the link from trying to display any value that the
function may return. Remember this
javascript: URL technique for all tags that
include
HREF and SRC attributes: If an attribute accepts a URL, it can accept this
javascript: URL as well. This can come in handy as a way to script actions for
client-side image maps that don’t necessarily navigate anywhere, but which cause
something to happen on the page just the same.
The next logical step past the document level in the object hierarchy is the form.
That’s where you will spend the next lesson.
Exercises
1. Which of the following references are valid and which are not? Explain what is
wrong with the invalid references.
a.
window.document.form[0]
b. self.entryForm.entryField.value
c. document.forms[2].name
d. entryForm.entryField.value
e. newWindow.document.write(“Howdy”)
2. Write the JavaScript statement that displays a message in the status bar wel-
coming visitors to your Web page.
CD-74
Part II ✦ JavaScript Tutorial
3. Write the JavaScript statement that displays the same message to the docu-
ment as an
<H1>-level headline on the page.
4. Create a page that prompts the user for his or her name as the page loads
(via a dialog box) and then welcomes the user by name in the body of the
page.
5. Create a page with any content you like, but one that automatically displays
a dialog box after the page loads to show the user the URL of the current
page.
✦✦✦
Forms and Form
Elements
M
ost interactivity between a Web page and the user
takes place inside a form. That’s where a lot of the
interactive HTML stuff lives for every browser: text fields,
buttons, checkboxes, option lists, and so on. As you can tell
from the (by now) familiar basic object hierarchy diagram
(refer back to Figure 8-1), a form is always contained by a
document. Even so, the
document object must be part of the
reference to the form and its elements.
The FORM Object
A FORM object can be referenced either by its position in
the array of forms contained by a document or by name
(if you assign an identifier to the
NAME attribute inside the
<FORM> tag). If only one form appears in the document, it is
still a member of an array (a one-element array) and is
referenced as follows:
document.forms[0]
Notice that the array reference uses the plural version of
the word, followed by a set of square brackets containing the
index number of the element (zero is always first). But if you
assign a name to the form, simply plug the form’s name into
the reference:
document.formName
Form as object and container
In the simplified, compatible object model of this tutorial, a
form has a relatively small set of properties, methods, and
event handlers. Almost all of the properties are the same as
the attributes for forms. All scriptable versions of Navigator,
and most versions of Internet Explorer, allow scripts to change
these properties under script control, which gives your scripts
potentially significant power to direct the behavior of a form
submission in response to user selections on the page.
9
9
CHAPTER
✦✦✦✦
In This Chapter
What the FORM
object represents
How to access key
FORM object
properties and
methods
How text, button, and
SELECT objects work
How to submit forms
from a script
How to pass
information from form
elements to functions
✦✦✦✦
CD-76
Part II ✦ JavaScript Tutorial
A form is contained by a document, and the form in turn contains any number of
elements (sometimes called form controls). All of those interactive elements that
enable users to enter information or make selections belong to the
form object.
This relationship mirrors the HTML tag organization in which items such as
<INPUT> tags are nested between the <FORM> and </FORM> tag “bookends.”
Accessing form properties
Forms are created entirely from standard HTML tags in the page. You can set
attributes for
NAME, TARGET, ACTION, METHOD, and ENCTYPE. Each of these is a prop-
erty of a FORM object, accessed by all lowercase versions of those words, as in
document.forms[0].action
document.formName.action
To change any of these properties, simply assign new values to them:
document.forms[0].action = “ />form.elements[ ] property
In addition to keeping track of each type of element inside a form, the browser
also maintains a list of all control elements within a form. This list is another array,
with items listed according to the order in which their HTML tags appear in the
source code. It is generally more efficient to create references to elements directly,
using their names. However, sometimes a script needs to look through all of the ele-
ments in a form. This is especially true if the content of a form changes with each
loading of the page because the number of text fields changes based on the user’s
browser type. (For example, a script on the page uses
document.write() to add
an extra text box for information required only from Windows users.)
The following code fragment shows the
form.elements[] property at work in a
for repeat loop that looks at every element in a form to set the contents of text
fields to an empty string. The script cannot simply barge through the form and set
every element’s content to an empty string because some elements may be but-
tons, which don’t have a
value property that you can set to an empty string.
var form = window.document.forms[0]
for (var i = 0; i < form.elements.length; i++) {
if (form.elements[i].type == “text”) {
form.elements[i].value = “”
}
}
In the first statement, I create a variable — form — that holds a reference to the
first form of the document. I do this so that when I make many references to form
elements later in the script, the typical length of each reference is much shorter
(and marginally faster). I can use the
form variable as a shortcut to building refer-
ences to items more deeply nested in the form.
Next, I start looping through the items in the
elements array for the form. Each
form element has a
type property, which reveals what kind of form element it is:
CD-77
Chapter 9 ✦ Forms and Form Elements
text, button, radio, checkbox, and so on. I’m interested in finding elements whose
type is
text. For each of those, I set the value property to an empty string.
I return to forms later in this chapter to show you how to submit a form without
a Submit button and how client-side form validation works.
Form Controls as Objects
Three kinds of HTML elements nested inside a <FORM> tag become scriptable
objects in all browser document object models. Most of the objects owe their exis-
tence to the
<INPUT> tag in the page’s source code. Only the value assigned to the
TYPE attribute of an <INPUT> tag determines whether the element is a text box,
password entry field, hidden field, button, checkbox, or radio button. The other
two kinds of form controls, TEXTAREA and SELECT, have their own tags.
While form controls have several properties in common, some properties are
unique to a particular control type or related types. For example, only a SELECT
object offers a property that reveals which item in its list is currently selected. But
checkbox and radio buttons both have a property that indicates whether the con-
trol is currently set to “on.” Similarly, all text-oriented controls operate the same
way for reading and modifying their content.
Having a good grasp of the scriptable features of form control objects is impor-
tant to your success with JavaScript. In the next sections, you meet the most
important form control objects and see how scripts interact with them.
Text-related objects
Each of the four text-related HTML form elements — text, password, hidden, and
TEXTAREA — is an element in the document object hierarchy. All but the hidden
object display themselves in the page, enabling users to enter information. These
objects also display text information that changes in the course of using a page
(although Dynamic HTML in IE4+ and NN6+ also allows the scripted change of body
text in a document).
To make these objects scriptable in a page, you do nothing special to their
normal HTML tags — with the possible exception of assigning a
NAME attribute. I
strongly recommend assigning unique names to every form control element if your
scripts will be getting or setting properties or invoking their methods. Besides, if
the form is actually submitted to a server program, the
NAME attributes must be
assigned in order for the server to process the element’s data.
For the visible objects in this category, event handlers are triggered from many
user actions, such as giving a field focus (getting the text insertion pointer in the
field) and changing text (entering new text and leaving the field). Most of your text
field actions are triggered by the change of text (the
onChange event handler). In IE
and NN version 4 browsers and later, event handlers fire in response to individual
keystrokes as well.
Without a doubt, the single most used property of a text-related element is the
value property. This property represents the current contents of the text element.
A script can retrieve and set its content at any time. Content of the
value property
CD-78
Part II ✦ JavaScript Tutorial
is always a string. This may require conversion to numbers (see Chapter 6) if text
fields are used to enter values for some math operations.
To demonstrate how a text field’s
value property can be read and written,
Listing 9-1 provides a complete HTML page with a single-entry field. Its
onChange
event handler invokes the upperMe() function, which converts the text to upper-
case. In the
upperMe() function, the first statement assigns the text object refer-
ence to a more convenient variable:
field. A lot goes on in the second statement of
the function. The right side of the assignment statement performs a couple of key
tasks. The reference to the
value property of the object (field.value) evaluates
to whatever content is in the text field at that instant. That string is then handed
over to one of JavaScript’s string functions,
toUpperCase(), which converts the
value to uppercase. The evaluated result of the right side statement is then
assigned to the second variable:
upperCaseVersion. Nothing has changed yet in
the text box. That comes in the third statement where the
value property of the
text box is assigned whatever the
upperCaseVersion variable holds. The need for
the second statement is more for learning purposes, so you can see the process
more slowly. In practice, you can combine the actions of steps two and three into
one power-packed statement:
field.value = field.value.toUpperCase()
Listing 9-1: Getting and Setting a Text Object’s value Property
<HTML>
<HEAD>
<TITLE>Text Object value Property</TITLE>
Text Object Behavior
Many scripters look to JavaScript to solve what are perceived as shortcomings or behavioral
anomalies with text-related objects in forms. I want to single these out early in your script-
ing experience so that they do not confuse you later.
First, only the most recent browsers let scripts reliably alter the font, font size, font style, and
text alignment of a text object’s content. You can access changes through the element’s
style-related properties (Chapter 30).
Second, most browser forms practice a behavior that was recommended long ago as an
informal standard by Web pioneers. When a form contains only one text INPUT object, a
press of the Enter/Return key while the text object has focus automatically submits the form.
For two or more fields in browsers other than IE5/Mac, you need another way to submit the
form (for example, a Submit button). This one-field submission scheme works well in many
cases, such as the search page of most Web search sites. But if you are experimenting with
simple forms containing only one field, you can submit the form with a press of the
Enter/Return key. Submitting a form that has no other action or target specified means the
page performs an unconditional reload — wiping out any information entered into the form.
You can, however, cancel the submission through an
onSubmit event handler in the form, as
shown later in this chapter. Also, starting with version 4 browsers, you can script the press of
the Enter/Return key in any text field to submit a form (see Chapter 29).
CD-79
Chapter 9 ✦ Forms and Form Elements
<SCRIPT LANGUAGE=”JavaScript”>
function upperMe() {
var field = document.forms[0].converter
var upperCaseVersion = field.value.toUpperCase()
field.value = upperCaseVersion
}
</SCRIPT>
</HEAD>
<BODY>
<FORM onSubmit=”return false”>
<INPUT TYPE=”text” NAME=”converter” VALUE=”sample” onChange=”upperMe()”>
</FORM>
</BODY>
</HTML>
Later in this chapter, I show you how to reduce even further the need for explicit
references in functions such as
upperMe() in Listing 9-1. In the meantime, notice for
a moment the
onSubmit event handler in the <FORM> tag. I delve more deeply into
this event handler later in this chapter, but I want to point out the construction that
prevents a single-field form from being submitted when you press the Enter key.
The Button Object
I have used the button INPUT element in many examples up to this point in the
tutorial. The button is one of the simplest objects to script. In the simplified object
model of this tutorial, the button object has only a few properties that are rarely
accessed or modified in day-to-day scripts. Like the text object, the visual aspects
of the button are governed not by HTML or scripts, but by the operating system
and browser that the page visitor uses. By far, the most useful event handler of the
button object is the
onClick event handler. It fires whenever the user clicks the
button. Simple enough. No magic here.
The Checkbox Object
A checkbox is also a simple element of the FORM object, but some of the proper-
ties may not be intuitive entirely. Unlike the
value property of a plain button object
(the text of the button label), the
value property of a checkbox is any other text
you want associated with the object. This text does not appear on the page in any
fashion, but the property (initially set via the
VALUE tag attribute) might be impor-
tant to a script that wants to know more about the purpose of the checkbox within
the form.
The key property of a checkbox object is whether or not the box is checked. The
checked property is a Boolean value: true if the box is checked, false if not.
When you see that a property is a Boolean value, it’s a clue that the value might be
usable in an
if or if else condition expression. In Listing 9-2, the value of the
checked property determines which alert box the user sees.