OCA /OCP Oracle Database 11g A ll-in-One Exam Guide- P11 pot
Bạn đang xem bản rút gọn của tài liệu. Xem và tải ngay bản đầy đủ của tài liệu tại đây (316.48 KB, 10 trang )
OCA/OCP Oracle Database 11g All-in-One Exam Guide
56
Perhaps the simplest yet most important strategic task in the life of an Oracle database
occurs at the planning and installation phase. Although the decisions you make at
this point are not cast in stone, they will often be complex to undo. For example,
choosing a database name, the locations of the installation binaries, and those of
other important files might seem trivial, but once you have committed to these
settings, they are usually permanent. It is therefore well worth the effort to consider
the key factors that influence planning, installing, and creating a database.
This chapter begins by introducing the essential bread-and-butter tools used by
Oracle DBAs and proceeds to discuss planning a database installation. Once the plan
is made, installing the Oracle software is described and the chapter culminates with
you creating your very own database.
Identify the Tools for Administering
an Oracle Database
Oracle Corporation provides a number of tools for managing the Oracle environment.
First there is the Oracle Universal Installer (OUI) used (as its name suggests) to install
any Oracle software. Second is the Database Configuration Assistant (DBCA), the tool
for creating a database. A related tool used during upgrades is the Database Upgrade
Assistance (DBUA), but a discussion of DBUA is beyond the scope of the exams. These
can be launched from the OUI or run separately. Third, the OUI will install a number of
other tools for managing a database and related components, notably SQL*Plus. Depending
on the installation type chosen, it may also install SQL Developer.
Oracle Enterprise Manager (OEM) Database Control is also installed by the OUI
and will be used extensively in this book.
The Oracle Universal Installer
Historically, managing Oracle software could be a painful task. This was because the DBA
was largely responsible for ensuring that incompatible products were kept separate. It was
not uncommon to install one product, a second, and a third satisfactorily—then installation
of a fourth would break the other three. The problem of incompatibilities lies in the use
of the base libraries. The base libraries provide facilities that are common to all Oracle
products. For example, all Oracle products use the Oracle Net communications protocol;
it is impossible to install a product without it. If two products are built on the same
version of the base libraries, then (theoretically) they can coexist in the same Oracle Home. An
Oracle Home is the location of an Oracle product installation: a set of files in a directory
structure. Before the Oracle Universal Installer, each product had its own self-contained
installation routine, which was sometimes not too clever at identifying incompatibilities
with already installed products.
The OUI is written in Java, using JDK/JRE1.5. This means that it is the same on
all platforms. The OUI can be installed as a self-contained product in its own Oracle
Home, but this is not usually necessary, as it is shipped with every Oracle product and
can be launched from the product installation media; it will install itself into the
Chapter 2: Installing and Creating a Database
57
PART I
Oracle Home along with the product. There are different versions of the OUI, and if
a product comes with an earlier version than one already installed on the machine,
then it will usually be a good idea (and may indeed be necessary) to install the
product using the already-installed version. When the OUI prompts for the location
of a products.xml file, specify the media with the product you want to install.
TIP Always use the latest version of the OUI that you have available. There
can be issues with updating the OUI inventory if you try to revert to earlier
versions after using a later version.
The OUI Inventory
Central to the OUI is the inventory. This is a set of files that should ideally exist outside
any Oracle Home. The inventory stores details of all the Oracle products installed on
the machine, including the exact version, the location, and in some cases details of
patches that have been applied. Every run of the OUI will check the inventory for
incompatibilities before permitting an install into an existing Oracle Home to
proceed, and will then update the inventory with details of all products installed or
upgraded. The location of the Unix inventory can be chosen by the DBA the first time
the OUI (any version) is run on the machine. On Windows, the location is always
created in
%SystemRoot%\Program files\Oracle\Inventory
All platforms have a hard-coded, platform-specific location where the OUI will
search for an existing inventory pointer. On Linux this is a file:
/etc/oraInst.loc
On Solaris it is also a file:
/var/opt/oracle/oraInst.loc
On Windows it is a key in the registry:
HKEY_LOCAL_MACHINE\SOFTWARE\ORACLE\inst_loc
When the OUI starts, it will look for this file (or registry key). If it does not exist,
OUI assumes that there has never been any Oracle software installed on the machine,
and it will create the file (or registry key) and write to it the location of the new
inventory that is to be created. All subsequent runs of the OUI, no matter what
version, will then be able to find the inventory.
This mechanism for creating an inventory pointer does raise an issue with
operating system privileges: on Linux or Unix, the user running the installer for the
first time will need permission to write to the appropriate directory. Usually only the
root user can write to /etc or /var. As it is not acceptable for security reasons to run
the OUI as the root user, OUI will generate a script (the orainstRoot.sh script) to
be run by the root user that will create the oraInst.loc file. On Windows, the user
running the OUI will need privileges to create the registry key.
OCA/OCP Oracle Database 11g All-in-One Exam Guide
58
TIP To relocate the inventory, first copy it (the whole directory system to
which the inventory pointer is pointing) to the new location, and then edit
the pointer file (or registry key). Sometimes, you may want to create a new
inventory but keep the old one. On Linux, simply delete the oraInst.loc
file, run the OUI, and choose a location for the new inventory. From then on,
edit oraInst.loc to switch between the two inventories.
The Prerequisite Tests
The OUI checks certain requirements on the server machine before it will run. These
are platform specific and are provided in this file on the installation media:
• /install/oraparam.ini (Unix)
• \install\oraparam.ini (Windows)
The requirements are not too demanding, doing little more than checking that the
graphics device on which the installer is displaying can show at least 256 colors.
The oraparam.ini file also specifies the location of the file products.xml,
which is the file with details of all the products that can be installed from this media.
Each product will have its own requirements, and these may be demanding (or
irritating, if you know they actually don’t matter). The product requirements are listed
in a set of XML files. Typical of these is
• /stage/prereq/db/refhost.xml (Unix)
• \stage\prereq\db\refhost.xml (Windows)
The Windows file is usually very simple, specifying little more than a calculation
for necessary swap space, and the operating system release:
<SYSTEM>
<MEMORY>
<PHYSICAL_MEMORY VALUE="256" UNIT="MB"/>
<! AVAILABLE_MEMORY VALUE="512" UNIT="MB"/ >
<SWAP_SIZE>
<STEP NAME="PHYSICAL_MEMORY" ATLEAST="0" ATMOST="256"
UNIT="MB" MULTIPLE="3"/>
<STEP NAME="PHYSICAL_MEMORY" GREATER_THAN="256" ATMOST="512"
UNIT="MB" MULTIPLE="2"/>
<STEP NAME="PHYSICAL_MEMORY" GREATER_THAN="512" ATMOST="2048"
UNIT="MB" MULTIPLE="1.5"/>
<STEP NAME="PHYSICAL_MEMORY" GREATER_THAN="2048" ATMOST="8192"
UNIT="MB" MULTIPLE="1"/>
<STEP NAME="PHYSICAL_MEMORY" GREATER_THAN="8192"
UNIT="MB" MULTIPLE="0.75"/>
</SWAP_SIZE>
</MEMORY>
</SYSTEM>
<CERTIFIED_SYSTEMS>
<OPERATING_SYSTEM>
<VERSION VALUE="5.0"/>
<SERVICE_PACK VALUE="1"/>
</OPERATING_SYSTEM>
Chapter 2: Installing and Creating a Database
59
PART I
<OPERATING_SYSTEM>
<VERSION VALUE="5.1"/>
<SERVICE_PACK VALUE="1"/>
</OPERATING_SYSTEM>
<OPERATING_SYSTEM>
<VERSION VALUE="5.2"/>
</OPERATING_SYSTEM>
<! Microsoft Windows Vista >
<OPERATING_SYSTEM>
<VERSION VALUE="6.0"/>
</OPERATING_SYSTEM>
</CERTIFIED_SYSTEMS>
It is worth noting the swap space calculation, which is based on the amount of main
memory detected. For instance, if OUI detects physical memory of 512MB–2048MB, it
will demand a swap file of 1.5 times the amount of physical memory. OUI is not
intelligent enough to realize that Windows can resize its swap file, so that even if the
present size is far less than this, it could expand to far more. Also note that the Windows
Vista base version (Windows version 6.0) is listed, but not with any service packs.
The Unix prerequisites are more demanding, in that as well as a calculation for
required swap space they specify a whole list of packages and kernel settings, with
several sections for the various supported Unix versions. Following is a print of a
typical section:
<PACKAGES>
<PACKAGE NAME="make" VERSION="3.81" />
<PACKAGE NAME="binutils" VERSION="2.17.50.0.6" />
<PACKAGE NAME="gcc" VERSION="4.1.1" />
<PACKAGE NAME="libaio" VERSION="0.3.106" />
<PACKAGE NAME="libaio-devel" VERSION="0.3.106" />
<PACKAGE NAME="libstdc++" VERSION="4.1.1" />
<PACKAGE NAME="elfutils-libelf-devel" VERSION="0.125" />
<PACKAGE NAME="sysstat" VERSION="7.0.0" />
<PACKAGE NAME="compat-libstdc++-33" VERSION="3.2.3" />
<PACKAGE NAME="libgcc" VERSION="4.1.1" />
<PACKAGE NAME="libstdc++-devel" VERSION="4.1.1" />
<PACKAGE NAME="unixODBC" VERSION="2.2.11" />
<PACKAGE NAME="unixODBC-devel" VERSION="2.2.11" />
</PACKAGES>
<KERNEL>
<PROPERTY NAME="semmsl" NAME2="semmsl2" VALUE="250" />
<PROPERTY NAME="semmns" VALUE="32000" />
<PROPERTY NAME="semopm" VALUE="100" />
<PROPERTY NAME="semmni" VALUE="128" />
<PROPERTY NAME="shmmax" VALUE="536870912" />
<PROPERTY NAME="shmmni" VALUE="4096" />
<PROPERTY NAME="shmall" VALUE="2097152" />
<PROPERTY NAME="file-max" VALUE="65536" />
<PROPERTY NAME="VERSION" VALUE="2.6.18" />
<PROPERTY NAME="ip_local_port_range" ATLEAST="1024" ATMOST="65000" />
<PROPERTY NAME="rmem_default" VALUE="4194304" />
<PROPERTY NAME="rmem_max" VALUE="4194304" />
<PROPERTY NAME="wmem_default" VALUE="262144" />
<PROPERTY NAME="wmem_max" VALUE="262144" />
</KERNEL>
OCA/OCP Oracle Database 11g All-in-One Exam Guide
60
Obtaining the required packages can be a quite challenging for some Unix
distributions. Also, some of the kernel settings (such as the ip_local_port_range)
may conflict with local system administration policies. If you cannot get your system
into a state where it will pass the prerequisite tests, you have three options. First, you
can edit the oraparam.ini file or the refhost.xml file to change the value or to
remove the test entirely. This will “fix” the problem permanently. Second, you can run
the OUI with a switch that tells it to ignore the prerequisite tests. Third, you can run
the OUI and during the run tell it to ignore any failures. This last option can only
work when running OUI interactively, not when doing a silent install.
If at all possible, do not do any of these! In practice, often the problem is not that
the products will not work. For example, on Linux, some of the kernel settings and
packages are not really needed for an entry-level installation. The problem, however,
lies with the supportability of your installation. If you ever raise an SR (an SR is a
Service Request, passed to Oracle Support Services through MetaLink) and your
system does not conform to the prerequisites, the support analysts may well refuse to
help you. So if you have to break one of the rules to get an installation through, fix it
as soon as possible afterward.
Running the OUI
Oracle products are shipped on CDs or DVDs, or can be downloaded from Oracle
Corporation’s web site. The installation can be done directly from the CD or DVD,
but it is usually better to copy the CD or DVD to disk first (this is called staging), and
install from there. This does save time, since you aren’t prompted to insert different
media during the installation. The downloaded versions are usually ZIP files, or for
Linux and Unix compressed TAR or CPIO files. Use whatever operating system utility
is appropriate to expand them.
To launch the OUI, on Windows run the setup.exe file in the root directory, on
Linux and Unix, run the runInstaller shell script.
Database Creation and Upgrade Tools
The Database Configuration Assistant (DBCA) is a graphical tool used for creating
and modifying a database. Creating a database is not a big deal using DBCA. The
wizard-driven approach guides you through the database creations options, allowing
you to determine parameter values and file location options. DBCA then generates the
appropriate scripts to create a database with the options you have chosen. DBCA
ensures there are no syntax errors and proceeds to run these scripts. Everything that
DBCA does can also be done manually using a command-line utility. DBCA is
commonly launched by OUI. When you opt for this, OUI instantiates the Oracle
Home and then goes on to run DBCA.
As with database creation, database upgrade can be done manually or through a
graphical tool. The graphical tool is the Database Upgrade Assistant (DBUA). It, too,
can be called by OUI, if OUI detects an existing database Oracle Home of an earlier
version. The DBUA will ensure that no steps are missed, but many DBAs prefer to do
upgrades manually. They believe that it gives them more control, and in some cases a
manual upgrade can be quicker.
Chapter 2: Installing and Creating a Database
61
PART I
Both DBCA and DBUA are written in Java and therefore require a graphics
terminal to display.
Tools for Issuing Ad Hoc SQL: SQL*Plus
and SQL Developer
There are numerous tools that can be used to connect to an Oracle database. Two
of the most basic are SQL*Plus and SQL Developer. These are provided by Oracle
Corporation and are perfectly adequate for much of the work that a database
administrator needs to do. The choice between them is partly a matter of personal
preference, partly to do with the environment, and partly to do with functionality.
SQL Developer undoubtedly offers far more function than SQL*Plus, but it is more
demanding in that it needs a graphical terminal, whereas SQL*Plus can be used on
character-mode devices.
SQL*Plus
SQL*Plus is available on all platforms to which the database has been ported, and it
is installed into both Oracle database and Oracle client Oracle Homes. On Linux, the
executable file is sqlplus. The location of this file will be installation specific but
will typically be something like
/u01/app/oracle/product/db_1/bin/sqlplus
Your Linux account should be set up appropriately to run SQL*Plus. There are
some environment variables that will need to be set. These are
• ORACLE_HOME
• PATH
• LD_LIBRARY_PATH
The PATH must include the bin directory in the Oracle Home. The LD_LIBRARY_
PATH should include the lib directory in the Oracle Home, but in practice you may
get away without setting this. Figure 2-1 shows a Linux terminal window and some
tests to see if the environment is correct.
In Figure 2-1, first the echo command checks whether the three variables have
been set up correctly: there is an ORACLE_HOME, and the bin and lib directories
in it have been set as the first elements of the PATH and LD_LIBRARY_PATH variables.
Then which confirms that the SQL*Plus executable file really is available, in the
PATH. Finally, SQL*Plus is launched with a username, a password, and a connect
identifier passed to it on the command line.
Following the logon, the next lines of text display the version of SQL*Plus being
used, which is 11.1.0.6.0, the version of the database to which the connection has
been made (which happens to be the same as the version of the SQL*Plus tool), and
which options have been installed within the database. The last line is the prompt to
the user, SQL>, at which point they can enter any SQL*Plus or SQL command.
OCA/OCP Oracle Database 11g All-in-One Exam Guide
62
Historically, there were always two versions of SQL*Plus for Microsoft Windows:
the character version and the graphical version. The character version is the executable
file sqlplus.exe, the graphical version was sqlplusw.exe; with the current
release the graphical version no longer exists, but many DBAs will prefer to use it, and
the versions shipped with earlier releases are perfectly good tools for working with an
11 g database. There are no problems with mixing client versions: an 11g SQL*Plus
client can connect to a 9i database, and a 9i SQL*Plus client can connect to an 11g
database; changes in Oracle Net may make it impossible to go back further than 9i.
Following a default installation of either the Oracle database or just the Oracle client
on Windows, SQL*Plus will be available as a shortcut on the Windows Start menu.
The tests of the environment and the need to set the variables if they are not
correct, previously described for a Linux installation, are not usually necessary on a
Windows installation. This is because the variables are set in the Windows registry by
the Oracle Universal Installer when the software is installed. If SQL*Plus does not
launch successfully, check the registry variables. Figure 2-2 shows the relevant section
of the registry, viewed with the Windows regedit.exe registry editor utility. Within
the registry editor, navigate to the key
HKEY_LOCAL_MACHINE\SOFTWARE\ORACLE\KEY_OraDb11g_home1
The final element of this navigation path will have a different name if there have
been several 11g installations on the machine.
SQL Developer
SQL Developer is a tool for connecting to an Oracle database (or, in fact, some non-
Oracle databases too) and issuing ad hoc SQL commands. It can also manage PL/SQL
objects. Unlike SQL*Plus, it is a graphical tool with wizards for commonly needed
actions. SQL Developer is written in Java, and requires a Java Runtime Environment
(JRE) to run. It is available on all platforms that support the appropriate version of
the JRE. SQL Developer does not need to be installed with the Oracle Universal
Figure 2-1
Checking the Linux
session setup
Chapter 2: Installing and Creating a Database
63
PART I
Installer. It is not installed in an Oracle Home but is completely self-contained. The
latest version can be downloaded from Oracle Corporation’s web site.
To install SQL Developer, unzip the ZIP file. That’s all. It does require at least JRE
release 1.5, to be available. If a JRE is not available on the machine being used, there
are downloadable versions of SQL Developer for Windows that include it. (These
versions include a Java Developers Kit or JDK which includes the JRE.) For platforms
other than Windows, JRE1.5 must be preinstalled. Download it from Sun Microsystem’s
web site, and install it according to the platform-specific directions. To check that the
JRE is available and its version, run the following command from an operating system
prompt:
java -version
This should return something like
java version 1.5.0_13
Java(TM) 2 Runtime Environment, Standard Edition (build 1.5.0_13-b05)
Java HotSpot(TM) Client VM (build 1.5.0_13-b05, mixed mode, sharing)
If the version number returned is not what you expect, using which java may help
identify the problem: the search path could be locating an incorrect version.
Once SQL Developer has been unzipped, change your current directory to the
directory in which SQL Developer was unzipped, and launch it. On Windows, the
executable file is sqldeveloper.exe. On Linux, it is the sqldeveloper.sh shell
script. Remember to check that the DISPLAY environment variable has been set to a
suitable value (such as 127.0.0.1:0.0, if SQL Developer is being run on the system
console) before running the shell script.
Figure 2-2 The Oracle registry variable
OCA/OCP Oracle Database 11g All-in-One Exam Guide
64
Any problems with installing the JRE and launching SQL Developer should be
referred to your system administrator.
TIP Database 11g does ship with a release of SQL Developer, and OUI
will unzip it into a directory in the Oracle Home, but this will not be the
up-to-date version. As of the time of writing, the version shipped with the
production release of the 11g database is version 1.1, but the current version
is 1.5.
Figure 2-3 shows the SQL Developer User Interface after connecting to a database
and issuing a simple query.
The general layout of the SQL Developer window comprises a left pane for
navigation around objects, and a right pane to display and enter information.
In the figure, the left-hand pane shows that a connection has been made to a database.
The connection is called orcl_sys. This name is just a label chosen when the connection
was defined, but most developers will use some sort of naming convention—in this case,
the name chosen is the database identifier, which is orcl, and the name of the user the
connection was made as, which was sys. The branches beneath list all the possible object
types that can be managed. Expanding the branches would list the objects themselves. The
Figure 2-3 The SQL Developer user interface
Chapter 2: Installing and Creating a Database
65
PART I
right-hand pane has an upper part prompting the user to enter a SQL statement, and a
lower part that will display the result of the statement. The layout of the panes and the
tabs visible on them are highly customizable.
The menu buttons across the top menu bar give access to standard facilities:
• File A normal Windows-like file menu, from where one can save work and
exit from the tool.
• Edit A normal Windows-like edit menu, from where one can undo, redo,
copy, paste, find, and so on.
• View The options for customizing the SQL Developer user interface.
• Navigate Facilities for moving between panes, and also for moving around
code that is being edited.
• Run Forces execution of the SQL statements, SQL script, or PL/SQL block
that is being worked on.
• Debug Rather than running a whole block of code, step through it line by
line with breakpoints.
• Source Options for use when writing SQL and PL/SQL code, such as
keyword completion and automatic indenting.
• Migration Tools for converting applications designed for third-party databases
(Microsoft Access and SQL Server, and MySQL) to the Oracle environment.
• Tools Links to external programs, including SQL*Plus.
• Help It’s pretty good.
SQL Developer can be a very useful tool, and it is very customizable. Experiment
with it, read the Help, and set up the user interface the way that works best for you.
Exercise 2-1: Install SQL Developer on Windows In this exercise, you will
install SQL Developer on a Windows machine.
1. Download the current version of SQL Developer. The URL is
/> Click the radio button to accept the license agreement, and then select the file
that includes the JDK (if you do not already have this) or without the JDK if it
already available on the machine.
The file will be called something like sqldeveloper-1.2.1.3213.zip,
depending on the version.
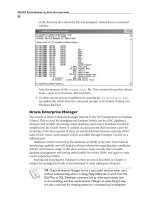
2. Move the file to an empty directory, and expand it. You will need WinZip or
a similar utility installed to do this. The next illustration shows the contents