OCA /OCP Oracle Database 11g A ll-in-One Exam Guide- P90 pot
Bạn đang xem bản rút gọn của tài liệu. Xem và tải ngay bản đầy đủ của tài liệu tại đây (394.53 KB, 10 trang )
OCA/OCP Oracle Database 11g All-in-One Exam Guide
846
section. From the Transport Tablespaces window you can launch either a wizard to
generate a set of files (the Data Pump dump file and copies of the datafiles) that can
be moved to another database, or a wizard to integrate a previously created set of files
into the database. Tablespaces can also be transported using RMAN (RMAN can
extract the necessary datafiles from a backup if necessary) or by using the impdp
and expdp utilities.
When transporting tablespaces, there are certain restrictions:
• The tablespace(s) should be self-contained. This means that the objects within
the tablespace(s) must be complete: not dependent on any other objects. For
instance, if tables are in one tablespace and indexes on the tables in another,
both tablespaces must be included in the set to be transported.
• The destination database must use the same (or a compatible) character set as
the source database.
• The schemas that own the objects in the tablespace(s) must exist in the
destination database, or the operation will fail.
• Any objects in the destination database with the same owner and object name
as objects in the transportable tablespace set will not be lost: they will be
ignored during the import.
• A tablespace of the same name must not already exist. Remember that is
possible to rename tablespaces.
Figure 23-3 shows the steps to generate a transport set.
In Figure 23-3, the first command is the PL/SQL procedure call to confirm that a
set of tablespaces (in the example, just one tablepsace: TS1) is self-contained. Then
the tablespace is made read only. The Data Pump job, launched with the expdp
Figure 23-3 Using command-line utilities to create a transportable tablespace set
Chapter 23: Moving and Reorganizing Data
847
PART III
command-line utility, connects as user SYSTEM and then specifies the tablespace to
be transported. This will generate a dump file with metadata describing the contents
of the TS1 tablespace in the Oracle directory DP_OUT. Then, while the tablespace is
still read only, copy its datafiles and the Data Pump dump file to a suitable location
on the destination database server.
If the destination database is on a platform with a different endian-ness from the
source, connect to the destination database with RMAN and run a command such as
this:
RMAN> convert datafile '/u02/ttsfiles/ts1.dbf'
from platform='Linux IA (32-bit)' format '/u02/ttsfiles/ts1conv.dbf';
This command will read the nominated datafile, and convert it from the named
platform format to a new file in the format that is required for the destination
database.
To import the tablespace(s) on the destination system, use a command such as
that shown in Figure 23-4.
The impdp command in Figure 23-4 reads a dump file to determine the name
and contents of the tablespace consisting of the nominated datafile (previously
converted, if necessary).
TIP Do not forget the final step: make the tablespace read/write, in both the
source and the destination databases.
Figure 23-4 Using the impdp utility to import a transported tablespace
OCA/OCP Oracle Database 11g All-in-One Exam Guide
848
A generalization of the transportable tablespace feature makes it possible to
transport an entire database from one machine to another. As discussed in Chapter
17, RMAN can create a database. This is a useful capability, but the new database can
be only on the same platform as the source database; the technique leverages RMAN
backup and restore, which cannot work across platforms. The transportable database
feature leverages the transportable tablespace capability, which can go across platforms.
The technique is to copy all the datafiles to the new machine with appropriate
conversion, start an instance with a new parameter file, and create a new controlfile
and online log files.
Transporting a database from one machine (and possibly one platform) to another
does not involve any technology not already discussed in this chapter and previous
chapters on backup and recovery, but it does involve many steps. To ease the process,
there is an RMAN command that will automate (almost) the whole process: it will
convert the datafiles, generate a parameter file, and generate a script to be run on the
destination machine that will create the controlfile and open the database with a
RESETLOGS (necessary to create the online redo log files). The script will not, however,
transfer any files that are external to the database (such as BFILEs or external table
files), and it will not create a password file.
TIP After a database transport there will usually be some objects that must
be adjusted manually, such as directories. Also, the transported database will
have the same DBID as the source: you can change this with the DBNEWID
utility, implemented as the executable $ORACLE_HOME/bin/nid on Unix
or %ORACLE_HOME%\bin\nid.exe on Windows.
Exercise 23-3: Transport a Database In this exercise you will carry out the
preparatory steps for a database transport, and inspect the results.
1. Shut down the database cleanly, and open it read only. The clean shutdown
is necessary, because undo data cannot be transported (though an undo
tablespace can, and will, be). The illustration shows this step.
Chapter 23: Moving and Reorganizing Data
849
PART III
2. Connect to the database with the RMAN executable. If working on Windows,
run a command to prepare for transport to a Linux system, nominating a
suitable name for the SQL script and a suitable destination for the script,
the converted datafiles, and the generated parameter file:
convert database transport script 'tran2linux.sql'
to platform 'Linux IA (32-bit)' format 'c:\tran2linux\%U';
The illustration shows this step on a Linux system, preparing for a transport to
Windows.
3. Use an operating system utility to inspect the files generated in the nominated
destination. These will be copies of the database’s datafiles, a parameter file,
and a SQL script.
4. Note the contents of the parameter file. It will include the phrase “Please
change the values of the following parameters:” followed by a list of
parameters that will usually need adjustment before transferring the files
to the destination system.
5. Note the contents of the SQL script. This includes a number of commands
that refer to operating system directories; these will usually require editing
before running the script on the destination system.
6. Note that the generated files do not include a password file. If the database
uses a password file (that is to say, if the instance parameter REMOTE_
LOGIN_PASSWORDFILE has been set), this must be created on the
destination system.
7. Shut down the source database, and open it normally.
OCA/OCP Oracle Database 11g All-in-One Exam Guide
850
Resumable Space Allocation
Many operations can fail for reasons of inadequate space. This typically shows up as
an inability to add another extent to a segment, which itself can have several causes:
a datafile could be full; an auto-extensible datafile or tempfile could be on a disk that
is full; an undo segment could be in an undo tablespace that is full; an operation
requiring temporary space could be using a temporary tablespace that is full; or a user
could have reached their quota limit on a tablespace. Whatever the reason, space-related
errors tend to be dreadfully time consuming.
Consider an exercise to load data into a data warehouse. The first time you attempt
this, it fails because the destination tablespace runs out of space. The data that did go
in must be rolled back (which may take as long as the insert), the tablespace extended,
and the load done again. Then it fails because of inadequate undo space; roll back,
increase the undo tablespace, and try again. Then it fails during index rebuilding,
because of a lack on temporary space. And so on. Exercises such as this are the bane
of many DBAs’ lives. The resumable space allocation feature can be the solution.
If you enable resumable space allocation, when an operation hits a space problem
(any space problem at all) rather than failing with an error (and in many cases rolling
back what it did manage to do) the operation will be suspended. To the user, this will
show as the session hanging. When the error condition is resolved, it will continue.
All suspended sessions (currently suspended and previously suspended but now
running again) are listed in the view DBA_RESUMABLE.
To enable resumable space allocation at the session level, the command is
alter session enable resumable [ timeout <seconds> ] [ name <opname> ] ;
The TIMEOUT option lets you specify for how long the statement should hang. If
this time is reached without the problem being resolved, the error is returned and the
statement fails. If there is no specified TIMEOUT, the session will hang indefinitely.
The NAME option lets you specify a name that will be displayed in the DBA_RESUMABLE
view, which can help you determine at which point in a multistatement process the
space problem occurred.
TIP It is possible for a process to be suspended and resumed many times.
The DBA_RESUMABLE view will show you details of the current or the last
suspension.
It is also possible to enable resumable space for all sessions, by setting an instance
parameter. This is a dynamic parameter. For example, to set a timeout of one minute:
alter system set resumable_timeout=60;
This will cause all sessions that hit a space problem to be suspended for up to one
minute.
Chapter 23: Moving and Reorganizing Data
851
PART III
TIP The expdb and impdp Data Pump utilities have a command-line switch
RESUMABLE=Y (the default is N) that will allow Data Pump jobs to suspend if
they hit space problems.
EXAM TIP While a session is suspended, it will retain control of all the
resources it is using, including: undo space, temporary space, PGA memory,
and record locks.
There is little point in enabling resumable space allocation for a session or the
instance if you don’t do anything about the problem that caused a session to be
suspended. Suspended sessions will, by default, be reported through the server alert
system (fully described in Chapter 24), be displayed by Database Control, and be
listed in the DBA_RESUMABLE data dictionary view. Having spotted a problem, you
can fix it interactively from another session. Or you can create a trigger: an AFTER
SUSPEND ON DATABASE trigger that will run whenever a session is suspended. This
trigger could report the problem (perhaps by generating an e-mail), or it could include
code to investigate the problem, and fix it automatically. For example, to send an e-mail:
create trigger detect_suspend
after suspend on database
begin
utl_mail.send(sender=>'',
recipients=>'',
subject=>'DB session suspended',
message=>'resumable space allocation event occurred');
end;
TIP If you create an AFTER SUSPEND ON DATABASE trigger that attempts
to fix problems, remember that it might hit the same problem.
Exercise 23-4: Use Resumable Space Allocation In this exercise you will
set up a space allocation problem, and enable resumable space allocation to gain the
opportunity to fix it without an error.
1. Connect to your database as user SYSTEM and create a tablespace to use for
this exercise. With SQL*Plus:
create tablespace small datafile 'small1.dbf' size 2m;
2. Create a table in the tablespace, with fixed-length rows. It will be impossible
to insert 2000 rows without filling the tablespace:
create table toobig(c1 char(1000)) tablespace small;
3. Run this anonymous PL/SQL block to force an error:
begin
for i in 1 2000 loop
insert into toobig values ('a row');
end loop;
end;
/
OCA/OCP Oracle Database 11g All-in-One Exam Guide
852
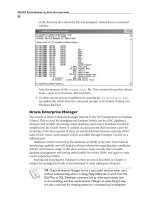
The illustration shows Steps 1, 2, and 3.
4. Note the error: an ORA-01653.
5. Alter the session to enable resumable space allocation:
alter session enable resumable name 'exercise 23-4';
6. Rerun the code from Step 3. The session will hang.
7. Start another SQL*Plus session, connected as SYSTEM, and run this query:
select session_id,suspend_time,name ,sql_text,error_number
from dba_resumable;
Note that the ERROR_NUMBER column is reporting the error that would
have been returned to the session, had it not been suspended.
8. Connect to the database with Database Control; you will see the problem
reported on the database home page, in the Alerts section.
9. From your second SQL*Plus session, fix the problem:
alter tablespace small add datafile 'small2.dbf' size 4m;
10. Observe that the procedure call of Step 6 will now complete successfully, with
no intervention required.
11. Tidy up by dropping the tablespace:
drop tablespace small including contents and datafiles;
Segment Reorganization
During typical database operation, rows will be inserted, updated, and deleted. This
will affect the table segments that store the rows themselves, and the index segments
associated with the tables. Chapter 5 included a discussion of extent management (how
Chapter 23: Moving and Reorganizing Data
853
PART III
space is allocated to segments within a tablespace) and segment space management
(how rows are allocated to blocks within a segment). You are strongly advised to use
locally managed tablespaces with automatic segment space management: these options
are enabled by default in the current release of the database and rely on bitmaps to track
extent allocation and block usage.
The bitmapped managed techniques are very efficient for allocating space as rows
are inserted and segments grow, but UPDATE and DELETE statements can still result
in problems that may make it necessary to reorganize the segments. Updates can
cause row migration, and deletions can result in wasted space.
Row Chaining and Migration
A chained row is a row that is stored in more than one block. This will occur when the
row is bigger than the block. If the block size is 4KB and the row is 5KB, there is no
choice; the row will be stored in two blocks. At system design time, this should have
been considered: the rows are too large for the blocks. This is sometimes a systems
analysis problem, caused by incorrect normalization resulting in an unnecessary
number of columns in the table, but it is often a design time problem. Perhaps the
table uses columns of type CHAR or LONG rather than VARCHAR2 or BLOB, or
perhaps the table could have been sliced vertically, into two or more tables. Whatever
the cause, row chaining is not the DBA’s problem. Row migration is a different matter.
Most of the Oracle primitive data types have variable length, and therefore most
tables have rows of variable length. As rows are updated, their length may change.
This means that the rows will get bigger.
The default settings for a table segment reserve 10 percent of each block as space
for rows to expand. If rows are only ever inserted or deleted, then this 10 percent is in
fact wasted space. But if rows are subjected to updates that make them bigger, then it
may not be sufficient. If the 10 percent free space has already been used by previous
updates and an update is made that will increase the size of another row, the entire
row must be relocated to another block, where there is room for the new version of
the row. This is a row migration. Clearly, this will impact on the performance of the
UPDATE statement: it becomes in effect a DELETE and an INSERT. A worse problem
arises with subsequent access to the row, because the index entries are not adjusted
when a row is migrated: the index keys always point to the row’s original location.
When a row is migrated, a stub (think of it as a forwarding address) is left behind,
which directs the session to the current location of the row. The result is that it takes
two table block reads to get the row, not one. Worse still, if a row has been migrated
once and is updated again, it may be migrated again. And again.
EXAM TIP Row migration is caused by UPDATE statements. INSERT and
DELETE can never cause row migration.
Row migration should be detected and fixed by the DBA. The ideal situation is to
prevent it in the first place, by adjusting the table settings to reserve an appropriate
amount of space for rows to expand. For example, if you know that on average the
OCA/OCP Oracle Database 11g All-in-One Exam Guide
854
rows of a certain table will double in size during its lifetime, the percentage of space
reserved should not be 10 percent but 50 percent. This can be set at table creation
time, or later:
alter table <table_name> pctfree 50;
Many times the information needed to set the PCTFREE correctly is not available, so
all you can do is correct the problem later. The simplest method is to move the table:
alter table <table_name> move [ <tablespace_name> ] ;
The underlying implementation of the MOVE command is a CREATE TABLE . . .
AS SELECT * FROM . . . command followed by some data dictionary magic to rename
the newly created table to the name of the original table, while maintaining the
connections to dependent objects. The row migration problem is fixed, because the
moved table will have all the rows freshly inserted. An INSERT can never cause row
migration. The problem is that all dependent indexes will be broken, because the
rows are in a new table, with new rowids; the indexes will have rowids that are now
invalid. The indexes will have to be reorganized next.
EXAM TIP Reorganizing a table with a MOVE will render all associated
indexes unusable.
TIP While a table move is in progress, the table can be queried but will be
locked against DML. You cannot move a table if there is an uncommitted
transaction against it.
A row migration problem can be detected with the ANALYZE command. This will
pass through the table counting the rows that are chained or migrated. To see the result,
query the CHAIN_CNT column in DBA_TABLES. To determine whether the rows are
chained or migrated, look at the AVG_ROW_LEN column: if this is less than the block
size, then the rows will be migrated rows; if it is greater, they will be chained rows.
EXAM TIP For most purposes, tables should be analyzed with procedures
in the DBMS_STATS package. An exception is counting chained and migrated
rows: these are detected only with the ANALYZE command.
Exercise 23-5: Manage Row Migration In this exercise you will create,
investigate, and fix a row migration problem.
1. Connect to your database as user SYSTEM with SQL*Plus.
2. Create a table with variable-length rows:
create table ex235 (c1 varchar2(20));
3. Run this PL/SQL code block to insert some rows:
begin
for i in 1 1000 loop
Chapter 23: Moving and Reorganizing Data
855
PART III
insert into ex235 values (null);
end loop;
end;
/
4. Analyze the table, and determine that no rows are migrated:
analyze table ex235 compute statistics;
select avg_row_len, chain_cnt from user_tables where table_name='EX235';
Steps 2, 3, and 4 are shown in the illustration.
5. Update the rows by populating the (previously null) column:
update ex235 set c1='1234567890qwertyuiop';
6. Repeat Step 4. Note that the rows are longer, and that the majority of them are
now migrated.
7. Fix the problem by moving the table:
alter table ex235 move;
8. Repeat Step 4. Note that the row migration problem has been solved.
9. Tidy up:
drop table ex235;
Segment Shrink
When a row is deleted, the space it was occupying in its block becomes available for
reuse when another row is inserted. However, the nature of the activity against a table
can result in a significant amount of wasted space within a table. This could be
reclaimed with a MOVE operation: following a MOVE, all the blocks will be consecutively
full of freshly reinserted rows. But during the MOVE, the table is locked and following
it all the indexes must be rebuilt. For many environments, this makes use of MOVE to
reorganize tables impossible. The SHRINK command, while not as effective as a MOVE,