Học Actionscript 3.0 - p 44 pptx
Bạn đang xem bản rút gọn của tài liệu. Xem và tải ngay bản đầy đủ của tài liệu tại đây (4.88 MB, 10 trang )
An XML-Based Navigation System
Chapter 14: XML
409
26 _xml = new XML(_menuLdr.data);
27 initLoader();
28 initMenus();
29 } catch (err:TypeError) {
30 trace("Can't parse loaded content as XML:",
31 err.message);
32 }
33 }
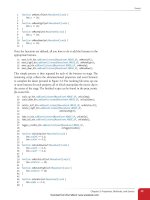
The initLoader() method creates an instance of the SafeLoader class (line
36), positions it below the future location of the menus (line 37), and adds it
to the display list (line 38). It also draws a 750 × 450 pixel movie clip (lines 40
through 44), adjusts its y position to 100, the same location as the
SafeLoader
instance (line 45), and uses it to mask the loaded content (line 46).
34 //loader and mask
35 private function initLoader():void {
36 _loader = new SafeLoader();
37 _loader.y = 100;
38 this.addChild(_loader);
39
40 var loaderMask:MovieClip = new MovieClip();
41 var g:Graphics = loaderMask.graphics;
42 g.beginFill(0x000000, 1);
43 g.drawRect(0, 0, 750, 450);
44 g.endFill();
45 loaderMask.y = 100;
46 _loader.mask = loaderMask;
47 }
The initMenus() method creates an instance of the NavigationBarXML class
(lines 50 and 51) and adds it to the display list (line 52). In doing so, it passes
the scope of the document class into the constructor, as well as the
<menus>
XMLList. This makes all of the menu XML data available to the class so it can
create the necessary buttons. The method also creates a
DropShadowFilter
instance (line 54), sets its alpha to 25 percent, and adds it to the _navBar
instance. This will give the entire menu system, including the submenus that
appear interactively, a drop shadow.
48 //navigation menu bar
49 private function initMenus():void {
50 var _navBar:NavigationBarXML =
51 new NavigationBarXML(this, _xml.menus);
52 this.addChild(_navBar);
53
54 var ds:DropShadowFilter = new DropShadowFilter();
55 ds.alpha = 0.25;
56 _navBar.filters = [ds];
57 }
58
59 public function get assetLoader():SafeLoader {
60 return _loader;
61 }
62 }
63 }
N OT E
Using a mask prevents loaded content
from appearing outside the area dedi-
cated for its display—something that
frequently happens when assets follow
the mouse, for example. If you want to
see what the project looks like without a
mask at any point, simply comment out
line 46 when testing.
N OT E
See Chapter 13 for information about
a modification made to Adobe’s
SafeLoader class.
Download from Wow! eBook <www.wowebook.com>
Part V: Input/Output
410
An XML-Based Navigation System
Finally, a getter is provided to return the SafeLoader instance when required.
Despite not processing the information returned, a getter is used here instead
of a public property because the value should be read-only. By contrast, we’ll
use public properties later on in the
MenuButtonSub class, to give you more
experience with both approaches to controlling information access in classes.
For more information, see the “Encapsulation” section in Chapter 6.
NavigationBarXML
The NavigationBarXML class is the longest class in the project, and the real
workhorse. Although its functionality isn’t particularly complex, a little more
detail is warranted to cover some of its inner workings.
Lines 1 through 15 declare the package and import the necessary classes. In
this case, note that three TweenLite classes that we haven’t discussed before
are imported:
TweenPlugin, ColorTransformPlugin, and VisiblePlugin. We’ll
discuss those when we go over the constructor. Also, note that
MenuButtonMain
and
MenuButtonSub are imported. It’s in this class that we’ll be using both but-
ton types.
Line 17 declares the class and extends
MovieClip so the navigation bar
instance inherits the accessible properties and methods of the
MovieClip
class. Lines 19 through 21 create three private properties, preventing access
from outside the class. The first property (line 19) will hold an instance of the
document class (remember that it extended
MovieClip, as well) passed into
the constructor during instantiation. This will allow us to get the
SafeLoader
instance when one of the menu buttons needs to load content.
The second property (line 20) will hold an
XMLList of all the button data
loaded in the document class—also passed into the constructor during
instantiation. The last property (line 21) will contain the currently active
submenu when the user rolls his or her mouse over a menu button. This will
allow us to reference the same menu in another method when the user rolls
the mouse away and we must hide the menu.
1 package com.learningactionscript3.ui {
2
3 import flash.display.Graphics;
4 import flash.display.MovieClip;
5 import flash.events.Event;
6 import flash.events.MouseEvent;
7 import flash.geom.Matrix;
8 import flash.net.URLRequest;
9 import flash.text.TextField;
10 import com.greensock.TweenLite;
11 import com.greensock.plugins.TweenPlugin;
12 import com.greensock.plugins.VisiblePlugin;
13 import com.greensock.plugins.ColorTransformPlugin;
14 import com.learningactionscript3.ui.MenuButtonMain;
15 import com.learningactionscript3.ui.MenuButtonSub;
16
17 public class NavigationBarXML extends MovieClip {
18
Download from Wow! eBook <www.wowebook.com>
An XML-Based Navigation System
Chapter 14: XML
411
19 private var _app:MovieClip;
20 private var _navData:XMLList;
21 private var _subMenu:MovieClip;
The class constructor occupies lines 23 through 41. It accepts two arguments:
the movie clip in which the navigation bar was instantiated (to allow us to
get a reference to the
SafeLoader instance), and the button data loaded from
XML. This information is immediately stored in the aforementioned private
properties, in lines 25 and 26, so we can use the references in multiple meth-
ods within the class.
Line 28 calls the
addMenus() function, which builds the menu system and
which we’ll discuss in just a moment. Lines 30 through 37 dynamically draw
the thick black line that serves as the lower bound of the main menu tabs.
This improves upon the original version of the menu system in Chapter 6,
which used a symbol for this purpose, because the code can easily be altered
without having to create new artwork in the FLA.
The last two lines in the constructor activate the TweenLite plugins. The
TweenLite tweening package is kept staggeringly small by only integrating
the bare animation essentials. It doesn’t skimp on bells and whistles, how-
ever, because it allows you to add individual features as needed by activating
plugins. This project uses two TweenLite plugins:
VisiblePlugin, which
turns an asset invisible after a tween, and
ColorTransformPlugin, which
allows us to tween color values. The uses of both plugins will be explained
in context. This is a one-time process. Once the plugins are activated, their
features will be available throughout your SWF, and any SWFs loaded from
the same domain.
22 //constructor
23 public function NavigationBarXML(app:MovieClip,
24 navData:XMLList) {
25 _app = app;
26 _navData = navData;
27
28 addMenus();
29
30 var line:MovieClip = new MovieClip();
31 var g:Graphics = line.graphics;
32 g.beginFill(0x000000);
33 g.drawRect(0, 0, _app.stage.stageWidth, 4);
34 g.endFill();
35 line.y = 100;
36 line.mouseEnabled = false;
37 this.addChild(line);
38
39 TweenPlugin.activate([VisiblePlugin]);
40 TweenPlugin.activate([ColorTransformPlugin]);
41 }
The addMenus() method is the workhorse of this class, and it’s responsible for
parsing the XML data, instantiating each main menu button, creating their
submenus, and instantiating all submenu buttons. Line 44 uses the XML
Download from Wow! eBook <www.wowebook.com>
Part V: Input/Output
412
An XML-Based Navigation System
length() method to determine how many main menu buttons are included
in the XML. (The project source XML contains five menus.)
The remainder of the function is inside a loop that iterates five times, once for
every menu. Line 46 starts the process by excerpting only the XML relevant
to the current menu. Lines 49 through 59 then initialize the main menu but-
ton. Lines 49 and 50 create a
MenuButtonMain instance, passing the label attri-
bute from the XML into the class constructor to create the button’s text label.
Line 51 positions the button horizontally, beginning at 20 pixels and then
offsetting a distance equivalent to the buttons width and a 2-pixel space, for
each button in the loop. As the button is 120 pixels wide, this means the first
button is placed at an x position of 20 pixels
(20 + 0 * (120 + 2)), the sec-
ond at 142
(20 + 1 * (120 + 2)), and so on. Line 52 positions each button
at a y coordinate of 75.
Lines 53 through 58 create two event listeners, one for the
MOUSE_OVER event
and another for the
MOUSE_OUT event. When these events occur, they call the
methods starting at lines 83 and 90, respectively. We’ll discuss these methods
in a few minutes. Finally, line 59 adds each main menu button to the display
list.
42 //building the menus
43 private function addMenus():void {
44 var mainButtonLength:uint = _navData.button.length();
45 for (var i:int; i < mainButtonLength; i++) {
46 var buttonXML:XML = _navData.button[i];
47
48 //main button
49 var mainBtn:MovieClip =
50 new MenuButtonMain(buttonXML.@label);
51 mainBtn.x = 20 + i * (mainBtn.width + 2);
52 mainBtn.y = 75;
53 mainBtn.addEventListener(MouseEvent.MOUSE_OVER,
54 onMainBtnOver,
55 false, 0, true);
56 mainBtn.addEventListener(MouseEvent.MOUSE_OUT,
57 onMainBtnOut,
58 false, 0, true);
59 this.addChild(mainBtn);
Still within the primary loop that iterates once for each main menu button,
lines 61 through 64 create the subMenu
MovieClip instance to hold all sub-
menu buttons. The submenu is added as a child to the main button (line
64), so their locations start out at the same point. In line 62, the submenu’s y
coordinate is set to the bottom of the main button (using the button’s height
plus a 2-pixel margin to account for the black line that will lay on top of the
navigation bar).
Line 67 next determines the number of project nodes in the current menu.
This will determine how many submenu buttons are required. Lines 68
through 79 make up a loop that iterates once for every submenu button. Line
69 parses the current project node from the parent menu XML data.
N OT E
As mentioned previously, length()
is a method, in contrast to the
Array
property
length that serves the same
purpose. This can take a little getting
used to.
N OT E
Note the nested loop that results from
the loop that begins at line 68 residing
within the loop that begins at line 45.
The outer loop increments through the
five main menus, using i as its increment
variable. The inner loop increments
through the number of projects in each
menu (which can vary) and uses j as its
increment variable.
Each time through the outer loop, line
46 creates a subset of XML that only
pertains to the current menu, beginning
with the main menu button:
var buttonXML:XML = _navData.
button[i];
Then each time through the inner loop,
each project node from this subset is
parsed in line 69, resulting in each sub-
menu button:
var projectNode:XML = buttonXML.
project[j];
Thereafter, any XML information can be
parsed from the
projectNode variable.
Download from Wow! eBook <www.wowebook.com>
An XML-Based Navigation System
Chapter 14: XML
413
Lines 70 and 71 create an instance of the MenuButtonSub class, passing the
label attribute of the <project> node into the constructor to serve as the
button’s text label. Line 72 sets the button’s public property
projectPath to
the
path attribute of the project, and Line 73 sets the button’s public property
projectDescription to the text within the <project> node.
Lines 75 through 77 add an event listener for the
CLICK event so the submenu
button will load the asset at the path associated with the button. Note that no
other mouse event listeners are created. The
ROLL_OVER and ROLL_OUT behav-
ior of the button is cosmetic and is not customizable, so we’ll build it in the
MenuButtonSub class.
The last line of the loop, line 78, adds the button to the submenu.
60 //sub menu
61 var subMenu:MovieClip = new MovieClip();
62 subMenu.y = mainBtn.height + 2;
63 subMenu.visible = false;
64 mainBtn.addChild(subMenu);
65
66 //sub buttons
67 var subButtonLength:uint = buttonXML.project.length();
68 for (var j:int = 0; j < subButtonLength; j++) {
69 var projectNode:XML = buttonXML.project[j];
70 var subButton:MovieClip =
71 new MenuButtonSub(projectNode.@label);
72 subButton.projectPath = projectNode.@path;
73 subButton.projectDescription = projectNode;
74 subButton.y = ((subButton.height) * j);
75 subButton.addEventListener(MouseEvent.CLICK,
76 onSubBtnClick,
77 false, 0, true);
78 subMenu.addChild(subButton);
79 }
80 }
81 }
Called each time the main menu button is rolled over, the onMainBtnOver()
method shows the submenu. Line 84 first determines which button was
rolled over by checking the
currentTarget property of the event. Next, the
button must show its submenu. Because the main menu button contains
both a sprite background and a text field (explained in the next section), line
85 references the submenu by querying the third child of the button. Line 86
sets the visibility of the menu to true, and then line 87 uses TweenLite to fade
from an alpha of 0 (transparent) to 1 (opaque), in one-quarter of a second.
Rolling off the main menu button calls the
onMainBtnOut() method so we
can again hide the menu. The first line of the method uses the
relatedObject
property of mouse events to determine if the mouse has rolled onto anything
but a submenu button. We don’t want to hide the menu if one of its buttons
is in use. If that’s not the case, the submenu’s visible property is set to true
so you can see the submenu when it fades in. TweenLite is used to fade the
submenu up to an alpha of 1 over one-quarter second.
N OT E
If the contents of the button were less
uniform, you might prefer to set the
name property of the submenu in the
creation process (perhaps after line 64
in this class) and then us the
getChild-
ByName()
method to retrieve a reference
to the submenu.
Download from Wow! eBook <www.wowebook.com>
Part V: Input/Output
414
An XML-Based Navigation System
Also, the visibility of the menu is set to false using TweenLite’s VisiblePlugin.
When the
visible property of the TweenLite object is set to false, this plugin
automatically sets the visibility of the target to false after the tween is com-
plete. In other words, the menu fades out and then becomes invisible. This is
vital to the success of the menu because we can’t rely solely on alpha to hide
our menus.
Despite being transparent, display objects with an alpha value of 0 can still
receive mouse events. If we just faded the submenu out, rolling the mouse
over its prior location would cause it to fade back into view without ever
going near its main menu button. Instead, the menus must be invisible
because invisible assets won’t respond to mouse events. So, the menus must
start as invisible, become visible but tween their alpha property from 0 to
1 when rolled over, tween their alpha back to 0 and become invisible again
upon mouse out.
82 //menu button mouse roll behavior: appearance
83 private function onMainBtnOver(evt:MouseEvent):void {
84 var mainBtn:MovieClip = MovieClip(evt.currentTarget);
85 _subMenu = mainBtn.getChildAt(2);
86 _subMenu.visible = true;
87 TweenLite.to(_subMenu, 0.25, {alpha:1});
88 }
89
90 private function onMainBtnOut(evt:MouseEvent):void {
91 if (!(evt.relatedObject is MenuButtonSub)) {
92 TweenLite.to(_subMenu, 0.25, {alpha:0, visible:false});
93 }
94 }
The last method in the class is called when a submenu button is clicked.
Line 97 determines which button was clicked and retrieves the values from
its public properties
projectPath and projectDescription. The path is used
to load the content associated with that button, and the description (included
here only as an example) might be used to show information about the asset
in a caption field, if you thought it necessary.
Line 100 or 101 will unload any content from the
SafeLoader instance
(retrieved from the document class
assetLoader getter), depending on which
platform you’re targeting. As discussed in Chapter 13,
unloadAndStop() is
preferable because it closes all sound and video streams, stops all timers, and
removes all relevant listeners, so the asset can be properly unloaded. This
method, however, requires Flash Player 10 or later. If you must target Flash
Player 9, you must use the
unload() method and take all necessary steps
yourself to close open streams, stop timers, and remove listeners within the
loaded asset. After any content is unloaded, line 102 then loads the content
at the path contained in the local
path variable.
95 //menu button click behavior: loading
96 private function onSubBtnClick(evt:MouseEvent):void {
97 var subBtn:MovieClip = MovieClip(evt.target);
98 var path:String = subBtn.projectPath;
99 var description:String = subBtn.projectDescription;
N OT E
Hiding and revealing the submenus
could be simplified by just popping
the menus in and out when the value
of their visible property changes. But
TweenLite makes this so easy that only
three extra lines of code are required—
line 87 does the work and lines 12
and 39 enable the
VisiblePlugin.
(Line 11 is still required to support the
ColorTransformPlugin, and line 92
will still be required in another form.)
If you prefer that the submenus pop in
and out (perhaps because the quarter-
second tween up and down makes the
system feel less responsive), that’s easy to
change. First comment out lines 87 and
92 and then add the following after line
92 to hide the menu:
_subMenu.visible = false;
(You may also comment out line 12 and
39, but their effect on the project will be
negligible. To remove all alpha tween-
ing of the submenus entirely, you can
remove lines 12, 39, 87, and the original
line 92, but they will not hinder perfor-
mance if the appropriate lines remain
commented, and this allows you restore
the functionality later if you change
your mind.)
Download from Wow! eBook <www.wowebook.com>
An XML-Based Navigation System
Chapter 14: XML
415
100 //_app.assetLoader.unload(); //FP 9
101 _app.assetLoader.unloadAndStop(); //FP 10
102 _app.assetLoader.load(new URLRequest(path));
103 }
104 }
105 }
This actually concludes the main functionality of the navigation bar, includ-
ing the XML loading and parsing, and the content loading triggered by using
the system. However, we must still discuss the classes that create the main
menu buttons and submenu buttons.
MenuButtonMain
The MenuButtonMain class works hand in hand with the corresponding
movie clip symbol in the main FLA’s Library. The movie clip contains art-
work resembling a tab, and a linkage class of
com.learningactionscript3.
ui.MenuButtonMain
. This class resides in that location and creates the button’s
text field and text format.
Lines 1 through 8 declare the package and import the required classes. Line
10 declares the class and extends
MovieClip to work with the aforementioned
symbol. Line 12 opens the class constructor, and receives a
String as its only
argument to serve as the text label for the button. It has a default value of
an empty
String, so an instance of the class can still be created even without
passing in any text.
Line 13 sets the
buttonMode property of the button to true, so the cursor will
change from a pointer to a finger when rolling over the button.
Lines 15 through 22 initialize the button’s text field, and lines 24 through 31
initialize and apply a text format. Much of this is self-explanatory, but a few
things are worthy of note. Lines 17 and 18 set the width and height of the text
field to fill the button. This exposes the possibility that the button will cease
working because the text field will trap incoming mouse events. To prevent
this, line 21 disables mouse interaction with the field.
Also of note, line 19 sets the field to use embedded fonts, allowing us to use
the font symbols in the library of the FLA. Line 24 instantiates the
ArialBold
symbol, line 26 ensures that we’re using the embedded font, and, finally, line
31 applies the text format using the
setTextFormat() method, after the text
has been added to the field.
1 package com.learningactionscript3.ui {
2
3 import flash.display.MovieClip;
4 import flash.text.Font;
5 import flash.text.TextField;
6 import flash.text.TextFieldAutoSize;
7 import flash.text.TextFormat;
8 import flash.text.TextFormatAlign;
9
10 public class MenuButtonMain extends MovieClip {
11
Download from Wow! eBook <www.wowebook.com>
Part V: Input/Output
416
An XML-Based Navigation System
12 public function MenuButtonMain(labl:String="") {
13 this.buttonMode = true;
14
15 var btnLabel:TextField = new TextField();
16 btnLabel.y = 5;
17 btnLabel.width = this.width;
18 btnLabel.height = 20;
19 btnLabel.embedFonts = true;
20 btnLabel.text = labl;
21 btnLabel.mouseEnabled = false;
22 this.addChild(btnLabel);
23
24 var btnFont:Font = new ArialBold();
25 var labelFormat:TextFormat = new TextFormat();
26 labelFormat.font = btnFont.fontName;
27 labelFormat.size = 12;
28 labelFormat.bold = true;
29 labelFormat.color = 0xFFFFFF;
30 labelFormat.align = TextFormatAlign.CENTER;
31 btnLabel.setTextFormat(labelFormat);
32 }
33 }
34 }
MenuButtonSub
The MenuButtonSub class is responsible for creating a submenu button and
controlling only its appearance when the mouse rolls over or out of the but-
ton. The click behavior is controlled from the
NavigationBarXML class. This
makes the button more flexible and reusable. It also uses two public proper-
ties to store the path and description of the asset the button will load.
Lines 1 through 13 declare the class package and import the required classes,
including TweenLite. Line 15 declares the class and extends
MovieClip to
inherit its accessible properties and methods. Lines 17 through 19 declare the
class properties. Note that both projectPath and projectDescription are public,
meaning they can be both set and retrieved from outside the class. As a result,
no getter or setter is used.
1 package com.learningactionscript3.ui {
2
3 import flash.display.GradientType;
4 import flash.display.Graphics;
5 import flash.display.MovieClip;
6 import flash.display.Sprite;
7 import flash.events.MouseEvent;
8 import flash.geom.Matrix;
9 import flash.text.Font;
10 import flash.text.TextField;
11 import flash.text.TextFormat;
12 import flash.text.TextFormatAlign;
13 import com.greensock.TweenLite;
14
15 public class MenuButtonSub extends MovieClip {
16
17 private var _background:Sprite;
18 public var projectPath:String;
19 public var projectDescription:String;
Download from Wow! eBook <www.wowebook.com>
An XML-Based Navigation System
Chapter 14: XML
417
Lines 21 through 30 contain the class constructor. The String that will serve
as the button label is passed into the constructor, and the argument uses an
empty
String as a default value so the button can still be instantiated even
without text input. Lines 22 and 23 call functions to draw the button’s back-
ground and create its text label, both of which we’ll look at in a moment.
(Note that the
String passed into the constructor is passed on to the add-
TextLabel()
method.)
Line 24 disables mouse interaction with the button’s children. This is not only
an alternative to disabling mouse interaction directly on the text field (as seen
in
MenuButtonMain class); it also disables interaction with the background
sprite. Finally, lines 26 through 29 add event listeners for mouse roll over and
roll out events.
20 //constructor
21 public function MenuButtonSub(labl:String="") {
22 addBackground();
23 addTextLabel(labl);
24 this.mouseChildren = false;
25
26 this.addEventListener(MouseEvent.ROLL_OVER,
27 onOver, false, 0, true);
28 this.addEventListener(MouseEvent.ROLL_OUT,
29 onOut, false, 0, true);
30 }
The addBackgound() method in lines 32 through 43, create the button’s back-
ground sprite using the gradient fill technique discussed in Chapter 8. The
colors used in the gradient both have alpha values of 80 percent, making
the buttons translucent. The
addTextLabel() method receives the button’s
label
String from the constructor, and uses the same technique seen in the
MenuButtonMain class to create and format a text field.
31 //background and text label
32 private function addBackground():void {
33 _background = new Sprite();
34 var g:Graphics = _background.graphics;
35 var matrix:Matrix = new Matrix();
36 matrix.createGradientBox(120, 25, deg2rad(90));
37 g.beginGradientFill(GradientType.LINEAR,
38 [0x64788C, 0x2C4054],
39 [0.8, 0.8], [0, 255], matrix);
40 g.drawRect(0, 0, 120, 25);
41 g.endFill();
42 addChild(_background);
43 }
44
45 private function addTextLabel(btnLabelText:String):void {
46 var btnLabel:TextField = new TextField();
47 btnLabel.x = btnLabel.y = 2;
48 btnLabel.width = this.width;
49 btnLabel.height = 20;
50 btnLabel.embedFonts = true;
51 btnLabel.text = btnLabelText;
52 this.addChild(btnLabel);
53
Download from Wow! eBook <www.wowebook.com>
Part V: Input/Output
418
An XML-Based Navigation System
54 var btnFont:Font = new ArialRegular();
55 var labelFormat:TextFormat = new TextFormat();
56 labelFormat.font = btnFont.fontName;
57 labelFormat.size = 12;
58 labelFormat.color = 0xDDDDEE;
59 labelFormat.align = TextFormatAlign.LEFT;
60 btnLabel.setTextFormat(labelFormat);
61 }
Although the actions invoked by a button click are invoked from the
NavigationBarXML class, each MenuButtonSub instance updates its own appear-
ance based on mouse interaction. Specifically, TweenLite is used to tint the
button a slate blue using TweenLite’s
ColorTransformPlugin (activated earlier
in the
NavigationBarXML class). When rolling over the button with the mouse,
TweenLite changes the tint from 0 to 100 percent, tinting it blue. When rolling
off the button, the tint changes from 100 to 0 percent.
62 //submenu button mouse behavior
63 private function onOver(evt:MouseEvent):void {
64 TweenLite.to(_background, 0.3, {colorTransform:
65 {tint:0x223355, tintAmount:1}});
66 }
67
68 private function onOut(evt:MouseEvent):void {
69 TweenLite.to(_background, 0.3, {colorTransform:
70 {tint:0x334466, tintAmount:0}});
71 }
72
73 private function deg2rad(deg:Number):Number {
74 return deg * (Math.PI/180);
75 }
76 }
77 }
Finally, the deg2rad() method in lines 73 through 75 supports the create-
GradientBox()
method in line 36, allowing us to convert degrees to radians
so we can rotate the gradient.
Tying it all together
When you tie it all together, you end up with Figure 14-1. The document
class creates the loader, loader mask, and navigation bar, and loads the XML.
The
NavigationBarXML class instantiates each MenuButtonMain instance, sub-
menu, and
MenuButtonSub instance based on the XML data. It also sets the
click behavior of the submenu buttons to load content into the
SafeLoader
instance in the document class. The result is that new content is loaded every
time the user clicks a submenu button.
Download from Wow! eBook <www.wowebook.com>