PHP 5/MySQL Programming- P14 pdf
Bạn đang xem bản rút gọn của tài liệu. Xem và tải ngay bản đầy đủ của tài liệu tại đây (262.58 KB, 5 trang )
43
C
h
a
p
t
e
r 2 U
s
i
n
g
V
a
r
i
a
b
l
e
s
a
n
d
I
n
p
u
t
value = “pt”>points<br>
<input type = “radio”
name = “sizeType”
value = “cm”>centimeters<br>
<input type = “radio”
name = “sizeType”
value = “in”>inches<br>
</td>
</tr>
</table>
<input type = “submit”
value = “show me”>
</form>
</center>
</body>
</html>
The borderMaker.html page is designed to interact with a PHP program called
borderMaker.php, as you can see by inspection of the action attribute. Note that I
added a
value attribute for each option element, and the radio buttons all have
the same name but different values. The
value attribute becomes very important
when your program is destined to be read by a program. Finally, the
submit button
is critical, because nothing interesting happens until the user submits the form.
I didn’t include checkboxes in this particular example. I show you how check-
boxes work in chapter 3, “Controlling Your Code with Conditions and Functions,”
because you need
conditional
statements to work with them. Conditional state-
ments allow your programs to make choices.
Reading the Form Elements
The borderMaker.php program expects input from borderMaker.html. When the
user submits the HTML form, the PHP program produces results like those shown
in Figure 2.14.
In general, it doesn’t matter what type of element you use on an HTML form. The PHP
interpreter simply looks at each element’s name and value. By the time the informa-
tion gets to the server, it doesn’t matter what type of input element was used. PHP
TRICK
automatically creates a variable corresponding to each form element. The value of
that variable is the value of the element. The code used in
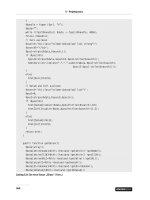
borderMaker.php illustrates:
<html>
<head>
<title>Your Output</title>
</head>
<body>
<h1>Your Output</h1>
<center>
<?
$theStyle = <<<HERE
“border-width:$borderSize$sizeType;
border-style:$borderStyle;
border-color:green”
HERE;
print “<div style = $theStyle>”;
print $basicText;
print “</span>”;
?>
</center>
44
P
H
P
5
/M
y
S
Q
L
P
r
o
g
r
a
m
m
i
n
g
f
o
r
t
h
e
A
b
s
o
l
u
t
e
B
e
g
i
n
n
e
r
FIGURE 2.14
The
borderMaker.php
code reacts to
all the various
input elements
on the form.
</body>
</html>
In the case of text boxes and text areas, the user types in the value directly. In
borderMaker.html, there is a text area called basicText. The PHP interpreter cre-
ates a variable called
$basicText. Anything typed into that text box (as a default
the first few lines of the
Gettysburg Address
) becomes the value of the $basicText
variable.
Reading Select Elements
Recall that both drop-down lists and list boxes are created with the select object.
That object has a
name attribute. Each of the possible choices in the list box is an
option object. Each option object has a value attribute.
The name of the
select object becomes the variable name. For example, border-
Maker.html
has two select objects: borderSize and borderStyle. The PHP program
can expect to find two corresponding variables:
$borderSize and $borderStyle.
Because the user has nowhere to type a value into a
select object, the values it
can return must be encoded into the structure of the form itself. The value of
whichever option the user selected is sent to the PHP program as the value of the
corresponding variable. For example, if the user chose
groove as the border style,
the
$borderStyle variable has the value groove in it.
You can have multiple selections enabled in a list box. In that case, the variable
contains a
list
of responses. While managing this list is not difficult, it is a topic
for another chapter (chapter 4, “Loops and Arrays,” to be specific). For now,
concentrate on the singular list box style.
TRAP
45
C
h
a
p
t
e
r 2 U
s
i
n
g
V
a
r
i
a
b
l
e
s
a
n
d
I
n
p
u
t
IN THE REAL WORLD
The options’ value doesn’t necessarily have to be what the user sees on the
form. This “hidden value” is handy if you want to show the user one thing but
send something else to the server. For example, you might want to let the user
choose from several colors. In this case, you might want to create a list box that
shows the user several color names, but the value property corresponding to
each of the option objects might have the actual hexadecimal values. Similar
tricks are used in online shopping environments, where you might let the user
choose an item by its name but the value associated with that item might be its
catalog number, which is easier to work with in a database environment.
Reading Radio Groups
CSS allows the developer to indicate sizes with a variety of measurements. This is an
ideal place for a group of radio buttons because only one unit of measure is appro-
priate at a time. Even though there are four different radio buttons on the
borderDemo.html page with the name sizeType, the PHP program will only see one
$sizeType variable. The value associated with whichever option is selected will
become the value of the
$sizeType variable. Note that like option elements, it is pos-
sible for the value of a radio button to be different than the text displayed beside it.
Returning to the Story Program
The Story program introduced at the beginning of this chapter is an opportunity
to bring together all the new elements you learned. The program doesn’t intro-
duce anything new, but it helps you see a larger context.
Designing the Story
Even though this is not an especially difficult program to write, you run into prob-
lems if you simply open your text editor and start blasting away. It really pays to plan
ahead. The most important thinking happens before you write a single line of code.
46
P
H
P
5
/M
y
S
Q
L
P
r
o
g
r
a
m
m
i
n
g
f
o
r
t
h
e
A
b
s
o
l
u
t
e
B
e
g
i
n
n
e
r
DECIDING ON A FORM ELEMENT
You might wonder if all these form elements are necessary, since they all boil
down to a name and value by the time they get to the PHP interpreter. The var-
ious kinds of user interface elements do make a difference in a few ways:
• It’s easier (for many users) to use a mouse than to type. Whenever possible,
it is nice to add lists, checks, and options so the user can navigate your
forms more quickly. Typing is often much slower than the kinds of input
afforded by the other elements.
• Interface elements (especially the drop-down list box) are extremely effi-
cient in terms of screen space. You can pack a lot of choices on a small
screen by using drop-downs effectively. While you might not think space is
an issue, take a look at how many people are now surfing the Web with
PDAs and cell phones.
• Your life as a programmer is much easier if you can predict what the user
will send. When users type things, they make spelling and grammar mis-
takes, use odd abbreviations, and are just unpredictable. If you limit choices
whenever possible, you are less likely to frustrate users.
In this situation, start by thinking about your story. You can write your own story
or modify some existing text for humorous effect. I raided a nursery rhyme book
for my story. Regardless of how you come up with a story, have it in place
before
you start writing code. I wrote the original unmodified version of “Little Boy Blue”
in my text editor first so I could admire its artistic genius—and then mangle it
beyond recognition.
As you look over the original prose, look for key words you can take out, and try
to find a description that hints at the original word without giving anything
away. For example, I printed my story, circled the word
blue
in the original poem,
and wrote
color
on another piece of paper. Keep doing this until you’ve found
several words you can take out of the original story. You should have a document
with a bunch of holes in it, and a list of hints. Mine looked like Figure 2.15.
47
C
h
a
p
t
e
r 2 U
s
i
n
g
V
a
r
i
a
b
l
e
s
a
n
d
I
n
p
u
t
FIGURE 2.15
I thought through
the story and the
word list before
writing any code.
IN THE REAL WORLD
Figure 2.15 shows the plan written as a Word document. Although things are
sometimes done this way…(especially in a professional programming environ-
ment), I really wrote the plan on paper. I reproduced it in a cleaner format
because you don’t deserve to be subjected to my handwriting.
I usually plan my programs on paper, chalkboard, or dry erase board. I avoid
planning programs on the computer, because it’s too tempting to start program-
ming immediately. It’s important to make your plan describe what you wish to do in
English before you worry about how you’ll implement the plan. Most beginners (and
a lot of pros) start programming way too early, and get stuck as a result. You see,
throughout the rest of this chapter, how this plan evolves into a working program.


