wiley publishing suse linux 9 bible phần 7 pps
Bạn đang xem bản rút gọn của tài liệu. Xem và tải ngay bản đầy đủ của tài liệu tại đây (1.98 MB, 88 trang )
315
Chapter 13 ✦ Working with Files
According to the permissions that you see in the listing, you should certainly be able to
delete the file, but attempting to do so gives “Operation not permitted.”
Also, if you try to edit the file, you’ll find that you can’t save to it.
But the situation is even stranger than that:
user@bible:~> su
Password:
root@bible: /home/user/ # rm afile
rm: remove write-protected regular file `afile’? y
rm: cannot remove `afile’: Operation not permitted
This looks very odd indeed: The owner can’t delete the file although he appears to have the
right to do so, but even root can’t delete the file. The reason is that the file has the immutable
bit set:
root@bible: /home/user/ # lsattr afile
i afile
The file has the special file attribute “immutable” set, which effectively means that no one has
the right to change the file.
To set a file to be immutable, do the following:
root@bible: /home/user/ # chattr +i afile
This adds (+) the immutable attribute (i).
To remove the attribute, do the following:
root@bible: /home/user/ # chattr -i afile
root@bible: /home/user/ # lsattr afile
afile
There are easily imagined practical situations in which you might want to use this functional-
ity to prevent accidental deletion. For example, you might want to set this attribute on certain
configuration files so as to force yourself to think very hard before modifying them. Use of the
immutable attribute on particular system files is also often recommended as a way of adding
an additional level of security to the system.
For further details, see the
chattr and lsattr man pages.
File ACLs
Relatively recently, Linux has gained the concept of file and directory ACLs (access control
lists). In contrast to the file attributes discussed previously, which control the behavior of the
file itself (making it undeletable or immutable, for example), file ACLs are all about who can
access the file and in what way. These ACLs mean that the sharing of files and directories
with specifically named users can now be achieved, where previously a complex design of
users and multiple groups was the only way to bring this about.
The particular application where this is of importance is Samba, and it means that the owner
of a file who is accessing that file by Samba from a Windows client can set sharing on that file
in the same way as if the file were on a Windows machine.
Chapter 18 contains more on Samba.
Cross-
Reference
21_577395 ch13.qxd 12/15/04 12:14 AM Page 315
316
Part III ✦ Using the Command Line in SUSE Linux
To use this ACL functionality, it is necessary that the partition on which the filesystem
resides be mounted with the
acl option. ACL functionality is now available regardless of
which of the common filesystems you use (
ext2, ext3, or reiserfs).To set ACLs on the
command line, you use the command
setfacl. getfacl reads the ACLs of a file.
If ACLs have been set, when you do an
ls -l command, you will see this:
tom@bible:~> ls -l afile
-rw-r r + 1 tom users 81 2004-06-23 15:59 afile
Note the extra plus (+) symbol after the permissions string. This shows that ACLs have been
set on this file, but to actually find out what they are, you will need the
getfacl command
described later in this section.
If
tom wants to modify the ACL to allow tanya to write to the file, he does this:
tom@bible:~> setfacl -m u:tanya:w bfile
Here tom is modifying (-m) the ACL to allow the user (u) tanya to write (w) to the file.
You can then get the ACL for the file like this:
tom@bible:~> getfacl bfile
# file: bfile
# owner: tom
# group: users
user::rw-
user:tanya:-w-
group::r
mask::rw-
other::r
So the change was made. For each user, you see the permissions shown in the usual rwx
(read, write, execute) format. The user tanya now has write permission.
To remove the ACL that was just set:
tom@bible:~> setfacl -x u:tanya bfile
Here the -x means remove, so tom is removing the ACL that the user (u) tanya had on the file.
tom@bible:~> getfacl bfile
# file: bfile
# owner: tom
# group: users
user::rw-
group::r
mask::r
other::r
Here tanya’s special write permission has gone away.
Finally, familiarity with the techniques and concepts introduced in this chapter, as well as the
content of Chapter 2, is necessary for anyone who wants to be able to work comfortably with
a Linux system and their files. Some of the commands have a bewildering variety of options,
but practicing with the examples given here and building on them is the best way to increase
your facility and gain understanding.
✦✦✦
21_577395 ch13.qxd 12/15/04 12:14 AM Page 316
Working with
the System
I
n this chapter we look at some of the more useful tools for working
with your SUSE Linux system. First, we examine some of the tools
that are available to you to deal with emergencies; if your system
won’t boot or is otherwise seriously damaged, SUSE’s Rescue System
and YaST System Repair running from the installation media can be
very useful. We also look at different ways to deal with partitions and
disk images and how to create CDs. We touch on the use of Webmin
as an alternative to YaST for administrative tasks, and we give a (nec-
essarily brief) introduction to shell scripting and scripting languages.
What all these sections have in common is that they all concern tools
that give you more power over your system, and working with these
tools will add to your understanding.
You should not be afraid to experiment, even with — indeed partic-
ularly with — the more scary and destructive examples given in this
chapter. If you can, by all means set up a “sacrificial” system and
play with the rescue and repair systems, with the partitioning
tools, and so on. The knowledge that you gain may well be useful
when (not “if”) things eventually go wrong.
System Rescue and Repair
You may find occasionally that you have problems you cannot solve
from within the system itself. Most commonly, there may be some-
thing that is preventing the system from booting at all. This could be
a misconfigured boot manager or a root partition that needs to have
a filesystem check run on it manually. There is also the possibility
that you have forgotten the root password and you need to remove it.
Booting from the hard disk with special
boot parameters
Sometimes it is enough to boot the system from hard disk, but into
runlevel 1 (by simply typing the digit 1 as a boot parameter (in the
initial boot screen). Runlevel 1 is “single user” mode, with no net-
working and without starting most services. So if there is a problem
that is causing the boot process to fail at a later stage, you may be
able to solve the problem by booting into runlevel 1 and making the
Tip
14
14
CHAPTER
✦✦✦✦
In This Chapter
Using the rescue and
repair systems to
recover from problems
Working with partitions
and disk images
Using Webmin
Using shell aliases
Automating with shell
scripts and scripting
languages
✦✦✦✦
22_577395 ch14.qxd 12/15/04 12:20 AM Page 317
318
Part III ✦ Using the Command Line in SUSE Linux
necessary changes. You can run YaST or edit configuration files in this state, and then reboot
or bring the system up to runlevel 3 or 5 with one of the commands
init 3 or init 5.
Chapter 4 has more information on booting into specific runlevels.
If you have lost the root password, you can boot with the following parameter:
init=/bin/bash rw
This starts the system but bypasses the normal init system, instead taking you straight to a
shell, without the need to log in, and mounting the root partition read-write. You can then, if
necessary, remove the root password by editing the file
/etc/shadow using vi and removing
the encrypted password. You need to change it from looking something like the first line
below to something like the second.
root:cJLgWo7eN1gqk:12629:0:10000::::
root::12629:0:10000::::
Booting into the Rescue System
The SUSE installation media offer a special option when you boot from them: One of the menu
items is Rescue System. If you boot from the first CD or DVD and choose this option, a Linux
system that runs in memory loads and does not mount any hard disk partitions. You can log
into it as root without a password.
You can then mount any of the partitions on the hard disk to
/mnt and make changes before
rebooting. For example, if your root partition is
/dev/hda1, you could do:
Rescue:~ # mount /dev/hda1 /mnt
followed by, for example:
Rescue:~ # vi /mnt/etc/fstab
if you needed to correct a problem with the file /etc/fstab.
Booting into YaST System Repair mode
SUSE also provides a System Repair mode with YaST. If you boot from the installation media
and choose the option Installation, but add the boot parameter
repair=1, you enter a system
similar to the Rescue System (running in memory and with no hard disk partitions mounted),
but with YaST running in graphical mode. In this system you can use parts of YaST’s standard
functionality to repair a broken system. The main screen offers three options: Automatic
Repair, Customized Repair, and Expert Tools.
If you choose Automatic Repair, the YaST system check repair runs through a series of tests and
shows a commentary on the screen. Among the tests it runs are filesystem checks, verification
of the package database, a check on the boot loader configuration, and a check of the
initrd
(the initial ramdisk used at boot time). If problems are found, it offers to attempt a repair.
Cross-
Reference
22_577395 ch14.qxd 12/15/04 12:20 AM Page 318
319
Chapter 14 ✦ Working with the System
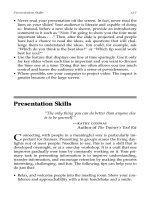
The Customized Repair screen
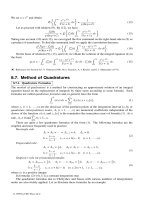
If you choose Customized Repair (see Figure 14-1), you can select or deselect the particular
tests that you want to be run. If you have a good idea of what might be at fault, this reduces
the time the tests and repairs need to run. The options are:
✦ Check Partition Tables
✦ Check Swap Areas
✦ Check File Systems
✦ Check fstab Entries
✦ Check Package Database
✦ Check Minimal Package Selection
✦ Verify Base Packages
✦ Check Boot Loader Configuration
Figure 14-1: The YaST System Repair mode Customized Repair screen
22_577395 ch14.qxd 12/15/04 12:20 AM Page 319
320
Part III ✦ Using the Command Line in SUSE Linux
The most useful of these are those concerned with filesystems and boot loaders.
✦ Although journaling filesystems mean that filesystem corruption is unlikely, if it occurs
and prevents the system from booting normally, this filesystem option is useful
because it will run a filesystem check for you with the correct options.
✦ If you have a dual-boot system, and you have reinstalled Windows, the Windows
installer may overwrite the Master Boot Record and prevent Linux from booting at all.
The boot loader check can rewrite the boot loader (usually grub) so that both systems
can be booted correctly.
If the package database does not correspond to the packages that are actually on the system,
or if packages have become corrupt, the package checking tools can correct the problem.
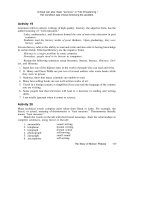
The Expert Tools screen
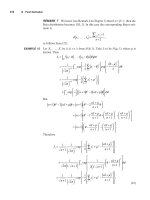
The Expert Tools screen (see Figure 14-2) offers some additional tools:
✦ Boot Loader Install
✦ Partitioning Tool
✦ Repair File System
✦ Recover Lost Partitions
✦ Save System Settings to Floppy Disk
✦ Verify Installed Software
Figure 14-2: The YaST System Repair mode Expert Tools screen
22_577395 ch14.qxd 12/15/04 12:20 AM Page 320
321
Chapter 14 ✦ Working with the System
The boot loader tool allows you to create a new boot loader configuration from scratch and
install it to the Master Boot Record. The partitioning tool is YaST’s standard partitioning mod-
ule (clearly a dangerous tool; see the next section of this chapter).
The Repair File System and Verify Installed Software options have the same function as the
equivalent items discussed in the previous section.
Recover Lost Partitions scans the disk and attempts to restore any partitions that might have
been deleted from the partition table (possibly by reckless use of the partitioning tool or
fdisk).
Finally, Save System Settings to Floppy Disk backs up important system files and the Master
Boot Record to a floppy disk.
Working with Partitions
Each hard disk that you use in a Linux system will have a number of partitions on it (except
in the rather rare cases when we write to raw disk devices). To find out what disks and parti-
tions the system can see, type:
root@bible:/tmp # fdisk -l
Disk /dev/hda: 40.0 GB, 40007761920 bytes
16 heads, 63 sectors/track, 77520 cylinders
Units = cylinders of 1008 * 512 = 516096 bytes
Device Boot Start End Blocks Id System
/dev/hda1 * 1 12484 6291904+ 83 Linux
/dev/hda2 12485 16646 2097648 82 Linux swap
/dev/hda3 16647 47854 15728832 83 Linux
/dev/hda4 47855 77520 14951664 83 Linux
This shows you the partitions the system can see, whether or not they are mounted. It
provides in more digestible form the information that can also be seen in the virtual file
/proc/partitions.
root@bible:/tmp # cat /proc/partitions
major minor #blocks name
3 0 39070080 hda
3 1 6291904 hda1
3 2 2097648 hda2
3 3 15728832 hda3
3 4 14951664 hda4
The fdisk -l command together with the outputs of mount and df -h are useful for under-
standing what you’ve got, how much of it, and where:
user@bible:~> mount
/dev/hda1 on / type reiserfs (rw,acl,user_xattr)
proc on /proc type proc (rw)
tmpfs on /dev/shm type tmpfs (rw)
devpts on /dev/pts type devpts (rw,mode=0620,gid=5)
/dev/hda3 on /home type ext3 (rw)
/dev/hda4 on /space type ext3 (rw)
usbfs on /proc/bus/usb type usbfs (rw)
22_577395 ch14.qxd 12/15/04 12:20 AM Page 321
322
Part III ✦ Using the Command Line in SUSE Linux
user@bible:~> df -h
Filesystem Size Used Avail Use% Mounted on
/dev/hda1 6.1G 5.5G 599M 91% /
tmpfs 253M 8.0K 253M 1% /dev/shm
/dev/hda3 15G 12G 2.8G 81% /home
/dev/hda4 15G 12G 1.5G 89% /space
Before doing anything with your partitions, you should at least run the three commands we
just mentioned. Together they should reassure you that you know what partitions exist and
what they contain and make it less likely that you will accidentally do something destructive.
When you work with partitions, most of your time is spent when you install the system, and
at that time you will be using YaST’s partitioning capabilities. At other times, if you simply
want to create partitions on a new disk, you are likely to do this using
fdisk, but you can use
YaST’s partitioning module at any time from the YaST menu or by typing (as root):
yast2 disk
You will first see a warning (see Figure 14-3).
Figure 14-3: YaST’s partitioning warning
Take that warning seriously, whatever tool you are using to do partitioning: One false move
and you can destroy your system.
The main YaST partitioning scheme looks like what is shown in Figure 14-4.
You may notice that YaST reports the starting and ending cylinders differently from fdisk.
That is because fdisk starts counting from 0, whereas YaST counts from 1.
YaST uses the functionality of parted rather than fdisk to do its job: This means that as
well as creating and destroying partitions, it is also capable of resizing them. It can also call
ntfsresize to resize NTFS partitions.
Partitions and the principles of partitioning are discussed in further detail in Chapters 1
and 3.
Cross-
Reference
Note
22_577395 ch14.qxd 12/15/04 12:20 AM Page 322
323
Chapter 14 ✦ Working with the System
Figure 14-4: YaST’s partitioning module
Partitioning examples
On the x86 architecture, there are limitations on the number of partitions a disk can contain:
There can be at most four primary partitions, one of which can be an extended partition. The
extended partition can contain multiple logical partitions (up to a maximum of 60 on an IDE
disk or 12 on a SCSI disk).
When working with partitioning tools, you should always ensure that any partitions you are
going to change are not mounted before you start. You should also be absolutely sure that
you know what partitions exist on the system and what they contain (as we stressed before):
Keep a printed copy of the output of at least the commands
fdisk -l, mount, and df -h on
hand during the process.
fdisk
To use fdisk to partition a disk, type the command fdisk followed by the device name of the
disk concerned. Suppose that you had just added a new disk as the first disk on the second
IDE controller:
root@bible : ~ # fdisk /dev/hdc
Command (m for help):
Command action
a toggle a bootable flag
b edit bsd disklabel
c toggle the dos compatibility flag
d delete a partition
22_577395 ch14.qxd 12/15/04 12:20 AM Page 323
324
Part III ✦ Using the Command Line in SUSE Linux
l list known partition types
m print this menu
n add a new partition
o create a new empty DOS partition table
p print the partition table
q quit without saving changes
s create a new empty Sun disklabel
t change a partition’s system id
u change display/entry units
v verify the partition table
w write table to disk and exit
x extra functionality (experts only)
Type m to see the menu as shown, and then n to add a new partition. At this point, p will cre-
ate a primary partition;
e will create an extended partition:
Command (m for help): n
Command action
e extended
p primary partition (1-4)
If you choose p, you will see something like the following:
p
Partition number (1-4): 1
First cylinder (2-77520, default 2):
Using default value 2
Last cylinder or +size or +sizeM or +sizeK (2-1000, default 1000): +2000M
You can specify the size of the partition in terms of disk cylinders, or (more usefully) by typ-
ing a size in megabytes (here the
+2000M). By default fdisk creates partitions of type Linux
(with the hex code 83). If you want to change the partition type, you need to do
t and then
the relevant code (which is typically 83 for a data partition and 82 for swap, but you can cre-
ate any number of “foreign” partition types).
When you think the correct partitions have been created, you can type p to print the parti-
tion table and then w to write it to disk.
Using YaST
YaST’s partitioning module has the ability to create and delete partitions. It can also resize
(non-destructively) certain types of partitions (including Windows partitions, which is a fea-
ture in great demand for dual-boot installations on previously Windows-only machines). YaST
uses
parted to do this but provides a user-friendly interface. Although the procedure is very
reliable, we recommend that you back up all the data on the partition you want to resize
before doing this. If, for example, the power suddenly failed during the resizing process, it’s
possible that the result would be a completely corrupt partition.
YaST’s partitioning tool can be accessed from the main menu, or by typing (as root) the com-
mand
yast2 disk (for a graphical interface) or yast disk for a text interface.
You cannot make changes to any partition that is mounted.
Note
22_577395 ch14.qxd 12/15/04 12:20 AM Page 324
325
Chapter 14 ✦ Working with the System
In YaST’s partitioning module, you can select a partition by clicking it. You can then choose to
delete, edit, or resize the partition. These options have the same functionality as the corre-
sponding options available through the expert partitioning option during installation.
✦ Delete — Naturally asks for confirmation. In fact, none of the changes that you make in
this module are carried out until you click the Apply button in the main screen, so you
can still abort if you have made a mistake.
✦ Edit — Allows you to choose whether to format the partition, and if so, which type of
filesystem to create in it. It also gives you the option of setting the mount point for the
partition and setting the mount options that will be written to the
/etc/fstab file.
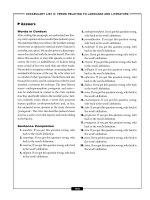
✦ Resize — Offers you a graphical resizing tool with a slider and a display showing how
much space the partition will take up after the operation and how much free space
there will be.
In Figure 14-5, you see YaST graphically resizing an
ext2 partition.
Figure 14-5: YaST resizing a partition
One of the Expert Tools in the YaST System Repair mode discussed earlier in this chapter is
YaST’s graphical partitioning tool. This means that you can use the YaST partitioning tool
“from the outside” with no partitions mounted.
Note
22_577395 ch14.qxd 12/15/04 12:20 AM Page 325
326
Part III ✦ Using the Command Line in SUSE Linux
Using parted
It is useful to be able to use parted from the command line when you need to change parti-
tioning from the SUSE Rescue System. You might need to do this because you want to reclaim
disk space from a partition that has empty space on it but that has to be mounted in the run-
ning system (as
/ or /usr, for example).
In that case, you boot from the installation medium and choose Rescue System from the boot
menu. You can then log in as root (without a password) to a Linux system running in memory:
None of the partitions will be mounted.
parted offers you a prompt like this: (parted). To get
help, type help or ?. In the example that follows, we list (
print) the partitions on /dev/hdc
and then resize the second partition. The parted command resize 2 6677 8000 moves the
end of the second partition from its current position at 8307 to 8000, while leaving the start of
the partition unchanged.
parted /dev/hdc
(parted) print
Disk geometry for /dev/hdc: 0.000-14324.625 megabytes
Disk label type: msdos
Minor Start End Type Filesystem Flags
1 0.016 4042.000 primary fat32 lba, type=0c
2 6677.000 8307.000 primary ext2 type=83
3 8307.000 14324.000 primary reiserfs type=83
(parted) resize 2 6677 8000
parted allows you to copy a filesystem from a partition onto another partition and can create
a filesystem on the partition as soon as it creates the partition.
At present it seems that parted does not handle EXT3 partitions very well: It regards them
as EXT2 partitions of a type that it does not understand. On the other hand, unlike fdisk,
parted is able to create large FAT partitions.
Commercial partitioning utilities
The commercial tools Acronis Disk Director (www.acronis.com/) and PartitionMagic
(
www.powerquest.com/partitionmagic/) are also very popular and have friendly graphical
interfaces. In our experience, PartitionMagic is easier to use than Acronis Disk Director. If you
simply need to create or resize partitions (including NTFS), Linux now has tools that will do
the job just as well as these commercial tools. They do have some additional functionality
(including built-in boot managers, which make it rather easy to boot multiple Windows parti-
tions on the same machine).
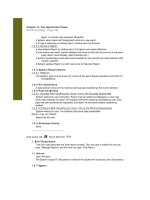
Using partimage
The partimage program is included in SUSE Professional and allows you to create an image
file from a partition for backup and restore purposes. Because empty space is not included in
the image, and because the image is compressed, it uses less space than simply writing out
the partition to a file using
dd (dd is discussed later in the chapter). The program includes a
Note
22_577395 ch14.qxd 12/15/04 12:20 AM Page 326
327
Chapter 14 ✦ Working with the System
restore option. It possibly should not be regarded as totally mature but is certainly worth
investigating. Figure 14-6 shows
partimage up and running. If partimage is installed, simply
(as root) type the command partimage to start it.
Figure 14-6: partimage
Making a filesystem
When you have created a partition, you still need to create the filesystem of your choice on it
(typically EXT2, EXT3, or ReiserFS). While YaST and
parted include the ability to create a
filesystem on the new partition,
fdisk simply makes the partition. Do not confuse the fact
that
fdisk sets the partition identity hex code with actually creating the filesystem on the
partition. To do that you will need to do one of the following (here we assume that you have
just created the partition
/dev/hdc3 and you now want to create a filesystem on it):
root@bible : ~ # mkfs -t ext2 /dev/hdc3
root@bible : ~ # mkfs -t reiserfs /dev/hdc3
root@bible : ~ # mkfs -t ext3 /dev/hdc3
Note that you must be root to create a filesystem.
These commands use the
mkfs command to make a filesystem of type (-t) ext2, reiserfs,
or
ext3, respectively, on the hard disk partition /dev/hdc3 (the third partition on the first
disk on the second IDE controller).
Again, note that these are seriously destructive commands: Be absolutely sure you know
which partition you are dealing with before you issue an mkfs command.
Caution
22_577395 ch14.qxd 12/15/04 12:20 AM Page 327
328
Part III ✦ Using the Command Line in SUSE Linux
Working with Disk Images
It is very useful to be able to take a floppy disk or CD and create an image file from it on your
hard disk from which you can create new copies of the disk, possibly after modifying them
first. You can even create a disk image of a hard disk partition or an entire hard disk if you
have sufficient disk space.
Linux makes it easy to work with disk images because copying a disk (a floppy disk or a CD or
a hard disk partition) to a file is a simple matter.
user@bible:~> dd if=/dev/fd0 of=floppy.img
The dd command reads the raw data from the device /dev/fd0 (the floppy disk) and writes it
to the image file
floppy.img.
You can now mount this image (you may need to become root):
root@bible : ~ # mount floppy.img /mnt –o loop
If you look in /mnt you see exactly the same files that you would have seen if you had
mounted the floppy disk. You need the option
-o loop to the mount command to mount a
filesystem from a file rather than a disk device. (The
-o loop option is discussed in more
detail later in the chapter.)
If you want to write the image back to another floppy, use the following:
user@bible:~> dd if=floppy.img of=/dev/fd0
This is exactly the same process in reverse: Now the input to the dd command is the image
file, and you are writing to the floppy disk.
Be very careful with the dd command. If you mix up the if= with the of= you could end
up doing very serious damage, particularly if one of them is a hard disk partition.
You can do exactly the same thing with disk partitions:
root@bible : ~ # dd if=/dev/hda1 of=imagefile
In this case it is certainly best if /dev/hda1 is not mounted at the time.
This is something you might find yourself doing in the rescue system. For example, it’s possi-
ble to imagine circumstances in which you might run the rescue system, get on to the network,
mount an NFS share from somewhere on the network, and then copy the disk partitions
across to that share to back them up before doing something drastic to the system.
When you have copied the partition to a file, again you can simply mount the file (with the
-o loop option):
root@bible : ~ # mount imagefile /mnt –o loop
Caution
22_577395 ch14.qxd 12/15/04 12:20 AM Page 328
329
Chapter 14 ✦ Working with the System
A CD image (ISO image) will work in exactly the same way; to copy a CD to an ISO image, do
the following:
user@bible:~> dd if=/dev/cdrom of=cdimage.iso
Again, you can mount it:
root@bible : ~ # mount cdimage.iso /mnt –o loop
Creating ISO images
Data CDs almost always use the ISO 9660 filesystem (so called after the international standard
that defines it). CD images are therefore usually referred to as ISO images. In fact, you can, if
you wish, create CD images and CDs using standard Linux filesystems (
ext2, for example),
but these will not be useful for exchanging data with users of other operating systems.
A quick way to save or back up a moderate amount of data is to create an ISO image contain-
ing that data and burn it to a CD.
The tool for creating ISO images is
mkisofs. The man page for mkisofs is fairly bewildering
to say the least because there is a very large number of options. But for most purposes, the
recipe we discuss will probably do exactly what you want.
Suppose you have a directory
work under your home directory. You want to create a CD con-
taining this directory’s contents, and you know that the total amount of data is not too big to
fit on a CD.
user@bible:~> mkisofs -J -r -o work.iso work/
This makes a filesystem of type iso9660 and copies the contents of the directory work into it.
The options
-J and -r here indicate that the ISO will have Joliet and Rock Ridge extensions
(this should mean that the resulting CD works fine on Windows, Mac OS, and Linux systems).
The
-o indicates the name of the output file.
You should now be able to mount
work.iso and check that it has been correctly created:
root@bible : ~ # mount work.iso /mnt –o loop
Burning ISO images to CD
There have been changes recently in the way Linux handles CD writers. Under the 2.4 kernel
series, CD writers required the
ide-scsi driver, which meant that they worked using SCSI
emulation. In 2.6, this is no longer the case. As a result, the user-space tools have had to
change somewhat.
The easiest way to burn ISOs to CD is
k3b, which is a graphical tool included with all current
versions of SUSE. At the time of this writing, there is a minor bug in the version of
k3b
shipped with SUSE regarding the way it displays the speed at which it is going to burn the
disk, but this does not affect the functionality of the program. Figure 14-7 shows a CD being
burned in
k3b.
22_577395 ch14.qxd 12/15/04 12:20 AM Page 329
330
Part III ✦ Using the Command Line in SUSE Linux
If you want to burn disks from the command line, the tool to use is cdrecord. If you are run-
ning a 2.6 kernel and your CD writer is an ATAPI device (almost all are), then you will need to
do something like this:
root@bible : ~ # cdrecord -v dev=/dev/hdc speed=8 -dao -data filename.iso
Here we are burning the image filename.iso to CD. The CD burner device is /dev/hdc (the
first device on the second IDE channel), and we are burning the image in “disk at once” mode
(
-dao) to produce a data CD (-data). The speed has been specified as 8. This example
assumes that we are running a 2.6 kernel.
Figure 14-7: Burning a CD with k3b
If you are using a 2.4 kernel, ATAPI CD writers are treated as emulated SCSI devices using the
ide-scsi module. In this case, the dev= parameter will refer to the SCSI device (for example,
typically
dev=0,0,0 on a system with no “real” SCSI devices: cdrecord scanbus helps to
find the correct device numbers).
Working with disk images
Just as you can copy a partition to a file and mount it using the loopback device (using the
-o loop option), you can create a file and then create a filesystem on it as if it were a disk
partition. You can then write it out to a partition or to a removable device. For example:
root@bible: /tmp # dd if=/dev/zero of=image.dsk count=1440k bs=1
1474560+0 records in
1474560+0 records out
22_577395 ch14.qxd 12/15/04 12:20 AM Page 330
331
Chapter 14 ✦ Working with the System
What you are doing here is creating a file of exactly the same size as a standard floppy disk
image (
1440k) by reading from the /dev/zero device (which simply outputs a stream of null
bytes).
Now you can create a filesystem on the file
image.dsk (you need to be root to do this):
root@bible: /tmp # mkfs -t ext2 image.dsk
mke2fs 1.34 (25-Jul-2003)
image.dsk is not a block special device.
Proceed anyway? (y,n) y
Filesystem label=
OS type: Linux
Block size=1024 (log=0)
Fragment size=1024 (log=0)
184 inodes, 1440 blocks
72 blocks (5.00%) reserved for the super user
First data block=1
1 block group
8192 blocks per group, 8192 fragments per group
184 inodes per group
Writing inode tables: done
Writing superblocks and filesystem accounting information: done
This filesystem will be automatically checked every 37 mounts or
180 days, whichever comes first. Use tune2fs -c or -i to override.
You can then mount the filesystem and copy files onto it:
root@bible: /tmp # mount image.dsk /mnt –oloop
cp file1 file2 /mnt
Now you can write out the image to a floppy disk, but first you should unmount it:
root@bible: /tmp # umount mnt
root@bible: /tmp # dd if=image.dsk of=/dev/fd0
What you have done here is very similar to the way that you created the ISO image earlier in
the chapter. The difference is that the
mkisofs tool both creates the special iso9660 filesys-
tem and writes the data to it in one action.
Note that it is not at all essential to use the iso9660 filesystem when you create images to
burn to CD; you can create a suitably sized EXT2 loopback filesystem and simply copy the
files you want to it and them burn a CD from it. (If you use
k3b it will detect that the image is
not an ISO image, but you can force it to burn the image by pretending that it is.). But you
won’t be able (easily) to read the resulting CD on a non-Linux system. You may also have to
mount it manually on Linux (with a command such as
mount /dev/hdc /mnt) as subfs on
current versions of SUSE will expect an iso9660 filesystem.
Webmin
Webmin is a modular web-based administration tool that works on a wide variety of Linux
versions and other Unix and Unix-like operating systems. It allows you to log in via a web
22_577395 ch14.qxd 12/15/04 12:20 AM Page 331
332
Part III ✦ Using the Command Line in SUSE Linux
page and perform administration tasks. Webmin then “does the right thing” and makes the
necessary appropriate changes to configuration files.
Webmin is included in the SUSE Professional distribution and works well with SUSE, even on
SLES (though at the time of this writing it does not support SLES 9, that will undoubtedly
change very soon). In some ways Webmin competes with YaST as a user-friendly system
administration tool. In fact, it does some things well that YaST does not yet do, or does not
yet do well.
Webmin’s philosophy differs from that of YaST: YaST tends (for many purposes) to make
changes in a two-stage process, first changing files under
/etc/sysconfig and then carrying
those forward to changes in the actual configuration files later when
SuSEconfig runs.
Webmin writes directly to the configuration files. Although SUSE ships versions of Webmin, it
should not be regarded as “supported” by SUSE, and official SUSE versions are not included
in SLES 8 or SLES 9, although Webmin itself includes support for SLES. That being said,
Webmin can be a very convenient alternative way to look after your system. It can also help
you to get started with configuration files for particular purposes (Samba and BIND spring to
mind) where writing them from scratch might be difficult the first time around.
Do not use Webmin on a production machine without thinking carefully about the possible
security implications. In particular, you will probably want to ensure that it is configured to
work only over SSL and limit the hosts that can connect to it.
Installing Webmin
Unfortunately, there is a slight problem with the version of Webmin that ships with SUSE
Professional 9.1; it fails to install correctly without a little help. You need to do the following:
1. Back up the file
/etc/SuSE-release:
root@bible: /etc # cp SuSE-release SuSE-release.real
2. Then edit /etc/SuSE-release so that it refers to 9.0 instead of 9.1.
3. Now install Webmin from the command line:
root@bible: /tmp # rpm –Uvh webmin-1.130-42.noarch.rpm
Preparing ########################################### [100%]
Operating system is SuSE Linux 9.1
1:webmin ########################################### [100%]
Webmin install complete. You can now login to http://bible:10000/
as root with your root password.
4. Then revert to the original /etc/SuSE-release file and start Webmin with:
root@bible: /tmp # cp /etc/SuSE-release.real /etc/SuSE-release
root@bible: /tmp # rcwebmin start
Caution
22_577395 ch14.qxd 12/15/04 12:20 AM Page 332
333
Chapter 14 ✦ Working with the System
These steps are needed because the Webmin RPM package in SUSE 9.1, although configured
for 9.1, has an incorrect check for the OS version built into it, which has not been updated
from the version for 9.0.
Contacting a running Webmin process
When Webmin has been started, you should be able to access it via a browser by going to
http://bible:10000 (or if name services are not available, the equivalent IP number fol-
lowed by
:10000. Of course, you can also use http://localhost:10000 from the machine
itself. You will then see the login screen (see Figure 14-8).
Figure 14-8: Webmin’s login screen
You should change the security settings in Webmin as soon as you can to ensure either that it
works only over SSL and/or so that it allows logins only from trusted IP numbers. These
actions can be done from icons in the Webmin Configuration screen after you choose the
Webmin tab in the main screen (see Figure 14-9).
22_577395 ch14.qxd 12/15/04 12:20 AM Page 333
334
Part III ✦ Using the Command Line in SUSE Linux
Figure 14-9: Webmin’s main screen
Webmin and YaST
The variety of modules that Webmin includes can be seen from the Networking tab and
Servers tab (see Figure 14-10). These include items that have only recently become part of
YaST (such as IPsec configuration and HTTP configuration) and others that are still not
included in YaST (such as Point-to-Point Tunneling Protocol (PPTP) server and client, CVS
server, MySQL server, and others).
At the time of this writing, at least one of the new YaST modules is buggy, and Webmin may be
a useful alternative. In the longer term it would be nice to see a “web-enabled” YaST. There
have been vague indications (but no announcement) that such a thing might be forthcoming.
It is interesting to compare the way Webmin and YaST do a job (which, frankly neither of
them is ideally suited to) — adding a host to the DHCP configuration. While Webmin provides
a web form to add all the details at once (see Figure 14-11), YaST requires you to add each
possible option separately by opening a drop-down list multiple times (see Figure 14-12). In
either case, you would almost certainly have some difficulty if you did not already know
something about the layout of the actual configuration file that is going to be written
(
/etc/dhcpd.conf). On the other hand, both tools save you from the kind of misery that
you can suffer if you mislay a semicolon somewhere and the DHCP server will not start.
Webmin’s home is at
www.webmin.com/. Among the resources linked from there is the 300-
page “Book of Webmin” by Joe Cooper, which is available as a PDF file on the web site’s
Documentation page.
22_577395 ch14.qxd 12/15/04 12:20 AM Page 334
335
Chapter 14 ✦ Working with the System
Figure 14-10: Webmin’s Servers screen
Figure 14-11: Webmin’s DHCP server screen
22_577395 ch14.qxd 12/15/04 12:20 AM Page 335
336
Part III ✦ Using the Command Line in SUSE Linux
Figure 14-12: YaST’s DHCP server screen
Automating Tasks
A useful maxim states that if you have to do something manually more than three times, it’s
time to find a way to do it automatically. If the thing that you need to do manually is a compli-
cated shell command, then maybe what you need is either an alias or a shell script to auto-
mate its effect.
Shell aliases
If you have long compound commands that you regularly type, a bash alias is a nice way of
reducing the amount of typing and thinking you have to do. You can create aliases at the com-
mand line (for the current session only) or permanently in the file
~/.alias.
For example, if you want to be able to use the single letter command
b as an alias for the com-
mand
ssh , you can type:
user@bible:~> alias b=’ssh ’
From now on in the current session if you type b, it will do the ssh command. To make that
permanent, simply add the following:
alias b=’ssh ’
22_577395 ch14.qxd 12/15/04 12:20 AM Page 336
337
Chapter 14 ✦ Working with the System
to your .alias file. Then from the next time that you log in, the alias will be available. If you
want to test it now, you will need to type bash to start a new bash shell.
To find out what aliases are defined, simply type the command alias.
There is no limit to the ingenuity you can apply to creating useful aliases: A long command
combined from smaller commands connected together with pipes might be a good candidate
for an alias. Once you have constructed the command to do what you want, you can call it
with a single small command. For example, to search the web server logs for a particular key-
word, you might do this:
root@bible: /tmp # grep keyword /var/log/apache2/access_log
To create an alias for it, do the following:
root@bible: /tmp # alias k =’grep keyword /var/log/apache2/access_log’
Now you can simply type k to search the logs for keyword. Of course, before defining an alias,
you should ensure that the alias you are about to define does not already exist as a command
in the system.
Writing shell scripts
Although in principle a shell command that you define an alias for could be quite long and
complex, in practice there can be problems, particularly if the command itself contains quo-
tation marks. But essentially you can create an alias only for a single command. So if you
want to execute a more complex command and particularly if you want to be able to execute
multiple commands, you are moving into the area of shell scripts. A shell script is a program
written to be interpreted by the shell. Essentially it is just a list of shell commands to be exe-
cuted one after the other, but it can contain conditionals and other programming constructs,
giving it the power of a real program. Here we consider scripts to be run by the
bash shell
(“
bash scripts”).
Shell scripts offer a simple means of automating tasks, provided those tasks are not too com-
plex. If the length and complexity of a shell script goes beyond certain limits, then it might be
that a shell script is not the best way to perform the task at hand.
In the next sections, we offer some examples of simple shell scripts, the aim being to show
their basic logic and act as a “getting started” guide. Like so much else in this book, shell
scripting is a subject on which whole books have been written. Here we give a few examples
of the basic concepts to get you started and experimenting.
Shell variables
As a shell script is essentially just a string of shell commands, it understands the current
environment variables. For example:
#! /bin/bash
echo “Hello” $USER
echo “Your current directory is” $PWD
Here $USER and $PWD are the environment variables that are already accessible to the shell
representing the current user and the working directory, respectively.
Note
22_577395 ch14.qxd 12/15/04 12:20 AM Page 337
338
Part III ✦ Using the Command Line in SUSE Linux
If you save this in a file scr1.sh, you have a simple shell script. The first line tells the system
that it is to interpret the script using
/bin/bash. This line applies if you make the script exe-
cutable and run it directly, and it is important because it is possible that the user might be
running a different shell. In fact, you can run the script in two different ways:
✦ Under the current shell by “sourcing” it:
fred@bible:~> source scr1.sh
Hello fred
Your current directory is /home/fred
✦ Equivalently, you can use a dot as the source command:
fred@bible:~> . scr1.sh
Hello fred
Your current directory is /home/fred
You can also run the script by explicitly calling bash:
fred@bible:~> bash scr1.sh
Or, because /bin/sh is a symbolic link to /bin/bash, you can do the following:
fred@bible:~> sh scr1.sh
Alternatively, you can make the script executable and run it as a program. This is done by the
chmod command, which adds executable permissions for all. Note that if you want to run the
script in this way, it must have the first line:
#! /bin/bash
This tells the system that the interpreter needed to run the script is bash. If you “source” the
script, this is not necessary.
fred@bible:~> chmod a+x scr1.sh
fred@bible:~> ./scr1.sh
Hello fred
Your current directory is /home/fred
A shell script can include the types of logical structures that one would expect to find in any
programming language. For example, a
for loop:
#! /bin/bash
for i in 1 2 3 4 5
do
echo $i
done
Here $i represents the variable i, which takes the successive values in the loop.
Save this as
scr2.sh, make it executable, and run it as you have previously, and you’ll see the
following:
fred@bible:~> chmod a+x scr2.sh
fred@bible:~> ./scr2.sh
1
2
3
4
5
22_577395 ch14.qxd 12/15/04 12:20 AM Page 338
339
Chapter 14 ✦ Working with the System
Although you are unlikely to often use numerical variables except as basic counters in keep-
ing track of a repeating process, you can do arithmetic in shell scripts:
#! /bin/bash
a=12
echo “a is “$a
echo “a+1 is “ $((a+1))
This script produces output like this:
a is 12
a+1 is 13
Notice that there should be no white space around the = sign; if there is, the variable a will
not be assigned. Notice also the way that extra brackets were needed in $((a+1)).
Variables can equally represent strings:
#! /bin/bash
a=ABCDE
echo $a
echo ${a}FGHIJ
This produces the following:
ABCDE
ABCDEFGHIJ
Here, to get the desired result, you had to write ${a}FGHIJ rather than $aFGHIJ, which
would have represented a new and as yet undefined variable (named
aFGHIJ). This ensures
that
bash interprets the last line as a request to echo the variable, which we defined as a, fol-
lowed immediately by the string
FGHIJ.
Suppose you want to produce word count data for all the files with the file extension
.txt in
the current directory.
#! /bin/bash
for i in *.txt
do
wc -l $i
done
This produces output as shown in the following lines, indicating that you can loop over a set
of files produced by “globbing”— the use of a notation such as
*.txt.
3 1.txt
8 2.txt
17 3.txt
Clearly you could take this idea further to (for example) select certain lines from each of a set
of files and append them to a file:
#! /bin/bash
for i in *.html
do
grep -i \<title\> $i >>titles.list
done
Note
22_577395 ch14.qxd 12/15/04 12:20 AM Page 339