thiết kế giao diện wordpress phần 5 pptx
Bạn đang xem bản rút gọn của tài liệu. Xem và tải ngay bản đầy đủ của tài liệu tại đây (2.2 MB, 18 trang )
Chapter 3
[ 75 ]
Category Links (with how many posts per category): This displays your
categories using the wp_list_categories template tag.
A BlogRoll set of links: This list is controlled by the wp_list_bookmarks()
template tag which displays bookmarks found in the Administration |
Blogroll | Manage Blogroll panel.
A set of 'Meta' links (links to info about the site): These links are hand-coded
into the sidebar.php page in the default template.
Generally, the above works out great for a more 'standard' blog. But as discussed,
I would like my page links to display horizontally up top of my sidebar, and I
want my theme to display a vertical sidebar that looks more like the contents page
of a magazine.
•
•
•
Coding It Up
[ 76 ]
Time For Action:
1. To start, I'll be treating my archives as Past Issues. So showing the month
and year will be just ne. Under my Past Issues heading I'll add the
following code which will display my archive links wrapped in unordered
list elements:
<! //start archive list >
<ul class="tocNav">
<?php wp_get_archives('type=monthly'); ?>
</ul>
<! //end archive list >
Formatting tip: You'll see I've wrapped each bit of PHP and its template
tag in <ul class=" "> (unordered list XHTML markup). WordPress
will automatically return each item wrapped in <li> (list item tags).
Adding the unordered list tags (or <ol> ordered list tags if you want.)
ensures I have a valid list that is easy for me to customize with my CSS.
XHTML comments: You'll also note that I'm wrapping most of my
WordPress code in <! // > XHTML comment tags. I do this so that
scanning the markup is easier for myself and any other developer who
comes across the code (a nice idea for those of you who are looking
forward to creating commercial themes to make a little money; the
more clear your markup, the less time you'll spend helping purchasers
troubleshoot your theme). Also, indicating where WordPress code starts
and ends as well as what kind of code it is, will also come in very handy
when we get ready to break the code out into template pages, reducing
the chance of possible cut-and-paste errors that can occur.
2. Next, my Columns are really just a list of my categories. The default sidebar
lists the title as Categories, but as I have my own special header hand-coded
into the side bar, I've removed the following:
&title_li=<h2>Categories</h2>
I have changed it to this:
&title_li=
It gives me the code under my Columns header that looks like this:
<! //start categories list >
<ul class="tocNav">
<?php wp_list_categories('show_count=1&title_li='); ?>
</ul>
<! //end categories list >
Chapter 3
[ 77 ]
3. Next, my Features will require a little bit of nessing. I would like WordPress
to display the most recent ve posts that are only in the Features category.
There are a few clean template tags that will display the most recent post
titles, but they don't seem to let me limit the posts to just coming from my
Features category.
Because I understand a little PHP, I'll include a small custom loop which will use
three WordPress template tags to call in the post information for the last ve posts in
category 3 (which is my Features category), then just display the perma link for each
post and its title.
Again, as long as you recognize what the template tags look like and how to
paste them into your theme template pages, you don't have to understand PHP or
write any special scripts yourself. You can do a whole lot with just the existing
template tags.
Understanding PHP and how to craft your own bits of code and loops will enable
you to have no limits on your theme's capabilities. The following script has the
WordPress template tags highlighted in it, so you can see how they're used.
<! //start recent features list >
<ul class="tocNav">
<?php
global $post;
$myposts = get_posts('numberposts=5&category=3');
foreach($myposts as $post):
setup_postdata($post);?>
<li><a href="<?php the_permalink() ?>"><?php the_title();
?></a></li>
<?php endforeach; ?>
</ul>
<! //end recent features list >
Custom Selecting Post Data: You'll probably notice that the
setup_postdata(); function isn't listed in WordPress.org's
template tag reference page, it's actually a WordPress formatting
function. If you're interested in PHP and would like to learn more about
being able to innitely customize WordPress content into your themes,
I'll discuss this and some other formatting functions in Chapter 6, it's
also worth it to check out the topic on WordPress codex site from
a_Custom_Select_Query.
Coding It Up
[ 78 ]
4. Last, I am ready for my page navigation. At the moment, my only static
pages are About and Contact. I'll place the wp_list_pages template tag into
my top_navlist div tags as follows:
<! //start page nav list >
<ul id="navlist">
<?php wp_list_pages('title_li=' ); ?>
</ul>
<! //end page nav list >
Chapter 3
[ 79 ]
Breaking It Up–Separating Your Theme Into
Template Files
As I mentioned earlier, the advantage to having your WordPress theme's parts
separated into individual template pages is that your theme will be more exible and
able to accommodate a wider range of content. As nice as my theme currently looks,
there are some problems with it that can only be dealt with if I break the theme's
design up into multiple WordPress template pages.
To start, I only want that huge 300 pixel high header graphic to load on the home
page. It's neat to give the feel of a magazine cover, but once the reader has moved
onto a full article (a.k.a. post) or one of my static pages, I'd rather not have it there
eating up screen real estate that the reader could be using to read more content
without having to scroll. Like wise, the This Month header only needs to be on the
home page, not on any internal page.
Also, while I do want the Features, Columns, Past Issues sidebar navigation to show
up in a full article view page, I don't want that navigation sidebar on the About and
Contact static pages. I'll have them click on an additional link in the top nav called
The Zine to get back to the home page view.
Again, because WordPress is so exible, it's super easy to add this extra link to the
top nav by just adding the list item under the template tag like so:
<ul id="navlist">
<li><a href="/">The Zine</a></li>
<?php wp_list_pages('title_li=' ); ?>
</ul>
That link The Zine will now let people go back to the home post page if they
view one of my static pages. As my CSS style is targeting list items in the
top_navigation div, the new list items automatically pick up the same styling
as the WP generated items.
Next, the loop needs slightly different formatting between my posts and static pages.
Posts are being treated like articles, so I have template tags that announce 'by Author
Name for Category Name,' but on the static pages, to have the page title About and
then 'by Author Name' is a little ridiculous.
Last, I'll need the full article pages to display comments under the article with the
'Add Comments' form underneath that, so if people click on the Add Your Thoughts
link, they'll be anchor-tagged down to the form for the post.
Coding It Up
[ 80 ]
The Home Page
To ensure that only the home page has the main header and This Month show up,
I'll take advantage of WordPress' template pages. Along withindex.php, header.
php, footer.php, and sidebar.php, you can also create a template le called
home.php.
If you have a template le called home.php, WordPress will automatically use this
as your theme's home page. If WordPress scans your theme's directory and nds no
home.php page, WordPress will use the index.php page as the default.
Many theme developers use a home.php page to set up a static home page or 'splash'
page for their site. I'll be keeping the loop in mine, but it's the same idea.
Because I don't intend for my theme's blog posts (a.k.a. articles) to have a different
URL location from my home page, this method for separating out some visual
elements between my home page and internal pages is just ne.
However, if you do intend to have different URL locations for your blog posts
versus the home page (that is for the home page and
for the blog posts page), you should heed WordPress'
latest 2.1 suggestion of not naming your homepage as home.php and setting your
home page up via your Administration | Options | Reading panel. Not doing so
may mean trouble for your more link button. You can nd out more on WordPress'
site: />Time For Action:
1. Because I like the way my index.php looks and works strictly as a home
page, I'll start off by just duplicating my index.php le and renaming it to
home.php inside my theme's directory. Even though the markup is same,
WordPress is now automatically reading from the home.php page instead of
the index.php page. (Making a small, temporary difference in the markup of
the home.php will prove this if you'd like to test it.)
2. Now that it's done, I know that the Features, Columns, and Past Issues side
bar will be used in post pages and the home page, so I'll pull the markup and
code from my #sidebarLT div and paste it into my sidebar.php page. I'll
then include that page into my home.php page by using the following code:
<?php get_sidebar(); ?>
3. I'll do the same with my footer code, cutting and pasting everything from my
footer div into the footer.php le using the following code:
<?php get_footer(); ?>
Chapter 3
[ 81 ]
4. I'll test this in the browser, and upon its working, I'll duplicate those included
les from my home.php page into in my index.php page. (It will be handy to
have the includes in place when we make our internal page.)
Extra Credit: In my #header div, I have a div id called #date. I want to
display the full name for the current month and year. The best route for
this is to just apply some basic PHP directly. I enter the following PHP
code into my #date div:
<div id="date"><?php echo date("F Y"); ?></div>
Coding It Up
[ 82 ]
Time For Action: The very last detail I'll include is my third column. I want to be
able to manually control the advertisements (be it Google AdSense or AdBright ads)
and custom feature graphic links that go in here. No one else should be able to edit
this include through the WordPress admin panel, so using a little of my own PHP,
I'll create a page called sidebar2.php which I'll place in my own directory in the
root of my WordPress installation and manually include this page with a standard
PHP include call, like so:
<?php include(TEMPLATEPATH . '/sidebar2.php'); ?>
Including TEMPLATEPATH will point to your current theme directory.
Chapter 3
[ 83 ]
Internal Pages
Now that our home page is working, it's time to modify the index.php le for the
internal page layout.
Using the same 'Rapid Prototyping' process we used to generate the home page
layout in Chapter 2, I've also created a mockup of my internal layout (the internal
layout is included with the home page layout in the zip le, available for download
at />Time For Action:
The biggest difference between my internal pages and my home page is the header.
As a result, it will be easier to start off by just copying my current home.php page
back over into the index.php page.
1. I'll rename the #header div id and give it a different id called #intHeader
and create a new style that calls in my thinner, internal page header graphic
and sets the height of the div accordingly.
2. Next, I'll remove the <h2> header that displays This Month:. I'll also create a
div id rule for the header's #date and create a style for that which will move
my magazine's PHP date code to the top-right of my internal header.
3. Next, my top_navigation id will have to change to intTop_navlist, and
I'll amend the top_navlist rules that control the unordered list.
4. Now, I just need to add the 'Comments' display and 'Add Comments' form to
my index page. I'll do so by placing the following code at the end of my loop
in the index.php page, under the the_content template tag like so:
<div class="entry">
<?php the_content('<br>Read the rest of this entry »');
?>
</div>
<div id="pagecomments">
<?php comments_template(); ?>
</div>
<p class="articleComment">
5. This will pull in the default theme's comments.php page, which works quite
well for my purpose. It just requires that I create a few additional style
elements for the input box and the submit button so that it works well with
my theme.
6. I'll now just break the header div out of my index.php page and copy it into
a header.php le in my theme's directory. Then in index.php, I'll call in the
header block with:
<?php get_header(); ?>
Coding It Up
[ 84 ]
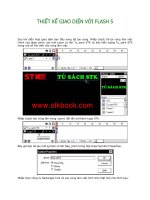
This gives us an internal page that looks like this:
Static Pages
Static pages are the pages you generate in WordPress using the Write (or Manage)
| Pages instead of Write (or Manage) | Posts. Our index.php page now effectively
handles all the secondary requests. This is great, except my static About and Contact
pages don't need the comment posted or #sidebarLT information to to be displayed.
This is where another one of those great WordPress template les comes in—the
page.php template le.
Chapter 3
[ 85 ]
Time For Action:
Create a page.php le and paste your index.php information into it.
The rst quick and easy thing we can do is remove the class="current_page_
item" from The Zine link we've added on to our page display.
1. You can now remove the WordPress' comments_template template tag and
XHTML markup from the loop:
<div id="pagecomments">
<?php comments_template(); ?>
</div>
You can also remove the number of comments code and the Add Your Thoughts
code from the loop:
<div class="comments"> <div class='commentIcon'><?php comments_
number('No Comments','<span class="bigNum">1</span> response','<span
class="bigNum">%</span> Comments'); ?></div> <?comments_popup_
link('Add Your Thoughts', 'Add Your Thoughts', 'Add Your Thoughts');
?></div>
2. You can also completely remove the #sidebarLT div now:
<div id="sidebarLT">
<?php get_sidebar();?>
</div><! //sidebarLT >
3. Without the side column, the content div doesn't have to be restricted to
430px wide. Change the div id to pgContent and add a new CSS rule to your
style.css page:
<! Begin #content >
<div id="pgContent">
#pgContent {
margin:0 0 0 10px;
width: 650px;
float:left;
}
Coding It Up
[ 86 ]
Quick Recap
OK to recap, you should have three views now:
1. One template view for your home page that shows the large home page
header and link to comments.
2. One template view for your article (post) pages, which uses the internal
header and displays your comments. Because this layout is for articles, The
Zine link is left with the class current_page_item.
3. And last, one template page view for 'static' pages.
Fun with Other Page Layouts
Because we renamed (or removed) archive.php and category.php from our
template directory, the index.php template le is covering links to Categories
(a.k.a. Columns) and archives (a.k.a. Past Issues).
This on its own is working well enough, but you can certainly improve these pages
by pasting your index.php code into a new archive.php and/or category.php
page, and then customize those page views even further.
For instance, you could place the following code into your category.php page, just
above the loop:
<h3>You're reading the: <?php the_category(', ')?> column</h3>
Chapter 3
[ 87 ]
It would give you the following result:
Remember, WordPress has a host of template tags to help you add content to any
of your template les, be they includes or page views. We'll discuss important
WordPress template tags in Chapter 6.
Coding It Up
[ 88 ]
Don't Forget About Your 404 Page
Error 404 pages are where servers direct browsers when a URL seeks a missing page.
While it's easy to think you won't really need a 404 page with a WordPress install,
you'd be surprised. Even though all the links to the article or page you deleted are
removed automatically from within your site, someone else might have created a
link on their site to your post, which will no longer work. The 404.php template
page is how you'll handle these requests.
You might have noticed, the PHP code we use for the home.php and index.php
page loops have a 'catch-all x' in case posts are not found, which will display a
nice message and the search.php template page. The 404.php template page in
the default WordPress theme does not do this (and it's also not set up to display our
other template les and CSS).
Because the 404.php page does not require the comments or author information
display, the template page that is closest to it is our page.php le. However, we want
to give people additional options to get back into our content, so we'll want to place
the #sidebarLT div back into it.
Time For Action:
1. Copy the contents of your page.php template le into the 404.php
template le.
2. You can remove the entire loop from the le.
3. Place in some encouraging text and the PHP code to include the search.php
template le:
<h2 class="center">Not Found</h2>
<p class="center">Sorry, but you are looking for something that
isn't here.</p>
<?php include (TEMPLATEPATH . "/searchform.php"); ?>
4. Add the #sidebarLT XHTML and PHP WordPress template tag back in
under the content div:
<div id="sidebarLT">
<?php get_sidebar();?>
</div><! //sidebarLT >
Chapter 3
[ 89 ]
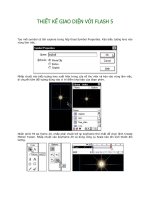
These steps should give you a 404 error page that looks like this:
Coding It Up
[ 90 ]
Summary
We've now completed the OpenSource Online Magazine WordPress theme.
Great Job!
It's probably clear that you can take advantage of all sorts of custom WordPress
template hierarchy pages, and endlessly continue to tweak your theme in order to
display custom information and layouts for all types of different scenarios.
How much customization your theme requires depends entirely on what you
want to use it for. If you know exactly how it's going to be used and you'll be the
administrator controlling it, then you can save time by covering the most obvious
page displays the site will need to get it rolling and occasionally creating new page
view les should the need arise. If you intend to release the theme to the public,
then the more customized page views you cover, the better. You never know how
someone will want to apply your theme to their site.
You've now learned how to set up your development environment and an HTML
editor for a smooth work ow. You now have a theme design that uses semantic,
SEO friendly XHTML and CSS, and has been broken down into WordPress template
pages for exibility in your layouts. Believe it or not, we're not quite done!
In the next chapter, we'll continue working with our XHTML and CSS layout,
showing you some tips and tricks for getting it to display properly in all the
browsers, debugging IE quirks as well as running it through a thorough
validation process.
Debugging and Validaton
For simplicity's sake, I've made this process a separate chapter. However, as you
work on and develop your own WordPress themes, you will no doubt discover
that life will go much smoother if you debug and validate at each step of your theme
development process. The full process will pretty much go like this: Add some code,
check to see the page looks good in FireFox, validate, then check it in IE and any
other browsers you and your site's audience use, validate again if necessary, add the
next bit of code repeat as necessary until your theme is complete.
In this chapter, I'm going to cover the basic techniques of debugging and validation
that you should be employing throughout your theme's development. We'll dive
into the W3C's XHTML and CSS validation services, and I'll walk you through using
FireFox's JavaScript/Error Console for robust debugging, as well as introduce you
to the FireBug extension and the Web Developer's Toolbar. I'll also give you a little
troubleshooting insight as to some of the most common reasons 'good code goes
bad,' especially in IE, and the various ways to remedy the problems.
Don't Forget About Those Other
Browsers and Platforms
I'll mostly be talking about working in Firefox and then 'xing' for IE. This is
perhaps, unfairly, assuming you're working on Windows or a Mac and that the
source of all your design woes will (of course) be Microsoft IE's fault. But as I
mentioned in Chapter 1, this book is not about only using Firefox! You must check
your theme in all browsers and if possible, other platforms, especially the ones you
know your audience uses the most.
Debugging and Validaton
[ 92 ]
I surf with Opera a lot and nd that sometimes JavaScripts can 'hang' or slow that
browser down, so I debug and double-check scripts for that browser. (We'll discuss
more on JavaScripts in Chapter 8.) I'm a freelance designer and nd a lot of people
who are also in the design eld use a Mac (like me), and visit my sites using Safari,
so I occasionally take advantage of this and write CSS that caters to the Safari
browser. (Safari will interpret some neat CSS 3 properties that other browsers
don't yet.)
Generally, if you write valid markup and code that looks good in Firefox, it will look
good in all the other browsers (including IE). Markup and code that goes awry in IE
is usually easy to x with a work-around.
Firefox is a tool, nothing more! That's the only reason why this book
tends to focus on Firefox. Firefox contains features and plug-ins that we'll
be taking advantage of to help us streamline the theme development
process and aid in the validation and debugging of our theme. Use it just
like you use your HTML/code editor or your image editor. When you're
not developing, you can use whatever browser you prefer.
Introduction to Debugging
Remember in Chapter 3, our initial work-ow chart?
I was insistent that your work-ow pretty much be as edit -> check it -> then go back
and edit some more. The main purpose of visually checking your theme in FireFox
after adding each piece of code is so that you can see if it looks OK, and if not,
immediately debug that piece of code. Running a validation check as you work just
doubly ensures you're on the right track.