apress foundations_of gtk plus development 2007 phần 5 pdf
Bạn đang xem bản rút gọn của tài liệu. Xem và tải ngay bản đầy đủ của tài liệu tại đây (1.8 MB, 65 trang )
206
CHAPTER 6
■ USING GLIB
case 0:
gtk_init (&argc, &argv);
setup_app (parent_to_child, child_to_parent, pid);
break;
default:
gtk_init (&argc, &argv);
setup_app (child_to_parent, parent_to_child, pid);
}
gtk_main ();
return 0;
}
/* Set up the GUI aspects of each window and setup IO channel watches. */
static void
setup_app (gint input[],
gint output[],
gint pid)
{
GtkWidget *window, *entry;
GIOChannel *channel_read, *channel_write;
window = gtk_window_new (GTK_WINDOW_TOPLEVEL);
entry = gtk_entry_new ();
gtk_container_add (GTK_CONTAINER (window), entry);
gtk_container_set_border_width (GTK_CONTAINER (window), 10);
gtk_widget_set_size_request (window, 200, -1);
gtk_widget_show_all (window);
/* Close the unnecessary pipes for the given process. */
close (input[1]);
close (output[0]);
/* Create read and write channels out of the remaining pipes. */
channel_read = g_io_channel_unix_new (input[0]);
channel_write = g_io_channel_unix_new (output[1]);
if (channel_read == NULL || channel_write == NULL)
g_error ("Error: The GIOChannels could not be created!\n");
/* Watch the read channel for changes. This will send the appropriate data. */
if (!g_io_add_watch (channel_read, G_IO_IN | G_IO_HUP,
iochannel_read, (gpointer) entry))
g_error ("Error: Read watch could not be added to the GIOChannel!\n");
7931ch06.fm Page 206 Wednesday, March 7, 2007 8:52 PM
CHAPTER 6 ■ USING GLIB
207
signal_id = g_signal_connect (G_OBJECT (entry), "changed",
G_CALLBACK (entry_changed),
(gpointer) channel_write);
/* Set the window title depending on the process identifier. */
if (pid == 0)
gtk_window_set_title (GTK_WINDOW (window), "Child Process");
else
gtk_window_set_title (GTK_WINDOW (window), "Parent Process");
}
/* Read the message from the pipe and set the text to the GtkEntry. */
static gboolean
iochannel_read (GIOChannel *channel,
GIOCondition condition,
GtkEntry *entry)
{
GIOStatus ret_value;
gchar *message;
gsize length;
/* The pipe has died unexpectedly, so exit the application. */
if (condition & G_IO_HUP)
g_error ("Error: The pipe has died!\n");
/* Read the data that has been sent through the pipe. */
ret_value = g_io_channel_read_line (channel, &message, &length, NULL, NULL);
if (ret_value == G_IO_STATUS_ERROR)
g_error ("Error: The line could not be read!\n");
/* Synchronize the GtkEntry text, blocking the changed signal. Otherwise, an
* infinite loop of communication would ensue. */
g_signal_handler_block ((gpointer) entry, signal_id);
message[length-1] = 0;
gtk_entry_set_text (entry, message);
g_signal_handler_unblock ((gpointer) entry, signal_id);
return TRUE;
}
/* Write the new contents of the GtkEntry to the write IO channel. */
static void
entry_changed (GtkEditable *entry,
GIOChannel *channel)
7931ch06.fm Page 207 Wednesday, March 7, 2007 8:52 PM
208
CHAPTER 6
■ USING GLIB
{
gchar *text;
gsize length;
GIOStatus ret_value;
text = g_strconcat (gtk_entry_get_text (GTK_ENTRY (entry)), "\n", NULL);
/* Write the text to the channel so that the other process will get it. */
ret_value = g_io_channel_write_chars (channel, text, -1, &length, NULL);
if (ret_value = G_IO_STATUS_ERROR)
g_error ("Error: The changes could not be written to the pipe!\n");
else
g_io_channel_flush (channel, NULL);
}
Setting Up IO Channels
If you are working on a UNIX-like machine, you can use the pipe() function to create new file
descriptors. In Listing 6-9, two pairs of pipes are set up: one for sending messages from the par-
ent to the child and one for sending messages in the other direction. Two GIOChannels can then
be created from these file descriptors by calling the following function on each.
After the pipes are created, the application is forked with fork(). If the fork is successful,
the application is set up for both the child and the parent process.
Within setup_app(), we begin by closing the pipes that are not needed by the child or par-
ent applications with close(). Each process will only need one read and one write pipe in order
to send and receive messages.
Next, we use the two remaining pipes in each application and set up a GIOChannel for each.
We will use channel_read to receive data from the other process and channel_write to send the
new content of the GtkEntry.
channel_read = g_io_channel_unix_new (input[0]);
channel_write = g_io_channel_unix_new (output[1]);
After initializing your IO channels, you need to set up a watch on channel_read. The watch
will monitor the channel for the specified events, which is setup with g_io_add_watch().
guint g_io_add_watch (GIOChannel *channel,
GIOCondition condition,
GIOFunc func,
gpointer data);
7931ch06.fm Page 208 Wednesday, March 7, 2007 8:52 PM
CHAPTER 6 ■ USING GLIB
209
The second parameter of g_io_add_watch() adds one or more events that should be
watched. You need to make sure to set up the correct conditions with each channel. You will
never get a G_IO_IN event from a channel used for writing data, so monitoring for that event is
useless. Possible values for the GIOCondition enumeration follow; these can be piped to the
condition parameter of g_io_add_watch():
• G_IO_IN: Read data is pending.
• G_IO_OUT: Data can be written without the worry of blocking.
• G_IO_PRI: Read data is pending and urgent.
• G_IO_ERR: An error has occurred.
• G_IO_HUP: The connection has been hung up or broken.
• G_IO_NVAL: An invalid request has occurred because the file descriptor is not open.
When one of the specified conditions occurs, the GIOFunc callback function is called. The
last parameter gives data that will be passed to the callback function. IO channel callback func-
tions receive three parameters: the GIOChannel, the condition that occurred, and the data
passed from g_io_add_watch(). TRUE should always be returned from the callback function
unless you want it to be removed. The function prototype follows:
gboolean (*GIOFunc) (GIOChannel *source, GIOCondition condition, gpointer data);
Reading from and writing to a GIOChannel is done in the same manner regardless of whether
it is a file or a pipe. Therefore, the g_io_channel_read_(*) and g_io_channel_write_*() func-
tions covered in the previous section can still be used.
Many of the GIOChannel functions provide two ways to check for errors. The first is the
GError structure that we have used in past chapters. Secondly, many functions return a
GIOStatus value, which will report one of the following four values:
• G_IO_STATUS_ERROR: Some type of error has occurred. You should still track errors even if
you are checking for this value.
• G_IO_STATUS_NORMAL: The action was successfully completed.
• G_IO_STATUS_EOF: The end of the file has been reached.
• G_IO_STATUS_AGAIN: Resources are temporarily unavailable. You should try again later.
7931ch06.fm Page 209 Wednesday, March 7, 2007 8:52 PM
210
CHAPTER 6
■ USING GLIB
Depending on the GIOStatus value, you should either continue or give an error message.
The only exception is G_IO_STATUS_AGAIN, in which case you should return to poll() in the
main loop and wait for the file descriptor to become ready.
To send the data to the read buffer, you need to flush the write buffer of the GIOChannel
with g_io_channel_flush(). This function, along with all of the functions in this section, can
cause an error of the type GIOChannelError.
GIOStatus g_io_channel_flush (GIOChannel *channel,
GError **error);
Spawning Processes
The GIOChannel example in the previous section used pipe() and fork() to set up the commu-
nication between the applications. However, this example is not cross-platform, because some
commands will not be supported on Microsoft Windows.
To spawn processes in a way supported by multiple platforms, GLib provides three func-
tions. Since all three work in a similar way, we will only talk about the following function,
g_spawn_async_with_pipes():
gboolean g_spawn_async_with_pipes (const gchar *working_directory,
gchar **argv,
gchar **envp,
GSpawnFlags flags,
GSpawnChildSetupFunc child_setup,
gpointer data,
GPid *child_pid,
gint *standard_input,
gint *standard_output,
gint *standard_error,
GError **error);
This function asynchronously runs a child program, which means that the program will
continue to run even if the child has not exited. The first parameter specifies the working direc-
tory for the child process or NULL to set it as the parent’s working directory.
The argv list is a NULL-terminated array of strings. The first string in this list is the name of the
application, followed by any additional parameters. This application must be a full path unless
you use the G_SPAWN_SEARCH_PATH flag, which will be shown later. Another NULL-terminated array
of strings is envp, each in the form KEY=VALUE. These will be set as the child’s environment
variables.
7931ch06.fm Page 210 Wednesday, March 7, 2007 8:52 PM
CHAPTER 6 ■ USING GLIB
211
You can then specify one or more of the following GSpawnFlags:
• G_SPAWN_LEAVE_DESCRIPTORS_OPEN: The child will inherit the open file descriptors of the
parent. If this flag is not set, all file descriptors except the standard input, output, and
error will be closed.
• G_SPAWN_DO_NOT_REAP_CHILD: Stop the child from automatically becoming reaped. If you
do not call waitpid() or handle SIGCHLD, it will become a zombie.
• G_SPAWN_SEARCH_PATH: If this flag is set, argv[0] will be searched for in the user’s path if it
is not an absolute location.
• G_SPAWN_STDOUT_TO_DEV_NULL: Discard the standard output from the child. If this flag is
not set, it will go to the same location as the parent’s standard output.
• G_SPAWN_STDERR_TO_DEV_NULL: Discard the standard error from the child.
• G_SPAWN_CHILD_INHERITS_STDIN: If this flag is not set, the standard input for the child is
attached to /dev/null. You can use this flag so the child will inherit the standard input of
the parent.
• G_SPAWN_FILE_AND_ARGV_ZERO: Use the first argument as the executable and only pass the
remaining strings as the actual arguments. If this flag is not set, argv[0] will also be
passed to the executable.
The next parameter of g_spawn_async_with_pipes() is the GSpawnChildSetupFunc callback
function that will be run after GLib sets up pipes but before calling exec(). This function
accepts the data parameter from g_spawn_async_with_pipes().
The next four parameters allow you to retrieve information about the new child process.
These are the child’s process identifier, standard input, standard output, and standard error.
Any of these four parameters can be set to NULL if you want to ignore it.
If the application was successfully launched, g_spawn_async_with_pipes() will return
TRUE. Otherwise, the error will be set under the GSpawnError domain, and it will return FALSE.
When you are finished with a GPid, you should use g_spawn_close_pid() to close it. This is
especially important when spawning processes on Microsoft Windows.
void g_spawn_close_pid (GPid pid);
7931ch06.fm Page 211 Wednesday, March 7, 2007 8:52 PM
212
CHAPTER 6
■ USING GLIB
Dynamic Modules
One extremely useful feature provided by GLib is the ability to dynamically load libraries and
explicitly call functions from those libraries using the GModule structure. This functionality is
not performed in the same way across platforms, so a cross-platform solution for dynamic
libraries makes things much easier. This functionality facilitates, for one, the creation of a
plug-in system. In Listing 6-10, a simple theoretical plug-in system will be created.
The example is split into two separate files: one for the plug-in and one for the main appli-
cation. To run this application, you first need to compile and link modules-plugin.c as a library.
You can use the following two commands to create the library and install it into the standard
location.
gcc –shared modules-plugin.c –o plugin.so `pkg-config libs glib-2.0` \
`pkg-config cflags glib-2.0`
sudo mv plugin.so /usr/lib
Library creation is generally performed by the GNU linker (ld), but by using the -shared
flag, GCC can create shared libraries. Also, on some systems it is necessary to run ldconfig after
you move the plug-in library so it will be registered. You will need to do this if you want to use
the library for purposes other than loading with GModule.
Listing 6-10. The Plug-in (modules-plugin.c)
#include <glib.h>
#include <gmodule.h>
G_MODULE_EXPORT gboolean
print_the_message (gpointer data)
{
g_printf ("%s\n", (gchar*) data);
return TRUE;
}
G_MODULE_EXPORT gboolean
print_another_one (gpointer data)
{
g_printf ("%s\n", (gchar*) data);
return TRUE;
}
The plug-in source only contains one or more functions that will be loaded by the main
application. Therefore, there is no need to include a main() function within the plug-in’s
source file.
The only important aspect of the plug-in file is that you should include G_MODULE_EXPORT
before any function you want to export. If you do not use this macro, GModule will be unable to
load the function from the library.
7931ch06.fm Page 212 Wednesday, March 7, 2007 8:52 PM
CHAPTER 6 ■ USING GLIB
213
Functions dynamically loaded from a library are called symbols. A symbol is merely a
pointer to a function in the library. You call symbol functions in the same way you would call
any other function. The only difference is that, when called, GLib searches out the actual func-
tion in the library and executes it from there.
The advantage of this method is that multiple applications can load a library at the same
time. A library that allows itself to be loaded by multiple applications is called a shared library.
Most libraries compiled on Linux are shared libraries.
When compiling the main file of Listing 6-11, you will need to use an altered compile line
as well, because you need to link against the GModule library.
gcc modules.c –o modules `pkg-config cflags libs glib-2.0` \
`pkg-config cflags libs gmodule-2.0`
GModule can easily be included by adding `pkg-config cflags libs gmodule-2.0` to
the compile command. The following example illustrates how to load the library that we have
just created and installed. Listing 6-11 is an application that takes advantage of the dynamic
module from Listing 6-10.
Listing 6-11. Loading the Plug-in (modules.c)
#include <gmodule.h>
#include <glib.h>
typedef gboolean (* PrintMessageFunc) (gpointer data);
typedef gboolean (* PrintAnotherFunc) (gpointer data);
int main (int argc,
char *argv[])
{
GModule *module;
PrintMessageFunc print_the_message;
PrintAnotherFunc print_another_one;
gchar *text = "This is some text";
/* Make sure module loading is supported on the user's machine. */
g_assert (g_module_supported ());
/* Open the library and resolve symbols only when necessary. Libraries on
* Windows will have a .dll appendix. */
module = g_module_open ("/usr/lib/plugin.so", G_MODULE_BIND_LAZY);
if (!module)
{
g_error ("Error: %s\n", (gchar*) g_module_error ());
return -1;
}
7931ch06.fm Page 213 Wednesday, March 7, 2007 8:52 PM
214
CHAPTER 6
■ USING GLIB
/* Load the print_the_message() function. */
if (!g_module_symbol (module, "print_the_message",
(gpointer*) &print_the_message))
{
g_error ("Error: %s\n", (gchar*) g_module_error ());
return -1;
}
/* Load the destroy_the_evidence() function. */
if (!g_module_symbol (module, "print_another_one",
(gpointer*) &print_another_one))
{
g_error ("Error: %s\n", (gchar*) g_module_error ());
return -1;
}
/* Run both loaded functions since there were no errors reported loading
* neither the module nor the symbols. */
print_the_message ((gpointer) text);
print_another_one ("Another Message!");
/* Close the module and free allocated resources. */
if (!g_module_close (module))
g_error ("Error: %s\n", (gchar*) g_module_error ());
return 0;
}
Not all platforms support the GModule structure. Therefore, if you are creating an applica-
tion that will be compiled for multiple platforms, it is a good idea to make sure support is
available.
Support for GModule can be checked with g_module_supported(), which will return TRUE if
the feature is available. By using g_assert(), you can ensure that the application will terminate
if GModule is not supported.
Once you are sure GModule is supported on the user’s system, you can open a library with
g_module_open(). If opening a module fails, NULL is returned by the function. However, before
failing, the function will attempt multiple formats of the given library name to find a library
that will load. This includes appending G_MODULE_SUFFIX, the system’s default library suffix, to
the specified path.
GModule* g_module_open (const gchar *library,
GModuleFlags flags);
7931ch06.fm Page 214 Wednesday, March 7, 2007 8:52 PM
CHAPTER 6 ■ USING GLIB
215
The second parameter in g_module_open() specified one or more module flags, which
instruct GModule how to deal with symbols. There are currently three available GModuleFlags
enumeration values:
• G_MODULE_BIND_LAZY: Symbols should all be bound when the module is loaded by
default. However, this tells GLib to only resolve symbols when needed.
• G_MODULE_BIND_LOCAL: Do not place symbols on the global namespace, which is the
default on most systems.
• G_MODULE_BIND_MASK: Mask for all GModule flags.
At any point within your application, you can call g_module_error(), which will return a
human-readable string describing the last error that has occurred. If any function returns an
unexpected value, it is a good idea to output this message to the screen.
If the module was successfully loaded, g_module_symbol() can then be used to load any
functions in the library that were made available with G_MODULE_EXPORT. If the symbol is suc-
cessfully loaded, the function will return TRUE.
gboolean g_module_symbol (GModule *module,
const gchar *symbol_name,
gpointer *symbol);
The second parameter of g_module_symbol() should be the full name of the function you
want to load from the library. The last parameter is a pointer that will store where to find the
function in memory. It is essential that you specify the same parameter and return values for
both the loaded function and the pointer, or problems will arise.
After you are finished with the GModule object, which is usually when the application is
closing or the plug-in is being unloaded, g_module_close() should be called. TRUE is returned
upon a successful destruction of the object.
If you are sure that the module should never be unloaded, you can ignore all calls to
g_module_close() by calling g_module_make_resident(). Be careful with this function, because
it will be impossible to unload the module after this is called!
Test Your Understanding
Since this chapter covers such a wide array of topics, it would be too time consuming to pro-
vide exercises for each thing you have learned. Therefore, in addition to doing the following
two exercises, you should create your own applications using various other topics you learned
in this chapter to practice.
Making your own examples, in addition to the following two exercises, should give you
enough experience to easily be able to use what you have learned in future chapters. The fol-
lowing two exercises will allow you to practice file management, error handling, message
reporting, and timeout functions.
7931ch06.fm Page 215 Wednesday, March 7, 2007 8:52 PM
216
CHAPTER 6
■ USING GLIB
Exercise 6-1. Working With Files
For this exercise, create a window that contains a GtkEntry widget. The entry can contain any text that the user
wants. The window will also contain a GtkFileChooserButton that will allow the user to choose a folder.
A third widget, a button, should be placed within the window. Upon clicking that button, the text from the GtkEntry
should be written to an arbitrary file in the folder chosen by the GtkFileChooserButton. You should handle all
errors that can occur in this exercise.
Exercise 6-1 is straightforward. You need to create a normal GTK+ application as always. In
the main window, the entry, file chooser button, and Save button should be added and packed
by a GtkVBox. The exercise solution can be found in Appendix F.
When the button is pressed, you need to save the text in the entry to a file. That file should
be created in the specified location under whatever name you choose. Then, you need to use
the GError structure to make sure the file was successfully created.
Exercise 6-2. Timeout Functions
For this exercise, create a window that contains a GtkLabel and a button. The label should initially display the
number “0”. The timeout function should be called every second, incrementing the label up one digit. When the but-
ton is pressed, the counter should be reset and begin counting again.
As stated before, you should never use timeouts to count time if you need accuracy. Therefore, you should reimple-
ment this example using timers. Consider placing two labels in the window, one using a timeout function for
counting and one using a timer. What can you conclude from this example?
Exercise 6-2 is a little more difficult than the previous one, because you need to figure out
how to get both the GtkLabel and the current count to the timeout function. Of course, you
could use a global variable, but this is not the preferred method in most cases.
In the solution in Appendix F, both elements were stored in a structure that could easily be
passed to the timeout function. This is the method that you should use in most of your appli-
cations, because it will make them easier to manage when they grow in size.
The purpose of the application was to count the number of seconds that have gone by
using a timeout function. Whenever the Clear button is clicked, the count should be reset to 0
seconds for each button.
Both of these exercises are meant to stimulate your imagination. You have learned a great
deal in this chapter as well as previous chapters. You should experiment with integrating your
previous knowledge of GTK+ with the topics in this chapter.
7931ch06.fm Page 216 Wednesday, March 7, 2007 8:52 PM
CHAPTER 6 ■ USING GLIB
217
Summary
Congratulations! You have made it through the longest chapter in the book. This chapter has
given you a thorough understanding of many of the most important features provided by GLib.
Of course, there were topics that were not covered, and those that provide options not
shown in this chapter’s examples. Therefore, when you need one of these features in an appli-
cation, you should reference the API documentation for further information.
The beginning of this chapter gave a quick overview of GLib basics including data types,
macros, message logging, environment variables, timers, file manipulation, directory manage-
ment, and file system work. You then learned about memory management in GLib. In addition
to wrapping malloc() and friends, you can also use the slab allocator provided by GSlice. GLib
provides a method for profiling memory usage within an application as well.
Another important topic in this chapter was the main loop. You learned that the main loop
is actually implemented in GLib by GMainLoop, GMainContext, and GSource. Two types of sources
already built-in are timeouts and idle functions. Timeout functions are called at a predefined
interval of time and idle functions are called when there are no more actions with a higher pri-
ority to perform.
GLib provides a wide array of data types. You learned about ten different data types,
including the following:
• Strings provide character arrays that automatically grow as text is added. These are sim-
ilar to the string class provided by C++’s Standard Template Library.
• Linked lists allow you to traverse, search, and sort a large list of data of an arbitrary type.
Both doubly and singly linked variations are provided by GLib.
• Balanced binary trees are tree structures that are optimized for traversing and searching.
N-ary trees allow each node to have as many branches as you want. They can very
quickly become complex.
• Arrays, byte arrays, and pointer arrays provide lists of elements that automatically grow
when items are added.
• Quarks provide an integer pointer to an associated string. Keyed data lists use them as a
reference to stored data of an arbitrary type.
• Hash tables are similar to linked lists, except items are accessed through a pointer of an
arbitrary type. They are optimized so data can be found very quickly.
GLib provides many file and directory utility functions. These can read or write files, read
the contents of a directory, or wrap UNIX file system functionality. The GIOChannel structure is
used to deal with files or pipes, which provide interprocess communication.
An easy way to create a plug-in system is to use GLib’s GModule structure. This structure
allows you to dynamically load libraries and retrieve symbols from the files. This can also be
used to make an application more modular.
7931ch06.fm Page 217 Wednesday, March 7, 2007 8:52 PM
218
CHAPTER 6
■ USING GLIB
At this point, you should have a decent grasp of many important GTK+ widgets and GLib
features. Many of these features are going to be used in the next few chapters, which will cover
more advanced widgets.
Chapter 7 will explain the multiline text entry widget called GtkTextView. Other topics
include the clipboard and the GtkSourceView library.
7931ch06.fm Page 218 Wednesday, March 7, 2007 8:52 PM
219
■ ■ ■
CHAPTER 7
The Text View Widget
In Chapter 6, you learned about a large number of utilities, data structures, and other types of
functionality provided by GLib, so there are very few further things about GLib that you will
learn throughout the book. Instead, you will apply the knowledge that you have gained in
Chapter 6 to future examples and exercises.
Chapter 7 will teach you how to use the GtkTextView widget. The text view widget is similar
to a GtkEntry widget, except it is capable of holding text that spans multiple lines. Scrolled win-
dows will be used to allow the document to exist beyond the bounds of the screen.
Before you learn about GtkTextView, Chapter 7 begins by introducing a few new widgets.
The first two widgets are scrolled windows and viewports. Scrolled windows are composed
of two scrollbars that are used to scroll the child widget. A few widgets support scrolling
already, including GtkLayout, GtkTreeView, and GtkTextView. For all other widgets that you
want to scroll, you will need to add them first to a GtkViewport widget, which gives its child wid-
get scrolling abilities.
In this chapter, you will learn the following:
• How to use scrolled windows and viewports
• How to use the GtkTextView widget and apply text buffers
• What function text iterators and text marks perform when dealing with buffers
• Methods for applying styles to the whole or part of a document
• How to cut, copy, and paste to and from the clipboard
• How to insert images and child widgets into a text view
Scrolled Windows
Before you can learn about the GtkTextView widget, you need to learn about two container
widgets called GtkScrolledWindow and GtkViewport. Scrolled windows use two scrollbars to
allow a widget to take up more space than is visible on the screen. This widget will allow the
GtkTextView widget to contain documents that expand beyond the bounds of the window.
7931.book Page 219 Thursday, February 22, 2007 9:09 PM
220
CHAPTER 7
■ THE TEXT VIEW WIDGET
Both scrollbars in the scrolled window have associated GtkAdjustment objects. These
adjustments are used to track the current position and range of a scrollbar. However, you will
not need to directly access the adjustments in most cases.
typedef struct
{
gdouble value;
gdouble upper;
gdouble lower;
gdouble step_increment;
gdouble page_increment;
gdouble page_size;
} GtkAdjustment;
A scrollbar’s GtkAdjustment holds information about scroll bounds, steps, and its current
position. The value variable is the current position of the scrollbar between the bounds. This
variable must always be between the lower and upper values, which are the bounds of the
adjustment. The page_size is the area that can be visible on the screen at one time, depending
on the size of the widget. The step_increment and page_increment variables are used for step-
ping when an arrow is pressed or when the Page Down key is pressed.
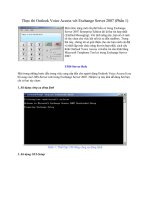
Figure 7-1 is a screenshot of the window created with the code in Listing 7-1. Both scroll-
bars are enabled, because the table containing the buttons is larger than the visible area.
Figure 7-1. A scrolled window and viewport that are synchronized
Listing 7-1 shows how to use scrolled windows and viewports. As a scrollbar is moved, the
viewport will scroll as well, because the adjustments are synchronized. Try to resize the win-
dow to see how the scrollbars react to becoming larger and smaller than the child widget.
7931.book Page 220 Thursday, February 22, 2007 9:09 PM
CHAPTER 7 ■ THE TEXT VIEW WIDGET
221
Listing 7-1. Using Scrolled Windows (scrolledwindows.c)
#include <gtk/gtk.h>
int main (int argc,
char *argv[])
{
GtkWidget *window, *swin, *viewport, *table1, *table2, *vbox;
GtkAdjustment *horizontal, *vertical;
GtkWidget *buttons1[10][10], *buttons2[10][10];
unsigned int i, j;
gtk_init (&argc, &argv);
window = gtk_window_new (GTK_WINDOW_TOPLEVEL);
gtk_window_set_title (GTK_WINDOW (window), "Scrolled Windows & Viewports");
gtk_container_set_border_width (GTK_CONTAINER (window), 10);
gtk_widget_set_size_request (window, 500, 400);
g_signal_connect (G_OBJECT (window), "destroy",
G_CALLBACK (gtk_main_quit), NULL);
table1 = gtk_table_new (10, 10, TRUE);
table2 = gtk_table_new (10, 10, TRUE);
gtk_table_set_row_spacings (GTK_TABLE (table1), 5);
gtk_table_set_row_spacings (GTK_TABLE (table2), 5);
gtk_table_set_col_spacings (GTK_TABLE (table1), 5);
gtk_table_set_col_spacings (GTK_TABLE (table2), 5);
/* Pack each table with 100 buttons. */
for (i = 0; i < 10; i++)
{
for (j = 0; j < 10; j++)
{
buttons1[i][j] = gtk_button_new_from_stock (GTK_STOCK_CLOSE);
buttons2[i][j] = gtk_button_new_from_stock (GTK_STOCK_CLOSE);
gtk_button_set_relief (GTK_BUTTON (buttons1[i][j]), GTK_RELIEF_NONE);
gtk_button_set_relief (GTK_BUTTON (buttons2[i][j]), GTK_RELIEF_NONE);
gtk_table_attach_defaults (GTK_TABLE (table1), buttons1[i][j],
i, i + 1, j, j + 1);
gtk_table_attach_defaults (GTK_TABLE (table2), buttons2[i][j],
i, i + 1, j, j + 1);
}
}
7931.book Page 221 Thursday, February 22, 2007 9:09 PM
222
CHAPTER 7
■ THE TEXT VIEW WIDGET
/* Create a scrolled window and a viewport, each with one table. Use the
* adjustments in the scrolled window to synchronize both containers. */
swin = gtk_scrolled_window_new (NULL, NULL);
horizontal = gtk_scrolled_window_get_hadjustment (GTK_SCROLLED_WINDOW (swin));
vertical = gtk_scrolled_window_get_vadjustment (GTK_SCROLLED_WINDOW (swin));
viewport = gtk_viewport_new (horizontal, vertical);
gtk_container_set_border_width (GTK_CONTAINER (swin), 5);
gtk_container_set_border_width (GTK_CONTAINER (viewport), 5);
gtk_scrolled_window_set_policy (GTK_SCROLLED_WINDOW (swin),
GTK_POLICY_AUTOMATIC, GTK_POLICY_AUTOMATIC);
gtk_scrolled_window_add_with_viewport (GTK_SCROLLED_WINDOW (swin), table1);
gtk_container_add (GTK_CONTAINER (viewport), table2);
/* Pack the widgets into a GtkVBox and then into the window. */
vbox = gtk_vbox_new (TRUE, 5);
gtk_box_pack_start_defaults (GTK_BOX (vbox), viewport);
gtk_box_pack_start_defaults (GTK_BOX (vbox), swin);
gtk_container_add (GTK_CONTAINER (window), vbox);
gtk_widget_show_all (window);
gtk_main();
return 0;
}
New scrolled windows are created with gtk_scrolled_window_new(). In Listing 7-1, each
parameter is set to NULL, which will cause the scrolled window to create two default adjust-
ments for you. In most cases, you will want to use the default adjustments, but it is also
possible to specify your own horizontal and vertical adjustments for the scroll bars.
The adjustments are used in this example when the new viewport is created with
gtk_viewport_new(). The viewport adjustments are initialized with those from the scrolled
window, which makes sure that both containers will be scrolled at the same time.
The first decision you need to make when setting up a scrolled window is when the scroll-
bars will be visible. In this example, GTK_POLICY_AUTOMATIC was used for both scrollbars so that
each will only be shown when needed. GTK_POLICY_ALWAYS is the default policy for both scroll-
bars. The three enumeration values provided by GtkPolicyType follow:
• GTK_POLICY_ALWAYS: The scrollbar will always be visible. It will be displayed as disabled or
grayed out if scrolling is not possible.
• GTK_POLICY_AUTOMATIC: The scrollbar will only be visible if scrolling is possible. If it is not
needed, the scrollbar will temporarily disappear.
• GTK_POLICY_NEVER: The scrollbar will never be shown.
7931.book Page 222 Thursday, February 22, 2007 9:09 PM
CHAPTER 7 ■ THE TEXT VIEW WIDGET
223
Another property, although not used by very many applications, is the placement of the
scrollbars. In most applications, you will want the scrollbars to appear along the bottom and
the right side of the widget, which is the default functionality.
However, if you want to change this, you can call gtk_scrolled_window_set_placement().
This function receives a GtkCornerType value, which defines where the content is placed with
respect to the scrollbars. For example, the default value is GTK_CORNER_TOP_LEFT, because the
content normally appears above and to the left of the scrollbars.
void gtk_scrolled_window_set_placement (GtkScrolledWindow *swin
GtkCornerType window_placement);
Available GtkCornerType values include GTK_CORNER_TOP_LEFT, GTK_CORNER_BOTTOM_LEFT,
GTK_CORNER_TOP_RIGHT, and GTK_CORNER_BOTTOM_RIGHT, which define where the content is
placed with respect to the scrollbars.
■Caution It is a very rare occasion when gtk_scrolled_window_set_placement() should be used! In
almost every possible case, you should not use this function, because it can confuse the user. Unless you
have a good reason for changing the placement, use the default value.
It is possible to set the shadow type of the widget with respect to the child widget by calling
gtk_scrolled_window_set_shadow_type().
void gtk_scrolled_window_set_shadow_type (GtkScrolledWindow *swin,
GtkShadowType type);
In Chapter 3, you learned how to use the GtkShadowType enumeration along with handle
boxes to set the type of border to place around the child widget. The same values as before are
used to set the shadow type of a scrolled window.
After you have set up a scrolled window, you should add a child widget for it to be of any
use. There are two possible ways to do this, and the method is chosen based on the type of
child widget. If you are using a GtkTextView, GtkTreeView, GtkIconView, GtkViewport, or
GtkLayout widget, you should use the default gtk_container_add() function, since all five of
these widgets include native scrolling support.
All other GTK+ widgets do not have native scrolling support. For those widgets,
gtk_scrolled_window_add_with_viewport() should be used. This function will give the child
scrolling support by first packing it into a container widget called a GtkViewport. This widget
implements scrolling ability for the child widget that lacks its own support. The viewport is
then automatically added to the scrolled window.
■Caution You should never pack GtkTextView, GtkTreeView, GtkIconView, GtkViewport, or
GtkLayout widgets into a scrolled window with gtk_scrolled_window_add_with_viewport(),
because scrolling may not be performed correctly on the widget!
7931.book Page 223 Thursday, February 22, 2007 9:09 PM
224
CHAPTER 7
■ THE TEXT VIEW WIDGET
It is possible to manually add a widget to a new GtkViewport and then add that viewport to
a scrolled window with gtk_container_add(), but the convenience function allows you to
ignore the viewport completely.
The scrolled window is simply a container with scrollbars. Neither the container nor
the scrollbars perform any action by themselves. Scrolling is handled by the child widget,
which is why the child must already have native scrolling support to work correctly with the
GtkScrolledWindow widget.
When you add a child widget that has scrolling support, a function is called to add adjust-
ments for each axis. Nothing will be done unless the child widget has scrolling support, which
is why a viewport is required by most widgets. When the scrollbar is clicked and dragged by the
user, the value in the adjustment changes, which causes the value-changed signal to be emit-
ted. This action will also cause the child widget to render itself accordingly.
Because the GtkViewport widget did not have any scrollbars of its own, it relied completely
on the adjustments to define its current position on the screen. The scrollbars are used in the
GtkScrolledWindow widget as an easy mechanism for adjusting the current value of the
adjustment.
Text Views
The GtkTextView widget is used to display multiple lines of text of a document. It provides
many ways to customize the whole of a document or individual portions of it. It is even possi-
ble to insert GdkPixbuf objects and child widgets into a document. GtkTextView is the first
reasonably involved widget you have encountered up to this point, so the rest of this chapter is
dedicated to many aspects of the widget. It is a very versatile widget that you will need to use in
many GTK+ applications.
The first few examples of this chapter may lead you to believe that GtkTextView can only be
used to display simple documents, but that is not the case. It can also be used to display many
types of rich text, word-processing, and interactive documents that are used by a wide variety
of applications. You will learn how to do this in the sections that follow.
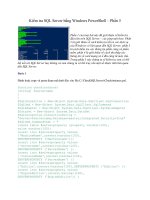
Figure 7-2 shows a simple GtkTextView widget contained by a GtkScrolledWindow widget.
Figure 7-2. A GtkTextView widget
Text views are used in every type of text and document editing application that uses GTK+.
If you have ever used AbiWord, Gedit, or most other text editors created for GNOME, you have
used the GtkTextView widget. It is also used in the Gaim application in instant message win-
dows. (In fact, all of the examples in this book were created in the OpenLDev application,
which uses GtkTextView for source code editing!)
7931.book Page 224 Thursday, February 22, 2007 9:09 PM
CHAPTER 7 ■ THE TEXT VIEW WIDGET
225
Text Buffers
Each text view is used to display the contents of a class called GtkTextBuffer. Text buffers are
used to store the current state of the content within a text view. They hold text, images, child
widgets, text tags, and all other information necessary for rendering the document.
A single text buffer is capable of being displayed by multiple text views, but each text view
has only one associated buffer. Most programmers do not take advantage of this feature, but it
will become important when you learn how to embed child widgets into a text buffer in a later
section.
As with all text widgets in GTK+, text is stored as UTF-8 strings. UTF-8 is a type of character
encoding that uses from 1 byte to 4 bytes for every character. In order to differentiate how
many bytes a character will take up, “0” always precedes a character that is 1 byte, “110” pre-
cedes 2-byte characters, “1110” comes before 3-byte sequences, and so on. UTF-8 characters
that span multiple bytes have “10” in the two most significant bits of the rest of the bytes.
By doing this, the basic 128 ASCII characters are still supported, because an additional
7 bits are available in a single-byte character after the initial “0”. UTF-8 also provides support
for characters in many other languages. This method also avoids small byte sequences occur-
ring within larger byte sequences.
When handling text buffers, you need to know two terms: offset and index. The word “off-
set” refers to one character. UTF-8 characters may span one or more bytes within the buffer, so
a character offset in a GtkTextBuffer may not be a single byte long.
■Caution The word “index” refers to an individual byte. You need to be careful when stepping through a
text buffer in later examples, because you cannot refer to an index that is between two character offsets.
Listing 7-2 illustrates one of the simplest text view examples you could create. A new
GtkTextView widget is created. Its buffer is retrieved, and text is inserted into the buffer. A
scrolled window is then used to contain the text view.
Listing 7-2. A Simple GtkTextView Example (textview.c)
#include <gtk/gtk.h>
int main (int argc,
char *argv[])
{
GtkWidget *window, *scrolled_win, *textview;
GtkTextBuffer *buffer;
gtk_init (&argc, &argv);
window = gtk_window_new (GTK_WINDOW_TOPLEVEL);
gtk_window_set_title (GTK_WINDOW (window), "Text Views");
gtk_container_set_border_width (GTK_CONTAINER (window), 10);
gtk_widget_set_size_request (window, 250, 150);
7931.book Page 225 Thursday, February 22, 2007 9:09 PM
226
CHAPTER 7
■ THE TEXT VIEW WIDGET
textview = gtk_text_view_new ();
buffer = gtk_text_view_get_buffer (GTK_TEXT_VIEW (textview));
gtk_text_buffer_set_text (buffer, "Your 1st GtkTextView widget!", -1);
scrolled_win = gtk_scrolled_window_new (NULL, NULL);
gtk_container_add (GTK_CONTAINER (scrolled_win), textview);
gtk_container_add (GTK_CONTAINER (window), scrolled_win);
gtk_widget_show_all (window);
gtk_main();
return 0;
}
Most new GtkTextView widgets are created with gtk_text_view_new(). By using this func-
tion, an empty buffer will be created for you. This default buffer can be replaced at a later time
with gtk_text_view_set_buffer() or retrieved with gtk_text_view_get_buffer().
If you want to set the initial buffer to one that you have already created, you can create the
text view with gtk_text_view_new_with_buffer(). In most cases, it will be easier to simply use
the default text buffer.
Once you have access to a GtkTextBuffer object, there are many ways to add content, but
the easiest method is to call gtk_text_buffer_set_text(). This function receives a text buffer,
a UTF-8 text string to set as the buffer’s new text, and the length of the text.
void gtk_text_buffer_set_text (GtkTextBuffer *buffer,
const gchar *text,
gint length);
If the text string is NULL-terminated, you can use -1 as the length of the string. This function
will silently fail if a null character is found before the specified length of text.
The current contents of the buffer will be completely replaced by the new text string. In the
“Text Iterators and Marks” section, you will be introduced to functions that allow you to insert
text into a buffer without overwriting the current content that are more suitable for inserting
large amounts of text.
Recall from the previous section that there are five widgets that have native scrolling
abilities, including the GtkTextView widget. Because text views already have the facilities to
manage adjustments, gtk_container_add() should always be used to add them to scrolled
windows.
Text View Properties
GtkTextView was created to be a very versatile widget. Because of this, many properties are pro-
vided for the widget. In this section, you will learn about a number of these widget properties.
One feature that makes the text view widget extremely useful is that you are able to apply
changes to the whole or only an individual part of the widget. Text tags are used to change the
properties of a segment of text. Customizing only a part of the document will be covered in a
later section of this chapter.
7931.book Page 226 Thursday, February 22, 2007 9:09 PM
CHAPTER 7 ■ THE TEXT VIEW WIDGET
227
Listing 7-3 shows many of the properties that can be used to customize the whole content
of a GtkTextBuffer. You should note that many of these properties could be overridden in indi-
vidual sections of a document with text tags.
Listing 7-3. Using GtkTextView Properties (textview2.c)
#include <gtk/gtk.h>
int main (int argc,
char *argv[])
{
GtkWidget *window, *scrolled_win, *textview;
GtkTextBuffer *buffer;
PangoFontDescription *font;
gtk_init (&argc, &argv);
window = gtk_window_new (GTK_WINDOW_TOPLEVEL);
gtk_window_set_title (GTK_WINDOW (window), "Text Views Properties");
gtk_container_set_border_width (GTK_CONTAINER (window), 10);
gtk_widget_set_size_request (window, 250, 150);
font = pango_font_description_from_string ("Monospace Bold 10");
textview = gtk_text_view_new ();
gtk_widget_modify_font (textview, font);
gtk_text_view_set_wrap_mode (GTK_TEXT_VIEW (textview), GTK_WRAP_WORD);
gtk_text_view_set_justification (GTK_TEXT_VIEW (textview), GTK_JUSTIFY_RIGHT);
gtk_text_view_set_editable (GTK_TEXT_VIEW (textview), TRUE);
gtk_text_view_set_cursor_visible (GTK_TEXT_VIEW (textview), TRUE);
gtk_text_view_set_pixels_above_lines (GTK_TEXT_VIEW (textview), 5);
gtk_text_view_set_pixels_below_lines (GTK_TEXT_VIEW (textview), 5);
gtk_text_view_set_pixels_inside_wrap (GTK_TEXT_VIEW (textview), 5);
gtk_text_view_set_left_margin (GTK_TEXT_VIEW (textview), 10);
gtk_text_view_set_right_margin (GTK_TEXT_VIEW (textview), 10);
buffer = gtk_text_view_get_buffer (GTK_TEXT_VIEW (textview));
gtk_text_buffer_set_text (buffer, "This is some text!\nChange me!\nPlease!", -1);
scrolled_win = gtk_scrolled_window_new (NULL, NULL);
gtk_scrolled_window_set_policy (GTK_SCROLLED_WINDOW (scrolled_win),
GTK_POLICY_AUTOMATIC, GTK_POLICY_ALWAYS);
7931.book Page 227 Thursday, February 22, 2007 9:09 PM
228
CHAPTER 7
■ THE TEXT VIEW WIDGET
gtk_container_add (GTK_CONTAINER (scrolled_win), textview);
gtk_container_add (GTK_CONTAINER (window), scrolled_win);
gtk_widget_show_all (window);
gtk_main();
return 0;
}
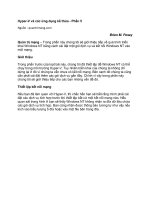
The best way to explain what each of GtkTextView’s properties does is to show you a
screenshot of the result, which can be viewed in Figure 7-3. You should compile the application
on your own machine and try changing the values used in Listing 7-3 to get a feel for what they
do as well.
Figure 7-3. GtkTextView with nondefault properties
It is possible to change the font and colors of individual parts of the text view content, but
as shown in Listing 7-3, it is still possible to use the functions from past chapters to change the
content of the whole widget. This is useful when editing documents that have a consistent
style, such as text files.
When dealing with a widget that displays text on multiple lines, you need to decide if
and how text will be wrapped. In Listing 7-3, the wrap mode was set to GTK_WRAP_WORD with
gtk_text_view_set_wrap_mode(). This setting wraps the text but does not split a word over two
lines. There are four types of wrap modes available in the GtkWrapMode enumeration:
• GTK_WRAP_NONE: No wrapping will occur. If a scrolled window contains the view, the
scrollbar will expand. Otherwise, the text view will expand on the screen. If a scrolled
window does not contain the GtkTextView widget, it will expand the widget horizontally.
• GTK_WRAP_CHAR: Wrap to the character, even if the wrap point occurs in the middle of a
word. This is usually not a good choice for a text editor, since it will split words over
two lines.
• GTK_WRAP_WORD: Fill up the line with the largest number of words possible but do not
break a word to wrap. Instead, bring the whole word onto the next line.
• GTK_WRAP_WORD_CHAR: Wrap in the same way as GTK_WRAP_WORD, but if a whole word takes
up more than one visible width of the text view, wrap it by the character.
7931.book Page 228 Thursday, February 22, 2007 9:09 PM
CHAPTER 7 ■ THE TEXT VIEW WIDGET
229
At times, you may want to prevent the user from editing the document. The editable
property can be changed for the whole text view with gtk_text_view_set_editable(). It is
worth noting that with text tags, you can override this for certain sections of the document, so
this is not always an end-all solution.
Contrast this with gtk_widget_set_sensitive(), which is used to prevent the user from
interacting with the widget at all. If a text view is set as not editable, the user will still be able to
perform operations on the text that do not require the text buffer to be edited, such as selecting
text. Setting a text view as insensitive will prevent the user from performing any of these
actions.
When you disable editing within a document, it is also useful to stop the cursor from being
visible with gtk_text_view_set_cursor_visible(). By default, both of these properties are set
to TRUE, so both will need to be changed to keep them in sync.
By default, there is no extra spacing placed between lines, but Listing 7-3 shows you how
to add spacing above a line, below a line, and between wrapped lines. These functions add
extra space between lines, so you can assume that there will already be enough spacing
between lines. In most cases, you should not use this feature, because spacing may not look
correct to the user.
Justification is another important property of text views, especially when dealing with rich text
documents. There are four default justification values: GTK_JUSTIFY_LEFT, GTK_JUSTIFY_RIGHT,
GTK_JUSTIFY_CENTER, and GTK_JUSTIFY_FILL.
Justification can be set for the whole text view with gtk_text_view_set_justification(),
but it can be overridden for specific sections of text with text tags. In most cases, you will want
to use the default GTK_JUSTIFY_LEFT justification unless the user wants it to be changed. Text is
aligned to the left of the view by default.
void gtk_text_view_set_justification (GtkTextView *textview,
GtkJustification justification);
The last properties set by Listing 7-3 were the left and right margins. By default, there is no
extra margin space added to either the left or right side, but you can add a certain number of
pixels to the left with gtk_text_view_set_left_margin() or to the right with gtk_text_view_
set_right_margin().
Pango Tab Arrays
Tabs added to a text view are set to a default width, but there are times when you will want to
change that. For example, in a source code editor, one user may want to indent two spaces
while another may want to indent five spaces. GTK+ provides the PangoTabArray object, which
defines a new tab size.
When changing the default tab size, you first calculate the number of horizontal pixels the
tab will take up based on the current font. The following make_tab_array() function can be
used to calculate a new tab size. The function begins by creating a string out of the desired
number of spaces. That string is then translated into a PangoLayout object, which is used to
retrieve the pixel width of the displayed string. Lastly, the PangoLayout is translated into a
PangoTabArray, which can be applied to a text view.
7931.book Page 229 Thursday, February 22, 2007 9:09 PM
230
CHAPTER 7
■ THE TEXT VIEW WIDGET
static void
make_tab_array (PangoFontDescription *fd,
gsize tab_size,
GtkWidget *textview)
{
PangoTabArray *tab_array;
PangoLayout *layout;
gchar *tab_string;
gint width, height;
g_return_if_fail (tab_size < 100);
tab_string = g_strnfill (tab_size, ' ');
layout = gtk_widget_create_pango_layout (textview, tab_string);
pango_layout_set_font_description (layout, fd);
pango_layout_get_pixel_size (layout, &width, &height);
tab_array = pango_tab_array_new (1, TRUE);
pango_tab_array_set_tab (tab_array, 0, PANGO_TAB_LEFT, width);
gtk_text_view_set_tabs (GTK_TEXT_VIEW (textview), tab_array);
g_free (tab_string);
}
The PangoLayout object is used to represent a whole paragraph of text. Normally, Pango
uses it internally for laying out text within a widget. However, it can be employed by this exam-
ple to calculate the width of the tab string.
We begin by creating a new PangoLayout object from the GtkTextView and creating the tab
string with gtk_widget_create_pango_layout(). This uses the default font description of the
text view. This is fine if the whole document will have the same font applied to it. PangoLayout
is used to describe how to render a paragraph of text.
PangoLayout* gtk_widget_create_pango_layout (GtkWidget *textview,
const gchar *text);
If the font varies within the document or is not already applied to the text view, you will
want to specify the font to use for the calculations. You can set the font of a Pango layout with
pango_layout_set_font_description(). This uses a PangoFontDescription object to describe
the layout’s font.
void pango_layout_set_font_description (PangoLayout *layout,
const PangoFontDescription *fd);
Once you have correctly configured your PangoLayout, the width of the string can be
retrieved with pango_layout_get_pixel_size(). This is the calculated space that the string will
take up within the buffer, which should be added when the user presses the Tab key within
the widget.
7931.book Page 230 Thursday, February 22, 2007 9:09 PM