C# Bible 2002 phần 10 pot
Bạn đang xem bản rút gọn của tài liệu. Xem và tải ngay bản đầy đủ của tài liệu tại đây (969.54 KB, 93 trang )
N
ote Fuzzy logic is defined as a form of algebra that uses the values of true and false to make
decisions based on imprecise data. Fuzzy logic is generally attributed to artificial
intelligence systems.
Summary
The Reflection and Type classes go hand in hand when you need to discover type information
at runtime. These classes enable you to examine objects, load the objects dynamically at
runtime, and even generate code as needed.
Chapter 33: C# Threading
In This Chapter
The multithreading power of the .NET Framework enables you to write very robust
multithreaded applications in any .NET language. In this chapter, you learn the ins and outs of
threading. The chapter starts with an overview of the different types of threading and how
they work in the .NET Framework, and then you learn what you can do with multithreading in
your own applications. As you read this chapter, carefully consider the dangers of adding
multiple threads to your applications before implementing them, because multithreading is not
a trivial concept.
Understanding Threading
Before you start writing multithreaded applications, you should understand what happens
when threads are created, and how the operating system handles threads.
When an application executes, a primary thread is created, and the application's scope is based
on this thread. An application can create additional threads to perform additional tasks. An
example of creating a primary thread would be firing up Microsoft Word. The application
execution starts the main thread. Within the Word application, the background printing of a
document would be an example of an additional thread being created to handle another task.
While you are still interacting with the main thread (the Word document), the system is
carrying out your printing request. After the main application thread is killed, all other threads
created as a result of that thread are also killed.
Consider these two definitions from the Microsoft Foundation Classes Software Development
Kit (MFCSDK):
• Process: An executing instance of an application
• Thread: A path of execution within a process
C++ and the MFC have long supported the concept of developing multithreaded applications.
Because the core of the Windows operating system is written using these tools, it is important
that they support the capability to create threads in which tasks can be assigned and executed.
In the early days of Windows 3.1, multitasking did not exist; this concept became a reality in
Windows NT 3.5, and NT 4.0, and then Windows 95, 98, 98SE, ME, 2000, and XP. To take
advantage of the operating system's features, multithreaded applications became more
important. Now, performing more than one task at a time is a necessary feature of an
application. Visual Basic 6.0 and earlier compiled down to single-threaded applications,
which meant that no matter what was going on, the VB application could only do one thing at
a time.
In reality, on a single-processor system, it doesn't matter what tool you use to write your
application; everything is still happening in a linear process. If you are a C++ developer, you
can create new threads and perform a task while something else is going on, but it is really
just sharing the same time with everything else that is running on the system. If there is only
one processor, only one thing can happen at a time. This concept is called preemptive
multitasking.
Understanding preemptive multitasking
Preemptive multitasking splits the processor time between running tasks, or threads. When a
task is running, it is using a time slice. When the time slice has expired for the running task,
somewhere around 20 milliseconds, depending on the operating system you are using, it is
preempted and another task is given a time slice. The system saves the current context of the
preempted task, and when the task is allocated another time slice, the context is restored and
the process continues. This loop for a task continues repeatedly until the thread is aborted or
the task ends. Preemptive multitasking gives the user the impression that more than one thing
is happening at a time. Why do some tasks finish before others, even if you started the one
that finished last first?
Understanding threading priorities and locking
When threads are created, they are assigned a priority either by the programmer or by the
operating system. If an application seems to be locking up your system, it has the highest
priority, and it is blocking other threads from getting any time slices. Priorities determine
what happens, and in what order. Your application might be 90 percent complete with a
certain process when suddenly a brand-new thread starts and races ahead of the thread that
your application is currently executing, causing that thread to be reassigned to a lower
priority. This frequently happens in Windows. Certain tasks take priority over others.
Consider the new Windows Media Player. Starting up this process basically causes anything
that is running to stop responding until it is completely loaded, including the Media Guide
page.
One of the biggest dangers facing programmers writing applications that are using multiple
threads are locking situations, in which two or more threads attempt to use the same resource.
A thread lock occurs when a shared resource is being access by a thread and another thread
with the same priority attempts to access that resource. If both threads have the same priority,
and the lock is not coded correctly, the system slowly dies, because it cannot release either of
the high-priority threads that are running. This can easily happen with multithreaded
applications. When you assign thread priorities and are sharing global data, you must lock the
context correctly in order for the operating system to handle the time slicing correctly.
Understanding symmetrical multiprocessing
On a multiprocessor system, more than one task can truly occur at the same time. Because
each processor can assign time slices to tasks that are requesting work, you can perform more
than one task at a time. When you need to run a processor-intensive long-running thread, such
as sorting 10 million records by first name, address, Zip code, middle name, and country,
using multiple processors gets the job done faster than a single processor. If you could
delegate that job to another processor, then the currently running application would not be
affected at all. Having more than one processor on a system enables this kind of symmetrical
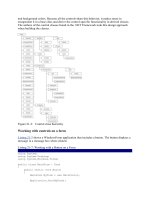
multiprocessing (SMP). Figure 33-1 shows the processor options for SQL Server 2000.
Figure 33-1: SQL Server 2000 Processor options dialog box
If you are running SQL Server on a multiprocessor machine, you can define the number of
processors it should use for labor-intensive, long-running tasks of the sort just mentioned.
SQL takes this a step further, performing queries across different processors, bringing the data
together after the last thread is completed, and outputting the data to the user. This is known
as thread synchronization. The main thread, which creates multiple threads, must wait for all
of the threads to complete before it can continue the process.
When using an SMP system, note that a single thread still only runs on a single processor.
Your single-threaded VB6 application does not perform one iota better if you throw another
processor at it. Your 16-bit Access 2.0 application does not run any better either, because 16
bits still equals a single process. You need to actually create processes on the other processors
in order to take advantage of them. This means that you do not design a multiprocessor GUI.
You create a GUI that creates other processes and can react when those processes are
completed or interrupted, while still enabling the user to use the GUI for other tasks.
Using resources: the more the merrier
Threads consume resources. When too many resources are being used, your computer is
painstakingly slow. If you attempt to open 80 instances of Visual Studio .NET while installing
Exchange 2000 on a computer with 96MB of RAM, you will notice that the screen does not
paint correctly, the mouse doesn't move very fast, and the music you were listening to in
Windows Media Player is not playing anymore. These performance problems are caused by
too many threads running at the same time on an operating system with hardware that cannot
handle this amount of work. If you attempt the same action on your new server, the 32-
processor Unisys box with 1 terabyte of RAM, you do not see any performance degradation at
all. The more memory you have, the more physical address space there is the running
applications to create more threads. When you write applications that create threads, be sure
you take this into consideration. The more threads you create, the more resources your
application consumes. This could actually cause poorer performance than a single-threaded
application, depending on the OS. The more the merrier does not include threads. Therefore,
use caution when creating threads in that new version of multithreaded Tetris you are writing
in C#.
Understanding application domains
Earlier, you learned that the MFC SDK defines a process as an executing instance of an
application. Each application that is executing creates a new main thread, which lasts the
lifetime of that application instance. Because each application is a process, each instance of an
application must have process isolation. Two separate instances of Microsoft Word act
independently of each other. When you click Spell Check, InstanceA of Word does not spell-
check the document running in InstanceB of Word. Even if InstanceA of Word attempts to
pass a memory pointer to InstanceB of Word, InstanceB would not know what to do with it,
or even know where to look for it, as memory pointers are only relative to the process in
which they are running.
In the .NET Framework, application domains are used to provide security and application
isolation for managed code. Several application domains can run on a single process, or
thread, with the same protection that would exist if the applications were running on multiple
processes. Overhead is reduced with this concept, as calls do not need to be marshaled across
process boundaries if the applications need to share data. Conversely, a single application
domain can run across multiple threads.
This is possible because of the way the CLR executes code. Once code is ready to execute, it
has already gone through the process of verification by the JIT compiler. By passing this
verification process, the code is guaranteed not to do invalid things, such as access memory it
is not supposed to, causing a page fault. This concept of type-safe code ensures that your code
does not violate any rules after the verifier has approved it passing from MSIL to PE code. In
typical Win32 applications, there were no safeguards against one piece of code supplanting
another piece of code, so each application needed process isolation. In .NET, because type
safety is guaranteed, it is safe to run multiple applications from multiple providers within the
same application domain.
Understanding the benefits of multithreaded applications
Several types of applications can take advantage of multithreading.
• Applications with long processes
• Polling and listener applications
• Applications with a Cancel button in the GUI
The following sections state the case for each of these reasons.
Applications with long processes
Applications that involve long processes with which the user does not need to interact can
benefit from multithreading because the long-running process can be created on a worker
thread that processes information in the background until a notification that the thread has
completed is made to the process that called the thread. In the meantime, the user is not kept
waiting, staring at an hourglass cursor, to move on to the next task.
Polling and listener applications
Polling applications and listener applications can benefit from multithreading. Suppose you
have an application that has created threads that are listening or polling. When something
happens, a thread can consume that particular event, and the other threads can continue to poll
or listen for events to occur. An example of this is a service that listens for requests on a
network port, or a polling application that checks the state of Microsoft Message Queue
(MSMQ) for messages. An example of an off-the-shelf polling applications is Microsoft
Biztalk Server. Biztalk is constantly polling for things like files in a directory, or files on an
SMTP server. It cannot accomplish all of this on a single thread, so multiple threads poll
different resources. Microsoft Message Queue has an add-on for Windows 2000 and a feature
in Windows XP called Message Queue Triggers. With MSMQ Triggers, you can set
properties that cause a trigger to fire an event. This is a multithreaded service that can handle
thousands of simultaneous requests.
Cancel buttons
Any application that has a Cancel button on a form should follow this process:
1. Load and show the form modally.
2. Start the process that is occurring on a new thread.
3. Wait for the thread to complete.
4. Unload the form.
By following these steps, the click event of your Cancel button occurs if the user clicks the
button while another thread is executing. If the user does click the Cancel button, it actually
clicks, as the process is running on a thread other than the currently running thread handling
the click event, your code should then stop the process on the other running thread. This is a
GUI feature that turns a good application into a great application.
Creating Multithreaded Applications
Now it's time to begin creating multithreaded applications. Threading is handled through the
System.Threading namespace. The common members of the Thread class that you use are
listed in Table 33-1.
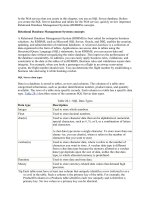
Table 33-1: Common Thread Class Members
Member Description
CurrentContext Returns the current context on which the thread is executing
CurrentThread Returns a reference to the currently running thread
ResetAbort Resets an abort request
Sleep Suspends the current thread for a specified length of time
Table 33-1: Common Thread Class Members
Member Description
ApartmentState Gets or sets the apartment state of the thread
IsAlive Gets a value that indicates whether the thread has been started and
is not dead
IsBackground Gets or sets a value indicating whether the thread is a background
thread
Name Gets or sets the name of the thread
Priority Gets or sets the thread priority
Threadstate Gets the state of the thread
Abort Raises the ThreadAbortException, which can end the thread
Interrupt Interrupts a thread that is in the WaitSleepJoin thread state
Join Waits for a thread
Resume Resumes a thread that has been suspended
Start Begins the thread execution
Suspend Suspends the thread
Creating new threads
Creating a variable of the System.Threading.Thread type enables you to create a new thread
to start working with. Because the concept of threading involves the independent execution of
another task, the Thread constructor requires the address of a procedure that will do the work
for the thread you are creating. The ThreadStart delegate is the only parameter the constructor
needs to begin using the thread.
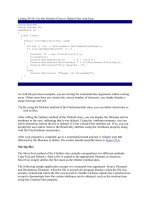
To test this code, create a new project with the Console application template. The code in
Listing 33-1
creates two new threads and calls the Start method of the Thread class to get the
thread running.
Listing 33-1: Creating New Threads
using System;
using System.Threading;
public class Threads
{
public void Threader1()
{
}
public void Threader2()
{
}
}
public class ThreadTest
{
public static int Main(String[] args)
{
Threads testThreading = new Threads();
Thread t1 = new
Thread(new ThreadStart(testThreading.Threader1));
t1.Start();
Thread t2 = new
Thread(new ThreadStart(testThreading.Threader2));
t2.Start();
Console.ReadLine();
return 0;
}
}
When you create a variable of type thread, the procedure that handles the thread must exist for
the ThreadStart delegate. If it does not, an error occurs and your application does not compile.
The Name property sets or retrieves the name of a thread. This enables you to use a
meaningful name instead of an address or hash code to reference the running threads. This is
useful when using the debugging features of Visual Studio .NET. In the debugging toolbar, a
drop-down list of the names of the running threads is available. Although you cannot "step
out" of a thread and jump into another thread with the debugger, it is useful to know on which
thread an error may have occurred.
Now that the thread variables are declared, named, and started, you need to do something on
the threads you have created. The procedure names that were passed to the thread constructor
were called Threader1 and Threader2. You can now add some code to these methods to see
how they act. Your code should now look something like Listing 33-2.
Listing 33-2: Retreiving Information on Runnnig Threads
using System;
using System.Threading;
public class Threads
{
public void Threader1()
{
Console.WriteLine (" *** Threader1 Information ***");
Console.WriteLine
("Name: " + Thread.CurrentThread.Name);
Console.WriteLine
(Thread.CurrentThread);
Console.WriteLine
("State: " + Thread.CurrentThread.ThreadState);
Console.WriteLine
("Priority: " + Thread.CurrentThread.Priority);
Console.WriteLine(" *** End Threader1 Information ***");
}
public void Threader2()
{
Console.WriteLine (" *** Threader2 Information ***");
Console.WriteLine
("Name: " + Thread.CurrentThread.Name);
Console.WriteLine
(Thread.CurrentThread);
Console.WriteLine
("State: " + Thread.CurrentThread.ThreadState);
Console.WriteLine
("Priority: " + Thread.CurrentThread.Priority);
Console.WriteLine(" *** End Threader2 Information ***");
}
}
public class ThreadTest
{
public static int Main(String[] args)
{
Threads testThreading = new Threads();
Thread t1 = new
Thread(new ThreadStart(testThreading.Threader1));
t1.Name = "Threader1";
t1.Start();
Thread t2 = new
Thread(new ThreadStart(testThreading.Threader2));
t2.Name = "Threader2";
t2.Start();
Console.ReadLine();
return 0;
}
}
When you run the application, your console output should look something like that shown in
Figure 33-2
.
Figure 33-2: Threading application output
The output displayed in Figure 33-2 is not very pretty. If you recall, you are working with
threads. Without setting a property or two, your Threader1 procedure never completes before
Threader2 starts.
When the following code executes
t1.Start();
it begins the execution of the Threader1 code. Because it is a thread, it has roughly 20
milliseconds of the time slice. In that time period, it reached the second line of code in the
function, passed control back to the operating system, and executed the following line of
code:
t2.start();
The Threader2 procedure then executes for its slice of time and is preempted by the t1 thread.
This back-and-forth process continues until both procedures can finish.
Understanding thread priority
For the Threader1 procedure to finish before the Threader2 procedure begins, you need to set
the Priority property to the correct ThreadPriority enumeration to ensure that the t1 thread has
priority over any other thread. Before the t1.Start method call, add the following code:
t1.Priority = ThreadPriority.Highest;
When you set the priority to highest, t1 finishes before t2. If you run the application again,
your output should look similar to that shown in Figure 33-3.
Figure 33-3: Output after setting the thread priority
The ThreadPriority enumeration dictates how a given thread is scheduled based on other
running threads. ThreadPriority can be any one of the following: AboveNormal,
BelowNormal, Highest, Lowest, or Normal. The algorithm that determines thread scheduling
varies depending on the operating system on which the threads are running. By default, when
a new thread is created, it is given a priority of 2, which is Normal in the enumeration.
Understanding thread state
When you create a new thread, you call the Start() method. At this point, the operating system
allocates time slices to the address of the procedure passed in the thread constructor. Though
the thread might live for a very long time, it still passes in between different states while other
threads are being processed by the operating system. This state might be useful to you in your
application. Based on the state of a thread, you could determine that something else might
need to be processed. Besides Start, the most common thread states you will use are Sleep and
Abort. By passing a number of milliseconds to the Sleep constructor, you are instructing the
thread to give up the remainder of its time slice. Calling the Abort method stops the execution
of the thread. Listing 33-3 shows some code that uses both Sleep and Abort.
Listing 33-3: Using the Thread.Sleep Method
using System;
using System.Threading;
public class Threads
{
public void Threader1()
{
for(int intX = 0; intX < 50;intX ++)
{
if(intX == 5){
Thread.Sleep(500);
Console.WriteLine("Thread1 Sleeping");}
}
}
public void Threader2()
{
for(int intX = 0; intX < 50;intX ++)
{
if(intX == 5){
Thread.Sleep(500);
Console.WriteLine("Thread2 Sleeping");}
}
}
}
public class ThreadTest
{
public static int Main(String[] args)
{
Threads testThreading = new Threads();
Thread t1 = new
Thread(new ThreadStart(testThreading.Threader1));
t1.Priority = ThreadPriority.Highest;
t1.Start();
Thread t2 = new
Thread(new ThreadStart(testThreading.Threader2));
t2.Start();
Console.ReadLine();
return 0;
}
}
If you notice, the Priority property is set to highest for the t1 thread. This means that no matter
what, it executes before t2 starts. However, in the Threader1 procedure, you have the
following if block:
for(int intX = 0; intX < 50;intX ++)
{
if(intX == 5){
Thread.Sleep(500);
Console.WriteLine("Thread2 Sleeping");}
}
This tells the t1 thread to sleep for 500 milliseconds, giving up its current time slice and
allowing the t2 thread to begin. After both threads are complete, the Abort method is called,
and the threads are killed.
The Thread.Suspend method calls suspend a thread, indefinitely, until another thread wakes it
back up. If you ever noticed the processor meter in the task manager spike at 100 percent
when you aren't losing any memory, you can understand what happens when a thread is
suspended. To get the thread back on track, you need to call the Resume method from another
thread so it can restart itself. The following code demonstrates Suspend and Resume methods:
Thread.CurrentThread.Suspend;
Console.WriteLine("Thread1 Suspended");
Thread.CurrentThread.Resume;
Console.WriteLine("Thread1 Resumed");
A big caution is in order here: Suspending threads can cause undesirable results. You must
ensure that the thread is resumed by another thread. Figure 33-4 demonstrates the issues
described in the preceding paragraph. Notice in the figure that the console window is at the T1
Suspended line of code. This example reflects a test case, so you can get rid of the Resume
method. The task manager results speak for the state of the system.
Figure 33-4: Spiked processor from a suspended thread
ThreadState is a bitwise combination of the FlagsAttribute enumeration. At any given time, a
thread can be in more than one state. For example, if a thread is a background thread, and it is
currently running, then the state would be both Running and Background. Table 33-2
describes the possible states a thread can be in.
Table 33-2: ThreadState Members
Member Description
Aborted The thread has aborted.
AbortRequested A request has been made to abort a thread.
Background The thread is executing as a backgroung thread.
Running The thread is being executed.
Suspended The thread has been suspended.
SuspendRequested The thread is being requested to suspend.
Unstarted The thread has not been started.
WatSleepJoin The thread is blocked on a call to Wait, Sleep, or Join.
Joining threads
The Thread.Join method waits for a thread to finish before continuing processing. This is
useful if you create several threads that are supposed to accomplish a certain task, but before
you want the foreground application to continue, you need to ensure that all of the threads you
created were completed. In the following code, switch
T2.Join();
with
Console.Writeline("Writing");
You get two sets of results, the second time you run the code. The console output of Writing
does not show up until both threads have finished.
Listing 33-4: Joining Threads
using System;
using System.Threading;
public class Threads
{
public void Threader1()
{
for(int intX = 0; intX < 50;intX ++)
{
if(intX == 5)
{
Thread.Sleep(500);
Console.WriteLine("Thread1 Sleeping");
}
}
}
public void Threader2()
{
for(int intX = 0; intX < 50;intX ++)
{
if(intX == 5)
{
Thread.Sleep(500);
Console.WriteLine("Thread2 Sleeping");
}
}
}
}
public class ThreadTest
{
public static int Main(String[] args)
{
Threads testThreading = new Threads();
Thread t2 = new
Thread(new ThreadStart(testThreading.Threader2));
t2.Start();
Thread t1 = new
Thread(new ThreadStart(testThreading.Threader1));
t1.Priority = ThreadPriority.Highest;
t1.Start();
/* Call Join to wait for all threads to complete */
t2.Join();
Console.WriteLine("Writing");
Console.ReadLine();
return 0;
}
}
As you can see, setting various properties on threads makes it very simple to control them.
Keep in mind that after you suspend a thread, you need to resume it, or your system consumes
unnecessary resources.
Synchronizing threads
Data synchronization is a critical aspect of using threads. Although it is not a complex
programming task, your data risks corruption if you fail to address it.
When threads are running, they are sharing time with other running threads. This is evident in
the sample you have run in this chapter. If you have a method that is running on multiple
threads, each thread has only several milliseconds of processor time before the operating
system preempts the thread to give another thread time in the same method. If you are in the
middle of a math statement, or in the middle on concatenating a name, your thread could very
well be stopped for several milliseconds, and another running thread overwrite data that
another thread was using. This is not the end of the world, however, because several methods
enable you to stop this from occurring. Consider the following code:
{
int Y;
int V;
for(int Z = 0; Z < 20; Z++){
return Y * V;}
}
It is highly likely that during the loop, a running thread will stop to allow another thread a
chance at this method. Remember that this only occurs if you are allowing multiple threads to
access this code block. When you write multithreaded applications, this happens frequently,
so you need to know how to address the situation. The following code solves this problem:
lock(this){
int Y;
int V;
for(int Z = 0; Z < 20; Z++){
return Y * V;}
}
The Lock statement is one way to force the joining of threads. Its implementation is a little
different from the Join method. With Lock, you are evaluating an expression passed to the
Lock block. When a thread reaches the Lock block, it waits until it can get an exclusive lock
on the expression being evaluated before it attempts any further processing. This ensures that
multiple threads cannot corrupt shared data.
The Monitor class enables synchronization using the Monitor.Enter, Monitor.TryEnter, and
Monitor.Exit methods. After you have a lock on a code region, you can use the Monitor.Wait,
Monitor.Pulse, and Monitor.PulseAll methods to determine if a thread should continue a lock,
or if any previously locked methods are now available. Wait releases the lock if it is held and
waits to be notified. When Wait is called, the lock is freed and it returns and obtains the lock
again.
Polling and Listening
Polling and listening are two more instances that represent the usefulness of multithreading.
Class libraries, such as System.Net.Sockets, include a full range of multithreaded classes that
can aid you in creating TCP listeners, UDP listeners, and a bevy of other network-related
tasks that require multithreading.
Take note of the TimerCallBack class of the System.Threading namespace. This class is very
similar to others you have been using so far, except that a timer period is part of the
constructor, which enables you to poll for something to happen at certain intervals.
You can accomplish the same result by adding a timer control to your form, but by using the
TimerCallBack class, the timing and the callback to the addressed procedure are automatic.
Listing 33-5
uses a timer callback to poll for files in a directory. If a file is found, it is
promptly deleted. You should only run this code against a test directory, because it deletes
files. The following sample code expects a C:\Poll directory. The constructor for the
TimerCallBack class expects an address for the thread to execute on; an object data type
representing the state of the timer; a due time, which represents a period of time to poll until;
and a period, which is a millisecond variable indicating when the polling interval occurs.
Listing 33-5: Using the TimerCallBack Delegate
using System;
using System.IO;
using System.Threading;
namespace cSharpTimerCallBack
{
class Class1
{
public static void Main()
{
Console.WriteLine
("Checking direcotry updates every 2 seconds.");
Console.WriteLine
(" (Hit Enter to terminate the sample)");
Timer timer = new
Timer(new TimerCallback(CheckStatus), null, 0, 2000);
Console.ReadLine();
timer.Dispose();
}
static void CheckStatus(Object state)
{
string[] str = Directory.GetFiles("C:\\Poll");
if(str.Length>0)
{
for(int i = 0; i < str.Length;i++)
{
Console.WriteLine(str[i]);
File.Delete(str[i]);
}
}
Console.WriteLine("Directory Empty");
}
}
After running this for a while and periodically copying a few files into the C:\Poll directory,
the console output should look similar to that shown in Figure 33-5.
Figure 33-5: Output from Listing 33-2
Summary
In this chapter, you learned how to implement multithreading in C# with the System.Thread
namespace.
The basic idea behind multithreading is simple: By creating more than one thread, you can
accomplish more than one task at a time. The number of threads you create has to be
determined by solid testing. Too many threads can cause resource problems. Not creating
enough threads can result in your application not performing to its full potential.
With the examples you created here, you should be well equipped to implement threading in
your own applications. Just avoid running with scissors, because before you know it, your
multithreaded applications can turn into a multithreaded headache.
As with anything else, carefully consider your applications beforehand, and decide whether
multithreading is appropriate as part of this planning process.
Chapter 34: Working with COM
In This Chapter
As a Windows developer, you have most likely created many COM components, either as
standalone DLLs or DLLs that run inside of COM+ services. With the advent of .NET, you
might wonder whether you need to rewrite everything with this new language. The good news
is that you do not have to rewrite any of your components. Microsoft was kind enough to
provide you with the tools that you need to use your existing components from .NET.
Moreover, those components can be safely invoked from the Common Language Runtime
environment. In this chapter, you learn how easy it is to leverage your existing code and use it
from a .NET-managed client. The client could be anything — a Web application, another
.NET component, or even a Service-based application. It doesn't matter; the core functionality
works across all types of applications.
Although you always have the option to rewrite your code, you do not have to. You will most
likely want to start using .NET for all of your development, especially the GUI development,
as it is so much easier to use than previous versions. At the same time, you do not want to
rewrite all of the core business logic that your applications use. With .NET, this is all
possible; you can port your applications to .NET while still using the thousands of lines of
existing code that you have already written in components.
In this chapter, you learn how to consume your existing COM components from a .NET client
using the tools that are provided with .NET, and you see how it all happens under the hood.
N
ote Chapter 35 covers working with COM+ Services, such as transactions and object
p
ooling within your C# applictions. This chapter covers the basics of interoperating with
COM objects.
Introducing the Runtime-Callable Wrapper
.NET code can access unmanaged code through a proxy called the Runtime-Callable
Wrapper, or RCW. The RCW enables a .NET application to see the unmanaged component as
a managed component. It does this by marshalling method calls, events, and properties
through a wrapper created by your application or created manually using tools (such as the
Type Library Importer) provided in the Framework. Using information from the COM type
library, the RCW handles the interoperability between the managed and unmanaged code.
When your application runs, it is unaware that the code being executed is from an unmanaged,
or COM, DLL. The consumers of the components do not need any special knowledge of how
the code was written, what language it was written in, or if it is a .NET component. All of the
features of the managed environment, such as garbage collection and exception handling, are
available to the .NET client as if it were consuming managed code. This makes it extremely
simple to port modules in your pre NET applications to .NET, without having to reinvent the
wheel or fully understand the intricacies of whatever .NET language you are using, be it C#,
J#, or VB .NET, or whatever. You can rework the client code and leave your existing business
and data logic in place by using COM Interop. Figure 34-1 shows the relationship between the
COM DLL, the RCW and the managed .NET application.
Figure 34-1: Managed and unmanaged code living in peace together
Creating .NET Assemblies from COM Components
To use your COM component in your .NET application, you need to create the Interop
Assembly, or RCW, that marshals the method calls from your .NET client to the COM server.
There are several ways to do this in .NET. The two most common ways are as follows:
• The Type Library Importer utility, or Tlbimp.exe, supplied with the .NET Framework
• Directly reference the COM from your VS .NET C# application
Both of these are covered in detail within this chapter.
The proxy that is created for Interop is based on the metadata exposed in the type library of
the COM component you are attempting to access. COM type libraries can be made available
in one of two forms:
• Type libraries can be found as standalone files. Standalone type libraries usually have
an extension of TLB. Older standalone type libraries may ship with an extension of
OLB. If you are creating a Visual Basic ActiveX DLL, you can create a standalone
type library for your component by selecting the Remote Server Files option in the
project's Property dialog box.
• Type libraries can also be found embedded in a COM server as a binary resource. In-
process COM servers, packaged as DLLs, as well as out-of-process COM servers,
packaged as EXEs, can include the type library as a resource in the COM server itself.
COM components built with Visual Basic have the type library compiled inside of the
DLL.
In the following section, you learn how to create the Interop assembly from a COM DLL
using the two methods described in the beginning of this section: using the Tlbimp utility and
directly referencing the DLL from Visual Studio .NET.
Using the Tlbimp utility
The Tlbimp utility is a standalone console application that creates the .NET Interop assembly
based on the COM DLL that you specify. It is located in the Framework SDK directory in
Program Files. The following code snippet demonstrates the syntax of Tlbimp:
tlbimp [COMDllFilename] /[options]
The command-line options for tlbimp.exe are described in Table 34-1.
Table 34-1: Tlbimp.exe Options
Option Description
/asmversion:versionumber Specifies the version of the assembly to create
/delaysign Tells Tlbimp to sign the assembly using delayed signing
/help Displays help options for tlbimp.exe
/keycontainer:containername Signs the assembly with a strong name using the
public/private key pair found in the key container specified
in the containername parameter
/nologo Suppresses the Microsoft startup banner display
/out:filename Specifies the name of the output file to be created. By
default, the output file has the same name as the COM DLL,
but you are warned if you attempt to overwrite the file if it
exists in the same path.
/primary Produces a primary Interop assembly for the type library
/publickey:filename Specifies the file containing the public key to use to sign the
resulting assembly
/reference:filename Specifies the assembly file to use to resolve references to
types defined outside of the current type library
/silent Suppresses the display of success messages
/strictref Does not import a type library if the tool cannot resolve all
references defined within the current assembly or
assemblies specified with the /reference option
/sysarray Imports any COM-style SafeArray as a managed
System.Array Class type
/unsafe Produces interfaces without .NET Framework security
checks. You should not use this option unless you are aware
of the risks of exposing code as unsafe.
/verbose Displays additional information about the imported type
library when tlbimp.exe is run
/? Displays help about the syntax for tlbimp.exe
This command produces a .NET assembly with a DLL extension whose base name is set to
the name of the library embedded in the type library file (which may be different from the
filename of the type library itself). The tlbimp command can accept the name of a type library
file as input:
tlbimp server.tlb
It can also accept the name of a COM server that holds an embedded type library:
tlbimp server.dll
By using the /out option, you can specify an alternate name for the .NET assembly created:
tlbimp server.dll /out:dotNetServer.dll
The assembly that is output by the Tlbimp.exe tool is a standard .NET assembly that you can
view with Ildasm.exe. The assembly does not contain the COM server's code; instead, it
contains references that help the CLR find the COM objects housed in the server, such as the
COM object's GUIDs. Think of the assembly generated by tlbimp as a bridge that connects
your .NET code to your COM server. Because the COM code still resides in the COM server,
you need to remember to install and register any COM servers you plan to use with your
.NET applications. This actually works to your advantage. Because the COM server is still
registered with Windows, standard COM applications that are not .NET-aware can continue
to use the same COM server without moving any of the code to a .NET-specific platform.
Creating a COM component
Before using the Tlbimp utility, you need a COM component to work with. Listing 34-1
shows the code for a simple VB6 ActiveX DLL with several common class functions, such as
setting and retrieving a property, firing an event, and returning a value from a method that has
input parameters.
Listing 34-1: Visual Basic 6.0 COM Server Code
Option Explicit
Private strMessage As String
Public Event COMEvent(Message As String)
Private Sub Class_Initialize()
strMessage = "Default Message"
End Sub
Public Property Get Message() As String
Message = strMessage
End Property
Public Property Let Message(ByVal vNewValue As String)
strMessage = vNewValue
End Property
Public Function SquareIt(int1 As Integer, int2 As Integer) As
Integer
SquareIt = int1 * int2
End Function
Public Sub FireCOMEvent()
RaiseEvent COMEvent(strMessage)
End Sub
This code is placed into a class module named COMObject. The class module is enclosed in a
project named VB6COMServer. Visual Basic 6.0 compiles this code into an in-process COM
server and embeds a type library into the server. The readable representation of the type
library, written in COM's Interface Description Language (IDL), is shown in Listing 34-2.
Listing 34-2: IDL Source for the COM Server In Listing 34-1
// Generated .IDL file (by the OLE/COM Object Viewer)
//
// typelib filename: VB6COMServer.dll
[
uuid(B4096C50-ACA4-4E1F-8D36-F36F1EE5F03B),
version(1.0)
]
library VB6COMServer
{
// TLib : // TLib : OLE Automation :
{00020430-0000-0000-C000-000000000046}
importlib("stdole2.tlb");
// Forward declare all types defined in this typelib
interface _COMObject;
dispinterface __COMObject;
[
odl,
uuid(5960D780-FEA2-4383-B2CB-9F78E4677142),
version(1.0),
hidden,
dual,
nonextensible,
oleautomation
]
interface _COMObject : IDispatch {
[id(0x68030000), propget]
HRESULT Message([out, retval] BSTR* );
[id(0x68030000), propput]
HRESULT Message([in] BSTR );
[id(0x60030002)]
HRESULT SquareIt(
[in, out] short* int1,
[in, out] short* int2,
[out, retval] short* );
[id(0x60030003)]
HRESULT FireCOMEvent();
};
[
uuid(50730C97-09EB-495C-9873-BEC6399AA63A),
version(1.0)
]
coclass COMObject {
[default] interface _COMObject;
[default, source] dispinterface __COMObject;
};
[
uuid(A4D4C3D8-DFFF-45DB-9A14-791E4F82EF35),
version(1.0),
hidden,
nonextensible
]
dispinterface __COMObject {
properties:
methods:
[id(0x00000001)]
void COMEvent([in, out] BSTR* Message);
};
};
To create the Interop assembly that enables your C# application to consume the unmanaged
DLL, you need to run the Tlbimp utility described in the preceding section. In Figure 34-2,
you can see that the /out: parameter is used to give the Interop assembly the name
compinterop.dll. The name of the output assembly can be anything that you choose — it can
even be the same name as the original COM component.
Figure 34-2: The Tlbimp utility in action
The VB6COMServer.dll that was created using VB6 can now be consumed from any .NET
client — as long as the cominterop.dll assembly is referenced by the application, and the VB6
component is registered on the machine that is attempting to consume the code. Because the
output from Tlbimp is now a .NET assembly, you can use the ILDASM utility to view details
about the metadata that was created from the ActiveX DLL that the CLR actually uses. Figure
34-3 shows the ILDSM utility when run against the new cominterop.dll just created.
Figure 34-3: ILDASM with assembly generated by Tlbimp
The assembly generated by importing the type library whose source code is shown in Listing
34-3 includes a namespace called cominterop, which is the name of the assembly that was
passed to the /out parameter from the Tlbimp utility. This namespace must be treated just like
a namespace defined by your code or the .NET Framework: Your code must reference the
namespace when using any of the classes in the namespace.
Figure 34-3 illustrates the classes inserted into the assembly generated by tlbimp. The class
that you use in your C# code to work with the COM object has the same name as the name
given to the COM object in the IDL source's coclass statement. In Listing 34-3, the COM
object is given a coclass name of COMObject. The assembly generated by tlbimp includes a
.NET class of the same name, and this is the class that you use in your code to work with the
Visual Basic COM object.
Using the Interop assembly from C#
Consuming the COM component from C# is very straightforward now that you have created
the Interop assembly. To use your Interop assembly, perform the following steps:
1. Create a test client application. For simplicity, create a new Windows Forms
application and call it Interop.
2. Once the application is created, you put your code in the click event of a button, so go
ahead and add a button to the default Form1.cs. Next, right-click References in the
Solution Explorer, and select Add. The Add Reference dialog box opens. This is
similar to the Add Reference dialog box in VB6. Basically, you need to make a
reference to the assembly that you need to use, just as any other .NET assembly is not
added by default to a new project.
3. To add a reference to the Cominterop DLL that you created earlier, click the Browse
button and locate the assembly on your hard drive. Once you have done this, your Add
Reference dialog box should look something like Figure 34-4
.
Figure 34-4: Adding the Cominterop reference
After the assembly is referenced by your application, you can use it just as you would any
other .NET assembly. Because Visual Studio .NET has such great features — such as auto-
complete and auto-list members — once the reference is added, your methods, events, and
properties are available to you through the IDE. Figure 34-5 shows the auto-list members in
action once the instance of the Cominterop object is created and the assembly is reference
with the using statement.
Figure 34-5: Auto-List members in action
To test all of the methods, properties, and events that you wrote in the ActiveX DLL,
duplicate Listing 34-3 in your WindowsForms application.
Listing 34-3: COM Client Code Written in C#
/// <summary>
/// The main entry point for the application.
/// </summary>
[STAThread]
static void Main()
{
Application.Run(new Form1());
}
// Create a handler for the event
private __COMObject_COMEventEventHandler
COMEventHandlerInstance;
private void button1_Click(object sender,
System.EventArgs e)
{
// create new instance of the COMObject class
COMObject ObjectInstance;
short Num1;
short Num2;
short Sum;
ObjectInstance = new COMObjectClass();
Num1 = 5;
Num2 = 6;
// Call the SquareIt method
Sum = ObjectInstance.SquareIt(ref Num1, ref
Num2);
listBox1.Items.Add (Sum.ToString());
listBox1.Items.Add (ObjectInstance.Message);
// Set the value of message different than the
default
ObjectInstance.Message = "C# Rocks";
COMEventHandlerInstance = new
__COMObject_COMEventEventHandler(COMEventHandler);
ObjectInstance.COMEvent +=
COMEventHandlerInstance;
ObjectInstance.FireCOMEvent();
}
void COMEventHandler(ref string Message)
{
listBox1.Items.Add(Message);
}
}
}
The output from this application looks similar to what is shown in Figure 34-6.
Figure 34-6: Output from the C# client using the COM component
Like any other object in .NET, you use the new operator to create a new instance of the
COMObject class, as the following snippet demonstrates:
ObjectInstance = new COMObject();
Once the variable name ObjectInstance is instantiated, you use the object just as you would
any other .NET object; nothing special needs to be done. The RCW handles all of the Interop,
type conversions and object marshalling for the types, so you are completely hidden from any
of the COM marshalling internals that are occurring.
If you have used COM Interop from VB .NET, you will notice something different about the
way the parameters are passed to the methods in C#. If you look at the C# code for the
SquareIt method, note the addition of the Ref keyword:
Num1 = 5;
Num2 = 6;
// Call the SquareIt method
Sum = ObjectInstance.SquareIt(ref Num1, ref Num2);
Visual Basic COM servers may pass values by value or by reference. Your C# code needs to
use the appropriate keywords when passing parameters into COM method calls. You can use
ILDASM to help you determine whether a parameter should be passed by value or by
reference.
Open the assembly generated by Tlbimp using the ILDASM tool and look at the definition of
the method that you want to call. In this case, you need to call the SquareIt() method. The
SquareIt() method is listed in the assembly with the following signature:
SquareIt : int16(int16&,int16&)
The type of the return value returned by the method follows the colon. The signature of the
SquareIt() method lists a return type of int16, which, in Intermediate Language parlance,
denotes a 16-bit integer. The ampersands that follow the parameter types signify that the