apress pro silverlight 3 in c sharp phần 10 potx
Bạn đang xem bản rút gọn của tài liệu. Xem và tải ngay bản đầy đủ của tài liệu tại đây (1.35 MB, 68 trang )
CHAPTER 18 ISOLATED STORAGE
656
lblStatus.Text = "Upload started.";
}
else
{
lblStatus.Text = "Files must be less than 5 MB.";
}
}
}
catch
{
lblStatus.Text = "Error reading file.";
}
}
}
private void client_UploadFileCompleted(object sender,
System.ComponentModel.AsyncCompletedEventArgs e)
{
if (e.Error == null)
{
lblStatus.Text = "Upload succeeded.";
// Refresh the file list.
client.GetFileListAsync();
}
else
{
lblStatus.Text = "Upload failed.";
}
}
This completes the example, and gives you a fully functional client that can transfer
content to and from the web server.
The Last Word
In this chapter, you saw how Silverlight allows you to access the local hard drive, but with
careful restrictions in place. First, you took a thorough look at isolated storage, the obfuscated,
space-limited storage location that you can use to store miscellaneous data, serialized objects,
and application settings. Then, you saw how you can use the OpenFileDialog class to retrieve
information from a user-selected file anywhere on the hard drive, and how to use
SaveFileDialog to perform the reverse feat and write to user-selected file. These features give
Silverlight applications an impressive balance of safety and performance, ensuring that
malicious applications can’t tamper with local files or read sensitive data but that legitimate
software can store details from one user session to the next.
657
CHAPTER 19
■ ■ ■
Multithreading
One of Silverlight’s least expected surprises is its support for multithreading–the fine art of
executing more than one piece of code at the same time. It’s a key part of the full .NET
Framework and a commonly used feature in rich client applications built with WPF and
Windows Forms. However, multithreading hasn’t appeared in the toolkit of most browser-
based developers, and it’s notably absent from both JavaScript and Flash.
The second surprise is how similar Silverlight’s threading tools are to those in the full
.NET Framework. As with ordinary .NET programming, Silverlight developers can create new
threads with the Thread class, manage a long-running operation with the BackgroundWorker,
and even submit tasks to a pool of worker threads with the ThreadPool. All of these ingredients
are closely modeled after their counterparts in the full .NET Framework, so developers who
have written multithreaded client applications will quickly find themselves at home with
Silverlight. And although there are some clear limitations–for example, you can’t control
thread priorities with Silverlight code–these issues don’t stop Silverlight threading from being
remarkably powerful.
In this chapter, you’ll begin by taking a look at the lower-level Thread class, which
gives you the most flexible way to create new threads at will. Along the way, you’ll explore the
Silverlight threading model and the rules it imposes. Finally, you’ll examine the higher-level
BackgroundWorker class, which gives you a conveniently streamlined, practical way to deal
with background tasks.
Understanding Multithreading
When you program with threads, you write your code as though each thread is running
independently. Behind the scenes, the Windows operating system gives each thread a brief unit
of time (called a time slice) to perform some work, and then it freezes the thread in a state of
suspended animation. A little later (perhaps only a few milliseconds), the operating system
unfreezes the thread and allows it to perform a little more work.
This model of constant interruption is known as preemptive multitasking. It takes
place completely outside the control of your program. Your application acts (for the most part)
as though all the threads it has are running simultaneously, and each thread carries on as
though it’s an independent program performing some task.
CHAPTER 19 ■ MULTITHREADING
658
■ Note If you have multiple CPUs or a dual-core CPU, it’s possible that two threads will execute at once, but
it’s not necessarily likely—after all, the Silverlight plug-in, other applications and services, and the client’s
operating system can also compete for the CPU’s attention. Furthermore, the high-level tasks you perform with a
programming platform like Silverlight will be translated into many more low-level instructions. In some cases, a
dual-core CPU can execute more than one instruction at the same time, meaning a single thread can keep more
than one CPU core busy.
The Goals of Multithreading
Multithreading increases complexity. If you decide to use multithreading, you need to code
carefully to avoid minor mistakes that can lead to mysterious errors later. Before you split your
application into separate threads, you should carefully consider whether the additional work is
warranted.
There are essentially three reasons for using multiple threads in a program:
• Making the client more responsive. If you run a time-consuming task on a separate
thread, the user can still interact with your application’s user interface to perform other
tasks. You can even give the user the ability to cancel the background work before it’s
complete. By comparison, a single-threaded application locks up the user interface
when it performs time-consuming work on the main thread.
• Completing several tasks at once. On its own, multithreading doesn’t improve
performance for the typical single-CPU computer. (In fact, the additional overhead
needed to track the new threads actually decreases performance slightly.) But certain
tasks may involve a high degree of latency, like fetching data from an external source
(web page, database, or a file on a network) or communicating with a remote
component. While these tasks are underway, the CPU is essentially idle. Although you
can’t reduce the wait time, you can use the time to perform other work. For example,
you can send requests to three web services at the same time to reduce the total time
taken, or you can perform CPU-intensive work while waiting for a call to complete.
• Making a server application scalable. A server-side application needs to be able to
handle an arbitrary number of clients. Depending on the technology you’re using, this
may be handled for you (as it is if you’re creating an ASP.NET web application). In other
cases, you may need to create this infrastructure on your own–for example, if you’re
building a socket-based application with the .NET networking classes, as demonstrated
in Chapter 20. This type of design usually applies to .NET-based server applications, not
Silverlight applications.
In this chapter, you’ll explore an example where multithreading makes good sense:
dealing with a time-consuming operation in the background. You’ll see how to keep the
application responsive, avoid threading errors, and add support for progress notification and
cancellation.
CHAPTER 19 ■ MULTITHREADING
659
■ Tip The CPU is rarely the limiting factor for the performance of a Silverlight application. Network latency,
slow web services, and disk access are more common limiting factors. As a result, multithreading rarely
improves overall performance, even on a dual-core CPU. However, by improving responsiveness, it can make
an application feel much more performant to the user.
The DispatcherTimer
In some cases, you can avoid threading concerns altogether using the DispatcherTimer class
from the System.Windows.Threading namespace. DispatcherTimer was used in Chapter 10 to
power the bomb-dropping animations in a simple arcade game.
The DispatcherTimer doesn’t offer true multithreaded execution. Instead, it triggers a
periodic Tick event on the main application thread. This event interrupts whatever else is
taking place in your application, giving you a chance to perform some work. But if you need to
frequently perform small amounts of work (for example, starting a new set of bomb-dropping
animations every fraction of a second), the DispatcherTimer works as seamlessly as actual
multithreading.
The advantage of the DispatcherTimer is that the Tick event always executes on the
main application thread, thereby sidestepping synchronization problems and the other
headaches you’ll consider in this chapter. However, this behavior also introduces a number of
limitations. For example, if your timer event-handling code performs a time-consuming task,
the user interface locks up until it’s finished. Thus, the timer doesn’t help you make a user
interface more responsive, and it doesn’t allow you to collapse the waiting time for high-latency
operations. To get this functionality, you need the real multithreading discussed in this chapter.
However, clever use of the DispatcherTimer can achieve the effect you need in some
situations. For example, it’s a great way to periodically check a web service for new data. As you
learned in Chapter 15, all web service calls are asynchronous and are carried out on a
background thread. Thus, you can use the DispatcherTimer to create an application that
periodically downloads data from a slow web service. For example, it might fire every 5 minutes
and then launch the web service call asynchronously, allowing the time-consuming download
to take place on a background thread.
■ Note The name of the DispatcherTimer refers to the dispatcher, which controls the main application thread
in a Silverlight application. You’ll learn more about the Dispatcher in this chapter.
The Thread Class
The most straightforward way to create a multithreaded Silverlight application is to use the
Thread class from the System.Threading namespace. Each Thread object represents a separate
thread of execution.
To use the Thread class, you being by creating a new Thread object, at which point you
supply a delegate to the method you want to invoke asynchronously. A Thread object can only
point to a single method. This signature of this method is limited in several ways. It can’t have a
return value, and it must have either no parameters (in which case it matches the ThreadStart
CHAPTER 19 ■ MULTITHREADING
660
delegate) or a single object parameter (in which case it matches the ParameterizedThreadStart
delegate).
For example, if you have a method like this:
private void DoSomething()
{ }
you can create a thread that uses it like this:
Thread thread = new Thread(DoSomething);
After you’ve created the Thread object, you can start it on its way by calling the
Thread.Start() method. If your thread accepts an object parameter, you pass it in at this point.
thread.Start();
The Start() method returns immediately, and your code begins executing
asynchronously on a new thread. When the method ends, the thread is destroyed and can’t be
reused. In between, you can use a small set of properties and methods to control the thread’s
execution. Table 19-1 lists the most significant.
Table 19-1. Members of the Thread Class
Property Description
IsAlive Returns true unless the thread is stopped, aborted, or not yet started.
ManagedThreadId Provides an integer that uniquely identifies this thread.
Name Enables you to set a string name that identifies the thread. This is
primarily useful during debugging, but it can also be used to distinguish
different threads. Once set, the Name property can’t be set again.
ThreadState A combination of ThreadState values that indicate whether the thread is
started, running, finished, and so on. The ThreadState property should
only be used for debugging. If you want to determine whether a thread
has completed its work, you need to track that information manually.
Start() Starts a thread executing for the first time. You can’t use Start() to restart
a thread after it ends.
Join() Waits until the thread terminates (or a specified timeout elapses).
Sleep() Pauses the current thread for a specified number of milliseconds. This
method is static.
CHAPTER 19 ■ MULTITHREADING
661
■ Note Seasoned .NET programmers will notice that the Silverlight version of the Thread class leaves out a
few details. In Silverlight, all threads are background threads, you can’t set thread priorities, and you have no
ability to temporarily pause and then resume a thread. Similarly, although the Thread class includes an Abort()
method that kills a thread with an unhandled exception, this method is marked with the SecurityCritical attribute
and so can be called only by the Silverlight plug-in, not by your application code.
The challenge of multithreaded programming is communicating between the
background thread and the main application thread. It’s easy enough to pass information to the
thread when it starts (using parameters). But trying to communicate with the thread while it’s
running, or trying to return data when it’s complete, are two more difficult tasks. You may need
to use locking to ensure that the same data isn’t accessed on two threads at once (a cardinal sin
of multithreaded programming) and marshalling to make sure you don’t access a user interface
element from a background thread (an equally bad mistake). Even worse, threading mistakes
don’t result in compile-time warnings and don’t necessarily lead to clear, show-stopper bugs.
They may cause subtler problems that appear only under occasional, difficult-to-diagnose
circumstances. In the following sections, you’ll learn how to use a background thread safely.
Marshalling Code to the User Interface Thread
Much like .NET client applications (for example, WPF applications and Windows Forms
applications), Silverlight supports a single-threaded apartment model. In this model, a single
thread runs your entire application and owns all the objects that represent user-interface
elements. Furthermore, all these elements have thread affinity. The thread that creates them
owns them, and other threads can’t interact with them directly. If you violate this rule–for
example, by trying to access a user-interface object from a background thread–you’re certain
to cause an immediate exception, a lock-up, or a subtler problem.
To keep your application on an even keel, Silverlight uses a dispatcher. The dispatcher
owns the main application thread and manages a queue of work items. As your application
runs, the dispatcher accepts new work requests and executes one at a time.
■ Note The dispatcher is an instance of the System.Windows.Threading.Dispatcher class, which was
introduced with WPF.
You can retrieve the dispatcher from any element through the Dispatcher property.
The Dispatcher class includes just two members: a CheckAccess() method that allows you to
determine if you’re on the correct thread to interact with your application’s user interface, and
a BeginInvoke() method that lets you marshal code to the main application thread that the
dispatcher controls.
CHAPTER 19 ■ MULTITHREADING
662
■ Tip The Dispatcher.CheckAccess() method is hidden from Visual Studio IntelliSense. You can use it in
code; you just won’t see it in the pop-up list of members.
For example, the following code responds to a button click by creating a new
System.Threading.Thread object. It then uses that thread to launch a small bit of code that
changes a text box in the current page:
private void cmdBreakRules_Click(object sender, RoutedEventArgs e)
{
Thread thread = new Thread(UpdateTextWrong);
thread.Start();
}
private void UpdateTextWrong()
{
// Simulate some work taking place with a five-second delay.
Thread.Sleep(TimeSpan.FromSeconds(5));
txt.Text = "Here is some new text.";
}
This code is destined to fail. The UpdateTextWrong() method will be executed on a
new thread, and that thread isn’t allowed to access Silverlight objects. The result is an
UnauthorizedAccessException that derails the code.
To correct this code, you need to get a reference to the dispatcher that owns the
TextBox object (which is the same dispatcher that owns the page and all the other Silverlight
objects in the application). When you have access to that dispatcher, you can call
Dispatcher.BeginInvoke() to marshal some code to the dispatcher thread. Essentially,
BeginInvoke() schedules your code as a task for the dispatcher. The dispatcher then executes
that code.
Here’s the corrected code:
private void cmdFollowRules_Click(object sender, RoutedEventArgs e)
{
Thread thread = new Thread(UpdateTextRight);
thread.Start();
}
private void UpdateTextRight()
{
// Simulate some work taking place with a five-second delay.
Thread.Sleep(TimeSpan.FromSeconds(5));
// Get the dispatcher from the current page, and use it to invoke
// the update code.
this.Dispatcher.BeginInvoke((ThreadStart) delegate()
{
txt.Text = "Here is some new text.";
}
);
}
CHAPTER 19 ■ MULTITHREADING
663
The Dispatcher.BeginInvoke() method takes a single parameter: a delegate that points
to the method with the code you want to execute. This can be a method somewhere else in your
code, or you can use an anonymous method to define your code inline (as in this example). The
inline approach works well for simple operations, like this single-line update. But if you need to
use a more complex process to update the user interface, it’s a good idea to factor this code into
a separate method, as shown here:
private void UpdateTextRight()
{
// Simulate some work taking place with a five-second delay.
Thread.Sleep(TimeSpan.FromSeconds(5));
// Get the dispatcher from the current page, and use it to invoke
// the update code.
this.Dispatcher.BeginInvoke(SetText);
}
private void UpdateTextRight()
{
txt.Text = "Here is some new text.";
}
■ Note The BeginInvoke() method also has a return value, which isn’t used in the earlier example.
BeginInvoke() returns a DispatcherOperation object, which allows you to follow the status of your marshalling
operation and determine when your code has been executed. However, the DispatcherOperation is rarely useful,
because the code you pass to BeginInvoke() should take very little time.
Remember, if you’re performing a time-consuming background operation, you need
to perform this operation on a separate thread and then marshal its result to the dispatcher
thread (at which point you’ll update the user interface or change a shared object). It makes no
sense to perform your time-consuming code in the method that you pass to BeginInvoke(). For
example, this slightly rearranged code still works but is impractical:
private void UpdateTextRight()
{
// Get the dispatcher from the current page.
this.Dispatcher.BeginInvoke((ThreadStart) delegate()
{
// Simulate some work taking place.
Thread.Sleep(TimeSpan.FromSeconds(5));
txt.Text = "Here is some new text.";
}
);
}
The problem here is that all the work takes place on the dispatcher thread. That means
this code ties up the dispatcher in the same way a non-multithreaded application would.
CHAPTER 19 ■ MULTITHREADING
664
Creating a Thread Wrapper
The previous example shows how you can update the user interface directly from a background
thread. However, this approach isn’t ideal. It creates complex, tightly coupled applications that
mingle the code for performing a task with the code for displaying data. The result is an
application that’s more complex, less flexible, and difficult to change. For example, if you
change the name of the text box in the previous example, or replace it with a different control,
you’ll also need to revise your threading code.
A better approach is to create a thread that passes information back to the main
application and lets the application take care of the display details. To make it easier to use this
approach, it’s common to wrap the threading code and the data into a separate class. You can
then add properties to that class for the input and output information. This custom class is
often called a thread wrapper.
Before you create your thread wrapper, it makes sense to factor out all the threading
essentials into a base class. That way, you can use the same pattern to create multiple
background tasks without repeating the same code each time.
You’ll examine the ThreadWrapperBase class piece by piece. First, you declare the
ThreadWrapperBase with the abstract keyword so it can’t be instantiated on its own. Instead,
you need to create a derived class.
public abstract class ThreadWrapperBase
{ }
The ThreadWrapperBase defines one public property, named Status, which returns
one of three values from an enumeration (Unstarted, InProgress, or Completed):
// Track the status of the task.
private StatusState status = StatusState.Unstarted;
public StatusState Status
{
get { return status; }
}
The ThreadWrapperBase wraps a Thread object. It exposes a public Start() method
which, when called, creates the thread and starts it:
// This is the thread where the task is carried out.
private Thread thread;
// Start the new operation.
public void Start()
{
if (status == StatusState.InProgress)
{
throw new InvalidOperationException("Already in progress.");
}
else
{
// Initialize the new task.
status = StatusState.InProgress;
// Create the thread.
thread = new Thread(StartTaskAsync);
CHAPTER 19 ■ MULTITHREADING
665
// Start the thread.
thread.Start();
}
}
The thread executes a private method named StartTaskAsync(). This method farms out
the work to two other methods: DoTask() and OnCompleted(). DoTask() performs the actual
work (calculating prime numbers). OnCompleted() fires a completion event or triggers a
callback to notify the client. Both of these details are specific to the particular task at hand, so
they’re implemented as abstract methods that the derived class will override:
private void StartTaskAsync()
{
DoTask();
status = StatusState.Completed;
OnCompleted();
}
// Override this class to supply the task logic.
protected abstract void DoTask();
// Override this class to supply the callback logic.
protected abstract void OnCompleted();
This completes the ThreadWrapperBase class. Now, you need to create a derived class
that uses it. The following section presents a practical example with an algorithm for finding
prime numbers.
Creating the Worker Class
The basic ingredient for any test of multithreading is a time-consuming process. The following
example uses a common algorithm called the sieve of Eratosthenes for finding prime numbers in
a given range, which was invented by Eratosthenes in about 240 BC. With this algorithm, you
begin by making a list of all the integers in a range of numbers. You then strike out the multiples
of all primes less than or equal to the square root of the maximum number. The numbers that
are left are the primes.
In this example, you won’t consider the theory that proves the sieve of Eratosthenes
works or the fairly trivial code that performs it. (Similarly, don’t worry about optimizing it or
comparing it against other techniques.) However, you will see how to perform the sieve of
Eratosthenes algorithm on a background thread.
The full code for the FindPrimesThreadWrapper class is available with the online
examples for this chapter. Like any class that derives from ThreadWrapperBase, it needs to
supply four things:
• Fields or properties that store the initial data. In this example, those are the from and to
numbers that delineate the search range.
• Fields or properties that store the final data. In this example, that’s the final prime list,
which is stored in an array.
CHAPTER 19 ■ MULTITHREADING
666
• An overridden DoTask() method that performs the actual operation. It uses the initial
data and sets the final result.
• An overridden OnCompleted() method that raises the completion event. Typically, this
completion event uses a custom EventArgs object that supplies the final data. In this
example, the FindPrimesCompletedEventArgs class wraps the from and to numbers and
the prime list array.
Here’s the code for the FindPrimesThreadWrapper:
public class FindPrimesThreadWrapper : ThreadWrapperBase
{
// Store the input and output information.
private int fromNumber, toNumber;
private int[] primeList;
public FindPrimesThreadWrapper(int from, int to)
{
this.fromNumber = from;
this.toNumber = to;
}
protected override void DoTask()
{
// Find the primes between fromNumber and toNumber,
// and return them as an array of integers.
// (See the code in the downloadable examples.)
}
public event EventHandler<FindPrimesCompletedEventArgs> Completed;
protected override void OnCompleted()
{
// Signal that the operation is complete.
if (Completed != null)
Completed(this,
new FindPrimesCompletedEventArgs(fromNumber, toNumber, primeList));
}
}
It’s important to note that the data the FindPrimesThreadWrapper class uses–the
from and to numbers, and the prime list–aren’t exposed publically. This prevents the main
application thread from accessing that information while it’s being used by the background
thread, which is a potentially risky scenario that can lead to data errors. One way to make the
prime list available is to add a public property. This property can then check the
ThreadWrapperBase.Status property, and return the prime list only if the thread has completed
its processing.
An even better approach is to notify the user with a callback or event, as with the
completion event demonstrated in the thread wrapper. However, it’s important to remember
that events fired from a background thread continue to execute on that thread, no matter where
the code is defined. Thus when you handle the Completed event, you still need to use
marshalling code to transfer execution to the main application thread before you attempt to
update the user interface or any data in the current page.
CHAPTER 19 ■ MULTITHREADING
667
■ Note If you really need to expose the same object to two threads that may use it at the same time, you must
safeguard the access to that object with locking. As in a full-fledged .NET application, you can use the lock
keyword to obtain exclusive access to an in-memory object. However, locking complicates application design
and raises other potential problems. It can slow performance, because other threads must wait to access a
locked object, and it can lead to deadlocks if two threads try to achieve locks on the same objects.
Using the Thread Wrapper
The last ingredient is a Silverlight sample application that uses the FindPrimesThreadWrapper.
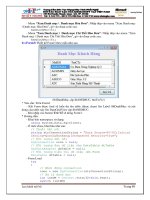
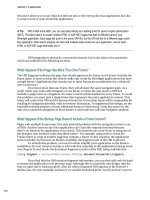
Figure 19-1 shows one such example. This page lets the user choose the range of numbers to
search. When the user clicks Find Primes, the search begins, but it takes place in the
background. When the search is finished, the list of prime numbers appears in a list box.
Figure 19-1. A completed prime-number search
The code that underpins this page is straightforward. When the user clicks the Find
Primes button, the application disables the button (preventing multiple concurrent searches,
which are possible but potentially confusing to the user) and determines the search range.
Then, it creates the FindPrimesThreadWrapper object, hooks up an event handler to the
Completed event, and calls Start() to begin processing:
private FindPrimesThreadWrapper threadWrapper;
private void cmdFind_Click(object sender, RoutedEventArgs e)
{
// Disable the button and clear previous results.
CHAPTER 19 ■ MULTITHREADING
668
cmdFind.IsEnabled = false;
lstPrimes.ItemsSource = null;
// Get the search range.
int from, to;
if (!Int32.TryParse(txtFrom.Text, out from))
{
lblStatus.Text = "Invalid From value.";
return;
}
if (!Int32.TryParse(txtTo.Text, out to))
{
lblStatus.Text = "Invalid To value.";
return;
}
// Start the search for primes on another thread.
threadWrapper = new FindPrimesThreadWrapper(from, to);
threadWrapper.Completed += threadWrapper_Completed;
threadWrapper.Start();
lblStatus.Text = "The search is in progress ";
}
When the task is in process, the application remains remarkably responsive. The user
can click other controls, type in the text boxes, and so on, without having any indication that
the CPU is doing additional work in the background.
When the job is finished, the Completed event fires, and the prime list is retrieved and
displayed:
private void threadWrapper_Completed(object sender, FindPrimesCompletedEventArgs e)
{
FindPrimesThreadWrapper thread = (FindPrimesThreadWrapper)sender;
this.Dispatcher.BeginInvoke(delegate()
{
if (thread.Status == StatusState.Completed)
{
int[] primes = e.PrimeList;
lblStatus.Text = "Found " + primes.Length + " prime numbers.";
lstPrimes.ItemsSource = primes;
}
cmdFind.IsEnabled = true;
}
);
}
Cancellation Support
Now that you have the basic infrastructure in place, it takes just a bit more work to add
additional features like cancellation and progress notification.
CHAPTER 19 ■ MULTITHREADING
669
For example, to make cancellation work, your thread wrapper needs a field that, when
true, indicates that it’s time to stop processing. Your worker code can check this field
periodically. Here’s the code you can add to the ThreadWrapperBase to make this a standard
feature:
// Flag that indicates a stop is requested.
private bool cancelRequested = false;
protected bool CancelRequested
{
get { return cancelRequested; }
}
// Call this to request a cancel.
public void RequestCancel()
{
cancelRequested = true;
}
// When cancelling, the worker should call the OnCancelled() method
// to raise the Cancelled event.
public event EventHandler Cancelled;
protected void OnCancelled()
{
if (Cancelled != null)
Cancelled(this, EventArgs.Empty);
}
And here’s a modified bit of worker code in the FindPrimesThreadWrapper.DoWork()
method that makes periodic checks (about 100 of them over the course of the entire operation)
to see if a cancellation has been requested:
int iteration = list.Length / 100;
if (i % iteration == 0)
{
if (CancelRequested)
{
return;
}
}
You also need to modify the ThreadWrapperBase.StartTaskAsync() method so it
recognizes the two possible ways an operation can end–by completing gracefully or by being
interrupted with a cancellation request:
private void StartTaskAsync()
{
DoTask();
if (CancelRequested)
{
status = StatusState.Cancelled;
OnCancelled();
CHAPTER 19 ■ MULTITHREADING
670
}
else
{
status = StatusState.Completed;
OnCompleted();
}
}
To use this cancellation feature in the example shown in Figure 19-1, you simply need
to hook up an event handler to the Cancelled event and add a new Cancel button. The following
code initiates a cancel request for the current task:
private void cmdCancel_Click(object sender, RoutedEventArgs e)
{
threadWrapper.RequestCancel();
}
And here’s the event handler that runs when the cancellation is finished:
private void threadWrapper_Cancelled(object sender, EventArgs e)
{
this.Dispatcher.BeginInvoke(delegate() {
lblStatus.Text = "Search cancelled.";
cmdFind.IsEnabled = true;
cmdCancel.IsEnabled = false;
});
}
Remember, Silverlight threads can’t be halted with the Abort() method, so you have no
choice but to request a polite stop that the worker code is free to honor or ignore.
The BackgroundWorker
So far, you’ve seen the no-frills approach to multithreading–creating a new
System.Threading.Thread object by hand, supplying your asynchronous code, and launching it
with the Thread.Start() method. This approach is powerful, because the Thread object doesn’t
hold anything back. You can create dozens of threads at will, pass information to them at any
time, temporarily delay them with Thread.Sleep(), and so on. However, this approach is also a
bit dangerous. If you access shared data, you need to use locking to prevent subtle errors. If you
create threads frequently or in large numbers, you’ll generate additional, unnecessary
overhead.
One of the simplest and safest approaches to multithreading is provided by the
System.ComponentModel.BackgroundWorker component, which was first introduced with
.NET 2.0 to simplify threading considerations in Windows Forms applications. Fortunately, the
BackgroundWorker is equally at home in Silverlight. The BackgroundWorker component gives
you a nearly foolproof way to run a time-consuming task on a separate thread. It uses the
dispatcher behind the scenes and abstracts away the marshalling issues with an event-based
model.
As you’ll see, the BackgroundWorker also supports two frills: progress events and
cancel messages. In both cases, the threading details are hidden, making for easy coding. In
CHAPTER 19 ■ MULTITHREADING
671
fact, the BackgroundWorker ranks as the single most practical tool for Silverlight
multithreading.
■ Note BackgroundWorker is perfect if you have a single asynchronous task that runs in the background from
start to finish (with optional support for progress reporting and cancellation). If you have something else in
mind—for example, an asynchronous task that runs throughout the entire life of your application or an
asynchronous task that communicates with your application while it does its work—you must design a
customized solution that uses the threading features you’ve already seen.
Creating the BackgroundWorker
To use the BackgroundWorker, you begin by creating an instance in your code and attaching
the event handlers programmatically. The BackgroundWorker’s core events are DoWork,
ProgressChanged, and RunWorkerCompleted. You’ll consider each of them in the following
example.
■ Tip If you need to perform multiple asynchronous tasks, you can create your BackgroundWorker objects
when needed and store them in some sort of collection for tracking. The example described here uses just one
BackgroundWorker, and it’s created in code when the page is first instantiated.
Here’s the initialization code that enables support for progress notification and
cancellation and attaches the event handlers. This code is placed in the constructor of a page
named BackgroundWorkerTest:
private BackgroundWorker backgroundWorker = new BackgroundWorker();
public BackgroundWorkerTest()
{
InitializeComponent();
backgroundWorker.WorkerReportsProgress = true;
backgroundWorker.WorkerSupportsCancellation = true;
backgroundWorker.DoWork += backgroundWorker_DoWork;
backgroundWorker.ProgressChanged += backgroundWorker_ProgressChanged;
backgroundWorker.RunWorkerCompleted += backgroundWorker_RunWorkerCompleted;
}
Running the BackgroundWorker
The first step to using the BackgroundWorker with the prime-number search example is to
create a custom class that allows you to transmit the input parameters to the
BackgroundWorker. When you call BackgroundWorker.RunWorkerAsync(), you can supply any
CHAPTER 19 ■ MULTITHREADING
672
object, which is delivered to the DoWork event. However, you can supply only a single object,
so you need to wrap the to and from numbers into one class:
public class FindPrimesInput
{
public int From { get; set; }
public int To { get; set; }
public FindPrimesInput(int from, int to)
{
From = from;
To = to;
}
}
To start the BackgroundWorker on its way, you need to call the
BackgroundWorker.RunWorkerAsync() method and pass in the FindPrimesInput object. Here’s
the code that does this when the user clicks the Find Primes button:
private void cmdFind_Click(object sender, RoutedEventArgs e)
{
// Disable this button and clear previous results.
cmdFind.IsEnabled = false;
cmdCancel.IsEnabled = true;
lstPrimes.Items.Clear();
// Get the search range.
int from, to;
if (!Int32.TryParse(txtFrom.Text, out from))
{
MessageBox.Show("Invalid From value.");
return;
}
if (!Int32.TryParse(txtTo.Text, out to))
{
MessageBox.Show("Invalid To value.");
return;
}
// Start the search for primes on another thread.
FindPrimesInput input = new FindPrimesInput(from, to);
backgroundWorker.RunWorkerAsync(input);
}
When the BackgroundWorker begins executing, it fires the DoWork event on a
separate thread. Rather than create this thread (which incurs some overhead), the
BackgroundWorker borrows a thread from the runtime thread pool. When the task is complete,
the BackgroundWorker returns this thread to the thread pool so it can be reused for another
task. The thread-pool threads are also used for the asynchronous operations you’ve seen in
other chapters, such as receiving a web service response, downloading a web page, and
accepting a socket connection.
CHAPTER 19 ■ MULTITHREADING
673
■ Note Although the thread pool has a set of workers at the ready, it can run out if a large number of
asynchronous tasks are under way at once, in which case the later ones are queued until a thread is free. This
prevents the computer from being swamped (say, with hundreds of separate threads), at which point the
overhead of managing the threads would impede the CPU from performing other work.
You handle the DoWork event and begin your time-consuming task. However, you
need to be careful not to access shared data (such as fields in your page class) or user-interface
objects. After the work is complete, the BackgroundWorker fires the RunWorkerCompleted
event to notify your application. This event fires on the dispatcher thread, which allows you to
access shared data and your user interface without incurring any problems.
When the BackgroundWorker acquires the thread, it fires the DoWork event. You can
handle this event to call the Worker.FindPrimes() method. The DoWork event provides a
DoWorkEventArgs object, which is the key ingredient for retrieving and returning information.
You retrieve the input object through the DoWorkEventArgs.Argument property and return the
result by setting the DoWorkEventArgs.Result property:
private void backgroundWorker_DoWork(object sender, DoWorkEventArgs e)
{
// Get the input values.
FindPrimesInput input = (FindPrimesInput)e.Argument;
// Start the search for primes and wait.
// This is the time-consuming part, but it won't freeze the
// user interface because it takes place on another thread.
int[] primes = Worker.FindPrimes(input.From, input.To);
// Return the result.
e.Result = primes;
}
When the method completes, the BackgroundWorker fires the RunWorkerCompleted
event on the dispatcher thread. At this point, you can retrieve the result from the
RunWorkerCompletedEventArgs.Result property. You can then update the interface and access
page-level variables without worry:
private void backgroundWorker_RunWorkerCompleted(object sender,
RunWorkerCompletedEventArgs e)
{
if (e.Error != null)
{
// An error was thrown by the DoWork event handler.
MessageBox.Show(e.Error.Message);
}
else
{
int[] primes = (int[])e.Result;
foreach (int prime in primes)
{
lstPrimes.Items.Add(prime);
}
CHAPTER 19 ■ MULTITHREADING
674
}
cmdFind.IsEnabled = true;
cmdCancel.IsEnabled = false;
progressBar.Width = 0;
}
Notice that you don’t need any locking code, and you don’t need to use the
Dispatcher.BeginInvoke() method. The BackgroundWorker takes care of these issues for you.
Tracking Progress
The BackgroundWorker also provides built-in support for tracking progress, which is useful for
keeping the client informed about how much work has been completed in a long-running task.
To add support for progress, you need to first set the
BackgroundWorker.WorkerReportsProgress property to true. Actually, providing and displaying
the progress information is a two-step affair. First, the DoWork event-handling code needs to
call the BackgroundWorker.ReportProgress() method and provide an estimated percent
complete (from 0% to 100%). You can do this as little or as often as you like. Every time you call
ReportProgress(), the BackgroundWorker fires the ProgressChanged event. You can react to this
event to read the new progress percentage and update the user interface. Because the
ProgressChanged event fires from the user interface thread, there’s no need to use
Dispatcher.BeginInvoke().
The FindPrimes() method reports progress in 1% increments, using code like this:
int iteration = list.Length / 100;
for (int i = 0; i < list.Length; i++)
{
// Report progress only if there is a change of 1%.
// Also, don't bother performing the calculation if there
// isn't a BackgroundWorker or if it doesn't support
// progress notifications.
if ((i % iteration == 0) && (backgroundWorker != null))
{
if (backgroundWorker.WorkerReportsProgress)
{
backgroundWorker.ReportProgress(i / iteration);
}
}
}
■ Note To set this system up, the worker code needs access to the BackgroundWorker object so it can call
the ReportProgress() method. In this example, the FindPrimesWorker class has a constructor that accepts a
reference to a BackgroundWorker object. If supplied, the FindPrimesWorker uses the BackgroundWorker for
progress notification and cancellation. To see the complete worker code, refer to the downloadable examples for
this chapter.
CHAPTER 19 ■ MULTITHREADING
675
After you’ve set the BackgroundWorker.WorkerReportsProgress property, you can
respond to these progress notifications by handling the ProgressChanged event. However,
Silverlight doesn’t include a progress bar control, so it’s up to you to decide how you want to
display the progress information. You can display the progress percentage in a TextBlock, but
it’s fairly easy to build a basic progress bar out of common Silverlight elements. Here’s one that
uses two rectangles (one for the background and one for the progress meter) and a TextBlock
that shows the percentage in the center. All three elements are placed in the same cell of a Grid,
so they overlap.
<Rectangle x:Name="progressBarBackground" Fill="AliceBlue" Stroke="SlateBlue"
Grid.Row="4" Grid.ColumnSpan="2" Margin="5" Height="30" />
<Rectangle x:Name="progressBar" Width="0" HorizontalAlignment="Left"
Grid.Row="4" Grid.ColumnSpan="2" Margin="5" Fill="SlateBlue" Height="30" />
<TextBlock x:Name="lblProgress" HorizontalAlignment="Center" Foreground="White"
VerticalAlignment="Center" Grid.Row="4" Grid.ColumnSpan="2" />
To make sure the progress bar looks right even if the user resizes the browser window,
the following code reacts to the SizeChanged event and stretches the progress bar to fit the
current page:
private double maxWidth;
private void UserControl_SizeChanged(object sender, SizeChangedEventArgs e)
{
maxWidth = progressBarBackground.ActualWidth;
}
Now, you simply need to handle the BackgroundWorker.ProgressChanged event,
resize the progress meter, and display the current progress percentage:
private void backgroundWorker_ProgressChanged(object sender,
ProgressChangedEventArgs e)
{
progressBar.Width = (double)e.ProgressPercentage/100 * maxWidth;
lblProgress.Text = ((double)e.ProgressPercentage/100).ToString("P0");
}
It’s possible to pass information in addition to the progress percentage. The
ReportProgress() method also provides an overloaded version that accepts two parameters. The
first parameter is the percent done, and the second parameter is any custom object you wish to
use to pass additional information. In the prime-number search example, you may want to use
the second parameter to pass information about how many numbers have been searched so far
or how many prime numbers have been found. Here’s how to change the worker code so it
returns the most recently discovered prime number with its progress information:
backgroundWorker.ReportProgress(i / iteration, i);
You can then check for this data in the ProgressChanged event handler and display it if
it’s present:
if (e.UserState != null)
lblStatus.Text = "Found prime: " + e.UserState.ToString() + " ";
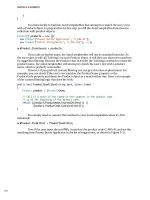
Figure 19-2 shows the progress meter while the task is in progress.
CHAPTER 19 ■ MULTITHREADING
676
Figure 19-2. Tracking progress for an asynchronous task
Supporting Cancellation
It’s just as easy to add support for canceling a long-running task with the BackgroundWorker.
The first step is to set the BackgroundWorker.WorkerSupportsCancellation property to true.
To request a cancellation, your code needs to call the
BackgroundWorker.CancelAsync() method. In this example, the cancellation is requested when
the user clicks the Cancel button:
private void cmdCancel_Click(object sender, RoutedEventArgs e)
{
backgroundWorker.CancelAsync();
}
Nothing happens automatically when you call CancelAsync(). Instead, the code that’s
performing the task needs to explicitly check for the cancel request, perform any required
cleanup, and return. Here’s the code in the FindPrimes() method that checks for cancellation
requests just before it reports progress:
for (int i = 0; i < list.Length; i++)
{
if ((i % iteration) && (backgroundWorker != null))
{
if (backgroundWorker.CancellationPending)
{
// Return without doing any more work.
CHAPTER 19 ■ MULTITHREADING
677
return;
}
if (backgroundWorker.WorkerReportsProgress)
{
backgroundWorker.ReportProgress(i / iteration);
}
}
}
The code in your DoWork event handler also needs to explicitly set the
DoWorkEventArgs.Cancel property to true to complete the cancellation. You can then return
from that method without attempting to build up the string of primes:
private void backgroundWorker_DoWork(object sender, DoWorkEventArgs e)
{
FindPrimesInput input = (FindPrimesInput)e.Argument;
int[] primes = Worker.FindPrimes(input.From, input.To,
backgroundWorker);
if (backgroundWorker.CancellationPending)
{
e.Cancel = true;
return;
}
// Return the result.
e.Result = primes;
}
Even when you cancel an operation, the RunWorkerCompleted event still fires. At this
point, you can check whether the task was cancelled and handle it accordingly:
private void backgroundWorker_RunWorkerCompleted(object sender,
RunWorkerCompletedEventArgs e)
{
if (e.Cancelled)
{
MessageBox.Show("Search cancelled.");
}
else if (e.Error != null)
{
// An error was thrown by the DoWork event handler.
MessageBox.Show(e.Error.Message);
}
else
{
int[] primes = (int[])e.Result;
foreach (int prime in primes)
{
CHAPTER 19 ■ MULTITHREADING
678
lstPrimes.Items.Add(prime);
}
}
cmdFind.IsEnabled = true;
cmdCancel.IsEnabled = false;
progressBar.Value = 0;
}
Now, the BackgroundWorker component allows you to start a search and end it
prematurely.
The Last Word
In this chapter, you saw two powerful ways to incorporate multithreading into a Silverlight
application. Of course, just because you can write a multithreaded Silverlight application
doesn’t mean you should. Before you delve too deeply into the intricacies of multithreaded
programming, it’s worth considering the advice of Microsoft architects. Because of the inherent
complexity of deeply multithreaded code, especially when combined with dramatically
different operating systems and hardware, Microsoft’s official guidance is to use multithreading
sparingly. Certainly, you should use it to move work to the background, avoid long delays, and
create more responsive applications. However, when possible, it’s better to use the
straightforward BackgroundWorker component than the lower-level Thread class. And when
you need to use the Thread class, it’s better to stick to just one or two background threads. It’s
also a good idea to set up your threads to work with distinct islands of information, and thereby
avoid locking complications and synchronization headaches.
679
CHAPTER 20
■ ■ ■
Networking
Like most software, Silverlight applications need to interact with the outside world to get
relevant, current information. You’ve already seen one tremendously useful way to pull
information into a Silverlight application: using WCF services, which allow Silverlight
applications to retrieve data from the web server by calling a carefully encapsulated piece of
.NET code. However, WCF services won’t provide all the data you need to use. In many
situations you’ll want to retrieve information from other non NET repositories, such as
representational state transfer (REST) web services, RSS feeds, and ordinary HTML web pages.
In this chapter, you’ll learn about this other side of the Silverlight networking picture.
You’ll pick up the techniques you need to download data from a variety of different non NET
sources and convert it to the form you need. On the way, you’ll also learn how to process XML
data with the remarkable XDocument class and LINQ to XML. But the most ambitious task
you’ll consider in this chapter is using Silverlight’s socket support to build a basic messaging
application.
■ What’s New Silverlight 3 adds a quick and easy local connection feature that allows the Silverlight
applications that are running on the same computer to communicate. You’ll learn about this feature in the “Local
Connections” section at the end of this chapter.
Interacting with the Web
In Chapter 6, you saw how you can use the WebClient class to download a file from the Web.
This technique allows you to grab a resource or even a Silverlight assembly at the exact point in
time when an application needs it.
The WebClient isn’t just for downloading binary files. It also opens some possibilities
for accessing HTML pages and web services. And using its bigger brother, WebRequest, you
gain the ability to post values to a web page. In the following sections, you’ll see a variety of
approaches that use these classes to pull information from the Web. But before you begin, you
need to reconsider the security limitations that Silverlight applies to any code that uses HTTP.
CHAPTER 20 NETWORKING
680
■ Note The networking examples in this chapter assume you’re using a solution with an ASP.NET test
website, as described in Chapter 1. You need to use a test website both to build simple web services and to use
Silverlight’s downloading features, which aren’t available when you launch a Silverlight application directly from
your hard drive.
Cross-Domain Access
If you’ve ever created a web page using Ajax techniques, you’ve no doubt used the
XMLHttpRequest object, which lets you perform web requests in the background. However, the
XMLHttpRequest object imposes a significant limitation: the web page can only access web
resources (HTML documents, web services, files, and so on) that are on the same web server.
There’s no direct way to perform a cross-domain call to fetch information from another
website.
Silverlight imposes almost exactly the same restrictions in its WebClient and
WebRequest classes. The issue is security. If a Silverlight application could call other websites
without informing the user, it would open up the possibility for phishing attacks. For example,
if a user was logged on to a service like Hotmail, a malicious Silverlight application could quietly
retrieve pages that provide the user’s Hotmail data. There are some possible changes that could
stave off these attacks–for example, linking user credentials to their source URLs–but these
would require a fairly significant change to the way browsers work.
However, Silverlight isn’t completely restrictive. It borrows a trick from Flash to let
websites opt in to cross-domain access through an XML policy file. When you attempt to
download data from a website, Silverlight looks on that website for a file named
clientaccesspolicy.xml (which you learned to create in Chapter 15). If this file isn’t present,
Silverlight looks for a file named crossdomain.xml. This file plays the same role but was
originally developed for Flash applications. The end result is that websites that can be accessed
by Flash applications can also be accessed by Silverlight applications.
The clientaccesspolicy.xml or crossdomain.xml file must be stored in the web root. So,
if you attempt to access web content with the URL
www.somesite.com/~luther/services/CalendarService.ashx, Silverlight checks for
www.somesite.com/clientaccesspolicy.xml and then (if the former isn’t found)
www.somesite.com/crossdomain.xml. If neither of these files exists, or if the one that exists
doesn’t grant access to your Silverlight application’s domain, your application won’t be allowed
to access any content on that website. Often, companies that provide public web services place
them on a separate domain to better control this type of access. For example, the photo-sharing
website Flickr won’t allow you to access , but it will let you access
.
■ Tip Before you attempt to use the examples in this chapter with different websites, you should verify that
they support cross-domain access. To do so, try requesting the clientaccesspolicy.xml and crossdomain.xml files
in the root website.