Make a Joomla Template in 5 Easy Steps phần 7 pps
Bạn đang xem bản rút gọn của tài liệu. Xem và tải ngay bản đầy đủ của tài liệu tại đây (472.25 KB, 10 trang )
TWO AND THREE COLUMN TEMPLATE
61
<td>
<table width="100%" cellpadding="0" cellspacing="0">
<tr>
<td width="200px" valign="top">
<?php mosLoadModules ( 'left' ); ?></td>
<td valign="top"><?php mosMainBody(); ?></td>
</tr>
</table>
</td>
I’ve highlighted these changes in pink so you can see where they go. Notice I have also add
the valign to the main body column too, just in case we have short amounts of text in here.
Finally we need to wrap the left module tag with a <div> class so we can add some
formatting to it, this will look like this:
<td>
<table width="100%" cellpadding="0" cellspacing="0">
<tr>
<td width="200px" valign="top">
<div class="dufleft">
<?php mosLoadModules ( 'left' ); ?>
</div>
</td>
<td valign="top"><?php mosMainBody(); ?></td>
</tr>
</table>
</td>
I’ve highlighted this green so you can see it. So your index.php file should be looking
something like this:
Save the index.php file and upload it to the duffer2 folder on your web site. Now open the
template_css.css file in the duffer2/css folder. Scroll to the very bottom and add this:
TWO AND THREE COLUMN TEMPLATE
.dufleft {
margin-right: 40px;
}
It should look like this now:
Save the file and upload it to the css folder in the duffer2 folder on your website. Now
browse to your web site, hard refresh the page (Ctrl F5) and take a look, it should now look
like this:
62
TWO AND THREE COLUMN TEMPLATE
Now you can place modules in the ‘left’ position and they will show up on your web site in
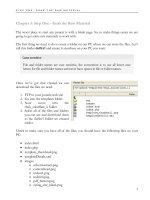
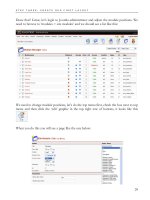
that left column. What we’ll do now is create a 3 column template. To do this we simply
copy the duffer1 folder again but this time rename the copy as ‘duffer3’. We need to open
templateDetails.xml and change the name tag to duffer3. Then we open index.php from the
duffer3 folder and get to line 36 again. Remember it looks like this:
<td><?php mosMainBody(); ?></td>
We delete the Joomla tag to leave just the <td> tags, like this:
<td></td>
And instead of putting a two column table in between the <td> and </td> tag we put a 3
column table. The html for line 36 in index.php now looks like this:
<td><table width="100%" cellpadding="0" cellspacing="0">
<tr>
<td></td>
<td></td>
<td></td>
</tr>
</table></td>
I’ve highlighted the original <td> tags that we didn’t delete. Now we have three columns to
fill with Joomla tags, we need to add these three:
<td><table width="100%" cellpadding="0" cellspacing="0">
<tr>
<td><?php mosLoadModules ( 'left' ); ?></td>
<td><?php mosMainBody(); ?></td>
<td><?php mosLoadModules ( 'right' ); ?></td>
</tr>
</table></td>
This time we also need to wrap both the left and right Joomla tags with a <div> class and
make sure we set the width and top align on all three columns.
63
TWO AND THREE COLUMN TEMPLATE
That’s what the final html should look like. Notice we have set both the left and right
column to 200 pixels wide. To accommodate this we also need to adjust the overall width
of the main table, this is on line 11 and looks like this:
<table align="center" width="700" cellpadding="0" cellspacing="0">
We need to change it to this:
<table align="center" width="850" cellpadding="0" cellspacing="0">
Making it 150 pixels wider. Now save the index.php file back into the duffer3 folder and
open the template_css.css file in the duffer3, css folder. We need to add the following to
the bottom of this file:
.dufleft {
margin-right: 40px;
}
.dufright {
margin-left: 40px;
}
This will make sure the 3 columns are not touching each other. Save all of the files and
upload the whole duffer3 folder to the templates directory on your web site. Go to your
Joomla administrator and navigate to sites > templates > site templates and set duffer3 as
default. Now browse to your site and take a look.
64
TWO AND THREE COLUMN TEMPLATE
65
That’s it, you now have a three column template. To get used to working with the templates
start practicing. Make a few of your own, just remember you can’t break anything so mess
around, see what works for you and what doesn’t. Use the <div> tag to surround Joomla
tags and add basic formatting like margins and colours.
If you want your site to stretch the whole width of the page set the main table width to
100% instead of 850px. Keep trying different things as just about anything is possible. I
hope this has given you some skills that can help inspire you to try making your own
templates, as it would be great to see thousands of people all making their site unique.
In the next section we are going to look at some advanced techniques including adding
some graphics to your page.
TWO AND THREE COLUMN TEMPLATE
66
ADVANCED TECHNIQUES
Chapter 9: Advanced Techniques
I want to cover some of the more advanced techniques you can use when developing
Joomla templates. First the use of graphics when creating a template and then some of the
style tags we can add to the Joomla tags to add some extra formatting.
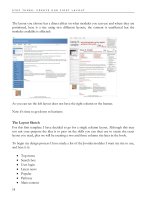
There are some basic ways you can change the look of the templates we have just created
by adding some images. Firstly let’s look at adding a couple of different background images
and see what affect this has on the overall design.
Set your site so it’s using duffer1 as the default template. We’ll use that for this example.
The first thing we will do is add a background image similar to the one we use on
it’s a 50 x 50 pixel square gradient graphic repeated along
the top of the page. The graphic is in our download section in the images folder
and called duf_back1.jpg and looks like the picture here on the right.
To add this we upload it to the images folder found in the duffer1 folder on your web site.
Then we need to edit line 343 of the duffer1 template_css.css and change the line to this:
background: #fff url( /images/duf_back1.jpg) repeat-x;
That section now looks like this:
Save the file and upload to the css folder in the duffer1 folder on your web site. Browse to
your site and do a hard refresh (Ctrl F5) and it should look like this:
67
ADVANCED TECHNIQUES
To tidy up the site name position we may want to increase the margin size to the top of the
page. So, once again we edit template_css.css and find line 658 ‘margin-top’ to 50px, it
looks like this:
Save and upload and take another look at the site, you will see the site name has moved
down. Now we can play around with the background image, but we may need to make
other adjustments depending on what we change it to.
First let’s upload another images, called duf_back3.jpg and make this change to
template_css.css:
background: #fff url( /images/duf_back3.jpg) repeat-y;
As you can see we have changed the image name and changed the ‘x’ to a ‘y’ this will repeat
the image down the left hand side of the page and will look like this:
Next let’s use an image to frame the content on the left and right, for this upload
duf_back4.jpg to the images folder of duffer1 and make this change to line 343 of
template_css.css:
background: #0055B3 url( /images/duf_back4.jpg) repeat-y;
background-position : center top;
As you can see we have changed the image name and added a line that center’s the image
on the page. Plus we have changed the background colour to #0055B3 so it matches the
blue on the edge of our image.
Upload the saved template_css.css file and take a look at your web site, it should look like
this:
68
ADVANCED TECHNIQUES
As you can see the content is now framed right and left with our blue background. Simple
changes to your background can be made and can have a great overall effect on your web
page. Use the images supplied as templates to make your own background colours.
Adding a Logo
One of the things you will need to consider if you are packaging templates for other people
is image location. So if you want to add a logo to your template or a header graphic you
would normally use an image tag like this:
<img src="/templates/duffer1/images/duf_back5.jpg" width="309"
height="63" alt="logo" />
The problem with doing this is that you won’t know whether the user of the template is
going to install Joomla in the root of their web site. They may install it in a folder within the
root. This would mean the above tag wouldn’t find the image, because it’s looking for it in:
/templates/duffer1/images/duf_back5.jpg
The actual position may be:
/joomla/templates/duffer1/images/duf_back5.jpg
So, we can get Joomla to dynamically find all of the path, so we can use a tag like this:
<img src="<?php echo
$mosConfig_live_site;?>/templates/duffer1/images/duf_back5.jpg"
width="309" height="63" alt="logo" />
What we’ve done is added this to the front of the path to the image:
<?php echo $mosConfig_live_site;?>
This grabs the URL of the site from the Joomla config file and so will always find our
image. We can improve this further by dynamically grabbing the template name as well, as
follows:
69
ADVANCED TECHNIQUES
70
<img src="<?php echo $mosConfig_live_site;?>/templates/<?php echo
"$GLOBALS[cur_template]"; ?>/images/duf_back5.jpg" width="309"
height="63" alt="logo" />
What we have done is replaced ‘duffer1’ in the image path with this Joomla tag:
<?php echo "$GLOBALS[cur_template]"; ?>
Using these Joomla tags in image paths can save a lot of trouble trying to determine exactly
where an image is. So, let’s test it out, upload the duf_back5.jpg to the duffer1 images
folder and make this change to line 13 of the duffer1 index.php:
<td><h1><img src="<?php echo $mosConfig_live_site;?>/templates/<?php
echo "$GLOBALS[cur_template]"; ?>/images/duf_back5.jpg" width="309"
height="63" alt="logo" /></h1></td>
We removed the Joomla site name tag and put our image tag in between the two <h1>
tags. The file should now look like this:
Save the index file and upload it to the duffer1 folder and browse to your site. It should
look like this:
If you package up the template now it wouldn’t matter where on a persons site they had
Joomla installed the template would still know exactly where it had to find the logo image.
And users can replace the duf_back5.jpg image with their own logo as long as they give
exactly the same name and make it the same size.
Complex Joomla Tags
Joomla does allow for a certain amount of formatting by adding certain switches to each
Joomla tag you add to your template. Normally you would add a tag that looks like this: