practical liferay Java -based Portal Applications development apress phần 6 pdf
Bạn đang xem bản rút gọn của tài liệu. Xem và tải ngay bản đầy đủ của tài liệu tại đây (1.43 MB, 38 trang )
CHAPTER 6 ■ INCORPORATING BLOGS
155
Figure 6-5. Result of the “market” keyword search
Editing an Entry
To edit an entry, perform the following steps:
1. Scrolltothedesiredentry.
2. ClicktheEdit link shown below the entry title.
3. LookattheselectedentryintheWYSIWYGeditor.Thisisthesameeditoryouused
while creating the entry.
4. Make any desired changes to the entry, such as formatting its contents, changing its
title, changing the timestamp, or adding tags.
5. ClicktheSave button to save your changes, which should be reflected in the Blogs
browser display.
Deleting an Entry
To delete an entry, perform the following actions:
1. Scrolltothedesiredentry.
2. ClicktheDelete link below the entry title.
3. Confirmwhetheryouwanttodeletetheentry.Whenyoureturntothebrowserdisplay,
note that the entry has disappeared.
■Note When you delete an entry, all comments made on the entry will be deleted as well. (You’ll read
more about comments in the section “Posting Comments.”)
CHAPTER 6 ■ INCORPORATING BLOGS
156
Sharing an Entry
If you find a blog entry useful and you want to share it, you can choose from several sites that
letyoudothat.Linkstomanysuchsitesappearbeloweachblogentryinthebrowserdisplay:
• BlinkList
• del.icio.us
• Digg
• Furl
• Newsvine
• Technorati
You need to register on these sites in order to share your discoveries with other users of
the site. Once you share a blog entry on Technorati, for example, other Technorati members
willbeabletoviewyourrecommendation.Suchsharingisagoodwaytopopularizeablog
entry.
These sites also crawl the Internet and create an index of various blog entries so that the
sites’ members can search the entire web for the indexed terms. This indexing, sometimes
used by the press, proves useful for collecting public opinion on a particular topic.
Rating an Entry
No doubt you’ll like some blog entries better than others. The Blogs application allows you to
giveeachentryaratingbetweenoneandfivestars.Ratinganentryiseasy.Undertheentry,
you will find five stars below the Your Ratinglabel(seeFigure6-6).
Figure 6-6. Rating an entry
If you want to give a three-star rating to the current blog entry, click the third star. The first
three stars become red in color, and the Average stars change to reflect the average rating of all
the votes made on this article. Because this entry has only one vote, the average rating is the
sameasyourpersonalrating(threestars).
■Tip Log on to the portal as some other user and locate the entry that you want to rate. Cast your vote,
assuming that you have the permission to do so. The Average rating displays the number of votes cast, and
the number of stars shown in red changes to reflect the new average of all the votes cast so far.
CHAPTER 6 ■ INCORPORATING BLOGS
157
Posting Comments
In addition to rating blog entries, you will also be able to post comments on them. To com-
ment on an entry, follow these steps:
1. Locatetheentryonwhichyouwishtocomment.
2. ClicktheComments link at the bottom of the entry.
3. ClickthePost Replylinktoopenaneditboxforyourcommenttext(seeFigure6-7).
Figure 6-7. Posting a reply to a blog entry
4. Enter your reply message and click the Reply button.
Youshouldseeyourreplybelowtheoriginalmessageinthebrowser(seeFigure6-8).
CHAPTER 6 ■ INCORPORATING BLOGS
158
Figure 6-8. Displaying a user’s reply to a blog entry
Navigating Comments
IfyouexamineFigure6-8,youwillnoticethatanavigationtreeappearsimmediatelyunder
theblogentry.Hereyouwillfindthehierarchyofalltherepliesontheoriginalentry,witha
linktoeachreply.AsamplenavigationhierarchyisshowninFigure6-9.
Figure 6-9. Displaying the navigation hierarchy of replies
ClickinganyofthelinkswillopenthecorrespondingreplyinyourBlogs application
browser.
CHAPTER 6 ■ INCORPORATING BLOGS
159
■Tip If you are too deep in the reply hierarchy, you can jump straight to the top entry by clicking the Top
button at the bottom (see Figure 6-8).
Replying to a Comment
When you are looking at somebody else’s comment on a blog entry, you might want to add
your own comment to the existing comment, assuming you have been assigned permission to
do so. To post a reply to a comment, perform these steps:
1. ClickthePost Reply button at the bottom of the selected comment to pull up a text box
(seeFigure6-10).
Figure 6-10. Posting a reply to a comment
2. Enter your comment and click the Reply button.
3. Verify that your message has posted under the selected comment by examining the
navigation tree.
Editing a Comment
If you wish to editthecommentthatyouposted(onceagain,assumingyouhavetherequired
permissions),followthestepslistedhere:
1. ClicktheEdit link at the bottom of the comment to open the comment in the edit box.
2. Make the desired changes to the contents.
3. ClicktheUpdate button and view your changes in the browser window.
CHAPTER 6 ■ INCORPORATING BLOGS
160
Deleting a Comment
To delete a comment, click the Delete link at the bottom of the comment display. The current
comment will be deleted after your confirmation.
■Note When you delete a comment, all its subcomments are not deleted. The Blogs application retains
them and moves them up in the hierarchy.
Setting User Permissions
When you add a blog entry, you will definitely want to set permissions to limit what other
users can do with it. To set user permissions on a blog entry, click the Permissions link
underneath it. You will see the usual permissions screen with the list of current roles and per-
missions assigned to each role.
By default, the guest user has only the View permission and the owner has all the permis-
sions. You’ll now assign permissions to the portal’s power-user role by following these steps:
1. In the permissions display screen, select the Power User check box.
2. ClicktheUpdate Permissions button to get the screen shown in Figure 6-11.
Figure 6-11. Setting permissions on a blog entry
CHAPTER 6 ■ INCORPORATING BLOGS
161
3. On this screen, you will be able to assign permissions for adding, deleting, and updat-
ing discussions. You can also allow the user to see the Permissions option itself.
4. Usingthetwoarrows,assignorrevokethedesiredpermissions.
5. ClicktheFinished button to save your changes and display them in the Power User tab.
I will now discuss the meanings of the various permissions.
Add Discussion
AssigningtheAdd Discussion permission allows the user to add a reply to the current message
or its replies. If you grant this permission, the user will see the Post Reply link at the bottom of
the blog entry and its replies. This link is highlighted in Figure 6-12.
Figure 6-12. The display seen by a user after the Add Discussion permission is granted
Delete Discussion
The Delete Discussion permission allows a user to delete any of the replies to the current blog
entry.SuchauserwillhaveaccesstotheDelete link at the bottom of the entry.
Update Discussion
The Update Discussion option lets a user modify the contents of any reply to the current blog
entry.SuchauserwillseetheEdit link at the bottom of the entry.
Delete
Granting the Delete permission allows the user to delete the original blog entry. Whenever a
blogentryisdeleted,allitsreplieswillalsobedeleted.Auserwiththispermissionwillseethe
Delete link at the bottom of the original blog entry.
CHAPTER 6 ■ INCORPORATING BLOGS
162
Update
Granting the Update permission allowstheusertoedittheoriginalblogentry.AnEdit link
appears at the bottom of the original blog entry whenever this permission is granted.
View
By default, the View permission isgrantedtoallusers.However,ifyouexplicitlydenythis
permission for a certain blog post, users will not be able to see the entry. You should always
enable the View permission to encourage readership on your portal’s blog.
Permissions
If you deny a user the Permissions permission, the Permissions link that you see at the bottom
of the blog entry will be removed from the display. This user cannot change permissions on
the current blog entry.
■Note Setting the permissions on a selected blog entry affects only the currently selected entry and does
not affect the remaining entries in the blog. If you want to grant or deny permissions on multiple blog entries,
you must do so for each entry individually. Generally, the blog-entry author sets these permissions when she
creates the entry.
■Tip You can set some general permissions at the application level. These will apply to all blog entries. You
can read more about this in the section “Setting General Permissions” under “Configuring the Blogs Portlet.”
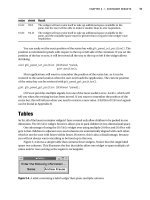
Configuring the Blogs Portlet
Sofar,you’veseenhowto use the Blogs portlet for setting up blogs, viewing blog entries,
responding to blog messages, and so on. You’ll now look at how to customize the Blogs portlet
itself.Primarily,youwilllearnto
• Setwhatisdisplayedontheapplicationbrowserwhileusersviewtheblogentries
• Setpermissionsfortheentireuserbase
Controlling Output
To configure how blogs are displayed, click the Configuration icon in the Blogs application.
YouwillseethescreenshowninFigure6-13.
CHAPTER 6 ■ INCORPORATING BLOGS
163
Figure 6-13. Configuring the Blogs application
Hereyouwillseetwooptionsforcontrollingtheoutputdisplay:Page and RSS.Let’slook
at the various settings under each heading.
Page Output Options
The Page output option allows the following settings:
• Maximum Items to Display: This option lets you control the number of blog entries you
display per page. This number can range from 1 to 100, as indicated in the drop-down
list. The default value is 1.
• Display Style: This option gives you three choices:
• Full Content:Displaysthefullcontentsoftheblog;thisincludesboththeabstract
and the title.
• Abstract:Displaysonlytheabstract,whichconsistsoftheblogentry’sfirstfew
lines. This view provides a Read More link at the bottom of each abstracted entry so
that the user can view the full blog contents when desired.
• Title:Displaysonlytheentry’stitle.Thisoptionisusefulifyouwanttosavethereal
estate on your screen. This view also provides a link to the full content.
• Enable Ratings:Thisoptionischeckedbydefault.Uncheckingitwillremovethestar-
ratingdisplayfromtheblog-entryview.ThescreenshotinFigure6-14showstheresult
of disabling this option.
CHAPTER 6 ■ INCORPORATING BLOGS
164
Figure 6-14. Disabling the Enable Ratings option
• Enable Comments:Thisoptionisalsocheckedbydefault.Uncheckingitremovesthe
Comments link from the display screen so that the user will not be able to add com-
ments to the posted blog entries.
• Enable Comment Ratings:Leavingthisoptioncheckedallowsuserstoratethecom-
ments made by other users.
■Note If you disable ratings at some point, the previous ratings on a blog entry or its comments do not get
destroyed. The system retains them and redisplays them whenever you enable the ratings again.
RSS Output
UserscanviewtheblogentriesinRSSformat.AtypicalviewofablogoutputinRSSformatis
shown in Figure 6-15.
CHAPTER 6 ■ INCORPORATING BLOGS
165
Figure 6-15. Displaying an RSS view of blog entries
In the RSS area of the Blogs application’s configuration screen, you can control the
following:
• Maximum Items to Display: This drop-down list resembles the one in the Page area of
the configuration screen. The default value is 20.
• Display Style:LiketheoptionofthesamenameinthePage area, it offers full-content
display, abstract display, or title-only display.
• Format:Thisoptionletsyouselecttheoutputformat:RSS1.0,RSS2.0,orAtom1.0.
The default is Atom1.0.
CHAPTER 6 ■ INCORPORATING BLOGS
166
Setting General Permissions
Now you’ll see how to set some general permissions for the users of our Blogs application.
ClickthePermissions tab to get the regular screen for setting application permissions. It dis-
plays the currently assigned roles for the application user. The Available tab displays all roles
thatareavailableforassignment.Usethistabtolookupthepermissionsthatyoucanassign
to or revoke from a power user. You’ll now assign permissions to the portal’s power-user role
by following these steps:
1. CheckthePower User role in the displayed list.
2. ClicktheUpdate Permissions button to see the screen shown in Figure 6-16.
Figure 6-16. Setting general permissions for a power user
3. Setthedesiredpermissionsusingthetwoarrows.Youcanchoosefromthreetypesof
permissions:
a. Add Entry:Allowstheusertoaddanewblogentry.
b. Configuration:Allowstheusertoconfiguretheblog.
c. View: Allowstheusertoviewtheblog;thisisassignedbydefault.
4. ClicktheFinished button to save your changes and put the newly assigned permissions
into effect.
Using the Recent Bloggers Application
With luck, you’ll encounter many active bloggers after opening up the community page to
yourportalusers.Knowingwhoyourmostrecentpostersarecanhelpyouquicklyidentify
CHAPTER 6 ■ INCORPORATING BLOGS
167
newentriesmadebyyourfavoritebloggers.LiferayprovidesanapplicationcalledRecent Blog-
gersthathelpsyougetthisinformation.Infact,theLiferaysiteitself,whichrunsontheLiferay
Portalengine,hasthisapplicationinstalledonitsCommunitypage.OpentheURLhttp://
www.liferay.com/web/guest/community/home in your browser and you will see the screen simi-
lar to the one shown in Figure 6-17.
Figure 6-17. The Recent Bloggers application on Liferay’s Community page
In the screen’s top-left corner, you will see the Recent Bloggers application running. It
displays the photos of recent bloggers; hovering the mouse over a photo displays the blogger’s
name underneath.
IwillnowshowyouhowtosetupthisfacilityonyourISIportal.
Installing the Application
To install the Recent Bloggers application, follow these steps:
1. SelecttheCommunitypagecreatedintheprevioussection.(Youcanselectanyother
pagewhereyouwishtoaddthenewapplication.)
2. SelecttheAdd Application menu.
CHAPTER 6 ■ INCORPORATING BLOGS
168
3. SelectRecent Bloggers under the Collaboration category.
4. Addtheapplicationtothepage.YoushouldgetascreenliketheoneshowninFig-
ure6-18,andtheapplicationviewshouldshowthelistofrecent bloggers.
Figure 6-18. Adding the Recent Bloggers application
Configuring the Application
You’ve just seen the Recent Bloggers application display the list of recent bloggers onscreen.
However,youmightwanttoconfigurethisapplicationbycontrollingtheoutputdisplay.Click
the Configuration button in the application window to get the screen shown in Figure6-19.
Figure 6-19. Configuring the Recent Bloggers application
Here,youwillfindthreeoptionsthatyoucanconfiguretocustomizetheoutputofthe
Recent Bloggers application: Organization, Display Style, and Maximum Bloggers to Display.
I will discuss each of these.
CHAPTER 6 ■ INCORPORATING BLOGS
169
Organization
You can choose the organization by clicking the Select button and selecting the desired orga-
nizationfromthedisplayedlist.Severalorganizationsdefinedinyourportalmightuseyour
blog, especially in the case of multinational corporations with offices in different parts of the
world. Each office works as an independent organization, so you might have organizational
unitsintheUnitedStates,theUnitedKingdom,Denmark,China,andsoon.Whiledefining
the portal, you will need to create organizations for each such unit.
■Note You learned how to create organizations in Chapter 3.
By selecting an organization, you are choosing to display only the recent bloggers from
thatorganization.WehaveonlyoneorganizationalunitinourISIportal,soalltheportal’s
recent bloggers will be displayed in the list.
■Note Unfortunately, Liferay does not allow you to select a community instead of an organization. Our ISI
portal has two communities, both defined within the same organization. Thus, you will not be able to differ-
entiate between the postings made by the two user communities.
Display Style
The Display Style option offers two choices: User Name and Image, and User Name. The first
choice displays the user name along with an image, which the user provided when he created
an account. Generally, bloggers provide photos of themselves to use in the image display. If no
photoisprovided,adefaultimageisused.(Insteadofaphoto,ausermightprovideacartoon
imageorotherpicture.)
The second choice displays only the user name. You might opt for this choice if you want
to display a large number of users, most of whom have not set up images on their profiles.
Maximum Bloggers
This option controls the number of bloggers to display on screen. This, once again, is a dis-
crete value in the range of 1 to 100. The default value is 10.
Using the Blogs Aggregator Application
Instead of viewing the full blog contents, you might find it more convenient to look at the
aggregated view of the blogs and then retrieve the full blog entries only for the posts you find
interesting.LiferayprovidesanapplicationcalledBlogs Aggregator for this purpose. In this
section, you will learn to install and use this application.
CHAPTER 6 ■ INCORPORATING BLOGS
170
Installing the Application
To install an instance of the Blogs Aggregator application on your portal page, follow these
steps:
1. SelecttheCommunity page you created earlier, or any other page where you want to
add the application.
2. SelecttheInstall Application menu.
3. SelecttheBlogs Aggregator application under the Collaboration category.
4. Addtheapplicationtotheportalpage.Youshouldgetascreenliketheoneshownin
Figure 6-20, where you’ll see an aggregated view of blog entries.
Figure 6-20. Adding the Blogs Aggregator application
Configuring the Application
Likealltheapplicationsdiscussed so far, Blogs Aggregator provides customization. To custom-
ize the application, click the Configuration icon in the application window. You will see the
screen shown in Figure 6-21.
CHAPTER 6 ■ INCORPORATING BLOGS
171
Figure 6-21. Customizing the Blogs Aggregator application
Hereyouwillfindfourcustomizationoptions:
• Organization
• Display Style
• Maximum Items to Display
• Enable RSS Subscription
I will now discuss each of these options.
Organization
The Organization option allows youtofilterblogentriesforadesiredorganization.Asyoudid
with the Recent Bloggers application, you can select the organization filter by clicking the Select
buttonandselectingthedesiredorganizationfromthedisplayedlist.OurISIportaldefines
only one organization, so this filter will not be useful in this case.
Display Style
The Display Style option provides several choices:
• Body and Image
• Body
• Abstract
• Abstract without Title
• Quote
• Quote without Title
• Title
CHAPTER 6 ■ INCORPORATING BLOGS
172
The Body and Image option lets you display the blog entry’s body contents, the entry’s
title, and the blogger’s profile image. The difference between this view and the view pro-
vided in the Blogs application discussed earlier in this chapter is that the options for rating,
commenting, editing, and so on are not displayed on the screen of the Blogs Aggregator
application.Soyoucanreadtheentriesquicklyratherthangetdistractedwithseverallinks
and buttons on each blog entry. The screen output when this option is selected is shown in
Figure 6-22.
Figure 6-22. The Body and Image view of the Blogs Aggregator application
ChoosingtheBody option displays the title and body of each blog entry without the
blogger’s image. This saves some real estate on the screen and makes it easier to focus on the
contents.
The Abstractviewprovidesthetitleandthefirstfewwordsofthebodycontents.Alink
called Read More lets a user retrieve the full body contents. The Abstract without Title option
provides the same view as Abstract, except that the blog title is not displayed.
The Quoteoptiondisplaysthecontentsoftheblogentryindoublequotes.Asthename
suggests, the Quote without Title option provides the same view as Quote, but without the title.
Finally, the Title option displays only the title of each entry.
Maximum Items to Display
The Maximum Items to Display option lets you set the maximum number of posts to display
onscreen.AsinthecaseoftheRecent Bloggers application, this is a discrete number in the
range of 1 to 100. The default value is 20.
Enable RSS Subscription
The Enable RSS Subscription option, which is enabled by default, displays a Subscribe to this
bloglinkatthebottomoftheapplicationwindow.Ausercanclickthelinktosubscribetothis
CHAPTER 6 ■ INCORPORATING BLOGS
173
blogandreceiveupdatesregularlyinRSS-feedformat.(SeeChapter4forinstructionsoncus-
tomizingtheRSSfeedanditsformat.)
Summary
Inthischapter,yousetupblogging,whichisaveryimportantfeatureofanyportal.Liferay
provides three applications to help you implement blogging on your portal: Blogs, Recent
Bloggers, and Blogs Aggregator. The Blogs application allows users to create their own blog
entries, post replies to existing entries, navigate posts, view and edit entries, and so on. It
alsoprovidesaWYSIWYGeditorforformattingblogentries.
The Recent Bloggers application displays the list of users who have recently posted blog
entries, so you can identify your regular bloggers when you visit the portal’s blog page. The
Blogs Aggregator application provides a consolidated view of the blogs, where you can see
many blog entries on one screen. You can then read a full entry by clicking the link provided
on each.
CHAPTER 7
Establishing a Wiki
If you’re reading this book, you’re almost certainly familiar with Wikipedia. Wikipedia is an
online encyclopedia created and maintained entirely by Internet users. If you have expertise in
a certain field and want to share that knowledge with other users worldwide, you can post that
information on Wikipedia. Anyone can contribute to the site.
The ISI portal that we are creating for stock-market investors can certainly benefit from
the types of features that Wikipedia offers. Luckily, Liferay comes with an application to pro-
vide wiki functionality on its portals. In this chapter, you’ll augment the ISI portal with a wiki
that lets users post definitions and other information about investing and markets. This wiki
will benefit the entire user community, from novices to seasoned investors, from short-term
investors to long-term investors, from fundamental analysts to technical analysts.
This chapter will start with an overview about wikis, then show you how to
• InstallanduseLiferay’sWiki application
• Createnodes
• Addpagesandsubpages
• Configurepages’displaysettingsandpermissions
• Moveanddeletepages
• Managewikis
• Trackpagechanges
• Listandmanagerecentlychangedpages
• Listandmanageorphanpages
What Is a Wiki?
Wikis have some similarities to the applications you’ve seen in earlier chapters, but they have
some differences too. Like discussion forums and blogs, wikis facilitate collaboration among
users. But whereas forums and blogs are controlled by individuals, wikis are controlled by a
large number of users. And because the number of contributors to a wiki is potentially endless,
wikis are vulnerable to abuse. Thus, the effective use of a wiki lies in its users’ honest use and
adherence to certain guidelines.
175
CHAPTER 7 ■ ESTABLISHING A WIKI
176
Wikipedia defines “wiki” as follows:
A wiki is a page or collection of Web pages designed to enable anyone who accesses it to
contribute or modify content, using a simplified markup language. Wikis are often used
to create collaborative websites and to power community websites.
As stated in the definition, a wiki is a web page or a collection of pages. Any user with
appropriate permissions, which are generally granted by default, can create a new page and
add it to a wiki. Ideally, this page should contain useful information that’s helpful to other
users, but the accuracy of the information cannot be guaranteed in most cases. If the informa-
tion is incorrect, though, other users can fix it. The wiki tracks the changes that different users
make to each entry, so one can revert back to the original entry if the modified information is
technically incorrect. A classic example of a wiki is Wikipedia, which is entirely authored and
edited by a large number of worldwide users with expertise in different areas.
Wikis also prove useful in business. A large multinational corporation can set up wikis on
their intranets to publish company policies. The regional changes made to such policies can
be directly entered and edited by employees belonging to those individual regions. Such wikis
can also be useful for sharing knowledge and experience among colleagues, especially since
the wiki retains that information long after employees leave the organization.
The first wiki software programwasdevelopedbyWardCunningham.Theapplication
was called WikiWikiWeb and was described as “the simplest online database that could pos-
sibly work.”
1
According to Wikipedia, “wiki” stands for “What I Know Is,” but this is apparently
a “backronym” (an acronym constructed for the word after the word had already been in exis-
tence). “Wiki,” incidentally, is a Hawaiian word for “fast” or “quick.”
Installing the Wiki Application
The Liferay installation comes with an application called Wiki to provide wiki functionality on
Liferay portals. You will now learn to use it. First, install the Wiki application on the ISI portal
by following these steps:
1. Open the Community page that you created in the last chapter.
2. Add a child page called Wiki to the Community page.
3. Alternatively, you can create a public page called Wiki under the Fundamental Analysts
community.
4. Select the Add Application menu.
5. Select the Wiki application under the Collaboration category.
6. Add the application to the page. Your screen with the Wiki application should look like
the one shown in Figure 7-1.
1 Wiki.org, “What Is Wiki,” 2002.
CHAPTER 7 ■ ESTABLISHING A WIKI
177
Figure 7-1. Adding the Wiki application
As you can see in Figure 7-1, the Wiki application has created a default node for you and
has added a page called FrontPage. The page is empty, so you will need to edit it to add some
content.
■Note You can change the default name assigned to the page, which I’ll describe in the “Advanced
Actions” section under “Adjusting Page Properties.”
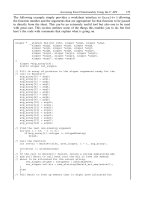
Working with Nodes
A wiki consists of several nodes. You’ll now add a few nodes of your own.
Creating Nodes
You’ll add two nodes based on the classifications of our community users: Fundamental and
Technical. The Fundamental node will carry information useful to fundamental analysts, while
CHAPTER 7 ■ ESTABLISHING A WIKI
178
the Technical node will carry information for those who are interested in technical analysis. To
add these nodes, follow the steps listed here:
1. Locate the small toolbox icon above the FrontPage heading (see Figure 7-2). You’ll see a
tool tip titled Manage Wikis when you hover the mouse over this icon.
Figure 7-2. Icon for managing wikis
2. ClickthistoolboxicontopullupthescreenshowninFigure7-3.Thescreenshowsthe
list of currently defined nodes and displays a button to let you add new nodes.
Figure 7-3. Adding nodes to a wiki
3. ClicktheAdd Wiki button to create a new node. You will see the screen shown in
Figure 7-4.
4. Enter Fundamental as the node name.
5. Enter a description for the node.
6. With the Configure link, you would be able to set the user permissions for the node
you’re adding. Leave the default settings for these. Note that the screenshot in Fig-
ure 7-4 shows the configuration options expanded, so the Configure link itself is not
visible in the screenshot.
CHAPTER 7 ■ ESTABLISHING A WIKI
179
Figure 7-4. Creating a new node
7. ClicktheSavebutton.YouwillreturntothescreenshowninFigure7-3,whereyou’ll
see the new node added to the displayed list.
8. Gobacktostep3andaddonemorenodecalledTechnical. After you have added the
two nodes, the screen will look like the one shown in Figure 7-5.
Figure 7-5. List of created wikis
Now that you’ve added the desired nodes, you can customize each one by editing its
pages. You’ll learn to modify the default pages created at the time of node creation, and you’ll
also learn to add child pages and configure them.