Wrox Beginning SharePoint 2010 Development phần 5 potx
Bạn đang xem bản rút gọn của tài liệu. Xem và tải ngay bản đầy đủ của tài liệu tại đây (2.07 MB, 50 trang )
Programmatically Accessing Lists
169
web.AllowUnsafeUpdates = true;
SPList list = web.Lists[strSPListName];
SPListItem Item = list.Items.Add();
Item[“Title”] = strProductName;
Item[“Product_SKU”] = strProductSKU;
Item[“Price”] = strProductPrice;
Item.Update();
web.AllowUnsafeUpdates = false;
}
}
}
}
}
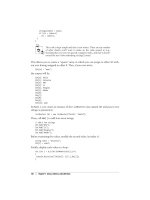
11. When you’re finished adding the code, press F5 to debug the application. When prompted by the
UI, enter some product information into the dialog, as shown in Figure 5-5.
FIGURE 55 Compiled WPF application using server-side
object model
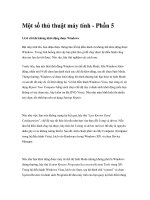
12. Now, open your SharePoint site and navigate to the list you updated (for example, Products list).
You will find that the application has updated the SharePoint list, as shown in Figure 5-6.
FIGURE 56 Updated list
584637c05.indd 169 5/3/10 11:44:01 AM
170
CHAPTER 5 Programming against sharePoint 2010 Lists
How It Works
When you’re developing applications that are running on the server, you can leverage the server-side
object model that is exposed using the
Microsoft SharePoint.dll. For example, in this walkthrough,
you built a simple WPF-based application that was running on the server (assuming that you were
building and deploying it on your server machine). Very simply, the application took a number of
string inputs from the WPF UI and used the server-side object model to add this input to a list on your
SharePoint site. The five
string variables were declared as follows:
…
string strSPSiteURL = ““;
string strSPListName = ““;
string strProductName = ““;
string strProductSKU = ““;
string strProductPrice = ““;
…
You’ll note that, per the earlier example, the code leverages the using statements to set the context for
the SharePoint site and then sets the Web to allow updates, creates an
SPList object and SPListItem
object, and then proceeds to set the specific column fields with the data that was entered by the users.
Finally, the
Update method is called to add the data to the list.
…
using (SPSite site = new SPSite(strSPSiteURL))
{
using (SPWeb web = site.OpenWeb())
{
web.AllowUnsafeUpdates = true;
SPList list = web.Lists[strSPListName];
SPListItem Item = list.Items.Add();
Item[“Title”] = strProductName;
Item[“Product_SKU”] = strProductSKU;
Item[“Price”] = strProductPrice;
Item.Update();
web.AllowUnsafeUpdates = false;
}
}
…
NOTE The preceding walkthrough showed you how to use the server-side
object model using a Windows client application. You can also use the server-
side object model on the server. To help you see what the project structure of
a Web part application looks like, this chapter also provides an additional code
sample where a Web part issues the same update action that the WPF applica-
tion does. This Web part code sample (
ServerSideObjectModel.zip) is avail-
able for download for you at the companion download site (
www.Wrox.com).
584637c05.indd 170 5/3/10 11:44:01 AM
Programmatically Accessing Lists
171
Programming Against Lists Using ASP.NET Web Services
The second way to interact with lists programmatically is to use the Lists ASP.NET Web service that
ships with SharePoint 2010. You might think of this as being not only a convenient service-based
way of coding against SharePoint, but also as support for legacy code that may be based on the set
of Web methods within the Lists service.
To develop using the ASP.NET service, you create a new application, set a reference to the ASP.NET
Web service, and then program against the Web reference (or more accurately, the service proxy you
add to the application code). For example, following is a code snippet that creates an instance of the
Lists Web service, sets the credentials of the service call as the default credentials, and then sets the
absolute URL to the service:
…
MySharePointData.SPListGetData.Lists proxy = new
MySharePointData.SPListGetData.Lists();
proxy.Credentials = System.Net.CredentialCache.DefaultCredentials.
proxy.URL = “http://fabrikamhockey/_vti_bin/lists.asmx”;
…
Within the Lists Web service, there are a number of Web methods that you can use when program-
ming against SharePoint lists, content types, list items, and files. To access the Web service, you set
your Web reference to
http://<server name>/_vti_bin/Lists.asmx and then use the reference
to the service in your code to manage data sent to and from SharePoint.
Table 5-4 provides a sampling of the list of the Web methods that are available in the Lists Web ser-
vice, along with a description of what the Web method does.
TABLE 54 Sample Lists Web Service Members
METHOD NAME DESCRIPTION
AddAttachment
Adds an attachment to a specific list item in a list
AddList
Creates a list in a SharePoint site based on specific name, descrip-
tion, and list template ID
CheckInFile
Allows documents to be checked in to a SharePoint document
library remotely
CheckOutFile
Allows documents in a SharePoint document library to be checked
out remotely
DeleteAttachment
Removes the attachment from the specified list item
DeleteList
Deletes a specified list
GetList
Returns the schema for a specified list
GetListAndView
Returns list and view schemas for the specified list
continues
584637c05.indd 171 5/3/10 11:44:01 AM
172
CHAPTER 5 Programming against sharePoint 2010 Lists
METHOD NAME DESCRIPTION
GetListCollection
Returns the names and globally unique identifiers (GUIDs) for all lists
in the site
GetListContentType
Returns the content type definition schema for the specified list con-
tent type
GetListItemChanges
Returns any changes made to a list since a specified date and time
GetListItems
Returns information about items in a list based on a specified query
UndoCheckOut
Undoes the check-out of a given document in a SharePoint docu-
ment library
UpdateList
Updates a list based on a specified field definition and list properties
UpdateListItems
Adds, deletes, or updates specified items in a list on a SharePoint site
NOTE You can find more information about the Lists Web service members at
You’ve walked through an exercise how to program against lists using the server-side object
model, so let’s try out another example using the Lists Web service. In this example, you’ll create
an Office add-in that will read and write data from the document to the SharePoint list, and vice
versa. (Note that if you completed the first walkthrough, you can use the same
Products list in
this example as well.)
Programming Against Lists Using the Lists Web ServiceTRY IT OUT
Code file [ProductsList.zip] available for download at Wrox.com.
The ASP.NET Web services are a great way to leverage the out-of-the-box capabilities when programming
against lists. To programmatically interact with a list using the Lists Web service, follow these steps:
1. Create a new Custom list and call it Products. Leave the default Title field and add two more
fields called
Product_SKU and Price. All fields should be of type “Single line of text.” Add some
data to the list, as shown in Figure 5-7.
FIGURE 57 Sample data in list
TABLE 54
(continued)
584637c05.indd 172 5/3/10 11:44:01 AM
Programmatically Accessing Lists
173
2. After you’ve created the list, open Visual Studio 2010 (as Administrator).
3. Select File New Project. Be sure to select the .NET Framework 3.5 in the drop-down list in the
New Project dialog.
4. Select Office in the Installed Templates, and then select the Excel 2010 Add-In project template.
5. Provide a name (for example, ProductsList) and a location for your project, as shown in
Figure 5-8. Click OK.
FIGURE 58 Oce Excel project template
6. Visual Studio 2010 creates a solution structure for you, which includes a number of default files.
Right-click the main project file and select Add New Item. Navigate to the WPF node and select
WPF User Control.
7. Provide a name for your user control (for example, ProductsUserControl.xaml), and click OK.
Visual Studio adds a WPF-based control to your project.
8. Right-click the new control in the Solution Explorer and select View in Designer.
9. Use the Toolbox to drag four labels — a listbox, two textboxes, and two buttons — onto the
designer surface. When done, arrange the user interface controls as shown in Figure 5-9.
Table 5-5 shows the control type and the name of the controls that you should add to the WPF
user control.
584637c05.indd 173 5/3/10 11:44:01 AM
174
CHAPTER 5 Programming against sharePoint 2010 Lists
FIGURE 59 WPF custom task pane UI
TABLE 55 Control Types for WPF User Control
CONTROL TYPE CONTROL NAME
Label
lblProduct, lblSku, LblPrice, lblTitle
Textbox
txtBxSku, txtbxPrice
Listbox
lstBxProducts
Button
btnUpdate, btnLoadData
Adding controls to the designer surface auto-generates XAML code (the XML mark-up that
defines the UI for the application). If you explore the XAML code for the UI, it will look very
close to the following code sample. Note that you can edit the properties of the UI either directly
from the XAML or by using the Properties window in Visual Studio.
<UserControl x:Class=”ProductsList.ProductsUserCtrl”
xmlns=” />584637c05.indd 174 5/3/10 11:44:01 AM
Programmatically Accessing Lists
175
xmlns:x=” /> xmlns:mc=”
xmlns:d=”
mc:Ignorable=”d”
d:DesignHeight=”243” d:DesignWidth=”223”>
<Grid Width=”220” Height=”239”>
<Button
Content=”Update” Height=”23” HorizontalAlignment=”Left” Margin=”118,173,0,0”
Name=”btnUpdate” VerticalAlignment=”Top” Width=”75” />
<Button
Content=”Load” Height=”23” HorizontalAlignment=”Left” Margin=”22,173,0,0”
Name=”btnLoadData” VerticalAlignment=”Top” Width=”75” />
<Label
Content=”Product:” Height=”28” HorizontalAlignment=”Left” Margin=”22,48,0,0”
Name=”lblProduct” VerticalAlignment=”Top” Width=”55” />
<Label
Content=”SKU:” Height=”28” HorizontalAlignment=”Left” Margin=”22,82,0,0”
Name=”lblSku” VerticalAlignment=”Top” Width=”55” />
<Label
Content=”Price:” Height=”28” HorizontalAlignment=”Left” Margin=”22,116,0,0”
Name=”lblPrice” VerticalAlignment=”Top” Width=”55” />
<Label
Content=”Products Data” Height=”28” HorizontalAlignment=”Left” Margin=”22,12,0,0”
Name=”lblTitle” VerticalAlignment=”Top” Width=”120” FontWeight=”Bold” />
<TextBox
Height=”23” HorizontalAlignment=”Left” Margin=”73,82,0,0”
Name=”txtBxSku” VerticalAlignment=”Top” Width=”120” />
<TextBox
Height=”23” HorizontalAlignment=”Left” Margin=”73,116,0,0”
Name=”txtBxPrice” VerticalAlignment=”Top” Width=”120” />
<ListBox
Height=”28” HorizontalAlignment=”Left” Margin=”73,45,0,0”
Name=”lstBxProducts” VerticalAlignment=”Top” Width=”120” />
</Grid>
</UserControl>
10. Double-click each of the buttons to add event handlers for each of them in the code behind. (Note
that this will update the XAML, so be sure to inspect the XAML to see these changes.)
11. Next, add a reference to the Lists Web service. To do this, right-click the project and select Add
Service Reference. Click the Advanced button in the Add Service Reference dialog, and then click
Add Web Reference in the Service Reference Settings dialog.
12. If you’re developing on the same machine as your SharePoint site, you can click “Web services on
local machine” to discover the services on your development machine. (Otherwise, you’ll need to
add the service URL into the URL field.)
13. Visual Studio loads all of the available services on the local machine, one of which should be the
SharePoint Lists service, as shown in Figure 5-10.
14. When you click the Lists service, you will see a list showing all of the available Web methods.
584637c05.indd 175 5/3/10 11:44:01 AM
176
CHAPTER 5 Programming against sharePoint 2010 Lists
FIGURE 510 Add Web Reference dialog
15. Provide a name for the service reference (for example, SPListWS) in the Web reference name field,
and then click Add Reference. You can now begin leveraging the Lists Web service in your applica-
tion. After you finish adding the Web service reference, add the following
using statements at the
top of the class:
using Excel = Microsoft.Office.Interop.Excel;
using System.Web.Services.Protocols;
16. Right-click the WPF-based user control, and select View Code.
17. In the code behind, you’re going to add some code to handle reading data from the SharePoint list
into the active Excel document and then some to handle writing back to the SharePoint list from
the Excel worksheet. The first set of code you’ll need is the code that defines your in-memory data
object. To add a class to the project and provide a name (for example,
Product), right-click the
project and select Add Class. The
Product class contains three public string properties, which
are shown in boldface in the following code sample:
using System;
using System.Collections.Generic;
using System.Linq;
using System.Text;
namespace ProductsList
{
class Product
{
public string productTitle { get; set; }
public string productSKU { get; set; }
public string productPrice { get; set; }
}
}
584637c05.indd 176 5/3/10 11:44:01 AM
Programmatically Accessing Lists
177
18. Data is managed in the application through the use of a list collection called myProducts
(which appears in bold in the following code snippet). Using an in-memory object that is of type
IEnumerable or a List collection makes it easier to query and bind data to controls in your
applications.
namespace ProductsList
{
public partial class ProductsUserCtrl : UserControl
{
List<Product> myProducts = new List<Product>();
public ProductsUserCtrl()
{
InitializeComponent();
}
…
}
}
19. After you’ve added the code for your class, you must handle the two button events and the changed
event for the listbox. The following code snippet represents the event that is triggered when the
user clicks the Load button (that is, the
btnLoadData_Click event). Within the btnLoadData_
Click
event, the application implements the Lists Web service and then, through the use of the
GetListItems method, within the Lists Web service. Much of the code within the try block essen-
tially builds out an XML document using the returned data from the Web service call. It next looks
for specific XML elements (that is,
ows_Title, ows_Product_SKU, and ows_Price). It then iter-
ates through each record in the XML document and populates the
Product list collection (as well
as adds the names of the products that are being returned to the listbox in the UI).
private void btnLoadData_Click(object sender, RoutedEventArgs e)
{
SPListWS.Lists myListReadProxy = new SPListWS.Lists();
myListReadProxy.Credentials =
System.Net.CredentialCache.DefaultCredentials;
myListReadProxy.Url = “http://fabrikamhockey/_vti_bin/Lists.asmx”;
try
{
XmlNode myListItems = myListReadProxy.GetListItems
(“Products”, null, null, null, null, null, null);
XElement newRootElement = new XElement(“ProductData”);
foreach (XmlNode outerNode in myListItems.ChildNodes)
{
if (outerNode.NodeType.Equals(System.Xml.XmlNodeType.Element))
{
foreach (XmlNode node in outerNode.ChildNodes)
{
if (node.NodeType.Equals(System.Xml.
XmlNodeType.Element))
{
XmlNode listFieldTitle = node.Attributes.
584637c05.indd 177 5/3/10 11:44:01 AM
178
CHAPTER 5 Programming against sharePoint 2010 Lists
GetNamedItem(“ows_Title”);
XmlNode listFieldProductSKU = node.Attributes.
GetNamedItem(“ows_Product_SKU”);
XmlNode listFieldPrice = node.Attributes.
GetNamedItem(“ows_Price”);
Product tempProduct = new Product();
tempProduct.productTitle = listFieldTitle.InnerText;
tempProduct.productSKU =
listFieldProductSKU.InnerText;
tempProduct.productPrice = listFieldPrice.InnerText;
myProducts.Add(tempProduct);
lstBxProducts.Items.Add(tempProduct.productTitle);
}
}
}
}
}
catch (SoapException ex)
{
MessageBox.Show(ex.Message);
}
}
20. The following code provides the methods that handle the btnUpdate_Click event. In this code,
you create an instance of the Excel worksheet so that you can inject the data coming from the
SharePoint list into a specific set of cells. The code does not format the cells, but you could assert
some formatting for the worksheet programmatically if you chose. Then, depending on the product
name in the cell, the code sets an integer variable called
index, which is the specific row of data
that you will update if you make any changes to the data in the spreadsheet. Then, similar to the
btnLoadData_Click event, you create an instance of the Lists Web service. However, this time,
you call the
UpdateListItems method. You’ll notice the CAML construct that is created and
passed with the
UpdateListItems method. This construct defines the command (Update) and then
provides the specific index to be updated through the aforementioned
index variable.
…
private void btnUpdate_Click(object sender, RoutedEventArgs e)
{
Excel.Worksheet myProductWorksheet = Globals.ThisAddIn.
Application.ActiveSheet as Excel.Worksheet;
int index = 0;
string strProductUpdate = myProductWorksheet.
Cells[2, 1].Value2.ToString();
string strProductSkuUpdate = myProductWorksheet.
Cells[2, 2].Value2.ToString();
string strProductPriceUpdate = myProductWorksheet.
Cells[2, 3].Value2.ToString();
if (strProductUpdate == “Bauer XXXX”)
{
index = 1;
}
else if (strProductUpdate == “CCM Tacks”)
{
584637c05.indd 178 5/3/10 11:44:01 AM
Programmatically Accessing Lists
179
index = 2;
}
else if (strProductUpdate == “Nike Air”)
{
index = 3;
}
SPListWS.Lists myListUpdateProxy = new SPListWS.Lists();
myListUpdateProxy.Credentials =
System.Net.CredentialCache.DefaultCredentials;
myListUpdateProxy.Url = “http://fabrikamhockey/_vti_bin/Lists.asmx”;
System.Xml.XmlNode xmlListView =
myListUpdateProxy.GetListAndView(“Products”, ““);
string strListID = xmlListView.ChildNodes[0].Attributes[“Name”].Value;
string strViewID = xmlListView.ChildNodes[1].Attributes[“Name”].Value;
XmlDocument xmlDoc = new XmlDocument();
XmlElement xmlBatchElement = xmlDoc.CreateElement(“Batch”);
xmlBatchElement.SetAttribute(“OnError”, “Continue”);
xmlBatchElement.SetAttribute(“ListVersion”, “1”);
xmlBatchElement.SetAttribute(“ViewName”, strViewID);
xmlBatchElement.InnerXml = “<Method ID=’1’ Cmd=’Update’>”+
“<Field Name=’ID’>” + index + “</Field>”+”<Field Name=’Title’>”
+ strProductUpdate + “</Field><Field Name=’Product_SKU’>” +
strProductSkuUpdate + “</Field><Field Name=’Price’>” +
strProductPriceUpdate + “</Field>” + “</Method>”;
try
{
XmlNode xmlReturn = myListUpdateProxy.UpdateListItems
(“Products”, xmlBatchElement);
System.Windows.MessageBox.Show(“Product Information Added!”);
}
catch (SoapException ex)
{
MessageBox.Show(ex.Message);
}
}
…
21. The last event that is handled is the lstBxProducts_SelectionChanged event, which updates the
worksheet. To create the
lstBxProducts_SelectionChanged event double-click the listbox. In
the following code, the in-memory list collection,
myProducts, is being queried using a LiNQ state-
ment. The results can then be mapped to the textboxes and then added to the spreadsheet.
…
private void lstBxProducts_SelectionChanged
(object sender, SelectionChangedEventArgs e)
{
string strSelectedProd = lstBxProducts.SelectedItem.ToString();
var products = from p in myProducts
.Where(p => p.productTitle == strSelectedProd)
584637c05.indd 179 5/3/10 11:44:01 AM
180
CHAPTER 5 Programming against sharePoint 2010 Lists
select new {p.productSKU, p.productPrice};
foreach (var d in products)
{
txtBxSku.Text = d.productSKU;
txtBxPrice.Text = d.productPrice;
}
Excel.Worksheet myProductWorksheet =
Globals.ThisAddIn.Application.ActiveSheet as Excel.Worksheet;
myProductWorksheet.Cells[1, 1].Value2 = “Product”;
myProductWorksheet.Cells[1, 2].Value2 = “SKU”;
myProductWorksheet.Cells[1, 3].Value2 = “Price”;
myProductWorksheet.Cells[2, 1].Value2 = strSelectedProd;
myProductWorksheet.Cells[2, 2].Value2 = txtBxSku.Text;
myProductWorksheet.Cells[2, 3].Value2 = txtBxPrice.Text;
}
}
}
…
22. While the three methods were split out for your reference, the following listing includes the full
code for the solution described earlier. You’ll note that, as you work through other examples in the
chapter, many of the generic .NET features can equally apply to different ways of retrieving data
from SharePoint. For example, you can equally use LINQ and in-memory objects to query and fil-
ter data while using the client object model, which is discussed later in this chapter.
using System;
using System.Collections.Generic;
using System.Linq;
using System.Text;
using System.Windows;
using System.Windows.Controls;
using System.Windows.Data;
using System.Windows.Documents;
using System.Windows.Input;
using System.Windows.Media;
using System.Windows.Media.Imaging;
using System.Windows.Navigation;
using System.Windows.Shapes;
using System.Xaml;
using System.Xml;
using System.Xml.Linq;
using Excel = Microsoft.Office.Interop.Excel;
using System.Web.Services.Protocols;
namespace ProductsList
{
public partial class ProductsUserCtrl : UserControl
{
List<Product> myProducts = new List<Product>();
public ProductsUserCtrl()
584637c05.indd 180 5/3/10 11:44:01 AM
Programmatically Accessing Lists
181
{
InitializeComponent();
}
private void btnLoadData_Click(object sender, RoutedEventArgs e)
{
SPListWS.Lists myListReadProxy = new SPListWS.Lists();
myListReadProxy.Credentials =
System.Net.CredentialCache.DefaultCredentials;
//Be sure to replace the URL below with your SharePoint server name.
myListReadProxy.Url = “http://fabrikamhockey/_vti_bin/Lists.asmx”;
try
{
XmlNode myListItems = myListReadProxy.GetListItems(“Products”,
null,
null, null, null, null, null);
XElement newRootElement = new XElement(“ProductData”);
foreach (XmlNode outerNode in myListItems.ChildNodes)
{
if (outerNode.NodeType.Equals(System.Xml.XmlNodeType.Element))
{
foreach (XmlNode node in outerNode.ChildNodes)
{
if (node.NodeType.Equals
(System.Xml.XmlNodeType.Element))
{
XmlNode listFieldTitle = node.Attributes.
GetNamedItem(“ows_Title”);
XmlNode listFieldProductSKU = node.Attributes.
GetNamedItem(“ows_Product_SKU”);
XmlNode listFieldPrice = node.Attributes.
GetNamedItem(“ows_Price”);
Product tempProduct = new Product();
tempProduct.productTitle = listFieldTitle.InnerText;
tempProduct.productSKU =
listFieldProductSKU.InnerText;
tempProduct.productPrice = listFieldPrice.InnerText;
myProducts.Add(tempProduct);
lstBxProducts.Items.Add(tempProduct.productTitle);
}
}
}
}
}
catch (SoapException ex)
{
MessageBox.Show(ex.Message);
}
}
private void btnUpdate_Click(object sender, RoutedEventArgs e)
{
Excel.Worksheet myProductWorksheet = Globals.ThisAddIn.
584637c05.indd 181 5/3/10 11:44:01 AM
182
CHAPTER 5 Programming against sharePoint 2010 Lists
Application.ActiveSheet as Excel.Worksheet;
int index = 0;
string strProductUpdate = myProductWorksheet.Cells[2, 1].
Value2.ToString();
string strProductSkuUpdate = myProductWorksheet.Cells[2, 2].
Value2.ToString();
string strProductPriceUpdate = myProductWorksheet.Cells[2, 3].
Value2.ToString();
if (strProductUpdate == “Bauer XXXX”)
{
index = 1;
}
else if (strProductUpdate == “CCM Tacks”)
{
index = 2;
}
else if (strProductUpdate == “Nike Air”)
{
index = 3;
}
SPListWS.Lists myListUpdateProxy = new SPListWS.Lists();
myListUpdateProxy.Credentials =
System.Net.CredentialCache.DefaultCredentials;
myListUpdateProxy.Url = “http://fabrikamhockey/_vti_bin/Lists.asmx”;
System.Xml.XmlNode xmlListView =
myListUpdateProxy.GetListAndView(“Products”, ““);
string strListID = xmlListView.ChildNodes[0].Attributes[“Name”].Value;
string strViewID = xmlListView.ChildNodes[1].Attributes[“Name”].Value;
XmlDocument xmlDoc = new XmlDocument();
XmlElement xmlBatchElement = xmlDoc.CreateElement(“Batch”);
xmlBatchElement.SetAttribute(“OnError”, “Continue”);
xmlBatchElement.SetAttribute(“ListVersion”, “1”);
xmlBatchElement.SetAttribute(“ViewName”, strViewID);
xmlBatchElement.InnerXml = “<Method ID=’1’ Cmd=’Update’>”+
“<Field Name=’ID’>” + index + “</Field>”+”<Field Name=’Title’>”
+ strProductUpdate + “</Field><Field Name=’Product_SKU’>” +
strProductSkuUpdate + “</Field><Field Name=’Price’>” +
strProductPriceUpdate + “</Field>” + “</Method>”;
try
{
XmlNode xmlReturn = myListUpdateProxy.UpdateListItems
(“Products”, xmlBatchElement);
System.Windows.MessageBox.Show(“Product Information Added!”);
}
catch (SoapException ex)
{
MessageBox.Show(ex.Message);
}
}
private void lstBxProducts_SelectionChanged(object sender,
584637c05.indd 182 5/3/10 11:44:02 AM
Programmatically Accessing Lists
183
SelectionChangedEventArgs e)
{
string strSelectedProd = lstBxProducts.SelectedItem.ToString();
var products = from p in myProducts
.Where(p => p.productTitle == strSelectedProd)
select new {p.productSKU, p.productPrice};
foreach (var d in products)
{
txtBxSku.Text = d.productSKU;
txtBxPrice.Text = d.productPrice;
}
Excel.Worksheet myProductWorksheet = Globals.ThisAddIn.
Application.ActiveSheet as Excel.Worksheet;
myProductWorksheet.Cells[1, 1].Value2 = “Product”;
myProductWorksheet.Cells[1, 2].Value2 = “SKU”;
myProductWorksheet.Cells[1, 3].Value2 = “Price”;
myProductWorksheet.Cells[2, 1].Value2 = strSelectedProd;
myProductWorksheet.Cells[2, 2].Value2 = txtBxSku.Text;
myProductWorksheet.Cells[2, 3].Value2 = txtBxPrice.Text;
}
}
}
23. Although you have your UI working now, you should not press F5 to debug the application just
yet. You’ve only set up what will be the UI for your custom task pane. To ensure that, when Excel
starts, your custom task pane is displayed, you must add a user control to your application and
then add some code in the
ThisAddIn_StartUp method. To do this, right-click your project and
click Add. Then select User Control (WPF). Give the user control a name (for example,
XAMLHost)
and make the height
800 and the width 350. Press F6 to build the project.
24. When you build the project, your WPF control will display in the Toolbox. Open the user control
you just created. Drag and drop the WPF control onto the user control. You can resize the WPF
control until all of the controls are visible.
25. Now, right-click on the ThisAddIn class and amend the code in that class with the following bold-
faced code. This code creates an instance of the
WinForm user control you just created (which is
now hosting the XAML control), creates an instance of the custom task pane object, and creates a
title variable that you’ll need for the custom task pane. The code leverages the
Add method to add
the user control and title to the
CustomTaskPanes collection, which is then set to be visible and
docked to the right of the document.
using System;
using System.Collections.Generic;
using System.Linq;
using System.Text;
using System.Xml.Linq;
using Excel = Microsoft.Office.Interop.Excel;
using Office = Microsoft.Office.Tools;
using Microsoft.Office.Tools.Excel;
584637c05.indd 183 5/3/10 11:44:02 AM
184
CHAPTER 5 Programming against sharePoint 2010 Lists
using System.Windows.Forms;
namespace ProductsList
{
public partial class ThisAddIn
{
XAMLHost ctrl = new XAMLHost();
string ctrlTitle = “Product Data”;
Office.CustomTaskPane ctp;
private void ThisAddIn_Startup(object sender, System.EventArgs e)
{
ctp = this.CustomTaskPanes.Add(ctrl, ctrlTitle);
ctp.Visible = true;
ctp.DockPosition = Microsoft.Office.Core.MsoCTPDockPosition.
msoCTPDockPositionRight;
}
private void ThisAddIn_Shutdown(object sender, System.EventArgs e)
{
}
private void InternalStartup()
{
this.Startup += new System.EventHandler(ThisAddIn_Startup);
this.Shutdown += new System.EventHandler(ThisAddIn_Shutdown);
}
}
}
26. At this point, you can press F5 to build and debug the application. You should see something simi-
lar to Figure 5-11. Click Load to load the data from SharePoint. Select an item within the Product
listbox to populate the
SKU and Price fields, and then add data into the Excel worksheet. You can
then make some changes in one of the cells and click Update. That will update your SharePoint list.
FIGURE 511 Excel application leveraging Lists Web service
584637c05.indd 184 5/3/10 11:44:02 AM
Programmatically Accessing Lists
185
How It Works
You can call the Lists Web service from a variety of client applications, and the code will more often
than not look very similar to the way it was used here. What could be different would be how the data
is consumed after the client application retrieves it. For example, in this exercise, you added the data
from SharePoint to the spreadsheet by using the Office object model. Per the following code, you cre-
ated an instance of the worksheet and then mapped the data to hard-coded cells:
…
Excel.Worksheet myProductWorksheet = Globals.ThisAddIn.
Application.ActiveSheet as Excel.Worksheet;
myProductWorksheet.Cells[1, 1].Value2 = “Product”;
myProductWorksheet.Cells[1, 2].Value2 = “SKU”;
myProductWorksheet.Cells[1, 3].Value2 = “Price”;
myProductWorksheet.Cells[2, 1].Value2 = strSelectedProd;
myProductWorksheet.Cells[2, 2].Value2 = txtBxSku.Text;
myProductWorksheet.Cells[2, 3].Value2 = txtBxPrice.Text;
…
The Lists Web service works by relaying XML documents (or data payloads) back from the server to
the calling application. Depending on the payload, the XML can be quite lengthy to parse. For exam-
ple, in this exercise, you called the
GetListItems method and then walked through an XML document
and built out your in-memory object, as reflected in the following code snippet:
…
XmlNode myListItems = myListReadProxy.GetListItems(“Products”, null, null,
null, null, null, null);
XElement newRootElement = new XElement(“ProductData”);
foreach (XmlNode outerNode in myListItems.ChildNodes)
{
if (outerNode.NodeType.Equals(System.Xml.XmlNodeType.Element))
{
foreach (XmlNode node in outerNode.ChildNodes)
{
if (node.NodeType.Equals(System.Xml.
XmlNodeType.Element))
{
XmlNode listFieldTitle = node.Attributes.
GetNamedItem(“ows_Title”);
XmlNode listFieldProductSKU = node.Attributes.
GetNamedItem(“ows_Product_SKU”);
XmlNode listFieldPrice = node.Attributes.
GetNamedItem(“ows_Price”);
Product tempProduct = new Product();
tempProduct.productTitle = listFieldTitle.InnerText;
tempProduct.productSKU =
listFieldProductSKU.InnerText;
tempProduct.productPrice = listFieldPrice.InnerText;
myProducts.Add(tempProduct);
584637c05.indd 185 5/3/10 11:44:02 AM
186
CHAPTER 5 Programming against sharePoint 2010 Lists
lstBxProducts.Items.Add(tempProduct.productTitle);
}
}
}
}
…
This might be perceived as a lot of programmatic moving parts and, depending on your payload, could
affect performance. It is, though, a proven and accepted way of interacting with SharePoint data.
With that said, you can optimize the previous code in any number of ways. For example, you could
move the Excel header row to be added on startup, or assert LINQ directly against your XML docu-
ments to increase performance and sanitize your code.
As you refine your applications, you’ll certainly craft your applications with better designs in mind.
However, one way to optimize the calling code into SharePoint is to leverage the SharePoint client-
side object model, instead of using the native Lists Web service.
Programming Against Lists Using the Client Object Model
The client object model is a new feature in SharePoint 2010, and enables developers to program
against SharePoint lists using remote clients. For example, you can create a WinForm or WPF appli-
cation, a Silverlight application, or a JavaScript application that all can use the client object model to
manage data sent in and out of SharePoint through that remote client.
Depending on what you’re trying to do with SharePoint, you’ll find the syntax of your code is some-
what cleaner than the earlier Web service example. For example, if you want to issue a
SELECT *
type query against a SharePoint list, the client object model, in some cases, auto-generates CAML
for you. Also, it’s easier to manage data in in-memory data objects, with which you can then use
LINQ, enumerables, collections, and so on, to quickly and efficiently query and filter that data into
your applications.
Let’s try an example where you read data from a SharePoint list, and display it within a Windows
Form application. In this example, you'll again leverage the
Products list you created earlier.
Using the Client-Side Object Model to Programmatically Read List DataTRY IT OUT
The client object model provides a powerful way to program against lists from a remote client applica-
tion. To use the client object model when programming against lists, follow these steps:
1. Open Visual Studio 2010 and click File New Project Windows Forms application. Provide a
name for your project (for example,
ReadSPListData). Be sure to select the .NET Framework 3.5
in the drop-down list in the New Project dialog.
2. Add a label, textbox, datagrid view, and two buttons to the Windows form in the Designer view,
as shown in Figure 5-12.
Table 5-6 shows the control type and the name of the controls that you should add to the
Windows Form designer.
584637c05.indd 186 5/3/10 11:44:02 AM
Programmatically Accessing Lists
187
FIGURE 512 WinForm UI
TABLE 56 Control Types for Windows Form Application
CONTROL TYPE CONTROL NAME
Label
lblSPURL
Textbox
txtbxSPURL
Datagrid View
dtgrdSPListData
Button
btnLoadData, btnExit
3. You must add a class to the project, so right-click the project name and select Add Class.
Provide a name (for example,
ProductInfo). Add three properties to the class that map to the
same
Products class you created earlier in the chapter. The code for this will look like the bold-
faced code in the following code snippet:
using System;
using System.Collections.Generic;
using System.Linq;
584637c05.indd 187 5/3/10 11:44:02 AM
188
CHAPTER 5 Programming against sharePoint 2010 Lists
using System.Text;
namespace ReadSPListData
{
class ProductInfo
{
public string productName { get; set; }
public string productSKU { get; set; }
public string productPrice { get; set; }
}
}
4. Next, you want to double-click the two buttons to add events in the code behind for the Load but-
ton and the Exit button. The
Exit code for WinForm applications is easy, so add that first:
private void btnExit_Click(object sender, EventArgs e)
{
Application.Exit();
}
5. The btnLoadData_Click event is a little more complex, but add that next. Before you begin cod-
ing using the new client object model, you must add the appropriate references. To add these refer-
ences, right-click the project and select Add Reference. Select the Browse tab, and then browse to
c:\Program Files\Common Files\Microsoft Shared\Web Server Extensions\14\ISAPI
and add the
Microsoft.SharePoint.Client.dll and the Microsoft.SharePoint.Client
.Runtime.dll
to your project. After you’ve added these references, add the following using
statements at the top of your main application:
using ClientOM = Microsoft.SharePoint.Client;
using Microsoft.SharePoint.Client;
When using the client object model, you may run into namespace conflicts (for example, with the
Form class in Windows Forms applications). To get around this, you can add the following line of
code to your application:
using ClientOM = Microsoft.SharePoint.Client;
This gives you a “custom” namespace reference that enables you to avoid namespace conflicts.
6. You’ll next add some code to handle the loading of the data from the SharePoint list using this
feature. You’ll note that the syntax for retrieving the data from SharePoint in this case is slightly
different from that of the Lists Web service. You are still achieving pretty much the same function,
but doing it in a more syntactically clean way.
In the following code sample, note that the application uses the
string variable entered into the text-
box as the SharePoint site context (that is, the URL). It then uses a number of in-memory objects to
manage the data coming from SharePoint (for example,
myListItems and myProducts). However,
the key differentiating code is where you begin to set the context by using the
ClientContext object.
This is one of the key features of the client object model — the process of setting context and then
calling
ExecuteQuery (a batch query method) when interacting with the SharePoint list. You will
again use LINQ to populate an object and iterate through the contents of that object to get the data
584637c05.indd 188 5/3/10 11:44:02 AM
Programmatically Accessing Lists
189
into a bindable object that can be mapped directly to the datagrid. One key item within the foreach
loop is that you’ll see values are assigned using the
ElementAt property. This is the specific element
index where the data lives within the SharePoint list. If you were to set a breakpoint right after the
LINQ statement and inspect the values within the
returnedListData object, you could see all of the
different values that are returned and the correlating index value.
…
private void btnLoad_Click(object sender, EventArgs e)
{
string SPUrl = txtbxSPURL.Text;
IEnumerable<ClientOM.ListItem> myListItems;
List<ProductInfo> myProducts = new List<ProductInfo>();
ClientOM.ClientContext SPContext = new ClientOM.ClientContext(SPUrl);
ClientOM.Web mySPSite = SPContext.Web;
ClientOM.ListCollection myListCollection = mySPSite.Lists;
var productsList = SPContext.Web.Lists.GetByTitle(“Products”);
ClientOM.CamlQuery myCamlQuery = new CamlQuery();
IQueryable<ClientOM.ListItem> myList = productsList.
GetItems(myCamlQuery);
myListItems = SPContext.LoadQuery(myList);
SPContext.ExecuteQuery();
var returnedListData = from prod in myListItems
select prod;
foreach (ClientOM.ListItem tempListItem in returnedListData)
{
ProductInfo tempProd = new ProductInfo();
tempProd.productName = tempListItem.FieldValues.
Values.ElementAt(1).ToString();
tempProd.productSKU = tempListItem.FieldValues.
Values.ElementAt(4).ToString();
tempProd.productPrice = tempListItem.FieldValues.
Values.ElementAt(5).ToString();
myProducts.Add(tempProd);
}
dtgrdSPListData.DataSource = myProducts;
}
…
Taken together, the full code sample for the WinForm code behind is as follows:
using System;
using System.Collections.Generic;
using System.ComponentModel;
using System.Data;
using System.Drawing;
using System.Linq;
using System.Text;
using System.Windows.Forms;
584637c05.indd 189 5/3/10 11:44:02 AM
190
CHAPTER 5 Programming against sharePoint 2010 Lists
//Be sure to add this along with your other using statements.
using ClientOM = Microsoft.SharePoint.Client;
using Microsoft.SharePoint.Client;
namespace ReadSPListData
{
public partial class Form1 : System.Windows.Forms.Form
{
public Form1()
{
InitializeComponent();
}
private void btnExit_Click(object sender, EventArgs e)
{
Application.Exit();
}
private void btnLoad_Click(object sender, EventArgs e)
{
string SPUrl = txtbxSPURL.Text;
IEnumerable<ClientOM.ListItem> myListItems;
List<ProductInfo> myProducts = new List<ProductInfo>();
ClientOM.ClientContext SPContext = new ClientOM.ClientContext(SPUrl);
ClientOM.Web mySPSite = SPContext.Web;
ClientOM.ListCollection myListCollection = mySPSite.Lists;
var productsList = SPContext.Web.Lists.GetByTitle(“Products”);
ClientOM.CamlQuery myCamlQuery = new CamlQuery();
IQueryable<ClientOM.ListItem> myList = productsList.
GetItems(myCamlQuery);
myListItems = SPContext.LoadQuery(myList);
SPContext.ExecuteQuery();
var returnedListData = from prod in myListItems
select prod;
foreach (ClientOM.ListItem tempListItem in returnedListData)
{
ProductInfo tempProd = new ProductInfo();
tempProd.productName = tempListItem.FieldValues.
Values.ElementAt(1).ToString();
tempProd.productSKU = tempListItem.FieldValues.
Values.ElementAt(4).ToString();
tempProd.productPrice = tempListItem.FieldValues.
Values.ElementAt(5).ToString();
myProducts.Add(tempProd);
}
dtgrdSPListData.DataSource = myProducts;
}
}
}
584637c05.indd 190 5/3/10 11:44:02 AM
Programmatically Accessing Lists
191
When you run the application and provide the URL to the
SharePoint site (for example,
http://fabrikamhockey),
the application displays the data within the datagrid after
you click the Load button, as shown in Figure 5-13.
The SharePoint client object model is not only useful for reading data from a SharePoint list, but it’s
also very useful for writing to that list. And again, you have the opportunity to clean up the syntax
of your code by not having to use CAML as a part of your call to push data back into SharePoint.
To put this into practice, the next example continues to leverage the
Products list but, this time,
uses a WPF client application that leverages the client object model to submit data back to the
SharePoint list.
Using the Client Object Model to Programmatically Write List DataTRY IT OUT
Code file [SPWriteListApp.zip] available for download at Wrox.com.
The client object model is an effective way to write back to a SharePoint list programmatically. To cre-
ate a simple application that writes to a list using the client object model, follow these steps:
1. Open Visual Studio. Click File New Project WPF Application (under the Windows cat-
egory). Be sure to select the .NET Framework 3.5 in the drop-down list in the New Project dialog.
Also, provide a name for your project (for example,
SPWriteListApp) and click OK.
2. Add four labels and textboxes to your WPF Designer surface, and then add three buttons. When
finished, the layout of your UI should look similar to Figure 5-14.
Table 5-7 shows the control type and the name of the controls that you should add to the WPF
application.
TABLE 57 Control Types for WPF Application
CONTROL TYPE CONTROL NAME
Label
lblSPUrl, lblProdName, lblProdSku, lblProdPrice
Textbox
txtbxURL, txtbxProdName, txtbxProdPrice, txtbxProdSKU
Button
btnAdd, btnClear, btnExit
FIGURE 513 WinForm application running
against a list
584637c05.indd 191 5/3/10 11:44:02 AM
192
CHAPTER 5 Programming against sharePoint 2010 Lists
FIGURE 514 WPF UI for writing data to list
The XAML code that maps to this UI will look like the following code snippet:
<Window x:Class=”SPWriteListApp.MainWindow”
xmlns=” /> xmlns:x=” /> Title=”SharePoint List Data” Height=”350” Width=”525”>
<Grid>
<Button
Content=”Add” Height=”23” HorizontalAlignment=”Left” Margin=
“70,240,0,0”
Name=”btnAdd” VerticalAlignment=”Top” Width=”75” Click=”btnAdd_Click” />
<Button
Content=”Clear” Height=”23” HorizontalAlignment=”Right” Margin=
“0,240,258,0”
Name=”btnClear” VerticalAlignment=”Top” Width=”75” Click=”btnClear_Click” />
<Label
Content=”SharePoint Site:” Height=”28” HorizontalAlignment=”Left” Margin=
“70,43,0,0”
Name=”lblSPUrl” VerticalAlignment=”Top” Width=”120” />
<Label
Content=”Product Name:” Height=”28” HorizontalAlignment=”Left” Margin=
584637c05.indd 192 5/3/10 11:44:02 AM
Programmatically Accessing Lists
193
“70,85,0,0”
Name=”lblProdName” VerticalAlignment=”Top” Width=”120” />
<Label
Content=”Product SKU:” Height=”28” HorizontalAlignment=”Left” Margin=
“70,129,0,0”
Name=”lblProdSku” VerticalAlignment=”Top” Width=”120” />
<Label
Content=”Product Price:” Height=”28” HorizontalAlignment=”Left” Margin=
“70,173,0,0”
Name=”lblProdPrice” VerticalAlignment=”Top” Width=”120” />
<TextBox
Height=”23” HorizontalAlignment=”Left” Margin=”206,43,0,0”
Name=”txtbxURL” VerticalAlignment=”Top” Width=”248” />
<TextBox
Height=”23” HorizontalAlignment=”Left” Margin=”206,90,0,0”
Name=”txtbxProdName” VerticalAlignment=”Top” Width=”248” />
<TextBox
Height=”23” HorizontalAlignment=”Left” Margin=”206,134,0,0”
Name=”txtbxProdSKU” VerticalAlignment=”Top” Width=”248” />
<TextBox
Height=”23” HorizontalAlignment=”Left” Margin=”206,173,0,0”
Name=”txtbxProdPrice” VerticalAlignment=”Top” Width=”248” />
<Button
Content=”Exit” Height=”23” HorizontalAlignment=”Left” Margin=”268,240,0,0”
Name=”btnExit” VerticalAlignment=”Top” Width=”75” Click=”btnExit_Click” />
</Grid>
</Window>
3. Before you begin coding using the new client object model, you must add the appropriate refer-
ences. To add these references, right-click the project and select Add Reference. Select the Browse
tab, and then browse to
c:\Program Files\Common Files\Microsoft Shared\Web Server
Extensions\14\ISAPI
and add the Microsoft.SharePoint.Client.dll and the Microsoft.
SharePoint.Client.Runtime.dll
to your project. After you’ve added these references, add the
following
using statements to your application:
using ClientOM = Microsoft.SharePoint.Client;
using Microsoft.SharePoint.Client;
4. After you’ve created the UI, you’ll want to add the event handlers to each of the buttons you’ve
added to the Designer surface. For the Clear and Exit buttons, this code is similar to earlier exam-
ples in this chapter. But the new code that you may not have seen before is the client object model
code that adds a new record to a list. This corresponds to the Add button in the WPF UI and is
shown here. You’ll first note that this code snippet is a slight improvement over the use of CAML
constructs to push data back into SharePoint. Note that it’s not because CAML goes away; it’s
because in this example SharePoint abstracts it away — it is now created dynamically.
In the following code snippet, the updating of the list leverages class-level variables that are set via the
data that users enter via the textboxes. Then, you use the
ClientContext object to set the context
of the SharePoint site (again leveraging the user entry from the
txtbxURL textbox). The code then
gets the list by name (that is,
Products) and loads the list in memory. After the list is in memory, you
584637c05.indd 193 5/3/10 11:44:02 AM