Beginning Game Programming (phần 5) potx
Bạn đang xem bản rút gọn của tài liệu. Xem và tải ngay bản đầy đủ của tài liệu tại đây (875.86 KB, 50 trang )
On Your Own
The following exercises will help to challenge your grasp of the information
presented in this chapter.
Exercise 1. The Trans_Sprite program animates a running cat on the screen.
Modify the program so that it uses a new background of your own design, and
change the animation rate of the cat sprite.
Exercise 2. The Tiled_Sprite program features a running caveman. Modify the
caveman’s movement rate and animation rate so that he runs really fast!
180 Chapter 8
n
Advanced Sprite Programming
Jamming with DirectX
Audio
Sound and music are vital parts of any game; they help to really make the game
feel more immersive and can add an enormous amount of emotion to a game.
There is just a completely different reaction to any type of game when it features
dynamic, powerful sound effects and appropriate background music. This
chapter will show you how to use DirectSound to audibly enhance a game and
give it some mood.
181
chapter 9
Here is what you will learn in this chapter:
n How to initialize DirectSound.
n How to load a wave file.
n How to play a static sound with mixing.
n How to play a looping sound with mixing.
Using DirectSound
DirectSound is the DirectX component that handles all sound output for your
game, and features a multi-channel sound mixer. Basically, you just tell
DirectSound to play a sound and it takes care of all the details (including
combining that sound with any currently playing sounds).
The code required to create, initialize, load, and play a wave file using Direct-
Sound is even more involved than the bitmap and sprite code you learned about
in the last several chapters. For this reason, and in the interest of re-inventing the
wheel, I will show you how to use Microsoft’s own wrapper for DirectSound.
Using a wrapper is generally against my own instincts as a programmer, as
I prefer to know everything about the code I’m using, and often prefer to write
my own rather than use someone else’s code. However, there comes a time when,
in the interest of time, you have to give in and use what’s already available. After
all, DirectX itself is a game library written by someone else, and it makes no sense
to adhere to a strict philosophy in game programming when all it does is slow
you down. It’s okay if you are writing mostly C, as I am doing in this book,
because once in a while you may be required to delve a little into C++ in order to
re-use code. In this case, we’ll use the DirectSound Utility classes–but I have
chosen not to go into detail on how they work. You might think of it as going
over an SDK, such as DirectX itself—there is a lot of code that you don’t
understand, but as long as it works, you can work on your game without wor-
rying about it.
The latest releases of the DirectX SDK provide a new version of the DirectSound
Utility library, called DXUTsound. We won’t be using this because it has too
many support files with it. Instead, we’ll use an older version that I hung onto
from a previous version of DirectX 9.0c. The old ‘‘DXUT’’ version of Direct-
Sound is found in a file called dsutil.cpp (and it depends on only dsutil.h and
182 Chapter 9
n
Jamming with DirectX Audio
dxutil.h, nothing more). You will need to include these three files in your game
projects in order to use the DirectSound wrapper.
Note
There is nothing wrong with using a wrapper when time is of the essence or when something is
too complicated for you to write yourself. If you would like to learn absolutely everything about
DirectX Audio, I recommend you acquire a copy of
Beginning Game Audio Programming
,by
Mason McCuskey (also published by Thomson Course Technology PTR). This book goes over every
detail of the DirectSound interfaces and shows you how to create a more robust and powerful
sound library for your game projects.
Note
Three files are required for the programs in this chapter to compile: dxutil.h, dsutil.h, and
dsutil.cpp. These files are available in the chapter09\play_sound project folder on the CD-ROM.
When you create any new project that uses sound, just include these three files with your project.
Later, when we create the dxaudio.cpp and dxaudio.h files, you’ll want to include those in any
new project you create as well. In the latest DirectX SDK, Microsoft is now distributing a new
version of these files under the new name of
DXUT
(which you can find in the DirectX SDK
Documentation for C++ in the Programs menu).
The new DXUT has many file dependencies that I did not want to include for our meager needs
here. So, I am using the DirectSound helper classes from the old version of the DXUT framework
library, as they are self-contained. Everything Microsoft touches becomes hopelessly complicated,
so it’s often easier to work with earlier versions of the code, as in this case.
There are three classes defined in dsutil that we’re interested in here:
Initializing DirectSound
The first thing to do in order to use DirectSound is create an instance of the
CSoundManager class (which creates an ‘‘object’’ of the ‘‘class’’).
CSoundManager *dsound = new CSoundManager();
The next step requires you to call the Initialize function to initialize the
DirectSound manager:
dsound->Initialize(window_handle, DSSCL_PRIORITY);
Using DirectSound 183
CSoundManager The primary DirectSound device.
CSound Used to create DirectSound buffers.
CWaveFile Helps load a wave file into a CSound buffer.
Thefirstparameteristhewindowhandleforyourprogram,whilethesecondparam-
eter specifies the DirectSound cooperative level, of which there are three choices:
DSSCL_NORMAL. Shares sound device with other programs.
DSSCL_PRIORITY. Gains higher priority over sound device (recommended for
games).
DSSCL_WRITEPRIMARY. Provides access to modify the primary sound buffer.
The most common cooperative level is DSSCL_PRIORITY, which gives your game a
higher priority on the sound device than other programs that may be running.
Creating a Sound Buffer
After you have initialized the DirectSound manager (via CSoundManager), you will
then usually load all of the sound effects for your game. You access sound effects
using
CSound pointer variables that are declared like this:
CSound *wave;
The CSound object that you create is a wrapper for a secondary sound buffer called
LPDIRECTSOUNDBUFFER8 that, thanks to dsutil, you do not need to program yourself.
Loading a Wave File
The sound mixer created and managed by DirectSound might be thought of as
the primary buffer for sound. Like Direct3D, the primary buffer is where output
occurs. But in the case of DirectSound, the secondary buffers are sound data rather
than bitmap data, and you play a sound by calling
Play (which I’ll go over shortly).
Loading a wave file into a DirectSound secondary buffer involves a simple single-
line function call rather than a multi-page code listing to initialize the sou nd
buffer, open the wave file, read it into memory, and configure all of the param-
eters. The
CSoundManager object that you create has the function you need to load
awavefile.Itiscalled
Create:
HRESULT Create(
CSound** ppSound,
LPTSTR strWaveFileName,
DWORD dwCreationFlags = 0,
GUID guid3DAlgorithm = GUID_NULL,
DWORD dwNumBuffers = 1
);
184 Chapter 9
n
Jamming with DirectX Audio
The first parameter specifies the CSound object that you want to use for the newly
loaded wave sound. The second parameter is the filename. The remaining
parameters can be left at their defaults, meaning you really only need to call this
function with two parameters. Here is an example:
result = dsound->Create(&wave, "snicker.wav");
Tip
Beginning Game Audio Programming
explains the wave file format and goes into extensive detail
on how to load a wave file from scratch.
Playing a Sound
You are free to play sounds as often as you want without worrying about the
sound mixing, ending the sound playback, or any other details, because
DirectSound itself handles all of those details for you. Within the
CSound class
itself is a function called
Play that will play the sound for you. Here is what that
function looks like:
HRESULT Play(
DWORD dwPriority = 0,
DWORD dwFlags = 0,
LONG lVolume = 0,
LONG lFrequency = -1,
LONG lPan = 0
);
The first parameter is the priority, which is an advanced option and should
always be set to zero. The second parameter specifies whether you want the sound
to loop, meaning that it will restart at the beginning and continue playing every
time it reaches the end of the wave data. If you want to play the sound with
looping, use
DSBPLAY_LOOPING for this parameter. The last three parameters
specify the volume, frequency, and panning (left to right) of the sound, which
are also usually left at their defaults, but you may experiment with them if you
wish.
Here is an example of how you would usually call this function, first with normal
playback. You can either fill in the parameters or leave them out entirely if you
want to use the defaults .
wave->Play();
Using DirectSound 185
And here is how you would use looping:
wave->Play(0, DSBPLAY_LOOPING);
To stop playback ofa sound while i t is playing, u se theStop function. This function is
particularly useful with looping sounds, which will go on forever unless you spe-
cifically stop or reset the sound by playing it again without the looping parameter.
HRESULT Stop();
An example usage of this function couldn’t be much simpler:
wave->Stop();
Testing DirectSound
Let’s write a simple demo to test the DirectSound code you have learned how to
write in this chapter. As DirectSound is an entirely new component, we need to add
it to the so-called ‘‘framework’’ by creating a new header and source code file for the
new code. I’ll show you how to create the project from scratch, add all the necessary
files, and type in the code for the new DirectSound functions you learned about
(but have yet to put into practice). After the basic project is ready to go, I’ll go over
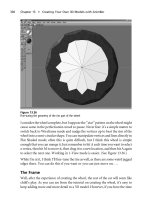
the code f or a sample program that bounces a hundred balls on the screen with
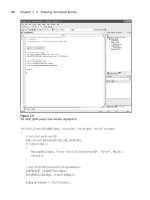
looping and static sound effects. The Play_Sound program is shown in Figure 9.1.
186 Chapter 9
n
Jamming with DirectX Audio
Figure 9.1
The Play_Sound program demonstrates how to use DirectSound.
Creating the Project
I’ll show you how to create this entire project from scratch. Although you can open
an existing project and modify it, I recommend you follow along and create one
from scratch because doing so is good practice and there are a lot of steps involved.
Fire up Visual C++. Open the File menu and select New to bring up the New dialog.
Make sure the Projects tab is selected. Choose Win32 Application for the project
type, and type Play_Sound for the project name. Click OK to close the dialog and
create the new project. As usual, don’t let Visual C++ add any files for you.
Copying the Reusable Source Files
Next, copy the support files from a previous project into the new folder that was
created for the project you just created. Here are the files you will need:
n winmain.cpp
n dxgraphics.h
n dxgraphics.cpp
n game.h
n game.cpp
The game.h and game.cpp files will be replaced with entirely new code, but it
doesn’t hurt to copy the files to your new project, as that’s easier than creating the
new files from the New dialog.
Copying the DirectSound Utility Files
The next step is somewhat annoying but it is necessary for using the dsutil
support classes, which, as you have learned, greatly simplifies the otherwise very
complex DirectSound library. There are three files that must be copied to your
project folder and added to your project:
n dxutil.h
n dsutil.h
n dsutil.cpp
Inserting the Copied Files into Your Project
After you have copied these files to your new project folder, you can add them to
your project in Visual C++ by opening the Project menu and selecting Add
Existing Item. This will bring up the Add Existing Item dialog shown in Figure 9.2.
Testing DirectSound 187
Following are listed all of the files that should have been copied to your new
project folder that you should select to insert into your project:
n winmain.cpp
n dxgraphics.h
n dxgraphics.cpp
n game.h
n game.cpp
n dsutil.cpp
n dxutil.h
n dsutil.h
188 Chapter 9
n
Jamming with DirectX Audio
Figure 9.2
Adding an existing file to the project.
Figure 9.3 shows all of the files selected in the file selection dialog.
You can verify that your project is configured correctly by referring to Figure 9.4,
which shows the Solution Explorer loaded with all of the necessary files.
Adding DirectX Library References
Next, let’s configure the project for the various DirectX libraries that are
required. Open the Project menu and select Properties to bring up the Project
Property Pages dialog. Select the Linker tree menu item on the left, and select the
Linker/Input page, shown in Figure 9.5.
Here are the lib filenames to add to the Additional Dependencies field on the
Project Property Pages dialog:
n d3d9.lib
n d3dx9.lib
n dsound.lib
n dxguid.lib
n dxerr9.lib
n winmm.lib
Testing DirectSound 189
Figure 9.3
Selecting the files to be inserted into the project.
190 Chapter 9
n
Jamming with DirectX Audio
Figure 9.5
Adding DirectX library references to the list of library modules in the Project Settings dialog.
Figure 9.4
The framework files have been added to the project.
That’s a long list of lib files for the project, but just think: it will get even longer
when you learn about DirectInput in the next chapter! Actually, we won’t be
adding many more files to the list.
But hang on a minute! Before you can compile this program, there are a few more
things that must be done first.
Creating the DirectX Audio Support Files
Your new Play_Sound project is now ready for the DirectSound code. I have put
together the DirectSound helper code we went over earlier in the chapter and
placed it inside two files:
n dxaudio.h
n dxaudio.cpp
The header file will include the definitions for the DirectSound functions you’ll
need to load and play sounds in your game. This just makes it easier to work with
the
CSoundManager and CSound classes (which are provided by the DirectSound
Utility library).
Creating dxaudio.h
Open the Project menu and select Add New Item to bring up the Add New Item
dialog. Select Header File (.h) and type dxaudio.h for the filename, as shown in
Figure 9.6. Click OK to add the new file to your project.
Here is the code for the dxaudio.h file:
#ifndef _DXAUDIO_H
#define _DXAUDIO_H 1
#include "dsutil.h"
//primary DirectSound object
extern CSoundManager *dsound;
//function prototypes
int Init_DirectSound(HWND);
CSound *LoadSound(char *);
void PlaySound(CSound *);
Testing DirectSound 191
void LoopSound(CSound *);
void StopSound(CSound *);
#endif
Creating dxaudio.cpp
Open the Project menu again and select Add New Item to bring up the Add New
Item dialog. Select C++ File (.cpp) and type dxaudio.cpp for the filename, as
shown in Figure 9.7. Click OK to add the new file to your project.
Here is the code for the dxaudio.cpp file:
#include "dxaudio.h"
CSoundManager *dsound;
int Init_DirectSound(HWND hwnd)
{
HRESULT result;
//create DirectSound manager object
dsound = new CSoundManager();
192 Chapter 9
n
Jamming with DirectX Audio
Figure 9.6
Adding the new dxaudio.h file to the project.
//initialize DirectSound
result = dsound->Initialize(hwnd, DSSCL_PRIORITY);
if (result != DS_OK)
return 0;
//set the primary buffer format
result = dsound->SetPrimaryBufferFormat(2, 22050, 16);
if (result != DS_OK)
return 0;
//return success
return 1;
}
CSound *LoadSound(char *filename)
{
HRESULT result;
//create local reference to wave data
CSound *wave;
//attempt to load the wave file
Testing DirectSound 193
Figure 9.7
Adding the new dxaudio.cpp file to the project.
result = dsound->Create(&wave, filename);
if (result != DS_OK)
return NULL;
//return the wave
return wave;
}
void PlaySound(CSound *sound)
{
sound->Play();
}
void LoopSound(CSound *sound)
{
sound->Play(0, DSBPLAY_LOOPING);
}
void StopSound(CSound *sound)
{
sound->Stop();
}
Tweaking the Framework Code
The next subject is more a matter of personal preference than it is a requirement.
I personally like to stuff as much logistical code away as possible and let the
‘‘framework’’ (I use that word loosely because it is not quite a wrapper and not
quite a game engine, but just a way of organizing the DirectX code) handle it. So,
you can follow this step to add the DirectSound initialization to
WinMain or you
can call the
Init_DirectSound function from your main initialization routine in
the game, instead. I prefer to add it to
WinMain, so here is how to do that.
Adding DirectSound Initialization to winmain.cpp
Open winmain.cpp in your project. Scroll down to the WinMain function until
you find the beginning of the
while loop, which looks like this:
// main message loop
int done = 0;
while (!done)
Just above that, you’ll see the Direct3D initialization and game initialization
code. You can insert the DirectSound initialization before or after either of those
two other initialization lines, as long as it comes before the
while loop.
194 Chapter 9
n
Jamming with DirectX Audio
//initialize DirectSound
if (!Init_DirectSound(hWnd))
{
MessageBox(hWnd, "Error initializing DirectSound", "Error", MB_OK);
return 0;
}
Note
If you ever get totally, completely, absolutely lost during the tutorial to create this project, feel free
to save yourself the headache and just load the project off the CD-ROM (which you should have
copied to your hard drive already, if you have been working through the examples in each
chapter).
Adding the Game Files
Okay, this has been quite a long process, but if you have followed along and
performed each step along the way, then you should now have a project that is
ready to compile. Unfortunately, the game.h and game.cpp files contain source
code from a previous project that has nothing to do with DirectSound! So,
conveniently, these files are already in your project—you just need to open them
up and replace the code.
game.h
Here is the code for the game.h file. Just delete all of the existing code and replace
it with the code listed here, or make selective replacements if you are relatively
sure you won’t make any mistakes. It’s usually safer to wipe all of the code lines,
but you can leave the conditional compiler statements in place (such as
#ifndef ).
#ifndef _GAME_H
#define _GAME_H 1
//windows/directx headers
#include <d3d9.h>
#include <d3dx9.h>
#include <dxerr9.h>
#include <dsound.h>
#include <windows.h>
#include <time.h>
#include <stdio.h>
#include <stdlib.h>
Testing DirectSound 195
//framework-specific headers
#include "dxgraphics.h"
#include "dxaudio.h"
//application title
#define APPTITLE "Play_Sound"
//screen setup
#define FULLSCREEN 0 //0 = windowed, 1 = fullscreen
#define SCREEN_WIDTH 640
#define SCREEN_HEIGHT 480
//macros to read the keyboard asynchronously
#define KEY_DOWN(vk_code) ((GetAsyncKeyState(vk_code) & 0x8000) ? 1 : 0)
#define KEY_UP(vk_code)((GetAsyncKeyState(vk_code) & 0x8000) ? 1 : 0)
//function prototypes
int Game_Init(HWND);
void Game_Run(HWND);
void Game_End(HWND);
//sprite structure
typedef struct {
int x,y;
int width,height;
int movex,movey;
int curframe,lastframe;
int animdelay,animcount;
int scalex, scaley;
int rotation, rotaterate;
} SPRITE;
#endif
game.cpp
You’ll also need to replace the code in game.cpp with the following code listing.
The projects are really completely different, so I don’t expect that you’ll be able to
just selectively replace the code with the listing given here. However, you can give
it a try if you wish. If all else fails, you can copy the completed game.cpp file off
the CD-ROM and insert it into the project, all ready to go.
196 Chapter 9
n
Jamming with DirectX Audio
#include "game.h"
//number of balls on the screen
#define NUMBALLS 100
//misc variables
LPDIRECT3DTEXTURE9 ball_image;
SPRITE balls[NUMBALLS];
LPDIRECT3DSURFACE9 back;
LPD3DXSPRITE sprite_handler;
HRESULT result;
//timing variable
long start = GetTickCount();
//the wave sound
CSound *sound_bounce;
CSound *sound_electric;
//initializes the game
int Game_Init(HWND hwnd)
{
int n;
//set random number seed
srand(time(NULL));
//create sprite handler object
result = D3DXCreateSprite(d3ddev, &sprite_handler);
if (result != D3D_OK)
return 0;
//load the background image
back = LoadSurface("background.bmp", NULL);
if (back == NULL)
return 0;
//load the ball sprite
ball_image = LoadTexture("ball.bmp", D3DCOLOR_XRGB(255,0,255));
if (ball_image == NULL)
return 0;
//set the balls’ properties
for (n=0; n<NUMBALLS; n+ +)
Testing DirectSound 197
{
balls[n].x = rand() % SCREEN_WIDTH;
balls[n].y = rand() % SCREEN_HEIGHT;
balls[n].width = 12;
balls[n].height = 12;
balls[n].movex = 1 + rand() % 6;
balls[n].movey = rand() % 12 - 6;
}
//load bounce wave file
sound_bounce = LoadSound("bounce.wav");
if (sound_bounce == NULL)
return 0;
//load the electric wave file
sound_electric = LoadSound("electric.wav");
if (sound_electric == NULL)
return 0;
//return okay
return 1;
}
//the main game loop
void Game_Run(HWND hwnd)
{
D3DXVECTOR3 position(0,0,0); //ball position vector
int n;
int playing = 0;
//make sure the Direct3D device is valid
if (d3ddev == NULL)
return;
//after short delay, ready for next frame?
//this keeps the game running at a steady frame rate
if (GetTickCount() - start >= 30)
{
//reset timing
start = GetTickCount();
//move the ball sprites
for (int n=0; n<NUMBALLS; n+ +)
198 Chapter 9
n
Jamming with DirectX Audio
{
balls[n].x += balls[n].movex;
balls[n].y += balls[n].movey;
//bounce the ball at screen edges
if (balls[n].x > SCREEN_WIDTH - balls[n].width)
{
balls[n].x -= balls[n].width;
balls[n].movex *= -1;
PlaySound(sound_bounce);
}
else if (balls[n].x < 0)
{
balls[n].x += balls[n].width;
balls[n].movex *= -1;
PlaySound(sound_bounce);
}
if (balls[n].y > SCREEN_HEIGHT - balls[n].height)
{
balls[n].y -= balls[n].height;
balls[n].movey *= -1;
PlaySound(sound_bounce);
}
else if (balls[n].y < 0)
{
balls[n].y += balls[n].height;
balls[n].movey *= -1;
PlaySound(sound_bounce);
}
}
}
//start rendering
if (d3ddev->BeginScene())
{
//erase the entire background
d3ddev->StretchRect(back, NULL, backbuffer, NULL, D3DTEXF_NONE);
//start sprite handler
sprite_handler->Begin(D3DXSPRITE_ALPHABLEND);
//draw the balls
for (n=0; n<NUMBALLS; n+ +)
Testing DirectSound 199
{
position.x = (float)balls[n].x;
position.y = (float)balls[n].y;
sprite_handler->Draw(
ball_image,
NULL,
NULL,
&position,
D3DCOLOR_XRGB(255,255,255));
}
//stop drawing
sprite_handler->End();
//stop rendering
d3ddev->EndScene();
}
//display the back buffer on the screen
d3ddev->Present(NULL, NULL, NULL, NULL);
//check for escape key (to exit program)
if (KEY_DOWN(VK_ESCAPE))
PostMessage(hwnd, WM_DESTROY, 0, 0);
//spacebar plays the electric sound
if (KEY_DOWN(VK_SPACE))
LoopSound(sound_electric);
//enter key stops the electric sound
if (KEY_DOWN(VK_RETURN))
StopSound(sound_electric);
}
//frees memory and cleans up before the game ends
void Game_End(HWND hwnd)
{
if (ball_image != NULL)
ball_image->Release();
if (back != NULL)
back->Release();
200 Chapter 9
n
Jamming with DirectX Audio
if (sprite_handler != NULL)
sprite_handler->Release();
if (sound_bounce != NULL)
delete sound_bounce;
if (sound_electric != NULL)
delete sound_electric;
}
Running the Program
When you run the program, you are presented with either a windowed or full-
screen display. I recommend running all of the sample programs in fullscreen
mode—refer to the setting in game.h that affects this:
#define FULLSCREEN 0 //0 = windowed, 1 = fullscreen
Figure 9.8 shows the output of the Play_Sound program.
Testing DirectSound 201
Figure 9.8
The Play_Sound program output.
When you run the program, be aware of how to start and stop the looping sound
(which sounds like electricity). Press the spacebar to start the looping sound, and
press Enter to stop the sound. All the while, the annoying balls are bouncing all
over the screen and making an uproar in the process!
What You Have Learned
This chapter explained how to use some relatively painless DirectSound support
routines included in the DirectX SDK to make DirectSound programming easier.
Here are the key points:
n You learned how to initialize the DirectSound object.
n You learned how to load a wave file into a sound buffer.
n You learned how to play and stop a sound, with or without looping.
n You learned a little bit about sound mixing.
n You got some practice working on a project with many files.
n You learned about the value of code re-use.
202 Chapter 9
n
Jamming with DirectX Audio
Review Questions
These questions will help to challenge your understanding of the chapter:
1. What is the name of the primary DirectSound class used in this chapter?
2. What is a secondary sound buffer?
3. What is the secondary sound buffer called in dsutil.h?
4. What is the option called that causes a sound to play with looping?
5. For reference, what is the name of the function that draws a surface to the
screen?
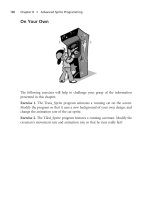
On Your Own
On Your Own 203
The following exercises will help you to think outside the box and push your
limits, which will increase your capacity for retention.
Exercise 1. The Play_Sound program played a sound effect every time a small ball
hit the edge of the screen. Modify the program so that it draws a different number
of balls of your choosing (instead of 100).
Exercise 2. The Play_Sound program plays just a single sound when a ball sprite
hits an edge. Modify the program by adding three more wave files, with asso-
ciated code to load them, so that when a ball strikes the top, left, right, or bottom
edge of the screen, it plays a different sound for each.
204 Chapter 9
n
Jamming with DirectX Audio