Wrox Beginning SharePoint 2010 Development phần 9 ppsx
Bạn đang xem bản rút gọn của tài liệu. Xem và tải ngay bản đầy đủ của tài liệu tại đây (2.68 MB, 50 trang )
ASP.NET Web Services
369
string ratingonProjURL = “ /> Pages/Home.aspx”;
string ratingonPlansURL = “ /> Pages/Home.aspx”;
SocialDataService mySocialDataService = new SocialDataService();
mySocialDataService.Credentials =
System.Net.CredentialCache.DefaultCredentials;
mySocialDataService.Url = “ /> _vti_bin/socialdataservice.asmx”;
SocialRatingDetail confWikiRating =
mySocialDataService.GetRatingOnUrl(ratingonConfURL);
SocialRatingDetail projWikiRating =
mySocialDataService.GetRatingOnUrl(ratingonProjURL);
SocialRatingDetail plansWikiRating =
mySocialDataService.GetRatingOnUrl(ratingonPlansURL);
addRatingsToWebPart(confWikiRating.Rating,
projWikiRating.Rating, plansWikiRating.Rating);
mySocialDataService.Dispose();
}
private void addRatingsToWebPart(int confRate, int projRate, int plansRate)
{
int avgRating = 0;
string confWiki = “Conference Wiki: “ + confRate.ToString();
string projWiki = “Project Wiki: “ + projRate.ToString();
string plansWiki = “Plans Wiki: “ + plansRate.ToString();
avgRating = (confRate + projRate + plansRate) / 3;
string avgRatingForWikis = “Average Rating: “ + avgRating.ToString();
lstbxRatingData.Items.Add(confWiki);
lstbxRatingData.Items.Add(projWiki);
lstbxRatingData.Items.Add(plansWiki);
lstbxRatingData.Items.Add(avgRatingForWikis);
lblData.Text = avgRating.ToString();
}
}
}
9. Amend the .webpart file to have a more intuitive title and description, such as shown here:
…
<properties>
<property name=”Title” type=”string”>Wiki Rating Web Part</property>
<property name=”Description” type=”string”>Web Part that displays
wiki rating data.</property>
</properties>
…
584637c10.indd 369 5/2/10 7:14:13 PM
370
CHAPTER 10 Developing Service-orienteD ApplicAtionS for ShArepoint 2010
10. Press F6 to build the project. When the project successfully builds, click Build Deploy Solution
to deploy the new Visual Web part to SharePoint.
11. Navigate to your SharePoint site. Create a new Web part page and
then click “Add a new web part.”
12. In the Custom category, select your newly created Web part and
click Add. When the Web part is added to the page, click the
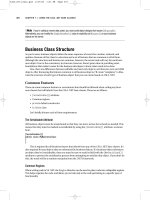
Refresh button. You should see the social data service load infor-
mation into the Web part, as shown in Figure 10-2.
How It Works
The Social Data Web service provides a set of Web methods to interact with SharePoint social data.
Note that your first step in using the Web service was creating a proxy, and then you set the credentials
and endpoint for the service proxy. In this example, you used the
GetRatingOnURL method to extract
the ratings you’d given your three wiki sites by passing the string URL in with the method call.
SocialRatingDetail confWikiRating = mySocialDataService.
GetRatingOnUrl(ratingonConfURL);
SocialRatingDetail projWikiRating = mySocialDataService.
GetRatingOnUrl(ratingonProjURL);
SocialRatingDetail plansWikiRating = mySocialDataService.
GetRatingOnUrl(ratingonPlansURL);
You also created a helper function to calculate the average ratings for the three different wikis, and passed
it the
Rating property, which is the property that is returned from the call to the GetratingOnURL method.
Note that you recast the
Rating properties into integer values before you calculated the average. After you
calculated the average rating using the three, you added the information to a listbox (
lstbxRatingData)
and set the
Text property of a label (lblData) so that it would contain the rating.
Custom ASP.NET Services
As a general practice, just as you should generally use the server-side object model for server-side
applications, you should equally leverage the services that ship with SharePoint 2010 when designing
service-based applications for SharePoint. This is because you don’t want to re-create the wheel, so to
speak, and it’s much easier for you to use the services that SharePoint natively understands. However,
there may be times when you want to create your own custom ASP.NET service. For example, you may
want to integrate Enterprise Resource Planning (ERP) data from disparate systems, or you may need to
create a connection to a legacy data in SQL. The end goal, therefore, would be to surface this data in
SharePoint. This is also very possible. Let’s take a look at an example.
The example you’ll build is a custom Web service that will retrieve data from a SQL database. It
will be a straightforward Web service that will illustrate how you can build a custom ASP.NET
Web service and then deploy it to IIS. However, what you’ll do in this example is also leverage the
Business Connectivity Services (BCS), one of the core new capabilities built into SharePoint 2010.
You learned about this in Chapter 8. However, in this example, you’ll use the BDC Metadata project
template in Visual Studio 2010 to call the service.
FIGURE 102 Wiki Rating
Web part
584637c10.indd 370 5/2/10 7:14:13 PM
ASP.NET Web Services
371
Integrating a Custom ASP.NET Service with BCSTRY IT OUT
Code file [SalesBDCModel.zip] available for download at Wrox.com.
The BDC Metadata model is a great way to model external data and create an external list using the
new BCS in SharePoint 2010. The process of creating a model is equally compelling when you use a
Web service to integrate external data from SharePoint into the external list. To create an external list
using a custom Web service, follow these steps:
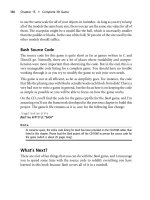
1. Create a new SQL Server database called Sales. To do this, open SQL Server 2008 (or 2005), and
right-click the Database node. Select New Database. In design view, create five columns, as shown
in Figure 10-3.
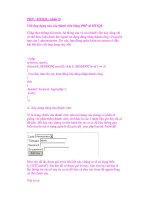
2. After you’ve finished creating the database, save it with the name Sales, and then add some sample
data to the table, as shown in Figure 10-4.
3. With the database complete, open Visual Studio 2010 and select File New. Select the Web cate-
gory. Within the Web category, select ASP.NET Web Service. Provide a name for your service, and
then click OK.
4. Click Data New Data Source. In the Data options, select Data Model and click OK.
5. In the Data Connection Wizard, select New Connection.
6. When prompted in the Data Connection Wizard, provide your server name information, and then
click the
Sales database you just created. Select the table you created in the wizard, and then click
Finish.
7. Visual Studio adds the new entity data model from your database to the solution, which you can
then use in your service.
8. Before you start working with the service code, you’ll need a custom object. To add this, right-click
the project and select Add Class. Call the new class
SalesObject, and then add the following
bolded code to the newly added class. Note that, because you allowed nulls in your database, you
need to add a
? when declaring each of the class variables.
using System;
using System.Collections.Generic;
using System.Linq;
using System.Web;
namespace MySalesService
{
public class SalesObject
FIGURE 103 Creating data in
SQL Server
FIGURE 104 Sales data
584637c10.indd 371 5/2/10 7:14:13 PM
372
CHAPTER 10 Developing Service-orienteD ApplicAtionS for ShArepoint 2010
{
public int companyID { get; set; }
public string companyName { get; set; }
public int? fy08Sales { get; set; }
public int? fy09Sales { get; set; }
public int? fy10Sales { get; set; }
}
}
9. Right-click the Service.cs file and select View Code. Replace the existing Hello World service
code with the following bolded code in the
Service.cs file. This will be the core code that will
execute when your service is called.
using System;
using System.Collections.Generic;
using System.Linq;
using System.Web;
using System.Web.Services;
namespace MySalesService
{
[WebService(Namespace = “ /> [WebServiceBinding(ConformsTo = WsiProfiles.BasicProfile1_1)]
[System.ComponentModel.ToolboxItem(false)]
public class Service1 : System.Web.Services.WebService
{
SalesEntities mySalesData = new SalesEntities();
List<SalesObject> mySalesList = new List<SalesObject>();
[WebMethod]
public List<SalesObject> getAllSalesData()
{
var returnSalesData = (from sales in mySalesData.Sales_Data
select sales).ToArray();
foreach (var s in returnSalesData)
{
SalesObject tempSales = new SalesObject();
tempSales.companyID = s.CompanyID;
tempSales.companyName = s.CompanyName.ToString();
tempSales.fy08Sales = s.FY08Sales;
tempSales.fy09Sales = s.FY09Sales;
tempSales.fy10Sales = s.FY10Sales;
mySalesList.Add(tempSales);
};
return mySalesList;
}
[WebMethod]
public string[] getSpecificSale(int companyID)
{
584637c10.indd 372 5/2/10 7:14:13 PM
ASP.NET Web Services
373
string[] mySalesInfo = new string[5];
var returnSpecificSalesItem = (from sales in mySalesData.Sales_Data
.Where(x => x.CompanyID == companyID)
select sales);
foreach (var s in returnSpecificSalesItem)
{
mySalesInfo[0] = s.CompanyID.ToString();
mySalesInfo[1] = s.CompanyName.ToString();
mySalesInfo[2] = s.FY08Sales.ToString();
mySalesInfo[3] = s.FY09Sales.ToString();
mySalesInfo[4] = s.FY10Sales.ToString();
}
return mySalesInfo;
}
}
}
10. At this point, you can press F5 to test the service code.
11. You should now be able to click each of the Web methods in your new service to execute the code,
as shown in Figure 10-5. The code will retrieve all of the items (
getAllSalesItems), or get one
item if you enter an ID (
getSpecificSale). Test both of the methods to ensure that they work.
FIGURE 105 Web service page
584637c10.indd 373 5/2/10 7:14:14 PM
374
CHAPTER 10 Developing Service-orienteD ApplicAtionS for ShArepoint 2010
12. You’ll now want to deploy the service. To do this, create a new folder on your local drive using a
name you’ll remember (for example,
SalesService). Then, right-click the Web service project and
select Publish. Select the Local File System option, navigate to the newly created folder, and then
click Publish. You are now ready to create a new Web site in IIS, which will use the published Web
service to this folder.
13. Open IIS and navigate to the Sites folder. Right-click the Sites node and select New Web Site.
Provide a name for the site (for example,
SPWebService). Navigate to the new folder you created
in Step 12 to map a virtual directory to the new Web site.
14. To test the service, use a local account. To do this, click Connections Use Custom Account.
Provide a local system account that has system-wide access to the machine and SQL Server (for
example,
administrator). Click Test Connection to ensure that you are successfully authenticated
when calling the service. (Note that when you deploy the service, you would use another type of
account set up by your administrator that enables applications or users to call this service within a
specific security protocol.)
15. When you’ve configured the security, click the Content tab. Then right-click the Service1.asmx file
and select Browse. You should see the same service definition page as you did when you tested your
service from within Visual Studio. However, the URL may be different. This is the URL you will use
when implementing the service. Test the service Web methods to ensure that they work properly.
16. Now that you’ve created, tested, and deployed your Web service to IIS, you are ready to consume the
custom ASP.NET Web service in a SharePoint application. To do this, open Visual Studio, click File
New Project, and select the SharePoint 2010 node. In the SharePoint 2010 node, select the BDC
Metadata Model project template. Provide a name (for example,
SalesBDCModel), and click OK.
17. Visual Studio will create a new project for you with a number of default objects in the solution.
The goal for using this project will be to model an external list (which uses BCS) using the custom
Web service and then deploy the service to SharePoint as an external list.
18. Right-click the Entity1.cs file, and select View Code. Using the following bolded code, amend the
Entity1 class to map to the data structure from your database:
using System;
using System.Collections.Generic;
using System.Linq;
using System.Text;
namespace SalesBDCModel.BdcModel1
{
public partial class Entity1
{
public int Identifier1 { get; set; }
public string bdcCompanyName { get; set; }
public int bdcFY08Sales { get; set; }
public int bdcFY09Sales { get; set; }
public int bdcFY10Sales { get; set; }
}
}
584637c10.indd 374 5/2/10 7:14:14 PM
ASP.NET Web Services
375
19. When you are finished, you’ll need to amend the code Entity1Service code, which executes
the methods for your external list. For example, the
ReadItem method uses the id parameter to
load a specific list item, and the
ReadList method loads all of the list items. The goal, though,
is for you to load a specific item or list of items using the custom ASP.NET service. Amend the
Entity1Service.cs file using the following bolded code:
using System;
using System.Collections.Generic;
using System.Linq;
using System.Text;
using SalesBDCModel.SPSalesWebService;
namespace SalesBDCModel.BdcModel1
{
public class Entity1Service
{
public static Entity1 ReadItem(int id)
{
SPSalesWebService.Service1 myWSProxy = new Service1();
string[] returnedData = new string[5];
returnedData = myWSProxy.getSpecificSale(id).ToArray();
Entity1 entity1 = new Entity1();
entity1.Identifier1 = id;
entity1.bdcCompanyName = returnedData[1];
entity1.bdcFY08Sales = Int32.Parse(returnedData[2]);
entity1.bdcFY09Sales = Int32.Parse(returnedData[3]);
entity1.bdcFY10Sales = Int32.Parse(returnedData[4]);
myWSProxy.Dispose();
return entity1;
}
public static List<Entity1> ReadList()
{
List<Entity1> mySalesInfoList = new List<Entity1>();
SPSalesWebService.Service1 myWSProxy = new Service1();
var salesData = myWSProxy.getAllSalesData();
foreach (var item in salesData)
{
Entity1 tempEntity = new Entity1();
tempEntity.Identifier1 = item.companyID;
tempEntity.bdcCompanyName = item.companyName.ToString();
tempEntity.bdcFY08Sales = item.fy08Sales;
tempEntity.bdcFY09Sales = item.fy09Sales;
tempEntity.bdcFY10Sales = item.fy10Sales;
mySalesInfoList.Add(tempEntity);
}
myWSProxy.Dispose();
return mySalesInfoList;
584637c10.indd 375 5/2/10 7:14:14 PM
376
CHAPTER 10 Developing Service-orienteD ApplicAtionS for ShArepoint 2010
}
}
}
20. The final step in this custom solution is to ensure that the BDC model (the .bdml file) maps to the
data that will be returned from the Web service call — essentially the properties in the
Entity1
object. To do this, double-click the BDC Explorer in the Solution Explorer and then amend the
TyepDescriptors (think of these as the individual data elements within your model — for exam-
ple,
Identifier1, bdcCompanyName, and so on) within the BDC model under the Entity1 node.
Specifically, ensure that, under the
ReadItem node, the id includes a TypeDescriptor called
Identifier1 (System.Int32), and the Entity1 node under the returnParameter node includes
bdcCompanyName (System.String), bdcFY08Sales (System.Int32), bdcFY09Sales (System.
Int32
), bdcFY10Sales (System.Int32), and Identifer1 (System.Int32). Table 10-1 summa-
rizes the
TypeDescriptors and type names for the ReadItem method.
TABLE 101 TypeDescriptor and Type Name
TYPEDESCRIPTOR TYPE NAME
Identifer1 (id)
System.Int32
bdcCompanyName
(Entity1)
System.String
FY08Sales
(Entity1)
System.Int32
FY09Sales
(Entity1)
System.Int32
FY10Sales
(Entity1)
System.Int32
Identifier1
(Entity1)
System.Int32
Then, under the ReadList node, ensure that the Entity1 node (under the EntityList and
returnParameter nodes) includes the same TypeDescriptors as you had under the returnPa-
rameter
in the ReadItem method. In fact, you can copy and paste the Entity1 node from the
ReadItem method to the ReadList method. Table 10-2 summarizes the TypeDescriptors and
type names for the
ReadList method.
TABLE 102 TypeDescriptor and Type Name
TYPEDESCRIPTOR TYPE NAME
bdcCompanyName (Entity1)
System.String
FY08Sales
(Entity1)
System.Int32
FY09Sales
(Entity1)
System.Int32
FY10Sales
(Entity1)
System.Int32
Identifier1
(Entity1)
System.Int32
584637c10.indd 376 5/2/10 7:14:14 PM
ASP.NET Web Services
377
When you’ve finished amending the structure of the BDC model, it should look like Figure 10-6.
It is important that you model these correctly or else the external list will not be created properly
because the data and data types will be incorrectly mapped.
FIGURE 106 Amending the BDC Explorer
21. You can now save and build your project. When the project successfully builds, click Build
Deploy to deploy the new external list to SharePoint.
22. When deployed, open SharePoint and click Site Actions View All Site Content.
23. Click Create Lists External List. Click Create and then provide a name and description.
Because Visual Studio deployed the BDC Metadata model to SharePoint, you can click the Browse
button and then select the model you just deployed to SharePoint. When finished, click OK.
24. By default, SharePoint opens the external list after you click OK, as shown in Figure 10-7.
FIGURE 107 External list using the Web service
584637c10.indd 377 5/2/10 7:14:14 PM
378
CHAPTER 10 Developing Service-orienteD ApplicAtionS for ShArepoint 2010
How It Works
In this walkthrough, you did a number of things. First, you created your data object (that is, the Sales
database in SQL Server). Second, you created a service to interact with that data in two ways: to get all
of the data and to get a specific item within the table. To accomplish this, you created a method called
getAllSalesData and another method called getSpecificSale.
The first method returned a
List collection (mySalesList) of a custom object you created
(
SalesObject). The second method used an integer input parameter (companyID) as a filter to find the
specific record within the database and then converted that to an array (
mySalesInfo) to return to any
client application.
After you finished creating the service, you deployed the service to IIS by creating a Web site in IIS
and pointing the virtual directory of the Web site to the published Web service. Lastly, you created a
SharePoint application that then called the Web service to populate an external list and display one of
the records.
When the external list loads, it is calling the
ReadList method, which, in turn, calls your Web service
and loads the data from the external data system (in this case, it was SQL Server). If you click a par-
ticular item, this calls the
ReadItem method and retrieves the specific list item using the id (which is
the
Identifier1 column).
The walkthrough was an advanced example of how you can integrate Web services with BCS.
However, this is a very powerful integration, because, once you get the external data into your external
list, you can then use the SharePoint client object model to further interact with that data. This means
creating dynamic Silverlight applications, for example, against the external list that leverages the cus-
tom Web service.
WCF WEB SERVICES
WCF is another type of Web service that is supported in SharePoint 2010. Used more frequently
these days, WCF was designed to a set of standards that enables developers to build service-oriented
applications to support distributed computing.
WCF follows architectural principles similar to those of ASP.NET Web services — that is,
there is a client and server, and the service is hosted. Client applications can consume one
or more WCF services, and services will typically have a WSDL interface. WCF also imple-
ments a number of more advanced service standards, such as WS-Addressing, WS-Security, and
WS-ReliableMessaging — which makes it a more robust, flexible and secure option than its ASP.
NET counterpart.
A WCF service has three main parts:
A
service class, which is the core code that executes the service
The
hosting mechanism
The
endpoint to the service to which the client application will connect
584637c10.indd 378 5/2/10 7:14:14 PM
WCF Web Services
379
The endpoints specify a contract that defines the methods of the service class. They also define a
binding that specifies how a client will communicate with the service, and the address where the
endpoint is hosted. Thus, while a service in WCF may (from an execution perspective) perform the
exact same function as its ASP.NET counterpart, there are a number of syntactical and structural
differences between them that make them slightly more complex to write, but, overall, more robust,
flexible, and secure.
One of the key innovations in SharePoint 2010 is that it offers native support for WCF. This means
that you can either deploy a custom WCF service to IIS, or you can deploy it into the SharePoint root.
You should note that you can also self-host WCF services using the
ServiceHost class. When a client
application connects to the hosted WCF service, it does so using the endpoint that is defined within the
service — essentially a URL specifying where the methods of the service can be accessed.
NOTE For more general information on WCF, go to rosoft
.com/en-us/library/ms735119.aspx
.
SharePoint 2010 offers a number of new WCF services. For example, one WCF service that was
discussed earlier in the book was the
Listdata.svc service — a WCF service that provides
WCF Data Services–based interaction with list data. There have also been some other addi-
tions to SharePoint, including administrative services (
BdcAdminService.svc), BDC services
(
BdcRemoteExecutionService.svc and BDCResolverPickerService.svc), and other stor-
age, client accessibility, and security services (for example,
CellStorage.svc, Client.svc,
and
spclaimproviderwebservice.svc). (See the "SharePoint 2010 Class Libraries and Web
Services" MSDN site mentioned earlier to get more information.)
Of specific interest in this section is the use of custom WCF services for SharePoint 2010. To illus-
trate how you can create and implement a WCF service, you will leverage the database you created
earlier in the chapter and build a WCF service that reads and writes data to the SQL database using
a custom WCF service.
Integrating a Custom WCF Service with SharePointTRY IT OUT
Code files [GetSPSalesRecord.zip and AddSalesRecordWebPart.zip] available for download at Wrox.com.
WCF services can be used in many different ways. To create a custom WCF service and leverage that
service in SharePoint, follow these steps:
1. Open Visual Studio 2010 and click File New. Under WCF, click WCF Service Application.
Provide a name for the project (for example,
GetSPSalesData) and click OK.
2. Click Data Add a New Data Source. Use the same process that you did earlier in the chapter to
add the
Sales database as an entity data model to the Visual Studio solution.
3. After you finish adding the Sales database, right-click the project and select Add Class. Call the
class
SalesObject, and then add the following bolded code to the new class:
using System;
using System.Collections.Generic;
584637c10.indd 379 5/2/10 7:14:14 PM
380
CHAPTER 10 Developing Service-orienteD ApplicAtionS for ShArepoint 2010
using System.Linq;
using System.Text;
namespace AddSalesRecordWebPart
{
class SalesObject
{
public int companyID { get; set; }
public string companyName { get; set; }
public int? fy08Sales { get; set; }
public int? fy09Sales { get; set; }
public int? fy10Sales { get; set; }
}
}
4. Open the Service1.svc file and amend the file, using the following bolded code:
using System;
using System.Collections.Generic;
using System.Linq;
using System.Runtime.Serialization;
using System.ServiceModel;
using System.ServiceModel.Web;
using System.Text;
namespace GetSPSalesData
{
public class Service1 : IService1
{
SalesEntities mySalesData = new SalesEntities();
List<SalesObject> mySalesList = new List<SalesObject>();
public List<SalesObject> getAllSalesData()
{
var returnSalesData = (from sales in mySalesData.Sales_Data
select sales).ToArray();
foreach (var s in returnSalesData)
{
SalesObject tempSales = new SalesObject();
tempSales.companyID = s.CompanyID;
tempSales.companyName = s.CompanyName.ToString();
tempSales.fy08Sales = s.FY08Sales;
tempSales.fy09Sales = s.FY09Sales;
tempSales.fy10Sales = s.FY10Sales;
mySalesList.Add(tempSales);
};
return mySalesList;
}
public void addSalesRecord(int paramCompanyID, string paramCompanyName,
int paramFY08Sales, int paramFY09Sales, int paramFY10Sales)
{
SalesObject newRecord = new SalesObject()
{
584637c10.indd 380 5/2/10 7:14:14 PM
WCF Web Services
381
companyID = paramCompanyID,
companyName = paramCompanyName,
fy08Sales = paramFY08Sales,
fy09Sales = paramFY09Sales,
fy10Sales = paramFY10Sales,
};
Sales_Data myNewSalesRecord = new Sales_Data();
using (SalesEntities dataContext = new SalesEntities())
{
myNewSalesRecord.CompanyID = newRecord.companyID;
myNewSalesRecord.CompanyName = newRecord.companyName;
myNewSalesRecord.FY08Sales = newRecord.fy08Sales;
myNewSalesRecord.FY09Sales = newRecord.fy09Sales;
myNewSalesRecord.FY10Sales = newRecord.fy10Sales;
dataContext.AddToSales_Data(myNewSalesRecord);
dataContext.SaveChanges();
}
}
}
}
5. Open the IService1.cs file and ensure that the following bolded code replaces the default code.
(This is your service contract that must map to the two methods you have in your service code.)
using System;
using System.Collections.Generic;
using System.Linq;
using System.Runtime.Serialization;
using System.ServiceModel;
using System.ServiceModel.Web;
using System.Text;
namespace GetSPSalesData
{
[ServiceContract]
public interface IService1
{
[OperationContract]
List<SalesObject> getAllSalesData();
[OperationContract]
void addSalesRecord(
int paramCompanyID,
string paramCompanyName,
int paramFY08Sales,
int paramFY09Sales,
int paramFY10Sales);
}
}
6. You have now completed the custom WCF service. Press F5 to build and test the service.
584637c10.indd 381 5/2/10 7:14:14 PM
382
CHAPTER 10 Developing Service-orienteD ApplicAtionS for ShArepoint 2010
7. After the test page invokes, you can now deploy the service to IIS the same way you published and
deployed the ASP.NET service to IIS. To do this, create a new folder on your local server drive (for
example,
c:\Wrox\MyWCFService), publish the solution to that folder, create a new Web site in
IIS, and then point the virtual directory to that newly published folder and code.
8. Before you can use the WCF service in SharePoint, however, there is another configuration step
that is required. If you open the WCF service project, you’ll see a
web.config file, which con-
tains all of your WCF service configurations. WCF provides more granular and flexible control
over your Web service settings, and you can use the
web.config file to configure many service
settings. To enable the service in SharePoint, you must copy and paste the Service Model settings
in your
web.config file into your SharePoint site’s web.config file. This way, when SharePoint
uses the endpoint URL, it understands the bindings and other properties defined in the
config
file it needs to use to properly handle the WCF service.
To find the specific elements you need to copy, double-click the
web.config file in the Visual
Studio project, and then copy all of the code between the
system.serviceModel tags from the
web.config file in the Visual Studio project and add it to the appropriate places in the SharePoint
web.config file. You can typically find the SharePoint web.config file in the following directory:
c:\inetpub\wwwroot\wss\VirtualDirectories\<SharePoint_Server>\. The following code
snippet shows the copied
system.serviceModel elements within the SharePoint web.config file.
…
<system.serviceModel>
<serviceHostingEnvironment aspNetCompatibilityEnabled=”true” />
<bindings>
<basicHttpBinding>
<binding name=”projectBasicHttpConf” closeTimeout=”00:01:00”
openTimeout=”00:01:00” receiveTimeout=”00:10:00”
sendTimeout=”00:01:00” allowCookies=”true”
maxBufferSize=”4194304” maxReceivedMessageSize=”500000000”
messageEncoding=”Text” transferMode=”StreamedResponse”>
<security mode=”TransportCredentialOnly”>
<transport clientCredentialType=”Windows”
proxyCredentialType=”Windows” realm=”“ />
</security>
</binding>
</basicHttpBinding>
<wsHttpBinding>
<binding name=”WSHttpBinding_IService1” closeTimeout=”00:01:00”
openTimeout=”00:01:00” receiveTimeout=”00:10:00”
sendTimeout=”00:01:00”
bypassProxyOnLocal=”false” transactionFlow=”false”
hostNameComparisonMode=”StrongWildcard”
maxBufferPoolSize=”524288” maxReceivedMessageSize=”65536”
messageEncoding=”Text” textEncoding=”utf-8”
useDefaultWebProxy=”true”
allowCookies=”false”>
<readerQuotas maxDepth=”32” maxStringContentLength=”8192”
maxArrayLength=”16384”
maxBytesPerRead=”4096” maxNameTableCharCount=”16384” />
<reliableSession ordered=”true” inactivityTimeout=”00:10:00”
enabled=”false” />
<security mode=”Message”>
584637c10.indd 382 5/2/10 7:14:14 PM
WCF Web Services
383
<transport clientCredentialType=”Windows”
proxyCredentialType=”None”
realm=”“ />
<message clientCredentialType=”Windows”
negotiateServiceCredential=”true”
algorithmSuite=”Default” />
</security>
</binding>
</wsHttpBinding>
</bindings>
<client>
<endpoint address=”:1122/Service1.svc”
binding=”wsHttpBinding” bindingConfiguration=
“WSHttpBinding_IService1”
contract=”SalesWCFService.IService1” name=”WSHttpBinding_IService1”>
<identity>
<dns value=”localhost” />
</identity>
</endpoint>
</client>
</system.serviceModel>
…
9. With the service deployed and SharePoint’s web.config file now configured, you are ready to
use the service in a SharePoint application. To test the service from IIS, right-click the service in
Content view, and then select Browse. When the service page loads, navigate to
Service1.svc and
copy the URL from the Internet browser.
10. Open Visual Studio, create a new Empty SharePoint project, provide a name for it (for example,
AddSalesDataRecordWebPart) and click OK. Right-click the project when created, then click
Add New Item, and add a Web Part project to it. Provide a name for the Web part (for example,
SalesRecordWebPart) and click Add.
11. Add a reference to the URL by right-clicking the References node and clicking Add Service
Reference. Copy the IIS URL into the URL field, and click Go. When the endpoint is loaded into
the Service Reference dialog, provide a name for the service and click Add.
12. Right-click the main Web part class file and click View Code. Add the following bolded code to the
main Web part class file:
using System;
using System.ComponentModel;
using System.Web;
using System.Web.UI;
using System.Web.UI.WebControls;
using System.Web.UI.WebControls.WebParts;
using Microsoft.SharePoint;
using Microsoft.SharePoint.WebControls;
using System.Text;
namespace AddSalesRecordWebPart.SalesRecordWebPart
{
[ToolboxItemAttribute(false)]
public class SalesRecordWebPart : WebPart
584637c10.indd 383 5/2/10 7:14:14 PM
384
CHAPTER 10 Developing Service-orienteD ApplicAtionS for ShArepoint 2010
{
DataGrid datagrdSalesView = new DataGrid();
TextBox txtbxCompanyID = new TextBox();
TextBox txtbxCompanyName = new TextBox();
TextBox txtbxFY08Sales = new TextBox();
TextBox txtbxFY09Sales = new TextBox();
TextBox txtbxFY10Sales = new TextBox();
Button btnLoad = new Button();
Button btnGet = new Button();
protected override void Render(HtmlTextWriter writer)
{
txtbxCompanyID.Enabled = true;
txtbxCompanyName.Enabled = true;
txtbxFY08Sales.Enabled = true;
txtbxFY09Sales.Enabled = true;
txtbxFY10Sales.Enabled = true;
btnLoad.Text = “Add”;
btnGet.Text = “Get”;
writer.Write(“<table><tr>”);
writer.Write(“<td><b>Sales Information</b></td><td></td></tr>”);
writer.Write(“<tr><td>Sales Data:</td><td>”);
datagrdSalesView.RenderControl(writer);
writer.Write(“</td></tr><tr><td>Company ID:</td><td>”);
txtbxCompanyID.RenderControl(writer);
writer.Write(“</td></tr><tr><td>Company Name:</td><td>”);
txtbxCompanyName.RenderControl(writer);
writer.Write(“</td></tr><tr><td>FY 08 Sales:</td><td>”);
txtbxFY08Sales.RenderControl(writer);
writer.Write(“</td></tr><tr><td>FY 09 Sales:</td><td>”);
txtbxFY09Sales.RenderControl(writer);
writer.Write(“</td></tr><tr><td>FY 10 Sales:</td><td>”);
txtbxFY10Sales.RenderControl(writer);
writer.Write(“</td></tr><tr><td>”);
btnGet.RenderControl(writer);
writer.Write(“</td><td>”);
btnLoad.RenderControl(writer);
writer.Write(“</td></tr></table>”);
btnLoad.Click += new EventHandler(btnLoad_Click);
btnGet.Click += new EventHandler(btnGet_Click);
}
void btnGet_Click(object sender, EventArgs e)
{
SalesWCFService.Service1Client proxy =
new SalesWCFService.Service1Client();
var salesData = proxy.getAllSalesData();
List<SalesObject> mySalesInfoList = new List<SalesObject>();
foreach (var item in salesData)
584637c10.indd 384 5/2/10 7:14:14 PM
WCF Web Services
385
{
SalesObject tempEntity = new SalesObject();
tempEntity.companyID = item.companyID;
tempEntity.companyName = item.companyName.ToString();
tempEntity.fy08Sales = item.fy08Sales;
tempEntity.fy09Sales = item.fy09Sales;
tempEntity.fy10Sales = item.fy10Sales;
mySalesInfoList.Add(tempEntity);
}
datagrdSalesView.DataSource = mySalesInfoList;
datagrdSalesView.DataBind();
}
void btnLoad_Click(object sender, EventArgs e)
{
int companyID = Int32.Parse(txtbxCompanyID.Text);
string companyName = txtbxCompanyName.Text;
int fy08Sales = Int32.Parse(txtbxFY08Sales.Text);
int fy09Sales = Int32.Parse(txtbxFY09Sales.Text);
int fy10Sales = Int32.Parse(txtbxFY10Sales.Text);
SalesWCFService.Service1Client proxy =
new SalesWCFService.Service1Client();
proxy.addSalesRecord(companyID, companyName, fy08Sales,
fy09Sales, fy10Sales);
}
}
}
13. When finished, click Build Deploy to deploy the Web part to
SharePoint.
14. After the Web part successfully builds, navigate to SharePoint
and either use an existing page or create a new Web part page,
and click “Add a new Web part.”
15. Select the Custom category, and add the new Web part you just
created. Click
Get to invoke the one Web method within your
custom WCF service. Then, add some data and click
Add to add
some data to the SQL database via your WCF service. The result
should look similar to Figure 10-8.
How It Works
In much the same way that you created an ASP.NET Web service and then consumed it in an applica-
tion, you walked through a similar process here using a custom WCF service. However, there were
some differences this time, even though you used the same database in your service code.
First, your service code included the capability to add a record this time, as opposed to just retrieving data
(
addSalesRecord). In this method, you passed a number of parameters that you would eventually insert
FIGURE 108 Sales Web part
584637c10.indd 385 5/2/10 7:14:14 PM
386
CHAPTER 10 Developing Service-orienteD ApplicAtionS for ShArepoint 2010
as a record. To do this, you created a new object, and then, using the database data context, you added an
instance of the object to the database and saved the changes by calling the
SaveChanges method.
public void addSalesRecord(int paramCompanyID, string paramCompanyName,
int paramFY08Sales, int paramFY09Sales, int paramFY10Sales)
{
SalesObject newRecord = new SalesObject()
{
companyID = paramCompanyID,
companyName = paramCompanyName,
fy08Sales = paramFY08Sales,
fy09Sales = paramFY09Sales,
fy10Sales = paramFY10Sales,
};
Sales_Data myNewSalesRecord = new Sales_Data();
using (SalesEntities dataContext = new SalesEntities())
{
myNewSalesRecord.CompanyID = newRecord.companyID;
myNewSalesRecord.CompanyName = newRecord.companyName;
myNewSalesRecord.FY08Sales = newRecord.fy08Sales;
myNewSalesRecord.FY09Sales = newRecord.fy09Sales;
myNewSalesRecord.FY10Sales = newRecord.fy10Sales;
dataContext.AddToSales_Data(myNewSalesRecord);
dataContext.SaveChanges();
}
}
Second, you added some configuration information to the SharePoint web.config file after deploying
the WCF service. While this does make for an extra step in the development and deployment process, it
does provide more granular control over the security and bindings for your services — and is very much
typical of a WCF service. However, remember that what you need is typically created in your
web.con-
fig
file (unless you want to further customize the configuration settings).
Lastly, instead of using BCS (and the BDC Metadata model), you used the Visual Web part as your cli-
ent application. In this case, implementing the service was fairly straightforward and only required that
you call the
addSalesRecord method and pass in a number of variables — which the user entered into
the textboxes.
void btnLoad_Click(object sender, EventArgs e)
{
int companyID = Int32.Parse(txtbxCompanyID.Text);
string companyName = txtbxCompanyName.Text;
int fy08Sales = Int32.Parse(txtbxFY08Sales.Text);
int fy09Sales = Int32.Parse(txtbxFY09Sales.Text);
int fy10Sales = Int32.Parse(txtbxFY10Sales.Text);
SalesWCFService.Service1Client proxy =
new SalesWCFService.Service1Client();
proxy.addSalesRecord(companyID, companyName, fy08Sales,
fy09Sales, fy10Sales);
}
584637c10.indd 386 5/2/10 7:14:15 PM
RESTful Web Services
387
The example in this exercise deployed the WCF service to IIS, so when you created your client appli-
cation, it was calling the service from IIS. However, in SharePoint 2010, you can equally deploy a
WCF service to the SharePoint root (that is, the
ISAPI folder). The way in which you would deploy
to the SharePoint root would be as follows:
1. Create an Empty SharePoint Project and set it to “Deploy as farm solution.”
2. Add a WCF Service Library to the solution.
3. Copy the IService.cs and Service.cs files to the SharePoint project.
4. Add your service operations and contracts to the two service files.
5. Create a mapped SharePoint folder to the ISAPI folder.
6. Add a .svc file to the ISAPI mapped folder, and add the service registration information.
7. Deploy the SharePoint project to your SharePoint site.
Once you deploy the WCF service to SharePoint, you can consume the service either server-side or
client-side through Windows Form, WPF, or even Silverlight applications.
NOTE While there is no walkthrough presented in this discussion for a WCF
solution deployed to the SharePoint root, there is a code accompaniment
(
WCFServiceApp.zip) that is available for you to download for you at this
book’s companion download site (
www.wrox.com). You can review the project
to see how it is structured, as well as the way in which a client application
calls the WCF service.
You can build many more interesting and complex applications using WCF, so you should explore it
more as you sharpen your SharePoint development skills.
RESTFUL WEB SERVICES
You can also use the Representational State Transfer (REST) services in SharePoint 2010. While
REST is less of a service and more of a communications protocol, SharePoint 2010 supports REST
to give you better data access and programmability.
In some cases, the REST capabilities are surfaced using WCF services. For example, in
Chapter 5, you leveraged the WCF Data services and REST capabilities by using the
Listdata service (listdata.svc).
What this functionality provides to the developer is a way to interact with SharePoint data in a
strongly typed way. However, the strongly typed interaction with SharePoint data is not the only
benefit provided by the REST APIs. They also provide a way to interact with other types of data
within SharePoint, such as Excel data. You accomplish this through the REST protocols, which are
Atom, AtomPub, and RSS.
584637c10.indd 387 5/2/10 7:14:15 PM
388
CHAPTER 10 Developing Service-orienteD ApplicAtionS for ShArepoint 2010
In this section, you’ll see more of the REST protocols at work (as opposed to the WCF Data ser-
vices, which you already saw in Chapter 5) to interact with Excel data in SharePoint.
The REST protocols enable you to access data in Excel documents in various read/write ways. For
the following example, create an Excel 2010 spreadsheet, add some data to a workbook (as shown
in Figure 10-9), and create a named range called
Sales. Next, create a chart from the named range
by selecting all of the data in the table, clicking Insert Chart, and then selecting the Bar Chart to
add the chart into the workbook. Note that the chart is called
Chart 1 by default.
FIGURE 109 Creating a Sales spreadsheet
After you’ve created the workbook, save and upload the spreadsheet into SharePoint — for example,
into the Shared Documents document library with the name
RestExample.xlsx. With the Excel
document in SharePoint, you can now use REST to retrieve or insert data.
Let’s walk through an example where you retrieve the data using the REST protocols.
Using REST to Interact with Data in ExcelTRY IT OUT
Code file [RestExample.xlsx] available for download at Wrox.com.
REST is a lightweight set of protocols to interact with data in various ways, one of which is retrieving
data from Excel. To retrieve data from an Excel spreadsheet using REST, follow these steps:
1. Open your Internet browser and navigate to your SharePoint instance to ensure that you have con-
nectivity to your server.
2. Type the following URI into your Internet browser:
http://<server name>/_vti_bin/ExcelRest.aspx/Shared%20Documents/
RestExample.xlsx/Model
3. In your Internet browser, you should now see something similar to Figure 10-10. What you’re seeing is
an ATOM feed of the types of items in your workbook that are accessible using the REST protocols.
584637c10.indd 388 5/2/10 7:14:15 PM
RESTful Web Services
389
FIGURE 1010 Atom feed of available item types
4. Because you created a named range in the spreadsheet, you can access the named range using the
Atom feed. To do so, type the following URI into the Internet browser:
/> RestExample.xlsx/Model/Ranges(‘Sales’)?$format=html
5. You should now see something similar to Figure 10-11, which shows the result of the Atom
feed — the table that you made the named range in your Excel spreadsheet.
FIGURE 1011 Surfacing a named range in the browser
6. Lastly, type the following URI into your Internet browser to expose the chart you also created in
the spreadsheet:
/> RestExample.xlsx/Model/Charts(‘Chart%201’)
584637c10.indd 389 5/2/10 7:14:15 PM
390
CHAPTER 10 Developing Service-orienteD ApplicAtionS for ShArepoint 2010
How It Works
REST is a lightweight way to interact with SharePoint 2010. By using the URIs, you can interact with
data in an Excel spreadsheet within your SharePoint site. You must leverage the URIs, though, with an
Excel document that is stored in the SharePoint site, because you are either using the
ExcelRest.aspx
redirect or
Listdata.svc (for strongly typed data programmability) to interact with that data.
There are also a number of supported REST return formats. For example, supported return formats
include HTML, Atom, image, or workbook. To enable this return data, you append the REST URI
with
?$format=html to return, for example, the named range as HTML. This is what you did with the
Sales named range in the walkthrough. Note that you could also return the data as an Atom feed as is
indicated by the
?$format=atom that is appended to the end of the following URI:
/> RestExample.xlsx/Model/Ranges(‘Sales’)?$format=atom
You saw one way to leverage the Listdata service in Chapter 5 (where you developed a client applica-
tion to talk to SharePoint lists), and here you should be thinking how you can develop applications that
leverage the lightweight REST protocol to get and put data into SharePoint lists, or access data in Excel
spreadsheets programmatically.
AZURE AND SHAREPOINT
A growing trend in software development is cloud computing. Cloud computing is where code and
data live in the cloud so that organizations can both consume and deploy services in an Internet-
based data center for hosting. The business mechanics of cloud computing can make a lot of sense
when thinking about things like hardware, upgrading, administration, and software maintenance.
Cloud computing offsets these costs by moving the management and maintenance of applications to
companies like Microsoft.
One of the key Microsoft cloud offerings is the Windows Azure platform, which is a set of cloud
capabilities that provides specific services to both those trying to host services in the cloud and those
trying to develop and deploy services in the cloud. Interestingly, the Azure platform is not limited
to being consumed by cloud-only applications. You can integrate Azure services with on-premises
applications as well. In fact, the easy way to think about an Azure service is that it is very similar to
any other service endpoint — except that it is deployed and hosted in the cloud.
The demand for cloud computing is big, and, in the near term, you’ll see many companies trying to
integrate more with the Windows Azure platform. The question, then, is how does SharePoint inte-
grate with the cloud?
At present, SharePoint can integrate with Windows Azure services; again, it is just another end-
point. Thus, you build and deploy a service in the cloud and, as long as you have connectivity to the
service, you can integrate and run it with SharePoint. While this book mainly focuses on SharePoint
on-premises (that is, SharePoint Server 2010), there is no reason why you cannot integrate Azure-
based services with SharePoint does make for an extra step in the development and deployment pro-
cess, Online (for example, using sandboxed solutions as your point of integration) when it is released
later in 2010.
584637c10.indd 390 5/2/10 7:14:15 PM
Azure and SharePoint
391
Integrating SharePoint with Azure services or data primarily means two things at present. The first
is that you can integrate with services that are already hosted on Azure. Or, you can build your own
Azure services (or applications), deploy these services in the cloud, and then integrate these services
with SharePoint. The Windows Azure platform provides a set of developer tools and a replicated
developer environment where you can test any services you will deploy to the cloud.
NOTE For more information on how to get started using Windows Azure, go to
An interesting data service that is built on Azure is a technology codenamed “Dallas,” where com-
panies are hosting large quantities of public data on Azure, and then, through a subscription model,
you can build applications that leverage that data in some capacity. While the technology is cur-
rently limited, in the future it is sure to grow in use and popularity, because the data will grow to
include census, crime, and news data — and other types of data that can prove interesting when
mined and analyzed in different ways.
In this section, you’ll see how you can integrate Dallas data hosted on Azure integrated with
SharePoint. To complete the exercise that follows, you’ll need to have a Live ID and a developer key
to access the Dallas data and services.
To get a developer key, navigate to
and then sign in with
your Live ID. Click Home and follow the instructions to get your developer key sent to you via
email. It’s a very simple process and will only take you a couple of minutes. After you have your
developer key, click Catalog, and then subscribe to one or more of the data catalogs. When you sub-
scribe to a catalog, it is then added to your Subscriptions. For this walkthrough, use the
infogroup
data catalog that is hosted on Azure.
Creating a Web Part Integrated with AzureTRY IT OUT
Code file [AzureProject.zip] available for download at Wrox.com.
Azure is a very powerful cloud-based platform that hosts services and data. To integrate Azure with
SharePoint, follow these steps:
1. Navigate to your Dallas Azure Catalog page and then click the link that reads, “Click here to
explore the dataset,” as shown in Figure 10-12.
FIGURE 1012 infogroup data catalog
584637c10.indd 391 5/2/10 7:14:15 PM
392
CHAPTER 10 Developing Service-orienteD ApplicAtionS for ShArepoint 2010
2. Explore the catalog using the Web-based filters to get a better sense for what public data is
returned from your filtering.
3. Copy the Account Key, Unique User ID, and link feed to the catalog (for example, https://api.
sqlazureservices.com/InfoUsaService.svc/businessAnalytics/canada?$format=atom10
)
to a text document and save them to your desktop.
4. Open Visual Studio 2010 and create an Empty SharePoint project and provide a name for the project
(for example,
AzureProject). Add the Web part item-level template to the Empty SharePoint project.
5. Right-click the project and click Add Class. Call the class Customer and add the following
bolded code to the class:
using System;
using System.Collections.Generic;
using System.Linq;
using System.Text;
namespace AzureProject
{
class Customer
{
public string contactName { get; set; }
public string companyName { get; set; }
public string companyAddress { get; set; }
public string companyCity { get; set; }
public string companyProvince { get; set; }
public string companyPostalCode { get; set; }
public string companyPhone { get; set; }
}
}
6. Amend the .webpart file so that it has a more intuitive title and description.
…
<properties>
<property name=”Title” type=”string”>Azure Dallas Web Part</property>
<property name=”Description” type=”string”>Web Part that displays
Dallas data from Azure.</property>
</properties>
…
7. In the main Web part class, add the following bolded code. Where noted in the code, add your
account key, unique user ID, and the link to the data catalog.
using System;
using System.ComponentModel;
using System.Web;
using System.Web.UI;
using System.Web.UI.WebControls;
using System.Web.UI.WebControls.WebParts;
using Microsoft.SharePoint;
using Microsoft.SharePoint.WebControls;
using Microsoft.Dallas.Services;
using System.Net;
using System.IO;
584637c10.indd 392 5/2/10 7:14:15 PM
Azure and SharePoint
393
using System.Xml.Linq;
using System.Collections.Generic;
using System.Linq;
namespace AzureProject.AzureWebPart
{
[ToolboxItemAttribute(false)]
public class AzureWebPart : WebPart
{
Button btnGetAzureData = new Button();
DataGrid datagrdAzureData = new DataGrid();
Label lblData = new Label();
string myAccountKey = “<your account key>”
string myUniqueUserId = “<your user ID>”;
string myDallasURL = “<your Dallas URL>”;
protected override void CreateChildControls()
{
btnGetAzureData.Text = “Load Azure Data”;
lblData.Text = “Azure Data: “;
this.Controls.Add(new LiteralControl(“<table><tr><td>”));
this.Controls.Add(lblData);
this.Controls.Add(new LiteralControl(“</td><td>”));
this.Controls.Add(datagrdAzureData);
this.Controls.Add(new LiteralControl(“</td><tr><td></td<td>”));
this.Controls.Add(btnGetAzureData);
this.Controls.Add(new LiteralControl(“</td></tr></table>”));
btnGetAzureData.Click += new EventHandler(btnGetAzureData_Click);
}
void btnGetAzureData_Click(object sender, EventArgs e)
{
List<Customer> customerSalesLeads = new List<Customer>();
WebRequest azureWebRequest = WebRequest.Create(myDallasURL);
azureWebRequest.Headers.Add(“$accountKey”, myAccountKey);
azureWebRequest.Headers.Add(“$uniqueUserID”, myUniqueUserId);
HttpWebResponse azureWebResponse = (HttpWebResponse)azureWebRequest.
GetResponse();
Stream AzureDataStream = azureWebResponse.GetResponseStream();
StreamReader reader = new StreamReader(AzureDataStream);
string responseFromAzure = reader.ReadToEnd();
XDocument xmlAzureResultData = XDocument.Parse(responseFromAzure);
XNamespace nsContent = “ /> XNamespace nsProperties = “ /> 08/dataservices/metadata”;
XNamespace nsValue = “ /> 08/dataservices”;
var result = (from q in xmlAzureResultData.Descendants(nsContent +
“entry”)
where q.Element(nsContent + “content”).
Element(nsProperties + “properties”).
584637c10.indd 393 5/2/10 7:14:15 PM