Engineering Drawing for Manufacture phần 4 docx
Bạn đang xem bản rút gọn của tài liệu. Xem và tải ngay bản đầy đủ của tài liệu tại đây (769.41 KB, 17 trang )
ISO drawing rules
4b
V V
~W
movement
F _ .
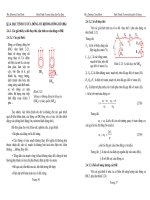
.Item List
.10 .1
Plate Screw
9 .1
Plate
8 4 Insert
Screws
7 .1
Tommy Bar
6 ,1 Jaw
Clamp Screw
5 1 Bush
Screw
.4 1
Bush
3 1 Movable Jaw
2 2
Hardened Inserts
1 .1
Body
PartNo,
I~" De~'dped~
VICE ASSEMBL Y DRAWING
Not to scale -(~ [~]-
Figure 3.1
Assembly engineering drawing of a small hand vice
Figure 3.2 is a third-angle orthographic projection 'detail'
drawing of the movable jaw (part number 3). It gives all the infor-
mation necessary for the part to be manufactured. The outline is
drawn in thick (or wide) lines whereas additional information (e.g.
hidden detail or section hatching) is drawn in thin (or narrow) lines.
The thick lines are deliberately drawn so that shape and form
[jump' out of the picture. With regard to the front elevation, the
'equals' sign at either end of the centre line shows that it is symmet-
rical about that centre line. The 16mm wide tongue is thus centrally
positioned in the front elevation and there is no need to dimension
its position from either side. There are further outcomes from this
symmetry. Firstly, both underside surfaces that contact the body (as
shown by thick chain dotted lines) are to be polished such that the
average surface finish (Ra) is less than 0,2urn. Secondly, the
counter-bored 5mm diameter holes are identical. The right-hand
elevation is a section through the centre of the jaw but nothing tells
you this. This is the designer's decision of how much to include in
the drawing, called 'draughtsman's licence'. The side elevation
shows that there is a vertical threaded hole in the base. The various
46 Engineering drawing for manufacture
line thicknesses of the threaded hole show that the initial hole is to
be drilled (note the conical end) and then threaded to M8. The 'M8'
means that it is a metric standard 8mm diameter thread. The desig-
nation 'M8' is all that needs to be stated since full details of the
thread form and shape are given in ISO 68-1:1998. The 'xl 0/12'
means that the drilled hole is 12mm long and the thread is 10mm
long. The right-hand side elevation section also indicates that the
horizontal central hole is counter-bored. The dimensions of this
hole are shown in note form on the inverted plan. The initial hole is
10mm diameter which is then counter-bored to 15mm diameter to
a depth of 7.5mm with a flat bottom (given by the 'U'). The position
of the hardened insert is shown on the sectioned right-hand
elevation. It is shown in outline by the double chain dotted thin line.
On the side elevation sectioned view, the position of the M8 hole is
not given. In such instances as this, the implication is that the hole is
centrally placed and since its exact position is not critical for func-
tional performance, it perhaps does not matter too much. However,
in product liability terms, all dimensions should be given and none
left to chance. Thus, if I were drawing this for real in a company
v
)
50
I_. 32 crs .=1
r -! ,,
ii
I
I [ %
-I-
,g-
1,0
2x~ 8x5u
-~
r /
i 3
+, ~xT,,uJ
Position of
hardened insert
12
MOVABLE JAW.
Part No 3.
Material: mild
steel
All dimensions in mm.
Not
to scale.
Figure
3.2
Detailed engineering drawing of the 'movable jaw', part number 3
ISO drawing rules
47
I would label its position as 10mm from the left-hand or the right-
hand side. However, to illustrate the point, I have left it off the
drawing. The inverted plan (lower left-hand drawing) is a staggered
section projected from the front elevation. The staggered section
lines are shown by the dual thick and thin chain dotted lines termi-
nating in arrows that give the direction of viewing. Thus, the
inverted plan is a part section.
Figure 3.3 shows a detail drawing of the hardened insert (part
number 2). This illustrates some other principles and applications of
engineering drawing practice. Two views are shown. Note that the
hardened insert is symmetrical as shown by the centre line and the
'equals' symbols at each end. Hence, I chose only to show one half.
With regard to the left-hand side elevation, the side is flame
hardened to provide abrasion resistance. The 'HRC' refers to the
Rockwell 'C' hardness scale. The M5 threaded hole is 15mm from
the lower datum place and the hole insert is 30mm high. The M5
hole could have been shown as being symmetrical with 'equals' signs
on the other centre line instead of being dimensioned from the base.
Only two detail drawings (Figures 3.2 and 3.3) are shown for
convenience. If this were a real artefact that really was to be manu-
factured, detailed drawings would be required for all the other
parts. However, there is no need to provide detailed drawings of
standard items like the screws.
3.2 Line types and thicknesses
The standard ISO 128:1982 gives 10 line types that are defined A to
K (excluding the letter I). The table in Figure 3.4 shows these lines.
Flame harden
to 50HRC
L. 5o
, o& HARDENED INSERT.
Part No 2.
-~-
Material: medium carbon steel.
All dimensions in mm.
Not to scale.
M5
Figure 3.3
Detailed engineering drawing of the 'hardened insert', part number 2
48
Engineering drawing for manufacture
The line types are 'thick', 'thin', 'continuous', 'straight', 'curved',
'zigzag', 'discontinuous dotted' and 'discontinuous chain dotted'.
Each line type has clear meanings on the drawing and mixing up
one type with another type is the equivalent of spelling something
incorrectly in an essay.
The line thickness categories 'thick' and 'thin' (sometimes called
'wide' and 'narrow') should be in the proportion 1:2. However,
although the proportion needs to apply in all cases, the individual
line thicknesses will vary depending upon the type, size and scale of
the drawing used. The standard ISO 128:1982 states that the
thickness of the 'thick' or 'wide' line should be chosen according to
the size and type of the drawing from the following range: 0,18;
0,25; 0,35; 0,5; 0,7; 1; 1,4 and 2mm. However, in a direct contra-
diction of this the standard ISO 128-24:1999 states that the thick-
nesses should be 0,25; 0,35; 0,5; 0,7; 1; 1,4 and 2mm. Thus
confusion reigns and the reader needs to beware! With reference to
the table in Figure 3.4, the A-K line types are as follows.
The ISO type 'A' lines are thick, straight and continuous, as shown
in Figure 3.5. They are used for visible edges, visible outlines, crests
of screw threads, limit of length of full thread and section viewing
lines. The examples of all these can be seen in the vice assembly
detailed drawings. These are by far the most common of the lines
types since they define the artefact.
The ISO type 'B' lines are thin, straight and continuous, as shown
in Figure 3.6. They are used for dimension and extension lines,
ENGINEERING DRAWING LINES
Continuous
Lines
Thick
Straight
Wavy
Straight
Thin
Non-straight
Curved ]Zigzags
ii +
Thick
Dash Chain
' I
I
' i
Discontinuous Lines
Tllin
Chain
Dash
Single Double
i I I
i i
ISO 128
Classification
of Line Types, 'A'to 'K'
I nonel B I C I D I EI
J I
F I G
Thick
& thin
Figure
3.4
Engineering drawing line types A to K (ISO 128:1982)
/SO drawing rules
49
leader lines, cross hatching, outlines of revolved sections, short
centre lines, thread routes and symmetry ('equals') signs.
The ISO type 'C' lines are thin, wavy and continuous, as shown in
Figure 3.7. They are only used for showing the limits of sections or
the limits of interrupted views as would be produced by freehand
drawings by a draughtsman on a paper-based drawing board.
Examples of type 'C' lines are shown on the assembly drawing, part
number six, jaw clamp screw.
The ISO type 'D' lines are thin, zigzag and continuous, as shown
in Figure 3.8. These have exactly the same use as the type 'C' lines
f?
Outlines
ISO Type 'A' Line
Thick, Continuous
! ,~ ~
Thread crests Limit of
Edges full thread
Section
viewing
line
Figure 3.5
ISO 128 engineering drawing line type 21'
ii ii
ISO Type 'B' Line
,, i
thin, straight, continuous
ii
i
T)
Dimens nd
extension
lines
Short centre
lines
Leader Lines Cross Outline of
hatching revolved
sections
\
Thread roots
Symmetry sign
Figure 3.6
ISO 128 engineerin.g drawinz line t~#e 'B'
50
Engineering drawing for manufacture
ISO Type 'C' Line
i
Thin, wavy, continuous
!\\\\%.\~"~(
~
Limit of section.
k "~.~.~.
~_j/ Limit of interrupted view.
-~'\-~
For freehand drawings.
Figure 3.7
ISO 128 engineering drawing line type 'C'
ISO Type 'D' Line
Thin, zig-zag, continuous
9 x\\ \-~ -x,J ]\-~ .x,J
!\~~.~
Limit of section.
l -Ii).~ ~ ~f ~
Limit of interrupted view.
h.\ \\ =~~~ <~ For machine drawings.
Figure 3.8
ISO 128 engineering drawing line type 'D'
but they are used for machine-generated drawings. Again they
apply to the limit of sections or the limit of interrupted views.
Examples of the type 'D' line are shown in the vice assembly
drawing.
The ISO type 'E' lines are thick, discontinuous and dashed, as
shown in Figure 3.9. They are only used for an indication of permis-
sible surface treatment. This could be, for example, heat treatment
or machining. This type of line is shown on the hardened insert
detailed drawing.
The ISO type 'F' lines are thin, discontinuous and dashed, as
shown in Figure 3.10. They are used for displaying hidden detail, be
that hidden detail edges or outlines. Hidden detail can be seen on
the movable jaw and hardened insert detailed drawings in Figures
3.2 and 3.3 respectively.
The ISO type 'G' lines are thin, discontinuous and chain dotted,
as shown in Figure 3.11. They are used to show centre lines of either
ISO drawing rules 51
ISO Type 'E' Line
Thick, discontinuous, dash
I Indication of
permissable surface
ir~- treatment, heat treatment
eg
Figure 3.9
ISO 128 engineering drawing line type 'E'
ISO Type 'F' Line
Thin, discontinuous, dash
~
Hidden edges
Hidden
outlines
Figure 3.10
ISO 128 engineering drawing line type 'F'
individual features or parts. Centre lines can be seen on the vice
assembly drawing as well as the movable jaw and hardened insert
drawings.
The ISO type 'H' lines are a combination of thick and thin,
discontinuous and chain dotted, as shown in Figure 3.12. They are
used to show cutting planes. The thick part of the type lines are at
the ends where the cutting section plain viewing direction arrows
are shown as well as at the points of a change in direction. An
example of a staggered type 'H' cutting plane is shown in the
movable jaw detailed drawing.
Note that no line type 'I' is defined in the ISO 128:1982 standard.
The ISO type 'J' lines are thick, discontinuous and chain dotted,
as shown in Figure 3.13. They are used for the end parts of cutting
planes as shown previously in the above type 'H' lines. They are also
used to provide an indication of areas that are limited for some
52
Engineering drawing for manufacture
ISO Type 'G' Line
Thin, discontinuous, chain
.Centre lines
Lines of symmetry
[
Figure 3.11
ISO 128 engineering drawing line type 'G'
ISO Type 'H' Line
Thick and thin, discontinuous, chain
' '] ~Extent of staggered
cutting planes
;
Figure 3.12
ISO 128 engineering drawing line type
7-1'
ISO Type 'J' Line
Thick, discontinuous, chain
T_~ Indication of
o limited areas,
,
,
-~
/eg measuring
-" 1 L r'- ~area or heat
T treatment
Figure 3.13
ISO 128 engineering drawing line type J"
reason, e.g. a measuring area or a limit of heat-treatment. Examples
of this type of line can be seen in the movable jaw detailed drawing.
The ISO type 'K' lines are thin, discontinuous and chain dotted
with a double dot, as shown in Figure 3.14. They are used to indicate
the important features of other parts. This could be either the
ISO drawing rules
53
ISO Type 'K' Line
Outlines ~f a
adjacent
Thin, discontinuous, double-chain
Extreme positions I " T
of movable parts
]
Figure
3.14
ISO 128 engineering drawing line type 'K'
outline of adjacent parts to show where a particular part is situated,
or, for movable parts, the extreme position of movable parts.
3.3 Sectioning or cross-hatching lines
When you go to a museum, you often see artefacts that have been
cut up. For example, to illustrate how a petrol engine works, the
cylinder block can be cut in half and the cut faces are invariably
painted red. In engineering drawing, cross-hatching is the equiv-
alent of painting something red. It is used to show the internal
details of parts which otherwise would become too complex to show
or dimension.
The cross-hatch lines are usually equi-spaced and, for small parts,
cover the whole of the 'red' cut area. They are normally positioned
at 45 ~ but if this is awkward because the part itself or a surface of it is
at 45 ~ , the hatching lines can be at another angle. Logical angles
like 0 ~ 30 ~ 60 ~ or 90 ~ are to be preferred to peculiar ones like 18 ~
(say). If sectioned parts are adjacent to each other, it is normal to
cross hatch in different orientations (+ and -45 ~ or if the same
orientation is used, to use double lines or to stagger the lines.
Examples of single and double + and 45 ~ cross-hatching lines are
shown in the vice assembly drawing in Figure 3.1. An example of
staggered cross-hatching is shown in the inverted plan drawing of
the movable jaw in Figure 3.2.
If large areas are to be sectioned, there is no particular need to have
the cross-hatching lines covering the whole of the component but
rather the outside regions and those regions which contain details.
54
Engineering drawing for manufacture
When sections are taken of long parts such as ribs, webs, spokes of
wheels and the like, it is normally the convention to leave them
unsectioned and therefore no cross-hatch lines are used. The reason
for this is that the section is usually of a long form such that if it were
hatched it would give a false impression of rigidity and strength. In
the same way it is not normal to cross hatch parts like nuts and bolts
and washers when they are sectioned. These are normally shown in
their full view form unless, for example, a bolt has some specially
machined internal features such that it is not an off-the-shelf item.
Example of threads that are not cross-hatched can be seen in the
vice assembly drawing in Figure 3.1.
3.4 Leader lines
A leader line is a line referring to some form of feature that could be
a dimension, an object or an outline. A leader line consists of two
parts. These are"
m A type B line (thin, continuous, straight) going from the
instruction to the feature.
m A terminator. This can be a dot if the line ends within the outline
of the part, an arrow if the line touches the outline or centre line
of a feature or without either an arrowhead or a dot if the line
touches a dimension.
Examples of leader lines with arrowheads and dots are shown in the
vice assembly and the movable jaw drawings.
3.5 Dimension lines
Various ISO standards are concerned with dimensioning. They are
under the heading of the ISO 129 series. The basic standard is ISO
129:1985 but it has various parts to it.
A dimensioning 'instruction' must consist of at least four things.
Considering the 50mm width of the jaw and the 32mm spacing of
the holes of the movable jaw drawing in Figure 3.15, these are"
Two projection lines which extend from the part and show the
beginning and end of the actual dimension. They are projected
from the part drawing and show the dimension limits. In Figure
ISO drawing rules
55
3.15, the width is 50mm and the projection lines for this
dimension show the width of the part. They are type B lines
(thin, continuous and straight). These lines touch the outline of
the part. The projection lines for the hole-centre spacing
dimension of 32mm are centre lines. They are type G lines (thin,
discontinuous, chain) which pass through the drawing just past
where the holes are located.
A dimension line which is a type B line (thin, continuous and
straight). In Figure 3.15, these dimension lines are the length of
the dimension itself, i.e. '50' or '32' mm long.
A numerical value which is a length or an angle. In the Figure
3.15 example the dimensions are the '50mm' and '32mm'
values. If a part is not drawn full size because it is too small or
too large with respect to the drawing sheet, the actual dimension
will be the value which it is in real life whereas the dimension
line is scaled to the length on the drawing.
Two terminators to indicate the beginning and end of the
dimension line. The terminators of '50' and '32' dimensions in
Figure 3.15 are solid, narrow arrowheads. Other arrowhead
types may be used. There are four types of arrowhead allowed in
ISO, as shown in Figure 3.16. These four are the narrow/open
(15~ the wide/open (90~ the narrow/closed (15 ~ and the
narrow/solid (15~ An alternative to an arrowhead is the oblique
stroke. When several dimensions are to be projected from the
same position, the 'origin' indication is used, consisting of a
small circle. These drawings are shown in Figure 3.16. An
example of an origin indicator is shown in the movable jaw
detailed drawing.
Many dimensioning examples can be seen in the movable jaw and
hardened insert detail drawings. The dimensions in these two
drawings follow the following convention. All terminators are of the
solid arrow type, all projection lines touch the outside of the part
outline, all dimension numerical values are placed above the
dimension lines and all dimension values can be read from the left-
hand bottom corner of the drawings.
The dimensioning convention used in the movable jaw and
hardened insert detail drawings is the one which is the most
commonly used one. However, alternative dimensioning conven-
tions are allowed in the ISO standards. These will be covered in
Chapter 4.
56
Engineering drawing for manufacture
Dimension
[
lines I~
50
L-" -"!~ "~ 32~rs _~
I I
sym~,s [ ]
[ :ormin.t,o~ "~I ~16~
u_
~1 Projoction,in.s I
_
T
I Dimension va, ues l
I AuxHiary Dimension 1
Figure 3.15
Example of general dimensioning
/
C>
Various types
of arrowhead
Oblique stroke
~) Origin indicator
Figure 3.16
The various types of dimension line terminators
ISO drawing rules
57
3.6 The decimal marker
Readers in the UK and USA should be aware that a full stop or point
is no longer recommended as the decimal marker. The ISO recom-
mended decimal marker is now the comma. Thus, taking pi as an
example, it should now be written as 3,142 and not 3.142. Similarly,
the practice of using a comma as a 103 separator is no longer
recommended. A space should be used instead. Thus, one million
should be represented as 1 000 000 and not 1,000,000.
3.7 Lettering, symbols and abbreviations
Many drawings are microfilmed and this causes a problem of legi-
bility when drawings are blown up again to their original size. Thus,
it is recommended that the distance between adjacent lines or the
spacing between letters or numerals should be at least twice the line
thickness. There are six ISO standards (would you believe it?) on
lettering alone; they are under one standard. The six parts of ISO
3098 refer to: general requirements (part 0), the Latin alphabet
(part 2), the Greek alphabet (part 3), diacritical marks (part 4), CAD
lettering (part 5) and the Cyrillic alphabet (part 6).
Symbols and abbreviations are used on engineering drawings to
save space and time. However, because they are shorthand methods
they need to impart precise and clear information. Standard
English language symbols and abbreviations are shown in the BSI
standard BS 8888:2000. Various abbreviations can be seen in the
movable jaw detailed drawing in Figure 3.2. The 'CRS' refers to the
fact that the hole centre lines are 32mm apart and the Greek letter
'+' is used to indicate diameter. Other symbols and abbreviations
are covered in Chapter 4.
Standard screw thread and threaded part dimensions are detailed
in ISO 68-1 and ISO 6410, parts 1, 2 and 3" 1993. Thus, the only
symbol which needs to appear with respect to a threaded part is the
'M' of the threaded hole on the right-hand end elevation section
drawing. There are other abbreviations concerned with holes that
are not covered by the BS 8888:2000 standard. These are the abbre-
viations and symbols and shorthand methods associated with the
dimensioning of holes, whether they are plain, threaded or
stepped. For example, the M8 threaded hole has the numbers '10'
and '12' separated by a forward slash. This means that the drilled
58
Engineering drawing for manufacture
hole is 12mm deep and the threaded section 10mm long. The notes
referring to the countersunk holes on the inverted plan sections use
the abbreviation 'U'. This refers to a flat-bottomed hole whether it
be a counter-bored or a full hole. If a hole were required to have a
vee-shaped hole bottom, the symbol 'V' would be used. There is a
complete standard concerned with the symbology and the abbrevia-
tions associated with holes; this is ISO 15786:2001. This hole
symbology is considered again in Chapter 4.
3.8 Representation of common parts and features
There are several standard feature shapes and forms that can be
represented in a simplified form, so saving drawing time and cost.
The most common types are covered below.
3.8.1 Adjacent parts
In a detailed drawing of a particular part, it may be necessary to
show the position of adjacent part/s for the convenience of under-
standing the layout. In the case of the detailed drawing of the
movable jaw, the adjacent hardened jaw position is indicated by the
chain double-dotted line on the left-hand side of the right-hand-
side sectional view. Such parts need to stand out but not be obtrusive
so they are drawn using type K lines, the thin, continuous, double
chain dotted lines. Adjacent parts are usually shown in outline
without any specific details.
3.8.2 Flats on cylindrical or shaped surfaces
It is not always obvious that surfaces are flat when they are on
otherwise curved, cylindrical or spherical surfaces. In this case, flat
surfaces such as squares, tapered squares and other flat surfaces may
be indicated by thin 'St Andrew' cross type diagonal lines. An
example of this is shown in the entirely fictitious gear shaft in Figure
3.17. The extreme right-hand end of the shaft has a reduced
diameter and approximately half of this cylindrical length has been
flat milled to produce a square cross-section. The fact that the cross-
sectional shape of this region is square and not cylindrical is seen in
the end view as a square and in the right-hand side elevation by the
crosses.
ISO drawing rules b9
Springs - ISO 2162-1:1993
& -2:1993
l
-J 1 Seals-ISO 9222-1:1989,
-t
~ Bearings-SO8826-1:1989, "~~ I
-1" ~ &-2:1994
Gears - ISO 2203:1973 _~
Figure
3.17
A fictitious gear shaft with bearings, seals, springs and splines with
the relevant ISO references
3.8.3 Screw threads
Screw threads are complex helical forms and their detailed charac-
teristics in terms of such things as angles, root diameter, pitch circle
diameter and radii are closely defined by ISO standards. Thus, if
the designation 'M8' appears on a drawing it would appear at first
sight to be very loosely defined but this is far from the case. Screw
threads are closely defined in the standard ISO 6410, parts 1, 2 and
3:1993. The 'M8' designation automatically refers to the ISO
68-1:1998, ISO 6410-1, 2 and 3:1993 standards in which things
like the thread helix angle, the vee angles and the critical diameters
are fully defined. Thus, as far as screw threads are concerned, there
is no need to do a full drawing of a screw thread to show that it is a
screw thread. This takes time and costs money. The convention for
drawing an engineering thread is shown using a combination of ISO
type A and B lines as shown in the drawings in Figures 3.1, 3.2 and
3.3. A screw thread is represented by two sets of lines, one referring
to the crest of the thread (type A line) and the other referring to the
roots of the thread (type B line). These can be seen for a bolt and a
hole in Figures 3.5 and 3.6. This representation can be used irre-
spective of the exact screw thread. For example, on the vice
assembly drawing in Figure 3.1, the screw thread on the bush screw
(part number 5) and the jaw clamp screw (part number 6) are very
different. In the real vice, the former is a standard vee-type thread
whereas the latter is a square thread.
60
Engineering drawing for manufacture
Line thicknesses become complicated when a male-threaded bolt
is assembled in a female-threaded hole. The thread crest lines of the
bolt become the root lines of the hole and vice versa. This means
that in an assembly, lines change from being thick to thin and vice
versa. This is shown in the vice assembly drawing in Figure 3.1, with
respect to the bush screw (part number 5)/jaw clamp screw (part
number 6) assembly.
3.8.4 Splines and serrations
Splines and serrations are repetitive features comparable to screw
threads. Similarly, it is not necessary to give all the details of the
splines or serrations, the symbology does it for you. The convention
is that one line represents the crests of the serrations or splines and
the other the roots. This is shown in the hypothetical drawing in
Figure 3.17 where there is a spline at the right-hand end of the gear
drive shaft. A note would give details of the spline. The standard
ISO 6413" 1988 gives details of the conventions for splines.
3.8.5 Gears
Gear teeth are a repetitive feature similar to screw threads or splines.
It is not necessary to show their full form. In non-sectional views,
gears are represented by a solid outline without teeth and with the
addition of the pitch diameter surface of a type G line. In a transverse
section, the gear teeth are unsectioned whereas the body of the gear
is. The limit of the section hatching is the base line of the teeth as
shown in the drawing in Figure 3.17. In an axial section, it is normal
to show two individual gear teeth unsectioned but at diametrically
opposed positions in the plane of the section. All details of the gear
type shape and form need to be given via a note. In a gear assembly
drawing which shows at least two gears, the same principle as for indi-
vidual teeth (above) is used but at the point of mesh, neither of the
two gears is assumed to be hidden by the other in a side view. Both of
the gears' outer diameters are shown as solid lines. The standard ISO
2203:1973 gives details of the conventions for gears.
3.8. 6 Springs
It is not normal to show the full shape and form of springs. Their
helical form means very complicated drawing shapes. The
ISO drawing rules 61
simplified representation is a zig-zag shape of ISO type A lines for
side views. If the spring is shown in cross-section, the full form is
drawn as is shown in Figure 3.17. A note should provide all the fine
details of the spring design. The standards ISO 2162-1:1993, ISO
2162-2:1993 and ISO 2162-3:1993 give details of the conventions
for springs.
3.8.7 Bearings
As shown in the simplified gear shaft assembly in Figure 3.17, the
transverse view of a bearing is shown in cross-section with only the
outline and none of the internal details such as ball bearings and
cages. Even when the transverse view is not a sectional view, it is
normal practice to show the bearing as if it was a cross-sectional
view. Within the bearing outline (class A line), symbology is used to
indicate the exact type of bearing. Symbology shown within the
example in Figure 3.17 refers to a thrust bearing. Details of how to
draw bearings are covered in ISO 8826-1:1989 and ISO
8826-2:1994.
3.8.8 Seals
Seals are treated in almost in the same way as gears. This is shown in
the shaft assembly in Figure 3.17 where a seal is shown adjacent to
the bearing. The outline of the seal is given and symbology within
the outline shows the type of seal. In this case the seal is a lip type
seal with a dust lip. The standards ISO 9222-1:1989 and ISO
9222-2:1989 give details of the various types of seal.
3.9 Item references and lists
In an assembly drawing, the various components or items which
make up the assembly need to be referenced. In the vice assembly
drawing in Figure 3.1, the individual items are shown by the
'balloon' reference system using the numbers 1-10 (in this case). For
convenience the balloon item references are normally arranged in
horizontal or vertical alignments. The small circles surrounding
each number are optional. The standard that gives details of item
references is ISO 6433" 1981.