dreamweaver cs5 all in one for dummies phần 6 ppt
Bạn đang xem bản rút gọn của tài liệu. Xem và tải ngay bản đầy đủ của tài liệu tại đây (2.06 MB, 86 trang )
Book IV
Chapter 2
JavaScript
Behaviors and
Spry Widgets
415
Set Text of Container Behavior
To begin using this behavior, you must start with at least one container
with an ID on the page. For instance, you may want to apply this behavior to
an AP Div layer. (See Book IV, Chapter 1 to learn more about working with
layers).
To attach the Set Text of Container behavior to a page, follow these steps:
1. Select a container on your page.
2. Click the Add Behavior (+) icon in the Behaviors panel, and then
choose Set Text➪Set Text of Container.
The Set Text of Container dialog box appears, as shown in Figure 2-14.
Figure 2-14:
Change the
text in a
container.
3. In the Container menu, select the target container.
The target container is the container where the new content is dis-
played. If the container you want to target isn’t listed, your target
doesn’t yet have an ID attribute. Close the dialog box, give your con-
tainer an ID with the Properties inspector, and start over at Step 1.
4. In the New HTML text box, type or paste the replacement HTML con-
tent for the targeted container.
Enter any HTML, including valid JavaScript and formatting code. When
no formatting is entered with the New HTML text, the original text color
and background color of the container is applied to the new text
content.
5. Click OK to close the dialog box.
6. Verify that the event handler listed in the Events column of the
Behaviors panel is the one you want to use.
The default event handler for this behavior is onFocus.
25_610770-bk04ch02.indd 41525_610770-bk04ch02.indd 415 5/6/10 1:14 PM5/6/10 1:14 PM
416
Set Text of Frame Behavior
Set Text of Frame Behavior
The Set Text of Frame behavior works exclusively with framesets and allows
you to replace text or HTML content in a frame with a specified action. The
HTML replacement content can include any JavaScript property, global vari-
able, function call, or other valid expression embedded in the text as long as
it’s embedded in braces ({}). To display a brace, type it with a backslash,
like this: \{.
By allowing you to change the content on a page inside a frame, this behav-
ior is an alternative to opening another page in a frame. For example, you
may want to change the text inside a frame containing a graphic that, when
moused over, changes to display a special message to the visitor or identi-
fies the URL of the page inside the frame.
With this behavior, most of the frame’s formatting is lost, but you can retain
the background and text colors. If you need to control more than text con-
tent, you may want to open a new page in the frame instead.
To begin using this behavior, you must start with a frameset (see Book IV,
Chapter 3). You can use any of Dreamweaver’s preset framesets when you’re
creating a new document: Choose File➪New, and then in the New Document
window, select a sample Frameset from the Sample Folder in the Page from
Sample category. Or choose Modify➪Frameset➪Split Frame and select any
option to create a quick and simple frameset for an existing open document.
To add the Set Text of Frame behavior to your page, follow these steps:
1. Select an object or a text link on your page to which you want to
attach the behavior.
The object can be inside any of the frames in the frameset.
2. Click the Add Behavior (+) icon in the Behaviors panel, and then
choose Set Text➪Set Text of Frame.
The Set Text of Frame dialog box appears, where you can enter in the
new HTML content for the page, as shown in Figure 2-15.
Figure 2-15:
Enter
replacement
HTML
content for
a targeted
frame.
25_610770-bk04ch02.indd 41625_610770-bk04ch02.indd 416 5/6/10 1:14 PM5/6/10 1:14 PM
Book IV
Chapter 2
JavaScript
Behaviors and
Spry Widgets
417
Set Text of Status Bar Behavior
3. In the Frame menu, select the target frame.
The target frame is the frame that displays the replacement content.
4. In the New HTML text box, type or paste the replacement HTML con-
tent for the targeted frame.
To copy the existing page content of the selected target frame in the text
box, click the Get Current HTML button. To use the same background
color of the current frame’s page with the new text, select the Preserve
Background Color check box.
5. Click OK to close the dialog box.
6. Verify that the event handler listed in the Events column of the
Behaviors panel is the one you want to use.
If desired, you can change the event handler in the Behaviors panel.
Set Text of Status Bar Behavior
Use the Set Text of Status Bar behavior to add a text message to the browser
window’s status bar (at the bottom-left corner of the window) when the visi-
tor interacts with the page in a specified way. For example, you can have the
status bar display a message about a particular link or image on the page
when the visitor mouses over that link or graphic (such as On Sale through
July 31st, 2010!) or list the title of the given page (such as Contact Us Today
for a Free Consultation!) rather than its URL, which appears by default.
Although adding a message to the browser status bar can be an interest-
ing way to enhance a site visitor’s experience of a page, many visitors don’t
know to look in this area for messages or may even have the status bar
disabled. Also, because the status bar displays useful information from the
browser, replacing it with your own text might be seen as rude to some visi-
tors. In addition, browser support for this behavior may vary slightly, so be
sure to test it in your target browsers before publishing.
For these reasons, think about using this behavior for optional information
messages rather than important ones. With your important messages, con-
sider using the Popup Message, Open Browser Window, or Show-Hide Layers
behaviors, all of which are described in this chapter.
Also, just like the Popup Message behavior, any JavaScript property, global
variable, function call, or other valid expression can be embedded in the
status bar text as long as it’s embedded in braces ({}).
25_610770-bk04ch02.indd 41725_610770-bk04ch02.indd 417 5/6/10 1:14 PM5/6/10 1:14 PM
418
Set Text of Text Field Behavior
To add the Set Text of Status Bar behavior to your page, follow these steps:
1. Select an object or a text link on your page.
This is the object or text link that triggers the action.
2. Click the Add Behavior (+) icon in the Behaviors panel, and then
choose Set Text➪Set Text of Status Bar.
The Set Text of Status Bar dialog box appears, as shown in Figure 2-16.
Figure 2-16:
Add a
custom
message to
the browser
status bar.
3. Type your text message, including any additional JavaScript
expressions.
For example, to display the URL for the visited page when mousing over
a target object or text link using a JavaScript function, type the following
code:
The URL for this page is {window.location}.
Try to keep your message short because many browsers that support
this behavior may truncate longer messages.
4. Click OK to close the dialog box.
5. Verify that the event handler listed in the Events column of the
Behaviors panel is the one you want to use.
The default event handler for the Set Text of Status Bar behavior is
onMouseOver, but you can change it, if needed, in the Behaviors panel.
Note: This behavior is not supported by all browsers, and in the brows-
ers that do support this behavior, its functionality often depends on
user preferences.
Set Text of Text Field Behavior
The Set Text of Text Field behavior is a handy behavior that replaces the
existing content of a text field on a form with specified new content. For
example, you may want to enter sample text so a visitor knows the kind of
25_610770-bk04ch02.indd 41825_610770-bk04ch02.indd 418 5/6/10 1:14 PM5/6/10 1:14 PM
Book IV
Chapter 2
JavaScript
Behaviors and
Spry Widgets
419
Set Text of Text Field Behavior
content they’re expected to type into the field. The new HTML content can
have any JavaScript property, global variable, function call, or other valid
expression embedded in the text as long as it’s embedded in braces ({}).
You can even display a brace by adding a backslash before it, like this: \{.
To begin using this behavior, you must start with at least one text
field in a form on the page. To add a text field to your page, choose
Insert➪Form➪Text Field, or click the Text Field icon in the Forms category
of the Insert panel to insert a text field at the insertion point in an open
document. If prompted to add the Form Tag, click Yes. When the page has
multiple text fields, it’s also helpful to name all the form fields to better iden-
tify them before attaching this behavior.
Follow these steps to use the Set Text of Text Field behavior:
1. Select a text field in a form in the open document, and give it an ID in
the Properties panel.
2. Click the Add Behavior (+) icon in the Behaviors panel, and then
choose Set Text➪Set Text of Text Field.
The Set Text of Text Field dialog box appears, as shown in Figure 2-17.
Figure 2-17:
Add
example
text into a
form field.
3. In the Text Field menu, select the target text field.
The target text field is where the new content will be displayed.
4. In the New Text text box, type or paste the replacement text.
5. Click OK to close the dialog box.
6. Verify that the event handler listed in the Events column of the
Behaviors panel is the one you want to use.
The default event handler is onBlur. If you’d like a different event han-
dler, you can change it in the Behaviors panel.
25_610770-bk04ch02.indd 41925_610770-bk04ch02.indd 419 5/6/10 1:14 PM5/6/10 1:14 PM
420
Show-Hide Elements Behavior
Show-Hide Elements Behavior
When one or more AP Div layers are on your page, you can control a layer’s
visibility (whether it’s shown or hidden) with the Show-Hide Elements behav-
ior. You can use this behavior also to restore an AP Div layer’s visibility to
its default setting.
The Show-Hide Elements behavior is great for hiding and showing informa-
tion as a visitor interacts with objects on your Web page. For example, you
may have an online photo gallery page with a series of thumbnail images and
an area to display close-up images. With the Show-Hide Elements behavior,
when the visitor slides the cursor over one of the thumbnail images, an
AP Div layer with a close-up image is shown, and when the visitor’s cursor
moves off the thumbnail, the close-up AP Div layer is hidden.
Before using this behavior, you must have at least one AP Div layer on
the page. To add an AP Div layer to your page, choose Insert➪Layout
Objects➪AP Div, or click the AP Div icon in the Layout category of the Insert
panel and draw an AP Div layer anywhere in an open document. You may
also want to rename all your AP Div layers with the Properties inspector or
in the AP Elements panel before attaching this behavior to objects on your
page to help identify them more easily. (Book IV, Chapter 1 describes layers
in detail.)
Follow these steps to use the Show-Hide Elements behavior on your page:
1. Select any object on your page (except a layer), such as a text link, an
image, or any object with an id attribute.
2. Click the Add Behavior (+) icon in the Behaviors panel, and then
select Show-Hide Elements.
The Show-Hide Elements dialog box appears, as shown in Figure 2-18.
If the behavior is not available in the list of behaviors, you may need to
select a different object on your page, such as the <body> tag or a link
(<a>) tag.
Figure 2-18:
Alter a
layer’s
visibility in
the browser.
25_610770-bk04ch02.indd 42025_610770-bk04ch02.indd 420 5/6/10 1:14 PM5/6/10 1:14 PM
Book IV
Chapter 2
JavaScript
Behaviors and
Spry Widgets
421
Show-Hide Elements Behavior
3. In the Elements menu, select the element for which you want to
change the visibility.
4. Edit the element’s visibility status by clicking one of the following
buttons:
• Show: Show the selected element.
• Hide: Hide the selected element.
• Default: Restore an element’s default visibility.
5. Repeat Steps 3 and 4 for each additional element that you want to
modify.
A single event handler controls all the elements selected here.
6. Click OK to close the dialog box.
7. Verify that the event handler listed in the Events column of the
Behaviors panel is the one you want to use.
You can always change the event handler in the Behaviors panel.
Be aware that some browsers support layers differently than others, espe-
cially older browsers. To stop browsers from altering layers, try setting layer
clip parameters or adding images or text to the layer to hold the layer open
to the size you want it to be. (See Book IV, Chapter 1 for more information on
setting layer clip parameters.)
Another cool use for this behavior is to make a preload layer by creating a
layer that covers the rest of the page as the page loads. Your visitors are
engaged with other content on this preload layer, such as a Flash movie,
while the main content loads. Then, when the content finishes loading, the
preload layer is hidden.
Follow these steps to make a preload layer with the Show-Hide Elements
behavior:
1. Create an AP Div layer on your page in the size you need to cover the
page’s main content while it loads.
To add an AP Div layer to your page, click the AP Div icon in the Layout
category of the Insert panel and draw an AP Div layer anywhere in an
open document.
2. Name the new AP Div layer “preload” or something similar in the
Properties inspector or in the AP Elements panel to help easily iden-
tify the layer when attaching the behavior.
25_610770-bk04ch02.indd 42125_610770-bk04ch02.indd 421 5/6/10 1:14 PM5/6/10 1:14 PM
422
Swap Image Behavior
3. In the AP Elements panel, set the preload layer’s z-index to 1.
The preload layer needs to be at the top of the z-index (stacking order)
for the behavior to work properly.
4. With the preload layer selected, edit the layer’s background color to
match the rest of the page.
Use the color picker in the Properties inspector to set the layer back-
ground color.
5. To add HTML content to the preload layer, click inside the layer and
type or paste the content.
For example, on the preload layer you may want to play a flash SWF file,
display an animated GIF, or show a Please wait . . . page loading type of
message.
You can give visitors the option of closing the preload layer by embed-
ding a link or button in it that closes the layer using another Show-Hide
Elements behavior.
6. In the Tag selector at the bottom of the open Document window, select
the <body> tag. Then click the Add Behavior (+) icon in the Behaviors
panel, and select Show-Hide Elements.
The Show-Hide Layers dialog box appears.
7. Select the preload layer in the Named Elements listing, and then click
the Show button.
8. Click OK to close the dialog box.
9. Verify that the event handler next to the Show-Hide Layers behavior
reads onLoad.
If not, change the event handler to onLoad in the Properties inspector.
Swap Image Behavior
With the Swap Image behavior, you can assign a rollover button script to any
graphic on the page. When the user moves the cursor over the graphic, the
JavaScript tells the user’s browser to display a new graphic (the over state
graphic) in its place. You also have the option to preload images and restore
the graphic to its original state with the onMouseOut event. You can even
assign rollover graphics to several graphics on the page with one event han-
dler, such as changing a button graphic and an image graphic at the same
time when the visitor places the mouse cursor over the button graphic.
25_610770-bk04ch02.indd 42225_610770-bk04ch02.indd 422 5/6/10 1:14 PM5/6/10 1:14 PM
Book IV
Chapter 2
JavaScript
Behaviors and
Spry Widgets
423
Swap Image Behavior
The script for this behavior calls an action that changes the image listed in
the src attribute of the <img> tag. The two things you need to do before
using this behavior are to name the normal state image in the Name field
in the Properties inspector and to ensure that the over state image has the
same width and height dimensions as the normal state graphic for a smooth
mouseover effect.
To add the Swap Image behavior to your page, follow these steps:
1. Select an image on your page.
If you need to insert an image, click the Image icon in the Common cat-
egory of the Insert panel or choose Insert➪Image.
2. In the Properties inspector, type a name (ID) for the image in the
Name field.
If you forget to name your images, you can still use the Swap Image
behavior, but it may be hard to assign the behavior to the correct image
when your page has multiple unnamed images.
3. If assigning the same rollover behavior to multiple graphics on your
page, repeat Steps 1 and 2 until all the graphics on your page are in
place and named.
In other words, if you know you want images 2 and 3 to change when
image 1 is moused over, insert and name images 2 and 3.
4. Select the image on the page that you want to attach the behavior to,
click the Add Behavior (+) icon in the Behaviors panel, and then select
Swap Image.
The Swap Image dialog box appears, displaying a list of named (and
unnamed) images on the page (see Figure 2-19).
Figure 2-19:
Add the
Swap Image
behavior
to named
images on
your page.
25_610770-bk04ch02.indd 42325_610770-bk04ch02.indd 423 5/6/10 1:14 PM5/6/10 1:14 PM
424
Swap Image Restore Behavior
5. In the list, select a named image that you want to assign a rollover
graphic to, and then click the Browse button to select the over state
graphic for that image.
If you know the path and filename, you can type it in the Set Source To
text field rather than browsing for it.
6. Repeat Steps 4 and 5 to create multiple rollover behaviors at once.
For example, you’d repeat Steps 4 and 5 if you want to change both a
photo and a button graphic with one mouseover event.
7. Select the Preload Images and Restore Image onMouseOut options.
By default, both options are enabled, which are recommended settings:
• Preload Images: Add JavaScript to the head area of the page that
tells the visitor’s browser to preload the rollover graphics when
the page loads so that the user experiences no delay in viewing
the rollover effect. Leave this option selected because images that
aren’t preloaded could create problems for displaying the page in a
browser.
• Restore Image onMouseOut: Add JavaScript to the page that tells
the browser to restore the over state image to the normal state
image when the site visitor moves the mouse cursor away from the
rollover image graphic.
Figure 2-20 shows an example of how you can use the Swap Image behav-
ior to create multiple over states for a single mouse event. When a visitor
mouses over a main navigation button, such as the one for reptiles, the navi-
gation button over state graphic appears, along with a graphic of a lizard
and a graphic containing text about reptiles.
Figure 2-20:
Create
dynamic
rollover
graphic
effects.
Graphic containing text Graphic
Over state graphic
Swap Image Restore Behavior
The Swap Image Restore behavior restores a swapped image to its original
state. Because the Swap Image Restore behavior is added automatically
when you use the Swap Image behavior and leaves the Restore option
25_610770-bk04ch02.indd 42425_610770-bk04ch02.indd 424 5/6/10 1:14 PM5/6/10 1:14 PM
Book IV
Chapter 2
JavaScript
Behaviors and
Spry Widgets
425
Using Third-Party Behaviors
selected, you’ll probably never need to manually add the Swap Image
Restore behavior.
On the blue moon occasion when you need to use it, simply choose the
behavior from the Add Behavior menu in the Behavior panel and click OK
in the Swap Image Restore dialog box. Dreamweaver adds the appropriate
JavaScript to your page to restore the last set of swapped images to their
original source graphics.
Validate Form Behavior
The Validate Form behavior verifies whether the visitor has accurately com-
pleted a form. If the form is inaccurate, the Validate Form behavior displays
a JavaScript alert window with an error message. To use this behavior, turn
to Book II, Chapter 7, which is devoted to creating forms.
Using Third-Party Behaviors
Dreamweaver is an extensible program, which means that you can enhance
its functionality by installing object, command, behavior, and other exten-
sions that perform various functions. You can find a ton of these third-party
extensions at the Adobe Exchange Web site and by searching for the term
Dreamweaver Extensions in your favorite search engine.
When you find extensions you want to try, you can download them and
use the Adobe Extension Manager to install them on your computer. The
Extension Manager is a standalone application that installs, manages,
and uninstalls extensions in Dreamweaver and other Adobe programs.
Dreamweaver installs the Extension Manager as part of the Dreamweaver
software installation process.
Visiting the Adobe Exchange Web site
More than 1,500 extensions are available in the Dreamweaver Exchange
section of Adobe’s Exchange Web site. You’ll find extensions to insert form
fields, format tables, and create navigation menus and e-commerce shopping
carts. Many of the extensions are offered free to registered Adobe members.
Others are available as either shareware requiring small fees or as fully sup-
ported software extensions for those willing to pay full price.
Adobe has its Dreamweaver extensions grouped into several categories:
Accessibility, App Servers, Browsers, Commerce, Content, DHTML/Layers,
Extension Development, Fireworks, Flash Media, Learning, Navigation,
25_610770-bk04ch02.indd 42525_610770-bk04ch02.indd 425 5/6/10 1:14 PM5/6/10 1:14 PM
426
Using Third-Party Behaviors
Productivity, Rich Media, Scripting, Security, Style/Format, Tables, Text,
Web Analysis, and Web Widgets.
In addition to listing the platform availability (Windows, Mac, or both) for
each of the extensions listed in the Exchange, you can find such helpful sta-
tistics as the number of recorded downloads, a user rating based on a five-
star rating system, the Dreamweaver product version compatibility (8, MX,
MX 2004, CS3, CS4, CS5), and the date the extension was released. You can
also find links to a variety of discussion groups and user reviews on the site
to help you make the best decision about which extensions to download.
To download and install extensions from the Adobe Dreamweaver Exchange
Web site, follow these steps:
1. Open the Dreamweaver Exchange Web site by choosing
Help➪Dreamweaver Exchange.
The Adobe Exchange opens in your primary Web browser, if you have a
live Internet connection.
2. Click the Dreamweaver link in the Exchanges by Product list.
You can also access the Exchange directly at www.adobe.com/cfusion/
exchange/index.cfm?event=productHome&exc=3&loc=en_us.
3. Look around the various categories or search for extensions related to
specific functions you’re interested in.
To find out more about an extension before downloading or purchasing
it, click the extension name.
4. When you find a behavior you want, download or save it.
When accessing extensions on the Exchange, browsers often give you
the option of downloading and installing the extension directly from the
source or saving the extension file to your local computer.
When you opt to save the file to your computer, Adobe recommends
that you save the extensions to a Downloaded Extensions folder in the
Dreamweaver application folder on your computer so you can manage
all extensions in one location. Another option is to download extensions
to your desktop, and then move them to another folder after installation
for archiving.
Using the Extension Manager
Using the Extension Manager to install your third-party extensions is easy.
To launch the application, choose Help➪Manage Extensions. If for some
reason you do not have the application installed on your computer, visit the
Adobe Web site at www.adobe.com/exchange/em_download/ to down-
load a free copy of the latest version of the application.
25_610770-bk04ch02.indd 42625_610770-bk04ch02.indd 426 5/6/10 1:14 PM5/6/10 1:14 PM
Book IV
Chapter 2
JavaScript
Behaviors and
Spry Widgets
427
Using Third-Party Behaviors
To install, manage, and uninstall extensions with the Extension Manager,
follow these steps:
1. From the Extension Manager’s main menu, choose File➪Install
Extension to install the new extension.
The Select Extension to Install dialog box appears.
2. Browse to and select an extension file with the .mxp file extension,
and then click the Open or Install button.
Some extensions install immediately, whereas others launch the
Extension Manager application panel and display the Adobe disclaimer.
If the latter happens, skip to Step 4. Otherwise, continue to Step 3.
3. If prompted, select the Adobe application under the Products list-
ing into which you want to install the extension (for example,
Dreamweaver or Fireworks).
This step is especially important when you have multiple Adobe prod-
ucts or multiple versions of the same product installed on the computer.
When you upgrade your application, the extensions are installed into
the newest or currently running version or you are prompted to update
them.
4. Read the Adobe Extension Manager disclaimer that appears, including
any extension license information.
5. To complete the installation, accept the terms of the disclaimer and
license.
6. If prompted to replace any existing extensions with the same name,
click Yes (or Yes to All) to accept the newer version of the extension
being installed.
If you click No, the current version of that file remains active. If you
click Cancel, the installation stops without replacing or installing any
new files. Note: Some extensions require you to close and restart
Dreamweaver before they take effect.
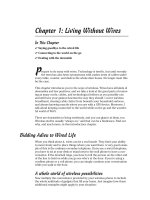
Figure 2-21 shows how newly installed extensions appear in the list of
Installed and Enabled Extensions in the Extension Manager. For online help
with Adobe’s Extension Manager, visit />ExtensionManager/2.0/index.html.
25_610770-bk04ch02.indd 42725_610770-bk04ch02.indd 427 5/6/10 1:14 PM5/6/10 1:14 PM
428
Working with Spry Widgets
Figure 2-21:
The
Extension
Manager
lists all
installed
extensions
along with
extension
details, such
as version,
type, and
author.
Working with Spry Widgets
Spry Widgets are part of the Spry framework for Ajax that was introduced in
Dreamweaver CS3. They are a special library of JavaScript widgets that help
Web designers, coders, and programmers who have a basic understanding
of HTML, CSS, and JavaScript build XLM-rich Web pages that offer unique
and interesting interactive experiences for site visitors.
In addition to Spry Widgets, Dreamweaver includes Spry Validation Form
Fields (which you can find out more about in Book II, Chapter 7), Spry
Effects, which can be applied to elements on your pages through the
Behaviors panel (see the “Spry Effects” section, earlier in this chapter), and
Spry Data Sets, which let you build dynamic pages by loading and manipulat-
ing data from a specified data source. Spry Data Sets and working with Spry
in general are documented in detail online in the Spry Framework for Ajax
Spry Developer’s Guide at />SDG/index.html.
What makes these Spry assets so powerful is that they’re easy to use and
customize after you understand how to work with them. However, to get the
most use out of the Spry Widgets, you need a firm understanding of HTML,
CSS, and JavaScript. Spry Widgets are a more advanced set of Dreamweaver
tools intended for the experienced Dreamweaver user.
To view all currently available Spry Widgets in CS5, open the Spry category
of the Insert panel, as shown in Figure 2-22. The first four widgets (Spry Data
Set, Spry Region, Spry Repeat, and Spry Repeat List) are tools to use when
25_610770-bk04ch02.indd 42825_610770-bk04ch02.indd 428 5/6/10 1:14 PM5/6/10 1:14 PM
Book IV
Chapter 2
JavaScript
Behaviors and
Spry Widgets
429
Working with Spry Widgets
creating dynamic pages. The Spry Validation Widgets (from Spry Validation
Text Field to Spry Validation Radio Group) are for adding dynamic interac-
tivity and validation functionality to forms. The remaining widgets are for
adding general interactivity to your pages, such as creating a Spry Menu
Bar, Spry Tabbed Panels, Spry Accordion, Spry Collapsible Panel, and Spry
Tooltip.
Figure 2-22:
Use the
Spry menu
in the Insert
panel to
insert Spry
Widgets.
Here is a description of the general Spry Widgets you can add to your pages:
✦ Spry Menu Bar: The Spry Menu Bar is a fully customizable set of naviga-
tion buttons with unlimited submenu capabilities based on the List Item
HTML tags (<ul>, <li>, and <a>) and CSS styling. Buttons have both
normal and hover states styled with CSS, allowing for relatively easy cus-
tomizable colors and fonts.
✦ Spry Tabbed Panels: This panel is actually a set of tabbed panels
that can contain a large amount of content in a smaller defined space.
Visitors can open and close panels by clicking the individual panel tabs,
so that only one panel is revealed at a time.
✦ Spry Accordion: This panel is actually a set of collapsible panels that
can contain a large amount of content in a smaller defined space. Panels
can be opened and closed by clicking the individual panel tabs, and only
one panel is revealed at a time.
25_610770-bk04ch02.indd 42925_610770-bk04ch02.indd 429 5/6/10 1:14 PM5/6/10 1:14 PM
430
Working with Spry Widgets
✦ Spry Collapsible Panel: This panel is a single collapsible panel that can
contain a large amount of content in a smaller defined space. Visitors
can expand and collapse the panel by clicking on the panel’s tab.
✦ Spry Tooltip: The Spry Tooltip provides tool tips to visitors when they
hover their mouse over a particular object or bit of text on the Web
page. Tips disappear when the visitors move their mouse away from the
object that triggered the tool tip.
To use these general interactivity widgets, start by inserting a Spry Widget
into your page, like the ones shown in Figure 2-23. After the widget is
inserted, you can modify how it works by adding customized content and by
editing the look and feel of how the widget appears in the browser. (All Spry
Widgets are styled with an external CSS file.)
Each time you insert a Spry Widget into your page, a corresponding CSS file
(such as SpryAssets/SpryTabbedPanels.css) and JavaScript file (such as
SpryAssets/SpryTabbedPanels.js) is added to the root level of your managed
site in a folder called SpryAssets. Sometimes, the widget may include graph-
ics too, and those are also automatically added to the SpryAssets folder. You
must upload this folder and its contents along with the page containing the
Spry Widget to the host server for the widget to function properly.
All general Spry Widgets listed in the preceding section can be inserted on
to your pages in the same way. After insertion, you can customize them with
your own data and modify their styles through the CSS Styles panel.
To insert a Spry Menu Bar, Spry Tabbed Panel, Spry Accordion panel, Spry
Collapsible Panel, or Spry Tooltip on your page, follow these steps:
1. Place your cursor in the area on your page where you want to insert
the Spry Widget.
2. Click the desired Spry Widget icon on the Spry category of the Insert
panel.
When inserting the Spry Menu Bar, you are prompted to select either a
Horizontal or Vertical layout before Dreamweaver adds the code to the
page. For all other widgets, the code is automatically inserted onto the
page.
3. With the Widget still selected (with the blue widget tab visible in
Design view), use the Properties inspector to customize the widget.
By default, the widget is generically named (such as sprytooltip1 or
Accordion2); however, you can change the name, which appears as the
widget’s id attribute, in the Properties inspector. After you change the
name, Dreamweaver updates all instances of the widget on the linked
JavaScript and CSS files.
25_610770-bk04ch02.indd 43025_610770-bk04ch02.indd 430 5/6/10 1:14 PM5/6/10 1:14 PM
Book IV
Chapter 2
JavaScript
Behaviors and
Spry Widgets
431
Working with Spry Widgets
Figure 2-23:
Spry
Widgets
offer visitors
customized
interactive
content.
Customize your widget using the options in the Properties inspector:
• Spry Menu Bar: Add, remove, label, and reorder menu and submenu
items, and add links, link title, and link targets.
• Spry Tabbed Panels: Add, remove, label, and reorder tabs, set the
default panel that is opened when the page loads, and add content to
each of the tab panels.
• Spry Accordion: Add, remove, label, and reorder tabs on the accor-
dion and add content to each of the tab panels.
• Spry Collapsible Panel: Label and add content to the panel, set the
panel display and default state to open or closed, and enable or dis-
able panel animation.
• Spry Tooltip: Customize tool tip trigger and tool tip content; specify
the trigger from a menu of all elements on the page with id attri-
butes; set the horizontal and vertical offset; and hide and show a tool
tip delay, a tool tip special effect (none, blind, fade), and whether
the tool tip should follow the mouse or disappear when the cursor
moves away from the trigger.
25_610770-bk04ch02.indd 43125_610770-bk04ch02.indd 431 5/6/10 1:14 PM5/6/10 1:14 PM
432
Working with Spry Widgets
4. When applicable, add customized content to the widget in Design
view.
For example, the labels and content of most widgets can be adjusted in
Design view.
5. Customize the widget style through the CSS Styles panel.
The CSS files for each of the widgets are listed in the CSS Styles panel.
Finding the right one to edit, however, may be a bit difficult without
Dreamweaver’s Help File documentation. Here’s a listing of all links for
customizing each of the widgets:
www.adobe.com/go/learn_dw_sprymenubar_custom
www.adobe.com/go/learn_dw_sprytabbedpanels_custom
www.adobe.com/go/learn_dw_spryaccordion_custom
www.adobe.com/go/learn_dw_sprycollapsiblepanel_custom
To customize the style of the Spry Tooltip widget, for example, expand
the SpryTooltip.css listed in the CSS Styles panel and make adjustments
to the .iframeTooltip and .tooltipContent styles.
For more information about Spry Framework for Ajax, see Adobe’s Online
Developer’s Guide at />index.html, where you can discover more about Spry Widgets and Spry
Effects, Spry Data Sets, and building dynamic pages with Spry. You can also
find helpful tutorials on the Spry Framework for Ajax Technology Center at
www.adobe.com/devnet/spry/ and informative video tutorials at www.
adobe.com/designcenter/video_workshop.
25_610770-bk04ch02.indd 43225_610770-bk04ch02.indd 432 5/6/10 1:14 PM5/6/10 1:14 PM
Chapter 3: Designing Pages
with Frames
In This Chapter
✓ Understanding frames
✓ Creating frames and framesets
✓ Modifying frame and frameset properties
✓ Targeting frames with links
✓ Adding noframes content
✓ Creating floating frames
B
ack in the early days of the Internet, the most common use of frames
was to ease navigation and reduce page loading wait times for site
visitors using dialup modem connections. The idea behind frames is this:
The browser window is divided into several panes, or frames, that each dis-
play different HTML pages, independent of the content in the other frames.
Furthermore, by specifying the target frame in your hyperlinks, you can con-
trol which frame a new page opens in when a user clicks a link.
Suppose that a user visits a Web site comprising a three-part frameset, with
company information in the top frame, some navigation buttons in the left
frame, and information pertinent to the Web site’s products or services,
such as contact information, in the main frame. With this type of frameset, a
visitor can click a link in the navigation frame, and the linked page opens in
the main frame of the frameset, thereby limiting the amount of new informa-
tion that needs to be loaded in the browser window. The less information to
load, the faster the page can be loaded.
Today many people visiting Web sites have high-speed connections, such
as DSL, cable, T-1, or broadband. With these faster types of Internet access,
frames are no longer necessary as a navigation or layout tool. In addition,
frames have coding, printer, browser, and SEO issues, including problems
with bookmarking pages and effective search engine optimization. Today,
the recommended practice is to create page layouts using layers (see Book
IV, Chapter 1) and CSS (see Book III, Chapter 1).
Nevertheless, frames are still used every once in a long while, so you should
know how to use them, especially in case you inherit a site that was built
with them or find a compelling reason to use them on your site.
26_610770-bk04ch03.indd 43326_610770-bk04ch03.indd 433 5/6/10 1:14 PM5/6/10 1:14 PM
434
Understanding Frames
This chapter provides you with an overview of frames, including how to
create and modify framesets, set attributes for frames and framesets, set the
target attribute of links to display pages in specific frames, add noframes
content for visitors using browsers without frame support, and insert float-
ing frames on a page.
Understanding Frames
You can divide a browser window into multiple panes, or frames. Each frame
contains a unique Web page that is displayed independently of the pages in
the other frames in the browser window. You can control the contents of
each framed area separately with regular HTML. For example, when a visitor
clicks a link, you can have some frames on the page remain static while the
content in another frame changes.
In the code, the page that defines the frame divisions or layout is called a
frameset. The frameset itself doesn’t display any content in the browser
window (except when you use the <noframes> tag, as described at the end
of this chapter). Rather, the frameset provides formatting and layout instruc-
tions to the browser on how to display the pages inside the frames. In other
words, the frameset is merely a container in which other documents are
displayed.
You can use frames to format your entire Web site or just a section or page
of a site. When using frames as the layout format for your entire Web site,
you typically save the frameset file as index.html so that the page loads in
the browser window when people visit the URL. When the frameset page is
loaded, the browser collects and displays the specified pages inside the indi-
vidual frames.
You can divide frames vertically and horizontally into as many frame rows
and columns as you need to achieve your layout. For example, in Figure 3-1,
the browser window is divided into three frames, with static company infor-
mation in the top frame, static navigation links in the left frame, and general
information in the main frame. When a visitor clicks a link in the navigation
area, a new page is displayed in the main frame.
In the code, <frameset> tags replace the <body> tags, and the <frame>
tags further define divisions in the frameset, as in the following sample code:
<frameset rows=”80,*” cols=”*” frameborder=”NO” border=”0” framespacing=”0”>
<frame src=”top.html” name=”topFrame” scrolling=”NO” noresize title=”topFrame”>
<frameset cols=”80,*” frameborder=”NO” border=”0” framespacing=”0”>
<frame src=”left.html” name=”leftFrame” scrolling=”NO” noresize
title=”leftFrame”>
<frame src=”main.html” name=”mainFrame” title=”mainFrame”>
</frameset>
</frameset>
26_610770-bk04ch03.indd 43426_610770-bk04ch03.indd 434 5/6/10 1:14 PM5/6/10 1:14 PM
Book IV
Chapter 3
Designing Pages
with Frames
435
Understanding Frames
Figure 3-1:
Create
framesets
with as
simple or
complex a
layout as
needed.
Top frame
Left frame Main frame
When you create new frames, rows are created top to bottom, and columns
are created left to right. The smallest frameset division can contain two rows
or two columns. However, you can nest a frameset within a frame of another
frameset, to any level of nesting, for some highly complex page display effects.
After you divide your page into a frameset, specify the frameset and the
frame parameters and attributes in the Properties inspector, just as you do
with text and graphics. For instance, you can set the width and height of
frames, the number of rows and columns in the frameset, the source page
for a frame along with the source page margin width and height, the name
or ID of a frame for targeting purposes, a border width and border color,
whether the frame has scroll bars, and whether a visitor can resize each
frame in the frameset.
There are both good and bad things about framesets. Frames are great because
✦ You can display multiple pages in one browser window.
✦ You can use them for displaying Web gallery images, including thumb-
nails and close-up images.
26_610770-bk04ch03.indd 43526_610770-bk04ch03.indd 435 5/6/10 1:14 PM5/6/10 1:14 PM
436
Creating Frames and Framesets
✦ The browser does not need to reload graphics for each page, which
speeds up page display.
✦ Each page in a frame can have its own set of scroll bars, which means
a visitor can scroll in one frame of the browser while referring to the
unmoving area of another frame of the browser.
✦ You can use several JavaScript behaviors with frames, such as the Set
Text of Frame, Go to URL, and Insert Jump Menu options. These behav-
iors allow you to modify the content of a page in a frame without open-
ing a new page in the frame, create a link to another page in particular
frame, and open a new page in a particular frame of the frameset using
a jump menu. For details on each of these and other scripts, check out
Book IV, Chapter 2.
Frames are not so good because
✦ Visitors can’t bookmark individual pages in framesets. The URL of the
frameset page (usually index.html) doesn’t change as the visitor navi-
gates through the site. Also, visitors can’t save individual configurations
of pages in frames.
✦ Search engines have trouble indexing pages, making search engine opti-
mization nearly impossible.
✦ You need to define the target attribute of link tags so new pages open
in the correct frame.
✦ Visitors with disabilities may have difficulty navigating the frames.
✦ Designing framesets can get very confusing.
✦ Precisely aligning elements between frames is more difficult than align-
ing elements on regular unframed pages.
✦ You’re likely to create errors with links and targets.
✦ Most site visitors don’t like frames, especially badly crafted framesets.
Creating Frames and Framesets
Before creating framesets in Dreamweaver, you need to do two things to
customize your work environment and improve the display of the frameset
document in Design view:
✦ Open the Frames panel. The Frames panel, shown in Figure 3-2, displays
all the frames in a frameset document and can assist you with selecting
the frame elements during the frameset building process. To open the
Frames panel, choose Window➪Frames.
26_610770-bk04ch03.indd 43626_610770-bk04ch03.indd 436 5/6/10 1:14 PM5/6/10 1:14 PM
Book IV
Chapter 3
Designing Pages
with Frames
437
Creating Frames and Framesets
Figure 3-2:
Open the
Frames
panel before
working
with frames.
✦ Enable the Frame Borders visual aids. When you have this feature
enabled, the open document displays frame borders and divider bars,
as shown in Figure 3-3. To enable Frame Borders visual aids, choose
View➪Visual Aids➪Frame Borders.
Figure 3-3:
Turn on
the Frame
Borders
visual aids.
Frame borders Divider bars
The W3C recognized frames as of the HTML 4.0 doctype (or DTD — Document
Type Definition), and because browsers need to know what they’re display-
ing, Dreamweaver automatically inserts the appropriate doctype when cre-
ating frames. This ensures that the browsers interpret the file accurately.
However, if you’re hand-coding or inheriting a frameset from another source
(as with a Web site redesign project, for instance), be sure to add the follow-
ing doctype to the master frameset file above the opening <html> tag:
26_610770-bk04ch03.indd 43726_610770-bk04ch03.indd 437 5/6/10 1:14 PM5/6/10 1:14 PM
438
Creating Frames and Framesets
<!DOCTYPE HTML PUBLIC “-//W3C//DTD HTML 4.01 Frameset//EN” “ />html4/frameset.dtd”>
When working in XHTML, use the XHTML Frameset DTD instead:
<!DOCTYPE html PUBLIC “-//W3C//DTD XHTML 1.0 Frameset//EN” “ />xhtml1/DTD/xhtml1-frameset.dtd”>
Building framesets is a complex process and you need to set them up care-
fully so that they are displayed correctly in browsers. For those reasons, try
following these general workflow steps when building framesets:
1. Create the frameset and select the files that you want to appear in
each frame.
See the following sections for details.
2. Save the frameset and all the files in each frame, and name each
frame for later targeting with links.
See “Saving Frames and Framesets,” later in the chapter.
3. Set the properties for the frameset and the individual frames in the
Properties inspector to achieve the look you want.
See the later section, “Setting Frame Properties with the Properties
Inspector.”
4. Set the target attribute for all the links on all the pages to display in
the frames of the frameset so that they’ll appear where you intend
them to.
For details, see “Targeting Frames with Links.”
In the next few sections, you find out how to create a frameset and select
files for the frames.
Using predefined framesets to create a new file
When you need a simple frameset with two to three frames, consider using
one of Dreamweaver’s predefined framesets. To create a new document with
one of the predefined framesets, follow these steps:
1. Choose File➪New to open the New Document dialog box, shown in
Figure 3-4.
2. Select the Page from Sample category, and then select a predefined
frameset in the Frameset Sample Folder.
If you’re not sure which frameset you want, select any frameset in the
Sample Page list; a preview and description of that preset appears on
26_610770-bk04ch03.indd 43826_610770-bk04ch03.indd 438 5/6/10 1:14 PM5/6/10 1:14 PM
Book IV
Chapter 3
Designing Pages
with Frames
439
Creating Frames and Framesets
the right. The Fixed Top, Nested Left frameset and the Fixed Top, Nested
Right frameset are the most popular Web layouts.
Figure 3-4:
Choose a
predefined
frameset
from the
Frameset
Sample
Folder in
the Page
from Sample
category
of the New
Document
dialog box.
3. Click the Create button.
The new frameset appears in the Document window. Note: If the Frame
Tag Accessibility Attributes dialog box appears, select a frame in the
frameset from the Frame menu and add a title for that frame. Repeat
this process until all the frames in the frameset have titles, and then
click OK. To bypass accessibility tags and just insert the frames without
frame titles, click the Cancel button.
Displaying a file in a predefined frameset
Another way of using predefined framesets is to convert an existing open
document into a file displayed inside a frameset. To display a file inside a
predefined frameset, follow these steps:
1. Open the file you want to display inside a frame in a frameset.
2. Place your insertion point somewhere in the file.
3. Choose a predefined frameset in the Frames icon drop-down menu in
the Layout category of the Insert panel.
When you’re trying to decide which frameset to choose, look at the
thumbnail images that appear next to the predefined frameset options,
as shown in Figure 3-5. The frame in blue indicates where your docu-
ment appears if you select the predefined frameset. The white areas
26_610770-bk04ch03.indd 43926_610770-bk04ch03.indd 439 5/6/10 1:14 PM5/6/10 1:14 PM