BeginningMac OS X Tiger Dashboard Widget Development 2006 phần 6 docx
Bạn đang xem bản rút gọn của tài liệu. Xem và tải ngay bản đầy đủ của tài liệu tại đây (859.07 KB, 37 trang )
9
Adding Cut, Copy, and Paste
to Your Widget
Cut, copy, and paste are key components of any Macintosh application and are quintessentially
Mac. Just like the Finder’s Clipboard, Dashboard has a pasteboard that can be used to pass data.
When you add the cut, copy, and paste functions to your widget, you give the user an easy way
to move data between applications and widgets.
By the end of this chapter, you will know:
❑ What the pasteboard operations are in Dashboard
❑ How the cut, copy, and paste functions work
❑ How to add cut, copy, and paste operations to your widget
Pasteboard
JavaScript in Dashboard supports two constants that are pasteboards for the event object. If you
are performing cut, copy, and paste operations in JavaScript, you will use the clipboardData con-
stant. If you are performing drag-and-drop operations in Javascript, you will use the dataTranser
constant.
Pasteboard Events
Six JavaScript events provide support for pasteboard operations that can be applied to any ele-
ment in your widget. Three of the events provide the usual cut, copy, and paste functionality:
oncut, oncopy, and onpaste. The other three allow you to manipulate the data beforehand:
onbeforecut, onbeforecopy, and onbeforepaste.
14_778257 ch09.qxp 6/9/06 9:33 AM Page 153
All six of these events can be attached to any HTML element in your widget that supports them. In the
case of these events, you will register them in the
<body> tag so they are called when the body of the
widget finishes loading. To implement the cut, copy, and paste functions, you must write handlers that
work with the data. You will also need to pass the information about the event to the handler using the
event variable.
Pasteboard Handlers
While not all widgets support the cut, copy, and paste functions, those that do perform just like their
application counterparts. If you perform a calculation on the Calculator widget, for instance, then press
Command-C, you can switch to Text Editor and paste in the result of the calculation. Notice in the widget
that the number remained in the display area (Figure 9-1).
Figure 9-1
Modify the number in the Text Editor document and cut it. Activate Dashboard, set the focus on the
Calculator and press Command-V. You’ll see that the number you cut from Text Editor is pasted in.
Divide that number by some amount and then press Command-X. Now you’ll see that the number in
the Calculator display has been replaced by a 0 (Figure 9-2).
Figure 9-2
This lets you know that the contents of the display have been removed.
154
Chapter 9
14_778257 ch09.qxp 6/9/06 9:33 AM Page 154
When you examine the source files for the Calculator widget, you can see how cut, copy, and paste are
implemented. The events are registered in the
<body> tag of the Calculator.html file.
<body oncut=’docut(event);’ oncopy=’docopy(event);’ onpaste=’dopaste(event);’>
The three event handlers are in the Calculator.js file. The docut function sets the pasteboard to MIME
type plain text and passes the data from the Calculator display, then calls the
clearDisplay and the
updateDisplay functions. This has the same effect as using the Cut command in the Calculator applica-
tion. The
docopy function also sets the pasteboard to the plain text MIME type, but it does not clear the dis-
play. Both of these functions end with the
event.preventDefault() and event.stopPropagation()
functions. You use the event.preventDefault() function to prevent Dashboard’s default behavior and
allow your handler to incorporate the data. You use the
event.stopPropagation() to stop the event
from continuing.
function docut(event) {
event.clipboardData.setData(‘text/plain’, display);
clearDisplay();
updateDisplay();
event.preventDefault();
event.stopPropagation();
}
function docopy (event) {
event.clipboardData.setData(‘text/plain’, display);
event.preventDefault();
event.stopPropagation();
}
function dopaste (event) {
var clip = event.clipboardData.getData(‘text/plain’);
// remove any commas
clip = clip.replace(/,/g, ‘’);
if (!directInput) {
display = evaluator(clip);
updateDisplay();
} else
document.getElementById(“calcDisplay”).innerText = clip;
event.preventDefault();
event.stopPropagation();
}
The dopaste function uses the getData method instead of the setData method because it is getting
the data for the event. The MIME type parameter for
getData is set to text/plain —the type of data
that the Calculator is expecting to receive. It puts the data in the
clip variable.
For security reasons, the
getData method can be called from ondrop and onpaste event handlers only.
The function replaces any commas in the
clip variable using a regular expression and then inserts the
number in the display.
155
Adding Cut, Copy, and Paste to Your Widget
14_778257 ch09.qxp 6/9/06 9:33 AM Page 155
Adding Pasteboard Handlers
Now that you see how the pasteboard events and handlers work together in a widget, you are ready to
add copy functionality to your widget. You can take the WeatherMaps widget that you have been work-
ing on and make a few changes to it and add a copy command so you can copy the current image from
the widget. Because the WeatherMaps widget contains images instead of text, you’ll have to use a differ-
ent MIME type.
Try It Out Add Copy to Your Widget
1.
Open the weathermaps.html file in your text editor.
2. Add oncopy=’docopy(event);’ to the <body> tag. The line should look like this:
<body onload=’setup();’ oncopy=’docopy(event);’>
3. Save and close the weathermaps.html file.
4. Open the weathermaps.js file in your text editor.
5. Add the global variable radarURL = “”; beneath the two button variables at the top of the file.
6. In the setup() function, add a line to set the baseURL variable from the radarMenu:
var theImage = widget.preferenceForKey(“radarMenu”);
radarURL = widget.preferenceForKey(“radarMenu”);
if (theImage == “”) {
radMap();
7. Now add the oncopy function to the file.
function docopy (event) {
event.clipboardData.setData(‘image/pict’,
document.getElementById(“mapImage”).src);
event.clipboardData.setData(‘text/plain’, radarURL);
event.preventDefault();
event.stopPropagation();
}
8. Save and close the weathermaps.js file.
9. Activate Dashboard and reload the WeatherMaps widget if you have it installed.
10. Select the radar map, and then press Command-C to copy it.
11. Close Dashboard, switch to your word processor, open a new document, and paste.
The radar map URL that you selected in the WeatherMaps widget will be pasted into the document.
How It Works
The oncopy event is registered in the <body> tag so the docopy handler in the JavaScript responds to
the standard Macintosh copy keystroke: Command-C. When the widget has focus in Dashboard and the
keystroke is pressed, the
docopy handler is called. The setData instance, as you might guess, sets the
data from the event’s
clipboardData and the MIME type parameter text/plain is set to the MIME type
156
Chapter 9
14_778257 ch09.qxp 6/9/06 9:33 AM Page 156
of the data, which is the URL for the radar map from the widget. Notice that you did not use var when
setting the global variable. The radarURL variable isn’t set until it is read from the preferences during
the
setup() function when it is local to that function. To reference the local variable globally, you set it
without the
var.
Summary
Widgets are not supposed to be small applications, but they should have some of the same basic func-
tionality as Macintosh applications to maintain a consistent user interface. A user who selects text in a
widget naturally expects to be able to copy or cut the text. If your widgets support selecting text, you
should allow the user to work with it the same way she would in an application.
In this chapter, you learned:
❑ What the pasteboard operations are in Dashboard
❑ How the cut, copy, and paste functions work
❑ How to add cut, copy, and paste operations to your widget
Before moving on to Chapter 10, take a moment to run through these exercises.
Exercises
1. Which events can you use the getData method with?
2. How do you get information about the event into the handler?
3. What parameters do you pass the event.stopPropagation() function in the handlers for the
oncut, oncopy, and onpaste events?
157
Adding Cut, Copy, and Paste to Your Widget
14_778257 ch09.qxp 6/9/06 9:33 AM Page 157
14_778257 ch09.qxp 6/9/06 9:33 AM Page 158
10
Adding Drag and Drop
to the Widget
You could say that Apple brought the notion of drag and drop to the personal computer with the
Trashcan in the Macintosh OS. Using direct manipulation, the user was able to grab any file,
folder, or application and drag it into the Trashcan and then empty the Trash to remove the item.
Dragging and dropping a file is more intuitive than typing
rm –r mycherishedfiles/ in a
Terminal window. Dragging and dropping text or graphics was ushered into the operating system
in 1994 with System 7.5 and has been incorporated into OS X and extended.
In OS X, the drag-and-drop interface has been extended to cover more applications and data types.
In addition to dragging graphics and text files —or just graphics and text —onto the application
icons in the Dock, you can drag lists. You can drag lists of songs in iTunes —you even get to see
the number of songs you are about to drop on a playlist (Figure 10-1).
Figure 10-1
In Chapter 9 you saw how to add cut, copy, and paste functionality to your widget. In this chapter,
you learn how to add support for drag and drop to your widget using JavaScript. Using WebKit
handlers, you can drag text and pictures between widgets as well as drag objects from the Finder
to widgets.
By the end of this chapter, you will know:
❑ How to use the drag-and-drop events
❑ How to incorporate drag and drop between the Finder and widgets
❑ How to provide feedback to the user during a drag
15_778257 ch10.qxp 6/9/06 9:33 AM Page 159
Drag-and-Drop Events
So that widgets can perform the some of the same functions as a compiled application, Dashboard pro-
vides events that you can use to trigger the drag-and-drop behavior. You can also add handlers to your
widget’s JavaScript so you can change the image when the object you are dragging reaches its destination.
Dragging and Dropping from the Finder
The Drag-and-Drop Overview section of Apple’s OS X Human Interface Guidelines describes the feed-
back a user should receive. During the drag and drop, the user should receive immediate feedback when
the data is selected, during the drag, when the destination is reached, and when the data is dropped.
In the Dashboard Examples from the Developer installation, you’ll find a Dropper widget. This widget
takes a file dropped on it from the Finder and displays the path to the file, much as you can do in
Terminal. The Finder provides most of the feedback for the user when a file is selected and dragged into
Dashboard. The JavaScript in the widget provides the feedback when the destination is reached and
when the file is dropped.
When you install the widget and activate Dashboard, you’ll see that you begin the drag in the Finder
before dropping it on the widget (Figure 10-2).
Figure 10-2
Close Dashboard and begin dragging a file and then press F12 to display Dashboard (Figure 10-3).
Figure 10-3
160
Chapter 10
15_778257 ch10.qxp 6/9/06 9:33 AM Page 160
When you get the file over the Dropper widget, you’ll see a plus added to the cursor to let you know
that you have reached your destination and can drop the file (Figure 10-4).
Figure 10-4
Release the file and the display box in the widget is updated with the path URL to the file (Figure 10-5).
Figure 10-5
This is very straightforward and something you do unconsciously in your daily use of the Macintosh.
Let’s take a look at the widget’s support for drag and drop.
Using Drag and Drop
You may have noticed that whenever you drag a file in the Finder, you see a lighter representation of it.
The application icon highlights whenever you drag the file over an application that may be able to work
with it in some fashion. Dashboard provides the ability to mimic this same behavior through a set of
events. Support for drag and drop in widgets is provided through three events and can be applied to the
individual elements of the HTML page in your widget:
ondragstart, ondrag, and ondragend.
161
Adding Drag and Drop to the Widget
15_778257 ch10.qxp 6/9/06 9:33 AM Page 161
When you begin dragging an object, the ondragstart event is called. As you drag, the ondrag event is
sent repeatedly to the object you are dragging. Once you reach the destination and drop the object, it is
sent the
ondragend event and it reports the status of the drop —either successful or unsuccessful.
While a drag is in process, any element that has the potential to receive the drop is sent an event when-
ever the object is dragged is near it. These events allow you to provide feedback to the user about the
progress of the drag by changing the cursor during drag or changing the widget to let the user know
that the drop can or cannot be accepted. The events are
ondragenter, ondragover, ondragleave,
and
ondrop.
The
ondragenter and ondragleave events let the element that might receive the drop know when the
object is entering its boundaries or when the object has left the element’s boundaries. The
ondragover
event lets the element know that the object could drop on it. The ondrop event is sent to the element
whenever the object is dropped and allows the widget to respond to the drop.
If you show the contents of the Dropper widget and take a look at the source files, you can see how these
events are tied to the elements in the HTML and CSS files through the JavaScript.
HTML
When you examine the HTML file you can see the basic structure with the CSS and JavaScript files incor-
porated in the Head section. The
ondragenter, ondragover, and ondragleave events are included in
the
<body> tag, and each of these events has its own handler assigned to it as well. Whenever a file
enters within the body of the widget these handlers are called and any action assigned in them will be
executed.
<html>
<head>
<! The CSS for this widget >
<style type=”text/css”>
@import “Dropper.css”;
</style>
<! The JavaScript for this widget >
<script type=’text/javascript’ src=’Dropper.js’ charset=’utf-8’/>
</head>
<! Note the drag and drop handlers set up for body; if any of these events
happen, the relevant handler is called >
<body ondragenter=’dragenter(event);’ ondragover=’dragover(event);’
ondrop=’dragdrop(event)’ ondragleave=’dragleave(event)’>
<img id=”arrow” src=”Default.png” > <! The background image for the widget >
<! The “info window” that shows the information that this widget outputs >
<div class=”theInfo”>
<img src=”images/top.png”>
<div class=”infoWrap”>
<div id=”infoLabel”>Drag an item from Finder, show Dashboard, and drop it on
this Widget.</div>
<div id=”infoURL”></div>
</div>
162
Chapter 10
15_778257 ch10.qxp 6/9/06 9:33 AM Page 162
<img src=”images/bottom.png”>
</div>
</body>
</html>
Like the Fortune widget, Dropper has a graphic with default text that is replaced by the file URL. The
default text is included in the infoLabel
<div> and the infoURL <div> holds the file URL whenever
the file is dropped on the widget.
CSS
The CSS file for the Dropper widget contains a header with information about how the styles are used.
If the style is going to remain static, you begin it with a period. If the style is going to change program-
matically, you begin it with a hash.
*/
/* Styles
* Style sheets allow for precise control of elements within your widget.
* All style information is contained within the <style> tags. If you want to
* utilize style information, use the class or id attributes on most any tag, and
* set them equal to one of your defined styles. Use the class attribute when a
* style is to remain static, and id if you change the style in your scripts.
* When defining the style, begin the style with a period (.) if it is to remain
* static, and a hash (#) if it is going to be altered programatically.
*/
body {
margin: 0;
}
.theInfo {
opacity: 1.0;
position: absolute;
top: 60px;
left: 25px;
}
.infoWrap {
background: url(“images/middle.png”);
padding-right: 9px;
padding-left: 9px;
width: 134px;
}
#infoLabel {
font: 9px “Lucida Grande”;
font-weight: bold;
color: white;
padding-top: 4px;
padding-bottom: 2px;
text-align: center;
163
Adding Drag and Drop to the Widget
15_778257 ch10.qxp 6/9/06 9:33 AM Page 163
}
#infoURL {
font: 11px “Courier New”;
font-weight: bold;
color: white;
word-wrap: break-word;
padding-top: 2px;
padding-bottom: 4px;
}
In the Dropper widget, theInfo and infoWrap styles are both defined as static. If you refer to the HTML
file,
theInfo begins with the top part of the rectangle graphic (images/top.png) where the file URL will
be placed and ends with the bottom portion of the rectangle graphic (images/bottom.png). The
infoWrap
style is also static and contains the middle portion of the graphic.
The infoLabel and infoURL styles are defined to be modified programmatically. The infoLabel con-
tains the default text that is replaced by a new label when a file is dropped, and the
infoURL holds the
file URL.
JavaScript
The JavaScript file contains the event handler to do the work whenever an item or items are dropped on
the widget. The
dragdrop function begins by setting the variable uri, which will hold the file URL, to
null. This ensures that the variable is cleared each time a new item is dropped on the widget. When the
user releases the mouse button over the widget, the variable is set by
event.dataTransfer.getData
(“text/uri-list”)
, which gets the path to the file in URL format. The function also changes the
label text.
The default behavior for WebKit with an ondrop event is to receive and incorporate the data. The
event.preventDefault() in the dragdrop function prevents this default behavior and allows
your handler to receive the data. You don’t have to pass any parameters for this method. The
event.stopPropagation() is a method that also doesn’t require any parameters. Calling it keeps
the event from continuing. If you want to cancel a drag, call the
cancelDefault() method.
/******************/
// Drag and drop code
// This code handles the various drag and drop events
/******************/
// The event handler for the image drop. This handles fetching the image URL and
// trying to place it inside of the widget.
function dragdrop (event)
{
var uri = null;
try {
uri = event.dataTransfer.getData(“text/uri-list”);
// attempt to load the URL
} catch (ex)
{
164
Chapter 10
15_778257 ch10.qxp 6/9/06 9:33 AM Page 164
}
// if the acquisition is successful:
if (uri)
{
document.getElementById(“infoLabel”).innerText = “That item’s URL is:”; //
Add the new label text
document.getElementById(“infoURL”).innerText = uri; // And display
the file’s URL
}
event.stopPropagation();
event.preventDefault();
}
// The dragenter, dragover, and dragleave functions are implemented but not used.
// They can be used if you want to change the image when it enters the widget.
function dragenter (event)
{
event.stopPropagation();
event.preventDefault();
}
function dragover (event)
{
event.stopPropagation();
event.preventDefault();
}
function dragleave (event)
{
event.stopPropagation();
event.preventDefault();
}
The remaining three functions that you saw referenced in the <body> tag of the HTML file for indicating
when a drag is over or inside of the widget boundaries have been stubbed at the bottom of the script but
no actions have been assigned to them.
Try It Out Adding the dragover Event
Now that you see how the drag events work, modify the Dropper.js file to change the image of the
Dropper widget as you drag an item over it.
1. Show the contents of the Dropper widget.
2. Open the Dropper.js file and scroll to the bottom of the file.
3. In the dragover function, add JavaScript to change the image of the object you are dragging
whenever it is over the body of the widget. Your code might look like this:
165
Adding Drag and Drop to the Widget
15_778257 ch10.qxp 6/9/06 9:33 AM Page 165
function dragover (event)
{
document.getElementById(“arrow”).src = “images/drop.png”;
event.stopPropagation();
event.preventDefault();
}
4. Save your changes to the Dropper.js file and close it.
5. Open the Dropper.html file and scroll to the body tag.
<body ondragenter=’dragenter(event);’ img src=’dropit.png’
ondragover=’dragover(event);’ ondrop=’dragdrop(event)’
ondragleave=’dragleave(event)’>
6. Add the image source information for the dragover event. Use the additional image included
with the widget if you do not have one of your own.
7. Save and close the file.
8. Activate Dashboard and reload the widget to load your changes.
How It Works
Whenever you perform a drag within Dashboard, WebKit provides feedback by showing you an image of
what you are dragging. WebKit does this by using a snapshot of the element you are dragging. Your mod-
ifications to the JavaScript and HTML files provide an image that WebKit can substitute for this snapshot.
Dragging Between Widgets
You may have also noticed that you can drag between widgets. Not every widget supports drag and drop,
and only dragging of text objects is supported. For example, the To Do Tracker from Monkey Business
Labs (Figure 10-6) and the Wikipedia widget both support drag and drop for text. When you begin drag-
ging a text object, Dashboard gives you the standard feedback of showing the text you are dragging.
Figure 10-6
166
Chapter 10
15_778257 ch10.qxp 6/9/06 9:33 AM Page 166
When you are over the text entry field in the Wikipedia widget, you get cursor feedback with the plus
added to the arrow to let you know that you can drop the object (Figure 10-7).
Figure 10-7
Summary
You probably use drag and drop most days and never think about it. You may unconsciously drag text
and graphics from your word processor to the Finder desktop or links from your browser to your word
processor or another browser window. Your widget may not need drag-and-drop capabilities, but you
should think about how the user will use it. Drag-and-drop functionality is ingrained in the way we use
our Macs and would be conspicuous in its absence.
In this chapter, you learned:
❑ How to use the drag-and-drop events
❑ How to incorporate drag and drop between the Finder and widgets
❑ How to provide feedback to the user during a drag
In Chapter 11, you’ll look at how access keys enable your widget to work with resources on your Mac
and the Internet. First, you should review some of the things you learned in this chapter by running
through these exercises.
Exercises
1. What method do you call if you want to cancel a drag?
2. What parameters are passed to the event.stopPropagation() method?
3. When was drag-and-drop functionality added to the Macintosh?
167
Adding Drag and Drop to the Widget
15_778257 ch10.qxp 6/9/06 9:33 AM Page 167
15_778257 ch10.qxp 6/9/06 9:33 AM Page 168
11
Access Keys
In Chapter 10, you learned about the different drag-and-drop events available to widgets as well
as how to add drag-and-drop functionality to a widget. In this chapter, you’ll look at the access
keys that are part of the widget Info.plist file. If your widget needs access to any content outside
of its bundle, you will need to allow it to access those resources by specifying the kind of access
that it needs.
By the end of this chapter, you will know:
❑ What access keys are
❑ How to use all of the access keys
❑ When access keys are appropriate
Using Access Keys
In Chapter 2, you had a brief look at a widget with a plugin and the widget properties including
access keys that are specified in the Info.plist file. You have probably looked at other widget prop-
erties as you’ve worked through the WeatherMaps example. At this point, you are familiar with
the idea that if your widget retrieves web pages or maps from the Internet, you have to declare
network access or it will not be able to retrieve those web pages. If your widget needs access to
any files or applications outside of its bundle, you must declare that access.
Widgets have seven access keys that provide them with varying levels of access to your
Macintosh, command-line utilities, your network, and the Internet. Those keys are
AllowFileAccessOutsideOfWidget, AllowSystem, AllowNetworkAccess,
AllowInternetPlugins, Plugin, AllowJava, and AllowFullAccess. The
following sections explain each of these and provide examples.
16_778257 ch11.qxp 6/9/06 9:34 AM Page 169
File System Access
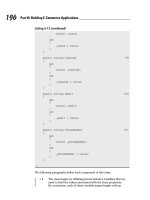
The AllowFileAccessOutsideOfWidget access key allows your widget to open files and applications
outside of the widget bundle. For example, the Tile Game widget that is part of Tiger has the
AllowFileAccessOutsideOfWidget access key set so that it can use pictures that you drag on it
(Figure 11-1).
Figure 11-1
If you remove the
AllowFileAccessOutsideOfWidget key, you can’t drag another image onto the Tile
Game. Even though you can grant your widget access outside of its bundle, that access will be limited to
your access permissions on the file system. A good rule of thumb is that if you can open the file or appli-
cation without having to enter the Administration password, your widget should be able to as well.
The
AllowFileAccessOutsideOfWidget is a Boolean key. If you look in the Tile Game Info.plist file
with the Property List Editor, you’ll see key and settings (Figure 11-2).
Figure 11-2
170
Chapter 11
16_778257 ch11.qxp 6/9/06 9:34 AM Page 170
If you are editing the Info.plist file with BBEdit or another text editor, the access key is entered between
key tags and the Boolean value is set on the line below as in the shaded portion of the Tile Game prop-
erty list below.
<plist version=”1.0”>
<dict>
<key>AllowFileAccessOutsideOfWidget</key>
<true/>
<key>CFBundleIdentifier</key>
<string>com.apple.widget.tilegame</string>
<key>CFBundleName</key>
<string>Tile Game</string>
<key>CFBundleDisplayName</key>
<string>Tile Game</string>
<key>CFBundleShortVersionString</key>
<string>1.0</string>
<key>CFBundleVersion</key>
<string>1.0</string>
<key>CloseBoxInsetX</key>
<integer>7</integer>
<key>CloseBoxInsetY</key>
<integer>5</integer>
<key>Height</key>
<integer>172</integer>
<key>MainHTML</key>
<string>TileGame.html</string>
<key>Width</key>
<integer>172</integer>
</dict>
</plist>
If your widget has preferences, you don’t need to set the AllowFileAccessOutsideOfWidget in the
Info.plist file in order to save the preferences to the filesystem. That functionality is incorporated in the
widget.preferenceForKey() and widget.setPreferenceForKey() methods so that you don’t
have to add the access key yourself.
Command-Line Access
If your widget needs access to the command line to run utilities or scripts, you would enter the
AllowSystem access key in your Info.plist file. The Uptime widget that is included in the Dashboard
examples with the Developer Tools installation calls a command-line utility to get the length of time
your Macintosh has been running.
The
AllowSystem access key is also binary. Like the AllowFileAccessOutsideOfWidget, your Info.plist
file would contain the access key on a single line.
<plist version=”1.0”>
<dict>
<key>AllowSystem</key>
<true/>
171
Access Keys
16_778257 ch11.qxp 6/9/06 9:34 AM Page 171
<key>CFBundleDisplayName</key>
<string>Uptime</string>
<key>CFBundleIdentifier</key>
<string>com.apple.widget.uptime</string>
<key>CFBundleName</key>
<string>Uptime</string>
<key>CFBundleShortVersionString</key>
<string>1.1</string>
<key>CFBundleVersion</key>
<string>1.1</string>
<key>CloseBoxInsetX</key>
<integer>2</integer>
<key>CloseBoxInsetY</key>
<integer>2</integer>
<key>MainHTML</key>
<string>Uptime.html</string>
</dict>
</plist>
To take advantage of this access key, your JavaScript file must include the widget.system method with
the call to the script or utility in the form
widget.system(“command”, handler). The command is the
relative or absolute path to the command-line utility or the script that you want to run. If you need to
pass switches to the utility, you would do that as part of the command. For instance, if you wanted to
return the current date in Universal Time format you would pass the date with the appropriate switch as
part of the command:
/bin/date –u.
The handler parameter is the function that you want to pass the output from the utility or script to after
it executes. If you don’t want to call a handler, you enter the value null for the handler parameter.
If you look at the Uptime.js file, you’ll see an example of the
widget.system method.
function uptime()
{
if(window.widget)
{
document.getElementById(“outputText”).innerText =
(widget.system(“/usr/bin/uptime”, null).outputString);
}
}
The widget.system calls the Uptime utility. Notice that it gives the absolute path to the utility to ensure
that the version of Uptime shipped with OS X and not a user-installed version is called.
If you don’t know the absolute path to the command that you want to run, you find it using the
which
command in the Terminal: [offhook:~]pfterry%which uptime.
The Uptime widget also doesn’t have a handler specified. The
outputString property allows you to
capture the output from the
uptime command and put it in the widget window using getElementById
(“outputText”).innerText
. You would normally see this output if you run the utility in Terminal.
[offhook:~] pfterry% uptime
1:31 up 8 days, 10:04, 3 users, load averages: 1.79 0.42 0.14
172
Chapter 11
16_778257 ch11.qxp 6/9/06 9:34 AM Page 172
The Uptime widget displays this information in the widget window (Figure 11-3).
Figure 11-3
Synchronous Usage
To explain a bit more about the syntax, you can use the widget.system() method either synchronously
or asynchronously to accommodate the kind of command-line utility you are working with. In other
words, if your widget needs to wait for the result of the command, you would use null for the handler
parameter as in the Uptime widget. This works best for command-line utilities that execute and return
the results of the execution quickly.
The
outputString used in the Uptime widget captures what is normally written to stdout, or the
Terminal window. You can also capture error and status information from the
widget.system()
method.
If you want to capture the command’s exit status, you would use the status property instead of
outputString.
document.getElementById(“outputText”).innerText =
(widget.system(“/usr/bin/uptime”, null).status);
Every command has an exit, or return, status. If the command runs successfully, it returns a 0. If a com-
mand does not exit successfully, it returns a number greater than 0, which is the error code.
If a command does not run successfully and exits with an error code, the information is written to stderr.
To capture what would normally be written to
stderr, use the errorString property. For example, if the
Uptime utility were to return an error code, that code would be written to
stderr.
document.getElementById(“outputText”).innerText =
(widget.system(“/usr/bin/uptime”, null).errorString);
Asynchronous Usage
If the command that you are calling from your widget takes a long time to execute or continues execut-
ing until you stop it, you will want to use the widget.system() method asynchronously. This allows your
widget to function while the command is executing. To do this, you provide a handler as the second
argument to
widget.system()instead of the null that you provided in synchronous mode. For
instance, the command might look like this.
widget.system(
“
/usr/bin/tail –f /var/log/system.log, outHandler);
The tail command prints any lines as they are added to the system.log file and the –f switch
instructs tail to follow, or keep printing the lines, until it is told to stop. The
outHandler should
accept a single object as a parameter that will contain the output from the command when it fin-
ishes executing. In the same way that you can get what is printed to
stdout, stderr, and the status
173
Access Keys
16_778257 ch11.qxp 6/9/06 9:34 AM Page 173
message when widget.system() is run synchronously, you can use the object.outputString,
object.errorString, and object.status parameters to retrieve the results of the asynchronous use.
If the command you are calling requires interaction, asynchronous use also supports that. You have
three methods for interacting with the command. You can provide input to the command through
write(string). For example, you could use the write(string) to pass the number of lines that
you want the tail command to give from the file that you are tailing.
tailCmd.write(200);
with
function outHandler(tailCmd) {
tailCmd.write(200);
}
In the tail –f example, the command runs until you cancel it. You use the cancel method to halt the exe-
cution of the command.
tailCmd.cancel()
You can stop the command from running by sending it an end-of-file (EOF) command. You do this with
a close command.
tailCmd.close()
When you are using the widget.system() method, you should consider how long it will take the
command-line utility to finish executing. If the utility runs continuously or may pause for long periods
while it is running, you should use the asynchronous mode.
Network Access
If your widget needs access to any resources that it has to get through the network or from the Internet,
you must use the
AllowNetworkAccess key. The WeatherMaps widget, for example, uses the
AllowNetworkAccess to retrieve maps from a remote website.
<dict>
<key>AllowNetworkAccess</key>
<true/>
<key>CFBundleDisplayName</key>
<string>WeatherMaps</string>
<key>CFBundleIdentifier</key>
<string>com.deadtrees.widget.weathermaps</string>
<key>CFBundleName</key>
<string>WeatherMaps</string>
<key>CFBundleShortVersionString</key>
<string>.8</string>
174
Chapter 11
16_778257 ch11.qxp 6/9/06 9:34 AM Page 174
<key>CFBundleVersion</key>
<string>.8</string>
<key>CloseBoxInsetX</key>
<integer>12</integer>
<key>CloseBoxInsetY</key>
<integer>12</integer>
<key>MainHTML</key>
<string>weathermaps.html</string>
</dict>
</plist>
References to remote web pages can be loaded in the WeatherMaps widget because this access key is set.
In the WeatherMaps widget, the URLs are included in the menus of the HTML file and are set for the dif-
ferent map links in the
setup() function.
<div id=’popupMenu2’>Current Temperatures</div>
<select id=’cTempMenu’ onChange=’cTempMap(this.value);’>
<option
value=” a
regional temperature map </option>
<option
value=” />Central</option>
<option
value=” />Central</option>
<option
value=” />Central</option>
<option
value=” />Northeast</option>
<option
value=” />Northwest</option>
<option
value=” />Central</option>
<option
value=” />Southeast</option>
<option
value=” />Southwest</option>
<option
value=” />Central</option>
</select>
If you remove the AllowNetworkAccess key, the maps in the widget are replaced with broken graphic
icons.
175
Access Keys
16_778257 ch11.qxp 6/9/06 9:34 AM Page 175
The AllowNetworkAccess key is not required, however, if your widget is going to pass the URL to your
browser to open the web page. In this case, you would use the
widget.openURL() method and pass it
the URL, like so.
widget.openURL(‘ />If you click a text link or a button that contains this method, your default browser is opened and the
URL is loaded.
WebKit and Internet Plugin Access
As you saw in Chapter 2, Dashboard widgets can include plugins in the same way that Safari and other
browsers do. The main difference between plugin use in browsers and widgets is that the plugins are
part of the widget bundle. As with the original browser plugin architecture; widget, WebKit, and stan-
dard browser plugins allow your widget to incorporate content from other sources that it wouldn’t be
able to access natively. Flash animations and QuickTime movies, for instance, can be displayed in a wid-
get making use of plugins. If your widget needs to access content beyond the widget bundle, file system,
or network or needs to interact with applications, you will want to use a plugin.
Because Dashboard is based on the same WebKit technologies as Safari, you are able to incorporate WebKit
plugins in your widget. To do this, you provide an access key, and you specify the name of the plugin. The
access key for a WebKit plugin is
AllowInternetPlugins and is a Boolean value. You can see this in the
Info.plist for a widget that uses the QuickTime plugin.
<plist version=”1.0”>
<dict>
<key>AllowInternetPlugins</key>
<true/>
<key>BackwardsCompatibleClassLookup</key>
<true/>
<key>CFBundleDisplayName</key>
<string>QT Movie</string>
<key>CFBundleIdentifier</key>
<string>com.deadtrees.widget.qtmovie</string>
<key>CFBundleName</key>
<string>QT Movie</string>
<key>CFBundleShortVersionString</key>
<string>1.0</string>
<key>CFBundleVersion</key>
<string>1.0</string>
<key>CloseBoxInsetX</key>
<integer>14</integer>
<key>CloseBoxInsetY</key>
<integer>16</integer>
<key>MainHTML</key>
<string>QTMovie.html</string>
</dict>
</plist>
You don’t have to enter the plugin name in the Info.plist file, because Internet plugins are automatically
picked up by Dashboard.
176
Chapter 11
16_778257 ch11.qxp 6/9/06 9:34 AM Page 176
Widget Plugin Access
The Widget plugin access key allows you to incorporate a plugin specifically written for your widget.
Plugins allow your widget access to other files and applications that it does not access natively. As you
saw with the Fortune widget earlier in the book, a widget plugin is a Cocoa bundle with its own
Info.plist file. It is included in your widget’s root directory and your widget is able to communicate
with it by using JavaScript to a script object.
The access key syntax specifies a widget plugin. If you look in the Easy Envelope widget’s Info.plist file,
you’ll see the plugin access key. This key uses a string instead of a Boolean value, and the plugin key is
followed by the name of the plugin.
<dict>
<key>AllowFullAccess</key>
<true/>
<key>CFBundleDisplayName</key>
<string>EasyEnvelopes</string>
<key>CFBundleGetInfoString</key>
<string>1.0.2 Copyright ©2005 by Ambrosia Software, Inc.</string>
<key>CFBundleIdentifier</key>
<string>com.ambrosiasw.widget.easyenvelopes</string>
<key>CFBundleName</key>
<string>EasyEnvelopes</string>
<key>CFBundleShortVersionString</key>
<string>1.0.2</string>
<key>CFBundleVersion</key>
<string>1.0.2</string>
<key>CloseBoxInsetX</key>
<integer>5</integer>
<key>CloseBoxInsetY</key>
<integer>6</integer>
<key>MainHTML</key>
<string>EasyEnvelopes.html</string>
<key>Plugin</key>
<string>EEWPlugin.widgetplugin</string>
</dict>
</plist>
The EEWPlugin is called numerous times in the EasyEnvelopes.js file. As in the example that follows,
each time the widget needs information from the plugin, it is called through the JavaScript. In the
grabClipboardAddress() function, the JavaScript uses the plugin to check the clipboard for an
address. If it finds one, the JavaScript places the address in the widget’s address field.
function grabClipboardAddress() {
if ( EEWPlugin ) {
window.setTimeout(“EEWPlugin.call(‘focusOnSearchField’)”, 0);
if ( document.getElementById(“back”).style.display == “block” )
EEWPlugin.toggleWithBool(“frontIsShowing”, false);
else
EEWPlugin.toggleWithBool(“frontIsShowing”, true);
}
if ( document.getElementById(“back”).style.display == “block” ) {
if (returnAddressIndex == kCustomReturnAddress ) {
177
Access Keys
16_778257 ch11.qxp 6/9/06 9:34 AM Page 177