Introducing Microsoft Windows sever 2008 r2 phần 6 pot
Bạn đang xem bản rút gọn của tài liệu. Xem và tải ngay bản đầy đủ của tài liệu tại đây (576.06 KB, 20 trang )
Active Directory Recycle Bin: Recovering Deleted Objects CHAPTER 5 83
A logically deleted object remains in that state for the duration of its deleted object life-
time, which by default is 180 days. At the end of the deleted object lifetime, the object’s state
changes to recycled object. This is also a new state in Windows Server 2008 R2, and although
objects in this state lose most of their attributes like tombstone objects, they are not recover-
able at this point, using either the Recycle Bin or the authoritative restore process in Directory
Services Restore Mode. After the object’s recycled object lifetime expires, which is another 180
days by default, the garbage collection process physically deletes the object from the Active
Directory database.
tIp Administrators can change the lifetime values from their defaults by modifying the
msDS-deletedObjectLifetime attribute for the deleted object lifetime, and the tombstone-
Lifetime attribute for the recycled object lifetime. To modify these attributes, you can use
the Set-ADObject cmdlet in the Active Directory Module for Windows PowerShell or the
Ldp.exe LDAP client.
Enabling the Active Directory Recycle Bin
The Active Directory Recycle Bin is available in Windows Server 2008 R2, but it is disabled by
default. Before you can use the Recycle Bin, you must perform the following procedures for
AD DS:
IMportant Enabling the Active Directory Recycle Bin is an irrevocable act. Once you
enable it, you cannot disable it again.
n
Prepare the Active Directory schema If you are upgrading your forest from Windows
Server 2008 or earlier, upgrade the directory schema by using an account with Schema
Admins privileges to execute the following commands from a command prompt:
•
adprep /forestprep on the server that holds the schema master role
•
adprep /domainprep /gpprep on the server that holds the infrastructure opera-
tions master role
•
adprep /rodcprep if you have any read-only domain controllers on your network
note If you have created your forest on a clean Windows Server 2008 R2 installation,
you do not have to upgrade the schema with Adprep.exe.
n
Upgrade all of your domain controllers to the Windows Server 2008 R2 operating
system, if necessary.
84 CHAPTER 5 Active Directory: Improving and Automating Identity and Access
n
Raise the forest functional level to Windows Server 2008 R2.
If you are running AD LDS, perform the following procedures:
n
Upgrade all of your servers running instances of AD LDS to Windows Server 2008 R2, if
necessary.
n
Update the directory schema by executing the following command, replacing the vari-
ables with the appropriate values on each server:
ldifde.exe –i –f MS-ADAM-Upgrade-2.ldf –s server_name:port –b username
domain_name password –j . -$ adamschema.cat
n
Raise the functional level of the AD LDS configuration set to Windows Server 2008 R2.
With all of the preparation finished, you are ready to actually enable the Recycle Bin, using
one of the following commands from an Active Directory Module for Windows PowerShell
prompt with elevated privileges:
n
For AD DS, use the following command, replacing the variables with appropriate values
for your installation:
Enable-ADOptionalFeature ‘Recycle Bin Feature’ –Scope
ForestOrConfigurationSet –Target ‘forest_name.com’
n
For AD LDS, use the following command, modifying the –Target parameter with the
appropriate distinguished name for your installation:
Enable-ADOptionalFeature 'recycle bin feature' -Scope
ForestOrConfigurationSet -Server localhost:50000 -Target
'CN=Configuration,CN={372A5A3F-6ABE-4AFD-82DE-4A84D2A10E81}’
Using the Active Directory Recycle Bin
Once you have enabled the Active Directory Recycle Bin, you can restore any objects you
delete, using the cmdlets in the Active Directory Module for Windows PowerShell.
note Active Directory Recycle Bin makes it possible to restore any objects you delete
after it is enabled. You cannot use Recycle Bin to restore objects you deleted before you
enabled Recycle Bin. These are already tombstone objects, and most of their attributes are
irrevocably lost.
After opening a session with elevated privileges, restoring deleted objects requires two
cmdlets: Get-ADObject, to locate the desired object in the Deleted Objects folder, and
Restore-ADObject, to perform the actual restoration. You can run each cmdlet separately,
noting the ObjectGUID value displayed by Get-ADObject so you can include it on the
Active Directory Recycle Bin: Recovering Deleted Objects CHAPTER 5 85
Restore-ADObject command line, or you can combine the two by piping the Get-ADObject
results to the Restore-ADObject cmdlet in the following manner:
Get-ADObject -Filter ‘string’ -IncludeDeletedObjects | Restore-ADObject
The string variable must contain search criteria that display the object or objects (and only
the object or objects) you want to restore. For example, the following command will restore
an object with the display name “Mark Lee.”
Get-ADObject -Filter ‘displayName -eq “Mark Lee”’ -IncludeDeletedObjects | Restore-
ADObject
To display the entire contents of the Deleted Objects folder, use the following command,
replacing the forest_name and top_level_domain variables with values appropriate to your
installation:
Get-ADObject –SearchBase “CN=Deleted Objects,DC=forest_name,DC=top_level_domain”
–ldapFilter “(objectClass=*)” -includeDeletedObjects
tIp If you do not know the exact display name of the object you want to restore, you
can use any viable value for the –Filter string. You might want to run the Get-ADObject
cmdlet by itself first (without the pipeline to Restore-ADObject), while you experiment
with string values. For example, the command GetADObject –Filter ‘displayname –like
“M*”’ -IncludeDeletedObjects will return a list of all deleted objects that have display
names starting with “M.” You can then refine your filter until you create a string that re-
turns only the object or objects you want to restore. For more information on the syntax of
the Get-ADObject –Filter parameter, type the command get-help about_ActiveDirec-
tory_Filter in an Active Directory Module for Windows PowerShell session.
When restoring multiple objects, and especially organizational units (OUs) that contain
other objects, the order in which you restore the objects can be critical and the filter strings
can be more complex. With the Active Directory Recycle Bin, you can only restore objects to
a live parent. This means, for example, that if you accidentally delete an OU object, you must
restore the OU itself before you can restore any of the objects in that OU. If you delete an
OU that contains other OUs, you must start by restoring the parent OU (that is, the highest
deleted OU in the hierarchy) before you can restore the subordinate ones.
tIp When restoring a hierarchy of objects, a series of exploratory Get-ADObject com-
mands might be necessary to ascertain the correct order for the restorations. In these
cases, you might want to use commands that include the –Properties lastKnownParent
parameter to determine parental relationships between the deleted objects.
86 CHAPTER 5 Active Directory: Improving and Automating Identity and Access
Offline Domain Join: Securing and Facilitating
Deployment
Another long-term complaint of Active Directory administrators has been the need to have a
workstation connected to an AD DS domain controller to join it to a domain. Many IT organi-
zations prefer to install and configure their servers and workstations at a central location, and
then deploy them to their final destinations. In many cases, this means that the domain the
computer will eventually join is not available at the time of the installation. The result is that IT
personnel have to wait to join the computer to the domain until the system is on site, which is
often an impractical solution.
The offline domain join capability in Windows Server 2008 R2 enables administrators
to gather the information needed to join a computer running Windows Server 2008 R2 or
Windows 7 to a domain and save it to the computer without it requiring access to the domain
controllers. When the computer starts for the first time in its final location, it automatically
joins to the domain using the saved information, with no interaction and no reboot necessary.
Djoin.exe is a command prompt tool that you run on one computer to gather the meta-
data needed to join another computer to a domain, create its computer account in AD DS,
and save the metadata to an encrypted file. Once this is complete, you copy the file to the
computer you want to join to the domain and run Djoin.exe there. The first computer, called
the provisioning computer, must be running Windows Server 2008 R2 or Windows 7, and it
must have access to a domain controller. By default, the domain controller must be running
Windows Server 2008 R2. An example of a basic provisioning command appears as follows:
djoin /provision /domain example.local /machine Wkstn1 /savefile c:\wkstn1_join.txt
In this example, the /domain parameter specifies the name of the domain you want the
target computer to join, the /machine parameter the name you want to assign to the target
computer, and the /savefile parameter the name of the metadata file you want to create.
Optional parameters enable you to specify the name of an OU where you want to create the
computer object, and the name of a specific domain controller to use.
note For more information on the Djoin.exe syntax, type djoin /? at a Windows Server
2008 R2 or Windows 7 command prompt.
To deploy the metadata on the target computer, which must also be running Windows
Server 2008 R2 or Windows 7, you copy the file Djoin.exe created to that system and run the
program again, this time with the /requestodj parameter, as in the following example:
djoin /requestodj /loadfile c:\wkstn1_join.txt /windowspath %windir% /localos
Service Accounts CHAPTER 5 87
At this point, the target computer can still be located in the setup facility. The system does
not have to have access to its eventual domain, or even be connected to a network. Once you
have provisioned the computer, you can move it to its final location. The next time you restart
the system, it will be joined to the domain you specified and ready to use.
This example provisioned a computer’s local Windows installation, but you can also use
Djoin.exe to provision offline virtual machines, or even computers on which you haven’t yet
installed the operating system. To do the latter, you insert a reference to the metadata file
that Djoin.exe created into an Unattend.xml file, for use during an automated installation.
Service Accounts
Applications and services require accounts to access network resources, just as users do.
Administrators can configure an application to run using the Local Service, Network Service,
or Local System account. These accounts are simple to manage, but they do have draw-
backs. First, they are local accounts, which means administrators cannot manage them at the
domain level. Second, these system accounts are typically shared by multiple applications,
which can be a security issue. It is possible to configure an application to use a standard
domain account. This enables you to isolate the account security for a particular applica-
tion, but it also requires you to manage the account passwords manually. If you change the
account password on a regular basis, you must reconfigure the application that uses it, so that
it supplies the correct password when logging on to the domain.
The managed service account is a new feature in Windows Server 2008 R2 that takes the
form of a new Active Directory object class. Because managed service accounts are based on
computer objects, they are not subject to Group Policy–based password and account poli-
cies as are domain users. Managed service policies also do not allow interactive logons, so
they are an inherently more secure solution for applications and services. Most importantly,
managed service accounts eliminate the need for manual credential management. When you
change the password of a managed service account, the system automatically updates all of
the applications and services that use it.
To create a managed service account, you must use the New-ADServiceAccount
cmdlet in the Active Directory Module for Windows PowerShell. You can also use the
Get-ADService Account cmdlet to locate existing managed service accounts. To use a
managed service account for a particular application or service, you must run the Install-
ADServiceAccount cmdlet on the computer hosting the application.
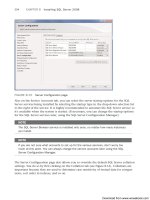
Best Practices Analyzer CHAPTER 5 89
The BPA works by running a Windows PowerShell script that collects information about the
system and stores it in an XML file. The analyzer then compares its preconfigured rules to the
information in the XML file and reports the results. You can also run BPA from the Windows
PowerShell command prompt directly, but first you must import the ServerManager and
BestPractices modules. The cmdlets that perform the BPA operations are as follows:
n
Get-BPAModel Displays the roles installed on the server that are supported by the
BPA
n
Get-BPAResult Displays the results of the most recently executed BPA scan for a
specified role
n
Invoke-BPAModel Initiates a new BPA scan for a specified role
n
Set-BPAResult Enables you to include or exclude specific results in a BPA scan
report
CHAPTER 6 91
CHAPTER 6
The File Services Role
n
Using the File Classification Infrastructure 91
n
Using BranchCache 101
n
Introducing Distributed File System Improvements 108
T
he overall take on file services in Windows Server 2008 R2 is to help administrators
in an enterprise environment manage the increasingly large amounts of data that
are their responsibility. Although storage space is cheaper and more plentiful than ever
before, the increased emphasis on audio and video file types, whether business related
or not, has led to a storage consumption rate that in many instances more than equals its
growth.
There is only one new role service in the File Services role, but there are innovative
new features introduced into some of the existing role services. In an enterprise with
multiple sites, increased storage capacity typically leads to increased consumption of
bandwidth between sites, and these new features can help administrators manage this
bandwidth consumption and improve file access times in the process.
Using the File Classification Infrastructure
An enterprise network can easily have millions of files stored on its servers, and admin-
istrators are responsible for all of them. However, different types of files have different
management requirements. Enterprise networks typically have a variety of storage tech-
nologies to accommodate their different needs. For example, drive arrays using Redun-
dant Array of Independent Disks (RAID) for fault tolerance are excellent solutions for
business-critical files, but they are also more expensive to purchase, set up, and maintain.
Storing noncritical files on a medium such as this would be a waste.
At the other end of the spectrum, an offline or near-line storage medium, such as
magnetic tape or optical disks, can provide inexpensive storage for files that are not
needed on a regular basis, or that have been archived or retired. The big problem for the
administrator with a variety of storage options is determining which files should go on
which medium, and then making sure that they get there.
92 CHAPTER 6 The File Services Role
There are often other storage management factors to consider as well, such as the
following:
n
Encryption Files containing confidential information might require encrypted stor-
age and backup media.
n
Permissions Business-critical files often need special permission assignments to
prevent unauthorized persons from accessing or modifying them.
n
Backups Important files that change frequently might require additional backups
several times per day.
However, determining which files require a certain treatment and seeing that they receive
it can be a major administrative problem.
Traditional methods for classifying files include storing them in designated folders, ap-
plying special file naming conventions, and, in the case of backups, the long-standing use of
the archive bit to indicate files that have changed. None of these methods are particularly
efficient for complex scenarios on a large scale, however, because of the manual maintenance
they require or their limited flexibility. Who is going to be responsible for making sure that
files are named properly, or moved to the appropriate folders? It would not be practical for IT
personnel to monitor the file management practices of every user on the network. Also, if you
designate one folder for files containing sensitive data and another for files that are modified
often, what do you do with a file that is both sensitive and frequently updated?
Introducing the FCI Components
The File Classification Infrastructure (FCI) introduced in Windows Server 2008 R2 is a system
that enables administrators to define their own file classifications, independent of directory
structures and file names, and configure applications to perform specific actions based on
those classifications.
FCI consists of four components, as follows:
n
Classification Properties Attributes created by administrators that identify certain
characteristics about files, such as their business value or level of sensitivity
n
Classification Rules Mechanisms that automatically apply classification properties
to certain files based on specific criteria such as file contents
n
File Management Tasks Scheduled operations that perform specified actions on
files with certain classification properties
n
Storage Reports Management Engine that can generate reports that, among oth-
er things, document the distribution of classification properties on file server volume
For example, an administrator might create a classification property that indicates whether
a file contains personal or confidential information. To apply that property automatically,
the administrator can create a classification rule that searches files for the words “personal”
or “confidential.” A backup application can then use the property to differentiate between
 -->
-->