Learning the vi Text Editor 6th phần 6 doc
Bạn đang xem bản rút gọn của tài liệu. Xem và tải ngay bản đầy đủ của tài liệu tại đây (440.55 KB, 30 trang )
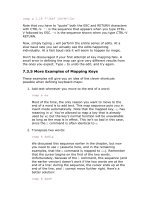
/getopt
Edit main.c and move to the call to getopt_long.
^]
Do a tag lookup on getopt_long. vim moves to getopt1.c, placing the
cursor on the definition of getopt_long.
It turns out that getopt_long is a "wrapper" function for _getopt_internal. You
place the cursor on _getopt_internal and do another tag search.
Keystrokes
Results
8jf_ ^]
You have now moved to getopt.c. To find out more about struct
option, move the cursor to option and do another tag search.
5jfo;
^]
The editor moves to the definition of struct option in getopt.h. You
may now look over the comments explaining how it's used.
:tags
The :tags command in vim displays the tag stack.
Typing ^T three times would move you back to main.c, where you started. The
tag facilities make it easy to move around as you edit source code.
8.6 Improved Facilities
The four clones all provide additional features that make simple text editing
easier and more powerful.
Editing the ex command line
The ability to edit ex mode commands as you type them, possibly
including a saved history of ex commands. Also, the ability to complete
filenames and possibly other things, such as commands and options.
No line length limit
The ability to edit lines of essentially arbitrary length. Also, the ability to
edit files containing any 8-bit character.
Infinite undo
The ability to successively undo all of the changes you've made to a file.
Incremental searching
The ability to search for text while you are typing the search pattern.
Left/right scrolling
The ability to let long lines trail off the edge of screen instead of wrapping.
Visual mode
The ability to select arbitrary contiguous chunks of texts upon which some
operation will be done.
Mode indicators
A visible indication of insert mode versus command mode, as well as
indicators of the current line and column.
8.6.1 Command-Line History and Completion
Users of the csh, tcsh, ksh, and bash shells have known for years that being able
to recall previous commands, edit them slightly, and resubmit them makes them
more productive.
This is no less true for editor users than it is for shell users; unfortunately, UNIX
vi does not have any facility to save and recall ex commands.
This lack is remedied in each of the clones. Although each one provides a
different way of saving and recalling the command history, each one's mechanism
is usable and useful.
In addition to a command history, all of the editors can do some kind of
completion. This is where you type the beginning of, for example, a filename. You
then type a special character (such as tab), and the editor completes the filename
for you. All of the editors can do filename completion, some of them can complete
other things as well. Details are provided in each editor's chapter.
8.6.2 Arbitrary Length Lines and Binary Data
All four clones can handle lines of any length.
[7]
Historic versions of vi often had
limits of around 1,000 characters per line; longer lines would be truncated.
[7]
Well, up to the maximum value of a C long, 2,147,483,647.
All four are also 8-bit clean, meaning that they can edit files containing any 8-bit
character. It is even possible to edit binary and/or executable files, if necessary.
This can be really useful, at times. You may or may not have to tell each editor
that a file is binary.
nvi
Automatically handles binary data. No special command-line or ex options
are required.
elvis
Under UNIX, does not treat a binary file differently from any other file. On
other systems, it uses the elvis.brf file to set the binary option, to avoid
newline translation issues. (The elvis.brf file and hex display modes are
described in Section 10.10
.)
vim
Does not have a limit on the length of a line. When binary is not set, vim
is like nvi, and automatically handles binary data. However, when editing a
binary file, you should either use the -b command-line option or :set
binary. These set several other vim options that make it easier to edit
binary files.
vile
Automatically handles binary data. No special command-line or ex options
are required.
Finally, there is one tricky detail. Traditional vi always writes the file with a final
newline appended. When editing a binary file, this might add one character to the
file and cause problems. nvi and vim are compatible with vi by default, and add
that newline. In vim you can set the binary option, so this doesn't happen. elvis
and vile never append the extra newline.
8.6.3 Infinite Undo
UNIX vi allows you to undo only your last change, or to restore the current line to
the state it was in before you started making any changes. All of the clones
provide "infinite undo," the ability to keep undoing your changes, all the way back
to the state the file was in before you started any editing.
8.6.4 Incremental Searching
When incremental searching is used, the editor moves the cursor through the file,
matching text as you type the search pattern. When you finally type RETURN, the
search is finished.
[8]
If you've never seen it before, it is rather disconcerting at
first, but after a while you get used to it.
[8]
emacs has always had incremental searching.
elvis does not support incremental searching. nvi and vim enable incremental
searching with an option, and vile uses two special vi mode commands. vile can
be compiled with incremental searching disabled, but it is enabled by default.
Table 8.6
shows the options each editor provides.
Table 8.6. Incremental Searching
Editor Option Command Action
nvi
searchincr
The cursor moves through the file as you type,
always being placed on the first character of the text
that matches.
vim
incsearch
The cursor moves through the file as you type. vim
highlights the text that matches what you've typed
so far.
vile
^X S, ^X
R
The cursor moves through the file as you type,
always being placed on the first character of the text
that matches. ^X S incrementally searches forward
through the file, while ^X R incrementally searches
backward.
8.6.5 Left-Right Scrolling
By default, vi and most of the clones wrap long lines around the screen. Thus, a
single logical line of the file may occupy multiple physical lines on your screen.
There are times when it might be preferable if a long line simply disappeared off
the right-hand edge of the screen, instead of wrapping. Moving onto that line and
then moving to the right would "scroll" the screen sideways. This feature is
available in all of the clones. Typically, a numeric option controls how much to
scroll the screen, and a Boolean option controls whether lines wrap or disappear
off the edge of the screen. vile also has command keys to perform sideways
scrolling of the entire screen. Table 8.7
shows how to use horizontal scrolling with
each editor.
Table 8.7. Sideways Scrolling
Editor Scroll Amount Option Action
nvi
sidescroll
= 16
leftright
Off by default. When set, long lines simply go off
the edge of the screen. The screen scrolls left or
right by 16 characters at a time.
elvis
sidescroll
= 8
wrap
Off by default. When set, long lines simply go off
the edge of the screen. The screen scrolls left or
right by 8 characters at a time.
vim
sidescroll
= 0
wrap
Off by default. When set, long lines simply go off
the edge of the screen. With sidescroll set to
zero, each scroll puts the cursor in the middle of
the screen. Otherwise the screen scrolls by the
desired number of characters.
vile
sideways =
0
linewrap
Off by default. When set, long lines wrap. Thus,
the default is to have long lines go off the edge
of the screen. Long lines are marked at the left
and right edges with < and >. With sideways set
to zero, each scroll moves the screen by
.
Otherwise the screen scrolls by the desired
number of characters.
horizscroll
On by default. When set, moving the cursor
along a long line off-screen shifts the whole
screen. When not set, only the current line
shifts; this may be desirable on slower displays.
vile has two additional commands, ^X ^R and ^X ^L. These two commands scroll
the screen right and left, respectively, leaving the cursor in its current location on
the line. You cannot scroll so far that the cursor position would go off the screen.
8.6.6 Visual Mode
Typically, operations in vi apply to units of text such lines, words, or characters,
or to sections of text from the current cursor position to a position specified by a
search command. For example, d/^} deletes up to the next line that starts with a
right brace. elvis, vim, and vile all provide a mechanism to explicitly select a
region of text to which an operation will apply. In particular, it is possible to
select a rectangular block of text and apply an operation to all the text within the
rectangle! See each editor's respective chapter for the details.
8.6.7 Mode Indicators
As you know by now, vi has two modes, command mode and insert mode.
Usually, you can't tell by looking at the screen which mode you're in.
Furthermore, often it's useful to know where in the file you are, without having to
use the ^G or ex := commands.
Two options address these issues, showmode and ruler. All four clones agree on
the option names and meanings, and even Solaris vi has the showmode option.
Table 8.8
lists the special features in each editor.
Table 8.8. Position and Mode Indicators
Editor With ruler, displays With showmode, displays
nvi row and column insert, change, replace, and command mode indicators
elvis row and column input and command mode indicators
vim row and column insert, replace, and visual mode indicators
vile
row, column, and
percent of file
insert, replace, and overwrite mode indicators
vi N/A
separate mode indicators for open, input, insert,
append, change, replace, replace one character, and
substitute modes
The GUI versions of elvis and vim change the cursor shape depending upon the
current mode.
8.7 Programming Assistance
vi was developed primarily as a programmer's editor. It has features that make
things especially easy for the UNIX programmer—someone writing C programs
and troff documentation. (Real Programmers write Real Documentation in troff.)
Several of the clones are proud bearers of this tradition, adding a number of
features that make them even more usable and capable for the "power user."
[9]
[9]
In contrast to the What You See Is What You Get (WYSIWYG) philosophy, UNIX is the You Asked For It,
You Got It operating system. (With thanks to Scott Lee.)
Two features (among many) most deserve discussion:
Edit-compile speedup
elvis, vim, and vile allow you to easily invoke make(1), capture the errors
from your compiler, and automatically move to the lines containing the
errors. You can then fix the errors and re-run make, all from within the
editor.
Syntax highlighting
elvis, vim, and vile have the ability to highlight and/or change the color of
different syntactic elements in different kinds of files.
8.7.1 Edit-Compile Speedup
Programming often consists of a "compile-test-debug" cycle. You make changes,
compile the new code, and then test and debug it. When learning a new
language, syntax errors are especially common, and it is frustrating to be
constantly stopping and restarting (or suspending and resuming) the editor in
between compiles.
elvis, vim, and vile all provide facilities that allow you to stay within the editor
while compiling your program. Furthermore, they capture the compiler's output
and use it to automatically go to each line that contains an error.
[10]
Consistent
use of this ability can save time and improve programmer productivity.
[10]
Yet another feature that emacs users are accustomed to comes to vi.
Here is an example, using elvis. You are beginning to learn C++, so you start out
with the obligatory first program:
Keystrokes
Results
:w
hello.C
You enter the program, forgetting the closing quote, and then write
the program to hello.C.
:make
hello
You type the :make command to run make, which in turn runs the
C++ compiler. (In this case, g++.)
:errlist
The :errlist command moves to the line with the error and displays
the first compiler error message in the status line.
You can fix the error, resave the file, re-run :make and eventually compile your
program without errors.
All of the editors have similar facilities. They will all compensate for changes in
the file, correctly moving you to subsequent lines with errors. More details are
provided in each editor's chapter.
8.7.2 Syntax Highlighting
elvis, vim, and vile all provide some form of syntax highlighting. All three also
provide syntax coloring, changing the color of different parts of the file on
displays that can do so (such as under X11 or the Linux console). See each
editor's chapter for more information.
8.8 Editor Comparison Summary
Most of the clones support most or all of the features described above. Table 8.9
summarizes what each editor supports. Of course, the table does not tell the full
story; the details are provided in each one's individual chapter.
Table 8.9. Feature Summary Chart
Feature nvi elvis vim vile
Multiwindow editing
GUI
Extended regular expressions
Enhanced tags
Tag stacks
Arbitrary length lines
8-bit data
Infinite undo
Incremental searching
Left-right scrolling
Mode indicators
Visual mode
Edit-Compile Speedup
Syntax Highlighting
Multiple OS support
8.9 A Look Ahead
The next four chapters cover nvi, elvis, vim, and vile, in that order. Each chapter
has the following outline:
1. Who wrote the editor, and why.
2. Important command-line arguments.
3. Online help and other documentation.
4. Initialization—what files and environment variables the program reads,
and in what order.
5. Multiwindow editing.
6. GUI interface(s), if any.
7. Extended regular expressions.
8. Improved editing facilities (tag stacks, infinite undo, etc.).
9. Programming assistance (edit-compile speedup, syntax highlighting).
10. Interesting features unique to the program.
11. Where to get the sources, and what operating systems the editor runs on.
All of the distributions are compressed with gzip, GNU zip. If you don't
already have it, you can get gzip from />1.2.4.tar The untar.c program available from the elvis ftp site is a very
portable, simple program for unpacking gzip'ed tar files on non-UNIX
systems.
Because each of these programs continues to undergo development, we have not
attempted an exhaustive treatment of each one's features. Such would quickly
become outdated. Instead, we have "hit the highlights," covering the features
that you are most likely to need to know about and that are least likely to change
as the program evolves. You should supplement this book with each one's online
documentation if you need to know how to use every last feature of your editor.
Chapter 9. nvi—New vi
nvi is short for "new vi." It was developed initially at the University
of California at Berkeley (UCB), home of the famous BSD (Berkeley
Software Distribution) versions of UNIX. It was used for writing this
chapter.
9.1 Author and History
The original vi was developed at UCB in the late 1970s by Bill Joy, then a
computer science graduate student, and now a founder and vice president of Sun
Microsystems.
Bill Joy first built ex, starting with and heavily enhancing the Sixth Edition ed
editor. The first enhancement was open mode, done with Chuck Haley. Between
1976 and 1979 ex evolved into vi. Mark Horton then came to Berkeley, added
macros "and other features,"
[1]
and did much of the work on vi to make it work on
a large number of terminals and UNIX systems. By 4.1BSD (1981), the editor
already had essentially all of the features described in Part I
of this book.
[1]
From the nvi reference manual. Unfortunately, it does not say which features.
Despite all of the changes, vi's core was (and is) the original UNIX ed editor. As
such, it was code that could not be freely distributed. By the early 1990s, when
they were working on 4.4BSD, the BSD developers wanted a version of vi that
could be freely distributed in source code form.
Keith Bostic of UCB started with elvis 1.8,
[2]
which was a freely distributable vi
clone, and began turning it into a "bug for bug compatible" clone of vi. nvi also
complies with the POSIX Command Language and Utilities Standard (IEEE
P1003.2) where it makes sense to do so.
[2]
Although little or no original elvis code is left.
Although no longer affiliated with UCB, Keith Bostic continues to maintain,
enhance, and distribute nvi. The version current at the time of this writing is nvi
1.79.
nvi is important because it is the "official" Berkeley version of vi. It is part of
4.4BSD-Lite II, and is the vi version used on the various popular BSD variants
such as NetBSD and FreeBSD.
9.2 Important Command-Line Arguments
In a pure BSD environment, nvi is installed under the names ex, vi, and view.
Typically they are all links to the same executable, and nvi looks at how it is
invoked to determine its behavior. (UNIX vi works this way too.) It allows the Q
command from vi mode to switch into ex mode. The view variant is like vi, except
that the readonly option is set initially.
nvi has a number of command-line options. The most useful are described here:
-c command
Execute command upon startup. This is the POSIX version of the historical
+command syntax, but nvi is not limited to positioning commands. (The
old syntax is also accepted.)
-F
Don't copy the entire file when starting to edit. This may be faster, but
allows the possibility of someone else changing the file while you're
working on it.
-R
Start in read-only mode, setting the readonly option.
-r
Recover specified files, or if no files are listed on the command line, list all
the files that can be recovered.
-S
Run with the secure option set, disallowing access to external programs.
[3]
[3]
As with anything labelled "secure," blind trust is usually inappropriate. Keith Bostic says, though,
that you can trust nvi's secure option.
-s
Enter batch (script) mode. This is only for ex, and is intended for running
editing scripts. Prompts and non-error messages are disabled. This is the
POSIX version of the historic "-" argument; nvi supports both.
-t tag
Start editing at the specified tag.
-w size
Set the initial window size to size lines.
9.3 Online Help and Other Documentation
nvi comes with quite comprehensive printable documentation. In particular, it
comes with troff source, formatted ASCII, and formatted PostScript for the
following documents:
The vi Reference Manual
The reference manual for nvi. This manual describes all of the nvi
command line options, commands, options, and ex commands.
The vi Man Page
The man page for nvi.
The vi Tutorial
This document is a tutorial introduction to editing with vi.
The ex Reference Manual
The reference manual for ex. This manual is the original one for ex; it is a
bit out-of-date with respect to the facilities in nvi.
Also included are ASCII files that document some of the nvi internals, and provide
a list of features that should be implemented, and files that can be used as an
online tutorial to vi.
The actual online help built in to nvi is minimal, consisting of two commands,
:exusage and :viusage. These commands provide one-line summaries of each
ex and vi command. This is usually sufficient to remind you about how something
works, but not very good for learning about new or obscure features in nvi.
You can give a command as an argument to the :exusage and :viusage
commands, in which case nvi will display the help just for that command. nvi
prints one line explaining what the command does, and a one-line summary of
the command's usage.
9.4 Initialization
If the -s or "-" options have been specified, then nvi will bypass all initializations.
Otherwise, nvi performs the following steps:
1. Read and execute the file /etc/vi.exrc. It must be owned either by root or
by you.
2. Execute the value of the NEXINIT environment variable if it exists,
otherwise use EXINIT if it exists. Only one will be used, not both. Bypass
executing $HOME/.nexrc or $HOME/.exrc.
3. If $HOME/.nexrc exists, read and execute it. Otherwise, if $HOME/.exrc
exists, read and execute it. Only one will be used.
4. If the exrc option has been set, then look for and execute either ./.nexrc if
it exists, or ./.exrc. Only one will be used.
nvi will not execute any file that is writable by anyone other than the file's owner.
The nvi documentation suggests putting common initialization actions into your
.exrc file (i.e., options and commands for UNIX vi), and having your .nexrc file
execute :source .exrc before or after the nvi-specific initializations.
9.5 Multiwindow Editing
To create a new window in nvi, you use a capitalized version of one of the ex
editing commands: Edit, Fg, Next, Previous, Tag or Visual. (As usual, these
commands can be abbreviated.) If your cursor is in the top half of the screen, the
new window is created on the bottom half, and vice versa. You then switch to
another window with CTRL-W:
<preface id="VI6-CH-0">
<title>Preface </title>
<para>
Text editing is one of the most common uses of any computer system,
and
<command>vi</command> is one of the most useful standard text editors
on your system.
With <command>vi</command> you can create new files, or edit any
existing
UNIX text file.
</para>
ch00.sgm: unmodified: line 1
# Makefile for vi book
#
# Arnold Robbins
CHAPTERS = ch00_6.sgm ch00_5.sgm ch00.sgm ch01.sgm ch02.sgm ch03.sgm
\
ch04.sgm ch05.sgm ch06.sgm ch07.sgm ch08.sgm
APPENDICES = appa.sgm appb.sgm appc.sgm appd.sgm
POSTSCRIPT = ch00_6.ps ch00_5.ps ch00.ps ch01.ps ch02.ps ch03.ps \
ch04.ps ch05.ps ch06.ps ch07.ps ch08.ps \
Makefile: unmodified: line 1
This example shows nvi editing two files, ch00.sgm and Makefile. The split screen
is the result of typing nvi ch00.sgm followed by :Edit Makefile. The last line of
each window acts as the status line, and is where colon commands are executed
for that window. The status lines are highlighted in reverse video.
The windowing ex mode commands and what they do are described in Table 9.1
.
Table 9.1. nvi Window Management Commands
Command Function
bg
Hide the current window. It can be recalled with the fg and Fg
commands.
di[splay]
b[uffers]
Display all buffers, including named, un-named, and numeric
buffers.
di[splay]
s[creens]
Display the filenames of all backgrounded windows.
Edit
filename
Edit filename in a new window.
Edit /tmp
Create a new window editing an empty buffer. /tmp is interpreted
specially to create a new temporary file.
fg filename
Uncover filename into the current window. The previous file moves
to the background.
Fg filename
Uncover filename in a new window. The current window is split,
instead of redistributing the screen space among all open windows.
Next
Edit the next file in the argument list in a new window.
Previous
Edit the previous file in the argument list in a new window. (The
corresponding previous command, which moves back to the
previous file, exists in nvi; it is not in UNIX vi.)
resize
±nrows
Increase or decrease the size of the current window by nrows
rows.
Tag
tagstring
Edit the file containing tagstring in a new window.
The CTRL-W command cycles between windows, top to bottom. The :q and ZZ
commands exit the current window.
You may have multiple windows open on the same file. Changes made in one
window are reflected in the other, although changes made in nvi's insert mode
are not seen in the other window until after you finalize the change by typing
ESC. You will not be prompted to save your changes until you issue a command
that would cause nvi to leave the last window open upon a file.
9.6 GUI Interfaces
nvi does not provide a graphical user interface (GUI) version.
9.7 Extended Regular Expressions
Extended regular expressions were introduced in Section 8.4. Here, we just
summarize the metacharacters that nvi provides. nvi also supports the POSIX
bracket expressions, [[:alnum:]], and so on.
You use :set extended to enable extended regular expression matching.
|
Indicates alternation. The left and right sides need not be just single
characters.
( )
Used for grouping, to allow the application of additional regular expression
operators.
When extended is set, text grouped with parentheses acts like text
grouped in \( \) in regular vi; the actual text matched can be retrieved
in the replacement part of a substitute command with \1, \2, etc. In this
case, \( represents a literal left parenthesis.
+
Matches one or more of the preceding regular expressions. This is either a
single character or a group of characters enclosed in parentheses.
?
Matches zero or one occurrence of the preceding regular expression.
{ }
Defines an interval expression. Interval expressions describe counted
numbers of repetitions. In the description below, n and m represent
integer constants.
{ n}
Matches exactly n repetitions of the previous regular expression.
{ n,}
Matches n or more repetitions of the previous regular expression.
{ n, m}
Matches n to m repetitions.
When extended is not set, nvi provides the same functionality with \{ and
\}.
As might be expected, when extended is set, you should precede the above
metacharacters with a backslash in order to match them literally.
9.8 Improvements for Editing
This section describes the features of nvi that make simple text editing easier and
more powerful.
9.8.1 Command-Line History and Completion
nvi saves your ex command lines, and makes it possible to edit them for
resubmission.
This facility is controlled with the cedit option.
When you type the first character of this string on the colon command line, nvi
opens a new window on the command history that you can then edit. When you
hit RETURN on any given line, nvi executes that line. ESC is a good choice for this
option. (Use ^V ^[ to enter it.)
Because the RETURN key actually executes the command, be careful to use either
the j or
keys to move down from one line to the next.
In addition to being able to edit your command line, you can also do filename
expansion. This feature is controlled with the filec option.
When you type the first character of this string on the colon command line, nvi
treats the blank delimited word in front of the cursor as if it had an * appended to
it and does shell-style filename expansion. ESC is also a good choice for this
option.
[4]
(Use ^V ^[ to enter it.) When this character is the same as for the
cedit option, the command-line editing is performed only when it is entered as
the first character on the colon command line.
[4]
Although the nvi documentation indicates that TAB is another common choice, we could not get that to
work. In practice, using ESC for both options works well.
It is easiest to set these options in your .nexrc file:
set cedit=^[
set filec=^[
9.8.2 Tag Stacks
Tag stacking is described in Section 8.5.3. nvi's tag stack is the simplest of the
four clones. Table 9.2
and Table 9.3 show the commands it uses.
Table 9.2. nvi Tag Commands
Command Function
di[splay]
t[ags]
Display the tag stack.
ta[g][!]
tagstring
Edit the file containing tagstring as defined in the tags file. The !
forces nvi to switch to the new file if the current buffer has been
modified but not saved.
Ta[g][!]
tagstring
Just like :tag, except that the file is edited in a new window.
tagp[op][!]
tagloc
Pop to the given tag, or to the most recently used tag if no tagloc
is supplied. The location may be either a filename of the tag of
interest or a number indicating a position in the stack.
tagt[op][!]
Pop to the oldest tag in the stack, clearing the stack in the
process.
Table 9.3. nvi Command Mode Tag Commands
Command Function
^]
Look up the location of the identifier under the cursor in the tags file,
and move to that location. The current location is automatically pushed
onto the tag stack.
^T
Return to the previous location in the tag stack, i.e., pop off one
element.
You can set the tags option to a list of file names where nvi should look for a tag.
This provides a simplistic search path mechanism. The default value is "tags
/var/db/libc.tags /sys/kern/tags", which on a 4.4BSD system looks in the
current directory, and then in the files for the C library and the operating system
source code.
The taglength option controls how many characters in a tagstring are significant.
The default value of zero means to use all the characters.
nvi behaves like vi; it uses the "word" under the cursor starting at the current
cursor position. If your cursor is on the i in main, nvi will search for the identifier
in, not main.
nvi relies on the traditional tags file format. Unfortunately, this format is very
limited. In particular, it has no concept of programming language scope, which
allows the same identifier to be used in different contexts to mean different
things. The problem is exacerbated by C++, which explicitly allows function name
overloading, i.e., the use of the same name for different functions.
nvi gets around the tags file limitations by using a different mechanism entirely:
the cscope program. cscope is a proprietary but relatively inexpensive program
available from the Bell Labs Software Toolchest. It reads C source files and builds
a database describing the program. nvi provides commands that query the
database and allow you to process the results. Because cscope is not universally
available, we do not cover its use here. Details of the nvi commands are provided
in the nvi documentation.
The extended tags file format produced by Exuberant ctags does not produce any
errors with nvi 1.79; however, nvi does not take advantage of this format either.
9.8.3 Infinite Undo
In vi, the dot (.) command generally acts as the "do again" command; it repeats
the last editing action you performed, be it a deletion, insertion, or replacement.
nvi generalizes the dot command into a full "redo" command, applying it even if
the last command was u for "undo."
Thus, to begin a series of "undo" commands, first type a u. Then, for each . (dot)
that you type, nvi will continue to undo changes, moving the file progressively
closer to its original state.
Eventually, you will reach the initial state of your file. At that point, typing . will
just ring the bell (or flash the screen). You can now begin redoing by typing u to
"undo the undos" and then using . to reapply successive changes.
nvi does not allow you to provide a count to either the u or . command.
9.8.4 Arbitrary Length Lines and Binary Data
nvi can edit files with arbitrary length lines and with an arbitrary number of lines.
nvi automatically handles binary data. No special command-line options or ex
options are required. You use ^X followed by one or two hexadecimal digits to
enter any 8-bit character into your file.
9.8.5 Incremental Searching
As mentioned in Section 8.6.4, you enable incremental searching in nvi using
:set searchincr.
The cursor moves through the file as you type, always being placed on the first
character of the text that matches.
9.8.6 Left-Right Scrolling
As mentioned in Section 8.6.5, you enable left-right scrolling in nvi using :set
leftright. The value of sidescroll controls the number of characters by which
nvi shifts the screen when scrolling left to right.
9.9 Programming Assistance
nvi does not provide specific programming assistance facilities.
9.10 Interesting Features
nvi is the most minimal of the clones, without a large number of additional
features that have not yet been covered. Yet it does have several important
features worthy of mention.
Internationalization support
Most of the informational and warning messages in nvi can be replaced
with translations into a different language, using a facility known as a
"message catalog." nvi implements this facility itself, using a
straightforward mechanism documented in the file catalog/README in the
nvi distribution. Message catalogs are provided for Dutch, English, French,
German, Russian, Spanish, and Swedish.
Arbitrary buffer names
Historically, vi buffer names are limited to the 26 characters of the
alphabet. nvi allows you to use any character as a buffer name.
Special interpretation of /tmp
For any ex command that needs a filename argument, if you use the
special name /tmp, nvi will replace it with the name of a unique temporary
file.
9.11 Sources and Supported
Operating Systems
nvi can be obtained from . This is a web page from
which you can download the current version, and also ask to be added to a
mailing list that is notified about new versions of nvi and/or new features.
The source code for nvi is freely distributable. The licensing terms are described
in the LICENSE file in the distribution, and they permit distribution in source and
binary form.
nvi builds and runs under UNIX. It also can be built to run under LynxOS 2.4.0,
and possibly later versions. It may build and run on other POSIX compliant
systems as well, but the documentation does not contain a specific list of known
operating systems.
Compiling nvi is straightforward. Retrieve the distribution via ftp. Uncompress
and untar it, run the configure program, and then run make.
$ gzip -d < nvi.tar.gz | tar -xvpf -
$ cd nvi-1.79; ./configure
$ make
nvi should configure and build with no problems. Use make install to install it.
Should you need to report a bug or problem in nvi, the person to contact is Keith
Bostic, at
.
Chapter 10. elvis
elvis was written and is maintained by Steve Kirkendall. An earlier
version became the basis for nvi. This chapter was written using
elvis.
10.1 Author and History
With our thanks for his help, we'll let Steve Kirkendall give the history in his own
words:
I started writing elvis 1.0 after an early clone called stevie crashed on me,
causing me to lose a few hours' work and totally destroying my confidence in that
program. Also, stevie stored the edit buffer in RAM which simply wasn't practical
in Minix. So I started writing my own clone, which stored its edit buffer in a file.
And even if my editor crashed, the edited text could still be retrieved from that
file.
elvis 2.x is almost completely separate from 1.x. I wrote this, my second vi clone,
because my first one inherited too many limitations from the real vi, and from
Minix. The biggest change is the support for multiple edit buffers and multiple
windows, neither of which could be retrofitted into 1.x very easily. I also wanted
to shed the line-length limitation, and have online help written in HTML.
As to the name "elvis," Steve says that at least part of the reason he chose the
name was to see how many people would ask him why he chose the name!
[1]
It is
also common for vi clones to have the letters "vi" somewhere in their names.
[1]
In around eight years, I was only number four! A.R.
10.2 Important Command-Line Arguments
elvis is not typically installed as vi, though it can be. If invoked as ex, it operates
as a line editor and allows the Q command from vi mode to switch into ex mode.
elvis has a number of command-line options. The most useful are described here:
-a
Load each file named on the command line into a separate window.
-r
Perform recovery after a crash.
-R
Start editing each file in read-only mode.
-i
Start editing in input mode instead of in command mode. This may be
easier for novice users.
-s
Set the safer option for the whole session, not just execution of .exrc
files. This adds a certain amount of security, but should not necessarily be
trusted blindly. In elvis 2.1, this option is renamed -S, and (following the
POSIX standard) -s provides ex scripting.
-f filename
Use filename for the session file instead of the default name. Session files
are discussed below.
-G gui
Use the given interface. The default is the termcap interface. Other
choices include x11, win32, curses, open, and quit. Not all the interfaces
may be compiled into your version of elvis.
-c command
Execute command upon start-up. This is the POSIX version of the
historical +command syntax. (The old syntax is also accepted.)
-t tag
Start editing at the specified tag.
-V
Output more verbose status information. Useful for diagnosing problems
with initialization files.
-?
Print a summary of the possible options.
10.3 Online Help and Other Documentation
elvis is very interesting in this department. The online help is comprehensive, and
written entirely in HTML. This makes is easy to view in your favorite Web
browser. elvis also has an HTML display mode (discussed below), making it easy
and pleasant to view the online help from within elvis itself.
When viewing HTML files, you use the tag commands (^] and ^T) to go to
different topics and then return, making it easy to browse the help files. We
applaud this innovation in online help.
Of course, elvis also comes with UNIX man pages.
10.4 Initialization
This section describes elvis's session files and itemizes the steps it takes during
initialization.
10.4.1 The Session File
elvis is intended to eventually meet COSE (Common Open System Environment)
standards. These require that programs be able to save their state and return to
that saved state at a later time.
To be able to do this, elvis maintains all its state in a session file. Normally elvis
creates the session file when it starts, and removes it when it exits, but if elvis
crashes, a left-over session file can be used to implement recovery of the edited
files.
10.4.2 Initialization Steps
elvis performs the following initialization steps. Interestingly, much of the
customization for elvis is moved out of editor options and into initialization files.
1. Initialize all hardcoded options.
2. Select an interface from those compiled into elvis. elvis will choose the
"best" of the ones that are compiled in and that can work. For example,
the X11 interface is considered to be better than the termcap interface,
but it may not be usable if X Windows is not currently running.
The selected interface can process the command line for initialization
options that are specific to it.
3. Create the session file if it doesn't exist; otherwise, read it (in preparation
for recovery).
4. Initialize the elvispath option from the ELVISPATH environment variable.
Otherwise, give it a default value. "~/.elvislib:/usr/local/lib/
elvis" is a typical value, but the actual value will depend upon how elvis
was configured and built.
5. Search elvispath for an ex script named elvis.ini and run it. The default
elvis.ini file performs the following actions:
o Chooses a digraph table based on the current operating system.
(Digraphs are a way to define the system's extended ASCII
character set and how characters from the extended set should be
entered.)
o Sets options based on the program's name (for example, ex vs. vi
mode).
o Handles system-dependent tweaks, such as setting the colors for
X11 and adding menus to the interface.
o Picks an initialization filename, either .exrc for UNIX, or elvis.rc for
non-UNIX systems. Call this file f.
o If the EXINIT environment variable exists, executes its value.
Otherwise, :source ~/f, where f is the filename chosen previously.
o If the exrc option has been set, then runs the :safer command on
f in the current directory.
o For X11, sets the normal, bold, and italic fonts, if they have not
been set already.
6. Load the pre- and post-read and pre- and post-write command files, if
they exist. Also load the elvis.msg file. All of these files are described later
in this chapter.
7. Load and display the first file named on the command line.
8. If the -a option was given, load and display the rest of the files, each in its
own window.
10.5 Multiwindow Editing
To create a new window in elvis, you use the ex :split command. You then use
one of the regular ex commands, such as :e filename or :n to edit a new file.
This is the simplest method; other, shorter methods are described below. You can
switch back and forth between windows with CTRL-WCTRL-W.
<preface id="VI6-CH-0">
<title>Preface </title>
<para>
Text editing is one of the most common uses of any computer system,
and
<command>vi</command> is one of the most useful standard text editors
on your system.
With <command>vi</command> you can create new files, or edit any
existing UNIX text file.
_____________________________________________________________________
# Makefile for vi book
#
# Arnold Robbins
CHAPTERS = ch00_6.sgm ch00_5.sgm ch00.sgm ch01.sgm ch02.sgm ch03.sgm
\
ch04.sgm ch05.sgm ch06.sgm ch07.sgm ch08.sgm
APPENDICES = appa.sgm appb.sgm appc.sgm appd.sgm
POSTSCRIPT = ch00_6.ps ch00_5.ps ch00.ps ch01.ps ch02.ps ch03.ps \
ch04.ps ch05.ps ch06.ps ch07.ps ch08.ps \
appa.ps appb.ps appc.ps appd.ps
The split screen is the result of typing elvis ch00.sgm followed by :split
Makefile.
Like nvi, elvis gives each window its own status line. elvis is unique in that it uses
a highlighted line of underscores, instead of reverse video, for the status line. ex
colon commands are carried out on each window's status line.
Table 10.1
describes the windowing ex mode commands and what they do.
Table 10.1. elvis Window Management Commands
Command Function
sp[lit]
[file]
Create a new window; load it with file if supplied. Otherwise, the
new window shows the current file.
new
sne[w]
Create a new empty buffer, and then create a new window to
show that buffer.
sn[ext]
Create a new window, showing the next file in the argument list.
[file ]
The current file is not affected.
sN[ext]
Create a new window, showing the previous file in the argument
list. The current file is not affected.
sre[wind][!]
Create a new window, showing the first file in the argument list.
Reset the "current" file to be the first one with respect to the
:next command. The current file is not affected.
sl[ast]
Create a new window, showing the last file in the argument list.
The current file is not affected.
sta[g][!] tag
Create a new window showing the file where the requested tag is
found.
sa[ll]
Create a new window for any files named in the argument list that
don't already have a window.
wi[ndow]
[target]
With no target, list all windows. The possible values for target are
described in Table 10.2
.
close
Close the current window. The buffer that the window was
displaying remains intact. If it was modified, the other elvis
commands that quit will prevent you from quitting until you
explicitly save or discard the buffer.
wquit
Write the buffer back to the file and close the window. The file is
saved whether or not it has been modified.
qall
Issues a :q command for each window. Buffers without windows
are not affected.
Table 10.2 describes the windowing ex arguments and their meanings.
Table 10.2. Arguments to the elvis Window command
Argument Meaning
+
Switch to the next window, like ^W k.
++
Switch to the next window, wrapping like ^W ^W.
-
Switch to the previous window, like ^W j.
Switch to the previous window, wrapping.
num
Switch to the window whose windowid=num.
buffer-name
Switch to the window editing the named buffer.
elvis provides a number of vi mode commands for moving between windows.
They are summarized in Table 10.3
.
Table 10.3. elvis Window Commands from vi Command Mode
Command Function
^W c
Hide the buffer and close the window. This is identical to the :close
command.
^W d
Toggle the display mode between "normal" and the buffer's usual
display mode. This is a per-window option. Display modes are
discussed in Section 10.10.1
.
^W j
Move down to the next window.
^W k
Move up to the previous window.
^W n
Create a new window, and create a new buffer to be displayed in the
window. It is similar to the :snew command.
^W q
Save the buffer and close the window, identical to ZZ.
^W s
Split the current window, equivalent to :split.
^W S
Toggle the wrap option. This option controls whether long lines wrap,
or whether the whole screen scrolls to the right. This is a per-window
option. This option is discussed in Section 10.8.5
later in this chapter.
^W ]
Create a new window, then look up the tag underneath the cursor. It
is similar to the :stag command.
[count]
^W ^W
Move to next window, or to the countth window.
^W +
Increase the size of the current window (termcap interface only).
^W -
Reduce the size of the current window (termcap interface only).
^W \
Make the current window as large as possible (termcap interface
only).
10.6 GUI Interfaces
The screen shots and explanation for this section were supplied by Steve
Kirkendall. We thank him.
elvis's X11 interface provides a scrollbar and mouse support, and allows you to
select which fonts to use. There is no way to change fonts after elvis has created
the first window. The fonts must all be monospace fonts, typically some variation
of a Courier or "fixed" font.
elvis 2.0's X11 interface supports multiple fonts and colors, a blinking cursor that
changes shape to indicate your editing mode (insert vs. command), a scrollbar,
and mouse actions. The mouse can be used for selecting text, cutting and pasting
between applications, and performing tag searches.
elvis 2.1 adds a configurable toolbar, dialogue windows, a status bar, and the -
client flag. It also works better on monochrome X terminals.
Because elvis 2.1 has a significantly improved X11 interface over 2.0, and
because it should be released by the time this book is published, details in the
rest of this section apply to it. A number of features, several command-line
options, and the ability to configure elvis via X resources are all missing from
Version 2.0.
10.6.1 The Basic Window
The basic elvis window is shown in Figure 10.1.
Figure 10.1. The elvis GUI window