Linux For Dummies 6th Edition phần 9 potx
Bạn đang xem bản rút gọn của tài liệu. Xem và tải ngay bản đầy đủ của tài liệu tại đây (1.19 MB, 46 trang )
of the box. The best way to see what you’re set up to support right now is to
simply try and listen. After you’re sure that your sound is set up properly,
you can try many Web sites with your default browser:
ߜ SHOUTcast for finding links to thousands of online stations, at
www.shoutcast.com/
ߜ Radio-Locator for finding “regular” radio stations offering online
versions, at
www.radio-locator.com/
The first place to try is SHOUTcast. When you find a station that you want to
listen to:
1. Click the Tune In! button.
If you already have your software set up, you can listen automatically.
However, you probably don’t if you haven’t listened to online radio
before. If you’ve never listened to this program’s format before, you will
be asked what program to open the content with.
2. If a program is suggested, click OK to proceed. Otherwise, you will
need to navigate through your filesystem to manually choose the
program.
If you have never used this program before, it probably has a setup rou-
tine it will want you to go through before you continue.
3. If required, walk through the program’s setup routine.
Even after all of this you might be told that the file format isn’t supported.
Fortunately, you are told here what format this is (for example, mpeg).
4. If your software doesn’t support the file’s format, install a program
that does.
For
mpeg and VFS, go to Chapter 12 and find how to add RealPlayer. For
ASX and ASF, which are Windows Media Player formats, use Chapter 12
to install mplayer-plugin or Kaffine, or see Chapter 19 for products that
let you run Windows software under Linux.
Software you’re likely to encounter as you experiment with Internet radio
includes
ߜ Amarok: A full-featured audio player that’s got some really cool features
like the ability to load images of your album covers.
ߜ Rhythmbox:
This is just called the Music Player in Fedora. See how to
add
MP3 support to this program in the section “Listening to down-
loaded music.” It can play CDs, Internet (streaming) radio, and
downloaded music.
ߜ RealPlayer: The all-too-familiar program from other operating systems.
It can play Internet (streaming) radio and downloaded music.
350
Part IV: Getting Things Done
25_579371 ch18.qxd 12/27/04 8:45 PM Page 350
ߜ HelixPlayer: A version of RealPlayer without the pieces that have to be
handed with pay licenses (like MP3s). It can play Internet (streaming)
radio and downloaded music.
ߜ MPlayer-Plugin: A browser plug-in that you can use at times to listen to
formats that other players may not support, including Windows formats.
Least likely to be legal if you’re in the United States.
ߜ XMMS: A Winamp clone that can play Internet (streaming) radio and
downloaded music. Sometimes comes with MP3 support and sometimes
doesn’t, but typically ‘you can add MP3 support regardless through your
distribution’s extra repositories (see Chapter 12).
ߜ Kaffeine: A full-featured audio/video media player for Internet (streaming)
radio, downloaded files, CDs, DVDs, and so on. Again, this program is of
questionable legality in the United States. In SuSE, if you get a complaint
about “demux” not being included, install the oggmtools package (see
Chapter 4).
ߜ Xine: A full-featured audio/video media player for Internet (streaming)
radio, downloaded files, CDs, DVDs, and so on. Again, this program is of
questionable legality in the United States. In SuSE, if you get a complaint
about “demux” not being included, install the oggmtools package (see
Chapter 4).
Listening to Downloaded Music
Downloading music from the Internet is a fun activity. A lot of people like to
pretend that it’s both legal and ethical, when, in fact, it’s often theft, depend-
ing on where you grabbed the music. I leave that ethical issue between you
and your belief system of choice, but because my own ethics say that it’s
theft, I’m going to focus on showing you music that you’re welcome to down-
load — legally and ethically! Take a look at strategies for finding such music,
along with how to listen to it.
One place to find such material is on a band’s own Web site. Many groups
today realize that offering free downloads of their work is a great PR move —
if people love the sample songs, they’re more likely to go out and buy the
album. For an example, I use one of my own favorite bands, Evanescence
(
www.evanescence.com).
Evanescence, like many other bands, has its page done mostly with
Macromedia’s Flash tool. (See Chapter 12 for how to add this functionality
to your distribution.) To listen to music files in general:
ߜ Fedora: Choose Applications➪Sound & Video➪Music Player.
ߜ Knoppix: From the main menu, choose Multimedia➪Sound➪XMMS.
351
Chapter 18: Multimedia Wow!
25_579371 ch18.qxd 12/27/04 8:45 PM Page 351
ߜ Linspire: From the main menu, choose Programs➪Audio & MP3➪CNR
More➪Lsongs to download this tool, and install it in the Audio & MP3
menu.
ߜ Mandrake: From the main menu, choose Multimedia➪Sound➪Amarok.
ߜ SuSE: From the main menu, choose Multimedia➪Audio Player.
ߜ Xandros: Choose Launch➪Applications➪Multimedia➪Media Player. After
you’re done, to see whether you can listen to any music here, click the
Music link. The songs are in the Flash window on the left. You have the
option of clicking
real for RealPlayer, windows for Windows Media
Player, or
lyrics to see the words for this song.
Ripping Music Tracks from CDs
This is another topic that’s impossible to cover without at least acknowledg-
ing that both ethics and legal issues are involved. I’m not going to get into
legalities here, but my personal ethics are that it’s fine to rip (copy) music
off my own CDs for my own use. If I want to pull my favorite songs off CDs
that I purchased and set them up so I can listen to them collectively in a
random playlist off of my computer’s hard drive, I don’t see a problem with
this. However, doing this and then taking the CD back for a refund is theft, in
my opinion.
So, with that said, a number of music ripping programs are available in Linux:
ߜ Fedora: Choose Applications➪Sound & Video➪Sound Juicer CD Ripper
(see Figure 18-4).
Figure 18-4:
The Sound
Juicer
CD Ripper
in Fedora.
352
Part IV: Getting Things Done
25_579371 ch18.qxd 12/27/04 8:45 PM Page 352
ߜ Knoppix: None, though you’d need a second CD drive anyway!
ߜ Linspire: From the main menu, choose Programs➪Audio & MP3➪CNR
More➪G-Rip, and add this program, which is then kept in the Audio &
MP3 menu.
ߜ Mandrake: From the main menu, choose Multimedia➪Sound➪CD Ripper
(KAudioCreator).
ߜ SuSE: From the main menu, choose Multimedia➪CD/DVD Tools.
ߜ Xandros: None, though you can use the Xandros File Manager to burn
CDs. (See the section “Burning CDs and DVDs,” later in this chapter.)
To rip songs, with the Sound Juicer, from a CD that you’ve already inserted:
1. For each song that you don’t want to rip, uncheck the Extract check
box, next to the song.
The check mark disappears for each song that you don’t want to digitize.
2. Choose Edit➪Preferences.
The Preferences dialog box appears, as shown in Figure 18-5.
Figure 18-5:
The Sound
Juicer
Preferences
dialog box.
353
Chapter 18: Multimedia Wow!
25_579371 ch18.qxd 12/27/04 8:45 PM Page 353
3. Select your preferred sound format.
I highly suggest Ogg Vorbis because this format is easily handled on
Linux machines without any inherent legal problems and is also better
compressed than MP3 for equivalent sound.
4. Use the Browse button to select where you want your sound files
saved.
5. In the Output Name section, select how you want Sound Juicer to
name and arrange the files in subdirectories.
6. Make any other configuration changes you want to make.
7. When finished making changes, click Close.
The dialog box closes.
8. Click Extract.
The Progress dialog box appears, showing you what track you’re on and
how far within that track you are.
9. Choose CD➪Eject.
The CD tray opens.
10. Remove the CD and close the tray.
11. Close Sound Juicer.
Burning CDs and DVDs
A CD burner is a great way to make data backups (especially if it’s a rewrite-
able), save and share your digital photos, put together multimedia memento
scrapbooks, and more. Many tools are available that allow you to burn CDs
under Linux:
ߜ Fedora: Choose Applications➪Sound & Video➪K3b if you have KDE
installed, or add grip (see Chapter 12).
ߜ Knoppix: From the main menu, choose Multimedia➪K3b.
ߜ Linspire: From the main menu, choose Programs➪Audio & MP3➪
CD Burner.
ߜ Mandrake: None installed by default. Using Chapter 12, look for the
programs arson, xcdroast, and rhythmbox.
ߜ SuSE: From the main menu, choose Multimedia➪CD/DVD Burning.
ߜ Xandros: Choose Launcher➪Applications➪Multimedia➪CD Writer.
354
Part IV: Getting Things Done
25_579371 ch18.qxd 12/27/04 8:45 PM Page 354
Creating and Modifying Graphics
The GIMP is a graphics program that’s considered in many ways equivalent to
Adobe Photoshop. Many don’t consider The GIMP the friendliest program on
the planet, but at the very least, it has enough features to keep you busy exper-
imenting for weeks! To open The GIMP:
The GIMP may not already be installed. In Linspire and Xandros in particular,
you might need to use what you learned in Chapter 12 to add this software
before you can use it.
ߜ Fedora: Choose Applications➪Graphics➪GIMP Image Editor.
ߜ Knoppix: From the main menu, choose Graphics➪GIMP Image Editor.
ߜ Linspire: From the main menu, choose Programs➪Multimedia & Design➪
CNR More➪GIMP, which is installed under Multimedia & Design.
ߜ Mandrake: From the main menu, choose Multimedia➪Graphics➪The
GIMP v2.
ߜ SuSE: From the main menu, choose Graphics➪Image Editing.
ߜ Xandros: Choose Launch➪Applications➪Graphics➪GIMP Image Editor.
When you start The GIMP for the first time, you have to walk through its
user setup routine. Fortunately, you can just click Continue each time, unless
you’re a graphics guru who has a particular reason to want to do things in a
different way. After you’ve clicked past all these dialog boxes, a collection of
one or more dialog boxes pops up containing the GIMP main dialog box (see
Figure 18-6) plus additional tool dialog boxes. I recommend closing all but the
main one for now, just to keep your screen and brain uncluttered.
Figure 18-6:
The GIMP’s
main dialog
box in
Mandrake
10.1.
355
Chapter 18: Multimedia Wow!
25_579371 ch18.qxd 12/27/04 8:45 PM Page 355
The GIMP is an incredibly complex program, with entire books written for the
people who really want to use it heavily. Great starter links for working with
The GIMP are
ߜ GIMP Tutorials Pointer Page:
ak.
edu/~nem/gimp/tuts
ߜ RRU GIMP Tutorial: www.rru.com/~meo/gimp/Tutorial
ߜ The official GIMP.org site’s tutorials page: www.gimp.org/tutorials/
ߜ The GIMP Savvy Web site (with a full book available for reading
online):
/>Watchin’ Movies
These days, you can watch many kinds of movies on your computer. Whether
it’s a Flash animation, a DVD, or a movie trailer, you’ve got the tools that you
need right at your fingertips (or just a click away). You may have even
installed some already while trying to access other multimedia features. Here
are some of the tools of the trade.
Watching a DVD in Linux is a bit of a legal quagmire if you live in the United
States. The Digital Milennium Copyright Act (DMCA) and other issues make
it tricky for any open source program to navigate the licensing maze when it
comes to movies that are encoded or protected in various fashions. However,
not all DVDs have such countermeasures enabled: There are DVDs that
Americans can watch under Linux with no trouble. (Note that I say watch,
and not copy or pirate.)
For more on the DMCA and the problems it causes, see
anti-dmca.org.
To watch a DVD in Linux, first check Chapter 11 to see what your distribution
will do if you just pop a DVD into your drive. Of course, you can also start a
program by hand, though you may have to download it first:
ߜ Fedora: Doesn’t ship with any DVD players by default. Use Chapter 12 to
add repositories so you can install Kaffeine, Xine, or Mplayer.
ߜ Knoppix: From the main menu, choose Multimedia➪Video➪xine media
layer.
ߜ Linspire: Purchase a legal DVD player from the Click And Run Warehouse
by going to the main menu and choosing Programs➪ Multimedia &
Design➪CNR More➪DVD Player (see Figure 18-7). Or install Mplayer
from the same place.
356
Part IV: Getting Things Done
25_579371 ch18.qxd 12/27/04 8:45 PM Page 356
ߜ Mandrake: From the main menu, choose Multimedia➪Video➪Kaffeine.
ߜ SuSE: From the main menu, choose Multimedia➪Video Player.
ߜ Xandros: Launch➪Applications➪Multimedia➪Video Player.
Figure 18-7:
The
Linspire
DVD
Player in
Linspire 4.5.
357
Chapter 18: Multimedia Wow!
25_579371 ch18.qxd 12/27/04 8:45 PM Page 357
358
Part IV: Getting Things Done
25_579371 ch18.qxd 12/27/04 8:45 PM Page 358
Chapter 19
Windows-Only Media Formats
and Programs
In This Chapter
ᮣ Running Microsoft Office and Web tools with CrossOver Office
ᮣ Using Windows inside Linux with Win4Lin
ᮣ Playing Windows games with Cedega
ᮣ Creating a “virtual computer” inside Linux with VMWare
ᮣ Trying out the free Windows inside Linux tool, WINE
A gentleman is a man who can play the accordion, but doesn’t.
— Unknown
T
here is little more maddening for computer users than to find a file online
or have someone send a file, just to discover that they can’t use it. While
this issue is less of a problem for Linux users as each day passes, things do
sometimes still crop up that have to be dealt with so that you can move for-
ward instead of spinning your wheels. Also, you may want certain programs
that you just can’t live without and haven’t found a replacement that you’re
happy with yet.
Fortunately, you have a number of options available in both of these scenar-
ios. If you’re looking for software, then a good place to start (aside from
Chapter 12) is
linuxshop.ru/linuxbegin/win-lin-soft-en/. Here, you
can see whether there really isn’t a Linux tool that can do the job. You may
be surprised. After looking at this site, you have two options. You can take
advantage of commercial packages that can help you to access these docu-
ments and features under Linux, or you can wade in and try to get Wine
working, which is the free base beneath all these tools. When it comes to file
formats, you also ultimately may have to go looking for ways to run Windows
tools under Linux to handle files that you otherwise can’t use under Linux
quite yet. Do a Web search on the file format (for example,
.doc) and the
word
linux for recommendations as well.
26_579371 ch19.qxd 12/27/04 8:40 PM Page 359
Commercial Software
A growing number of commercially available tools let you work with anything
from Microsoft Office to your Windows games under Linux. Mind you, ulti-
mately the Linux user’s goal is to not have to use any of these extra program
layers — but in the meantime, it’s nice not to be inconvenienced. I’ve reviewed
or at least used every one of these products (often more than once over the
years), so I’m not just going by their Web sites.
Many of these vendors offer server, as well as desktop products. I’m focusing
on the desktop. For more about their server products, check out their Web
sites.
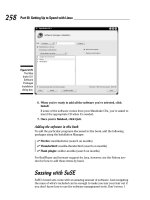
CodeWeavers
CodeWeavers (www.codeweavers.com) provides an excellent product that I
use from time to time: CrossOver Office. This program allows you to use
Microsoft Office (along with a growing number of office applications) directly
under Linux. It also comes with a hefty number of plug-ins (see Figure 19-1)
that you might miss when it comes to Web surfing. It’s a bit jarring to run
Microsoft Word and Windows Media Player under Linux at first — because
there’s no native (without special software) way to do this otherwise — but
it’s certainly handy. You can even use the iPod’s iTunes through CrossOver
Office!
Figure 19-1:
The
CrossOver
Office Install
Software
dialog
box, in
Xandros 2.5.
360
Part IV: Getting Things Done
26_579371 ch19.qxd 12/27/04 8:40 PM Page 360
What I most appreciate about CodeWeavers (and all these companies, really)
is that they are very upfront about what works really well, what works except
for a few features, and what works not so well. All you have to do is check
their Web site. For those who always seem to want to scream “piracy” when it
comes to Linux, you actually do have to own the programs you want to run
(say, ‘Microsoft Office) and install them through CrossOver Office off of
their original CDs or DVDs. However, you don’t have to own the version of
Microsoft Windows the software would run under. CodeWeavers has built a
re-implementation of the necessary Windows functionality under the hood
instead.
Are you an iPod and iTunes junkie? There’s no Linux version of iTunes avail-
able, but CrossOver Office lets you run iTunes under Linux.
A plus to CodeWeavers CrossOver Office is that the applications run in indi-
vidual windows just like every other program on your machine. A minus is
that not all Windows software is supported, because hooks have to be built
under the hood for each new piece of software.
CrossOver Office comes with the Xandros Deluxe desktop (available for instal-
lation through the Xandros Networks, see Chapter 12) and is available for
purchase from the Xandros Networks store for other Xandros users.
Win4Lin
Another option is Win4Lin from NeTraverse (www.netraverse.com/).
Win4Lin actually offers you a platform within which you install Microsoft
Windows (so have those CDs handy) and then run programs on top of it. As
of this writing, Win4Lin supports Windows 95, 98 (see Figure 19-2), and ME.
Soon, it will support newer versions of Windows as well.
A plus to Win4Lin is that it supports a more full range of Windows software. A
minus is that it runs in its own separate window, so its applications aren’t
integrated into the rest of your desktop. You also have to actually keep your
Microsoft Windows operating system CDs around because you need to be
able to install the operating system into Win4Lin — though you can then put
them in storage after you’ve done the installation. You also end up having to
have a special kernel (boot session) to run Win4Lin 5.0, so if you hate reboot-
ing, this program may not be the solution for you — though you could just
make this your default boot option.
Win4Lin is available for purchase for Linspire users through their Click
And Run Warehouse; from the main menu, choose Programs➪Utilities➪
CNR More➪Win4Lin.
361
Chapter 19: Windows-Only Media Formats and Programs
26_579371 ch19.qxd 12/27/04 8:40 PM Page 361
Cedega
More interested in games than office tools? There’s also TransGaming’s
Cedega (
www.transgaming.com), which was once called WineX. This version
of the free Wine project (see the upcoming section “Installing and Using Wine”)
is specifically designed to support Direct X, which is used in Windows to make
programming for multimedia and games easier. Subscribers have access to
regular updates, allowing them to make use of their favorite games and also
add any games they like to the growing list of games that are being tested
with the system.
Go to
www.transgaming.com/searchgame.php, scroll to the bottom of the
screen, and click the Here link. A listing of all games, in order, appears so that
you’re able to find out what games are supported at what level. A handy
new(ish) feature is the Point2Play installer (see Figure 19-3), which you
can use to ready your computer for the Cedega experience.
A plus to Cedega is, again, that you don’t need to keep those Windows CDs
lying around. However, its support for individual games can be spotty, so be
sure to check the Web site before you invest in this product. Also, be sure to
make use of the help forums!
Figure 19-2:
Windows 98
installing
under
Win4Lin
in a SuSE
9.1 window.
362
Part IV: Getting Things Done
26_579371 ch19.qxd 12/27/04 8:40 PM Page 362
VMware
If you absolutely have to do something under Windows itself but only have
one computer and it’s running Linux (or vice versa, for that matter), there’s
VMware (
www.vmware.com). This is a popular tool in technical support offices
where people need access to many different kinds of machines to test things.
It’s also popular with authors, like myself, because it allows us to grab those
tricky screenshots of the boot process and installer screens.
In VMware, you run a full session of another operating system (or even an
extra session of the same one you’re running on the main machine) within
your desktop — see Figure 19-4. If your machine is powerful enough, you
could have five different operating systems all running in their own windows
on a single computer.
A minus to VMWare is that it requires a bit of extra oomph in your system.
Check out its requirements and then try to go as far above them as you can.
It also runs in a self-contained window. A plus, though, is that this program
really is the next best thing to buying another computer.
Figure 19-3:
The Trans-
Gaming
Point2Play
installer.
363
Chapter 19: Windows-Only Media Formats and Programs
26_579371 ch19.qxd 12/27/04 8:40 PM Page 363
Installing and Using Wine
And then there’s Wine (www.winehq.org), a complete rebuild of Microsoft
Windows 9x functionality that runs under Linux. Wine is in many ways the
mother of everything in the previous section. However, because it’s a free
and very complicated project, it’s not quite as friendly as the commercial
versions. It’s kind of like the others but with all the makeup and hairspray
removed.
Some Linux distributions offer Wine RPMs directly on their installation CDs
or through their packaging schemes. For the distributions covered in this
book, do the following to install WINE for the distributions that don’t have
it already installed, or to start it for the distributions that do have it. (See
Chapter 12 for more details on installing software.)
Figure 19-4:
A VMware
window
containing
Windows
XP, but
running
in Linux.
364
Part IV: Getting Things Done
26_579371 ch19.qxd 12/27/04 8:40 PM Page 364
ߜ Fedora Core: Available through yum, depending on what repositories
you’ve added (see Chapter 12). Type
yum search wine to find the
available packages. Then, install both of them. For example, on my AMD
Athlon machine, I type
yum -y install winesetuptk wine.athlon
in order to install the setup tool and the main program.
ߜ Knoppix: From the main menu, choose WINE.
ߜ Linspire: From the main menu, choose Programs➪Software
Development➪CNR More➪WINE for Linspire.
ߜ Mandrake: Available through the package installation program
(Chapter 12). Search for
wine. (xwine is not the same as WineX.)
ߜ SuSE: Available through YaST’s software installation routine (see
Chapter 12). You can find it in System➪Emulators➪PC ➪WINE.
ߜ Xandros: Not available. The adventurous are welcome to go to
www.winehq.org, click the Download link, and try to build this
program from source code (see Chapter 12).
You can find the Wine documentation at
www.winehq.org/site/docs/
wine-user/index
. Start in the “Configuring Wine” section.
Now comes the fun part — trying to run your old Windows software. You
don’t really run Wine, per se. Instead, you invoke Wine whenever you need to
use something from the Windows world. To install a Windows program through
Wine, insert the CD-ROM or floppy into the appropriate drive. Your distribu-
tion might open the File Manager for you, or you may need to open the File
Manager manually. Regardless, your goal is to run the installation routine,
which is typically
SETUP.EXE. You can double-click this icon in the File
Manager and, when asked what program you want to use to open this file,
answer
wine.
As I write this, I’m trying some old home design program I bought back when
I was silly enough to think I’d be able to afford to build a house before I was
ninety. Because it’s difficult to describe a standard Wine session, I thought I’d
walk you through how this goes for me.
The installer loads and runs just fine. I stick with the defaults (because Wine
is still a work-in-progress and it’s best not to taunt it with getting too fancy)
and then wait while the installer adds all of the files to my SuSE system. Now,
to run my new old software. To run a Wine program, I first need to know what
the path is to that program. I can find it by looking in the
~/.wine directory.
In this case, the program was installed into
/home/dee/.wine/fake_
windows/Program Files/HOUSE
. The file house.exe looks like the one
for launching the program.
365
Chapter 19: Windows-Only Media Formats and Programs
26_579371 ch19.qxd 12/27/04 8:40 PM Page 365
If you’re trying to find the .wine directory in the GUI and can’t see it, you
probably have to go to the View menu and choose Show Hidden Files. So, to
run the program, I double-click it and, when asked what program to run it with,
enter
wine. That’s it (see Figure 19-5). Now pull out those old Windows 95
and 98 CDs and give them a try! Not all of them will work, but some probably
will. The cool thing is that you can keep trying them on and off over time as
newer versions of Wine come out.
Figure 19-5:
WINE
running an
old home
design
Windows 98
program.
366
Part IV: Getting Things Done
26_579371 ch19.qxd 12/27/04 8:40 PM Page 366
Part V
The Part of Tens
27_579371 pt05.qxd 12/27/04 8:45 PM Page 367
In this part . . .
I
n this part of the book, I cover answers to the questions
most frequently asked about Linux. I explain some key
Linux installation and setup points, as well as share more
routine troubleshooting tips and tricks. I also talk about
the most popular bootable distribution: Knoppix. Rather
than telling you just how to use Knoppix like any other dis-
tribution (I figure you’d like to have an installed machine
so that you can enjoy it, rather than just using a LiveCD),
you discover some cool ways to make use of Knoppix to
rescue floundering computers, including Windows boxes.
I only hope you enjoy reading this part of the book as
much as I enjoyed writing it!
27_579371 pt05.qxd 12/27/04 8:45 PM Page 368
Chapter 20
Ten Troubleshooting Tips
In This Chapter
ᮣ Dealing with frozen installations
ᮣ Changing your boot environment
ᮣ Recovering when you see some black-and-white text screen!
ᮣ Escaping a hung GUI
ᮣ Using multiple resolutions
T
roubleshooting is like reading a mystery novel. You have some facts,
symptoms, and details, but you don’t know whodunit. You have to take
whatever information you have, work with that data, weigh the various possi-
bilities, and then narrow them to a single suspect. Finally, you need to test
your theory and prove that your suspect is the guilty party.
Troubleshooting problems in Linux (or any operating system) can encompass
many hardware and software issues. Whether the problem is the operating
system, the hardware, or a service giving you fits, you can use some basic
troubleshooting techniques to start your investigations:
ߜ Document the problem. Write down any and all symptoms that the
system is showing, including actions you can and can’t do. Jot down
any information you see in error messages.
ߜ Examine the Linux log files. You can find most of these in the
/var/log
directory. Look for the word “error.”
ߜ Compare your problem system with a working system running the
same distribution and version. Sometimes, comparing configuration
files and settings may uncover the problem or narrow the possibilities.
ߜ Check connections. Check to make sure that all the hardware is con-
nected properly and powered on. Verify that all cables and connections
are attached properly. There’s always someone, somewhere, acciden-
tally kicking a cable out from a wall connection.
ߜ Remove new hardware. Remove any hardware that you have changed or
added recently (before the problem started) and see whether the problem
disappears. If so, you can probably conclude that the new or changed
hardware (or its driver) is the culprit and start researching solutions.
28_579371 ch20.qxd 12/27/04 8:43 PM Page 369
ߜ Reduce the number of active programs. Stop running unnecessary ser-
vices and applications that aren’t related to the problem at hand. You may
more easily figure out what’s happening if other services and applications
aren’t getting in the way.
ߜ Check to see whether the problem is reproducible. Does the same
sequence of events produce the same problem? Suppose that when
you try to print to a color printer, nothing happens. If nothing happens
every time you attempt to print, the problem is reproducible. If, instead,
sometimes your information is printed and at other times it isn’t, the
problem pattern isn’t the same and isn’t reproducible — or it’s caused
by something more complicated than just clicking one button. Unfortu-
nately, problems that are nonreproducible are more difficult to resolve
because it seems that no set pattern of events re-creates those problems.
After you’ve come up with a solution, take a few moments to document the
situation. Note the symptoms of the problem, its cause, and the solution you
implement. The next time you encounter the same problem, you can call on
your notes for a solution rather than reinvent the wheel.
If you don’t have any problems to troubleshoot (yet), document your envi-
ronment before you do. Making a backup of your
/etc directory and your
/boot directory is a great place to start.
“The Linux Installer Froze”
When you’re installing Linux, the installation may just freeze. If it does, wait
a bit and make sure that the installation program really froze. (Sometimes,
the software just takes a while to process information.) If the software looks
like it has frozen, there’s no harm in rebooting your computer and starting
over — just as you would do with any operating system installation. Some-
times, you can reboot and never have that problem again. At other times, the
problem may happen twice in a row and then be fine the third time. Be sure
to try several times before giving up.
If the installation still freezes in the same spot or close to the same spot, go
to the distribution’s support pages (see Chapter 2). These pages may talk
about some known problems and solutions that can help you and should
show you how to join discussion lists in order to get more assistance.
Otherwise, diagnosing the problem can be tricky and may seem more like
voodoo than science. Here are some tips:
ߜ If this problem happens repeatedly at exactly the same spot, you may
have a bad installation disk. If you’re a Fedora Core or Red Hat Enter-
prise Linux user, see the next section, “For Fedora Core Users,” and then
return here if that technique doesn’t solve your problem. Otherwise, try
the disk in another machine if possible and see whether the installation
370
Part V: The Part of Tens
28_579371 ch20.qxd 12/27/04 8:43 PM Page 370
fails in the same place there. If you purchased this disk with a Linux dis-
tribution, contact the distribution’s technical support team. If you got
the disk with a book, contact the publisher’s technical support team. If
you burned the disk yourself, try burning a new copy at a slower speed.
ߜ If this problem happens repeatedly at exactly the same spot and you
don’t have a bad installation disk, the trouble may be with one of
your machine’s hardware components. If you can, try trading hardware
between machines. If not, you may need to choose a different machine
on which to install Linux or try another distribution.
ߜ If the problem seems to happen randomly, your particular Linux dis-
tribution may not be compatible with that particular machine. Again,
you can try trading some hardware around, installing Linux on another
machine, or using another distribution.
If you’re not sure whether your installer has frozen, try pressing various
combinations of Alt+F#, where # corresponds to one of the function keys.
Depending on the distribution, the installer has not completely frozen if
you can see different screens when you try this technique.
For Fedora Core Users with CD-ROMs
When installing Red Hat Linux 7.3 or later (Fedora Core 3 is considered “later”),
a special solution is available to people who run into problems that seem to
have absolutely no explanation, such as the installer freezing.
This solution doesn’t work with the DVD provided with this book, because it
contains more than just the Fedora software, so continue with this section
only if you downloaded your own DVD or purchased it from a third party, or if
you downloaded or otherwise acquired the Fedora CDs.
If your installation keeps dying while Anaconda (the Red Hat installer program)
is placing packages on your hard drive, follow these steps to try to fix it:
1. Place the DVD-ROM or the first Fedora Core CD-ROM into your drive.
2. Reboot the machine.
3. Wait until you reach the boot screen where you usually press Enter to
start the installation.
If you reach a graphical installation screen, you missed the screen you’re
looking for. You need to reboot, repeat this step, and then proceed.
4. At the prompt, type
linux mediacheck and then press Enter.
Text scrolls by, and then you see a screen with a bright blue background.
Then the CD Found dialog box appears.
371
Chapter 20: Ten Troubleshooting Tips
28_579371 ch20.qxd 12/27/04 8:43 PM Page 371
5. Tab to the OK button and press Enter to proceed to the media
examination.
This step opens the Media Check dialog box. If you’ve changed your
mind and just want to start the installation, use the Tab or arrow keys to
select Skip and then press Enter.
6. If you want to test the first CD-ROM or the DVD-ROM, tab to the Test
button and press Enter. If you want to test another installation CD-ROM,
tab to the Eject CD button and press Enter.
If you chose the second option, remove the first CD-ROM from the
CD-ROM drive and replace it with the CD-ROM you want to test. Close
the CD-ROM drive and make sure that Test is selected.
7. Press Enter to begin the media check.
The Media Check status box opens and shows you the name assigned to
the DVD-ROM or CD-ROM and how much progress has been made. At the
end of the inspection, the Media Check Result dialog box opens.
8. Look at the text after
and the result is.
If the result is
PASS, nothing is wrong with the DVD-ROM or CD-ROM itself.
Your installation woes are caused by something else. Return to the sec-
tion “The Linux Installer Froze,” earlier in this chapter.
If the result is
FAIL, the DVD-ROM or CD-ROM you just tested is flawed.
If you purchased this CD-ROM or DVD-ROM, you need to talk to the com-
pany you purchased it from to see whether you can get a replacement.
On the other hand, if you burned your own DVD-ROM or CD-ROM, I rec-
ommend doing one of the following:
• Burn the DVD-ROM or CD-ROM again, at a speed of 4x or lower.
• Burn the DVD-ROM or CD-ROM again on a newer drive with
BurnProof technology (
www.burn-proof.com) or something
similar.
If the DVD-ROM that came with this book is defective, contact the technical
support address listed in this book, not Red Hat. However, remember that the
media checking routine does not give you a reliable PASS or FAIL for this par-
ticular DVD-ROM.
“I Told the Installer to Test My
Graphics, and They Failed”
The installer may have misguessed what hardware you have. Double-check
the settings as best you can. If they look right, try choosing a lower resolu-
tion for now and testing again, and if that fails try a lower number of colors
372
Part V: The Part of Tens
28_579371 ch20.qxd 12/27/04 8:43 PM Page 372
and test again. You can then try setting things back the way you want them
after the machine is fully installed and updated, when it hopefully will have a
fix for whatever the problem might be.
“The Installer Tested My Graphics
Fine, but My GUI Won’t Start”
If your Linux installation program showed you a GUI test screen saying that
you were ready to proceed with the rest of the installation, you probably
expected that the GUI would start with no problem. Unfortunately, that
doesn’t always happen.
Each distribution has its own set of graphics configuration tools. If you boot
your machine for the first time and see error messages when you’re trying to
enter the GUI automatically or when you type
startx to start the GUI manu-
ally, use the following tools to fix the problem:
ߜ In Fedora Core, use
system-config-display.
ߜ In Knoppix, you don’t install. Use the options available when you boot it
in order to tell it specifics about your display.
ߜ In Linspire, use
xf86config.
ߜ In Mandrake, use
drakconf and select the Display option.
ߜ In SuSE, use
sax2.
ߜ In Xandros, use
xf86config.
ߜ Your last resort is
xf86config. This fully text-based tool should be
available with most distributions. It may be called
xf86config4.
“I Think I’m in Linux, but I Don’t
Know What to Do!”
Two different screens tend to cause panic to folks new to Linux. The first of
these screens, shown in Figure 20-1, is in fact a sign that you installed the
software and booted the machine successfully. Jump for joy! It’s just that
you’re booting into the command-line environment rather than the GUI envi-
ronment. If you reach a screen similar to the one shown in Figure 20-1, the
computer is asking you to log in with the username for an account and a pass-
word that you created during the installation process.
373
Chapter 20: Ten Troubleshooting Tips
28_579371 ch20.qxd 12/27/04 8:43 PM Page 373
If you created only the root account, you can log in there as root.
After you enter the username and password, you find yourself at the screen
shown in Figure 20-2, which just happens to be the second spot where people
get worried. If you see this screen, you have not only booted properly into
Linux, but you’re also logged in and using the machine! Give yourself a good
pat on the back.
What do you do from here? Anything you want. Surf through this book for
commands you want to run. Type startx to start up the GUI. If you didn’t
install any GUI (which means you selected a minimal install option with no
graphical interface, or you actually unselected graphics), you may want to
reinstall, or you’ll have to add all the tools by hand (which is not a quick job!)
Figure 20-2:
Logged
in at the
Linux com-
mand line.
Figure 20-1:
A Linux
command-
line login
prompt.
374
Part V: The Part of Tens
28_579371 ch20.qxd 12/27/04 8:43 PM Page 374