mcts training kit 70 - 652 server virtualization phần 4 ppsx
Bạn đang xem bản rút gọn của tài liệu. Xem và tải ngay bản đầy đủ của tài liệu tại đây (1.26 MB, 65 trang )
Lesson 2: Working with Hyper-V Host Remote Administration CHAPTER 3 173
exaM tIp SCVMM CONFIGURATION ANALYZER
SCVMM offers a Configuration Analyzer that can scan your system prior to an SCVMM
deployment. The Analyzer will identify any potential issues with your system configuration
and provide information on best practices for use with SCVMM deployments. Find the
Analyzer at />4adc-8686-f4d140a3a3f4&displaylang=en. Note, however, that the Analyzer is not part of
the exam because it was not released until December 2008.
You must install and run the Analyzer on the computer that either currently is or will
become your SCVMM Server. Before you install the Analyzer, you must download and
install the 64-bit version of Microsoft Baseline Configuration Analyzer (MBCA). To
download the MBCASetup64.msi file, go to />You should use this version of the Analyzer with Virtual Machine Manager 2008 only. To
download the Analyzer for Virtual Machine Manager 2007, go to />fwlink/?LinkID=132136.
IMportant INSTALLING SCVMM ON A SERVER RUNNING HYPER-V
You can install SCVMM Server on a computer running Hyper-V; however, it is not a
recommended practice because your Hyper-V servers should only run the Hyper-V role to
achieve optimal performance (see Lesson 3 of this chapter). If you still decide to do so, you
must install two important updates on the co-hosting Hyper-V server.
The first update will update the Hyper-V service to work with a local copy of SCVMM. It is
update number KB956589 and can be found at
You should install this update on every Hyper-V host managed by SCVMM as a best
practice.
The second update is required to modify the BITS client on the local computer. It is update
number KB956774 and can be found at />If you do not install these updates, your Hyper-V host will always display a status of Needs
Attention and will never resolve to OK.
Distributed SCVMM Implementation Recommendations
When you install SCVMM in very large environments, you should consider the following:
n
If you plan to run SCVMM in a multiple AD DS forest environment, and SCVMM
operations will traverse these forests, you must establish a two-way Forest Trust
relationship.
n
If your SCVMM will traverse multiple forests, but only interact with specific domains in
each forest, you can implement a two-way trust between each affected domain.
n
When you use remote installations of SQL Server, you must use a named account—
often called a service account—to run the SQL Server Service. You cannot use the
Local System account.
174 CHAPTER 3 Completing Resource Pool Configurations
n
When you use SCVMM with Virtual Server, it will rely on the Virtual Machine Remote
Control protocol to control VMs. By default this protocol is not encrypted. You should
use SSL to encrypt this protocol to protect the information your administrators send to
these VMs.
In addition, you need to keep several considerations in mind after SCVMM is installed:
n
Run your VMs under a specific service account instead of the default account of the
user that launched the VM. Limit the level of privileges of this service account.
n
Make your VM administrators part of the local Virtual Machine Manager Administrator
security group. They do not need local administrative rights on the machine to do this.
n
Secure your Library servers at the file system level. Assign only the SCVMM
administrators and the Virtual Machine Manager Servers account at the NTFS security
level to Library folders. Where appropriate, assign specific self-service users—ideally
through a custom group—if you implemented the Self-Service Portal.
n
The SCVMM installation automatically creates a local account called Virtual Machine
Manager Servers as a local administrator of the machine. Make sure this account is not
removed through Restricted Groups settings in Group Policy; otherwise, the SCVMM
Server will be unable to operate.
Keep these elements in mind when customizing your SCVMM installation.
Upgrading from SCVMM 2007 to SCVMM 2008
Many organizations will already be using SCVMM 2007 to manage Virtual Server 2005 R2
hosts. If you want to upgrade your SCVMM 2007 installation to 2008, you must take special
steps to protect your existing information. Also note the following:
n
Begin by creating a backup of the SCVMM 2007 database using SQL Server
Management Studio, not SCVMM database backup. SCVMM 2007 database backup is
not compatible with SCVMM 2008.
note DATABASE BACKUP
For more information on how to back up the database with SQL Server Management
Studio, see />n
The upgrade will lose all passwords and product keys for VM templates, VM Profiles,
Hardware Profiles, and those stored in the Jobs Table.
n
Self-Service information and custom fields for VMs and hosts are maintained.
Make note of any potentially lost data and then proceed as follows to perform the
upgrade:
1. Begin by creating a backup of your SCVMM 2007 database with SQL Server
Management Studio. Restore the database on the server that will host the SCVMM
2008 database. This can be the local SCVMM Server or a remote SQL Server.
Lesson 2: Working with Hyper-V Host Remote Administration CHAPTER 3 175
2. Install SCVMM. During the installation, specify the existing database in the SQL Server
Settings page. Setup will automatically upgrade the database.
3. Install the SCVMM 2008 Administrator Console and connect to the SCVMM Server.
4. In the Administrative View of the console, click Managed Computers. Your SCVMM
2007 hosts should appear with an agent communication status of Access Denied.
5. Use the Results Pane to select the disconnected hosts and click Re-associate in the
Actions pane. This will change the host status to Unsupported.
6. Select the hosts again and click Update Agent in the Actions pane. Hosts will change
status to Responding and list an up-to-date agent status. Your host upgrade is
complete.
note SCVMM HOST UPDATES
Update hosts in batches of 10 to 25, first associating the hosts with the SCVMM 2008
server and then updating the agents on the hosts, until all hosts have been updated.
This will improve the upgrade performance.
7. Repeat steps 5 and 6 with any or all Library Servers.
8. Some hosts may still have a status of Needs Attention. Click Refresh to make sure the
status is updated. Virtual Server 2005 R2 hosts managed by SCVMM 2008 must have
update number KB948515 installed before the host status will change to OK. If your
hosts still list as Needs Attention, you must apply the update to them.
note THE VIRTUAL SERVER 2005 R2 SP1 UPDATE
Download the Virtual Server R2 SP1 update at
?LinkID=120488.
9. Select the hosts that still list as Needs Attention and click Update Virtual Server in the
Actions pane. The host will have a host status of OK. This indicates the upgrade for the
hosts is complete.
10. Review all other systems in your SCVMM management group to ensure that their
status is listed as OK. When all hosts are listed as OK, your upgrade is complete.
More Info CITRIX ESSENTIALS FOR HYPER-V MANAGEMENT
As a long-standing partner with Microsoft, Citrix has released several different tools to
support Microsoft virtualization products. One of the most interesting is Citrix Essentials
for Hyper-V Management. Essentials links with SCVMM and Hyper-V hosts to provide
additional management functionality. For example, with Essentials, you will gain more
granular control over resource pool storage foundations, gain dynamic provisioning
services for VMs, and gain lifecycle management features, allowing you to control the
176 CHAPTER 3 Completing Resource Pool Configurations
generation of entire environments through authorization workflows. Organizations
working with massive numbers of host servers and VMs should look to this product for
additional functionality. Find out more at
feature.asp?contentID=1686941.
Practice Installing SCVMM
In this practice you will perform the installation of SCVMM in a virtual machine running on
one of your two Hyper-V hosts. You will use this SCVMM installation later on to manage
your Hyper-V environment. This practice consists of seven exercises. In Exercise 1, you
export a virtual machine from ServerFull01 so that you can import it later on ServerCore01.
In Exercise 2, you add an external disk to ServerCore01. You will use this disk to store the
virtual machines you run on this server. Then you will copy the exported files that make up
the WS08_Full virtual machine you created in Lesson 2 in Chapter 2 from ServerFull01 to the
new disk you added to ServerCore01. In Exercise 3, you will import the VM on ServerCore01.
In Exercise 4, you will add a new virtual hard drive to this machine to support the installation
of SCVMM and prepare the new virtual machine for the SCVMM installation. In Exercise 5,
you install SCVMM using the guidelines for an installation for fewer than 150 host servers.
In Exercise 6, you install the SCVMM Administrator Console. And finally, in Exercise 7, you add
the SCVMM agent to your Hyper-V hosts.
note INSTALLING SCVMM VS. USING AN SCVMM VHD
This exercise takes you through the steps required to install SCVMM on your own
virtual machine. Alternatively, you could simply download the evaluation virtual hard
disk for SCVMM. This VHD includes a pre-installed version of SCVMM which is ready
to run. Find the evaluation VHD at
/>aspx?FamilyID=4a27e89c-2d73-4f57-a62c-83afb4c953f0&DisplayLang=en
.
exercise 1 Export a Virtual Machine
In this exercise you will export a VM from ServerFull01 so that you can import it on
ServerCore01 later. The export process packages a VM in a special transportable format that
Hyper-V understands.
1. Log on to ServerFull01 and launch Hyper-V Manager. You can either use the
standalone console or perform the action through Server Manager. Make sure you can
see ServerCore01 in the Hyper-V console.
2. Click ServerFull01 in the Tree pane of the console.
3. Right-click WS08_Full and choose Export from the shortcut menu.
4. Click Browse and move to C:\VirtualMachines on ServerFull01. Create a new folder
called WS08_FullExport and click Select Folder.
Lesson 2: Working with Hyper-V Host Remote Administration CHAPTER 3 177
5. Click Export to begin the process. An export status will appear next to the VM name
in the Details pane under the Operations heading. Wait until the export is complete
before proceeding with Exercise 2.
Exporting a virtual machine brings all of the files that make up the VM into a single folder.
This includes virtual machine configuration, virtual hard drive(s), and potential snapshots that
may belong to the VM. It then makes it easier to transport the VM from one Hyper-V host to
another.
exercise 2 Add an External Disk to ServerCore01
In this exercise you will add an external disk to your Server Core Hyper-V host. As outlined in
the Introduction, you need an external USB hard disk drive that is at least 100 GB in size. Once
again, perform this operation with domain administrator credentials. Only local administrative
credentials are required, but using domain administrator credentials simplifies the process.
1. Begin by plugging in the external hard disk into a USB port on ServerCore01. The
system will recognize the disk and add it to the system’s configuration.
2. Log on to ServerFull01. Click, Start, point to Administrative Tools, and click Computer
Management. You will use this tool to configure the disk remotely on ServerCore01.
3. Right-click Computer Management (Local) and select Connect To Another Computer.
Type in ServerCore01 and click OK.
4. Move to the Storage node in the Tree pane and click Disk Management. Locate
the new disk and make sure it is formatted and assigned to the D: drive. If it is not
formatted, right-click the partition and choose Format to format it in the NTFS format
and assign the D letter. Name the disk VMData. If it is already formatted, right-click
the partition, select Change Drive Letter And Paths, click Change to choose D from the
drop-down list, and then click OK twice.
note DRIVE LETTER ASSIGNMENTS
The Server Core system may already have assigned the D letter to the DVD drive. If so,
you must change the DVD drive to E before you can assign D to the new disk.
5. Open Windows Explorer and move to the address bar. Type \\ServerCore01\D$ and
press Enter. Create a folder called VirtualMachines in the root of the ServerCore01
D: drive.
6. Move to drive C: on ServerFull01 in Windows Explorer, open the VirtualMachines
folder, right-click the WS08_FullExport folder, and choose Copy.
7. Move back to the D:\VirtualMachines folder on ServerCore01 and right-click and choose
Paste. This will copy the files that make up the exported WS08_Full virtual machine to
ServerCore01.
Your computer is ready when the copy completes.
178 CHAPTER 3 Completing Resource Pool Configurations
exercise 3 Import a Virtual Machine on ServerCore01
In this exercise you will import a virtual machine in Hyper-V on ServerCore01. Again, log on
with domain administrator credentials.
1. Log on to ServerFull01 and launch Hyper-V Manager. You can either use the
stand-alone console or perform the action through Server Manager. Make sure you
can see ServerCore01 in the Hyper-V console.
2. Click ServerCore01 in the Tree pane and select Import Virtual Machine from the
Actions pane.
3. Click Browse to go to D:\VirtualMachines\WS08_FullExport\WS08_Full. Choose Select
Folder. Note that you must use the VM subfolder to import the VM. The machine is
imported into ServerCore01 and is ready to run from this system.
4. Finish the process by renaming the machine and examining its settings. Right-click
WS08_Full in the Details pane of ServerCore01 and choose Rename. Type SCVMM01
and press Enter.
5. Right-click SCVMM01 and choose Settings. Move to Network Adapter, assign Hyper-V
External to the adapter, and click Apply.
6. Click IDE Controller 0, choose Hard Drive in the right pane, and then click Add. This will
add a hard drive connection to IDE Controller 0 and assign 1 (in use) as the Location.
7. Click New under Virtual Hard Disk (.vhd) File. Click Next.
8. Under Choose Disk Type, make sure Dynamically Expanding is selected and click Next.
9. Type SCVMM01DiskD.vhd as the name and click Browse to go to D:\VirtualMachines\
WS08_FullExport\WS08_Full. Click Select Folder and then click Next.
10. Choose Create A New Blank Virtual Hard Disk and set it to 60 GB. Normally, your
SCVMM Library Server should use 100 GB or more, but for the purposes of this
exercise, 60 GB will be sufficient. Click Next and then click Finish. Click OK to close the
settings box.
Your new VM is ready.
exercise 4 Prepare for the SCVMM Server Installation
In this exercise you will install an SCVMM Server into your new VM. You will open the VM,
add it to the Contoso domain, configure its D: drive, and then proceed to the installation of
SCVMM. Use domain administrator credentials to perform this activity. In this case, domain
administrator privileges are required for this operation.
1. Log on to ServerFull01 using the domain administrator account.
2. Open Internet Explorer and connect to the Microsoft System Center Virtual Machine
Manager 2008 Evaluation site at />aspx?FamilyID=ED012990-6E86-4B43-9842-DA5C02FF1C83&displaylang=en. Click
Continue, select whether you want to register, and click Continue.
Lesson 2: Working with Hyper-V Host Remote Administration CHAPTER 3 179
3. The download consists of three files. Click the download button for the first file and then
click Save. Type in \\ServerCore01\D$ as the save path and create a new folder in the root
of the disk called SourceFiles. Click Save. Repeat for the two other files. The download will
take some time. Meanwhile, you can continue preparing your virtual machine.
4. In Hyper-V Manager, make sure ServerCore01 is selected and click SCVMM01. Click
Start in the Actions pane.
5. Double-click the SCVMM01 thumbnail at the bottom of the Details pane. This will
open the Hyper-V VM Console and let you interact with the VM. Make sure the VM
starts in normal mode.
6. When the VM is started, click the first button in the Virtual Machine Connection (VMC)
console to send a Ctrl+Alt+Delete to the machine. Log on with Administrator and use
pass@word1 for the password.
7. When you log on, Windows will have discovered new hardware and will request a
driver disk. Click Cancel or press Esc. The Initial Configurations Tasks (ICT) Wizard
will launch. Move the cursor to the Action menu in the VMC console and choose
Insert Integration Services Setup Disk. This will link the Integration Services ISO to
the machine’s DVD drive and launch AutoPlay. Click inside the console window in the
AutoPlay dialog box and press Enter. This will launch the setup. A previous version
of the drivers exists and a message will display to announce that an upgrade will be
performed (see Figure 3-21). Press Enter or select OK and click Yes when a reboot is
requested. This will upgrade the Integration Services and allow your mouse to work in
the console even in Remote Desktop Connections.
FIGURE 3-21 Upgrading Integration Services
8. Log on to the machine again when the reboot is complete. This time, a Terminal
Services Licensing Configuration message will appear. Close it to proceed. You must
perform several activities before this server is ready to host SCVMM. First, you must
give it an IP address, rename it, and join it to the domain. Move to ICT, click Configure
Networking, right-click the connection, and then select Properties. Select Internet
Protocol Version 4 and click Properties. Assign 192.168.0.11 as the IP address,
255.255.255.0 as the subnet mask, 192.168.0.1 as the gateway, and 192.168.0.5 as
the DNS server. Click Advanced and then click the DNS tab. Type in Contoso.com in
the DNS suffix for this connection and select Use This Connection’s DNS Suffix In DNS
registration and click OK three times. Close the Network Connections window.
180 CHAPTER 3 Completing Resource Pool Configurations
exaM tIp DNS SERVER NAME
The SCVMM Server installation will fail if you do not use a fully qualified domain name
(FQDN) for the server because it does not support NetBIOS names. Make sure your SCVMM
server includes a DNS suffix in its TCP/IP properties.
9. In ICT, click Provide Computer Name And Domain. Click Change, name the computer
SCVMM01 and join the Contoso.com domain. Type in your domain administrator
credentials and password and click OK. Click OK in the Welcome To The Contoso
Domain dialog box and then click OK to restart the computer. Click Close to close the
dialog box and restart.
10. When the reboot is completed, log on as the Contoso domain administrator. Click
Switch User and provide your domain administrator credentials with a preceding
Contoso\ to make sure you log on to the domain.
11. Now you will change the roles assigned to this machine. Select Do Not Show This
Window At Logon and close ICT. When Server Manager launches, right-click Roles and
select Remove Roles. Click Next.
note SECURITY UPDATES
Note that you should configure and install updates on this computer as you would with
any running machine in your network.
12. Clear Active Directory Domain Services, Network Policy And Access Services, and
Terminal Services. Click Remove Dependent Role Services whenever it pops up, click
Next, and then click Remove. Click Close when the removal is complete and click Yes to
restart the machine.
13. When the machine restarts, log on as domain administrator. When Server Manager
starts, move to the Storage and then Disk Management node in the Tree pane. Click
OK to initialize the new disk. Right-click the DVD drive, choose Change Drive Letter Or
Path, and change it to E:. Click OK and then click Yes.
14. Right-click the blank partition and choose New Simple Volume, then click Next. Choose
the entire partition and click Next. Select the D: letter and click Next. Name the volume
SCVMMData, make sure NTFS is selected, and choose Perform A Quick Format. Click
Next and then click Finish.
15. Move to Configuration | Local Users And Groups | Groups and double-click
Administrators. Click Add, type in SCVMM_Service, click Check Names, and then
OK twice.
Your machine is ready for the installation of SCVMM.
Lesson 2: Working with Hyper-V Host Remote Administration CHAPTER 3 181
exercise 5 Install SCVMM Server
In this exercise you will install an SCVMM Server into your new VM. You will open the VM and
proceed to the installation of SCVMM. Use domain administrator credentials to perform this
activity. In this case, domain administrator privileges are required for the operation.
1. Log on to ServerFull01 and move to ServerCore01 in Hyper-V Manager. Start
SCVMM01 if it is not already started. Once the machine is started, double-click the
SCVMM01 thumbnail and log on to SCVMM01 with domain administrator credentials.
2. Open Windows Explorer (click Start, right-click Computer, and select Explore) and
move to the address bar. Type in \\ServerCore01\D$ as the save path and move to the
SourceFiles folder. Double-click SCVMM2008_Eval.part1.exe. This will decompress the
SCVMM installation files. Click Run and then click Run again. This will decompress all
of the files making up the evaluation. When the installer asks if you want to run SETUP.
exe, click OK and then click Run. SCVMM Setup will launch (see Figure 3-22).
FIGURE 3-22 Running SCVMM Setup
This setup page includes several options:
n
The Prepare section outlines three options. Setup Overview lets you review the
SCVMM Setup requirements. VMM Configuration Analyzer points you to the
download site for the Analyzer, which lets you scan the system you are installing
SCVMM into and provides best practices for configuration. Release Notes lets you
find the latest information related to the SCVMM setup.
182 CHAPTER 3 Completing Resource Pool Configurations
n
The Setup section outlines five options: VMM Server, VMM Administrator Console,
Self-Service Portal, Local Agent, and Configure Operations Manager.
n
The Resources section outlines three options. License Terms lets you read about
SCVMM licensing requirements. Privacy Statement lists privacy information about
SCVMM. Visit Our Web Site links you to the SCVMM site on Microsoft TechNet.
3. Click VMM Server to launch the Server installation, click Install Server, and accept the
License Terms. Click Next.
4. On the Microsoft Update page select Use Microsoft Update and click Next. This will
update SCVMM installation files if updates are available. Click No on the Customer
Experience Improvement Page and click Next.
5. On the Product Registration page, enter your name and your organization’s name.
6. On the Prerequisites Check page, SCVMM Setup will verify that both hardware and
software prerequisites are met. When they pass, click Next. On the Installation Location
page, keep the default location, and click Next.
7. On the SQL Server Settings page, select Install SQL Server 2005 Express Edition, and
click Browse, move to drive D: and click Make New Folder, type VMMDB as the folder
name and press Enter, then OK. Click Next.
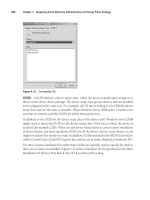
8. On the Library Share Settings page, select Create A New Library, click Change to locate
the library on drive D:, create a new folder called SCVMM_Library, and click OK. Click
Next. Note that once the Library is created on this system, you can no longer move it
(see Figure 3-23).
note LIBRARY SHARE
During the installation, the Setup Wizard will create a folder named VHDs and two
virtual hard disks, one of 16 GB and the other of 60 GB. These disks can be used as
sources for new VM system drives or simply as additional disk drives on existing VMs.
9. On the Installation Settings page, keep the default ports. Note the ports that will be
used—you will need to use the same ports for all other component installations. You
can refer to Table 3-6 for additional port information. Click Other Account and type in
Contoso\SCVMM_Service and its password. Click Next.
10. On the Summary of Settings page, review your changes and click Install. The
installation begins. Click Run when prompted to run the SQL Server Express Setup and
click Run again for the SQL Server Tools. Note that the system will install SQL Server,
SQL Server Tools, .NET Framework 3.0, Windows Automated Installation Kit 1.1, and
the SCVMM Server. Once the installation is complete, you can check for any available
updates. Clear this option. Click Close.
Lesson 2: Working with Hyper-V Host Remote Administration CHAPTER 3 183
FIGURE 3-23 Creating the Library Share
exercise 6 Install the SCVMM Administrator Console
In this exercise you will install the SCVMM Administrator Console. This console will be
installed on the same computer as the SCVMM Server. The installation of the Administrator
Console will also install Windows PowerShell.
note INSTALLING WITH SC OpsMgr
If you use the Operations Manager Administrator Console to perform tasks on the hosts
and virtual machines form the Virtualization Management Pack, you must install the
console on the same computer as the Operations Manager Server.
1. Launch Setup.exe and click VMM Administrator Console. Accept the License Terms.
Click Next.
2. On the Microsoft Update page select Use Microsoft Update and click Next. Note the
information on the Customer Experience Improvement Page and click Next.
3. Note that the prerequisites passed and click Next. Accept the default path and
click Next.
184 CHAPTER 3 Completing Resource Pool Configurations
4. On the Port Assignment page, use the default port (8100) and click Next. On the
Summary Of Settings page, review your settings and click Install.
5. When the installation is complete, you can check for any available updates. Clear this
option. You can also add a shortcut to your desktop and launch the console. Click
Open The VMM Administrator Console When The Wizard Closes and click Close.
6. The first time you open the console, the Connect To Server dialog box opens. Click
Connect. The connection to the local SCVMM Server will occur using the default port
8100. Click Connect. When you connect to a remote server, replace Localhost with the
FQDN of the server name in the form of Se rvername:8100, where Servername is the
name of the server that runs SCVMM Server.
exercise 7 Deploy the SCVMM Agent
Each host server that is part of an SCVMM farm must include an agent. Agent deployment
can be done locally or remotely through the Windows Installer for the agent files.
The agent is not required on the SCVMM Server because it is part of the installation of the
Server. Use the installation files to install on your other servers. Perform this operation on
ServerFull01.
1. Log on to ServerFull01 with domain administrator credentials. Link to the SCVMM
installation files and launch Setup.exe.
2. Click Local Agent.
3. Click Next to accept the default installation location and click Next again to accept the
default port settings configuration.
4. On the Security File Folder page, ensure that the This Host Is On A Perimeter Network
check box is cleared. Click Next.
5. On the Host Network Name page, click Next to have SCVMM contact the host by
using its local computer name, click Next, and then click Install.
note ADDING AGENTS TO PERIMETER NETWORKS
When a SCVMM agent is installed host in a perimeter network, the Agent Setup Wizard
prompts you for an encryption key and other information required to access and manage
the host and its VMs. The wizard generates a set of credentials for the local agent-access
information and stores them in a security file. You must transfer this security file to the
server on which an SCVMM Administrator Console is installed. When the file is transferred,
you can use the console to add the host and SCVMM will use these credentials to
communicate with the agent on the host. This file is named SecurityFile.txt and is located
in %SystemRoot%\Program Files\Microsoft System Center SCVMM 2008.
Your systems are ready. You will deploy the agent on ServerCore01 from the Administrator
Console in the next chapter.
Lesson 2: Working with Hyper-V Host Remote Administration CHAPTER 3 185
Quick Check
1. Where can you find the Hyper-V Manager installation files?
2. When you install the administration tools using the command line, which tools
will not be installed?
3. Which commands are available in the Failover Clustering Management Console
to manage the VM operations?
4. Which are the different virtualization engines that can be managed by SCVMM?
5. Which feature becomes available when you link OpsMgr’s capabilities with
SCVMM?
Quick Check Answers
1. You can find Hyper-V Manager in three locations:
n
The Hyper-V Update, KB950050, for both x86 and x64 setups
n
From the Remote Server Administration Tools included as a feature in Windows
Server 2008 full installation
n
From the downloadable update for Windows Vista with SP1
2. When you are using the command line to install the administration tools, all the
tools will be installed except the Internet Information Server tools.
3. The commands available to manage VM operations are startup, shutdown, saved
state, and transfer to another host. You cannot create or populate VMs in this
console.
4. SCVMM can manage Virtual Server 2005 R2, Windows Server 2008 with Hyper-V,
Hyper-V Server 2008, VMware ESX Server and ESXi Server, and VMware ESX or
ESXi servers that are part of a VMware Virtual Infrastructure 3 or greater cluster.
5. When you use OpsMgr and SCVMM to manage the environment, Performance
and Resource Optimization (PRO) can be used to dynamically manage host
resource pools.
186 CHAPTER 3 Completing Resource Pool Configurations
Lesson 3: Optimizing Hyper-V Hosts
You are now ready to optimize the performance of your Hyper-V machines. When you
optimize Microsoft Windows Server 2008 systems, you need to begin by reviewing the server
performance and then make appropriate modifications. When you use proper installation and
creation procedures, your Hyper-V servers should just work. Hyper-V is a very solid and stable
service and is among the most stable services available in Windows Server 2008.
However, you’ll find that despite this stability, things can still go wrong, whether they are
related to system error or human error. And when things do go wrong, you need to be ready
to identify the issues quickly and take appropriate steps to correct the situation. The best
way to do this is to perform proactive performance management. When you do so, you are
forewarned when untoward events might occur. This is the crux of this lesson.
After this lesson, you will be able to:
n
Monitor performance in Window Server 2008.
n
Work with key Hyper-V Performance Monitor Counters.
n
Use the Reliability and Performance monitor.
Each will help you ensure that your Hyper-V systems run at their optimum.
Estimated lesson time: 45 minutes
Managing Windows Server 2008 System Resources
Windows Server includes several tools that help identify potential issues with system
resources. When systems are not configured properly and are not assigned appropriate
resources such as CPU, RAM, or disk space, systems monitoring will help you identify where
bottlenecks occur. When you identify these bottlenecks, you then assign additional resources
to the system. If the system is physical, this most often means shutting down the system,
installing new resources (for example, additional memory chips), and then restarting the
system. If the system is virtual, depending on the component you want to change, you might
be able to allocate new resources while the virtual machine is still running. If not, shut it
down, allocate new resources (for example, an additional CPU and additional RAM), and then
restart it. After the system is restarted, monitor its performance again to identify whether the
new resources solved the problem.
The tools you can rely on to identify performance bottlenecks in Windows Server 2008 include:
n
Task Manager, which displays current system resource usage.
n
Event Viewer, which logs specific events, including performance-related events.
Lesson 3: Optimizing Hyper-V Hosts CHAPTER 3 187
n
Reliability Monitor, which tracks changes brought to the system, enabling you to
identify whether a change could be the cause of a new bottleneck.
n
Performance Monitor, which collects data in either real time or at specific intervals to
identify potential issues.
You can use other tools as well, such as Microsoft System Center Operations Manager,
to monitor the state of a system continuously and automatically correct well-known issues.
Operations Manager relies on custom management packs to monitor specific applications
and is designed to integrate with SCVMM in support of host server optimization.
Using Task Manager
The simplest of all tools to use is Task Manager. This tool provides real-time system status
information and covers several key aspects of a system’s performance, including:
n
Running applications
n
Running processes
n
Running services
n
Performance, including CPU and memory usage
n
Networking, including network interface card (NIC) utilization
n
Currently logged-on users
Task Manager is accessed in a variety of ways, the most common of which is to right-click
the taskbar and select Task Manager. Another common method is to use the Ctrl+Alt+Delete
key combination and click Task Manager when the menu choices appear. For example, that is
how you would access Task Manager on Server Core, which does not include a taskbar. You
can also type Taskmgr.exe at a command prompt.
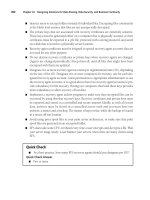
When you access information regarding system performance, the Performance tab is the
most useful tab (see Figure 3-24). This tab displays complete information about your system’s
key resource usage. It details physical and kernel memory usage. This tab also includes a
button that gives you access to Resource Monitor. Clicking this button launches Resource
Monitor while keeping Task Manager open.
Resource Monitor is a super Task Manager because it brings together the CPU, disk,
memory, and network usage graphs in a single view (see Figure 3-25). In addition, Resource
Monitor includes expandable components for each resource, displaying details of each
component so that you can identify which processes might be the culprits if issues are
evident. These two tools are ideal for on-the-spot verifications of resource usage. You should
rely on them if you need to identify immediately whether something is wrong with a server.
For example, if the system does not have enough memory, you will immediately see
that memory usage is constantly high. In this case, Windows will be forced to use on-disk
virtual memory and will need to swap or page memory contents constantly between
physical and virtual memory. Constant paging is a typical issue that servers with insufficient
physical memory face and is often indicated by slow system behavior. One good indicator of
insufficient memory is slow Server Manager operation.
188 CHAPTER 3 Completing Resource Pool Configurations
FIGURE 3-24 Viewing real-time performance information in Task Manager
More Info RESOURCE MONITOR
For more information on Resource Monitor, see Scenario 1 in “Windows Server 2008
Performance and Reliability Monitoring Step-by-Step Guide” at http://technet2. microsoft.com/
windowsserver2008/en/library/7e17a3be-f24e-4fdd-9e38-a88e2c8fb4d81033.mspx?mfr=true.
FIGURE 3-25 Viewing real-time performance information in Resource Monitor
Lesson 3: Optimizing Hyper-V Hosts CHAPTER 3 189
exaM tIp MONITORING HYPER-V PERFORMANCE
Note that the Task Manager and the Resource Monitor live in the parent partition
of Hyper-V and therefore do not provide accurate information on the processor and
memory usage of child partitions or virtual machines. They are useful for a quick view of
machine resource status, but should not be used to gauge the ongoing performance of
a host server. To obtain accurate information on Hyper-V performance, you must use the
Performance and Reliability Monitor, which is detailed further in this lesson. Remember
this when you take the exam.
Working with Event Viewer
Another excellent indicator of system health is Windows Event Log. Windows maintains several
event logs to collect information about each of the services running on a server. By default,
these include the Application, Security, Setup, System, and Forwarded Events logs, all located
in the Windows Logs folder. However, on a Hyper-V server, you also have an additional log that
is specifically related to Hyper-V operation. This log is located in a special Server Roles node
under the Event Viewer and is called Hyper-V. It contains all Hyper-V–specific information.
However, one of the best features of Event Log is related to Server Manager. Because
Server Manager acts as the central management location for each of the roles included in
Windows Server 2008, it provides custom log views that percolate all the events related to
a specific server role. For example, if you click the Hyper-V Manager role, Server Manager
provides you with a log view that includes, among other things, a summary view of key events
related to this service (see Figure 3-26).
Event Log lists three types of events: Information, Warning, and Errors. By default, the
summary view displayed under the server role lists Errors with a high priority, Warnings with a
medium priority, and Information messages with the lowest priority. Therefore, Errors always
appear at the top of the summary, alerting you immediately if there is an issue with your
system. To drill down and see the event details, either double-click the event itself or move to
the Event Viewer section under the Diagnostics node of the Tree pane in Server Manager.
Events provide much more information in Windows Server 2008 and Windows Vista
than ever before. In previous versions of Windows, events were arcane items that provided
very little information about an issue. Today, you get a full explanation of an event in Event
Viewer, and you can link to an online database maintained by Microsoft for each event.
You can look up an event in this database by clicking the Event Log Online Help link in the
event’s Properties dialog box. You will be prompted to send information about the event to
Microsoft. Click Yes if you want information specifically about this event.
This database does not provide information about every event in Windows, but it covers
the most frequently viewed events. You can also use third-party event log databases to view
information about events.
190 CHAPTER 3 Completing Resource Pool Configurations
FIGURE 3-26 Viewing summary events for Hyper-V in Server Manager
More Info WINDOWS EVENT IDs
To access a free database of Windows event IDs, go to
The more information you know about Windows events, the easier it is to deal with
the issue. You can rely on the Microsoft online event database and free third-party event
databases and supplement this information with online searches through tools such as
Windows Live Search to locate information about an issue. Searching on the event ID will
return the most results.
More Info NEW FEATURES OF THE EVENT LOG
For more information on working with Event Log, download “Tracking Change” in
Windows Vista at This multi-page
article details the new features of Event Log and how it can be integrated with Task
Manager to automate actions based on specific events as well as forward key events to a
central collection system.
Lesson 3: Optimizing Hyper-V Hosts CHAPTER 3 191
Working with Windows Reliability Monitor
Another useful tool to identify potential issues on a system is Reliability Monitor. This tool,
located under the Diagnostic, then Reliability and Performance, then Monitoring Tools
node in Server Manager, is designed to track changes that are made to a system. Each time
a change is performed on the system, it is logged in Reliability Monitor (see Figure 3-27).
Tracked changes include system changes, software installs or uninstalls, application failures,
hardware failures, and Windows failures.
If an issue arises, one of the first places you should check is Reliability Monitor because
it tracks every change to your system and reveals what might have happened to make your
system unresponsive. For example, if the change is a new driver for a device, it might be a good
idea to roll back the device installation and see whether the system becomes more responsive.
Verify Reliability Monitor whenever an issue affecting performance arises on a server.
FIGURE 3-27 Viewing system changes in Reliability Monitor
exaM tIp MONITORING RESOURCES
Work with Task Manager, Event Viewer, and Reliability Monitor. All are an important part of
the exam.
192 CHAPTER 3 Completing Resource Pool Configurations
Working with Windows Performance Monitor
Sometimes problems and issues are not immediately recognizable and require further
research to identify them. In this case, you need to rely on Performance Monitor. This tool,
located under the Diagnostic, then Reliability and Performance, then Monitoring Tools node
in Server Manager, is designed to track performance data on a system. You use Performance
Monitor to track particular system components either in real time or on a scheduled basis.
If you are familiar with previous versions of Windows Server, you’ll quickly note that
Windows Server 2008 Performance Monitor brings together several tools you might be
familiar with: Performance Logs and Alerts, Server Performance Advisor, and System Monitor.
If you are new to Windows Server with the 2008 release, you’ll quickly find that when it comes
to performance management and analysis, Performance Monitor is the tool to use. Using
Performance Monitor, you create interactive collections of system counters or create reusable
data collector sets. Performance Monitor is part of Windows Reliability and Performance
Monitor (WRPM). Table 3-11 outlines each of the tools in WRPM that supports performance
monitoring and the access rights required to work with them.
TABLE 3-11 WRPM Tools and Access Rights
TOOL DESCRIPTION REQUIRED MEMBERSHIP
Monitoring Tools,
Performance
Monitor
Use to view performance data in real
time or from log files. The performance
data can be viewed in a graph,
histogram, or report.
Local Performance Log
Users group
Monitoring Tools,
Reliability Monitor
Use to view the system stability and the
events that affect reliability.
Local Administrators
group
Data collector sets Groups data collectors into reusable
elements that can be used to review
or log performance. Contains three
types of data collectors: performance
counts, event trace data, and system
configuration information.
Local Performance Log
Users group with the
Log on as a batch user
right
Reports Includes preconfigured performance
and diagnosis reports. Can also be used
to generate reports from data collected
using any data collector set.
Local Performance Log
Users group with the
Log on as a batch job
user right
Windows Server 2008 includes a new built-in group called Performance Log Users, which
allows server administrators who are not members of the local Administrators group to
perform tasks related to performance monitoring and logging. For this group to be able to
initiate data logging or modify data collector sets, it must have the Log On As A Batch Job
user right. Note that this user right is assigned to this group by default.
Lesson 3: Optimizing Hyper-V Hosts CHAPTER 3 193
In addition, Windows Server 2008 will create custom Data Collector Set templates when
a role is installed. These templates are located under the System node of the Data Collector
Sets node of WRPM. For example, with the Hyper-V role, three collector sets are created:
n
The LAN Diagnostics set collects data from network interface cards, registry keys, and
other system hardware to identify issues related to network traffic on the local host.
n
The System Diagnostics set collects data from local hardware resources to generate
data that helps streamline system performance on the local host.
n
The System Performance set focuses on the status of hardware resources and system
response times and processes on the local host.
You can also create your own personalized data set. Hyper-V includes a wide variety of
counters for this very purpose. Table 3-12 outlines the counter set name and the number of
counters in each set. Hyper-V includes 24 counter sets.
TABLE 3-12 Hyper-V Performance Counter Sets
COUNTER SET CATEGORY NUMBER OF COUNTERS DESCRIPTION
Hyper-V Hypervisor 5 Information on the
hypervisor.
Hyper-V Hypervisor Logical
Processors
18 Information on logical
processors.
Hyper-V Hypervisor Partition 7 Information on virtual
machines.
Hyper-V Hypervisor Root
Partition
7 Information on virtual
machines.
Hyper-V Hypervisor Root
Virtual Processor
69 Information on virtual
processors.
Hyper-V Hypervisor Virtual
Processor
69 Information on virtual
processors.
Hyper-V Legacy Network
Adapter
6 Performance counters for a
virtual machine’s Ethernet
controller.
Hyper-V Task Manager Detail 72 The summary statistics
for the Virtual Machine
Management Service’s Task
Manager.
Hyper-V Virtual IDE Controller 4 Performance counters for
a virtual machine’s IDE
Controller.
Hyper-V Virtual Machine Bus 3 The statistics for the virtual
machine bus.
194 CHAPTER 3 Completing Resource Pool Configurations
COUNTER SET CATEGORY NUMBER OF COUNTERS DESCRIPTION
Hyper-V Virtual Machine
Health Summary
2 The health summary statistics
for the Virtual Machine
Management Service.
Hyper-V Virtual Machine
Summary
18 The summary statistics
for the Virtual Machine
Management Service.
Hyper-V Virtual Network
Adapter
12 The statistics for the Hyper-V
network adapter.
Hyper-V Virtual Storage Device 6 The total number of packets
per second traversing the
network adapter.
Hyper-V Virtual Switch 18 The statistics for the Hyper-V
switch.
Hyper-V Virtual Switch Port 12 The statistics for the Hyper-V
switch port.
Hyper-V VM IP APIC 1 Assertions are the number
of interrupt assertions the
I/O Apic device sent to the
Virtual Machine.
Hyper-V VM Remoting 2 Performance counters for a
virtual machine’s remoting
system.
Hyper-V VM Save, Snapshot,
and Restore
6 Performance counters for a
virtual machine’s save and
snapshot systems.
Hyper-V VM VID Driver 39 Performance counters for the
virtualization infrastructure
driver (VID) root level.
Hyper-V VM VID Message
Queue
8 Performance counters for a
VID message queue object.
Hyper-V VM VID NUMA Node 3 Performance counters
for a non-uniform access
(NUMA) node.
Hyper-V VM VID Partition 51 Performance counters for a
VID partition object.
Hyper-V VM Worker Process
Memory Management
12 Performance counters for
a worker process memory
manager.
Lesson 3: Optimizing Hyper-V Hosts CHAPTER 3 195
To add counters to Performance Monitor, simply click the plus sign (+) in the toolbar at
the top of the details pane. This displays the Add Counters dialog box (see Figure 3-28). Scroll
through the counters to identify which ones you need. In some cases, you will need subcounters
under a specific counter set; in other cases, you need the entire subset of counters. When you
need a subcounter, click the down arrow beside the heading, locate the subcounter, and click
Add. When you need the entire counter set, click the counter set and then click Add. This adds
the counter set with a star heading below it, indicating that all subcounters have been added.
FIGURE 3-28 Adding Hyper-V counters to Performance Monitor
Working with the Windows Server 2008 Interface
When you use the classic interface in Windows Server 2008, you access subcounters by clicking
plus signs. When you use the Desktop Experience feature in Windows Server 2008 (which
simulates the Windows Vista interface), you access subcounters by clicking down arrows.
To obtain information about a counter, click Show Description. Then, when you click any
counter or subcounter, a short description will appear at the bottom of the dialog box.
As soon as you are finished adding counters and you click OK, Performance Monitor starts
tracking them in real time. Each counter you added will be assigned a line of a specific color.
To remove a counter, click the counter and then click the Delete button (X) on the toolbar at
the top of the details pane.
196 CHAPTER 3 Completing Resource Pool Configurations
You can start and stop Performance Monitor much like a media player, using the same
type of buttons. When Performance Monitor runs, it automatically overwrites data as it
collects more; therefore, it is more practical for real-time monitoring.
If you want to capture the counters you added into a custom data set, right-click
Performance Monitor, select New, and then choose New Data Collector Set. Follow the
prompts to save your counter selections so that you can reuse them later.
exaM tIp SERVER PERFORMANCE ADVISOR
Work with Performance Monitor because it is an important part of the exam. Also, note
that there is no Server Performance Advisor (SPA) in Windows Server 2008. This Windows
Server 2003 tool has been rolled into Windows Reliability and Performance Monitor. Don’t
get caught on questions regarding SPA on the exam.
Creating Baselines for Hyper-V
For long-term system monitoring, you must create data collector sets. These sets run
automated collections at scheduled times. When you first install a system, it is a good idea
to create a performance baseline for that system. As load increases on the system, you can
compare the current load with the baseline and see what has changed. This helps you identify
whether additional resources are required for your systems to provide optimal performance.
For example, when working with Hyper-V servers, it is a good idea to log performance at
peak and nonpeak times. Peak times are when users access the virtual machines you are
running on the hosts; non-peak times are when VMs are at rest. To create a performance
baseline, you need to take samples of counter values for 30 to 45 minutes for at least a week
during peak, low, and normal operations.
However, note that it is difficult to get an accurate view of some of the resources in a
Hyper-V host because VM resource usage happens in various places. For example, when you
look at CPU uses, note the following:
n
VMs consume resources within the child partition. You can view individual VM CPU
resource usage within Hyper-V Manager. You can also look at the % Guest Run Time
counter under the Hyper-V Hypervisor Virtual Processor section of Performance Monitor.
n
CPU resources are also consumed when the hypervisor is managing intercepts,
connecting contexts, and performing other VM communication tasks. You can track
this through the % Hypervisor Run Time counter under the Hyper-V Hypervisor Virtual
Processor section.
n
Look at the worker process in the parent partition. Each VM is assigned a worker
process. These processes manage operations such as starting or stopping VMs or even
taking snapshots of the VM. These processes also manage emulated devices.
n
You can allocate more processors to VMs than are actually available in the physical
computer because the parent partition virtualizes logical processors. In this case, it
is extremely difficult to measure processor utilization because processor access is
controlled directly by the parent partition.
Lesson 3: Optimizing Hyper-V Hosts CHAPTER 3 197
Keep the concept of different locations in mind when you try to track resource usage in
Hyper-V. Also remember the following:
n
Disk Latency is an important potential bottleneck in Hyper-V. Many of the Hyper-V
operations are related to disk access because each VM is nothing but a set of files on a
disk and requires disk read-write operations to operate. Use the Logical Disk, Average
Disk second/Read, and Average second/Write counters on all disks to measure this
performance. A problem exists if average response times are greater than 15 milliseconds
(ms). Ideally, your seek times will be between 1 and 15 ms. If your seek times are 26 ms or
greater, your system has a critical problem.
n
Guest operating systems have the same counters. You can measure their disk seek
times by running the same performance counters in Windows VMs.
n
Memory is a critical resource in host computers. Use the Memory, Available Megabytes
counters on the parent partition to view how the host is using memory. If more than
50 percent of memory is available, your system is healthy. If 25 percent or less is
available, monitor memory closely. If 10 percent or less is available, your system will
start having poor performance. If memory levels fall significantly below 10 percent,
your systems have a problem and require more memory or fewer workloads.
n
Use Memory, Pages/second counters to determine the rate at which pages of memory
are read by the system. This measures memory swapping from the hard disk to RAM.
High levels will negatively impact your system operation. If the value is less than 500,
the system is healthy. If it is between 500 and 1000, monitor the system. If it is greater
than 1000, your system requires more memory or fewer workloads.
n
You can use the same counters within VMs running Windows operating systems.
n
Next, focus on networking performance since VMs must rely on the parent partition
and the VMBus to access networks. You can perform a simple ping test against each of
your VMs to view its network performance. If the response times are greater than 1 ms,
you many need to resolve an issue. You can also use the PATHPING.exe command to
identify whether packets are being lost when transferred from VMs to other systems.
You can use network file transfers to test network performance. Copying a 100-MB file
from one system to another is a good test of network performance. On a 100-Mbit
network, this transfer should take between 10 to 20 seconds; it should take about
3 seconds on a 1-Gbit network.
n
You can use the Network Interfaces, Bytes Total/second counters on each adapter in
the parent partition. If utilization is less than 40 percent, the system is healthy. If it is
between 41 and 64 percent, monitor the system. If it is between 65 and 100 percent,
an issue is indicated and more adapters may be required.
n
Use the Network Interface, Output Queue Length counters to identify the number
of threads waiting for transfer on the adapter. 0 is a healthy value, 1 to 2 requires
monitoring, and greater than 2 is an issue.
n
You can use the same counters within the Windows VMs.